How to Setup Tails Linux On GCP(Google Cloud Platform)
 Techlatest.net
Table of contents
Introduction
Tails stand for The Amnesic Incognito Live System. It is a security-focused Debian-based Linux distribution that helps to maintain privacy and anonymity. It is designed to be booted as a live USB and DVD, and it does not leave a digital footprint on the machine unless it is explicitly ordered to. It can also be operated as a virtual system, but it comes with its own set of security concerns. It only links to the internet via the Tor anonymity network.
In this article, we will introduce three topics
Tails Linux — It is a very secure and portable OS that uses the Tor network to protect users’ online privacy while also assisting them in circumventing internet censorship. It was initially designed and developed for the Project Secure Whistleblowers to protect whistleblower’s identities. It is the most secure operating system because of its flexibility. Although, regular users may download and use the TAIL operating system for free if they wish to protect their privacy and data flow.
Features of Tails Linux which is provided by Techlatest.net
Step by Step guide — Guide on how to set up Tails Linux Environment on GCP(Google Cloud Platform).
Features of Tails Linux provided by Techlatest.net
Easy Setup: Setting up Tails Linux is incredibly easy, making it an attractive choice for both beginners and experienced users. The installation process is straightforward and user-friendly, ensuring a smooth experience for those new to the operating system. And You can set up the OS in a few clicks.
Preinstalled tools: Tails Linux which is provided by Techlatest comes with infinite Preinstalled packages.
Step by Step Guide to install, setup, and run Tails Linux On GCP (Google Cloud Platform)
Note
If you want to save time to set up a Tails Linux on GCP with out of a box environment, you can opt for Techlatest’s Tails Linux, available on the GCP marketplace.
Step 1
Open Tails Linux listing on GCP Marketplace.
- Step 2
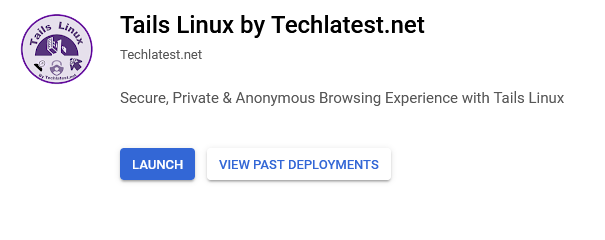
Click on the Launch Button.
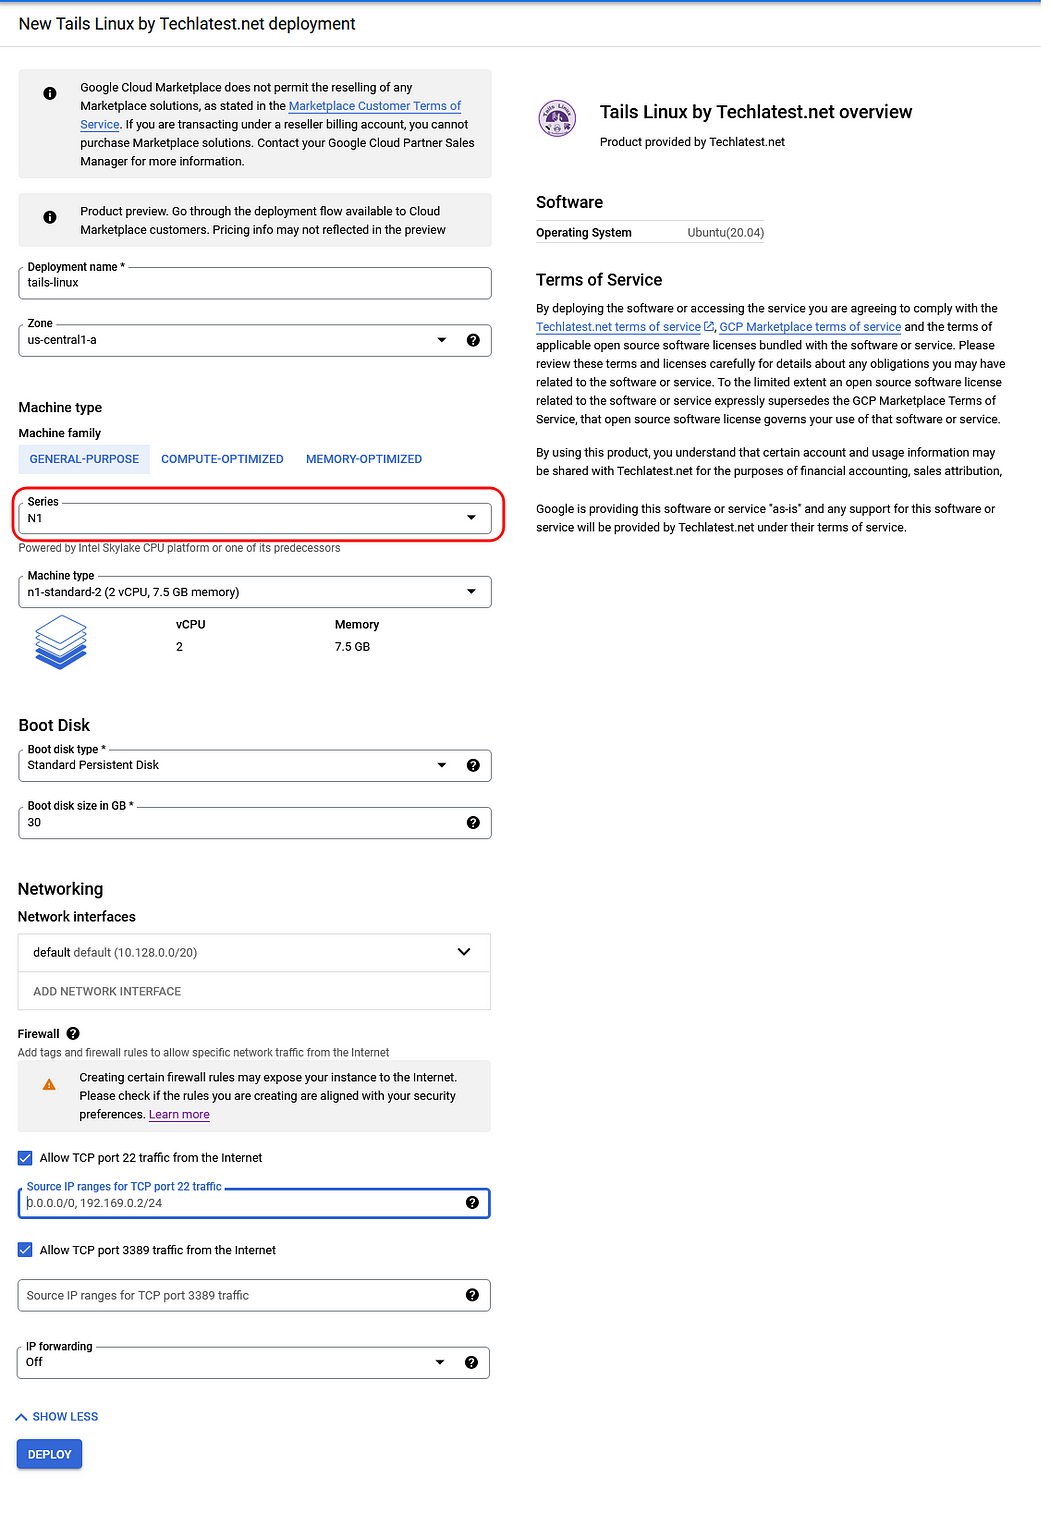
Select a zone where you want to launch the VM(such as us-east1-)
Optionally change the number of cores and amount of memory. ( This defaults to 2 vCPUs and 7.5 GB ram. Please select a machine from the N1 series only highlighted below).
Optionally change the boot disk type and size. (This defaults to ‘Standard Persistent Disk’ and 30 GB respectively).
Optionally change the network name and subnetwork names. Be sure that whichever network you specify has ports 22 (for SSH) and 3389 (for RDP) exposed.
Click on the Deploy Button when you are done.
Tails Linux will start deploying.
- Step 3
A summary page is displayed when the compute engine is successfully deployed. Click on the Instance link to go to the instance page.
- Step 4
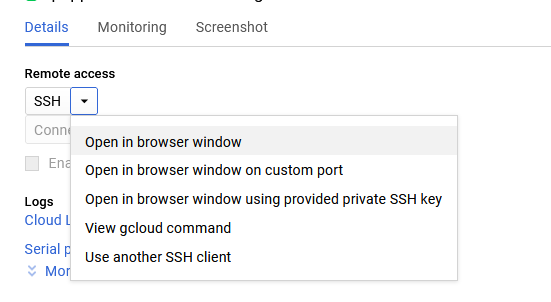
On the instance page, click on the “SSH” button, and select “Open in a browser window”.
- Step 5
This will open the SSH window in a browser.
- Step 6
Run the below command to set the password for the “ubuntu” user.

- Step 7
Now the password for Ubuntu users is set, you can connect to the VM’s desktop environment from any local Windows machine using RDP or Linux machine using Remmina.
- Step 8
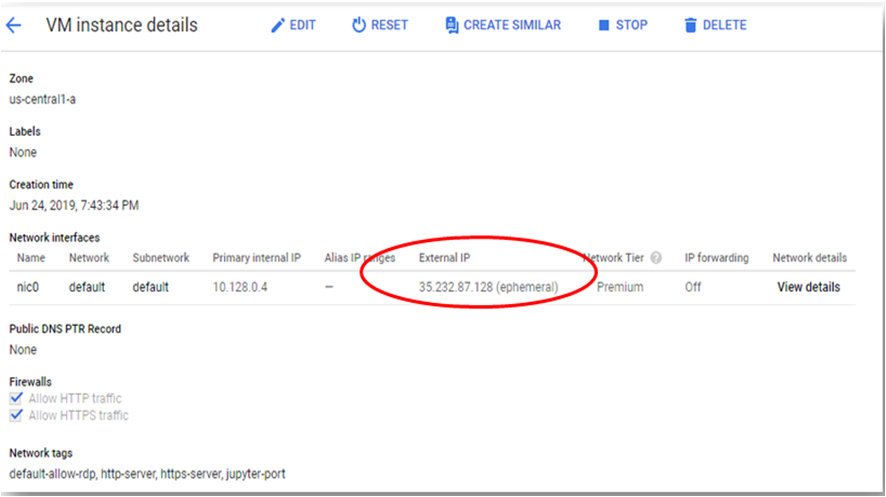
To connect using RDP via Windows machine, first note the external IP of the VM from the VM details page as highlighted below.
- Step 9
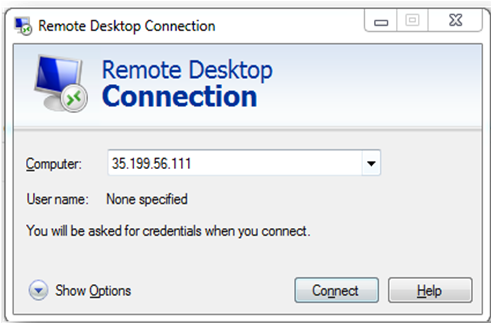
Then From your local Windows machine, go to the “start” menu, in the search box type and select “Remote desktop connection”.
- Step 10
In the “Remote Desktop Connection” wizard, paste the external IP and click on the connect button.
- Step 11
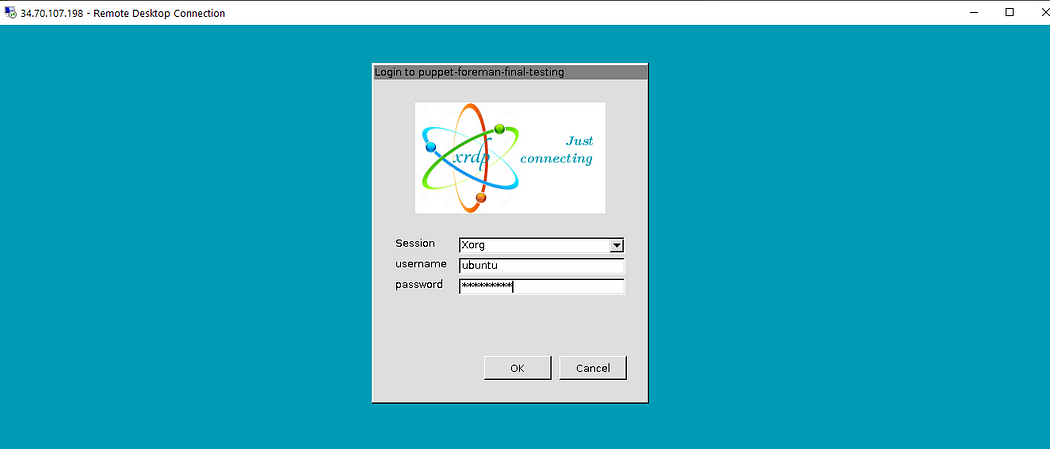
This will connect you to the VM’s desktop environment. Provide “ubuntu” as the user id and the password set in step 6 to authenticate. Click on the OK button.
- Step 12
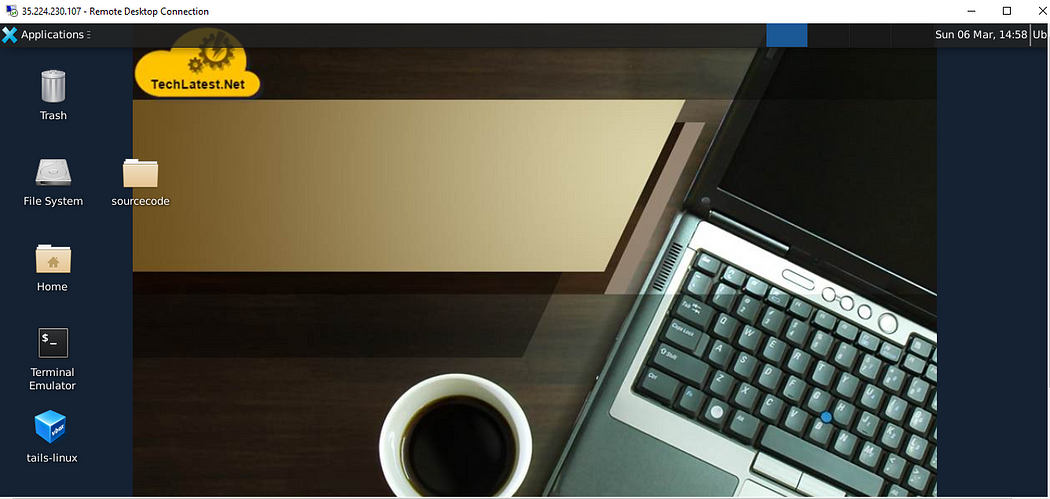
Now you are connected to out-of-box Tails Linux environment via Windows machines.
- Step 13
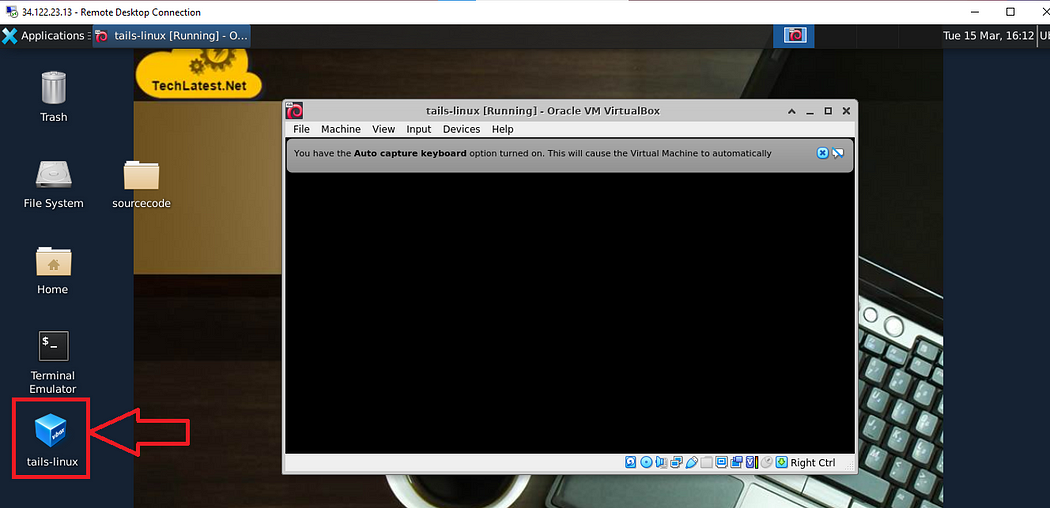
Once you are connected to GUI, click on the tails-linux VM icon on the desktop, this will start the tails VM inside the ubuntu VM. Wait for 4–5 minutes for the tails startup. In case you encountered a blank screen on clicking the VM, please check the Troubleshooting Guide to fix the issue and the continue with below steps:
- Step 14
Setting up root password :
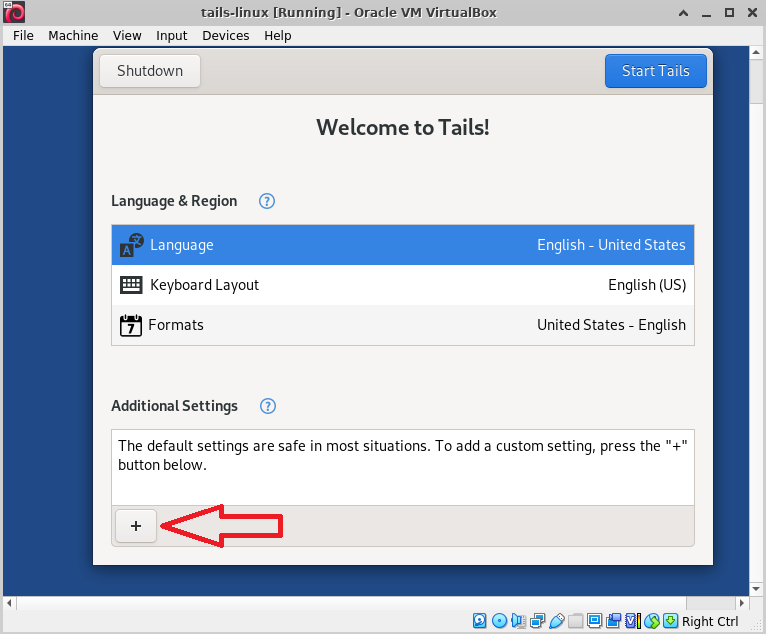
After 4–5 minutes, the below welcome screen will come up, click on the “+” sign at the bottom which will open the additional settings menu.
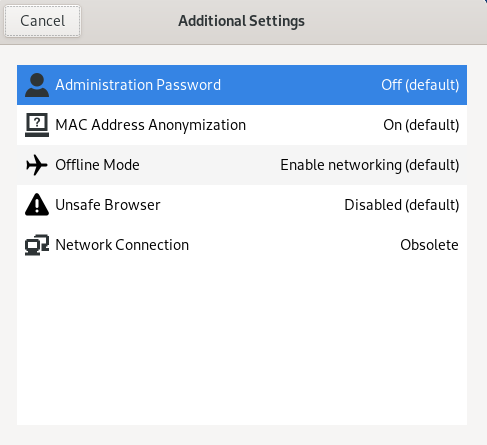
Select Administration Password and enter the password for the admin user and click on Add button on the top right.
- Step 15
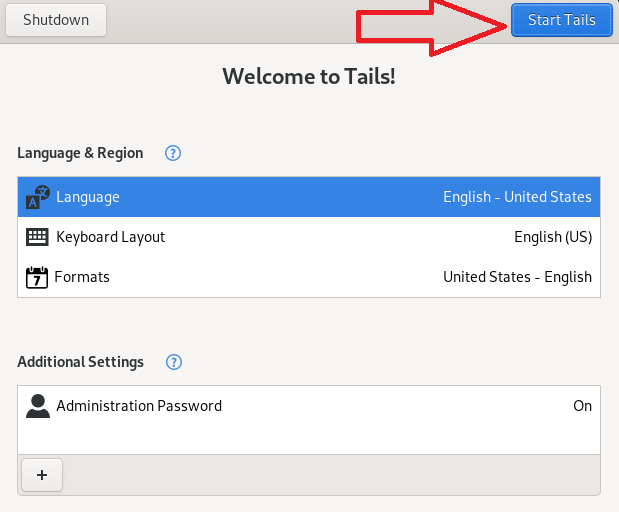
Now the password for the Admin user is set, click on the Start Tails on the top right.
- Step 16
Setting screen resolution:
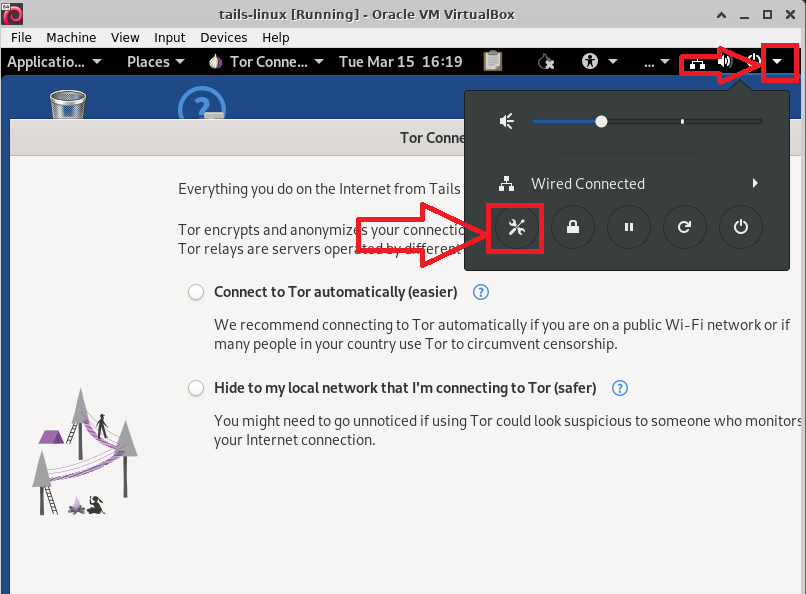
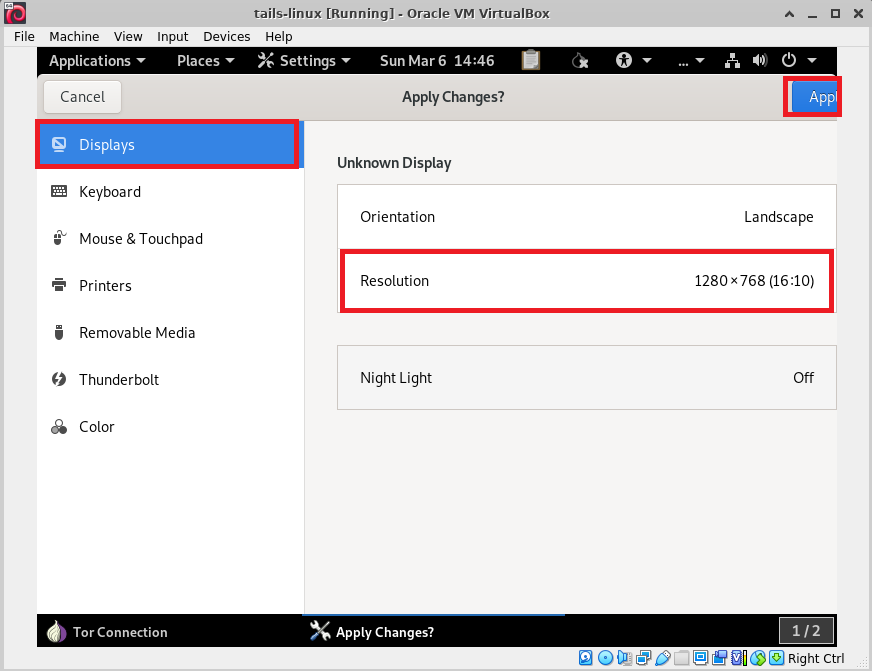
Once the tails VM start, reset the screen resolution. For that, click on the arrow on the top right, click the setting icon and the setting page will come, search for “display” in the top right search box. Select the display setting and change the resolution to the “1280x768 (16:10)” option, and click on Apply. It will ask you to keep the changes or revert them. Click Keep the new settings. This will expand the window to fit the screen. You can change the resolution to other settings as per your preference.
- Step 17
Connecting to Tor:
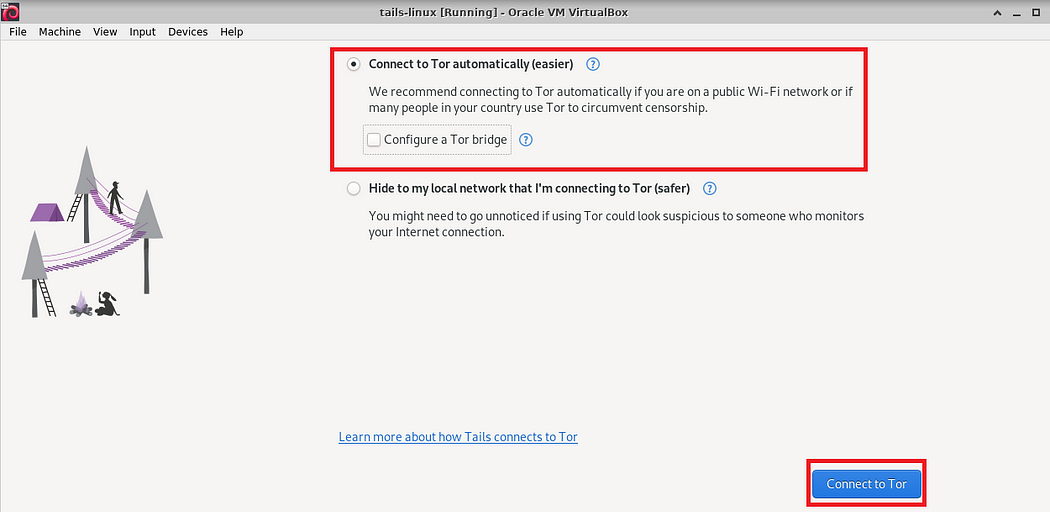
The tor connection wizard will be displayed by default. Select Connect to Tor automatically option and press Connect to Tor button.
- Step 18
Tails Application:
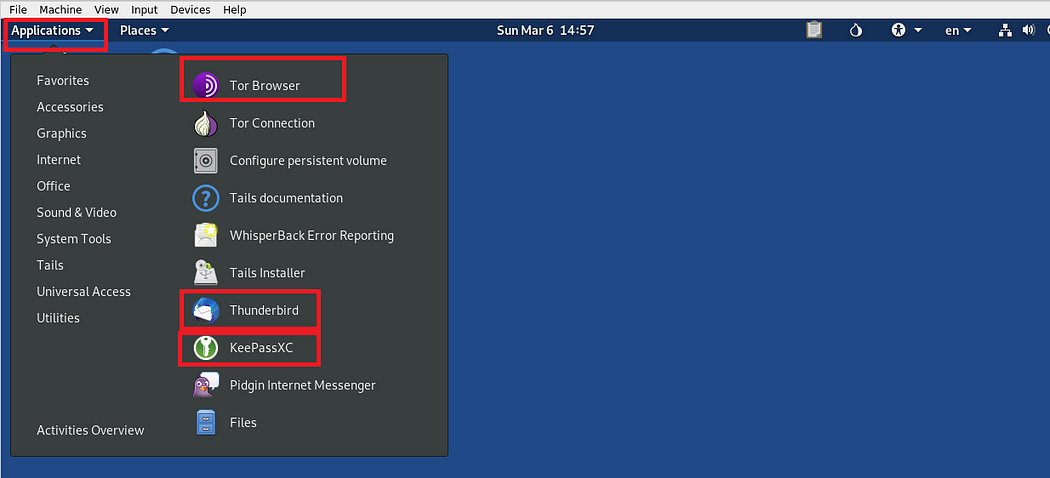
You can use different applications from the application menu of Tails.
Tails come with lots of open-source tools and software to operate and communicate securely. You can use The Tor Browser with uBlock ad blocker built in, Thunderbird which is an email client that encrypts emails, KeePassXC which is a password manager and OnionShare to share files over Tor among others.
- Step 19
The default tails VM will come with 4GB RAM. If you are experiencing latency or performance issues with your VM, please follow the How to Increase VM performance guide.
Conclusion
In conclusion, Tails Linux is a highly secure and portable operating system designed to protect user privacy and assist them in circumventing internet censorship. It is easy to set up and comes with pre-installed tools making it a popular choice for both beginners and experienced users. Techlatest.net offers an easy step-by-step guide to help users set up Tails Linux on GCP (Google Cloud Platform) in just a few clicks. Their pre-configured out-of-the-box environment saves time and effort. Once you have set up the Tails Linux environment, you can use a variety of open-source tools and software, including the Tor browser, Thunderbird email client, KeePassXC password manager, and OnionShare to share files over Tor. Tails Linux is an excellent choice for anyone looking to ensure their online privacy and protect their data flow.
Disclaimer: Other trademarks and trade names may be used in this article to refer to either the entities claiming the marks and/or names or their products and are the property of their respective owners. We disclaim proprietary interest in the marks and names of others.

Subscribe to my newsletter
Read articles from Techlatest.net directly inside your inbox. Subscribe to the newsletter, and don't miss out.
Written by

Techlatest.net
Techlatest.net
Bringing the latest tech to grow your business. AWS, GCP & Azure registered partner and cloud solution provider on latest tech.