Level - 2: Insecure S3 Buckets
 Goodycyb
This level is fairly similar to the first level. You will need to create an AWS account for this level if you don't already have one.
NB: Don’t use a company or sensitive account. Try to create a new free tier account.
You can check out my cloud security lab series (I, II, and III) on securing your AWS free tier account.
Recall that at the end of Level 1, we had access to the content in the S3 bucket because the permission was set to "Everyone" which means everyone on the Internet can access it.
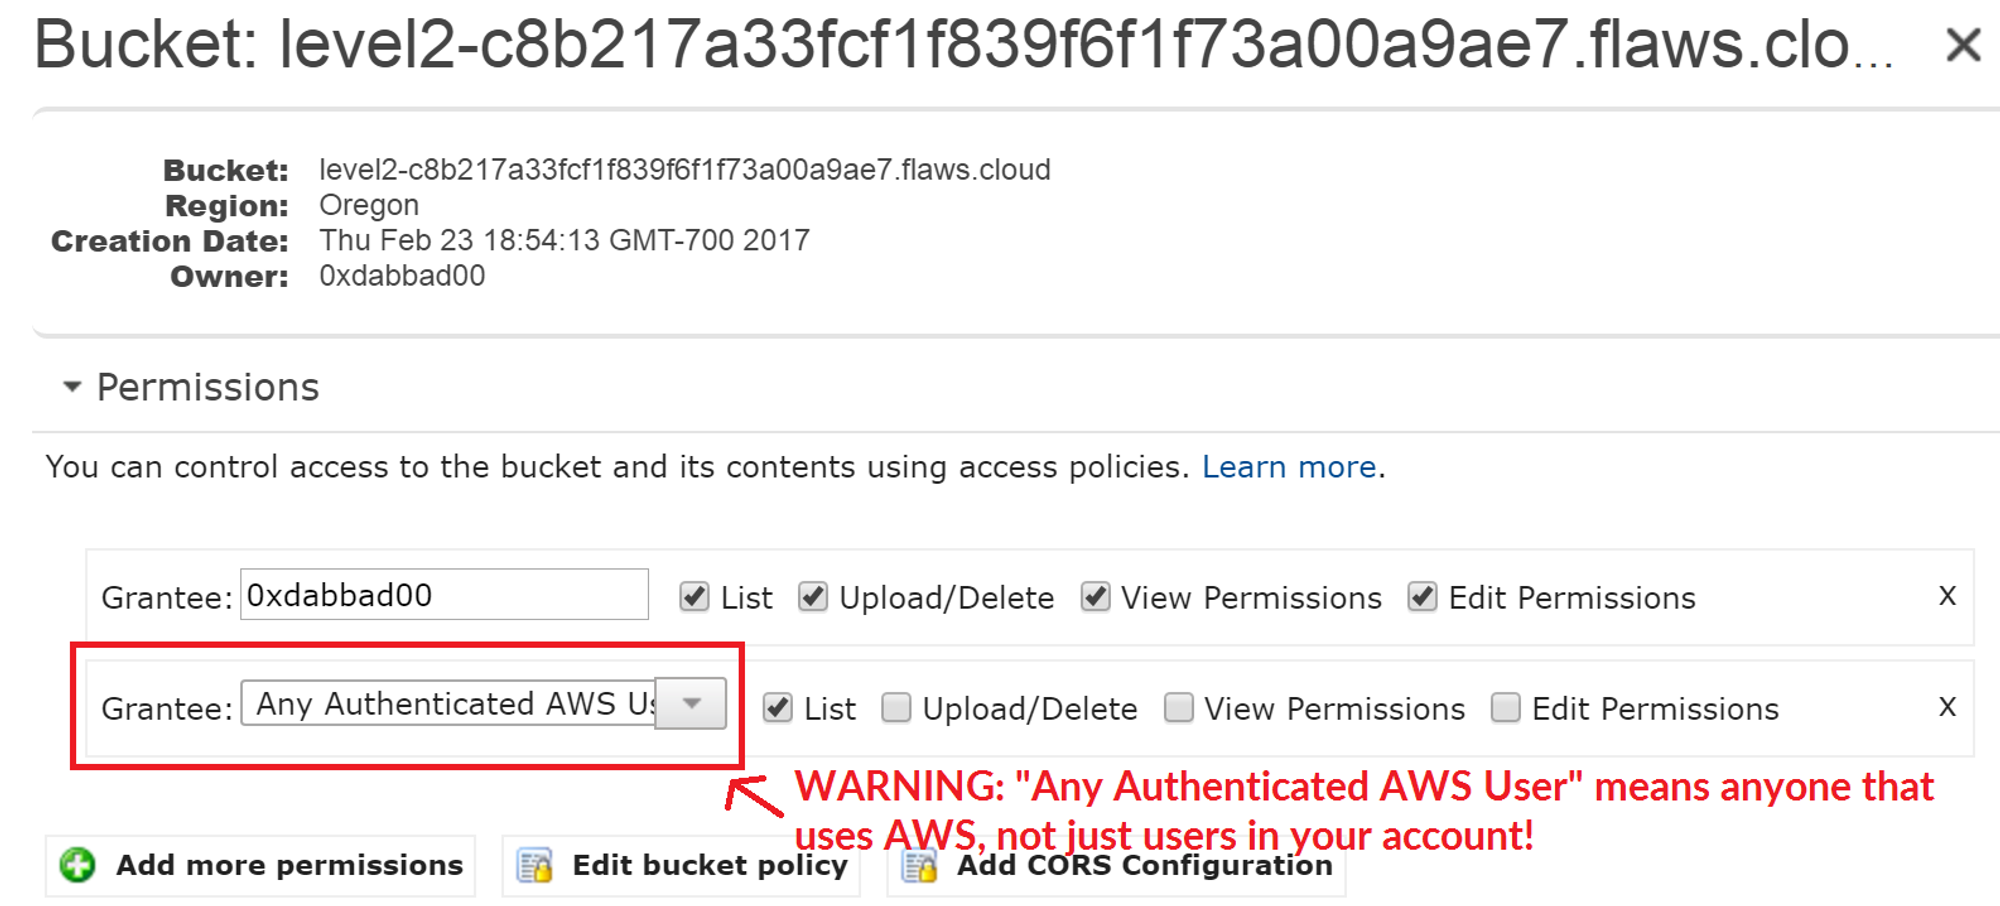
Now let's see how we can (“anyone”) access the S3 bucket with our AWS account.
Creating an IAM User Account
Once you have your AWS account created, Create an IAM User Account
Navigate to your IAM dashboard.

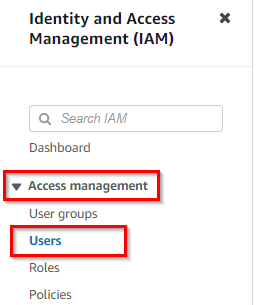
On your IAM Dashboard, navigate to the left-hand side of the menu. Under “Access Management”, click on “Users”.
On the “Users Page”, navigate to the top right and click on “Add User” to create an IAM USER.

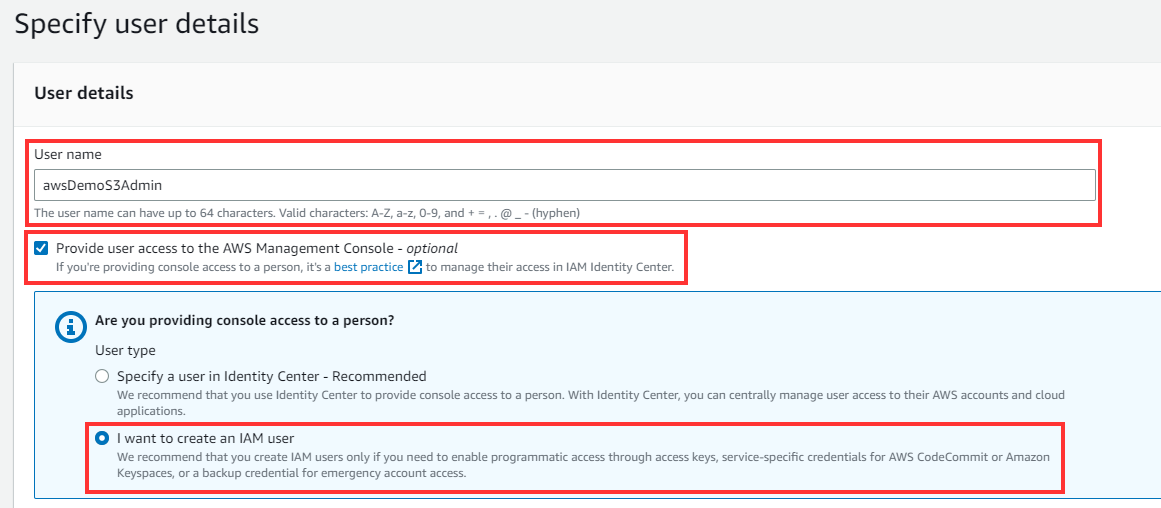
Specify a user name of your choice and tick the box “Provide user access to the AWS Management Console.”
Scroll down, under Console Password, and retain the default settings “Autogenerated Password” and “Users are required to create a new password at the next sign-in”. Then click NEXT

Under the “Set permissions” option, select Attach policies directly.
Here we want to give S3 Admin access to this user. But from a security approach in the real-world setting, it is recommended to select “Add user to group” to apply the policy to a group of users.

Under Permissions policies, search for “AmazonS3fullAccess” and check the box. Then click Next

Review settings and create
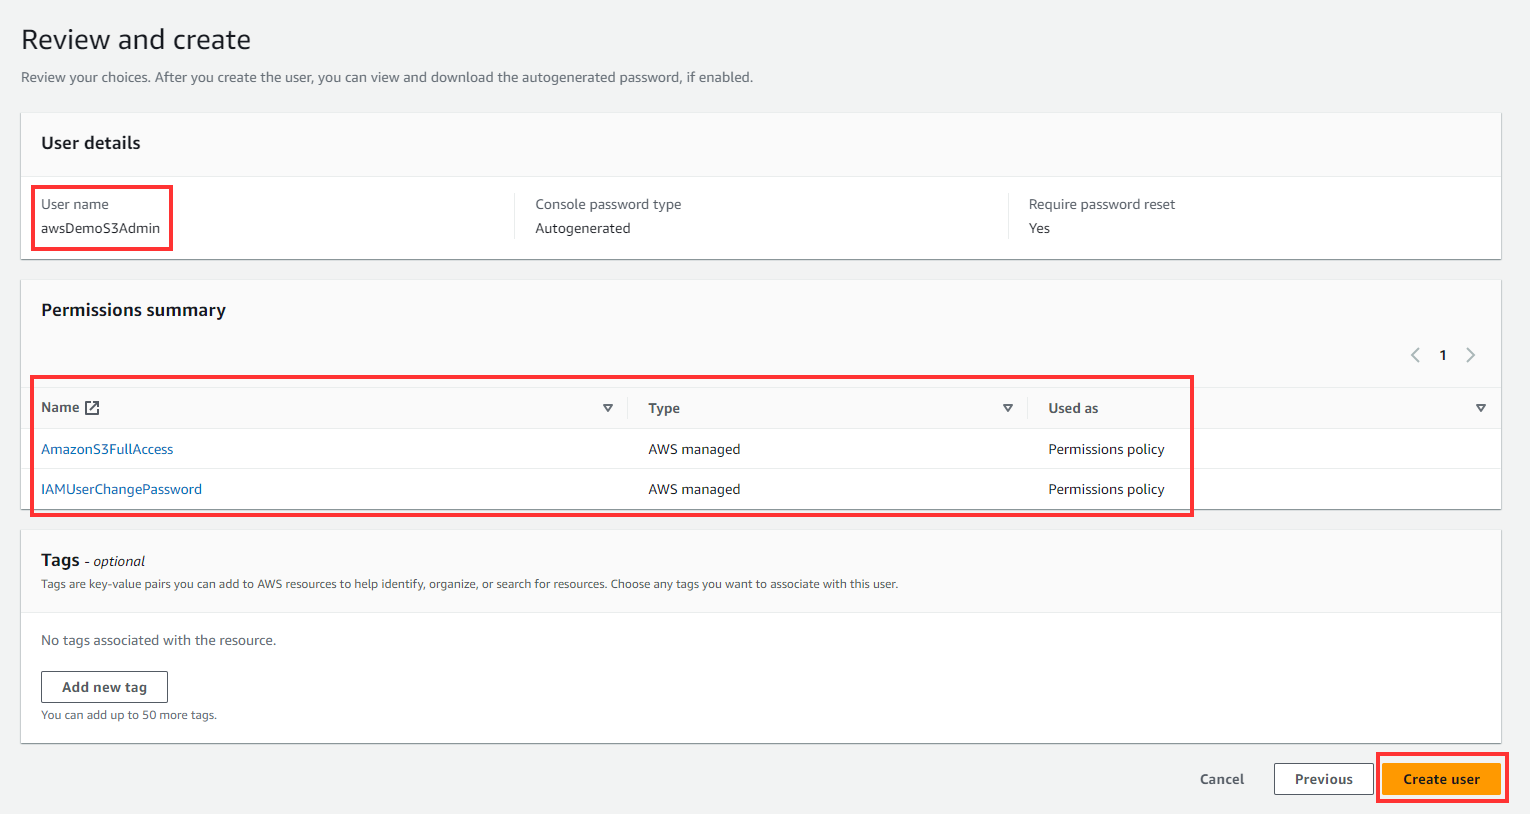

Download the .csv file which contains the Programmatic access credentials
Creating programmatic Security Credentials
On the Users Page, Click on the IAM user you just created “awsDemoS3Admin”. In the IAM User Page, click on Security Credentials Tab.
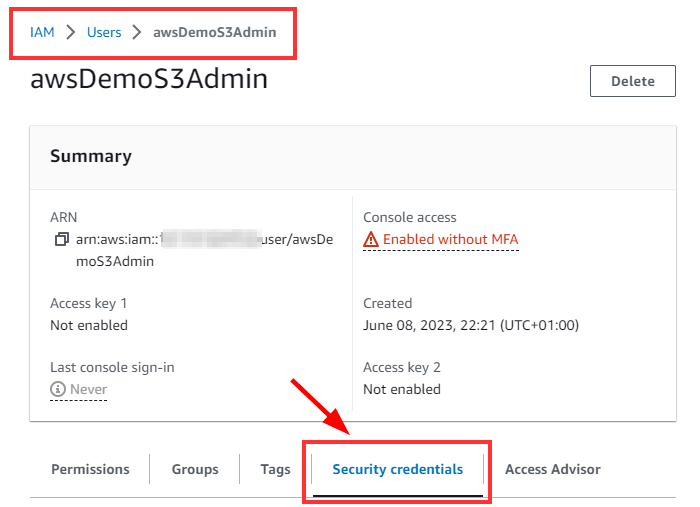
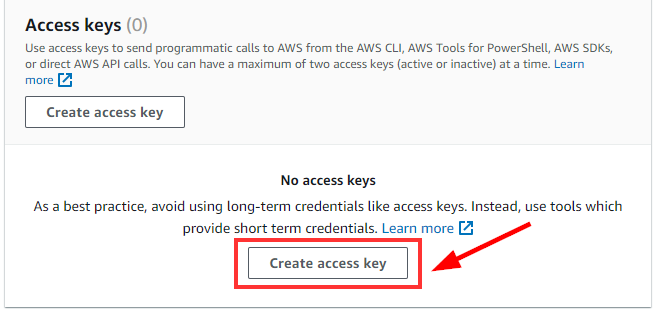
On the Security credentials Tab, Scroll down to the “Access Key” Section and click on “Create Access Key”
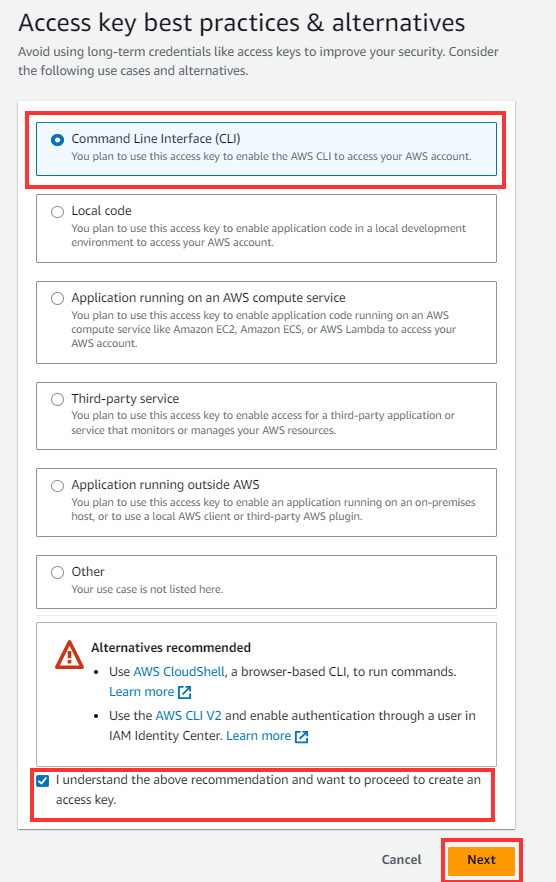
Select Command Line Interface (CLI) option and click on the checkbox “I understand the above recommendation and want to proceed to create an access key” Then click NEXT
Next, Enter “Description tag value” and then click “Create Access Key”
NOTE: Ensure you download the .csv file
Configure AWS CLI
💡Recall: From Level 1 Task, we installed AWS CLI from Git Hub on our Linux terminal.
NB: You can use the AWS CLI on Windows to access the IAM User account if you want to.
Download AWS CLI or check the Amazon website for Linux or MAC tools.
Once the .msi installer is done downloading,
Run the downloaded MSI installer or the setup file.
Follow the on-screen instructions. By default, the AWS CLI version 1 installs to
C:\Program Files\Amazon\AWSCLI(64-bit version) orC:\Program Files (x86)\Amazon\AWSCLI(32-bit version).To confirm the installation, use the
aws --versioncommand at a command prompt (open the Start menu and search forcmdto start a command prompt).
READ MORE ON AMAZON DOC

But for this lab, we will use a Linux terminal to access our created IAM User.
Use the details from the CSV file that was downloaded previously for the task below

- On your Linux terminal, type “aws configure”
⇒ For “AWS Access Key ID ###…###” Enter: Access Key ID from CSV file above and For AWS Secret Access Key ###…### Enter: The secret Access Key from the CSV file above, and ****Next ****Enter Region: us-east-1 and then Enter Default Output: JSON

Now that we have signed in with our IAM user with the Access Key security credentials, let's access the S3 content.
Accessing S3 content with an AWS account
aws s3 --profile default ls s3://level2-c8b217a33fcf1f839f6f1f73a00a9ae7.flaws.cloud
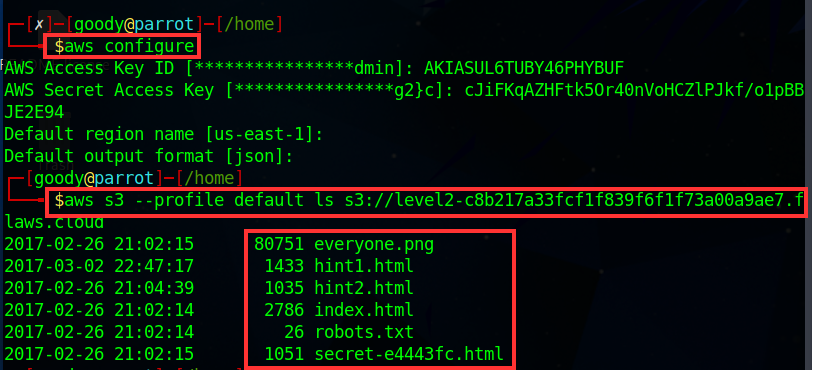
Since the S3 bucket is publicly available to everyone over the Internet, we can send a request to anonymously access the bucket without signing into an AWS account. using the command
“aws s3 ls s3://flaws.cloud --no-sign-request”.The command
“--no-sign-request”helps us bypass signing into an AWS account.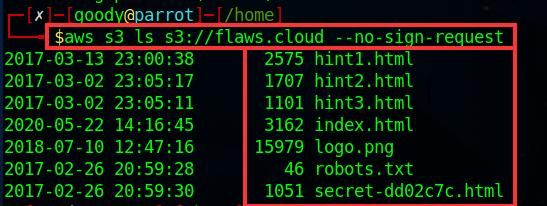
SUMMARY
We were able to access (list) the content of an S3 bucket using different IAM User account credentials.
LESSON LEARNED
Similar to opening permissions to "Everyone", people accidentally open permissions to "Any Authenticated AWS User". They might mistakenly think this will only be users of their account, when in fact it means anyone that has an AWS account.
Avoiding the mistake
Only open permissions to specific AWS users.
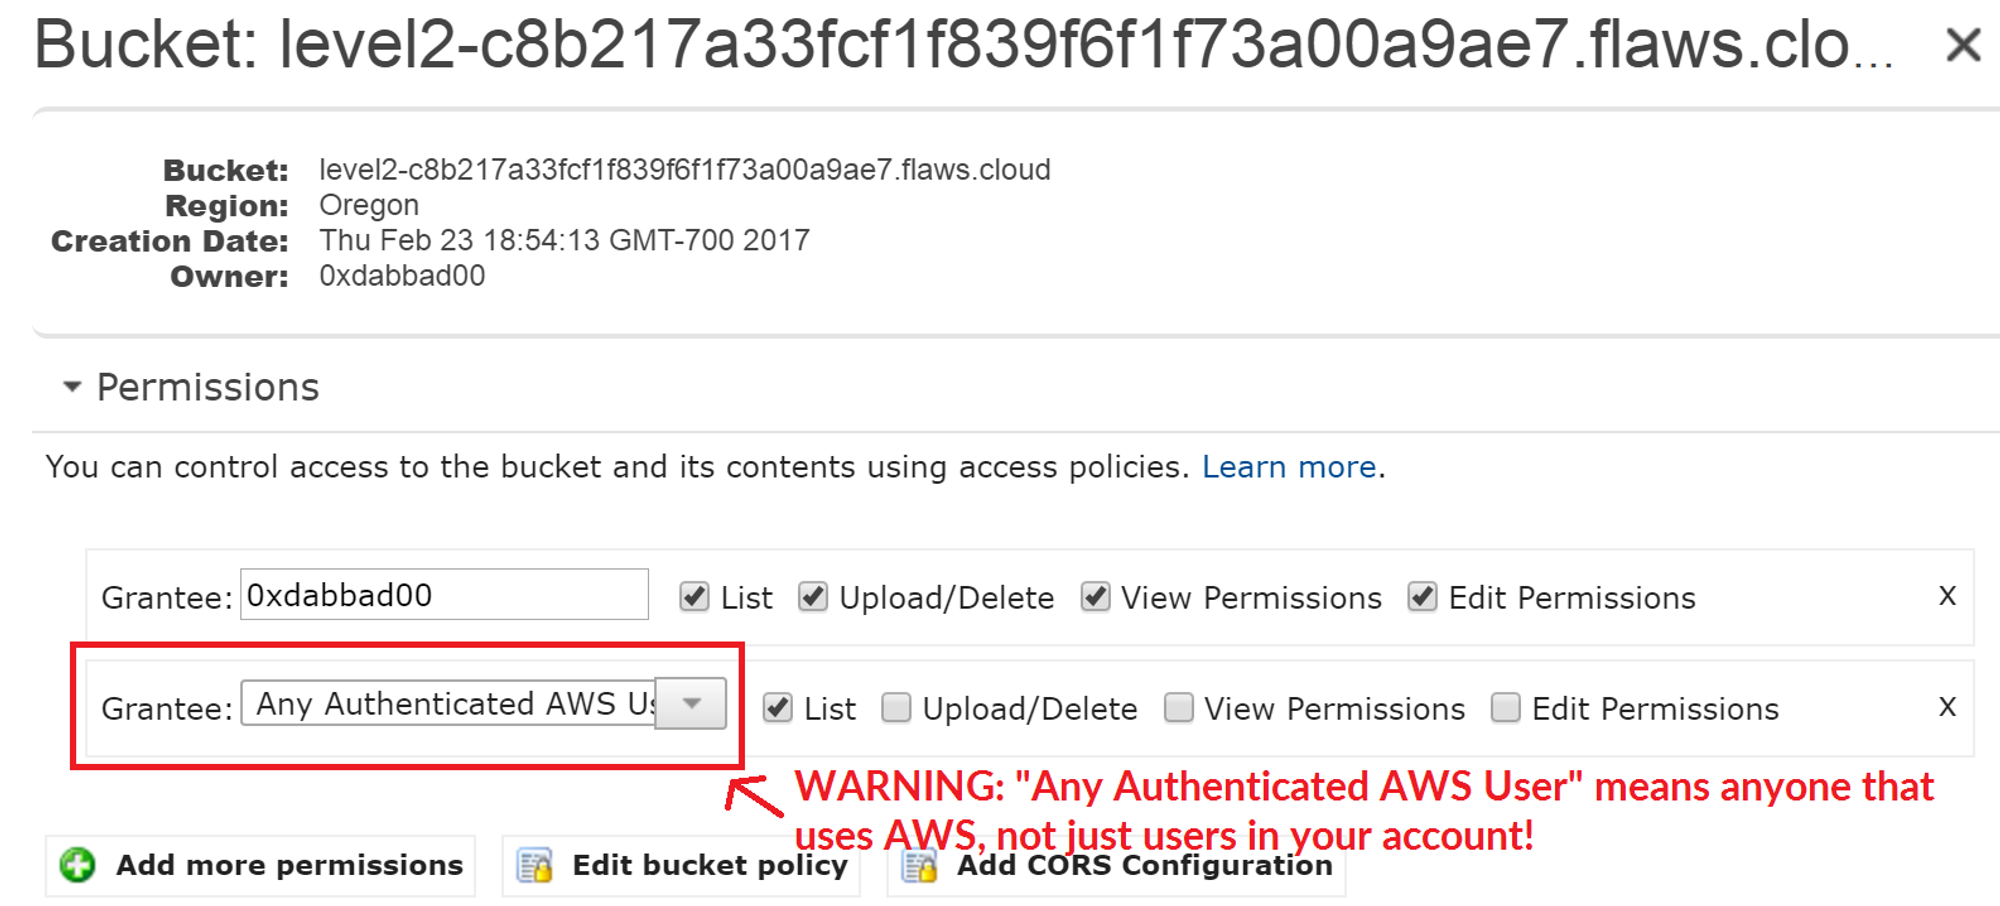
This screenshot is from the web console in 2017. This setting can no longer be set in the web console, but the SDK and third-party tools sometimes allow it.

Level 3 🚩 Let's Go!!
Subscribe to my newsletter
Read articles from Goodycyb directly inside your inbox. Subscribe to the newsletter, and don't miss out.
Written by

Goodycyb
Goodycyb
Hey there! 👋🏾 I'm Goody, a Cloud Threat Researcher by Day 🌞 and a Cloud Security Content Engineer by Night🌜. Join me on my journey as I explore the realm of Threat Detection in Cloud Security.