Installing Tensorflow(with GPU support) in linux or WSL 🐧
 Kelvin John Domeh
I was trying to install Tensorflow with GPU support on my Linux machine and WSL, but I was having a terrible time. I spent hours and days🤦♂️ scouring the internet looking for solutions, but nothing seemed to work. I felt like I was going in circles, and I was getting more and more frustrated with each passing minute. Eventually, I did manage to figure out a way to install Tensorflow with GPU support, and it was like a weight had been lifted off my shoulders.

I don't want you to go through the same pain and frustration that I experienced, so I'm going to share with you the steps to follow to install Tensorflow with GPU support in Linux or WSL. Trust me, it will save you a lot of time and headaches!😉
Tensorflow is an open-source software library used for dataflow and differentiable programming across various tasks. It is a popular choice for machine learning and deep learning tasks due to its flexibility and scalability. By default, Tensorflow installation does not include GPU support. However, GPU support can significantly speed up the training of deep learning models.
System Requirements
To install Tensorflow with GPU support, you need the following system requirements:
NVIDIA® GPU card with CUDA®. Check if your GPU has CUDA support here
CUDA® Toolkit 11.0 or higher
cuDNN SDK 8.0.4 or higher
Linux or Windows Subsystem for Linux (WSL) [will be using ubuntu in this blog]
Prerequisite
Python 3.6 - 3.9
Ubuntu 16.x or later
Installation Steps
Follow the below steps for installing Tensorflow with GPU support:
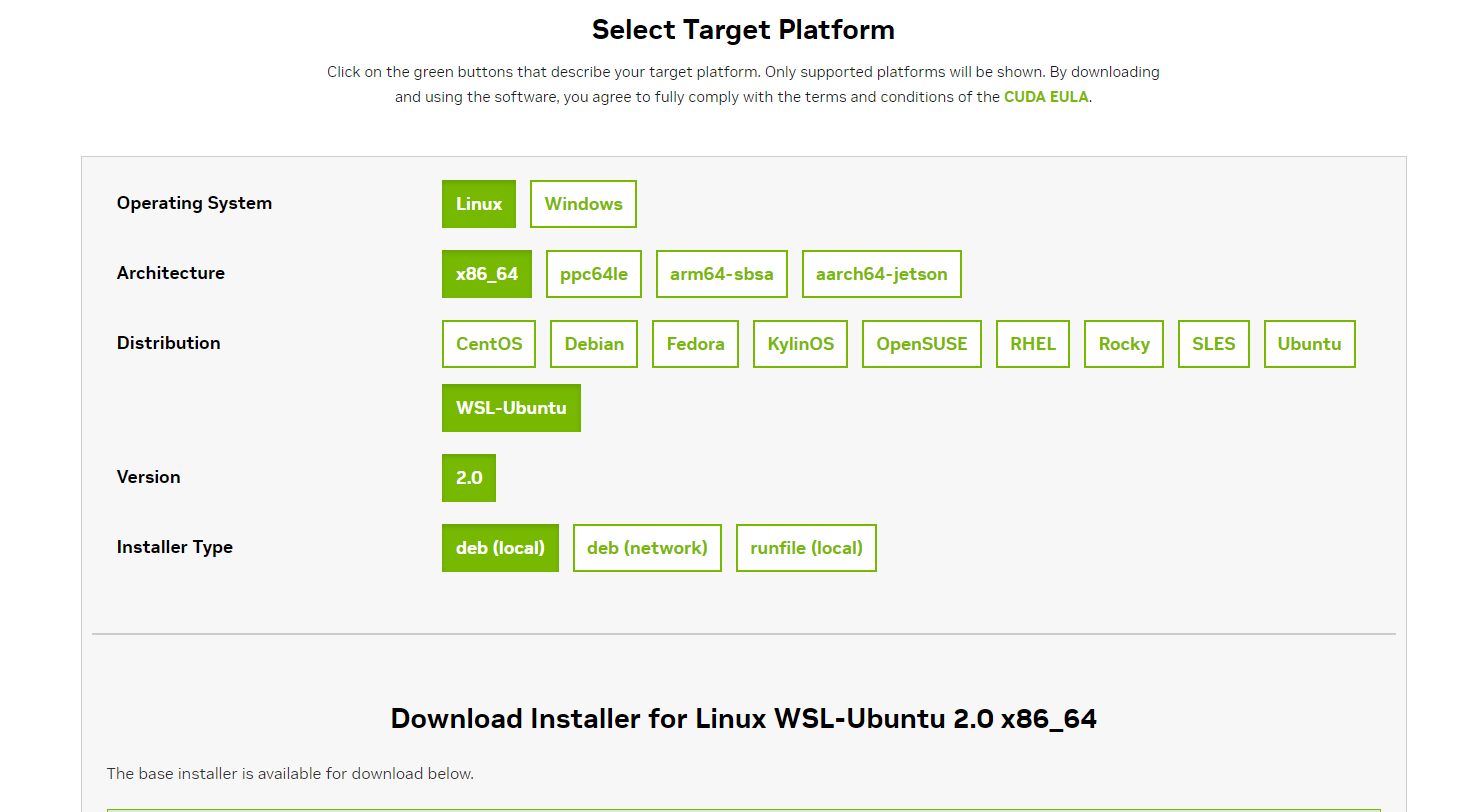
- First, install the CUDA® Toolkit. You can download the latest version of CUDA® Toolkit from the NVIDIA® website(ubuntu or linux). Make sure to select the appropriate version of the toolkit according to your GPU card and Linux distribution.

After installing the deb(local) file, you can install this by running this in the terminal.
sudo apt install ./<name_of_file>.deb
NB: Make sure you are in the right directory before running the above command.
Alternatively, you can install the CUDA® toolkit right in your terminal.
sudo apt install nvidia-cuda-toolkit
Run this command to check if installation of the toolkit has been successful.
nvcc -V
output should look like this.
nvcc: NVIDIA (R) Cuda compiler driver Copyright (c) 2005-2021 NVIDIA Corporation Built on Thu_Nov_18_09:45:30_PST_2021 Cuda compilation tools, release 11.5, V11.5.119 Build cuda_11.5.r11.5/compiler.30672275_0
After installing the CUDA® Toolkit, download the cuDNN SDK from the NVIDIA® website. Unzip the downloaded file and move the contents to the appropriate directory.
NB: To be sure of the version of the cuDNN to install. Please check the version on the tensorFlow website.
Unzip with this command:
tar -xvzf cudnn-linux-x86_64-8.9.2.26_cuda11-archive.tar.xz.tgzAfter extracting the files, I like to rename to folder because of the next command. In this case I renamed the folder from cudnn-linux-x86_64-8.9.2.26_cuda11-archive to cudnn.

Now let’s copy the extracted files into the cuda dir.
 sudo cp cudnn/include/cudnn.h /usr/lib/cuda/include/
 sudo cp cudnn/lib/libcudnn* /usr/lib/cuda/lib64/
Set file permissions for cudnn
sudo chmod a+r /usr/lib/cuda/include/cudnn.h /usr/lib/cuda/lib64/libcudnn*Export CUDA environment variables. To set them, run:
 echo 'export LD_LIBRARY_PATH=/usr/lib/cuda/lib64:$LD_LIBRARY_PATH' >> ~/.bashrc
 echo 'export LD_LIBRARY_PATH=/usr/lib/cuda/include:$LD_LIBRARY_PATH' >> ~/.bashrc
Install Tensorflow using pip. To install Tensorflow with GPU support, use the following command:
pip install tensorflow-gpuMaybe instead of just installing globally into the python environment, let’s use the conda and create an environment out of it. It is recommended to use a virtual environment for your Tensorflow project to avoid conflicts with other packages and ensure reproducibility. You can create a virtual environment using the following command:
Steps with using miniconda.
First download and [install](Installing on Linux — conda 0.0.0.dev0+placeholder documentation) Miniconda from their website.
Let’s create our environment.
conda create --name tf python=3.8
- Activate the environment.
conda activate tf
- Create a jupyter support for this environment.
conda install nb_conda
- Time to install tensorflow. For CPU support only, use this:
conda install -c anaconda tensorflow
For both CPU and GPU support, use this:
conda install -c anaconda tensorflow-gpu
- Verify the installation by running a simple Tensorflow program that uses the GPU. If the program executes without any errors, then the installation was successful.
import tensorflow as tf
tf.config.list_physical_devices("GPU")
You will see similar output, [PhysicalDevice(name=’/physical_device:GPU:0′, device_type=’GPU’)]
Conclusion
In conclusion, installing Tensorflow with GPU support can significantly speed up the training of deep learning models. By following the above steps, you can easily install Tensorflow with GPU support in Linux or WSL.
If you encounter any issues during the installation process, you can refer to the Tensorflow documentation for troubleshooting or seek assistance from the Tensorflow community. It is also important to note that the installation steps may vary depending on your system configuration.
By installing Tensorflow with GPU support, you can take advantage of the power of your GPU to accelerate the training of deep learning models and achieve faster results. With the increasing demand for deep learning applications, installing Tensorflow with GPU support is becoming more important than ever.
Subscribe to my newsletter
Read articles from Kelvin John Domeh directly inside your inbox. Subscribe to the newsletter, and don't miss out.
Written by

Kelvin John Domeh
Kelvin John Domeh
Passionately curious about Software engineering. 👌 I spend time exploring new technologies and improving upon the ones I know. When I'm not studying for university, you'll find me building side projects that challenge me to learn and grow as a Tech Enthusiast. Join me as I share my journey and discoveries in the tech world.