How to Create and move a master instance of Jenkins to the cloud-based servers of AWS (Amazon Web Services)
 Sudharsan Reddy
In this blog, I will show how to create a master instance of Jenkins, including how to configure a security group, a NGINX reverse proxy, and Jenkins master instance.
The main key points,
Create a security group -> Create a key pair -> Create the Jenkins EC2 instance -> Install Java, Jenkins, NGINX -> Configure NGINX -> Configure Jenkins
1. Create a security group
Before we set up our Jenkins master server, there are a few things we need to have in place. The first of these is a security group. Security groups are associated with network interfaces and act as a firewall for our instances. Using a security group, we can specify the ports that will be accessible on the instance for incoming and outgoing traffic.
Lets go to the AWS consol, login into my aws account, and update specific region. in my case us-east-1, so I want all of my security groups, key pairs and servers to be created in this region as well.

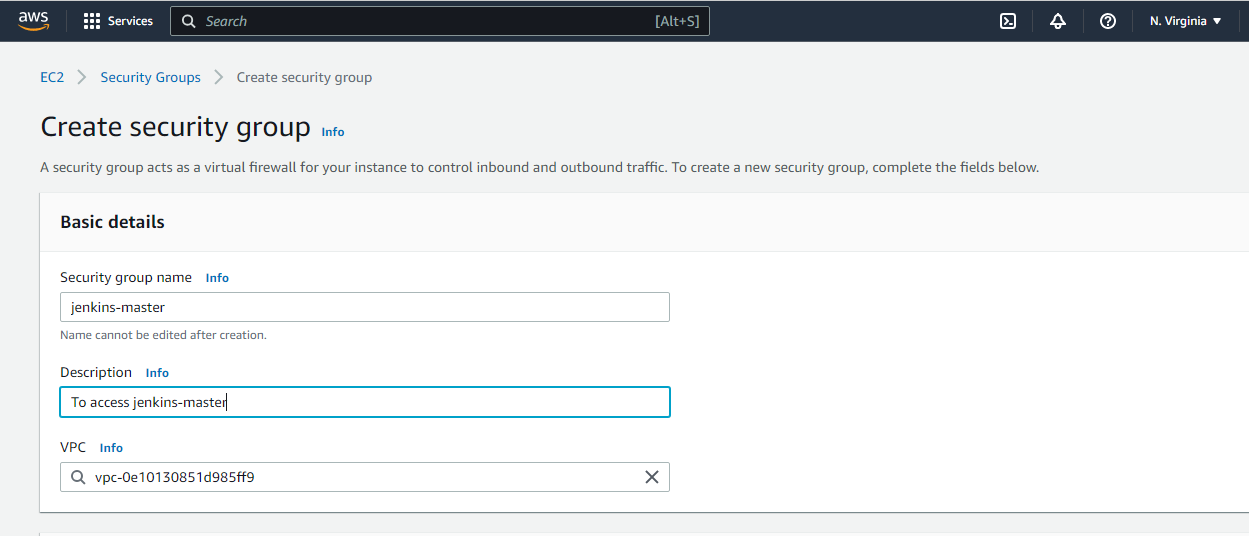
Let's go to EC2 Dashboard, under Network & Security there is a link Security Groups. Click on Security Groups, under this we have default existing security group. To create new security group, click on Create security group

Enter the basic details,
Enter the Inbound rules,
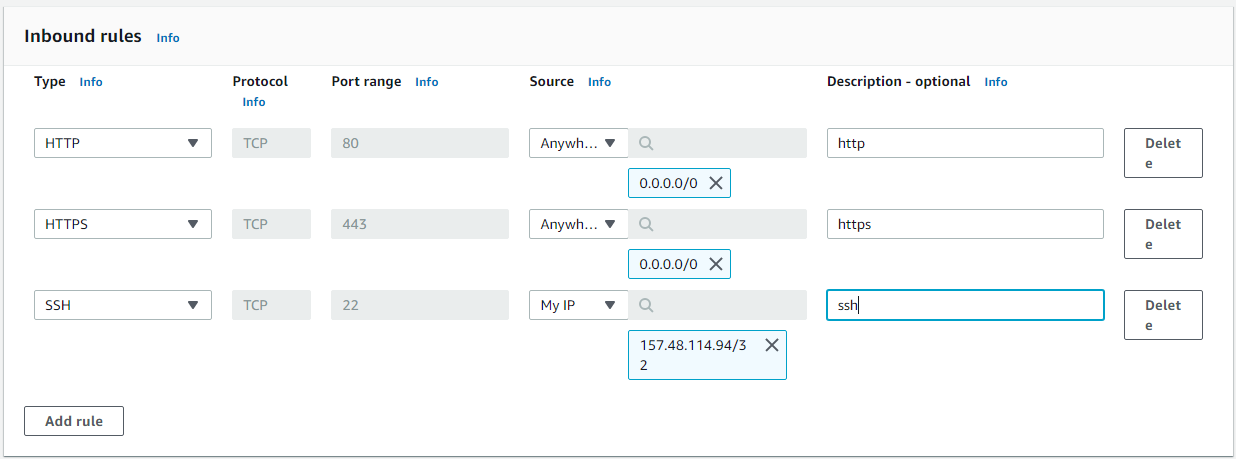
We are keeping Outbound rule Type value is All traffic, Port value is All, Port range is All and Destination is Custom (keeping as default)

Adding Tag value, tag values are easy to understand and identify.

click on Create security group.


2. Create a key pair
A public key and private key used for authentication. The public key is attached to an instance and private key is saved in local place. Keep both keys safe and secure.
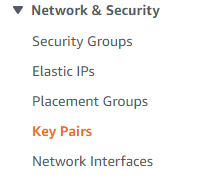
Click on Key Pairs,
Click on Create key pair, enter required details. Select Private Key formate based on your os. If your are using linux flavor os then select .pem, if you are using windows flavor os then select .ppk.
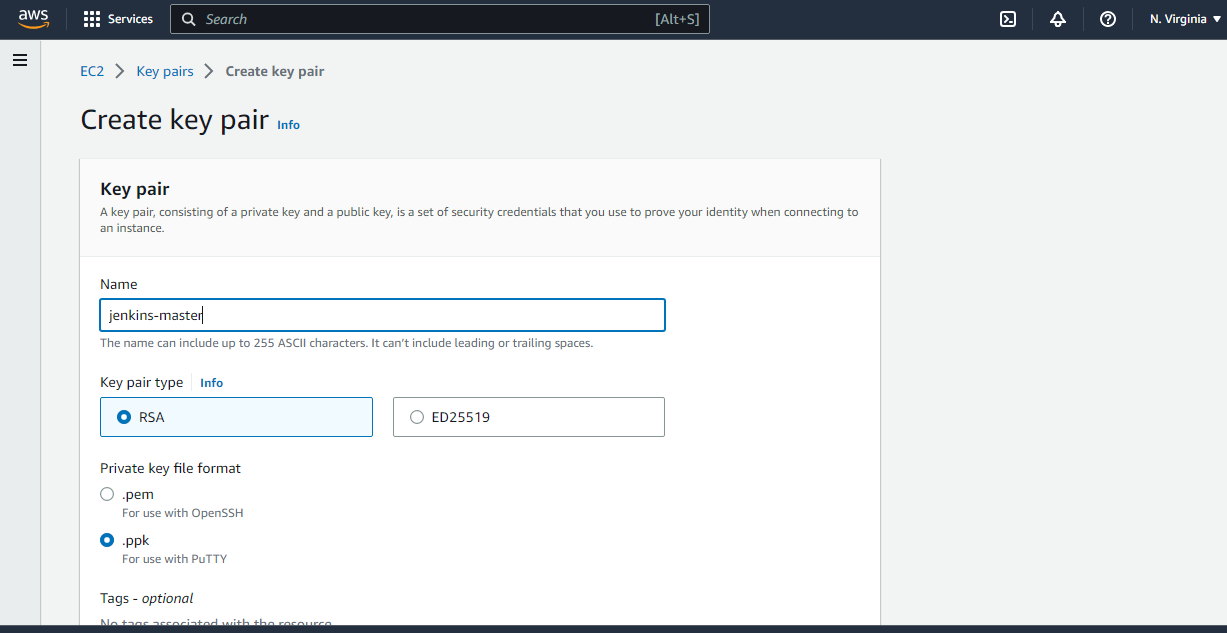

Click on Create key pair.

3. Create the Jenkins EC2 instance
With a security group and a key pair in place, we can create the EC2 instance that we'll use for our Jenkins Master.

Click on Launch instance,
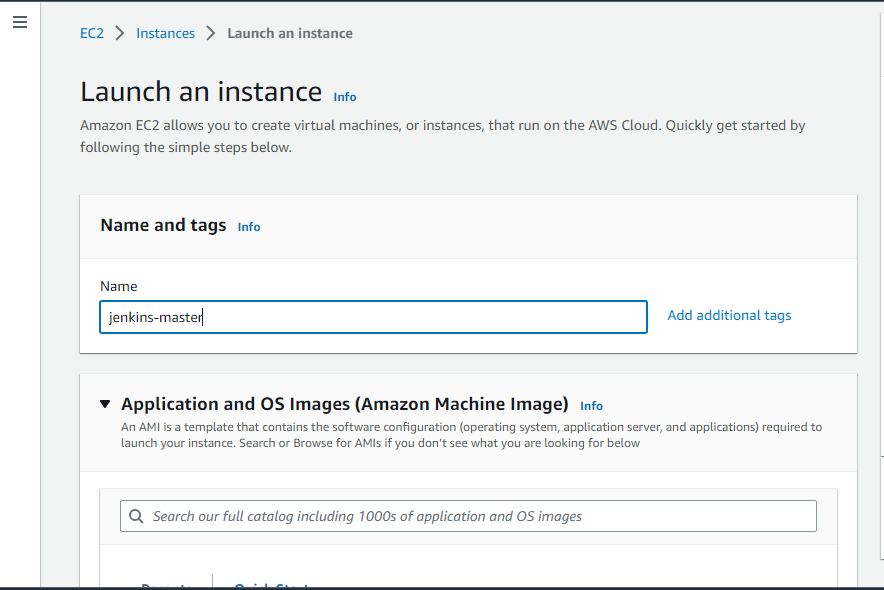
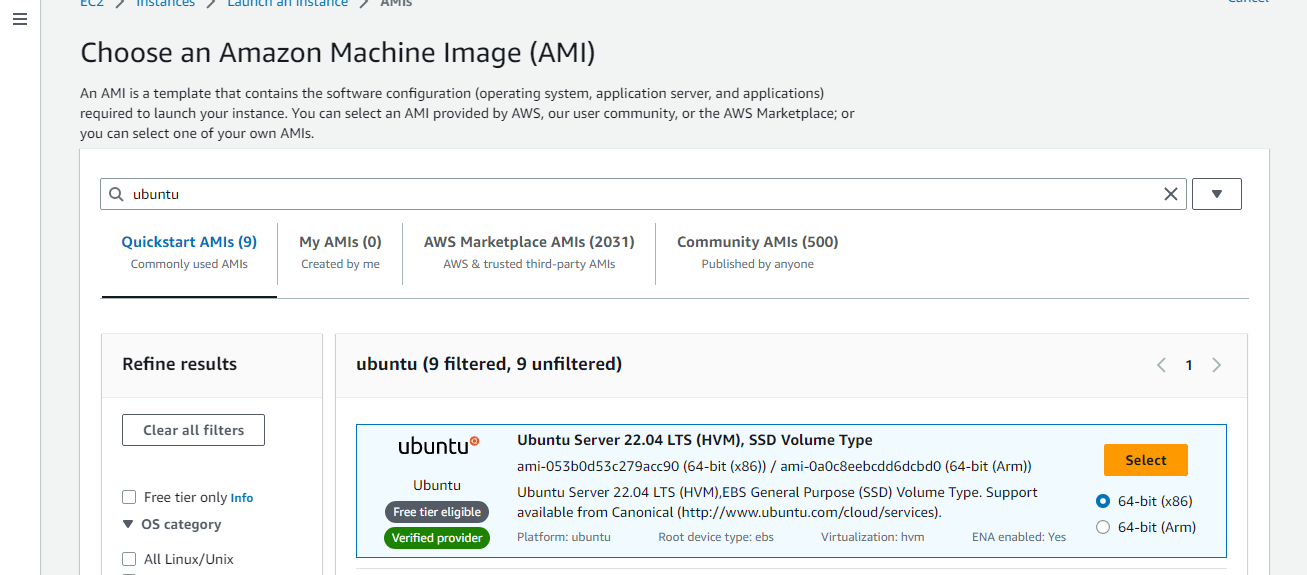
Select key pair, wich we created

Select created Security group
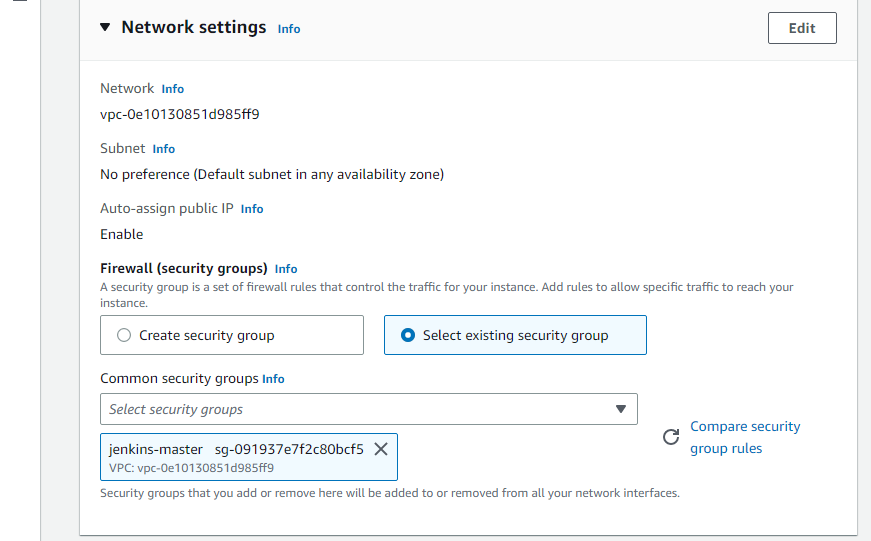
This is basic configuration process, so we are not adding storage volume. Click on Launch instance.

After all that clicking, we finally have an instance up and running. There's still one more thing we need to add. An elastic IP. If our instance is stopped and then restarted, the public IP address will change. This could be problematic if we have configurations that rely on the IP address being consistent, and elastic IP address solves this problem. In the menu on the left-hand side of the EC2 Dashboard, I'll select elastic IPs under network and security, and then I'll click allocate IP address.
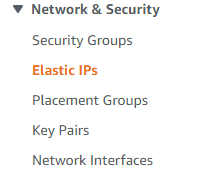

Click on Allocate Elastic IP address.
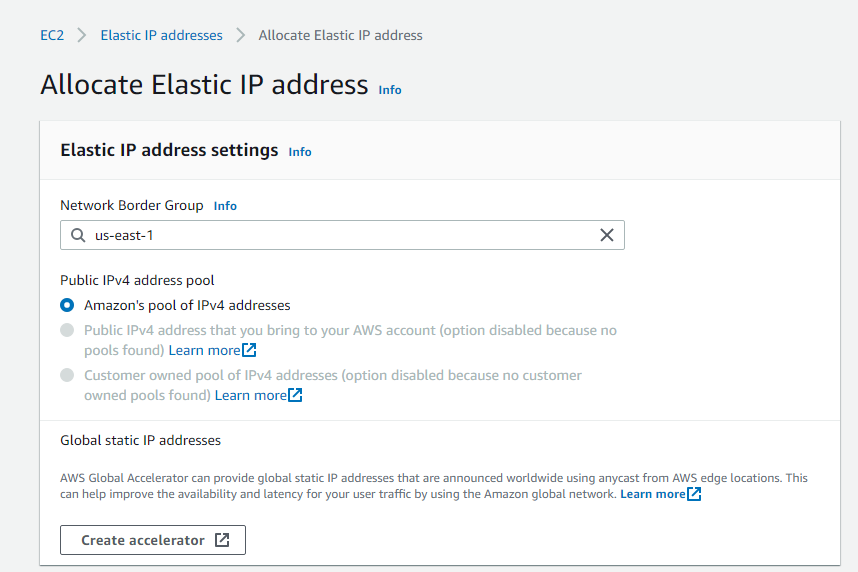
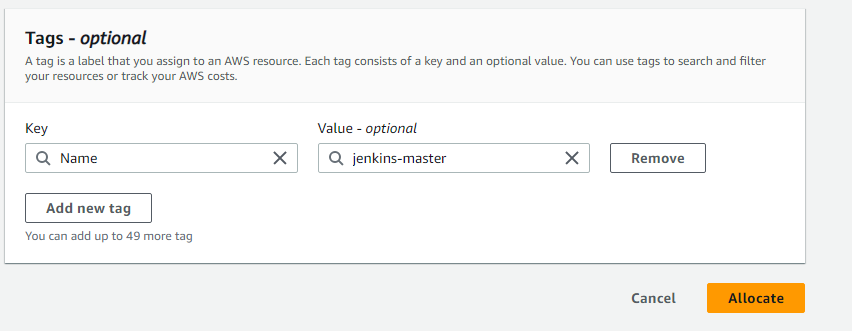
Click on Allocate. Click on Actions, click on Associate Elastic IP address.

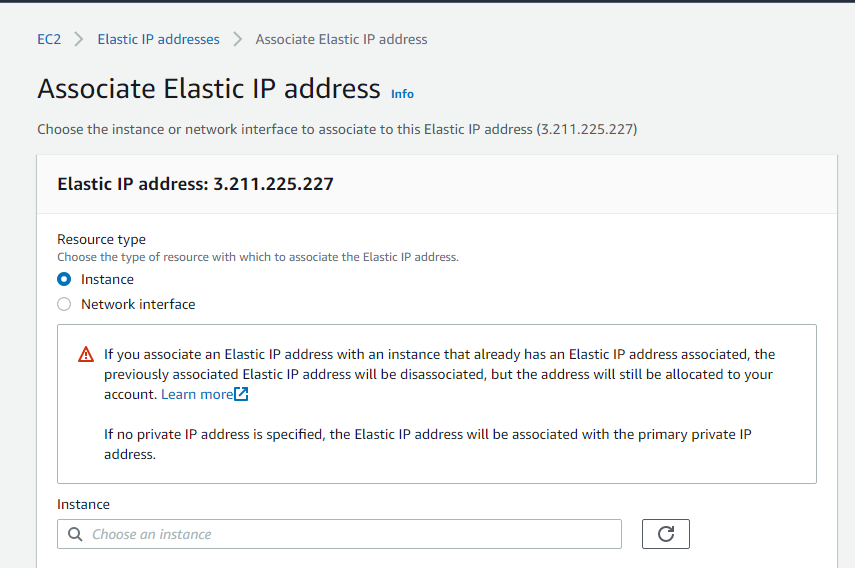
Select Instance (In my case jenkins-master instance).
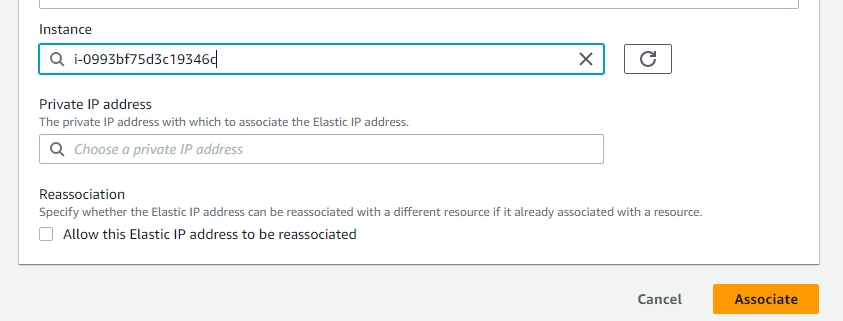
Click on Associate.

Okay, till here We have got the virtual hardware and a way to get connected to it. Now we need to install the software. To connect jenkins-master instance, we use the PuTTy tool.
Steps to connect jenkins-master using Putty.
We have public key, this is automatically downloaded while creating key pair. Save this public key in secure place.
Install PuTTy application.

Click puttygen. Select RSA type and click on the Load button to load Publick kay.
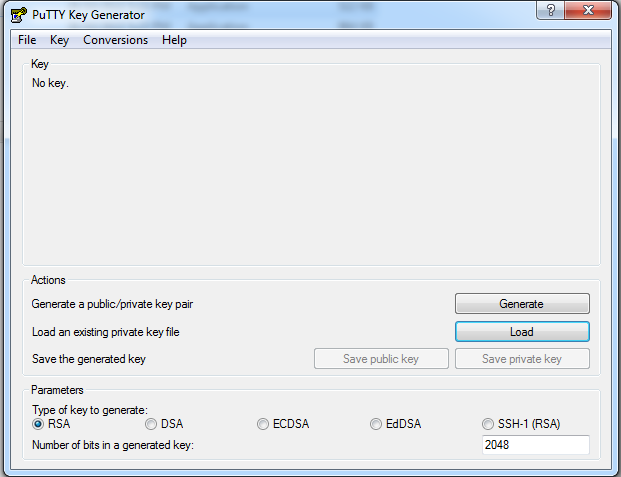
Click on the Load button, and select the public key. Click on the Save Private Key button. Save the Private Key in a secure place.
Open PuTTy application, click on the Auth-Credentials and browse the private key which we saved.
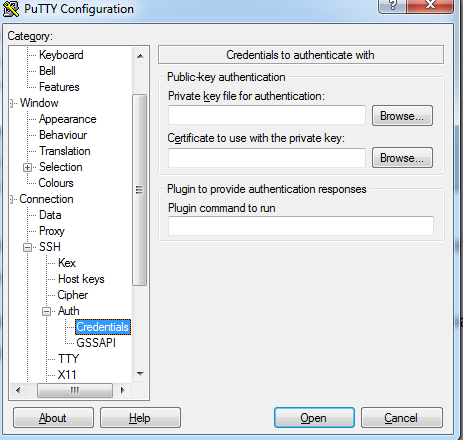
Now, scroll up and go to the Session.
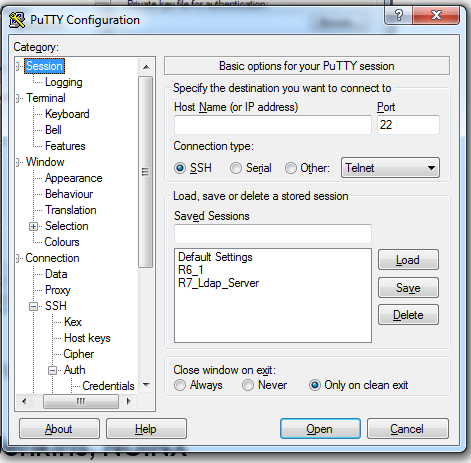
Enter Host name or Ip address.


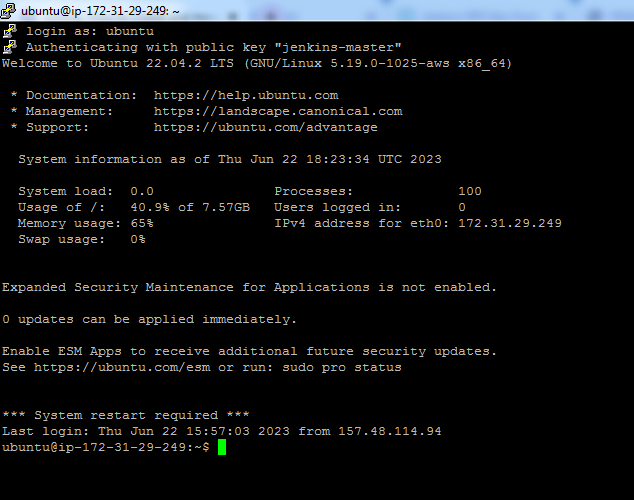
Till to here, we connected to the virtual Jenkins-master server. Now software process
4. Install Java, Jenkins, NGINX
Now that we have an EC2 instance up and running we need to install the software for our Jenkins Master Server. Since Jenkins is a Java based application, we'll need to install a Java Development Kit, or JDK. We'll also be installing NGINX to act as a proxy for connections to our Jenkins server.
Change to the root user after logging in:

    sudo su -
*On Debian and Debian-based distributions like Ubuntu you can install Jenkins through apt.

curl -fsSL https://pkg.jenkins.io/debian/jenkins.io-2023.key | sudo tee \
  /usr/share/keyrings/jenkins-keyring.asc > /dev/null

echo deb [signed-by=/usr/share/keyrings/jenkins-keyring.asc] \
  https://pkg.jenkins.io/debian binary/ | sudo tee \
  /etc/apt/sources.list.d/jenkins.list > /dev/null

sudo apt-get update

sudo apt-get install jenkins

Update the source lists and upgrade any out of date packages:

    apt update
    apt -y upgrade

Install the software for the Jenkins master:  openjdk-11-jdk, nginx, and jenkins.

Install JDK and nginx first:
    apt -y install openjdk-11-jdk nginx

Then install jenkins:

    apt -y install jenkins

Confirm that jenkins and nginx are installed:

    systemctl status nginx  | grep Active
    systemctl status jenkins  | grep Active

The Jenkins service is running, but the process that started Jenkins has exited. At this point, we're almost done getting our server up and running. The next steps are configuring NGINX in Jenkins.
5. Configure NGINX
We're at a point now where we have our Ubuntu Server in place and Jenkins and Nginx are installed. And you might be wondering, why do we need to install and configure Nginx if we're setting up a Jenkins server?
We will be configuring Nginx to act as a reverse proxy that sits in front of the Jenkins web application. So instead of accessing our Jenkins application directly, we'll be accessing Nginx, which will pass on to Jenkins whatever request we're sending in. Jenkins will process the request and send a response back to Nginx, and Nginx will then deliver the response back to us.
This seems like a lot of back and forth, but this configuration has its benefits. The main benefit we get from the reverse proxy is security for the app server. Jenkins listens on port 80 by default. By setting up a security group and they reverse proxy that only allows access on port 80, we can make sure that all requests to the app server come through the web server first. This gives the app server some protection by limiting access to it. The reverse proxy also gives us the benefit of generating logs for each request. Jenkins does create logs, but the content is more operational in terms of what Jenkins is doing, not what an end user is doing. By logging requests in the proxy, we get much more information like when and where requests are coming from. So if there's ever a need to debug an issue with the server, the Nginx logs will make a great complement to the Jenkins logs.
Using Nginx as a reverse proxy also allows for simplified SSL termination. With SSL, all of the traffic from the Jenkins application would be encrypted, improving the security of the information being transmitted. And while it's not impossible to set up SSL termination using Jenkins alone, setting up SSL in Nginx is much easier. The Jenkins documentation even suggests using a reverse proxy for SSL termination instead of poking around in the Jenkins configuration.
Jenkins and NGINX need to already be installed on your EC2 instance.
Connect to the instance via SSH and run the following commands:

    sudo su -
    unlink /etc/nginx/sites-enabled/default
    vim /etc/nginx/conf.d/jenkins.conf

Inside the jenkins.conf file, add the following contents:

    upstream jenkins {
        server 127.0.0.1:8080;
    }

    server {
        listen 80 default_server;
        listen [::]:80  default_server;
        location / {
            proxy_pass http://jenkins;
            proxy_set_header Host $host;
            proxy_set_header X-Real-IP $remote_addr;
        }
    }

Now check the configuration:

    nginx -t

If there are any errors, edit the configuration file to fix them and then test
the configuration again.

Once the configuration is testing without errors, reload the configuration:

    systemctl reload nginx

Now open a browser to the instance's address and look for the "Unlock Jenkins" page.
6. Configure Jenkins
Follow these steps to configure Jenkin.
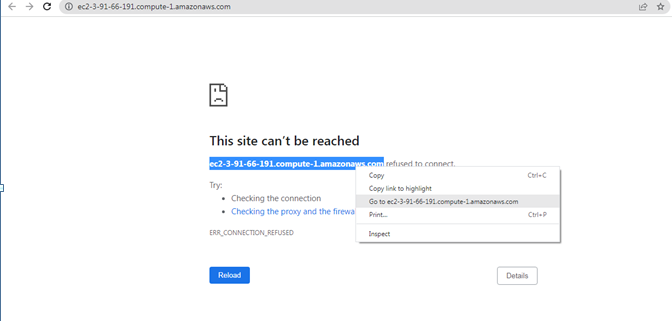
To retrieve the inital admin password, connect to the server where Jenkins is
running and execute the following commands:

    sudo su -
    cat /var/lib/jenkins/secrets/initialAdminPassword

Copy the output from the `cat` command and paste it into the Jenkins browser window prompting for the initial admin password.
The Jenkins page asks for initialAdminPassword, enter the initialAdminPassword. Singup page will come, here we will fill in all the required details.
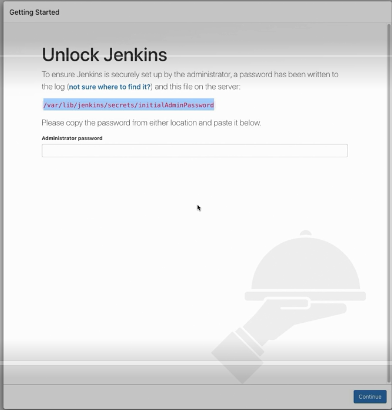
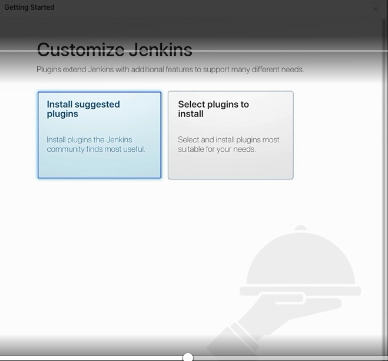
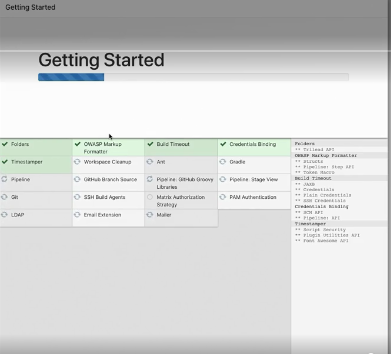
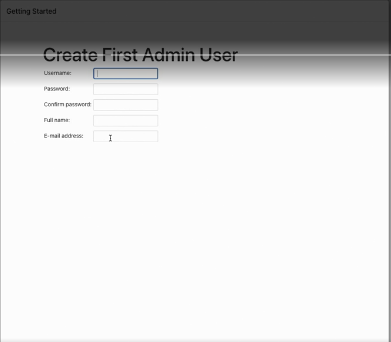
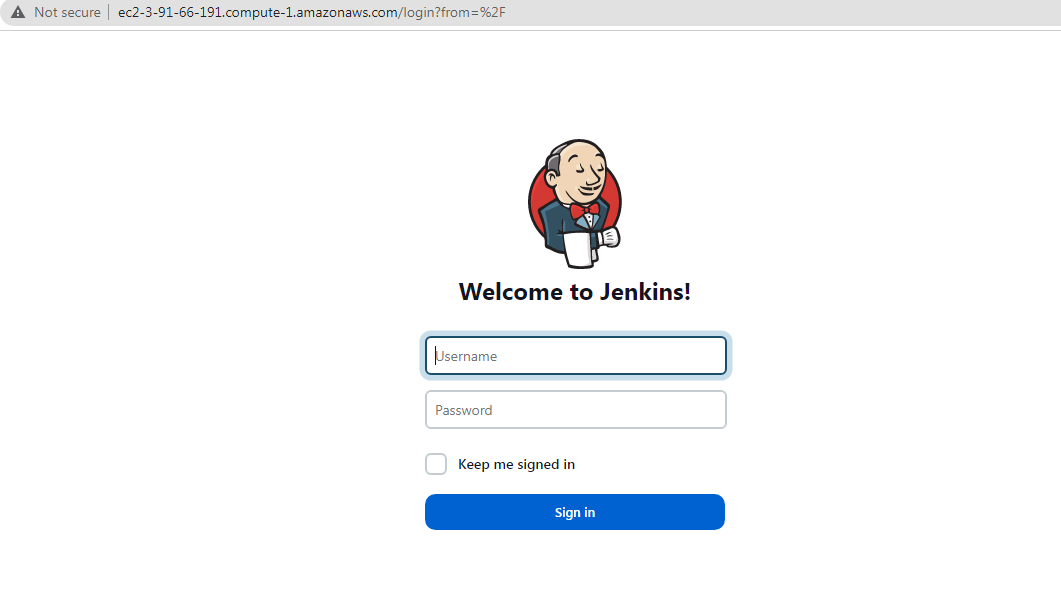
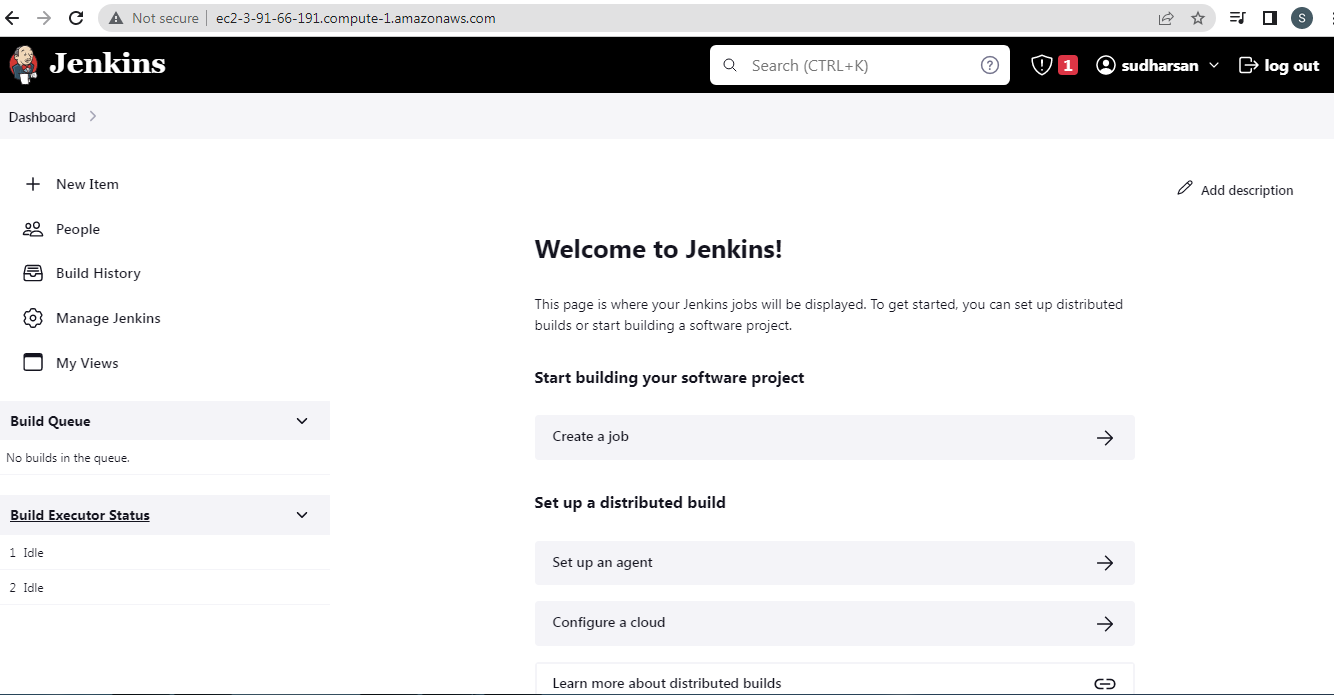
We're finally logged in to our new Jenkins-Master server.
Thanks for reading my blog. Hope you understand Jenkins master server setup.
Source: Realtime work, and LinkedIn
Subscribe to my newsletter
Read articles from Sudharsan Reddy directly inside your inbox. Subscribe to the newsletter, and don't miss out.
Written by
