Intergrating to Bitgo - Getting Started with BitGo Express
 Brian Kiplagat
BitGo Express makes it easy to get started developing with the Bitcoin protocol using multi-sig wallets in any language. BitGo Express is a proxy server designed to run within your network and ensures that all cryptographically secure operations, such as address creation and transaction signing, occur in a trusted environment. Users interact with BitGo Express using BitGo’s SDK through a RESTful interface, so any language capable of issuing HTTP requests can easily and securely use the Bitcoin protocol. This blog post will take you through the process of using BitGo Express to programmatically send and receive Bitcoin from scratch.
Your Requirements
This tutorial assumes comfort with javascript and git. Please ensure that you have the following:
Bitgo Account
A BTC Wallet from Bitgo
An access token from your BitGo account.
The latest version of npm.
Linux-based OS/Server
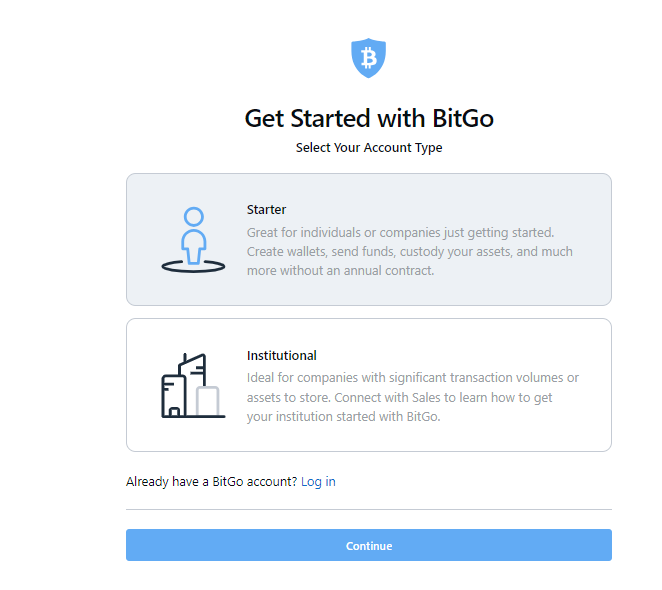
Create a Starter Bitgo account
Go to the Bitgo signup page to create your account
Create a BTC Wallet
On your Main Dashboard create a Bitcoin Wallet
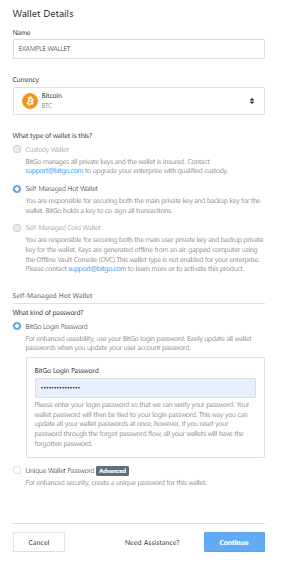
Click continue and allow Bitgo to keep your backup key secure with a Trusted partner to ensure you NEVER lose access to the funds in your wallet.
Click continue and Bitgo will download a PDF Keycard file with your private keys. Print this document, or keep it securely offline

Activate wallet
Activate your wallet by entering your 6-digit activation code from the PDF and Create the wallet
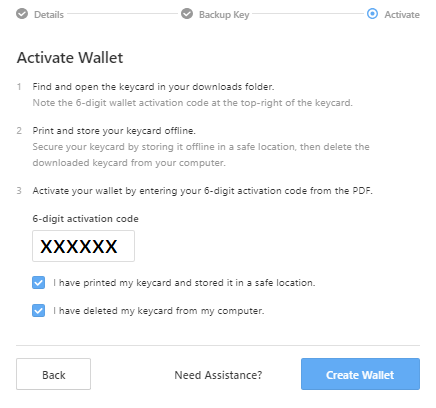
Great now you have a Self-Managed Bitgo Hot Wallet. You can now easily find your "EXAMPLE WALLET" from the
wallets and connections side menu.
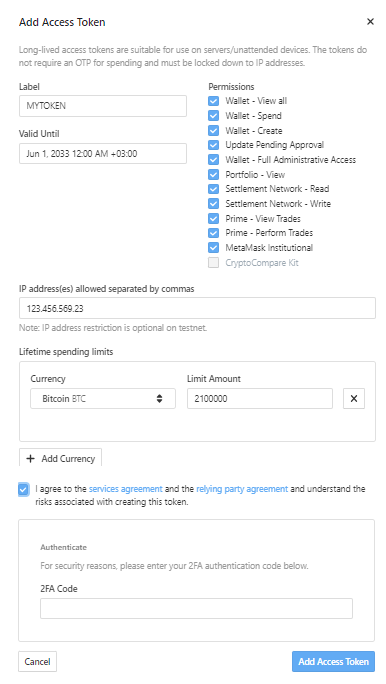
Create an access token
Set up an access token to enable your backend to authenticate and interact with BitGo programmatically. To do this go to Settings > Developer Options
Add the token, Copy it and store it securely
Installing Bitgo Express
BitGo Express runs as a service in your server and handles the client-side operations involving your key. This ensures your keys never leave your network. BitGo Express can also proxy the standard BitGo REST APIs, providing a unified interface to BitGo through a single REST API.
You need a Linux distro to spin up Bitgo Express. I used CentOS 7 but any other distro like Ubuntu and Kali should work as well.
You need the latest version of NPM(Node Package Manager) to install the necessary dependencies and run BitGo Express. If you don't have this just run the below command
To install npm and node JS on CentOS 7, you can follow these steps:
Update the system packages:
sudo yum update
Install Node.js and npm using the NodeSource repository. First, you need to enable the NodeSource repository by running the following command:
curl -sL https://rpm.nodesource.com/setup_18.x | sudo bash -
Note: In this example, we're installing Node.js version 18.x. You can change it to a different version if desired.
Install Node.js and npm:
sudo yum install nodejs
Verify that Node.js and npm are installed correctly by checking their versions:
node --version
npm --version
This should display the installed versions of Node.js and npm, respectively.
That's it! You have successfully installed npm on CentOS 7.
First, clone the latest BitGo Express repo master branch
Run
yarn installin the project root directory to install the necessary dependencies
git clone https://github.com/bitgo/bitgojs
cd bitgojs
yarn install --frozen-lockfile && yarn install --production --frozen-lockfile --non-interactive --ignore-scripts
Running BitGo Express with PM2
PM2 is a daemon process manager that will help you manage and keep your Bitgo Express Service online 24/7. If you don't have it run the below command to install pm2 globally. If you have it skip this step
npm install pm2 -g
-Navigate to the express module folder (modules/express) and use PM2 to run the service
cd modules/express
pm2 start ./bin/bitgo-express
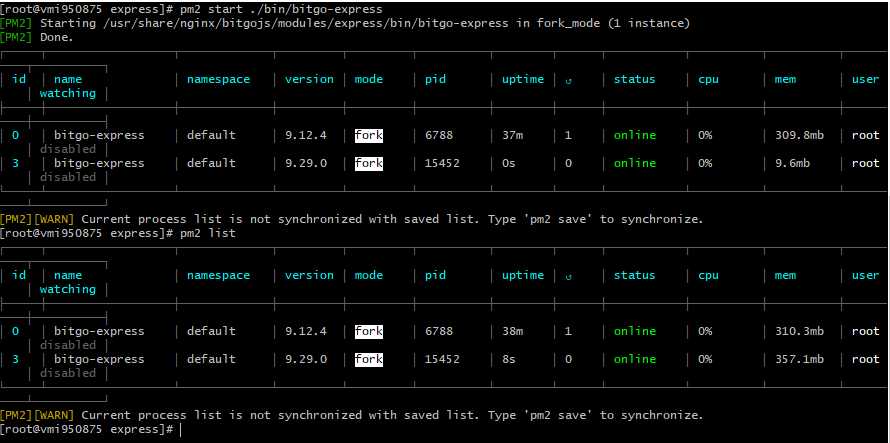
Testing Bitgo Express
To test the installation. Make a get request to the ping endpoint provided via CURL
curl http://localhost:3080/api/v2/ping

{"status":"service is ok!","environment":"BitGo Testnet","configEnv":"testnet"}
If you get "Service is OK" then you’ve just installed the BitGo Express Proxy successfully. For a more secure installation change the port number to your own and the environment to production
Now you can be able to programmatically
Create BTC Wallets for your users
Send BTC from individual accounts
Receive BTC in individual wallets
Receive Webhooks/Notifications involving Transactions
I'm excited to see what you’ll build next
BitGo Express helps power and protect some of the largest Bitcoin exchanges and hedge funds around the world. I'm excited to see how Express will help power the next generation of Bitcoin apps. In my next episode ill show you how you can be able to use the info above and dive right in to programmatically send, receive, validate and confirm BTC transactions for user accounts in a production-grade app. Let us know what you think of this on Twitter!
Subscribe to my newsletter
Read articles from Brian Kiplagat directly inside your inbox. Subscribe to the newsletter, and don't miss out.
Written by

Brian Kiplagat
Brian Kiplagat
Enthusiastic and dedicated Full Stack Developer with a passion for crafting efficient, user-centric, and innovative web solutions. Since 2019 I’ve been providing high-level support to agencies, startups and freelancing in various positions.