Installing a pyRevit Extension
 Symon Kipkemei
Table of contents

To install a Pyrevit extension for a Revit project, follow the following steps:
Download and install the PyRevit setup from the link below. pyRevit helps you quickly sketch out your automation and addon ideas, inside the Revit environment and using its APIs.
Go to the GitHub repository of the extension project. i.e https://github.com/symonkipkemei/panelization
Look for the extension.json file
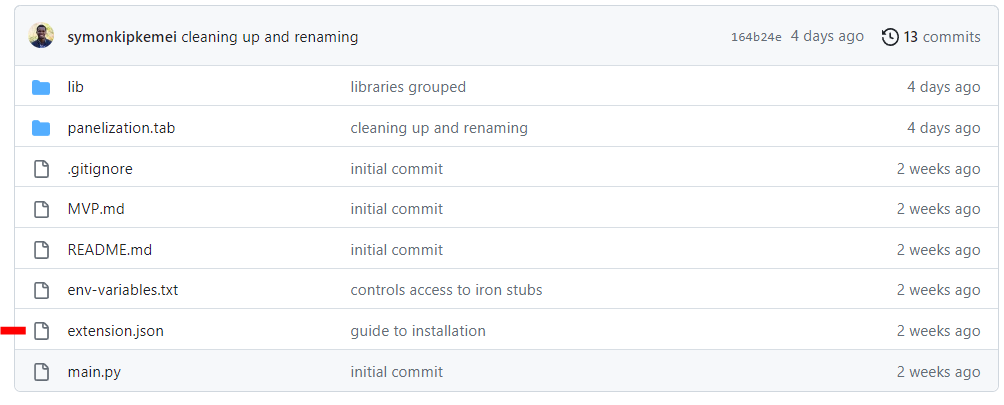
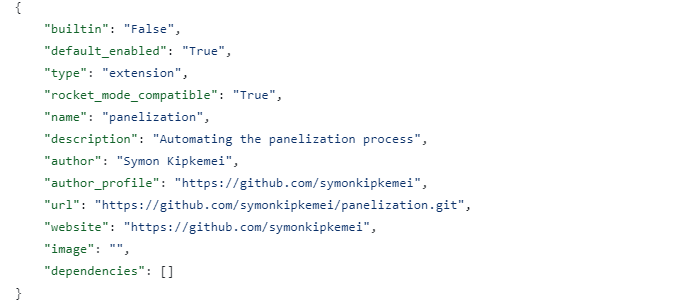
Open and copy the extension file info.
Search for the %AppData% folder on your PC, a Windows environment variable that stores the path to the AppData folder. This will direct you to "C:\Users\username\AppData\Roaming." Path
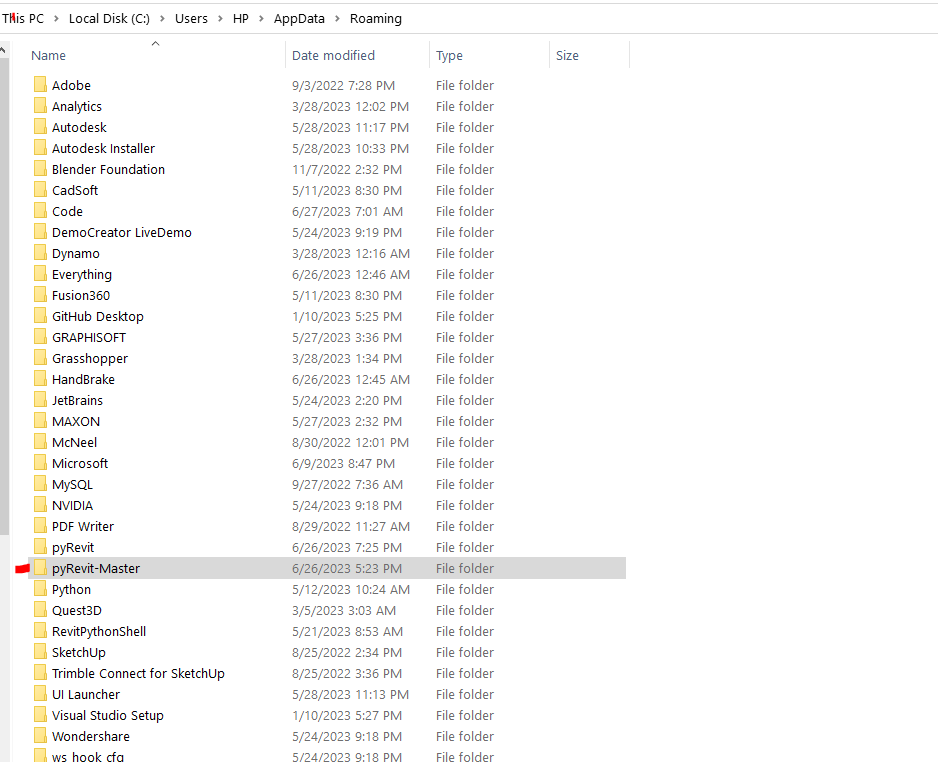
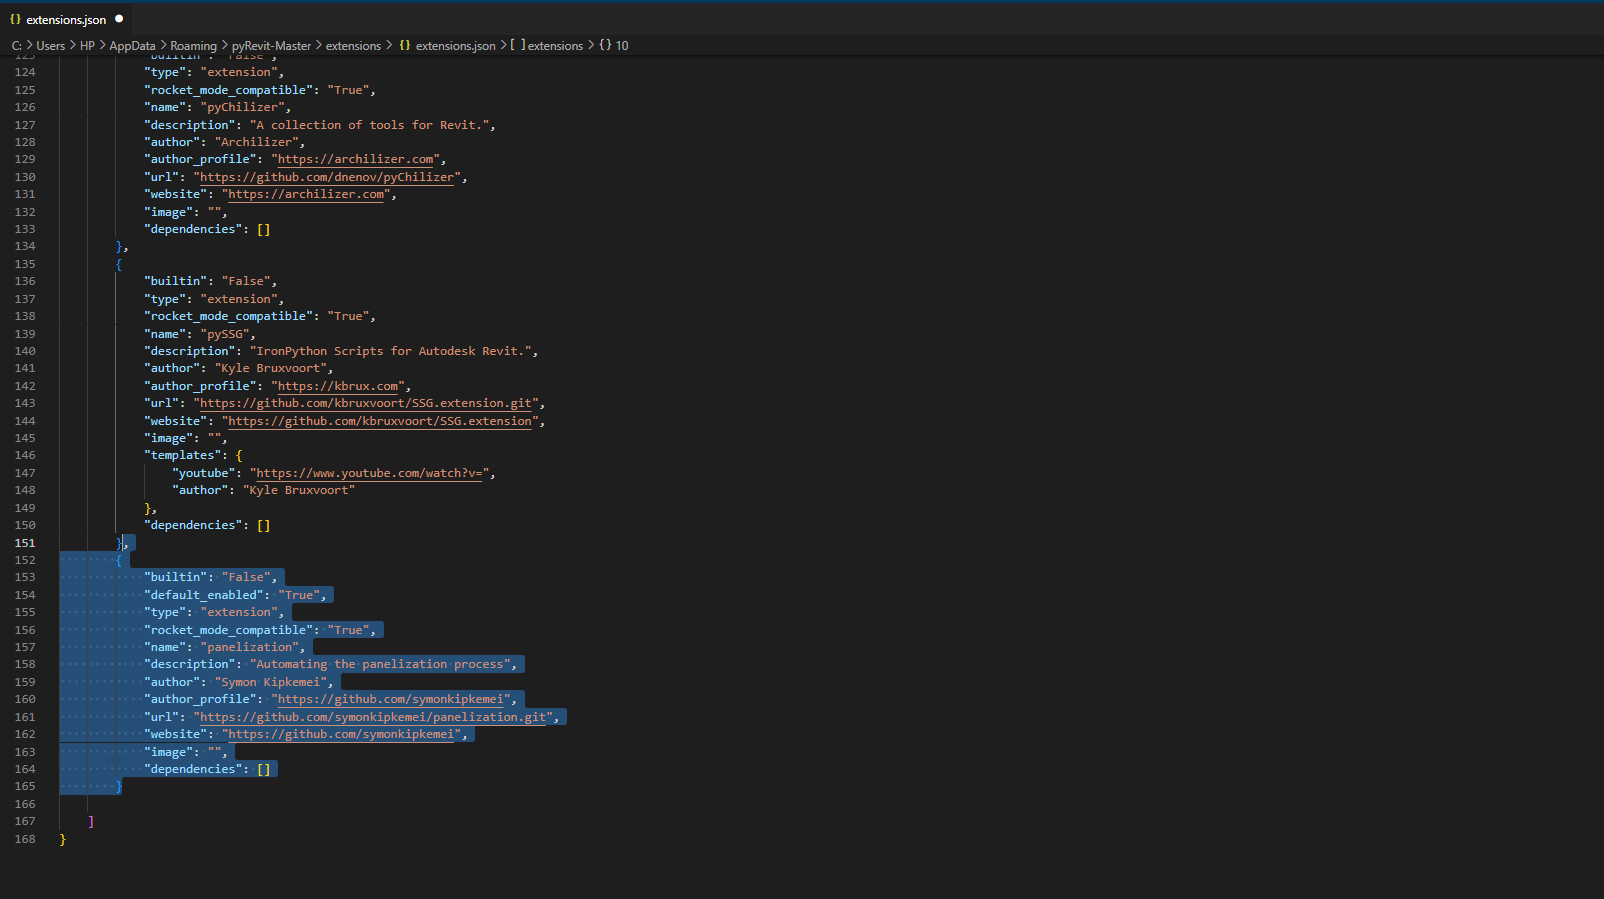
Open pyRevit-Master folder > extensions folder > extensions.json file

Open the extensions.json file and append the extension data copied from step 3 at the end of the script as shown below.
The extension will appear in Pyrevit Extension Manager.
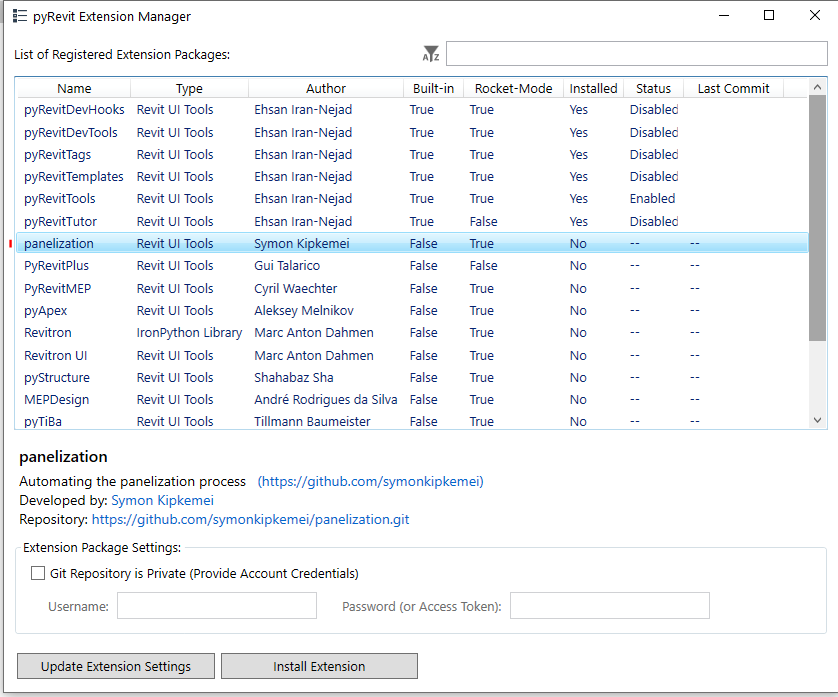
Proceed with its installation, the tool will now appear on the Revit Tool bar!

Congratulations!, you can now test/enjoy the tool. For future updates, the tool will be auto-updated.
Subscribe to my newsletter
Read articles from Symon Kipkemei directly inside your inbox. Subscribe to the newsletter, and don't miss out.
Written by

Symon Kipkemei
Symon Kipkemei
I am a BIM Developer & Architect with a passion for efficiency, sustainable development, and innovation in design. Active BIM community member & a lifetime student.