Streamline Your Software Delivery with AWS CodePipeline
 Subho Dey
Table of contents

Introduction:
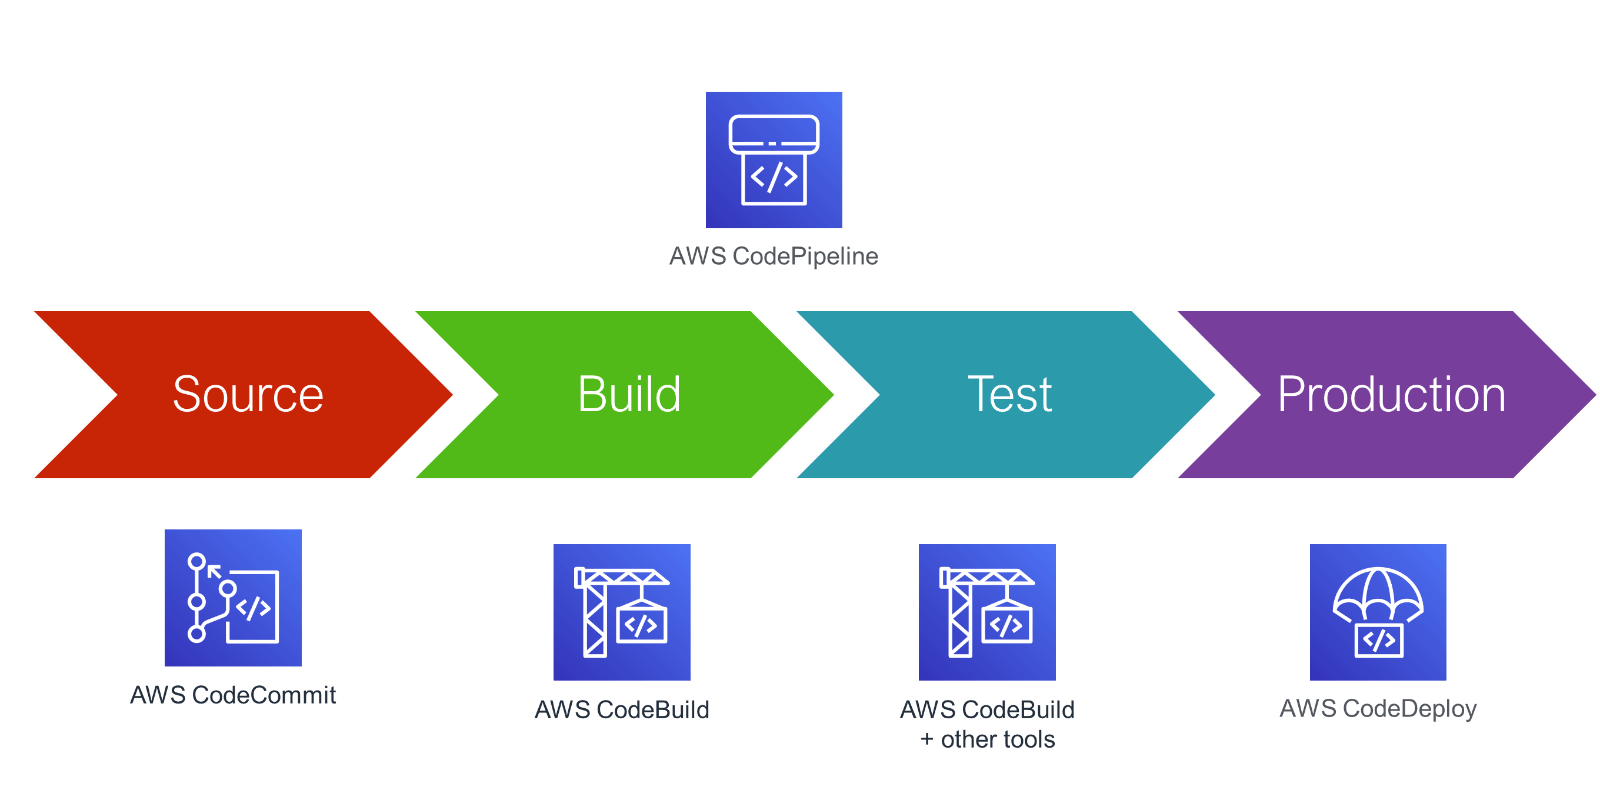
AWS CodePipeline is a fully managed continuous integration and continuous delivery (CI/CD) service that automates the release process for software applications. It allows you to create a workflow or pipeline for your application code, enabling you to build, test, and deploy your code changes automatically.
If you’re running your application code on AWS, you’re probably familiar with the need for a CI/CD pipeline. A robust and efficient CI/CD pipeline can improve the overall application development process while decreasing the time and effort required to release an application update.
In this blog, we will walk through the necessary steps to set up a simple AWS CodePipeline using AWS Management Console, AWS CLI, and AWS CloudFormation. By the end of this post, you will have all the tools you need to automate your deployment process.
Prerequisites Before we start, make sure you have the following prerequisites in place:
An AWS account AWS Command Line Interface (CLI) installed and configured An AWS S3 bucket to store the application code.
Step 1: Create AWS CodeCommit Repository AWS CodeCommit is a managed source control service that makes it easy to host private Git repositories. You can use CodeCommit to store application code that your CodePipeline will use to create builds. If you don’t have a CodeCommit repository set up already, follow these steps:
Go to the AWS Management Console and open the CodeCommit service. Click on "Create repository" and provide a name and optional description for your repository. Choose the repository settings as per your requirements. Click on "Create repository" to create the CodeCommit repository. This command creates a new repository named my-repository.
Step 2: Push Your Application Code to CodeCommit With the CodeCommit repository in place, it's now time to push your application code to the repository. The following steps assume that you already have the application code ready to go.
Clone the CodeCommit repository to your local machine using the following command:
$ git clone
Copy your application code into the local repository.
Commit and push the code changes to the CodeCommit repository using the following commands:
$ git add . $ git commit -m "Initial commit"
$ git push origin master
With that done, you’ve successfully uploaded your application code to your CodeCommit repository.
Step 3: Create AWS CloudFormation Template With AWS CodeCommit in place, it’s now time to create the AWS CloudFormation template. To get started with the template, create a new YAML or JSON file in your local directory where you’ll define your CloudFormation template.
In the YAML file, you can define all the AWS resources you’d like to create, such as an EC2 instance or S3 bucket. In this example, we’ll be creating an AWS CodeBuild project, which we’ll later use in our AWS CodePipeline.
Below is an example of the YAML file:
Resources:
  MyCodeBuildProject:
    Type: AWS::CodeBuild::Project
    Properties:
      Name: MyCodeBuildProject
      Source:
        Type: CODECOMMIT
        Location: !Ref CodeCommitRepository
      Environment:
        ComputeType: BUILD_GENERAL1_SMALL
        Image: aws/codebuild/standard:4.0
      TimeoutInMinutes: 10
      ServiceRole: !Ref CodeBuildServiceRole
Open the AWS Management Console and navigate to the CodeBuild service. Click on "Create build project" and provide a name, and optional description, and choose the source provider as CodeCommit. Select the repository you created earlier from the dropdown. Configure the build settings, such as compute type, environment, and build specification. Click on "Create build project" to create the CodeBuild project. This command creates a new CodeBuild project.

Step 5: Create AWS CodePipeline Now that you have your CodeBuild project, it’s time to create the AWS CodePipeline:
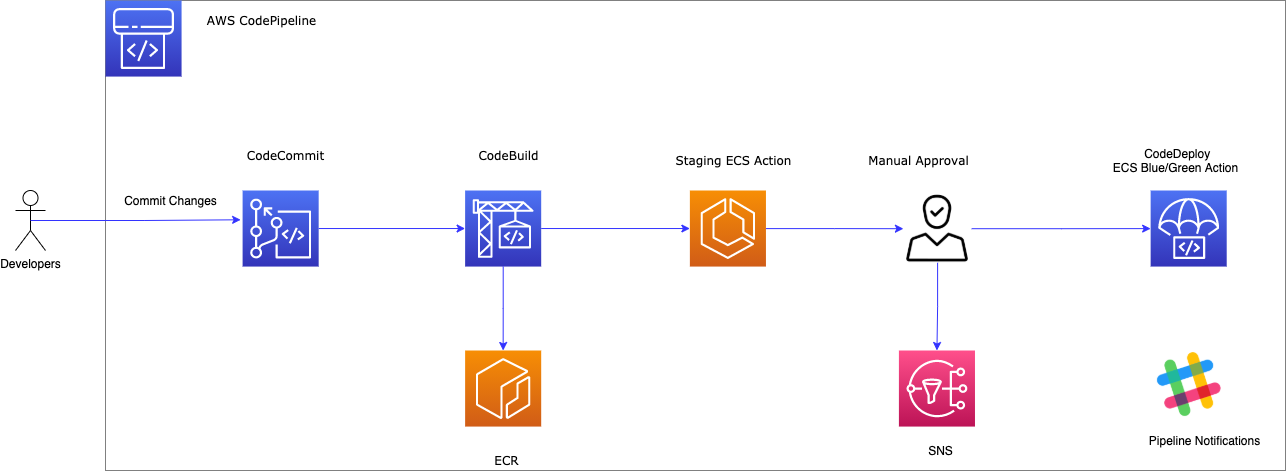
Open the AWS Management Console and navigate to the CodePipeline service. Click on "Create pipeline" and provide a name and optional description for your pipeline. Configure the pipeline settings, such as source provider (CodeCommit), build provider (CodeBuild), and deployment provider (Elastic Beanstalk, Lambda, etc.). Define the pipeline stages and actions, such as source, build, and deploy. Specify the inputs and outputs for each stage. Click on "Create pipeline" to create the CodePipeline. This command creates a new CodePipeline.
Step 6: Test the AWS CodePipeline With everything in place, it’s time to test the CodePipeline:
Make changes to your application code in the CodeCommit repository. Commit and push the code changes. Open the CodePipeline in the AWS Management Console. Observe the pipeline stages and actions being executed automatically. Verify the build and deployment logs for any errors or issues. Conclusion In this post, we’ve covered how to set up a simple AWS CodePipeline using AWS Management Console, AWS CLI, and AWS CloudFormation. With a working CI/CD pipeline, you can streamline your application development process, speed up your releases, and ensure your application code is always updated.

When it comes to CI/CD, there are many different tools and approaches you can take. By following the steps outlined in this post, you’ll be on your way to automating your deployment process with AWS CodePipeline.
Remember to clean up the resources created in this tutorial to avoid incurring any additional costs.
Conclusion:
AWS CodePipeline simplifies and automates the continuous delivery process, enabling teams to deliver software faster and more reliably. In this blog post, we explored the key features of CodePipeline and provided a step-by-step guide to setting up a basic pipeline. With CodePipeline's flexibility and integration capabilities, you can extend and customize your pipeline to meet the specific needs of your development workflow. Start streamlining your software delivery process today with AWS CodePipeline.

To connect with me - https://www.linkedin.com/in/subhodey/
Subscribe to my newsletter
Read articles from Subho Dey directly inside your inbox. Subscribe to the newsletter, and don't miss out.
Written by

Subho Dey
Subho Dey
"DevOps engineer with a passion for continuous improvement and a drive to build better software, faster. I'm a strong believer in the power of collaboration, automation, and agile methodologies to transform the world of software development and delivery. My expertise includes continuous integration and delivery, infrastructure as code, Docker, Kubernetes, and configuration management. Follow along as I share my insights and experiences on Hashnode and let's build better software, together!"