Deploying Azure VMs in Availability Set: A Simple Step-by-Step Process
 ayush shukla
In today's digital landscape, businesses rely heavily on cloud computing for their infrastructure needs. Azure, Microsoft's cloud computing platform, offers a wide range of services to support the scalability and reliability requirements of businesses. One such feature is the ability to deploy virtual machines (VMs) in an availability set. In this blog, we will walk you through a step-by-step process of deploying Azure VMs in an availability set and explain each term along the way.
Understanding Azure Virtual Machines (VMs)
Azure Virtual Machines (VMs) are the building blocks of cloud infrastructure. They provide the ability to run applications and workloads in a virtualized environment, allowing businesses to optimize their resources and scale as needed.
What is an Availability Set?
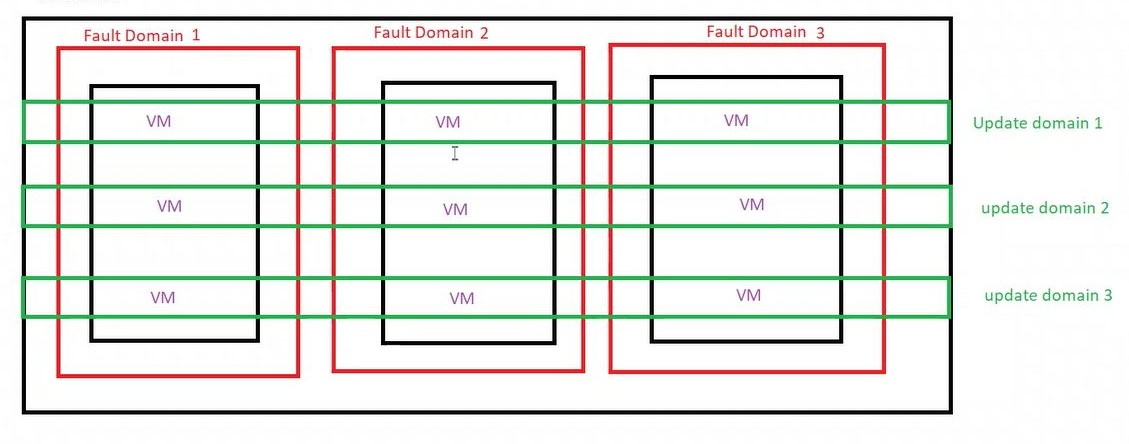
An availability set is a logical grouping of VMs within an Azure region. It ensures that the VMs are deployed across multiple physical hardware clusters, called fault domains, and are isolated from each other. By distributing VMs across fault domains, Azure minimizes the impact of potential hardware failures or planned maintenance events on your applications.
Deploy VMs In An Availability Set
1. To Sign in to the Azure portal click here.
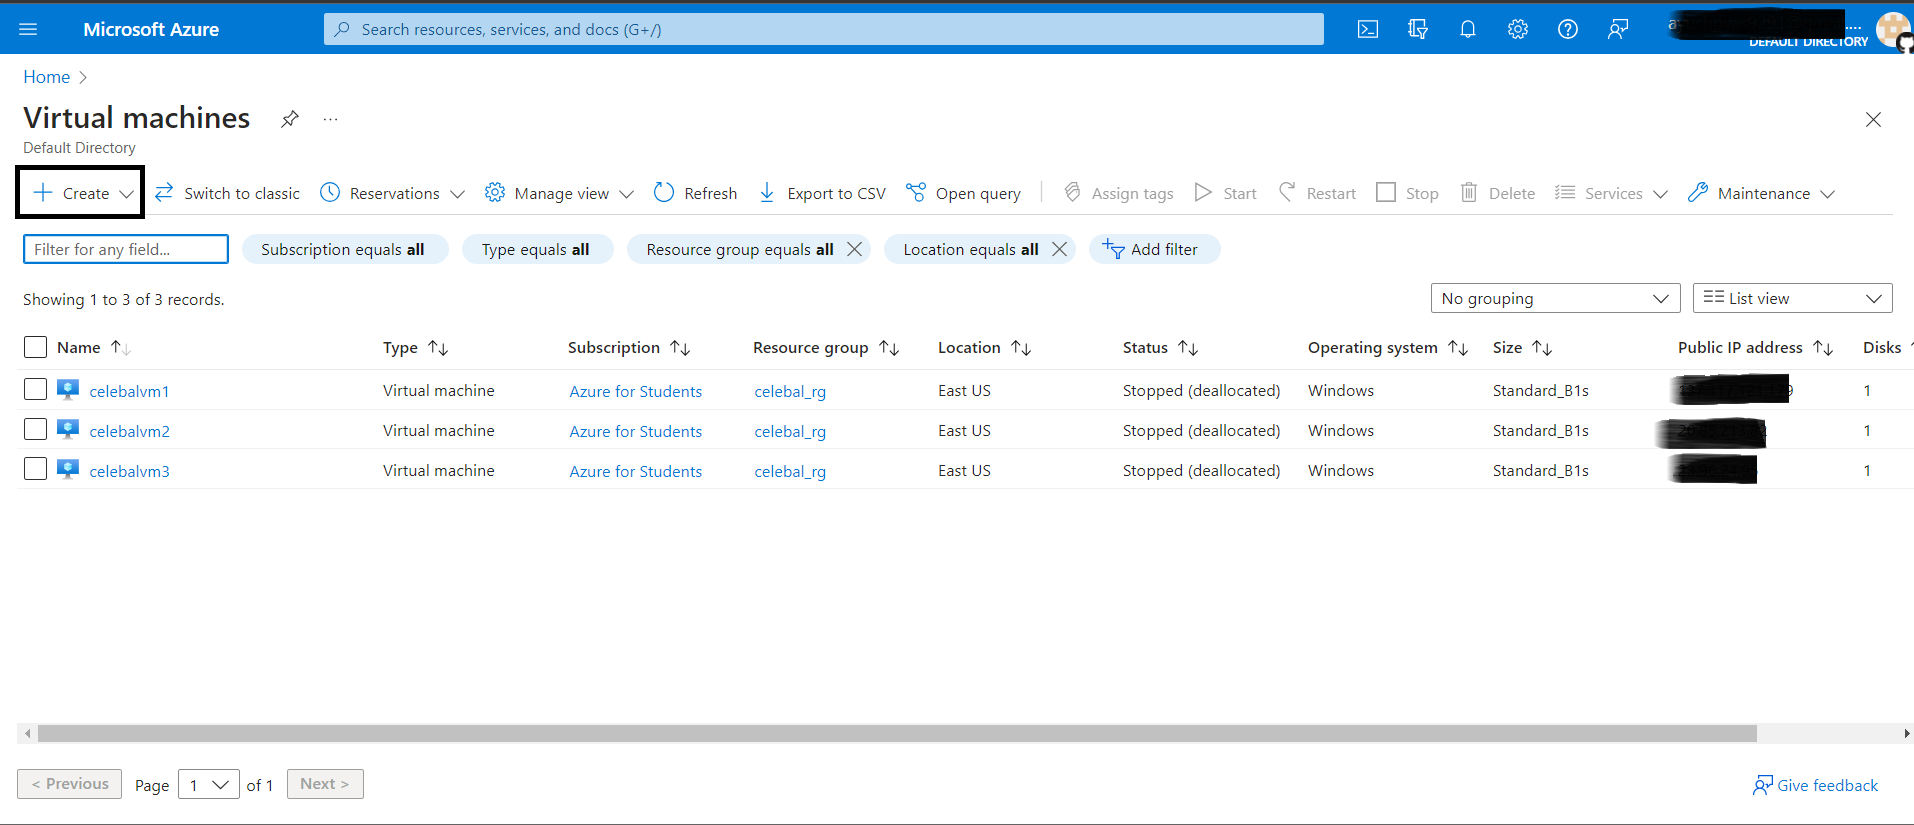
2. In the Search bar, type Virtual Machines, and then click Create.
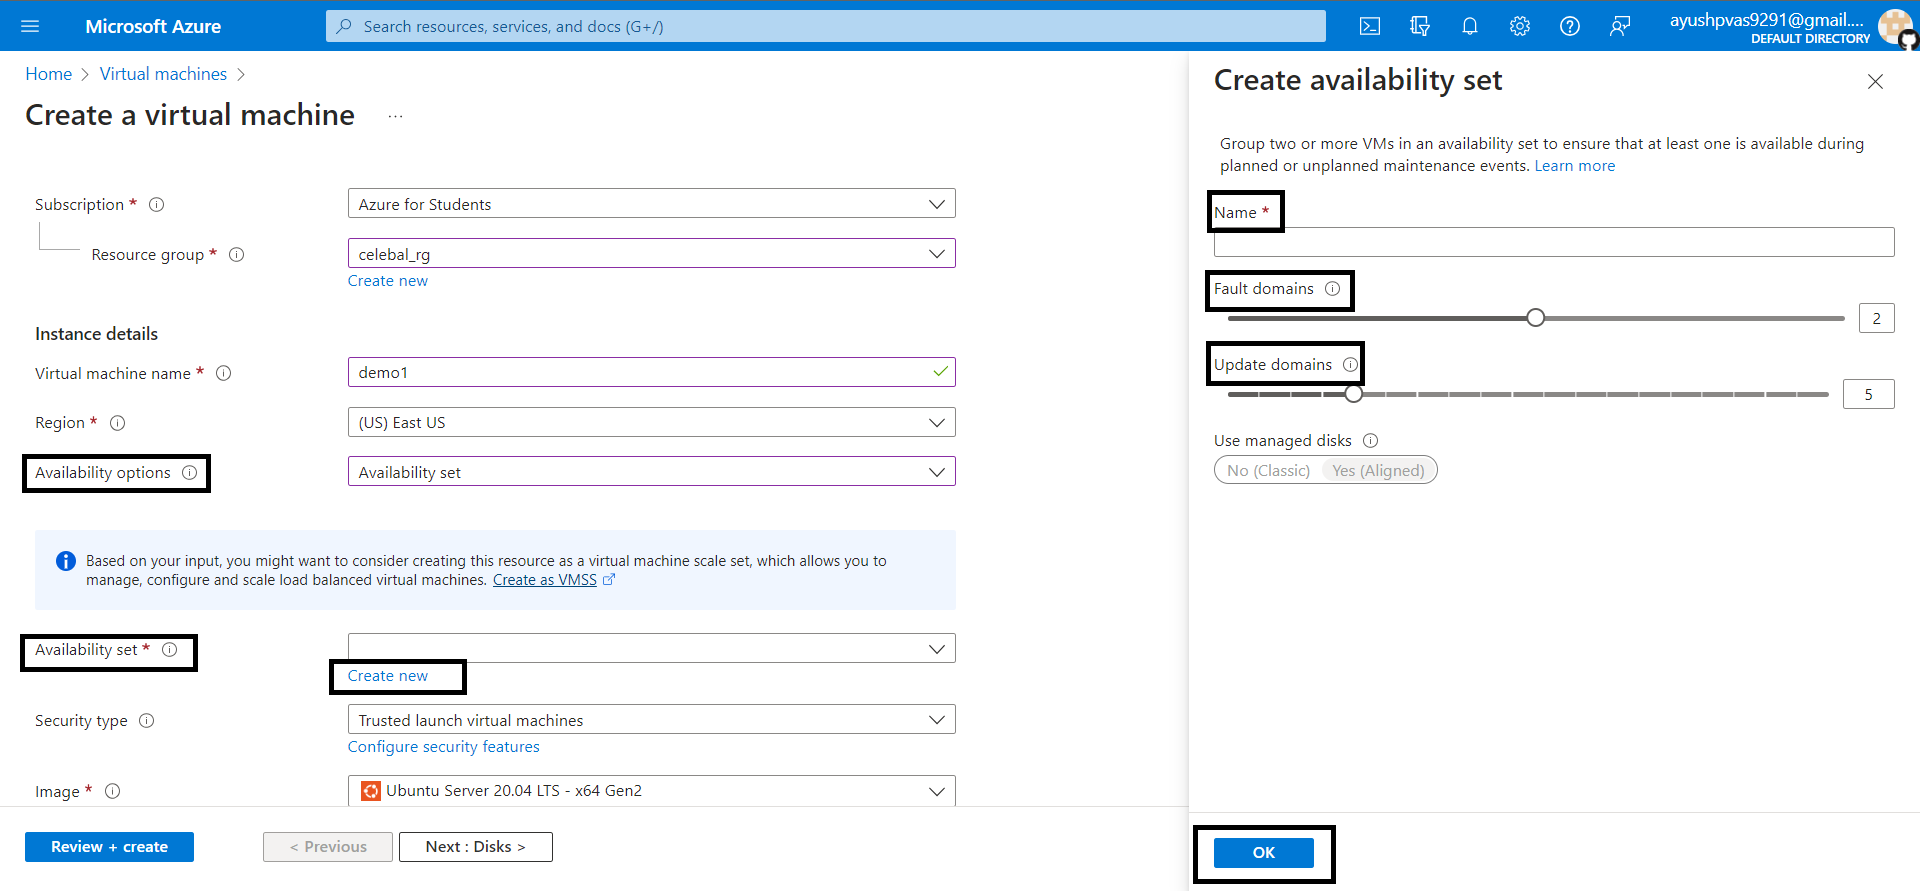
3. On the Create virtual machine blade, click Basics. Enter Unique VM Name, VM disk type, User name and Password, Subscription, Azure Resource Group (New or Existing), Azure DataCenter Location (Region), and Select Availability Options to Add Availability set.
4. Click Create New, type the name for the Availability set, select the no. of Fault Domains and Update Domain, Then click OK.
Fault domains – The group of VMs that share a common power source and network switch. By default, the VMs are separated across up to three fault domains and can be changed to between 1 and 3.
Update domains – Update domains indicate groups of virtual machines and underlying physical hardware that can be rebooted at the same time. By default, 5 domains are assigned. This can be set to between 1 to 20.
*In this blog we will make the availability set having 3 fault domains and 3 update domains and will deploy 3 VMs on it .
5. Leave the rest tabs to their default values and select Review + Create.
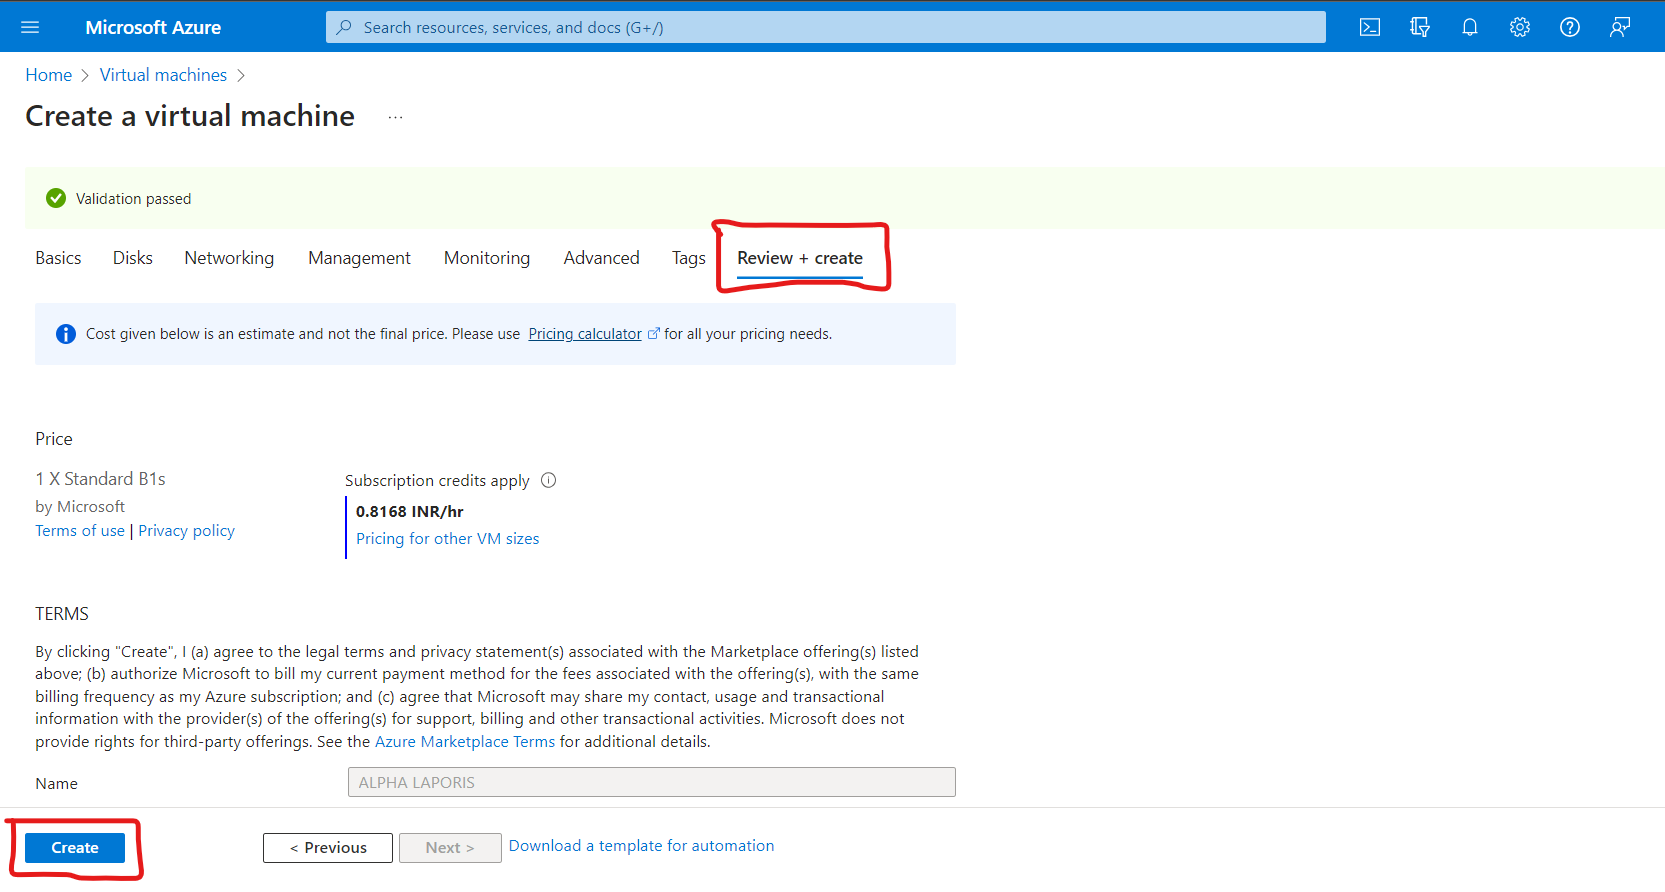
Now your first VM is created and deployed in an Availability Set.
Create a new second and third Virtual Machine and Add to the same Availability Set in the Azure Portal:
1. Repeat the same steps from 1-3 of the previous VM creation and Select the Availability Set in the Availability Set option.
NOTE: Second and third VM should be in the same Resource Group as the First VM.
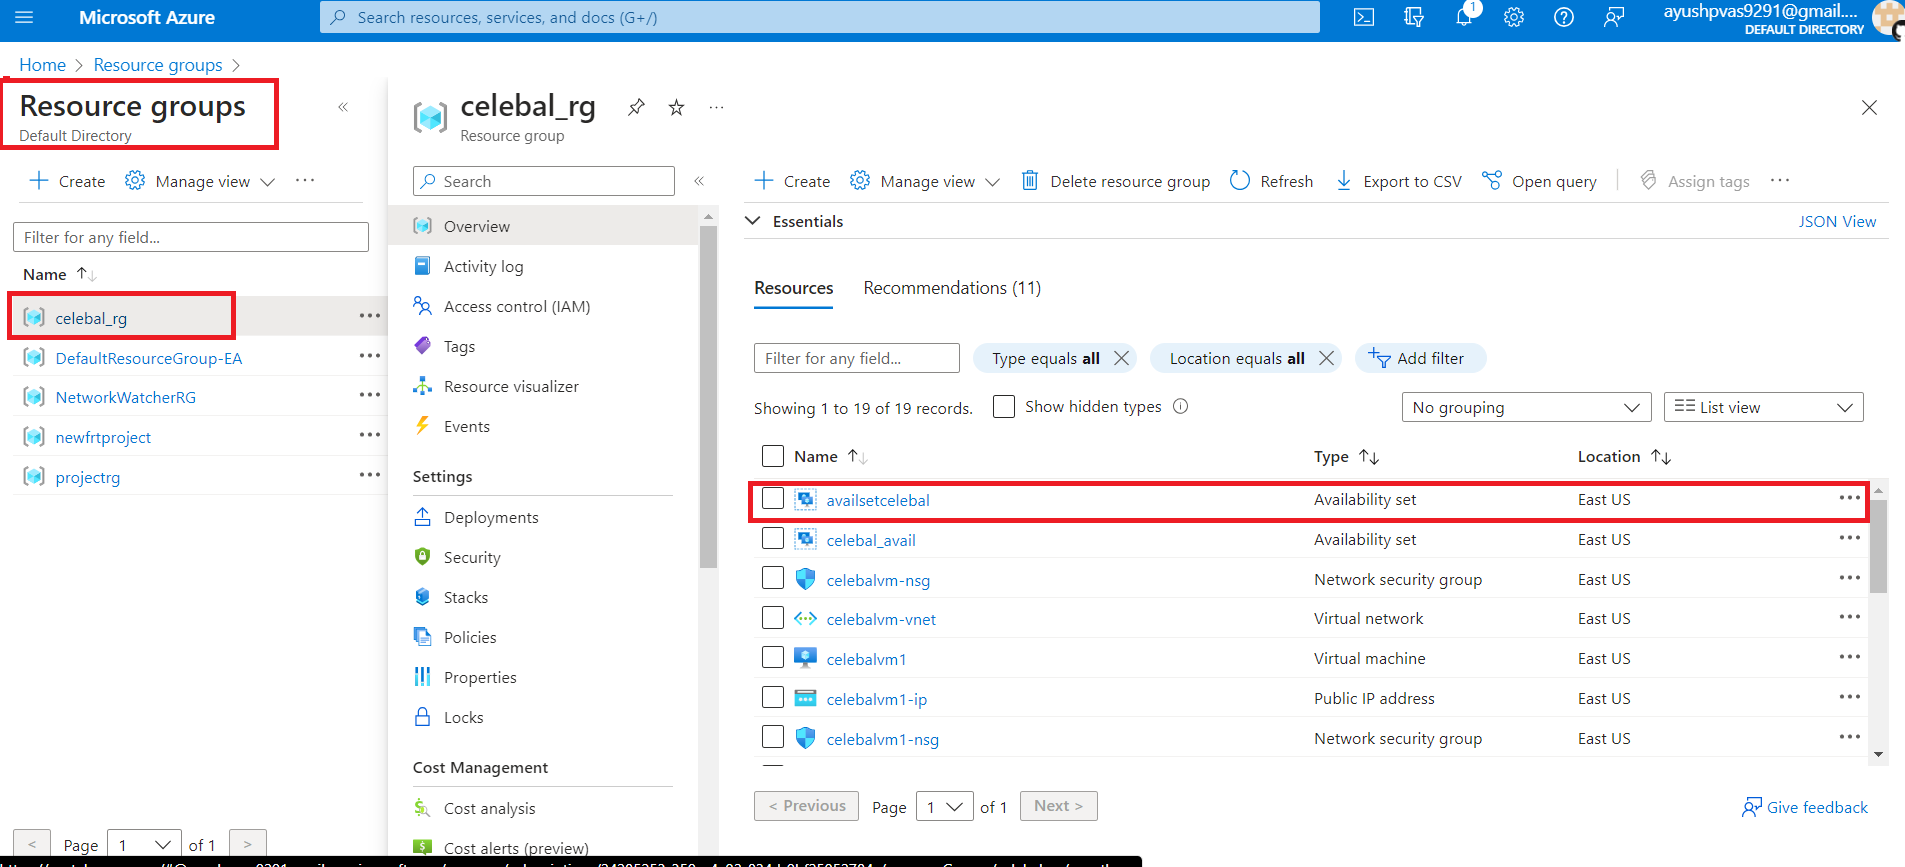
2. Check the status of the Availability Set by going into the Resource Group and select the created Availability Set resource.
3. Now you can see all the 3 Virtual Machines are deployed in the Fault Domain and Update Domain.
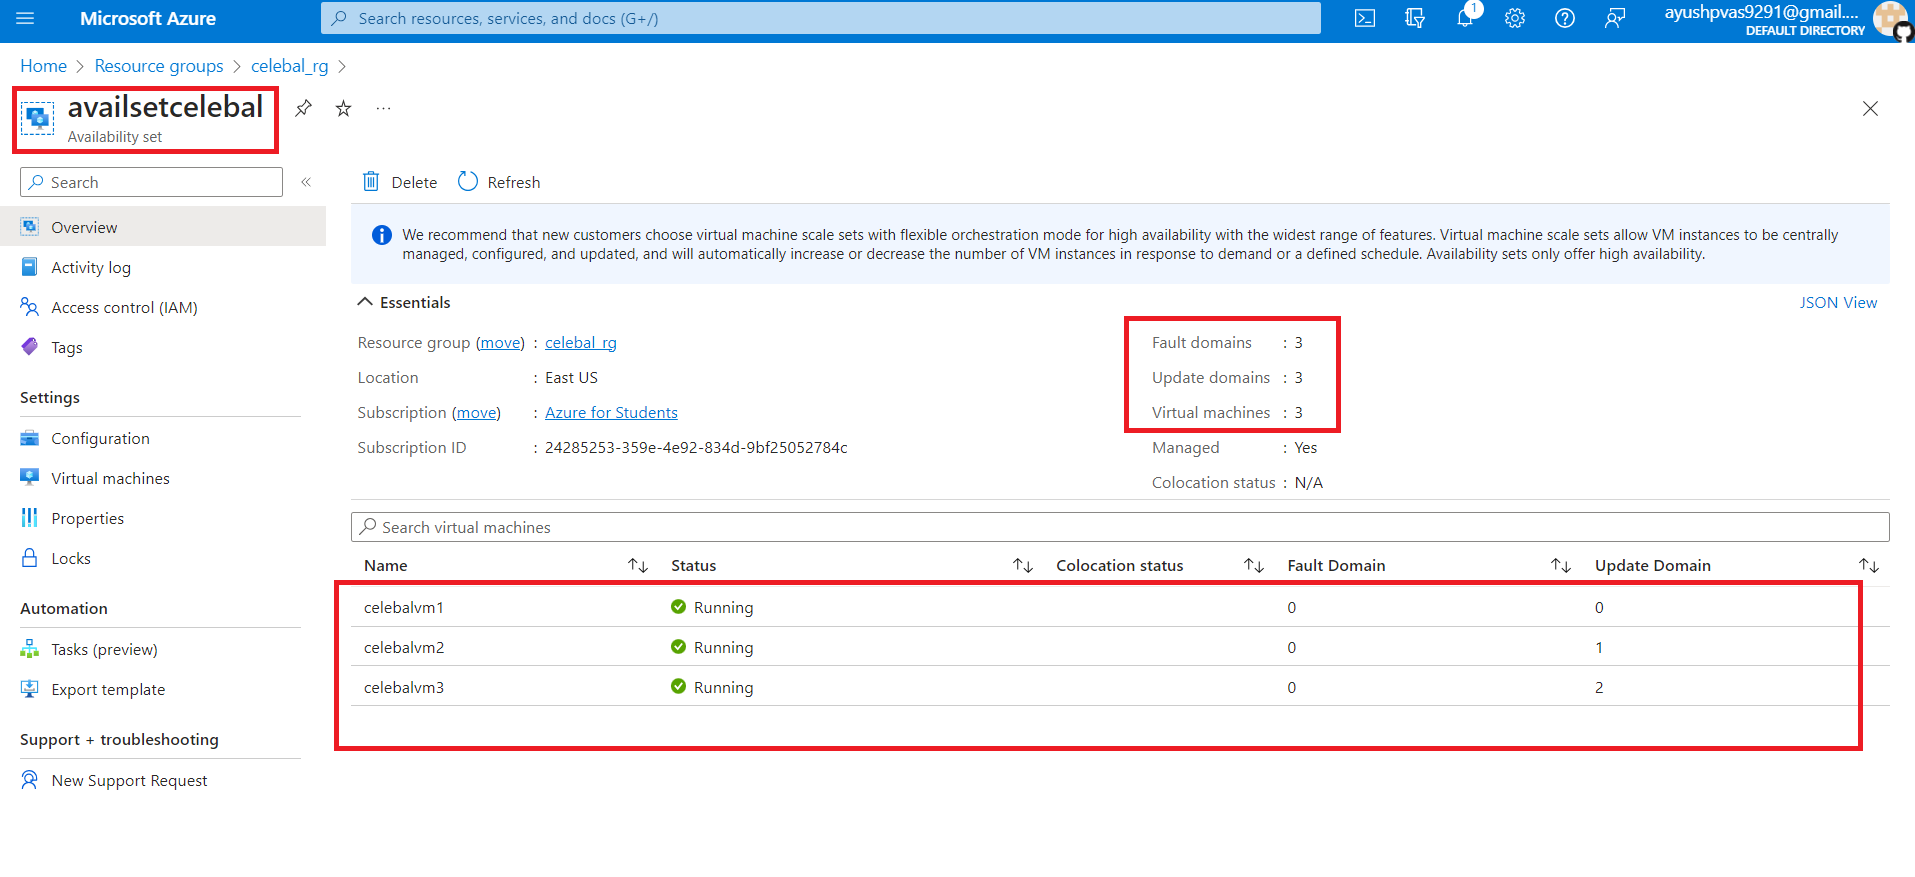
This is how Azure automatically keeps track of which VMs belong to each domain respectively. Just remember, you may not move a VM from one Availability set to another. This would require you to delete and recreate the VM.
Deploying Azure VMs in an availability set is a crucial step towards ensuring high availability and resilience for your applications. By following the simple step-by-step process outlined in this blog, you can leverage Azure's fault domain and update domain concepts to distribute your VMs across different physical hardware clusters and reduce the risk of single points of failure. Take advantage of Azure's powerful cloud infrastructure capabilities and build a robust and reliable environment for your applications.
Subscribe to my newsletter
Read articles from ayush shukla directly inside your inbox. Subscribe to the newsletter, and don't miss out.
Written by
