VPC with Public & Private Subnet in Production
 Atul Joshi
(Most Recommended approach by AWS if you want to deploy your Applications securely in an EC2 Instance)
About the Project:
This Project Demonstrate how to create a VPC that you can use for servers in Production environments.
To Improve resiliency, you can deploy the servers in two Availability zones, by using an auto-scaling group and an Application Load balancer. For additional security, you deploy the servers in private subnets. The server receives the request through the load balancer. the servers can connect to the internet using the load balancer and we will deploy the NAT Gateway in both the availability zones.

Note: Architecture is the same as above just we are not using the S3 gateway here.
Overview :
The VPC has a public subnet and a Private subnet in each Availability Zones.
Each Public subnet contains the NAT Gateway and a Load Balancer.
The servers launched in the private subnets are launched and terminated using the Autoscaling group and receive the traffic from Load Balancer. These servers can connect to the internet using the NAT gateway.
Steps :
Create the VPC :
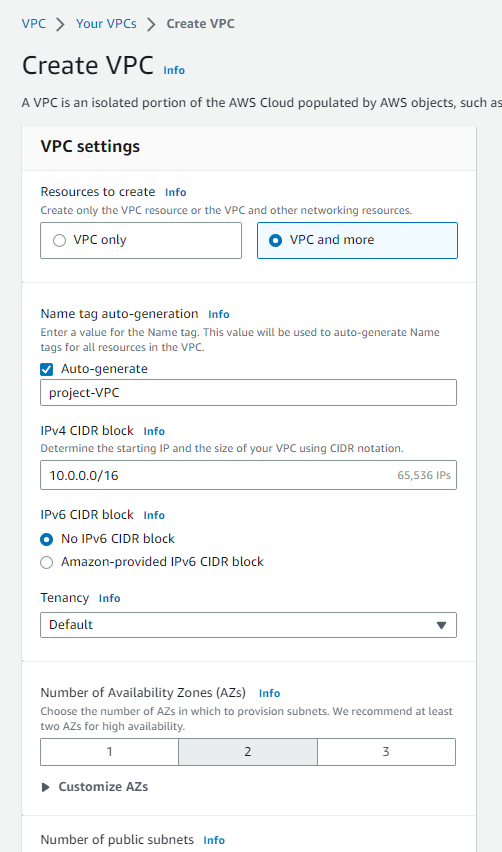
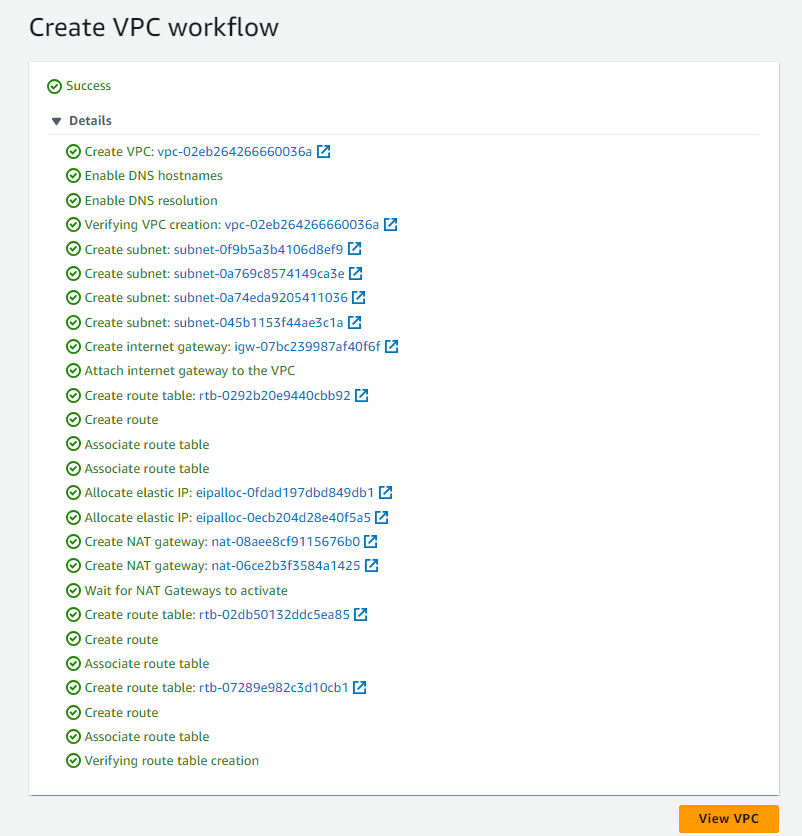
Log in to the AWS console and go to VPC service and click on Create VPC.
Fill in the details as shown in the screenshot below.


Create Auto-Scaling Group:
Autoscaling groups in AWS cannot be created directly, we will have to create the Launch Template first and based on that we can create the autoscaling groups. We can use this Launch template in multiple autoscaling groups or we can use them as a reference to understand how autoscaling groups are behaving.

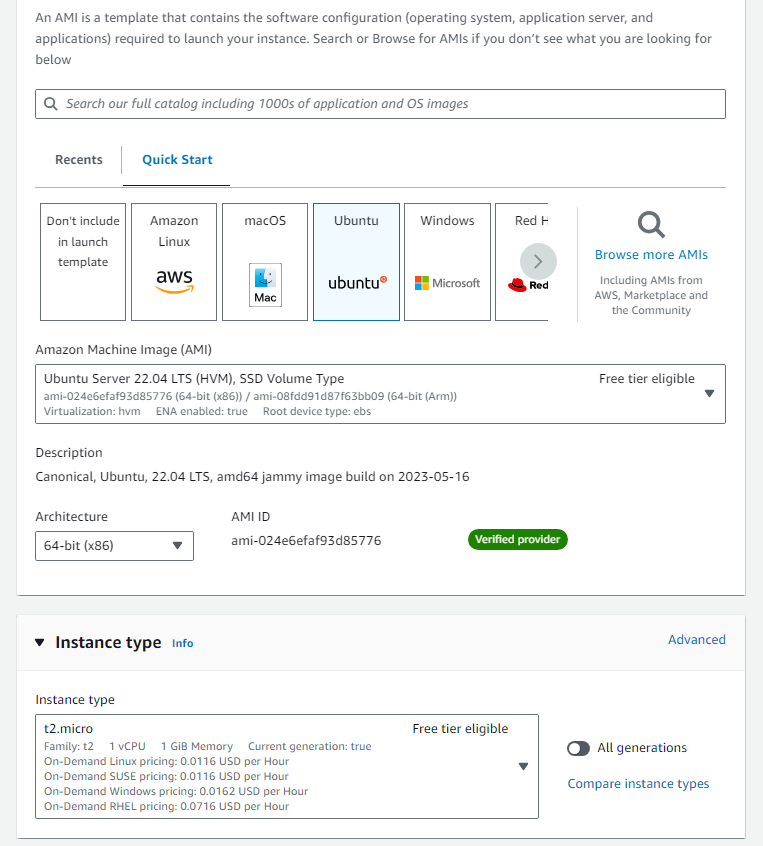
Click on the Create a launch template and fill in the details as shown below.
you can create new Key pair or use existing key pair.
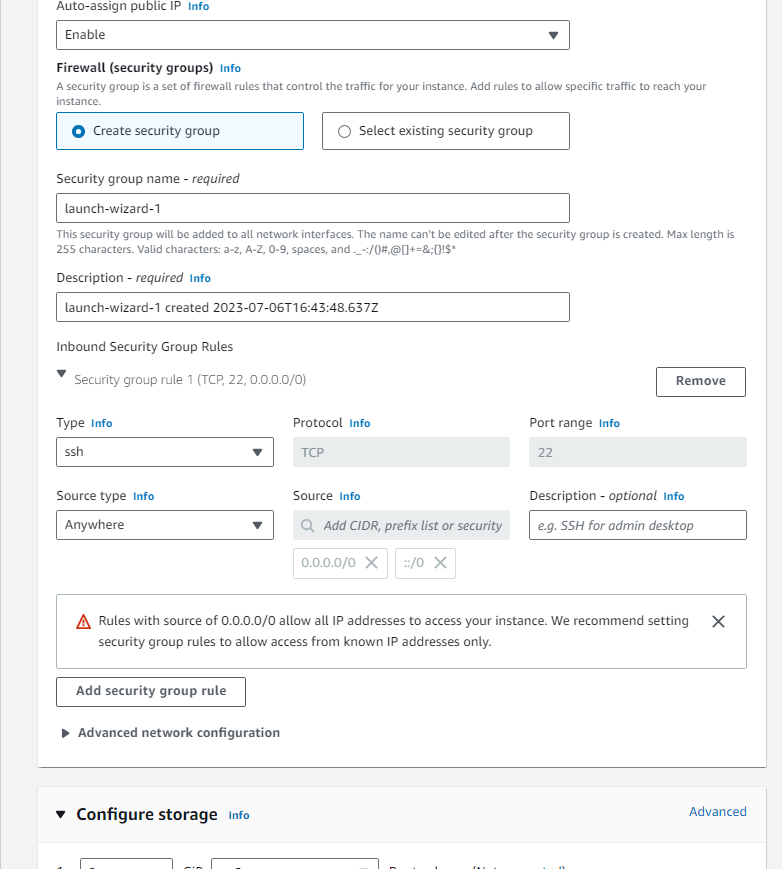
create a new security group and add two inbound routes, one route we will add for ssh to get the ssh connection and one route with custom TCP with port 8000 where we will be running and deploying our application.



Once the launch template is created go to the autoscaling group again and
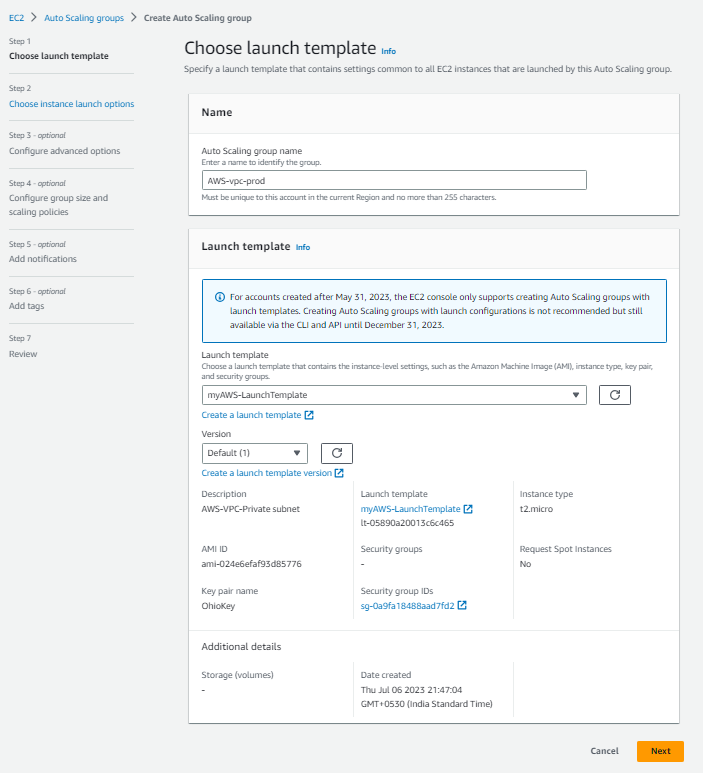
click on next and the next screen will appear, here select the VPC which you have created. select the private subnets and click on next.

after clicking on the next button, the below screen will appear. Don't update anything here just check the detail and go to next.


Now, specify the desired capacity for autoscaling groups.
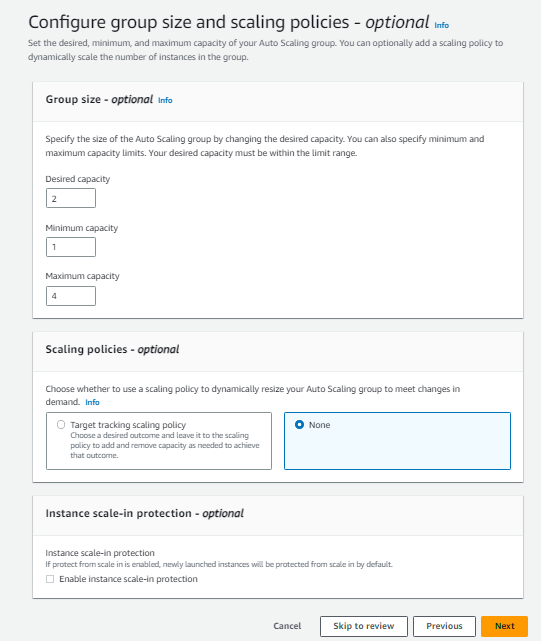
next

next

click on the Create an auto-scaling group and your autoscaling group will be created here.

you will see two ec2 instances will be created, check in ec2 services.these ec2 instances do not have a public IP address, only a private IP address is there.

Create Bastion-Host or Jump server :
We need to create the Bastion host to access the private subnet ec2 instances we will log in to the Bastion host and will access the private ec2 instance from it to deploy or run the application. Go to the Ec2 instance and create a new Ec2 instance inside the public subnet.
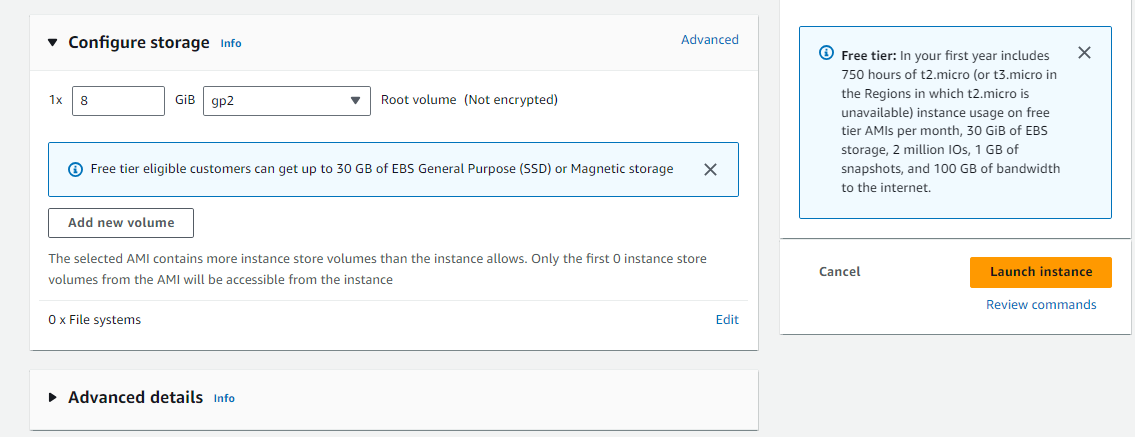
Launch the EC2 instance.



To access the Private subnet ec2 instances you will need the key value pair to be present on the bastion-host server.
If you are using Windows download the WinScp software: https://winscp.net/eng/download.php
if you are using the Unix OS, use the below command from your command prompt to copy the file to the bastion host.
scp -i <.pem file path> <.pem file path> ubuntu@<public IP of bastion-host>:/home/ubuntu
Here, I am using Windows OS so to login into the Bastion host we will need the Puttygen and Putty software. you can download the software from Google.
To connect the Bastion-host, open the puttygen and load the key pair created while launching the Bastion-host ec2 instance and save the private key on your desktop to use for login.
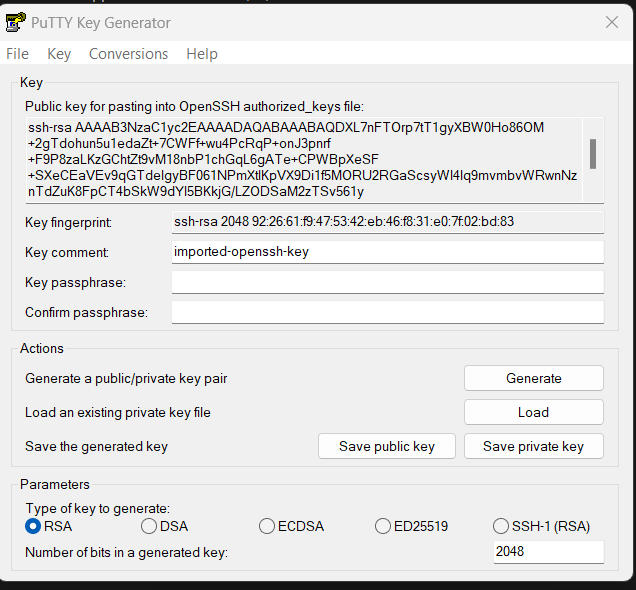

open the putty software and copy the bastion-host public IP in the hostname.
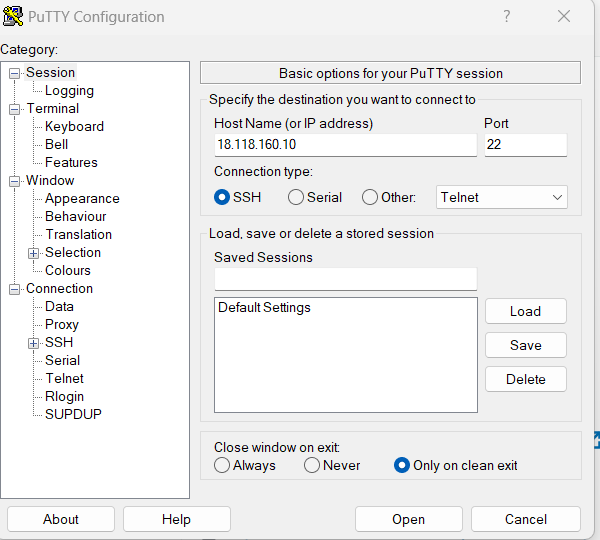
Go to Auth--> credentials and browse for the private key created above and click on the open.
login as: ubuntu

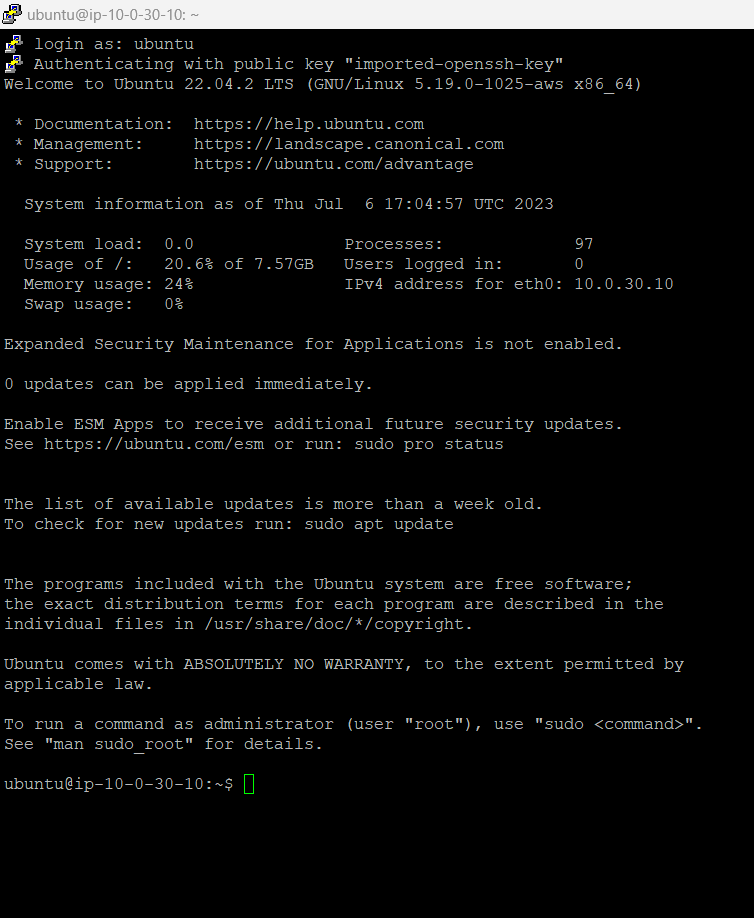
We are now logged into the Bastion host, to copy the key pair on the Bastion host use WinSCP to copy.
Hostname: public IP of bastion host
username: ubuntu
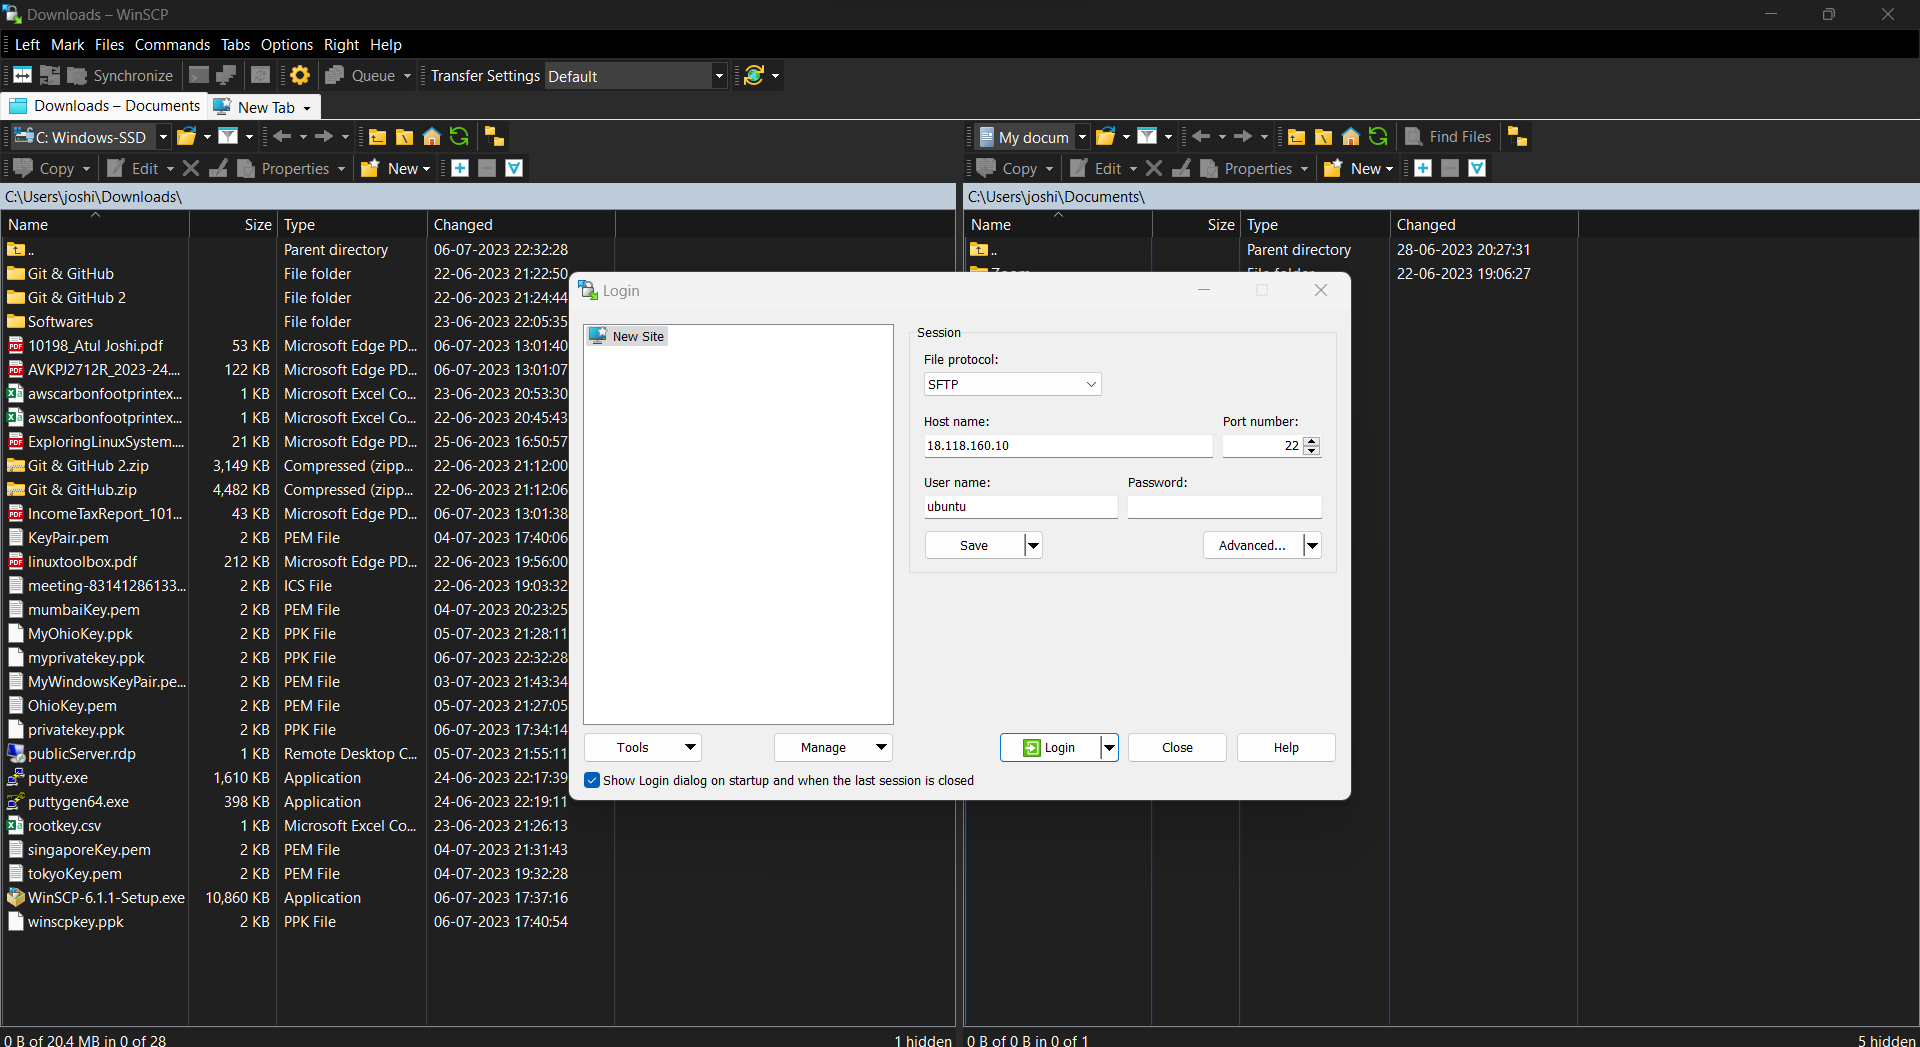
for the password, click on the Advance and go to authentication and browse for the private key create above and click on login, you will be logged into the Bastion host on WinSCP.

now on the left-hand side, select the private key on your local machine and drag-drop on the bastion host server home location.

Connect the Private subnet EC2 instance from the Bastion host
now, if you go to Putty and run ls -ltr command you will see the key pair there as below.
You will get a bad permission error as your keypair will not have the correct permission. run chmod 700 OhioKey.pem command to give the permission.
try to connect to the public subnet ec2 instance using the below command.
ssh -i ohiokey.pem ubuntu@<private IP of ec2 instance>

create the html page with index.html with below content you can edit the text as required.
<!DOCTYPE html>
<html> <head>
<title>AWS Demo Project 1</title> </head>
<body> <h1>This is my first AWS private subnet instance</h1>
<p>This is first ec2 instance in private subnet one !!.</p>
</body> </html>

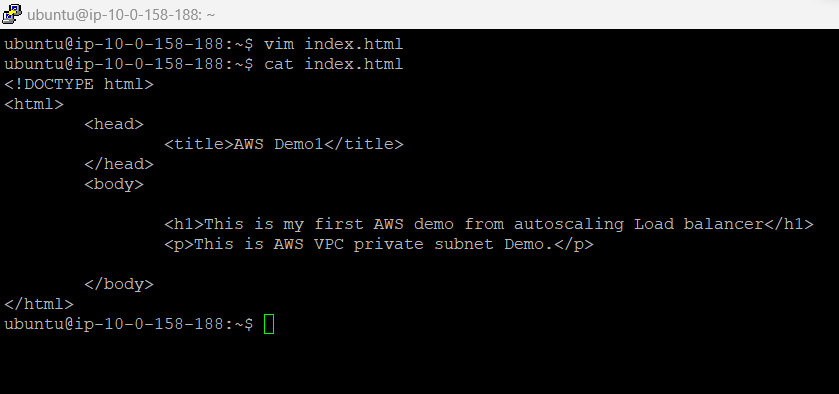
Now run the python application on 8000 port no.

Create the Load Balancer
go to the AWS console and search for the load balancer
Create Load Balancer --> Application Load Balancer
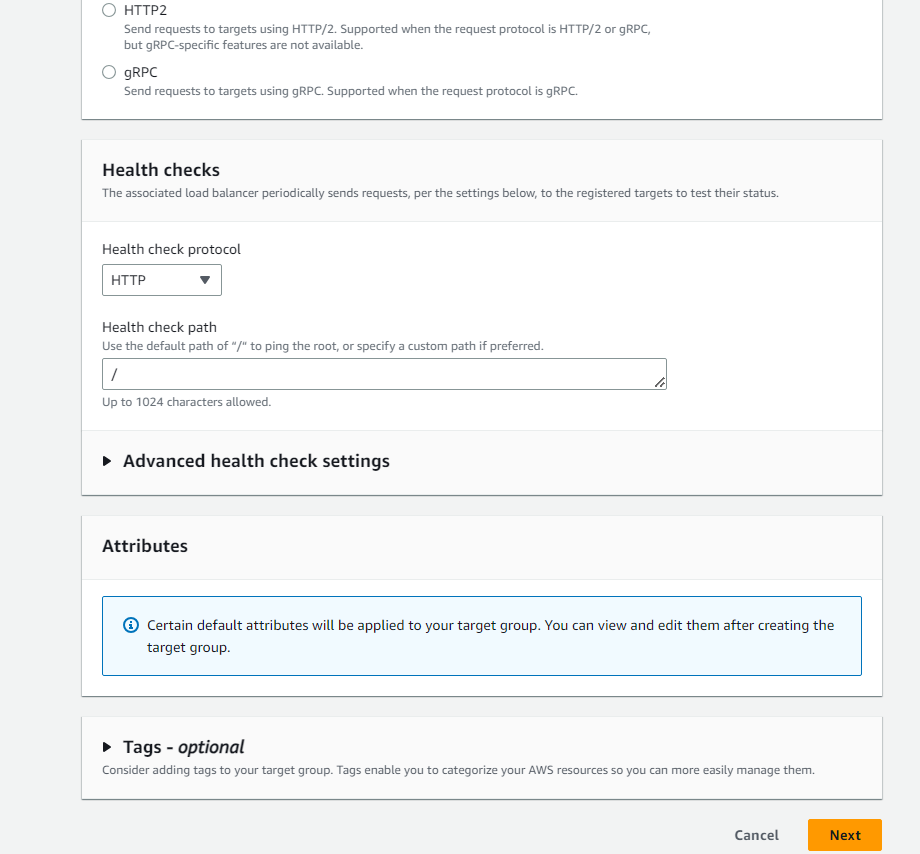
But you cannot create the Load Balancer directly you need to create the target group first, create the target groups by clicking on the create target group button the load balancer section.

Steps to create the Target Groups are as below.


select two ec2 instances created under autoscaling

select Include as Pending Below
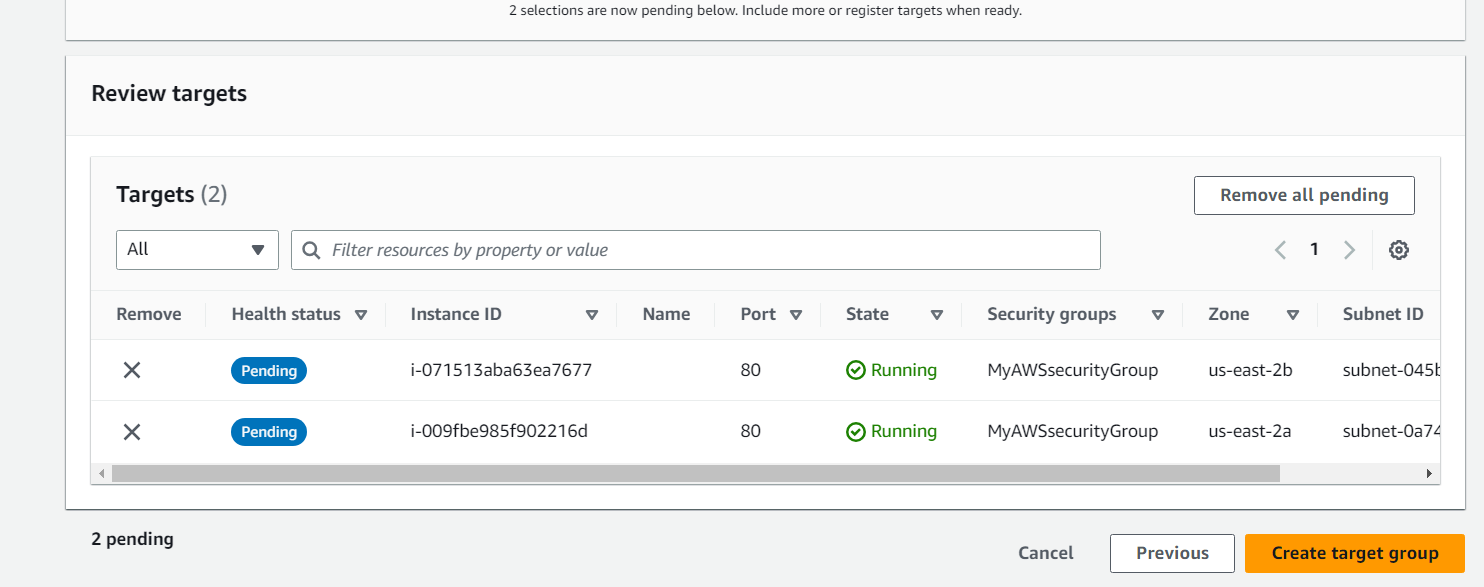
once Target group is created, go to Load Balancer section again and start creating the Load Balancer.
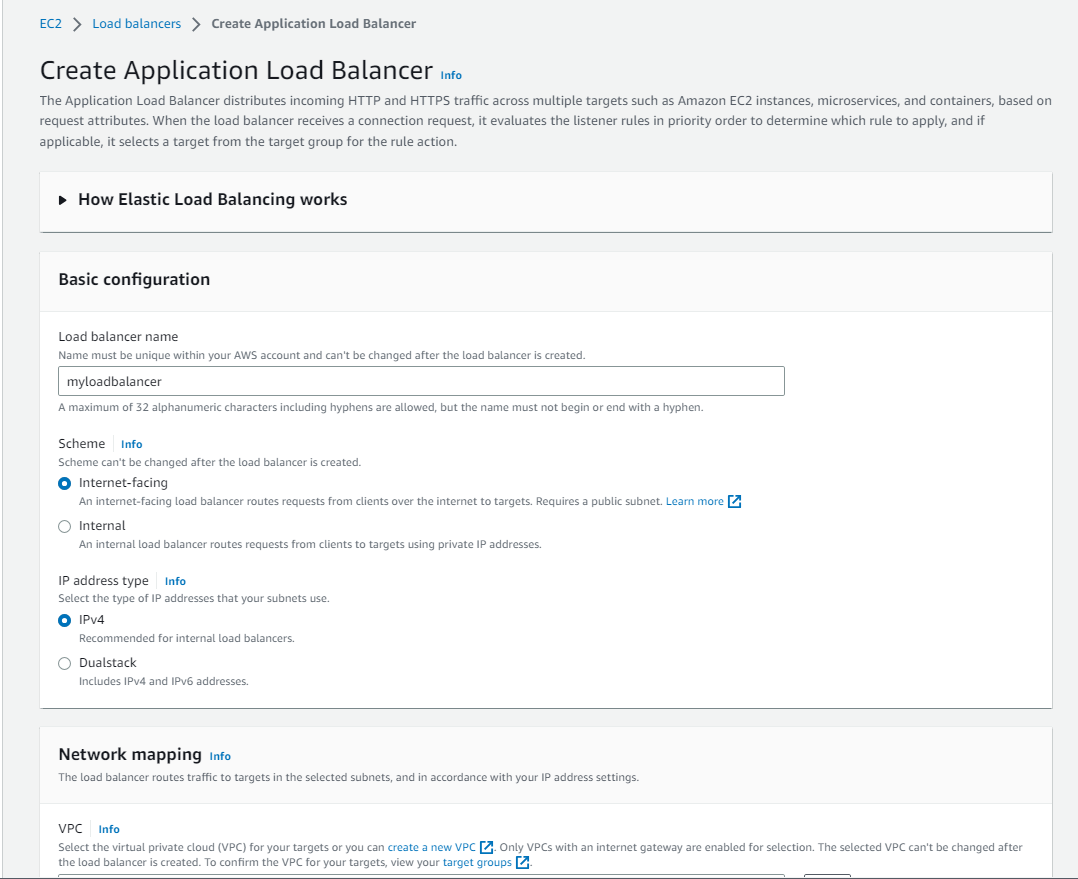
select the VPC which you have created and select the two public subnets. select security group which you have created.

select the target group which you have created in above step and mentioned the protocol as HTTP and port will be 8000.

click on the create load balancer.


once load balancer is created try to access the application from outside world and you will see the load balancer is giving you the response from the outside world.
Open the load balancer, copy the DNS name and paste it on the browser and try to access the index.html page created on the private subnet instance.

You should see the below page on the Browser.

You have successfully accessed the Application deployed in the Private subnet Ec2 instance and we have accessed the application from the outside world.
As of now, knowingly we have connected to only one Ec2 instance of one private subnet hosted in one AZ, you can access another EC2 instance hosted in the private subnet of the second AZ. For that connect the Ec2 instance from the bastion host and run the Python application in it by creating the index.html page with description as subnet2 similar way what we have created above. copy the load balancer DNS name and paste it into the browser.
so one time you should see the page from subnet one and the second time you should see the content from subnet 2 created as Private.

You have successfully implemented the project which is used by most of the AWS cloud engineers in the Industry.
Subscribe to my newsletter
Read articles from Atul Joshi directly inside your inbox. Subscribe to the newsletter, and don't miss out.
Written by
