How to integrate data import functionality into your app
 Bobur Umurzokov
If you are a software developer, think about how you could add the data import, transformation, and validation functionality to your web app in only a few minutes with your JavaScript and React knowledge using built-in SDK and libraries. You can think of using SDK such as the front-end Embed React library in the Flatfile. If you need to define more complex data validation rules in a backend, you can request Flatfile API directly to manage the data validation flow using your existing tech stack.
In this article, we will explore how to get started with Flatfile and leverage its API to integrate data import functionality directly into an existing application.
Need for data import service
We need data import functionality in our application for various purposes. Oftentimes, a single application's data is spread across various platforms and systems which means we need to bring in data from various sources and work with a wide range of data types and formats. When switching to a new system or software, data import functionality can make the transition smoother by allowing your users to easily transfer existing data into the new system. It can also be useful for data backup and recovery. If a system fails, users can restore their data from a backup by importing it back into the system.
There are other reasons you can think of, when need to enable file ingestion from a third-party source, like importing data directly from Salesforce. There may be specific scenarios where you need different data validation rules for multiple environments (Dev, Staging, or Prod). In this case, you can configure these data within Flatfile’s workflow. Data importing platforms such as Flatfile offers an intuitive interface and developer tools that simplify the process of integrating data from various sources and validating them without the need for complex coding, implementing on your own, or manual data entry. In essence, the choice between building and buying/using existing software solutions is no longer a matter of compromise, but rather a strategic decision that can bring together the benefits of both approaches. At the same time, these solutions often come with APIs and other customization options, allowing you to adapt them to your unique requirements.
When using Flatfile API?
It is an alternative to the users uploading and manipulating data manually, via the Flatfile data exchange platform. In the API approach, you have greater control and flexibility in customizing the data import process to fit your specific requirements. You can create Workbook, add data to the workbook, combine, transform, and validate data via the REST API, and then the data will be pushed to any destination such as another API, Database, or App. Additionally, you have the ability to create Actions that can subscribe to any Event triggered by data changes in Flatfile. These actions can programmatically initiate a job based on the specific Event, allowing for automation.
Imagine that healthcare providers often deal with patient records and medical data that need to be imported into electronic health record (EHR) systems. The Flatfile API can assist in importing patient demographics, medical history, diagnostic reports, or lab results while ensuring data accuracy and compliance with specific data formats and standards.
Import your first data into Flatfile
In this section, you will learn how to import data into Flatfile. We’ll begin by creating a new Flatfile account and obtaining an API key. Then we will create a new Workbook using Flatfile’s API and insert a record into the sheet.
Prerequisites
- Familiarize yourself with the Flatfile API documentation. This documentation will outline the available endpoints, request, and response formats.
- We are going to cURL commands to send requests to Flatfile API in our examples. You can also use easy tools such as Postman to interact with the API.
Key concepts
- Space - It is your application where you have a frontend, database to work with data.
- Workbooks - Similar to the spreadsheet template or traditional database schemas, which defines the structure of the data you are working with. One space can have multiple workbooks.
- Sheets - A group of fields that provide descriptive information about a specific entity, such as tables in a database.
- Fields - Define a characteristic or attribute of the entity, such as name or email, and specify its behavior.
Step 1: Sign up for a new account
You can start to use Flatfile for free. Visit the Flatfile website at https://flatfile.com/ and sign up for an account. Provide the necessary information to create your account. Once registered, you'll receive a confirmation email with instructions on how to verify your account.
Step 2: Obtain API Credentials
All REST Flatfile API queries require a valid API Secret key. Your account has two key types for each environment. Before using the FlatFile API, ensure that you have a suitable development environment (By default it is set to Development) configured in the portal. Navigate to the Developer section under your profile and find the Environment keys section to obtain your API Secret Key. This secret will be used to authenticate your API requests.
Step 3: Create a workbook
Below is an example of adding a new schema for patient data records to Flatfile by creating a Workbook using the FlatFile API with a cURL command. It's important to note that the provided curl command is just an example, and you'll need to replace PASTE_SECRET_KEY_HERE with the actual secret key to authenticate the request.
curl --request POST \
  --url https://platform.flatfile.com/api/v1/workbooks \
  --header 'Authorization: Bearer PASTE_SECRET_KEY_HERE' \
  --header 'Content-Type: application/json' \
  --data '{
   "name":"Medical Data Workbook",
   "sheets":[
      {
         "name":"Patient Data Records",
         "slug":"patient_records",
         "fields":[
            {
               "label":"Patient Name",
               "key":"patient_name",
               "type":"string"
            },
            {
               "label":"Gender",
               "key":"gender",
               "type":"string"
            },
            {
               "label":"Date of Birth",
               "key":"dob",
               "type":"date"
            },
            {
               "label":"Diagnosis",
               "key":"diagnosis",
               "type":"string"
            },
            {
               "label":"Treatment",
               "key":"treatment",
               "type":"string"
            }
         ]
      }
   ]
}'
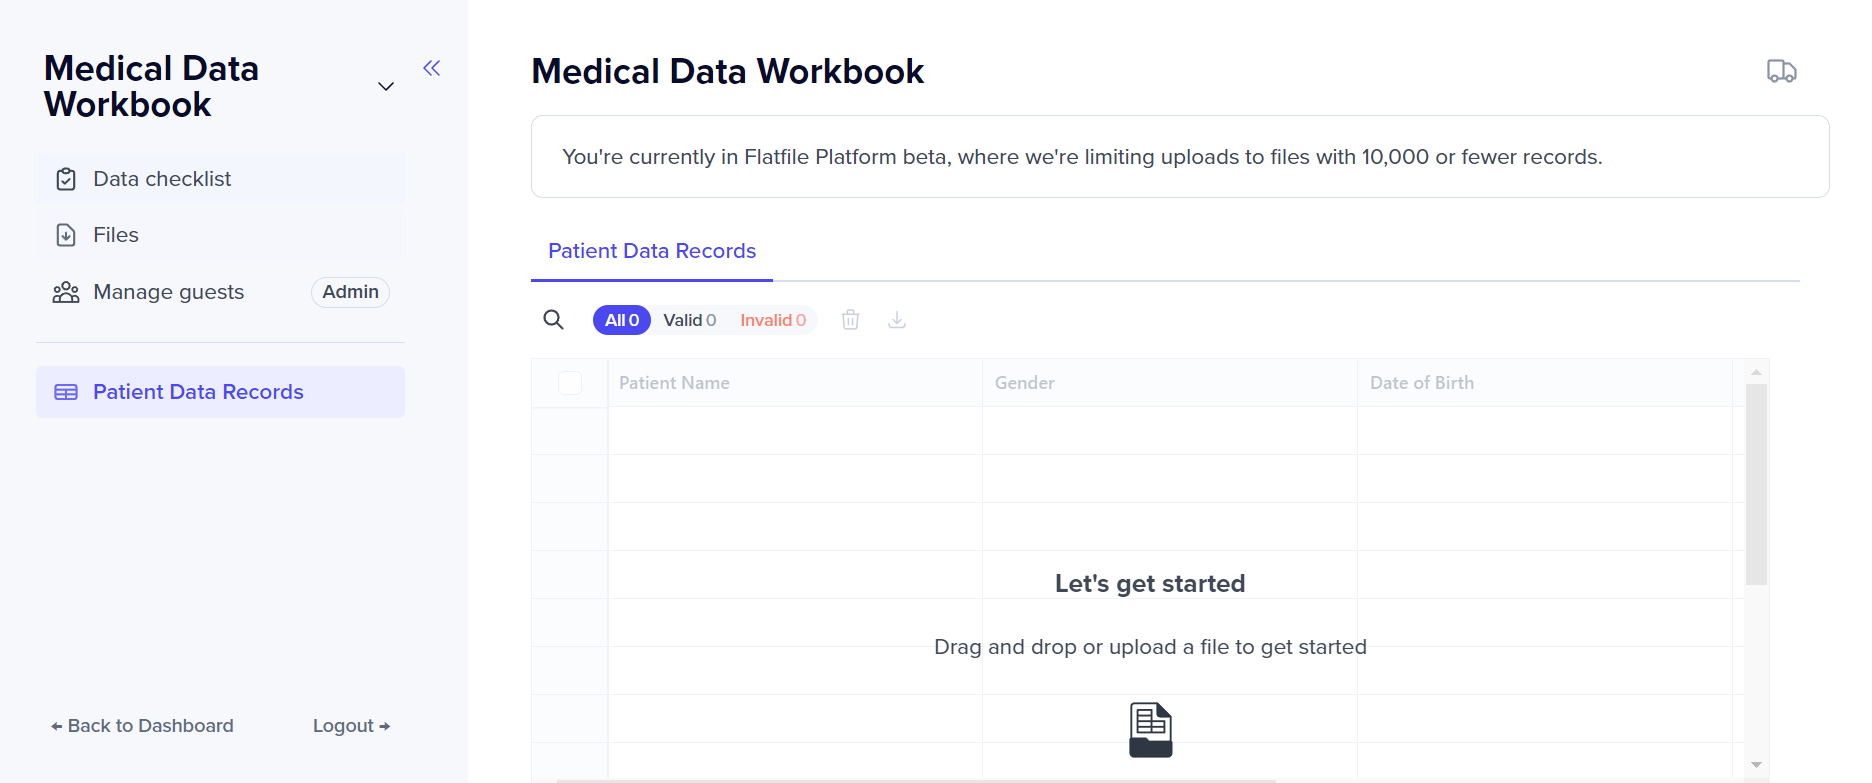
The cURL command sends a POST request to the FlatFile API endpoint /workbooks with the JSON payload. The JSON payload defines the workbook structure with fields corresponding to medical data records. Upon successful execution, the API will create the workbook and return a response with the details, including the spaceId, workbookId, and sheetId which you can use for further operations.

Step 4: Importing data
Note that in the previous step, we have just created the empty workbook with a single sheet and multiple fields but there is no data there yet. We need to import example data. There are many ways to import data into Flatfile:
- By uploading any file type such as CSV, Excel, JSON, etc manually on Flatfile Platform’s interface in the Files section, and then clicking the Import action for the file.
- By embedding Flatfile into your application’s code.
- By uploading files using an upload API endpoint.
- By adding new records to the workbook sheet using Flatfile API.
We are going to insert a single record using Flatfile API. To do so, we need sheetId to add records to the specific sheet and run the below cURL command to send a request to insert records endpoint:
curl --request POST \
  --url https://platform.flatfile.com/api/v1/sheets/{sheetId}/records \
  --header 'Authorization: Bearer PASTE_SECRET_KEY_HERE' \
  --header 'Content-Type: application/json' \
  --header 'Accept: application/json' \
  --data '[
   {
      "patient_name":{
         "value":"Jon Woodward",
         "valid":true
      },
      "gender":{
         "value":"male",
         "valid":true
      },
      "dob":{
         "value":"2000-01-01",
         "valid":true
      },
      "diagnosis":{
         "value":"Stomach Ache",
         "valid":true
      },
      "treatment":{
         "value":"Reduce your intake of coffee",
         "valid":true
      }
   }
]'
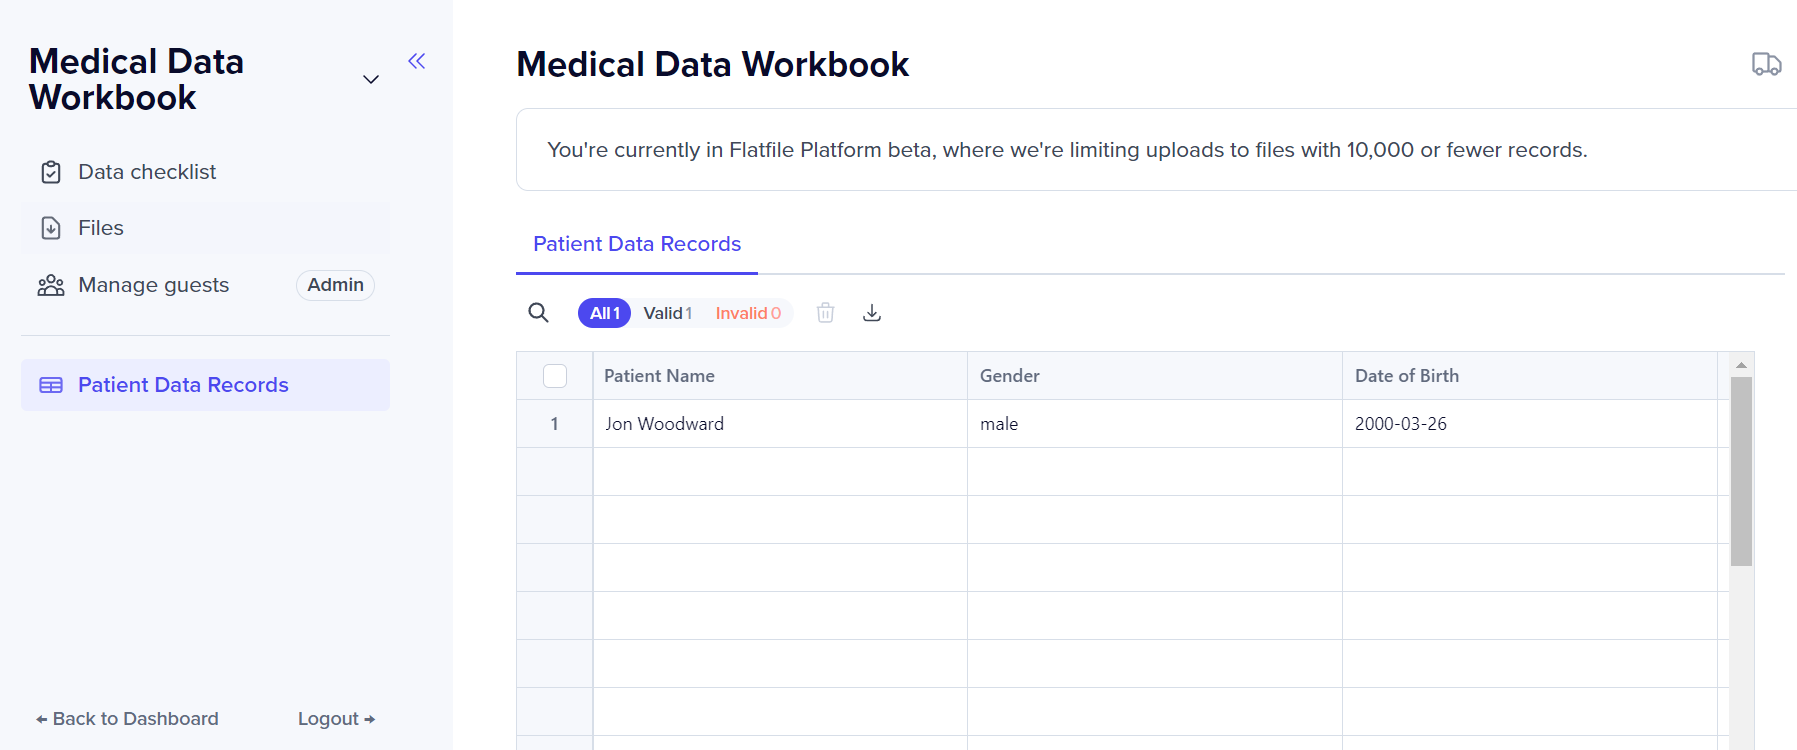
The request body contains JSON data representing the record to be created. In this example, a single record is created in the sheet, with fields like patient_name, gender, dob, diagnosis, and treatment along with their respective values and validation status.
Step 5: Check the result on the Flatfile platform
Finally, we can see the data added to Patient Data Records in the given sheet by navigating to the workbook we created in Step 3.

Step 6: Introduce the validation message
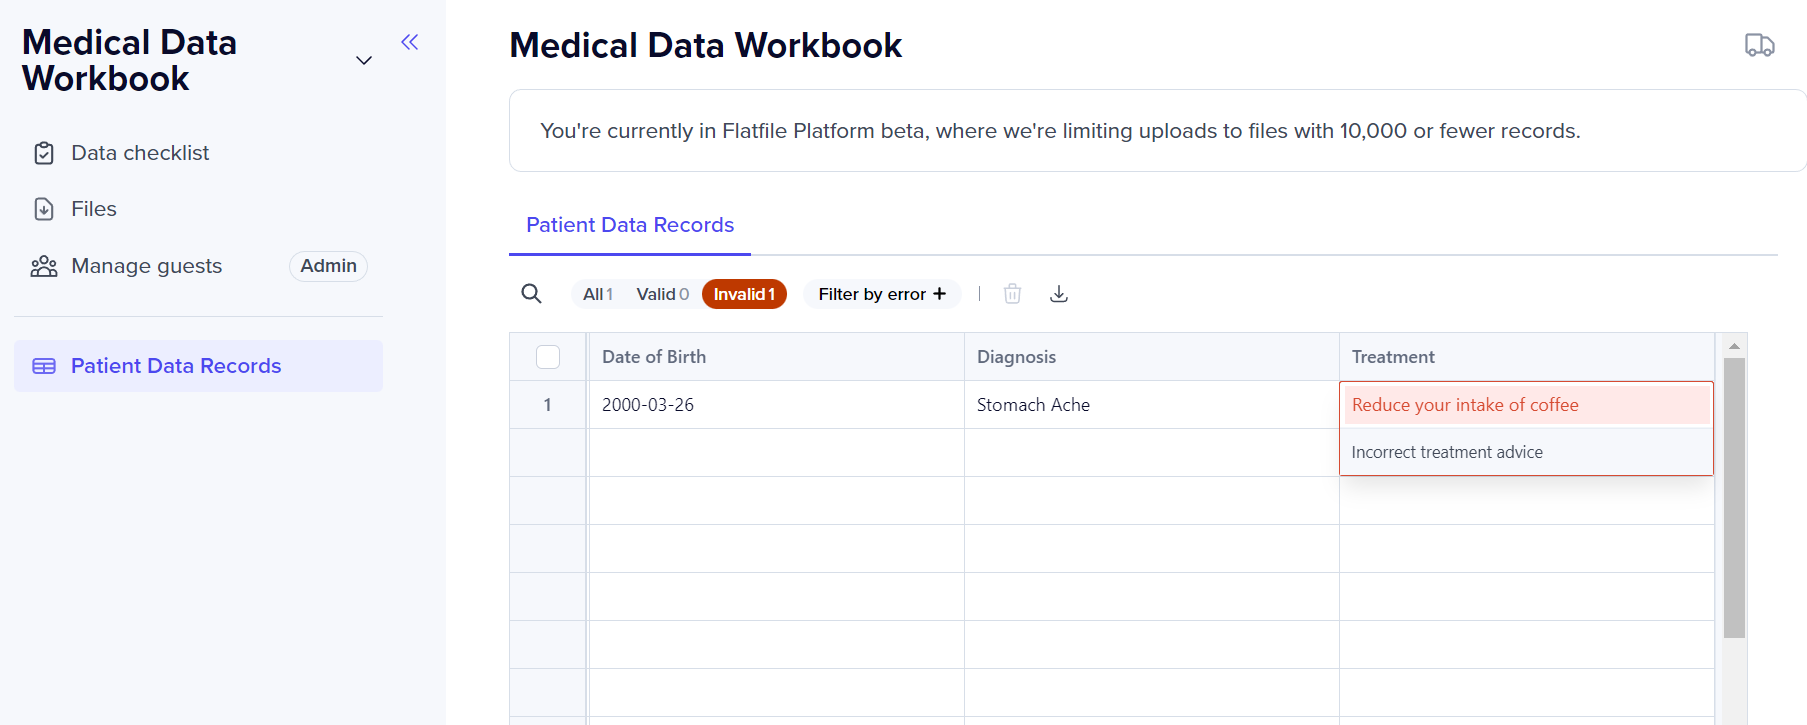
With Flatfile, you can also make the input data valid/invalid by defining validation rules. In the above example, we set all property values to be accurate. Still, you can also perform validations on your backend code or using Flatfile SDK, you can enable a number of transformation & validation plugins to reshape data before it gets updated, add the error message, and update records to show they are invalid with the necessary error messages. You need to request the Update Records endpoint with the recordId we received in Step 3. See below how to achieve this:
curl --request PUT \
  --url https://platform.flatfile.com/api/v1/sheets/{sheetId}/records \
  --header 'Authorization: Bearer PASTE_SECRET_KEY_HERE' \
  --header 'Content-Type: application/json' \
  --header 'Accept: application/json' \
  --data '[
   {
      "id":"{recordId}",
      "values":{
         "treatment":{
            "value":"Reduce your intake of coffee",
            "valid":false,
            "messages":[
               {
                  "type":"error",
                  "source":"custom-logic",
                  "message":"Incorrect treatment advice"
               }
            ]
         }
      }
   }
]'
Output after we invalidated the record:

Next steps
Congratulations! You have successfully completed the initial steps to get started with the Flatfile. You learned how to set up your development environment in Flatfile, created the workbook with the simple schema, and populated with records through Flatfile API. Next steps, you will explore other features such as data transformation capabilities and how to define custom validation rules. You can improve the capabilities of your Flatfile data engine by incorporating it with existing plugins or creating your own plugins.
Recommended resources
About the author
- Visit my blog: www.iambobur.com
- Follow me on Twitter: @BoburUmurzokov
Subscribe to my newsletter
Read articles from Bobur Umurzokov directly inside your inbox. Subscribe to the newsletter, and don't miss out.
Written by

Bobur Umurzokov
Bobur Umurzokov
𝐖𝐡𝐨 𝐈 𝐚𝐦 Bobur is a developer advocate and speaker specializing in software and data engineering. With over 10- years of experience in IT, he blogs about open-source technologies and the community around them. 𝐖𝐡𝐚𝐭 𝐈 𝐝𝐨 I work with companies at different scales to build awareness, drive adoption, and engage with the community for your developer-targeted products. I also create inspiring content, design, and code use cases, projects, and demo apps to boost learning your product.