Mastering Port Forwarding in VirtualBox: Unlocking Connectivity
 Travis Horn
In the realm of virtualization, VirtualBox stands as a powerful tool to create and manage virtual machines. Using it, you may often encounter scenarios where you need to establish communication between the host and virtual machines, and this is where port forwarding comes into play. In this comprehensive guide, we will explore the concept of port forwarding within the context of VirtualBox, providing you with a step-by-step configuration process, insights into connecting to your virtual machine, a list of commonly forwarded ports, and even an alternative solution using a bridged adapter. By the end, you'll be equipped with the knowledge and skills to set up and use forwarded ports on your virtual machines.
By default, virtual machines running inside VirtualBox use a virtual network adapter attached to NAT. This means that the machine is not accessible on your host network, but rather a virtual network inside of the host computer. Any time you need to connect to your virtual machine remotely (whether by SSH, HTTP, or another protocol), you'll need to make sure the appropriate port is forwarded from your host machine. Here's how to do that.
Open Oracle VM VirtualBox Manager on the host machine.
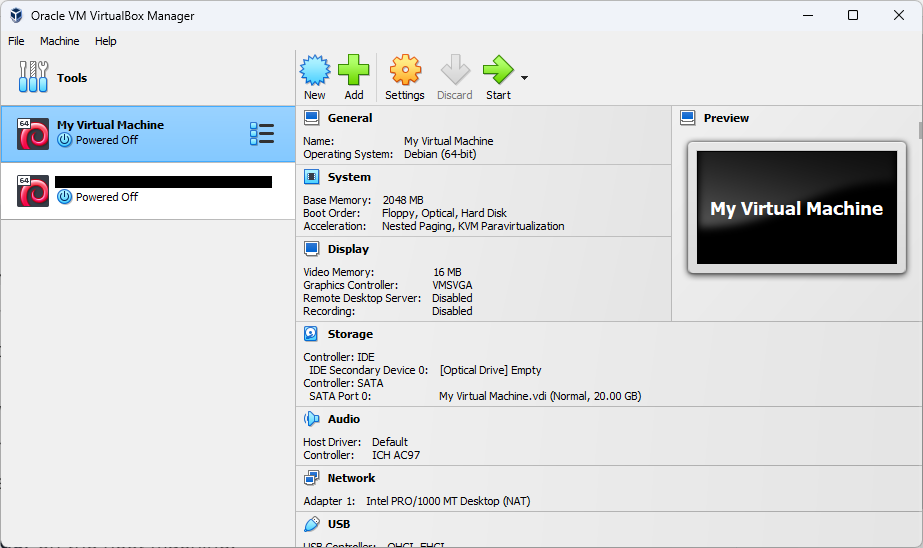
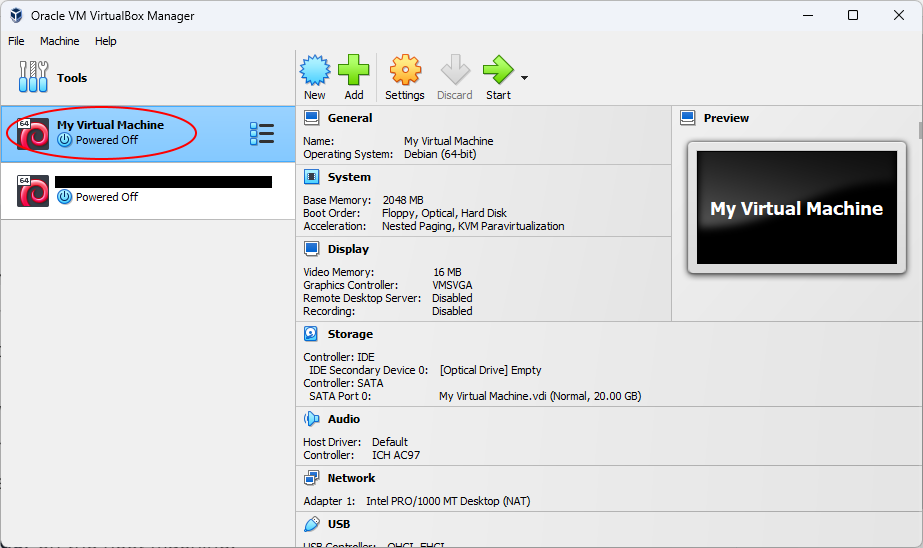
Click to select the virtual machine from the list on the left.
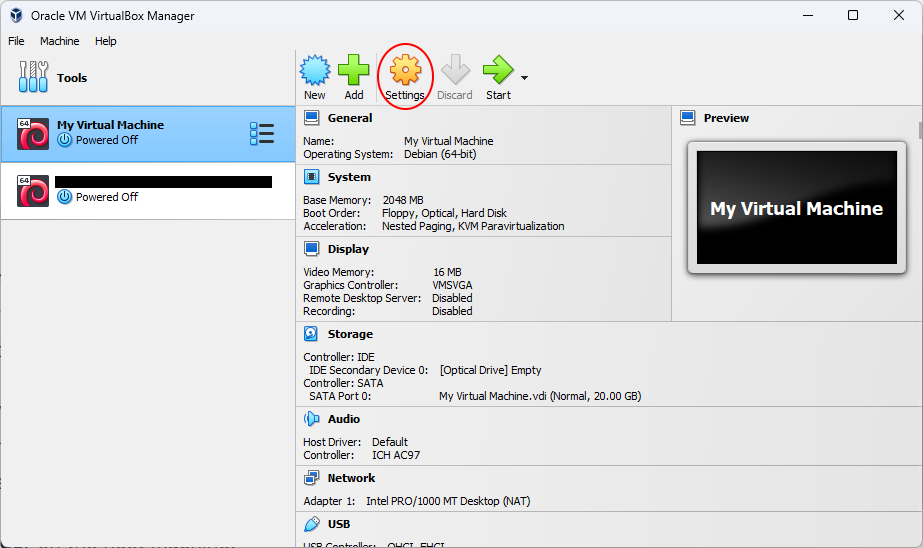
Click the Settings button.
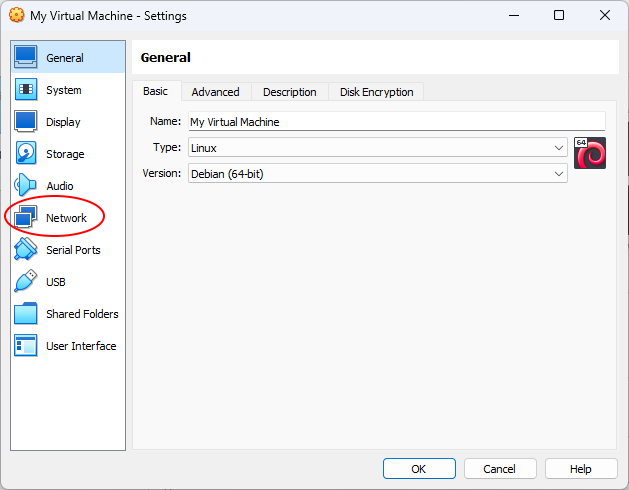
Click Network from the pane on the left.
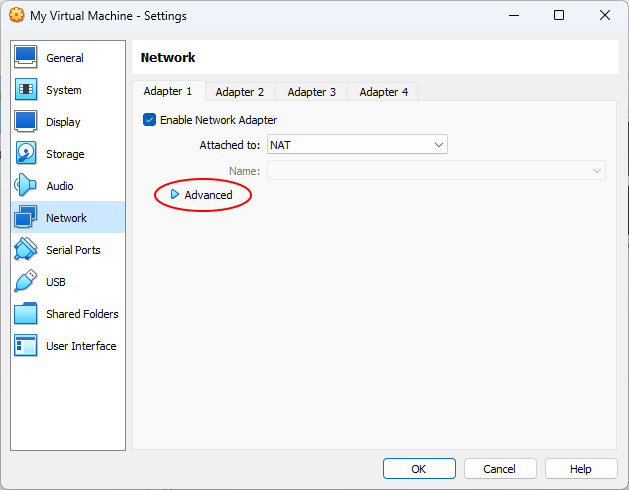
Under the Adapter 1 tab, click Advanced.
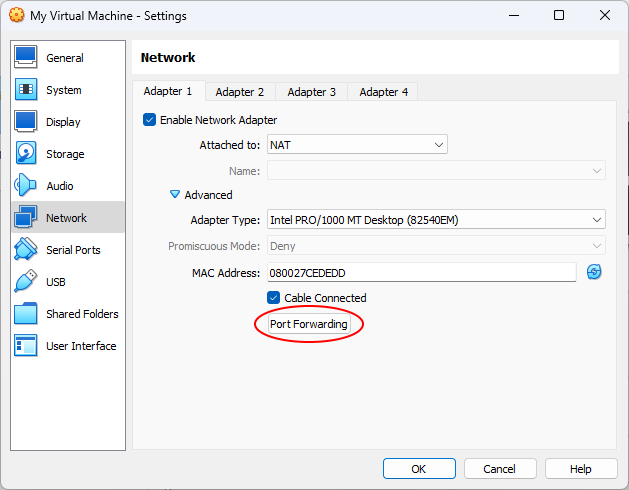
Click Port Forwarding.
Click the Adds new port forwarding rule. button. It's on the right side.

In the table on the left, double-click Rule 1. This will allow you to edit the name of the rule. Type in the name of the service. For example, SSH.
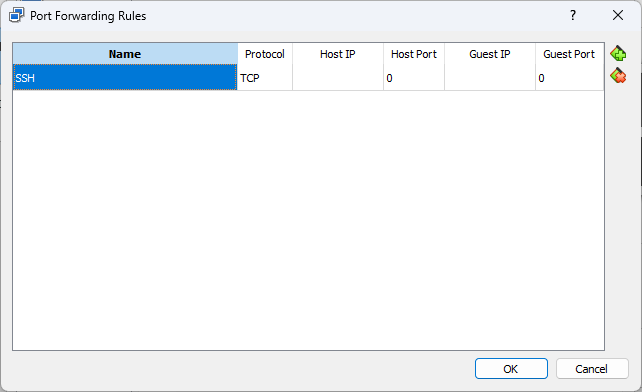
Under Host Port, enter the port number you want the host machine to listen on. This can be anything, but for simplicity, I recommend using the same as the guest port. For SSH, use port 22.
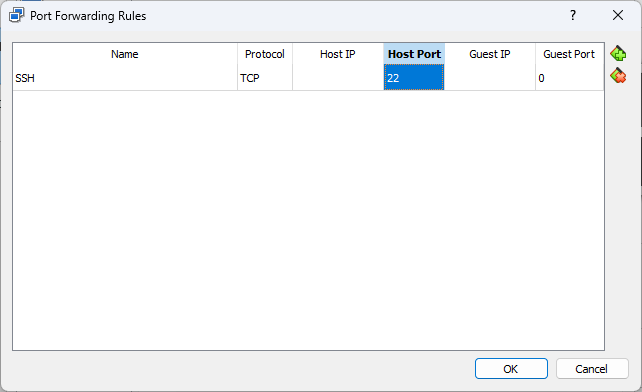
If you have multiple virtual machines which you will be SSHing into, or you already have an SSH server running on the host machine itself, you may want to enter a different Host Port. In that case, choose any number you like between 1024 and 49152. Just make sure it is not in use by any other service.
Under Guest Port, enter the port number that your virtual machine is listening on. For SSH, use port 22.

Leave everything else blank.
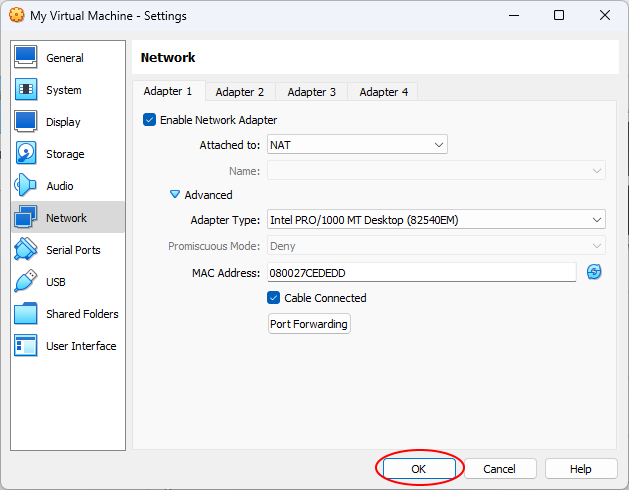
Click OK.
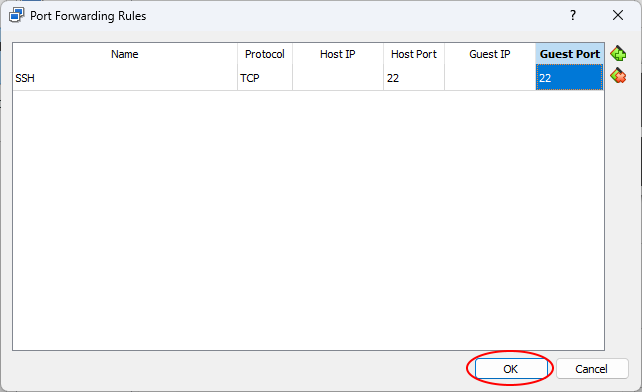
Click OK again.
Using the Forwarded Port
Now, if you want to SSH into the virtual machine from the host machine, you can use something like this:
ssh username@localhost
Make sure to change username to the actual username that is set up on your virtual machine.
If you want to connect to the virtual machine from some other machine than the host, try something like this:
ssh username@host_ip_address
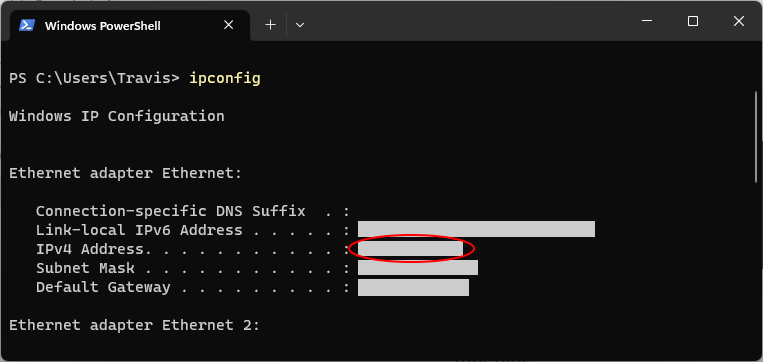
Change username to the actual username and change host_ip_address to the host's actual IP address. On Windows, you can determine this from the ipconfig command.
Other Ports to Forward
Some common ports you may consider forwarding are...
Port 21 for FTP
Port 22 for SSH
Port 80 for HTTP traffic
Port 443 for HTTPS traffic
Port 3000 which is a common development port for things like Node.js
Port 3306 for MySQL/MariaDB access
An Alternate Solution: Setting up a Bridged Adapter
If you want to access the virtual machine but don't want to forward any ports, you could attach the virtual network adapter to a bridged adapter. This places the virtual machine directly on the network with your other devices. It will receive its own IP address via DHCP.
Open Oracle VM VirtualBox Manager on the host machine.

Click to select the virtual machine from the list on the left.

Click the Settings button.

Click Network from the pane on the left.

Select Bridged Adapter from the Attached to dropdown menu.
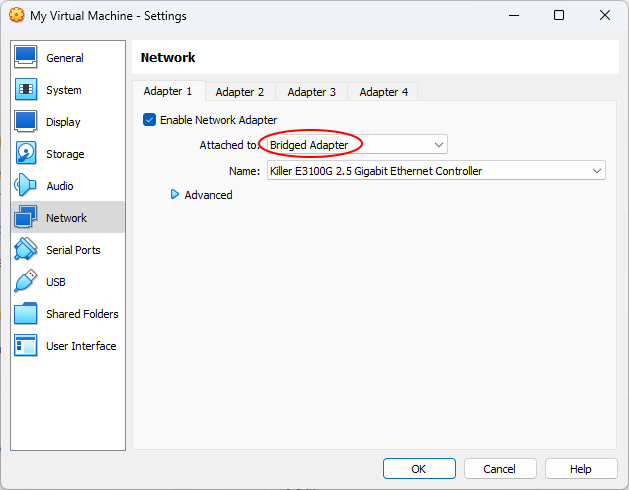
Click OK.

Using a Bridged Adapter
First, you need to determine what IP address the virtual machine received via DHCP. This can most easily be done on the virtual machine.
On Linux, you can use ip addr show.

Now you can connect (via SSH, for example) to the machine using the virtual machine's IP address you just discovered.
ssh username@vm_ip_address
By unraveling the mysteries of port forwarding in VirtualBox, we have taken a significant stride toward optimizing our virtualization endeavors. We now understand how to seamlessly connect our virtual machines to the outside world. Through the step-by-step configuration process, we have simplified the process of port forwarding, making it accessible to users of all levels. We also explored some common ports, discovering which services can benefit from port forwarding, and even ventured into the realm of bridged adapters as an alternative solution.
Cover photo by Danielle Suijkerbuijk on Unsplash.
Subscribe to my newsletter
Read articles from Travis Horn directly inside your inbox. Subscribe to the newsletter, and don't miss out.
Written by

Travis Horn
Travis Horn
I have a passion for discovering and working with cutting-edge technology. I am a constant and quick learner. I enjoy collaborating with others to solve problems. I believe helping people achieve their goals helps me achieve mine.