Step-by-Step Guide: Setting Up a Windows 11 Virtual Machine in Azure
 Lawal Azeez
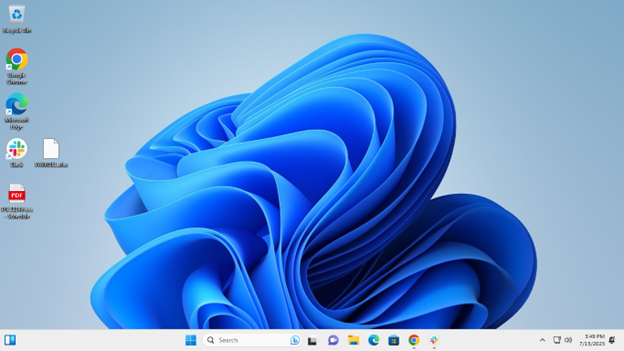
Discover the benefits of creating a Windows 11 Virtual Machine (VM) in Microsoft Azure. With cloud computing's flexibility and scalability, Azure VMs provide an efficient way to experience the latest Windows operating system without dedicated hardware.
The benefits of Windows 11 VM in Azure can be seen below:
Seamless Integration: Azure VMs integrate effortlessly with other Azure services, enhancing productivity and accessibility.
Scalability: Easily scale resources up or down to match demand, making it suitable for businesses of all sizes.
Security and Reliability: Azure ensures robust security and data redundancy for a safe and reliable Windows 11 VM.
On-Demand Accessibility: Access your VM remotely from anywhere, enabling seamless collaboration and remote work.
Please follow the steps below to create your Windows 11 virtual machine
SIGN IN TO AZURE PORTAL
Before we begin the process of setting up your Window 11 VM, please note that having an Azure subscription is a prerequisite. If you don't already have one, you can log in to the Azure portal (portal.azure.com) to create a free account and your Azure subscription.
Once you have your subscription, login to portal.azure.com using your email and password.
CREATE A RESOURCE GROUP TO HOST YOUR WINDOWS 11 VM
After signing in to the Azure Portal, the next crucial step in setting up your Windows 11 Virtual Machine is creating a Resource Group. A Resource Group is a logical container that helps you organize and manage related Azure resources, such as virtual machines, storage accounts, and networking components, as a single unit. Here's a detailed explanation of how to create a Resource Group:
Navigate to the Azure Portal Dashboard Home page
Click on "Create a Resource" around the top right corner of the screen or just select "Resource group" from the list of Azure service displayed

In the "Resource Group" window, click the "Create" button to initiate the creation process.
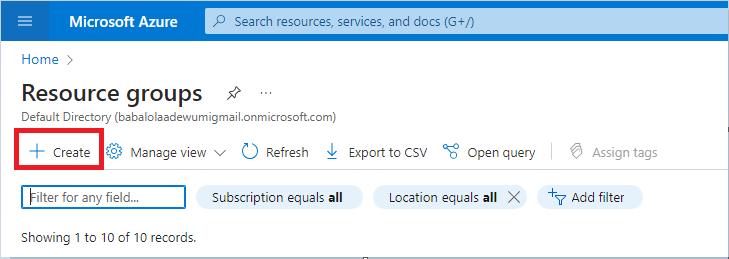
Provide Details for the Resource Group:
a. Subscription: Select the Azure subscription under which you want to create the Resource Group. If you have only one subscription, it will be preselected.
b. Resource Group: Choose a meaningful name for your Resource Group. It should be descriptive enough to reflect its purpose, such as "Windows11-VM-Resources" or "MyApp-Prod-Resources."
c. Region: Select the Azure region where you want the Resource Group to be located. Consider choosing a region geographically close to your primary user base for better performance.
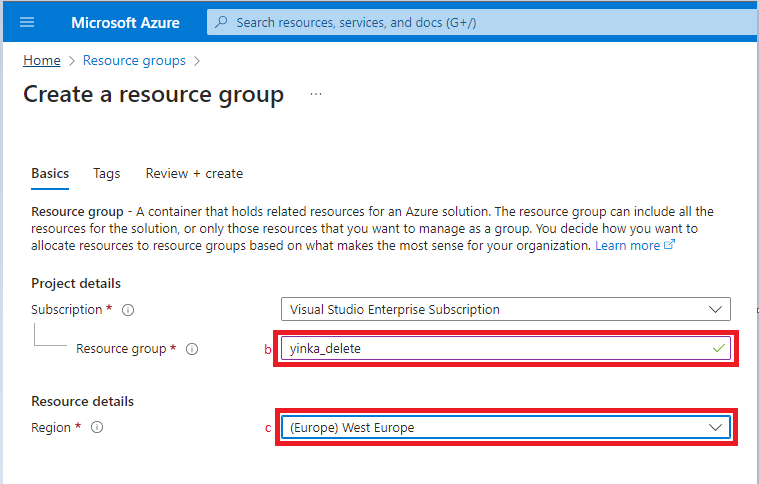
After entering the required details, click the "Review + Create" button at the bottom of the window to proceed.

Azure will validate the information provided. Review the details to ensure they are accurate.
Once you're satisfied with the information, click the "Create" button. Azure will now begin creating the Resource Group with the specified settings.
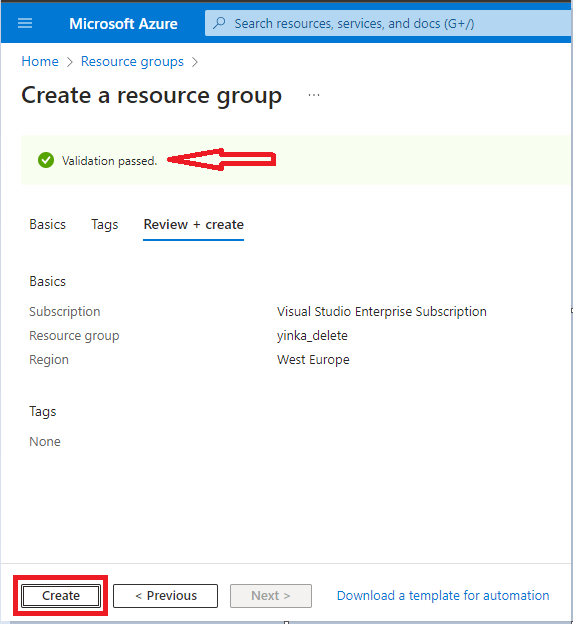
Wait for Deployment: The deployment process may take a few moments to complete, depending on the Azure region and network conditions. You can monitor the progress on the Azure Dashboard.
DEPLOY YOUR WINDOWS 11 VIRTUAL MACHINE
After creating the Resource Group, the next crucial step is deploying a Virtual Machine (VM) within that group. This involves selecting the appropriate settings, such as VM size, storage options, and networking configurations. Here's a detailed explanation of how to deploy a VM in Azure:
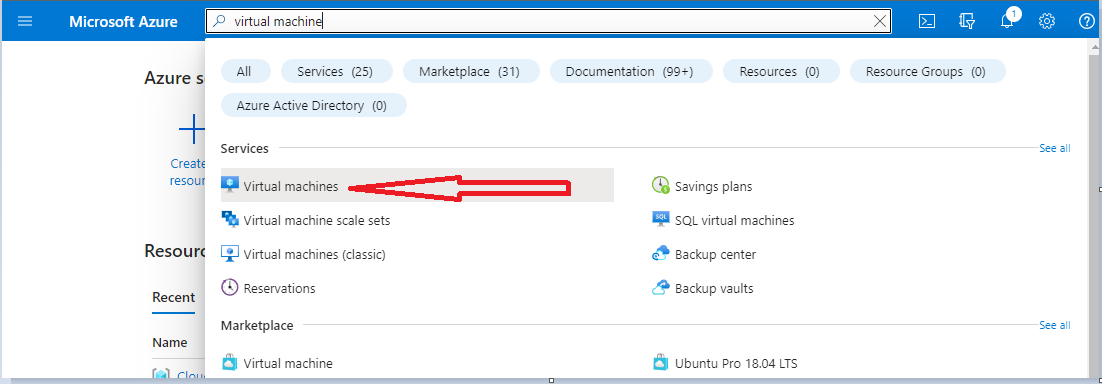
From the general; search bar, type "Virtual machine"
From the search result, select "Virtual machine" from the list of resources shown
Basics Tab:
a. Project Details: Ensure that the correct Azure subscription and Resource Group created above are selected. If needed, you can create a new Resource Group here.

b. Instance Details: i. Provide a unique name for your VM to identify it within Azure.
ii. Region: Choose the same Azure region where you created the Resource Group or select a different one if necessary.
iii. Availability Options: Choose the availability options based on your requirements. You can choose availability sets or availability zones for higher availability.
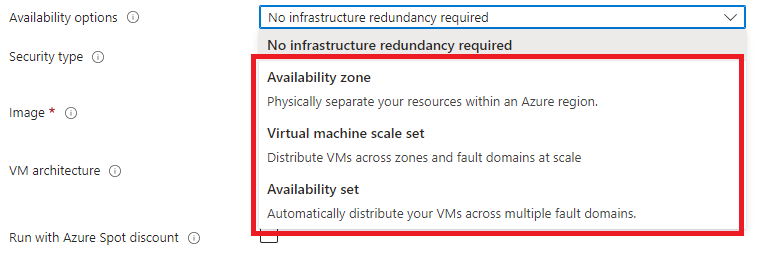
iv. Leave security type at "Trusted launch virtual machines"

v. Image: Select "Windows 11 pro" as the operating system image for your VM.
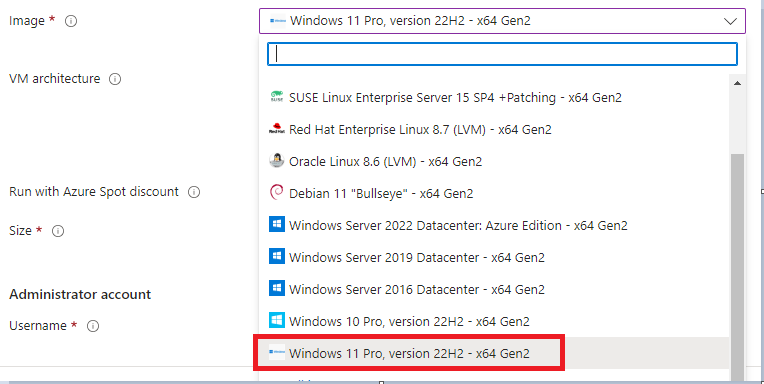
leave VM Architecture, Spot discount and Size at default. However, you can select the "See all sizes" to increase or decrease your compute power as need be.

c. Administrator account: select a suitable username and password to login to your Windows 11 VM. leave every other information as shown below, allow RDP (3389) port to allow remote desktop protocol access to the VM, also select/check the License confirmation box, click "Next: Disk"
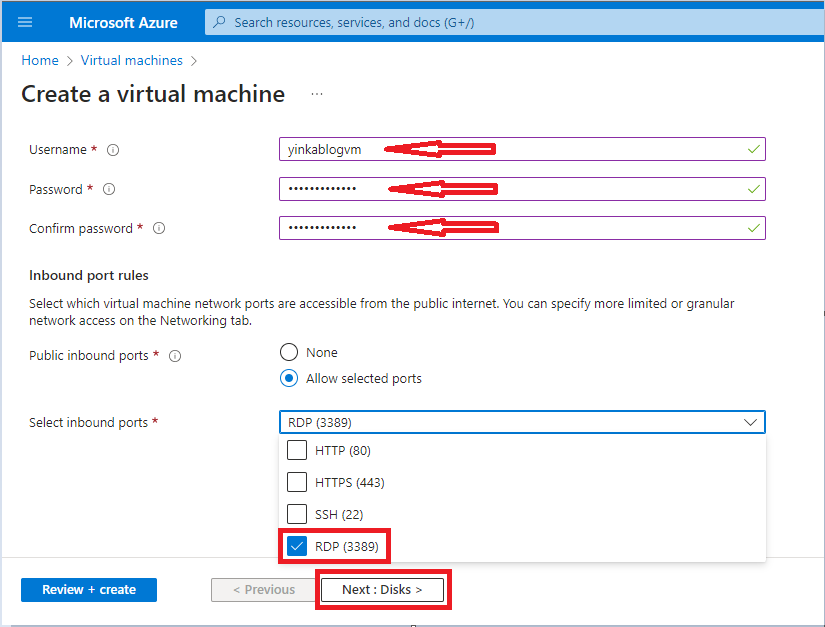
Size Tab:
a. Choose a VM Size: Azure offers various VM sizes with different configurations. Select the one that meets the performance and resource requirements for your Windows 11 VM. Leave every other settings under network as it is
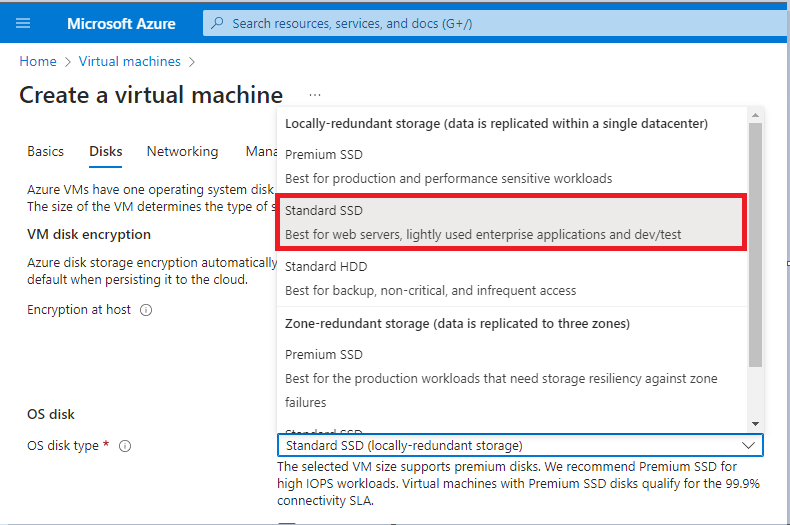
scroll up, skip Networking, Management, Monitoring and Advance to the "Tag" tab as shown below.
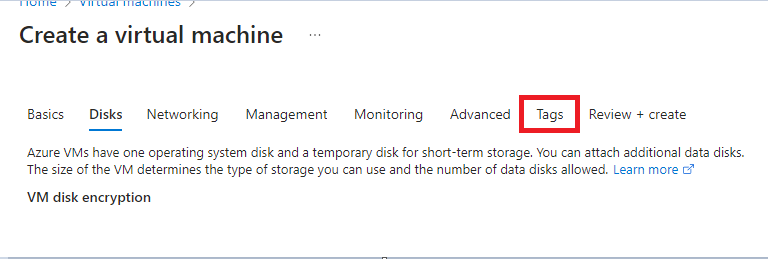
- Tags Tab:
Tag your VM
In cloud computing environments, tags serve as labels for resources, aiding in their organization and classification. These tags act as metadata, supplying valuable information to manage, organize, and monitor resources effectively within the cloud infrastructure.
set your tag name and value

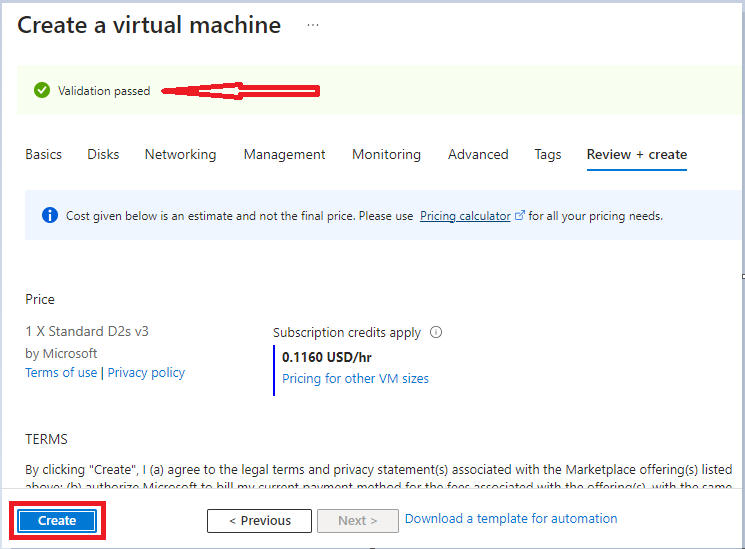
Click on "Review + create"

Once validation is passed, click on create
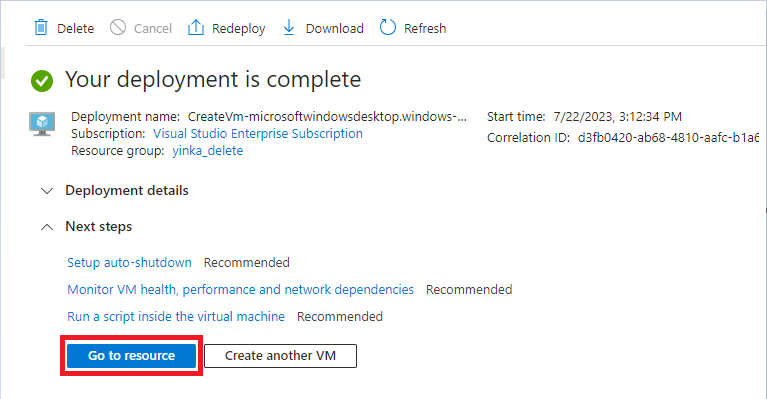
Once your deployment is complete click on "Go to resources"
CONNECT TO YOUR VM USING REMOTE DESKTOP PROTOCOL
Once you have deployed your Windows 11 Virtual Machine in Azure, the next step is to connect to the VM using Azure's tools. Azure provides multiple methods to connect to a VM, depending on your operating system and preferences. Here's a detailed explanation of how to connect to your VM using the Remote Desktop Protocol (RDP):
Option 1: Connect using Azure Portal (Web-based)
a. From the VM Overview page, click on the "Connect" button at the top.
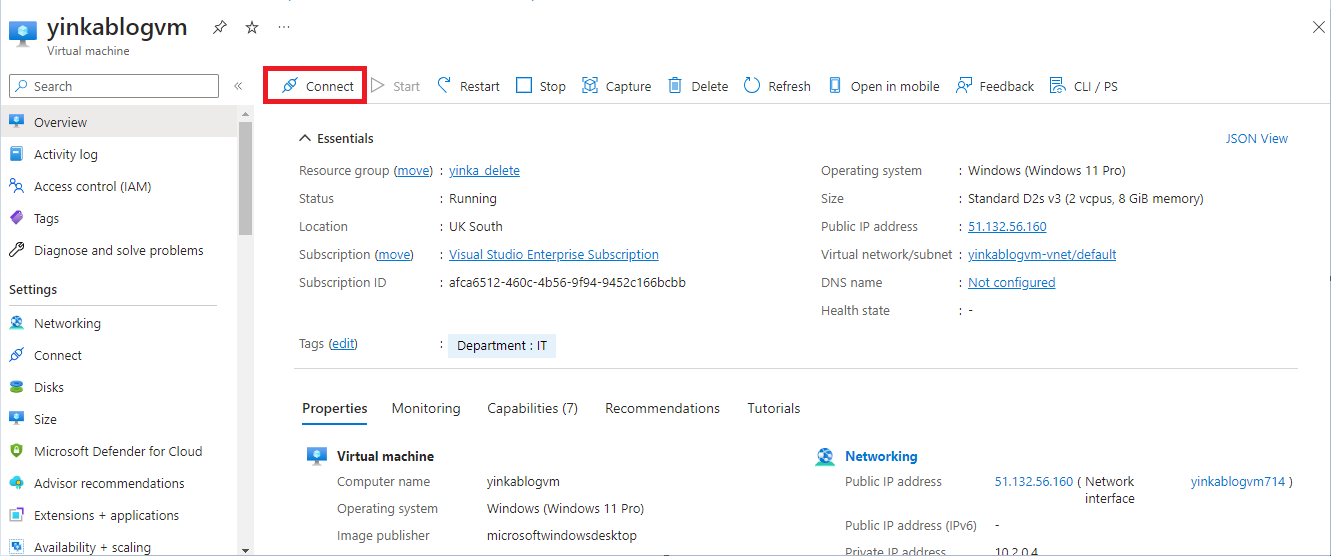
b. Select "RDP" (Remote Desktop Protocol) as the connection method (Windows VMs).
If prompted, download the RDP file (for Windows VMs) to your local machine.
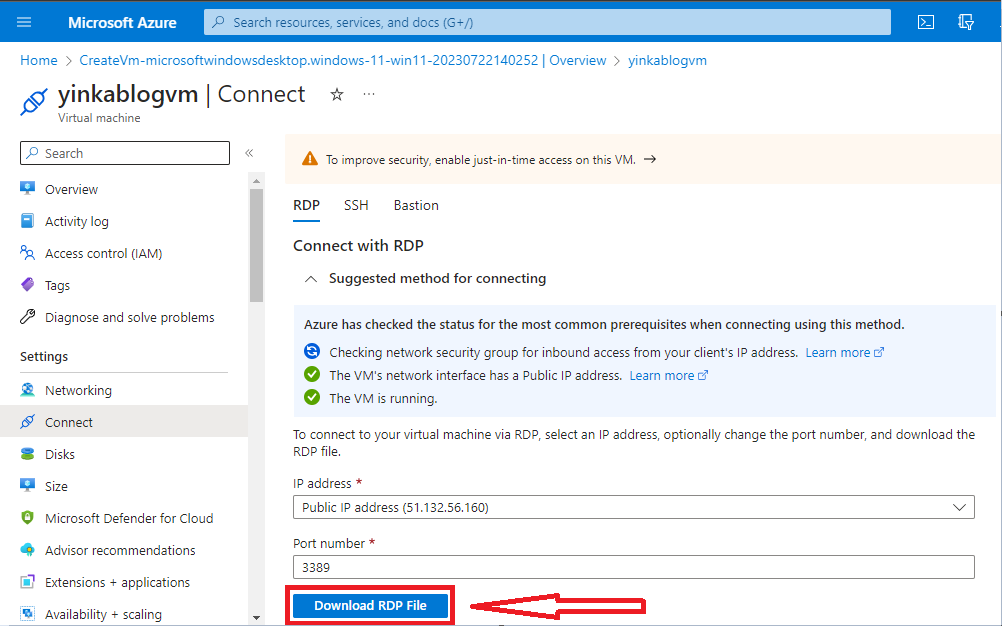
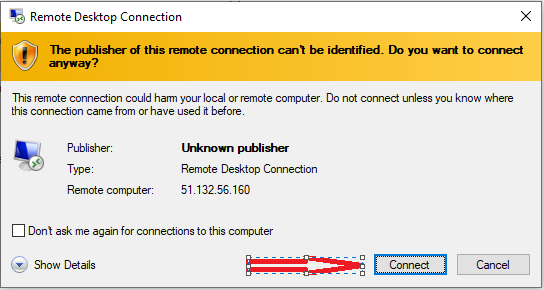
Open the downloaded RDP file (for Windows VMs) using a Remote Desktop client
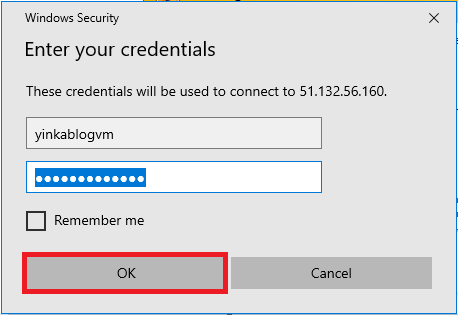
Enter the login credentials you provided during the VM deployment process and click OK
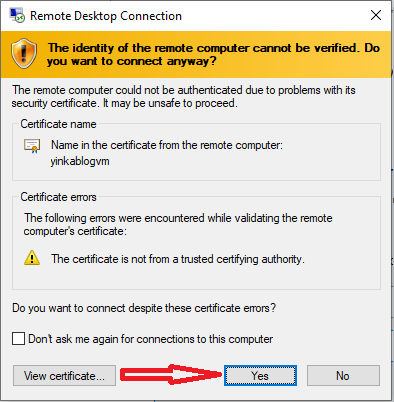
Click Yes below
Setup you Windows 11 profile
Congratulations! Your windows 11 pro is ready.
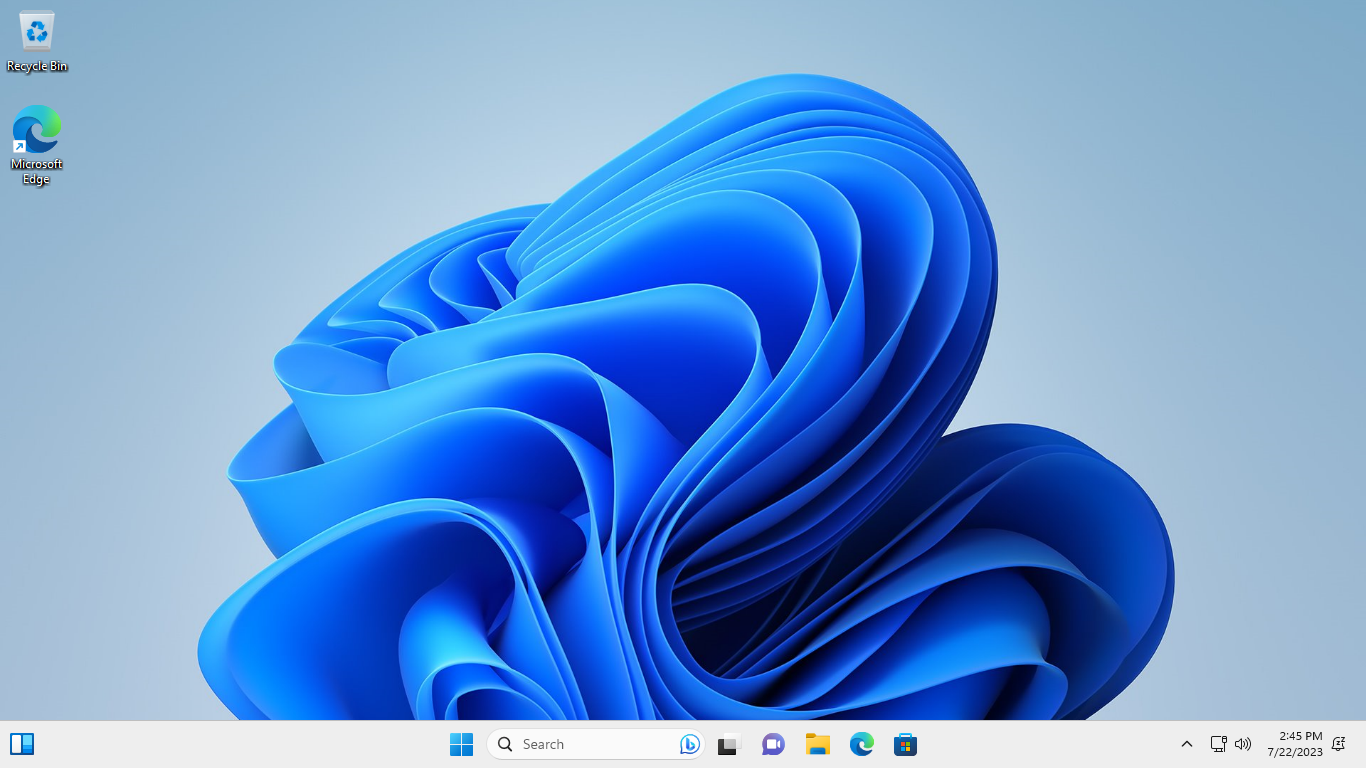
Feel free to install software, store data, files and folders and make use of it just like your regular computer.
- CONCLUSION
Setting up a Windows 11 Virtual Machine in Azure opens up a world of possibilities for harnessing the benefits of cloud computing. Azure's seamless integration, scalability, security, and on-demand accessibility make it an ideal platform to deploy and manage your Windows 11 VM. By following the step-by-step guide, you can create a resourceful VM, customize it to your needs, and connect to it using Azure's RDP. Embrace the efficiency and flexibility of cloud-based computing, and enjoy the full potential of Windows 11 without the constraints of physical hardware.
Subscribe to my newsletter
Read articles from Lawal Azeez directly inside your inbox. Subscribe to the newsletter, and don't miss out.
Written by

Lawal Azeez
Lawal Azeez
I am a cloud administrator, simply documenting my cloud computing journey.