How to Create a Let's Encrypt Wildcard Certificate for Cockpit in 2 min
 Joel KOUSSAWO
Cockpit is a powerful web-based host management tool that allows you to monitor and administer Linux servers through a user-friendly interface. To secure communications between your browser and Cockpit, using an SSL/TLS certificate is essential. In this article, we will guide you step-by-step on how to create a Let's Encrypt Wildcard certificate, which will secure Cockpit and all its subdomains with a single configuration.
Step 1: Install the Let's Encrypt Certbot Tool
The Certbot tool is used to generate Let's Encrypt certificates. Here's how you can install it on a RedHat-based system:
sudo dnf update -y
sudo dnf install epel-release -y
sudo dnf install certbot -y
Step 2: Generate the Wildcard Certificate
Make sure to replace "joelkoussawo.me" with your domain. To generate a Let's Encrypt Wildcard certificate, use the following command:
sudo certbot certonly --manual --preferred-challenges=dns --email admin@joelkoussawo.me --server https://acme-v02.api.letsencrypt.org/directory --agree-tos -d *.joelkoussawo.me
Explanation of Certbot options used:
certonly: Request or renew certificate without installing it--manual: Obtaining certificates manually--preferred-challenges=dns: Use DNS to authenticate as the domain owner--server: Server URL to use for certificate generation--agree-tos: Agree with the terms and conditions of the ACME server-d: Specify the domain for which the certificate is to be created
After running Certbot, you will be prompted to create specific DNS records to confirm your ownership of the domain. Follow the instructions provided by Certbot to add these records to your DNS service. Once added, wait a few minutes for the changes to propagate through the DNS servers and for the validation to succeed. This validation step is crucial for Let's Encrypt to issue the SSL/TLS certificate for your domain, ensuring the security and confidentiality of communications on your website or web application.
Once verified, the certificates will be generated and can be accessed from the following path:
/etc/letsencrypt/live/joelkoussawo.me/
Step 3: Configure Cockpit to Use the New Certificate
By default, Cockpit uses the latest file with an extension .cert or .crt loaded in the directory /etc/cockpit/ws-certs.d/. You only need to copy the certificate files into /etc/cockpit/ws-certs.d/, modifying the extensions as follows:
cp /etc/letsencrypt/live/joelkoussawo.me/fullchain.pem /etc/cockpit/ws-certs.d/wildcart.joelkoussawo.me.cert
cp /etc/letsencrypt/live/joelkoussawo.me/privkey.pem /etc/cockpit/ws-certs.d/wildcart.joelkoussawo.me.key
You can verify the certificate through Cockpit using this command:
sudo /usr/libexec/cockpit-certificate-ensure --check
Restart the service
systemctl restart cockpit.service
Congratulations! You have now created a Let's Encrypt Wildcard certificate for Cockpit, securing both Cockpit and any other subdomains you may have with a single certificate.
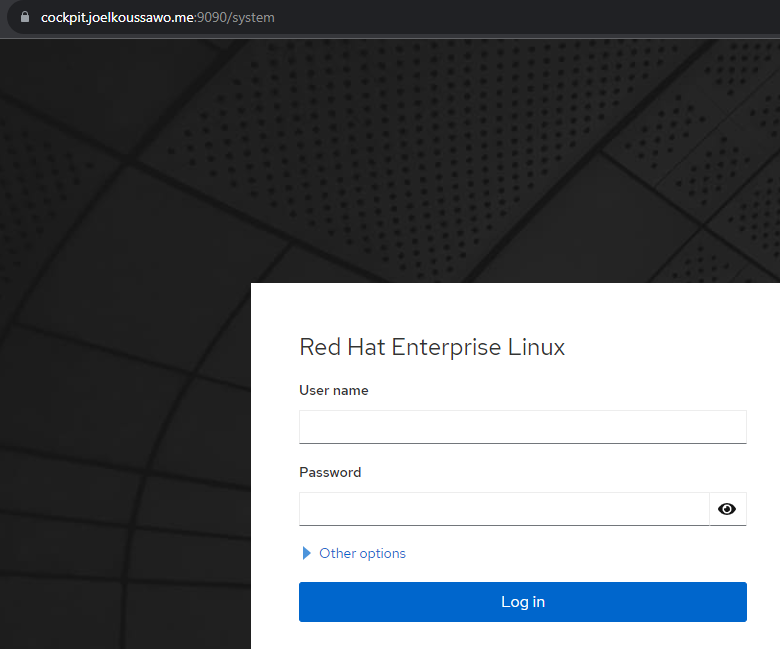
Connect to cockpit from your preferred browser:

The padlock means the connection is secure.
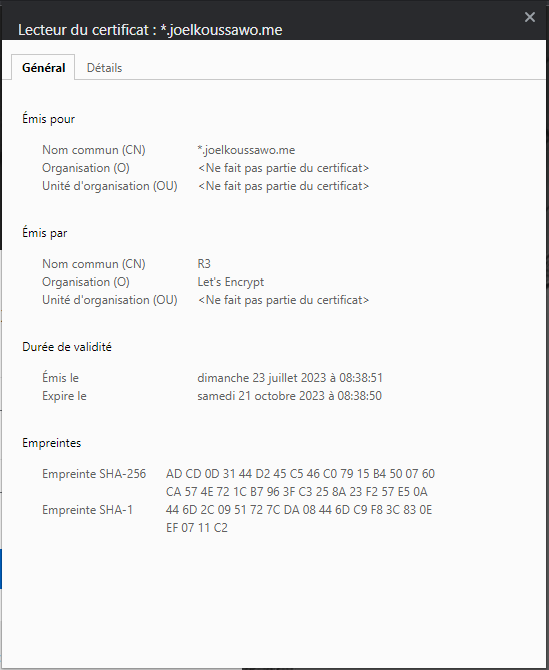
Let's check the associated certificate information.

The wildcard certificate is used.
Subscribe to my newsletter
Read articles from Joel KOUSSAWO directly inside your inbox. Subscribe to the newsletter, and don't miss out.
Written by

Joel KOUSSAWO
Joel KOUSSAWO
{ SysOps / Devops / Cloud / SysAdmin } Consultant | 3x Certified RedHat | Ansible Certified | Terraform Certified | CKA | AWS SAA Certified