Add Jenkins slave nodes Step by step guide.
 utkarsh srivastava
Introduction
Jenkins is an open-source automation server that helps in automating various tasks related to building, testing, and deploying software. One of its key features is the ability to distribute workloads across multiple machines using the "Master-Slave" architecture, also known as the "Controller-Agent" architecture.
The Jenkins Master-Slave architecture is designed to improve the scalability and efficiency of the Jenkins server by enabling it to handle a larger number of projects and builds simultaneously. Here's a brief introduction to the concept:
Jenkins Master: The Jenkins Master is the central server that manages the entire Jenkins environment. It handles the scheduling of jobs, manages the configuration, and stores the build artefacts and logs. The Master is responsible for coordinating the distribution of work among the available Jenkins Slaves. It provides a web-based user interface that allows users to configure Jenkins, create and manage jobs, and monitor the overall build status.
Jenkins Slave: A "slave" (also known as a "node" or "agent") is a separate computing machine that connects to the Jenkins master server to offload and execute tasks assigned by the master. environments, and configurations, allowing you to run builds on various platforms.
Working Together: When a build job is triggered on the Jenkins Master, it assesses the workload and decides which Slave is best suited to handle the job based on the configured criteria (such as labels or capabilities). The Master then delegates the build task to the selected Slave. The Slave will execute the build steps on its environment and report the results back to the Master once it completes the job.
Use Cases:
Parallel Builds: Running multiple builds concurrently on different Slaves to speed up the build process.
Distributed Testing: Executing tests on multiple environments simultaneously to improve test coverage.
Platform Diversity: Building and testing projects on various operating systems or hardware configurations.
Prepare Slave nodes
Before adding a slave node to the Jenkins master we need to prepare the node. We need to install Java on the slave node. Jenkins will install a client program on the slave node. To run the client program we need to install the same Java version we used to install on Jenkins master. According to your production environment, you need to install and configure the necessary tool in the slave node.
Install OpenJDK 8 on the slave node,
# sudo yum install -y java-1.8.0-openjdk
Configure ssh connectivity to the slave node from master
Log in to the Jenkins master node and create an ssh key pair. Use the below command to create the key-pair
# ssh-keygen # cat .ssh/id_rsa.pub
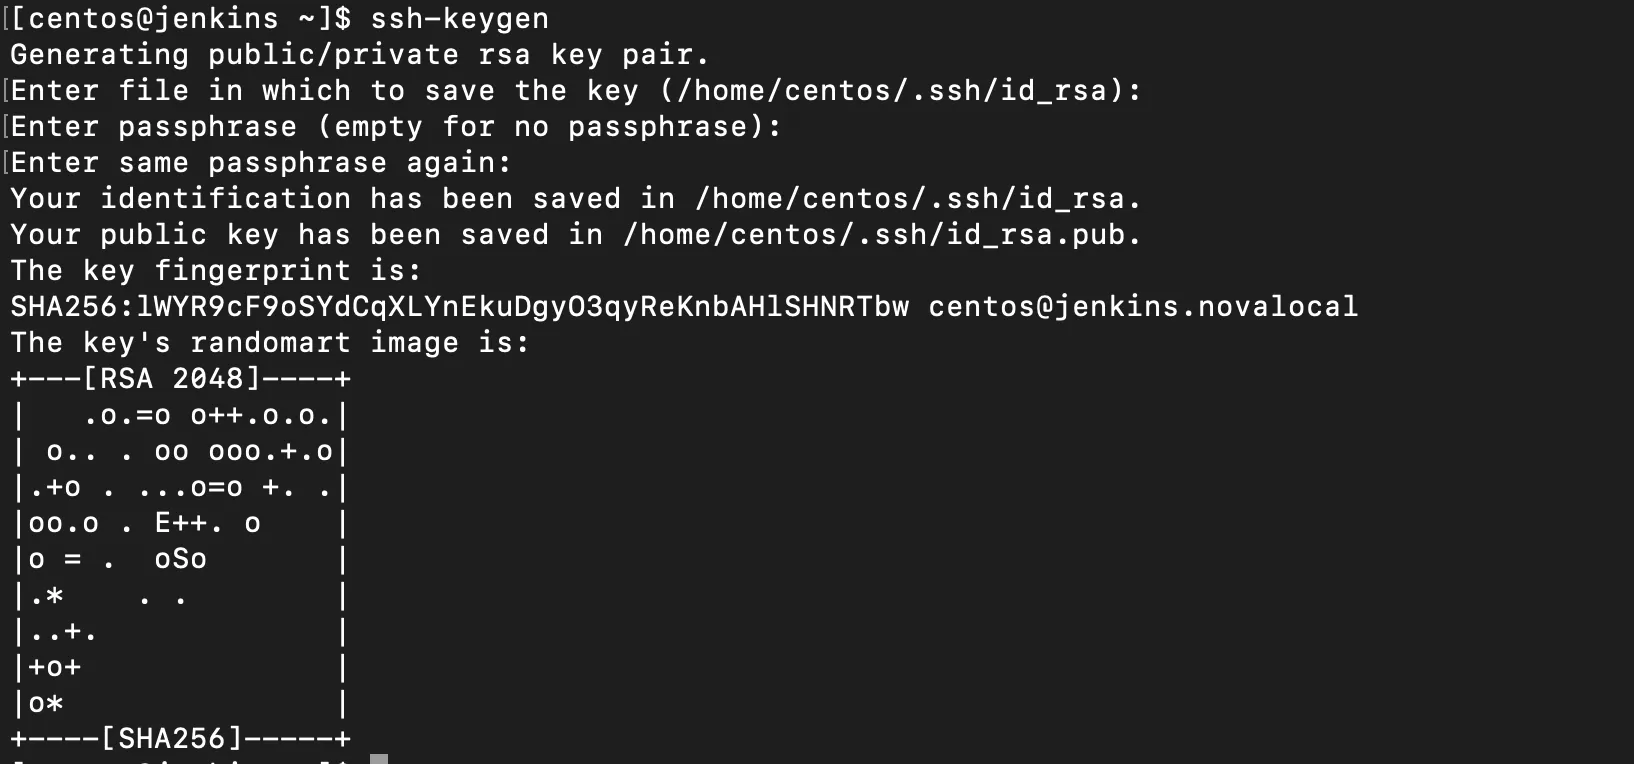
Copy the content and log in to the slave node. Add the copied content to authorized_keys.
# vim .ssh/authorized_keys
From the master ssh to the slave node. It will ask to accept the ssh fingerprint, type yes and enter. If you haven’t done anything wrong you should be able to ssh into the slave node.
TIP:- Switch to Jenkins user (command:- su jenkins)Try to Ping or Telnet the slave IP on port 22 from Jenkins master.
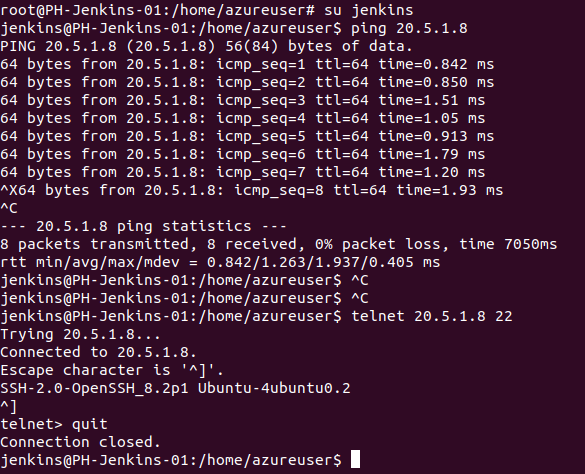
Adding the slave node to the master
Log in to the Jenkins console via the browser and click on "Manage Jenkins" and scroll down to the bottom. From the list click on "Manage Nodes". In the new window click on "New Node".
Give a name to the node, select "Permanent Agent" and click on OK

In the remote root directory field enter a path in the slave node. Note that the ssh user must have read/write access to this directory path. Here I use the ssh user's home directory.
Enter the slave nodes' IP address in the field.
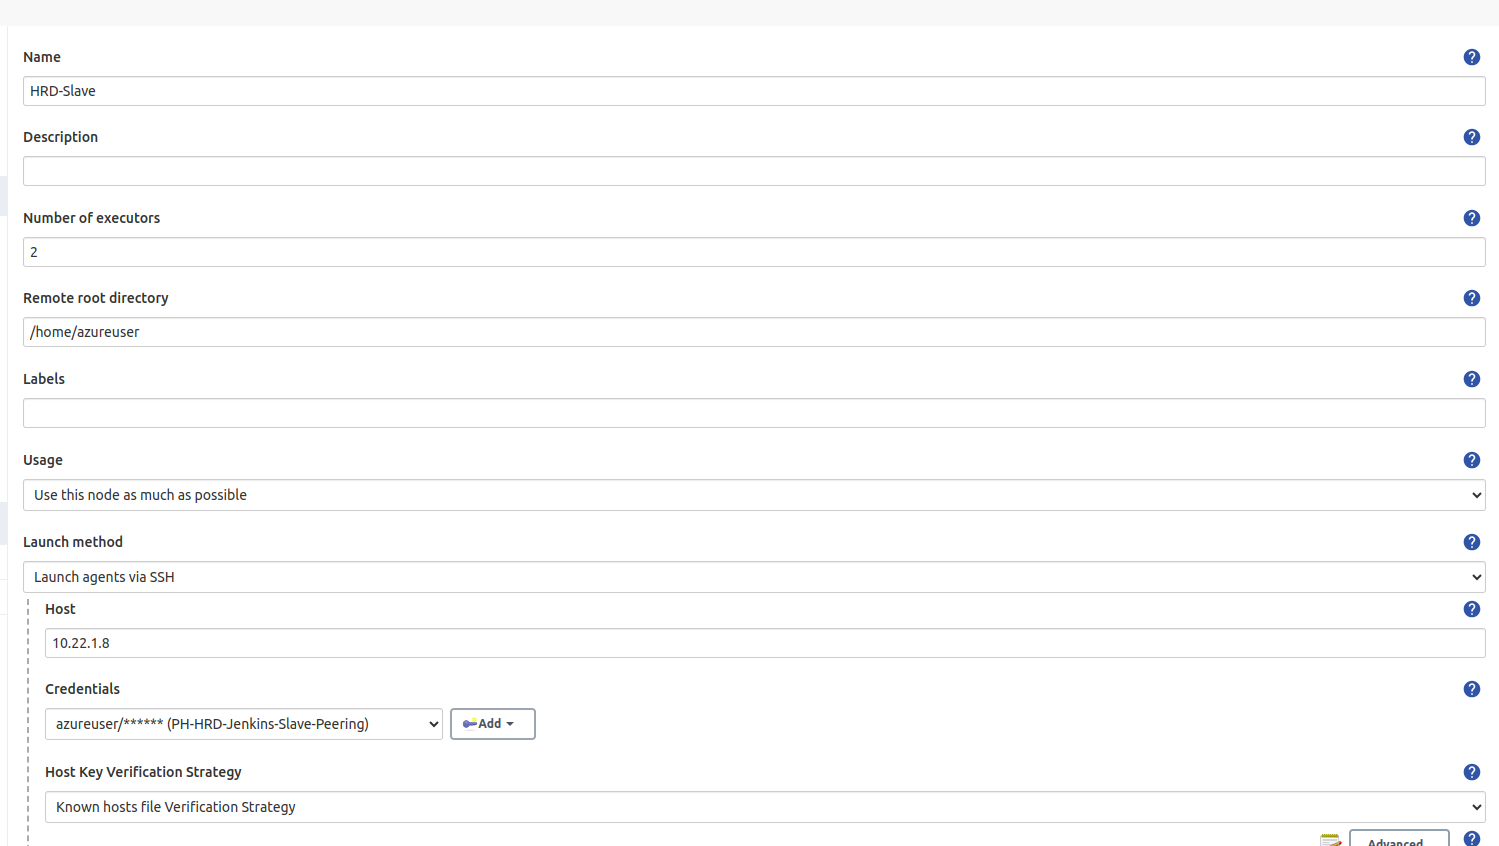
Click on the Advance option Button below the Host Key verification text area.

provide Port number and java path the same as in Salve.
TIP:- log in slave switch to Jenkins user (command:- su jenkins) and use this command to check javaPath (command:- which java).

Click on the "Add" button near the credentials field. Jenkins will pop up a new window to add credentials. Select the kind as "SSH Username with private key" or "Username With Password" from the drop-down. Enter the user name of the slave node. In the private key field add the Jenkins masters private key. You can find the private key with the below command,
# cat /home/centos/.ssh/id_rsa
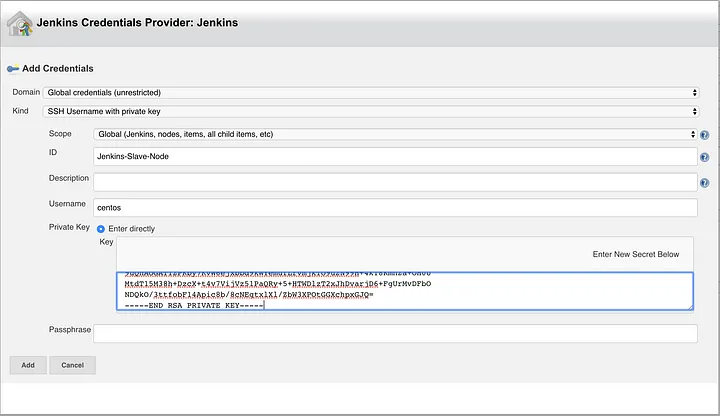
As my slave server is password Protected so I have used Username With Password.
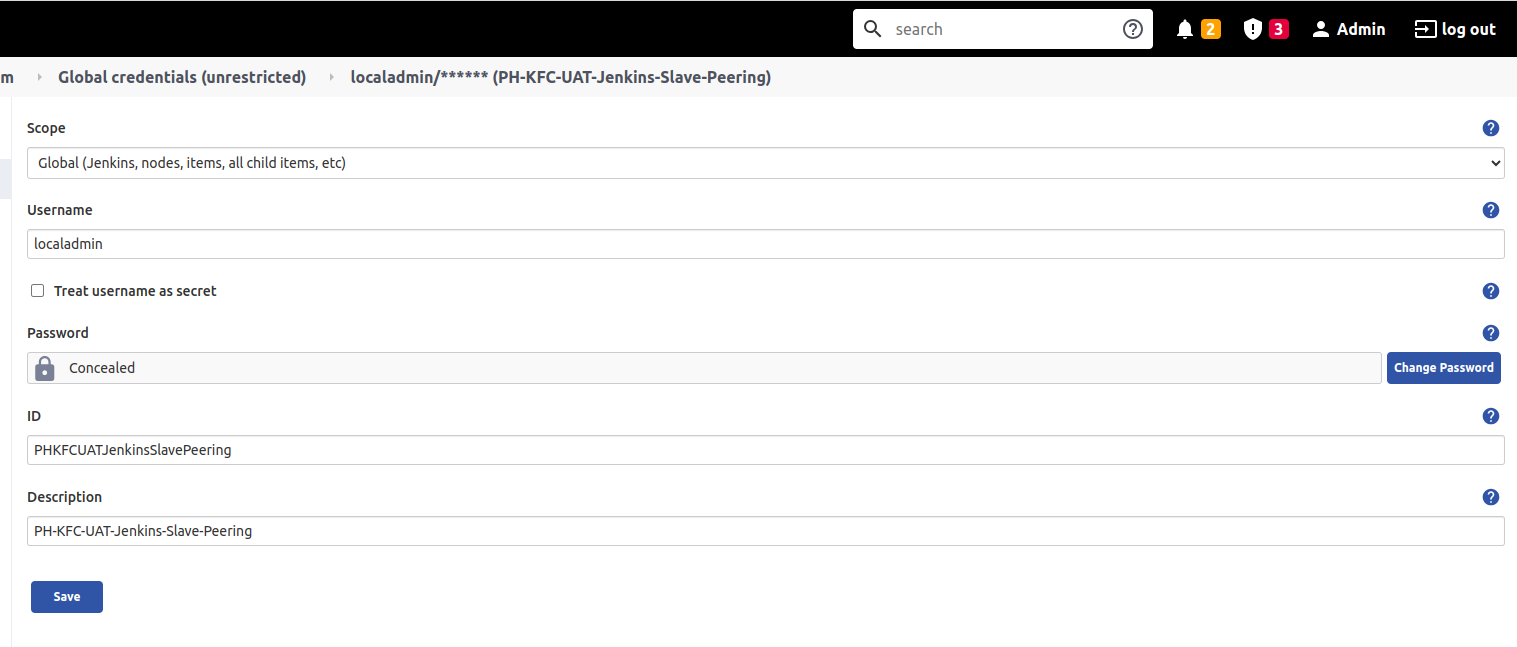
Click on Add and select the credentials we created from the drop-down. Click on save. If you did all the correct slave nodes will come to a live state within a few seconds.
I have created 3 slaves by following the above steps as shown in the image below.

Troubleshooting
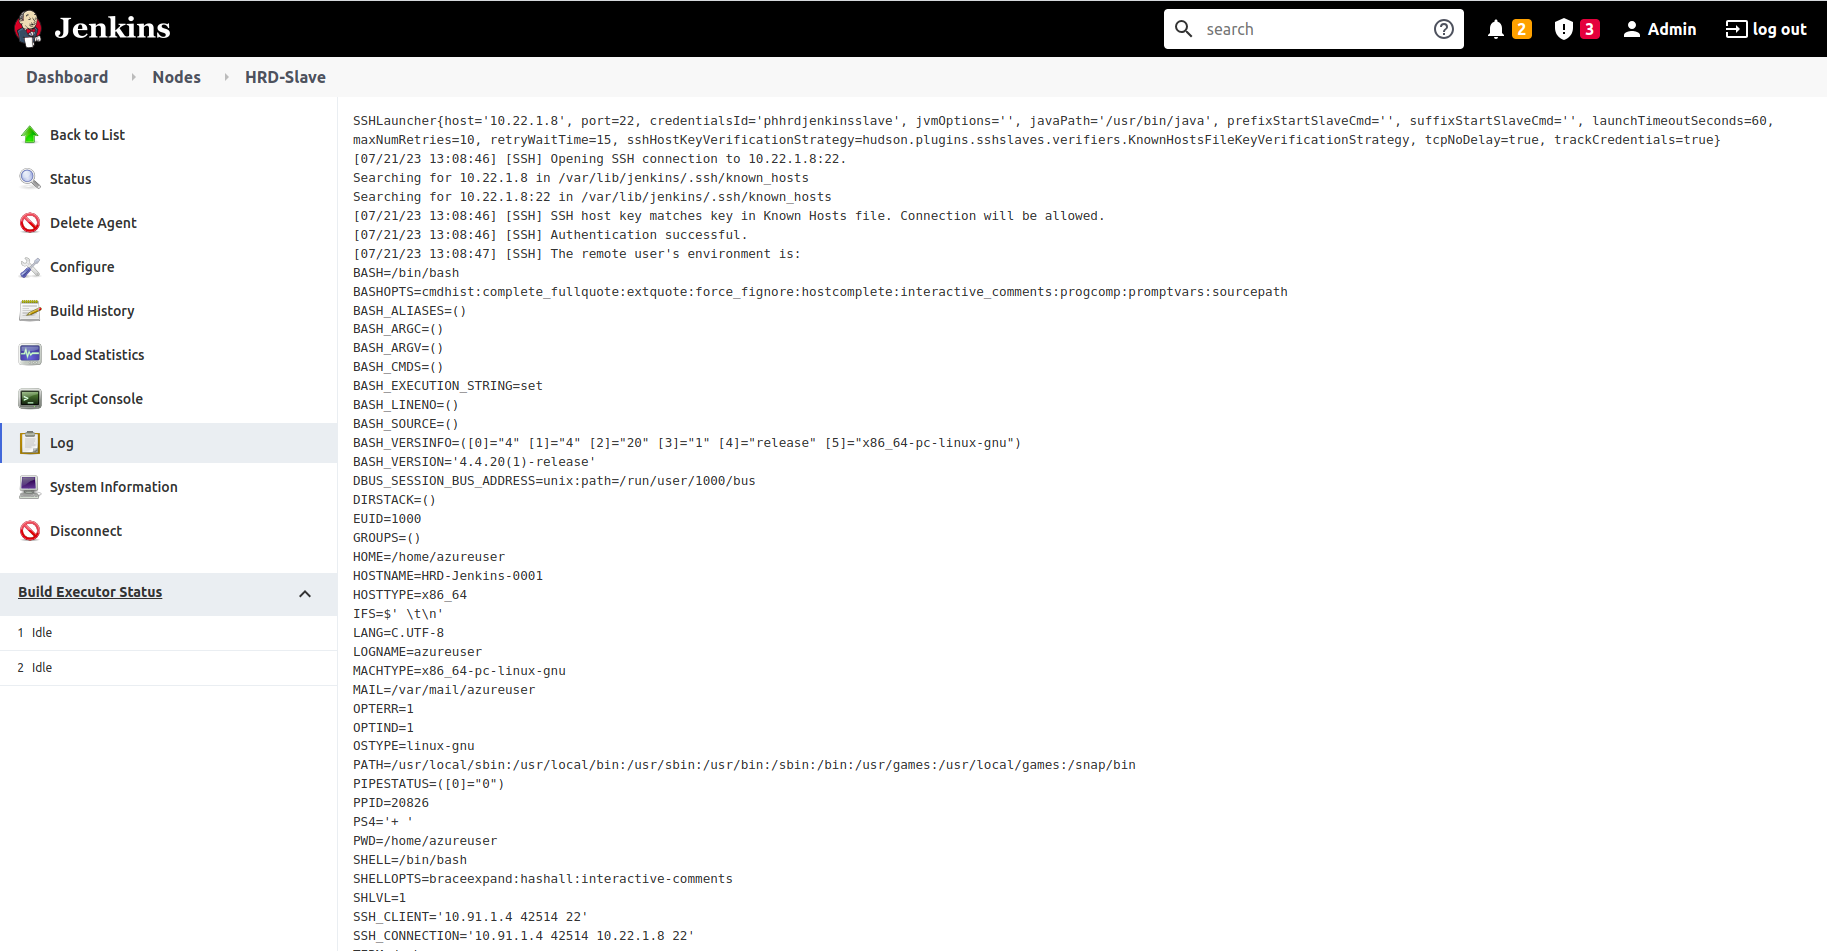
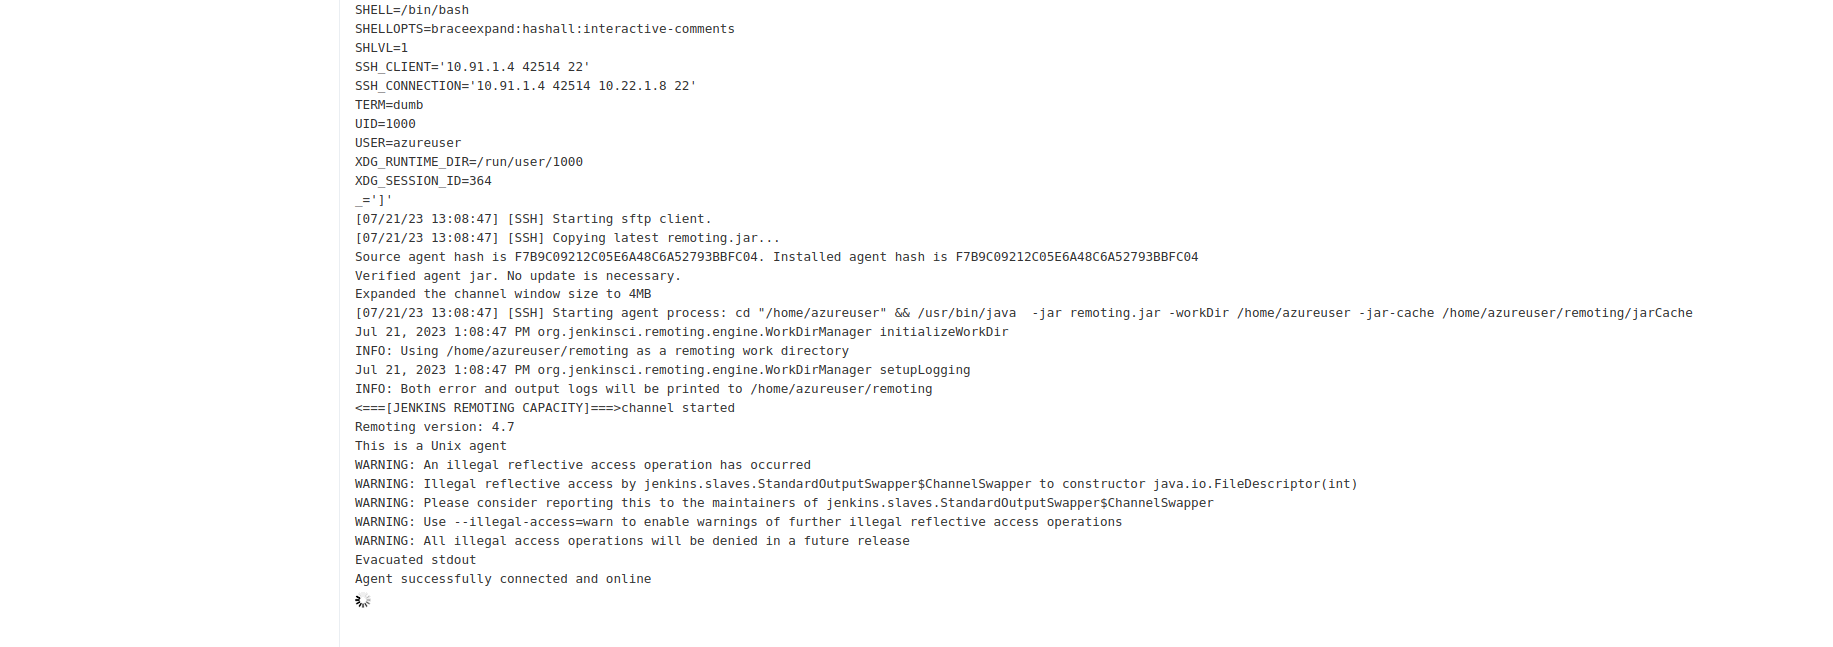
You can click on the slave node and from there you can view the log. Fix any error shown in the log.
Conclusion
Hence, we successfully connected Jenkins slave to our master. now we can schedule builds on Jenkins slave. thanks!
feel free to ask queries related to this topic. I will be happy to help you.
connect with me:- @utkarshsri0701@gmail.com / serv-ar-tistry Studio
Subscribe to my newsletter
Read articles from utkarsh srivastava directly inside your inbox. Subscribe to the newsletter, and don't miss out.
Written by

utkarsh srivastava
utkarsh srivastava
A seasoned IT professional with over 10 years of experience, crafting innovative solutions at serv-ar-tistry Studio. I am a passionate leader with a proven track record of success in the cloud, infrastructure, and DevOps space. After gaining extensive experience working for various multinational corporations across diverse industries, I took the leap to pursue my entrepreneurial dream and founded serv-ar-tistry Studio. At serv-ar-tistry Studio, we are dedicated to empowering businesses with cutting-edge cloud infrastructure and DevOps solutions. Our team of skilled professionals leverages their expertise to deliver: Scalable and secure cloud solutions: We help businesses migrate and optimize their infrastructure on leading cloud platforms, ensuring efficient resource utilization and cost-effectiveness. Robust infrastructure management: We design, implement, and manage robust infrastructure solutions that are reliable, secure, and adaptable to evolving business needs. Streamlined DevOps workflows: We automate and optimize development and deployment processes, enabling businesses to deliver software faster and with higher quality.