A Step-by-Step Guide to Building an AWS CI/CD Pipeline with CodeCommit, CodeBuild,CodeDeploy,S3, CodePipeline
 Monu batham
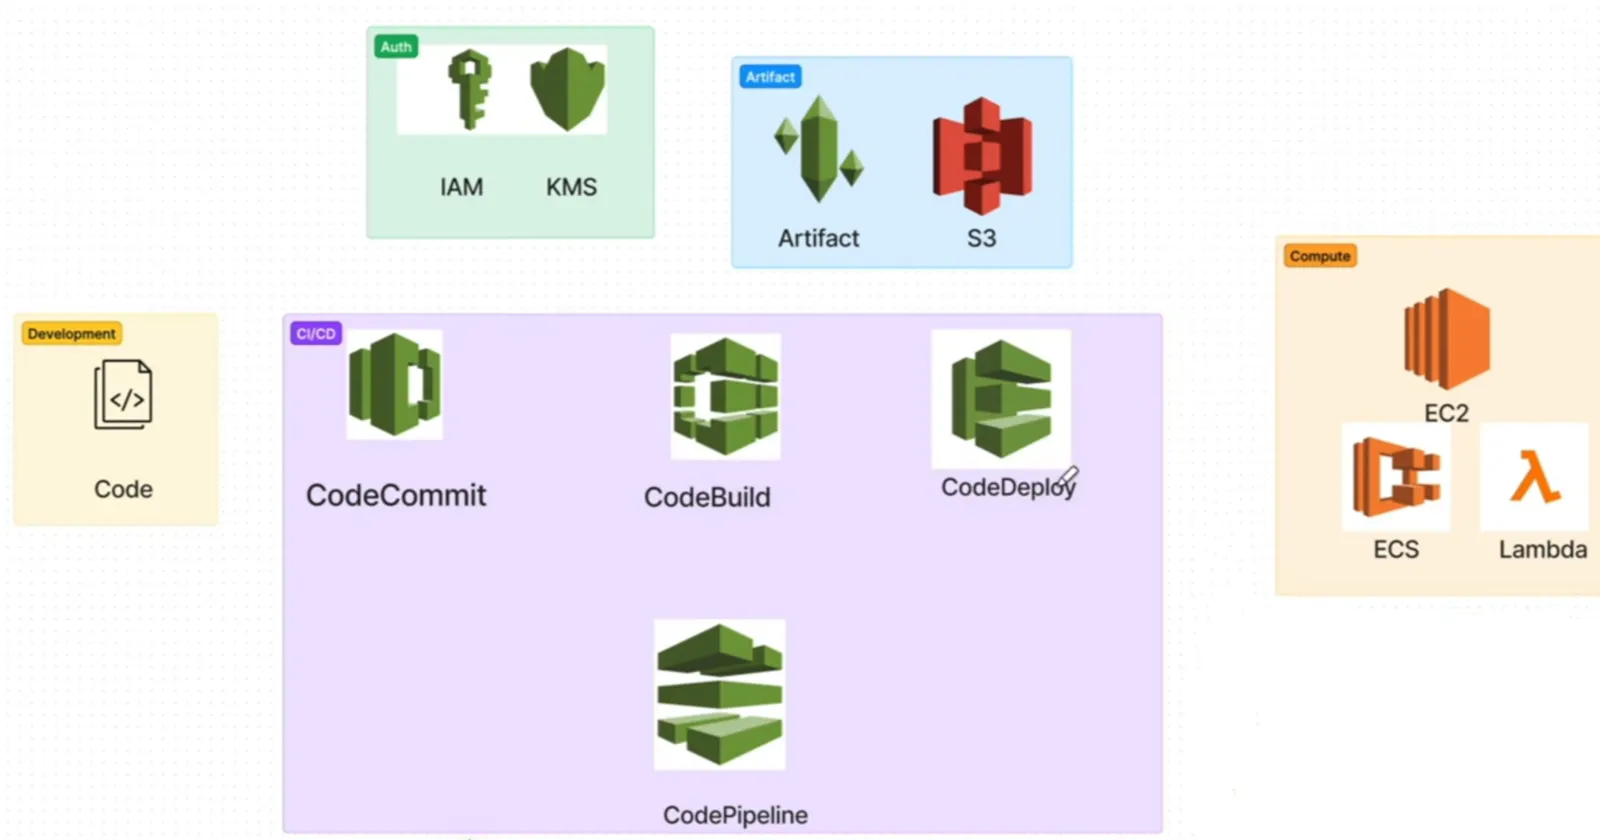
Let us know about AWS Code........ :

AWS CodeCommit : is a managed Git repository service that allows companies to securely host and manage their codebase. With built-in features like code reviews, pull requests, and seamless integration with other AWS services, it provides a reliable and collaborative environment for developers to version control their code.
AWS CodeBuild : is a fully-managed continuous integration service that automates the build process. Developers can compile, test, and package their code with ease, leading to faster software delivery cycles and reduced manual errors. The service scales effortlessly, ensuring efficient handling of varying workloads.
AWS CodeDeploy : streamlines application deployment by automating the process and supporting various deployment strategies. With controlled updates and minimal downtime, CodeDeploy ensures high availability of applications across multiple environments, both on-premises and in the cloud.
AWS CodePipeline : is a managed CI/CD service that enables developers to create customizable pipelines for building, testing, and deploying code changes. It orchestrates the entire release process, from source code changes to deployment, providing faster software delivery, increased collaboration, and consistent deployments through seamless integration with AWS services.
Step - 1 :
To set up a code repository on CodeCommit and clone it on your local.
Login to AWS account by using valid credentials. Search “CodeCommit” from the search box and click on it. Click on “Create repository”.

Now you can fill in the repo name description and create the repository

As you can see the repository is successfully created but me being a root user I cannot do ssh so to sort this out I will be creating an AMI user account and providing some permissions
For that, I will be going to the Services section in the AWS Management Console and searching for IAM
IAM( Identity and Access Management)
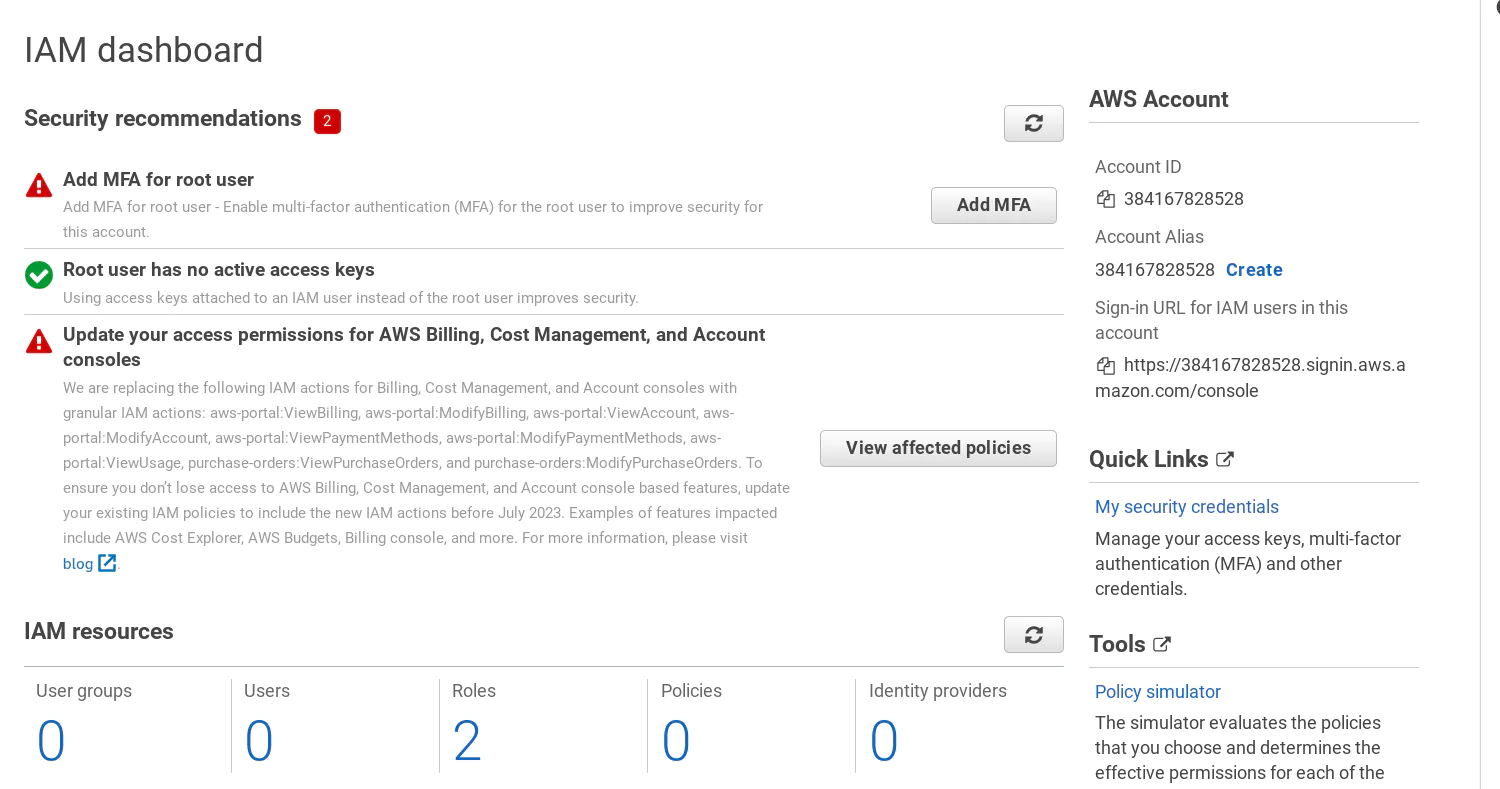
Now I have created the AMI user using my requirements as follows

I have given the Console password as the Autogenerated password and made it visible and created my AMI user

The above are my HTTP Git credentials where I have generated credentials which will be used to check in as an IAM
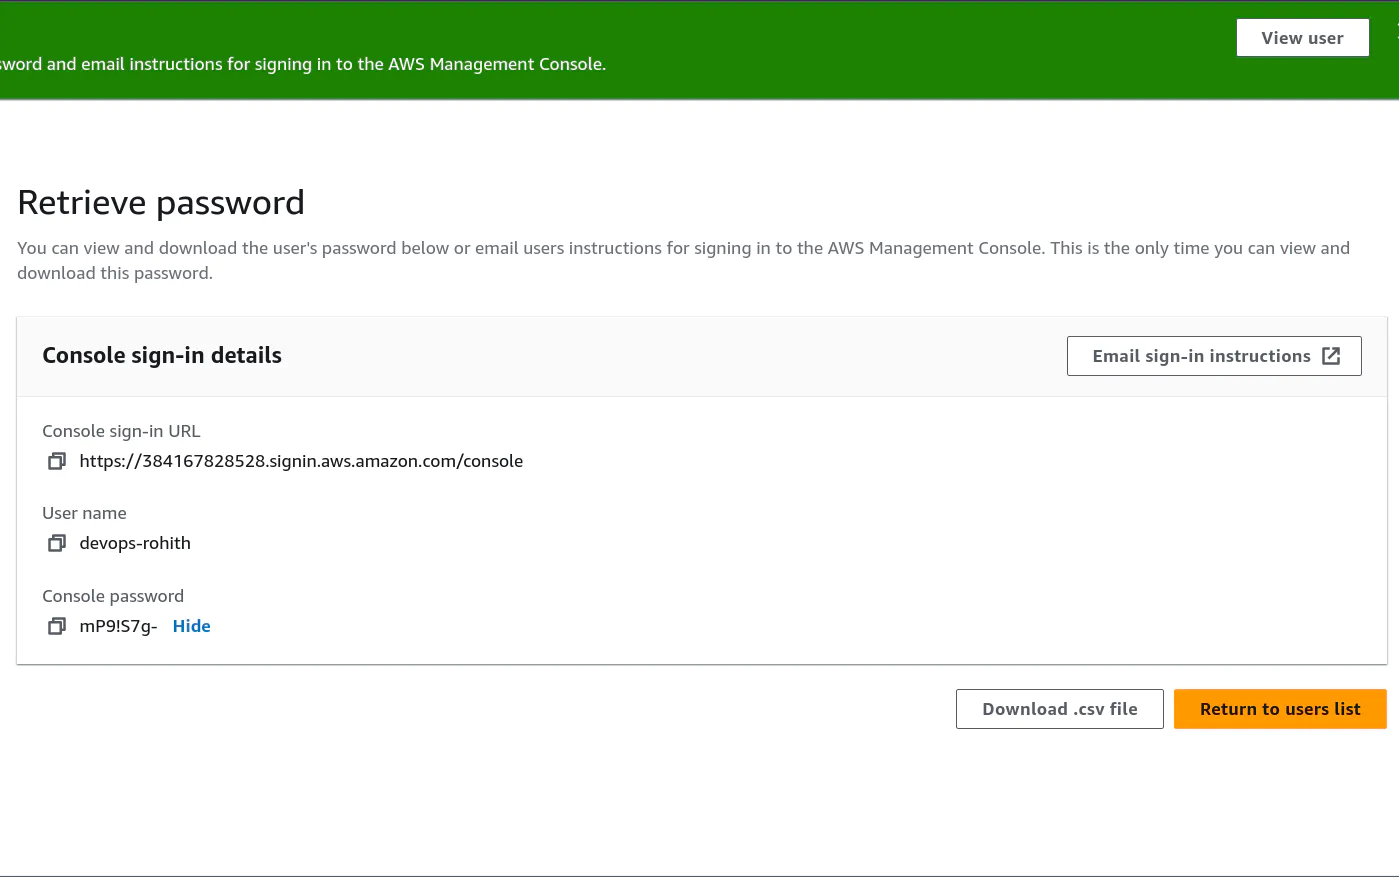
I have downloaded the .csv and saved it in my local , which I am going to use while performing ssh using the clone URL

I have copied the URL and Clicked on the third icon from the left in VS Code. On top, 3 dots will appear. Click on three dots. The “Remote” option will come. Under that “Add Remote” will be visible and click on it
Enter cloned repository URL.

Enter the username from the file which you downloaded earlier.

Enter the password from the file which you downloaded earlier. Click on the “Enter” button from your keyboard.

Click on “Add permissions” dropdown and click on “Add permissions”.
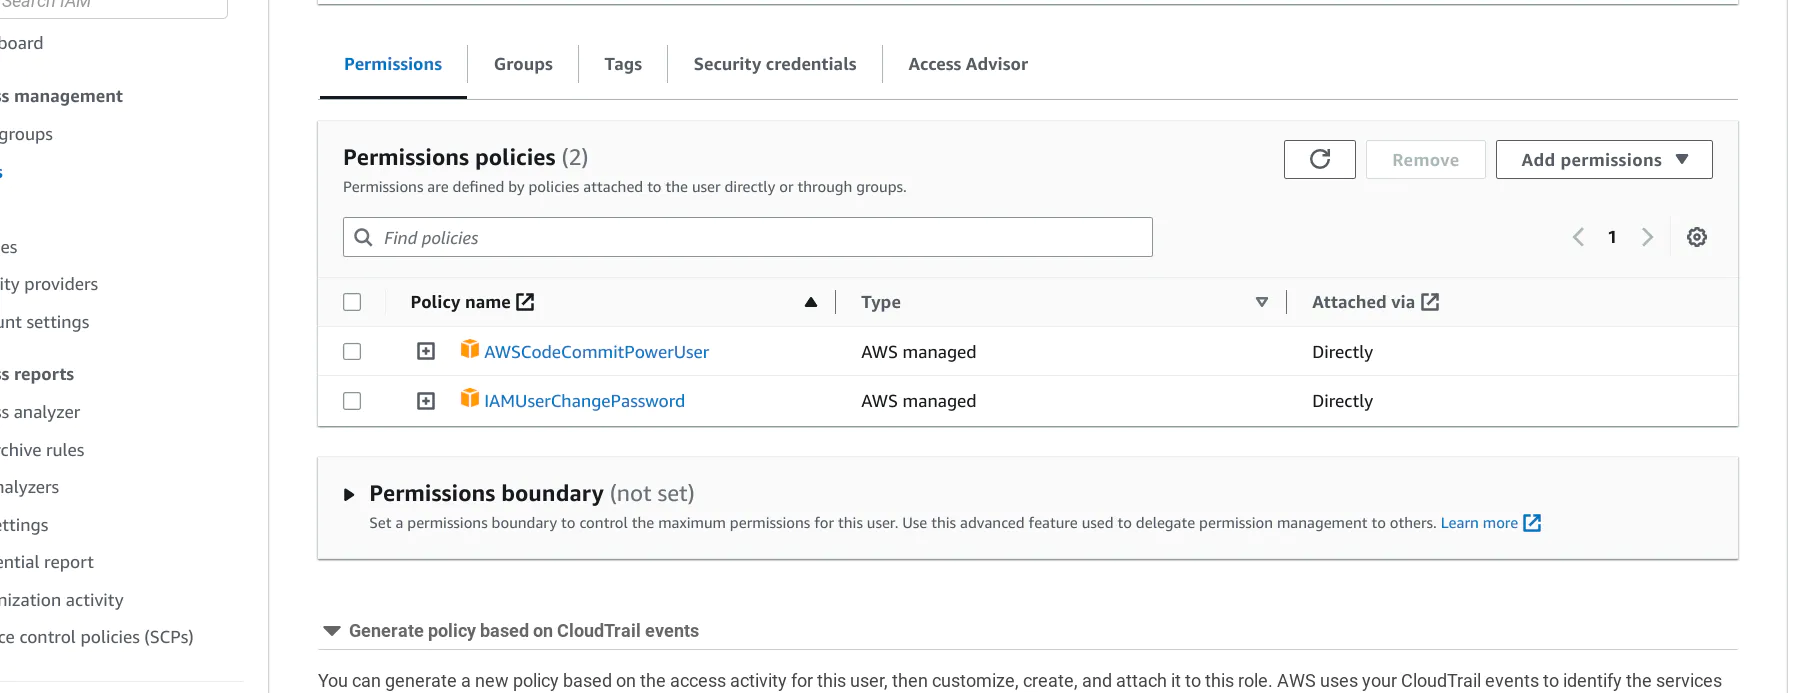
Click on “Next”.

Click on “Add permissions”.
Your policy will be created and added to your user.

Step - 2 :
Add a new file from local and commit to your local branch.
- Go to your VS Code. Clone your repository from CodeCommit using the command “git clone <repository_url>”. Make a new file “index.html” and write desired code in it as given below in the screenshot.

2. Enter the command “git status”, “git add .”, “git comit -m “<any_message>””.

Push the local changes to the CodeCommit repository.
Enter the command “git push origin master” to push the newly made file locally to the CodeCommit repository.

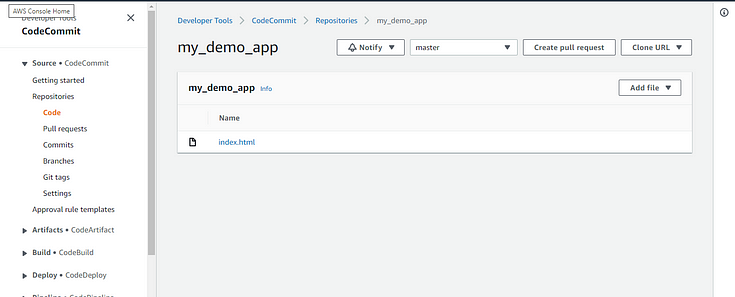
Open CodeCommit. Go to your repository and click on it.
You will be able to see “index.html” file in your repository.
Step - 3 :
Go to CodeBuild in AWS.

2. Enter mandatory details like the Project name.

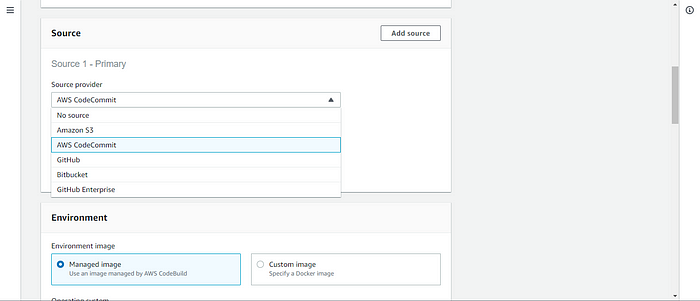
3. Choose “AWS CodeCommit” from the “Source provider” dropdown box
4. Choose the repository which you had already created.

5. Choose a Branch as “master”

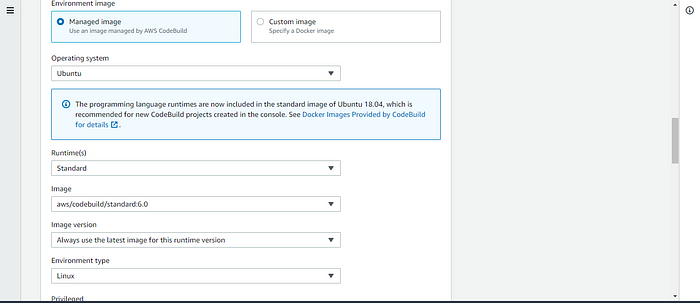
6 . Choose the Operating system “Ubuntu”.

7. Choose Image as the latest one available from the “Image” dropdown.
Select the Use a buildspec file and create one like buildspec.yml

Add buildspec.yml file to CodeCommit Repository and complete the build process.
Go to your VS Code. Make a file with the name “buildspec.yml”. Add configurations to install nginx as given below in the screenshot and save the file.

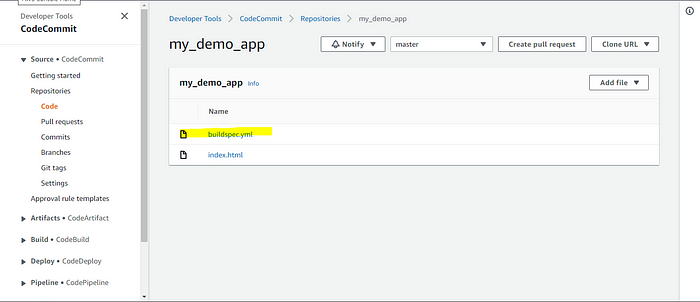
9 . Enter commands: “git add buildspec.yml”, “git commit -m <”any_message”>” and “git push origin master”


The buildspec.yml file will be visible in CodeCommit.
10 . Go back to CodeBuild where you left. Scroll down and click on “Create build project”.
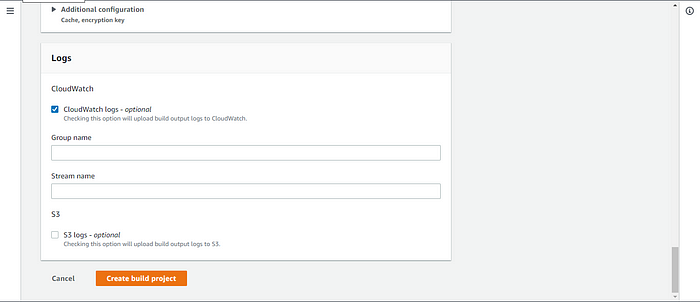
11 . Your project will be created successfully. Click on “Start to build”.

12 . Project will start building.

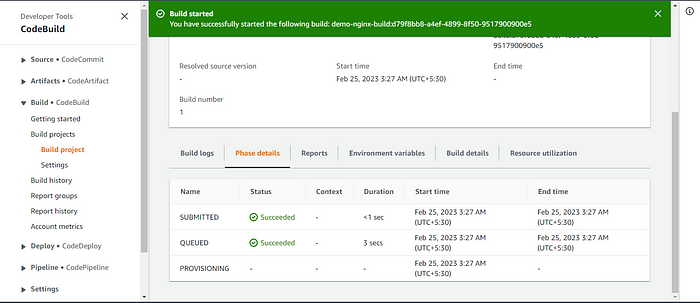
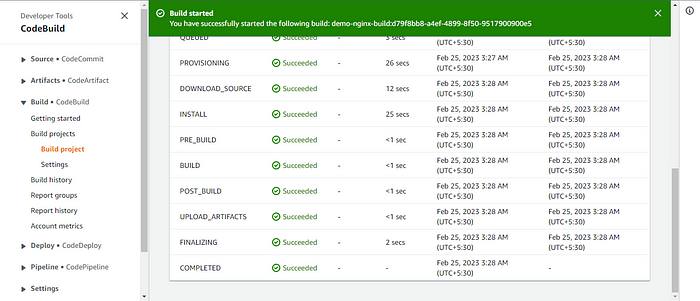
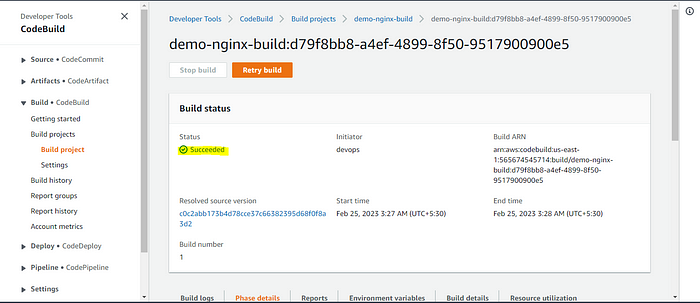
13 . After some time, the project will be built successfully.
Step - 4 :
Go to Developer tools in CodeDeploy and search for applications and then create an application

To deploy an app in multiple servers we need a group called as deployment group so we will create it
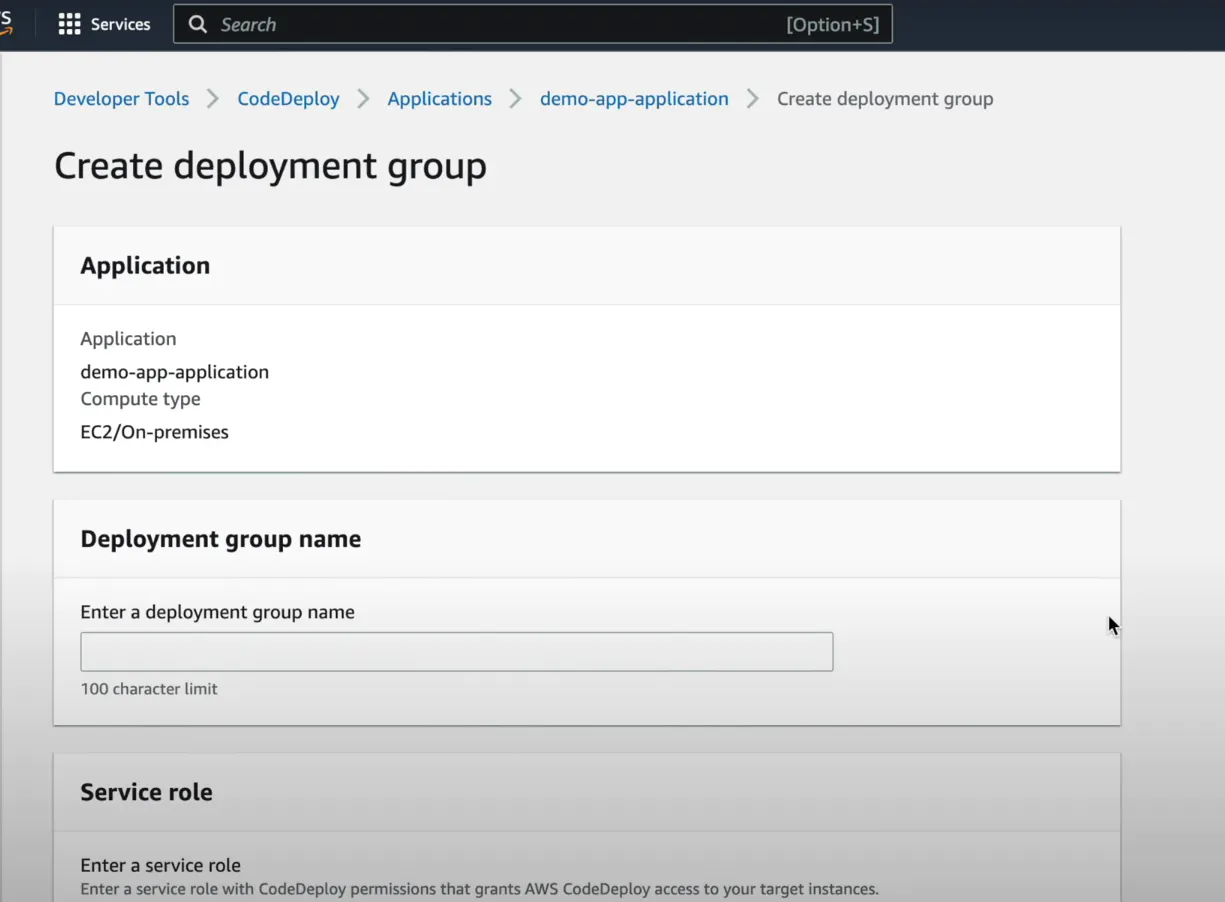
we need to attach a service role so we will select the code deployment role in our IAM role and check for the permissions

After creating the deployment group go to the search box and search for EC2 and create a new instance and select Ubuntu as an OS provider and launch it

Update security groups and give the keys and values for the tags
In order to deploy your app to EC2, CodeDeploy needs an agent which actually deploys the code on your EC2.
So let's set it up.
Create a shell script with the below contents and run it
Credits : Shubham Londhe
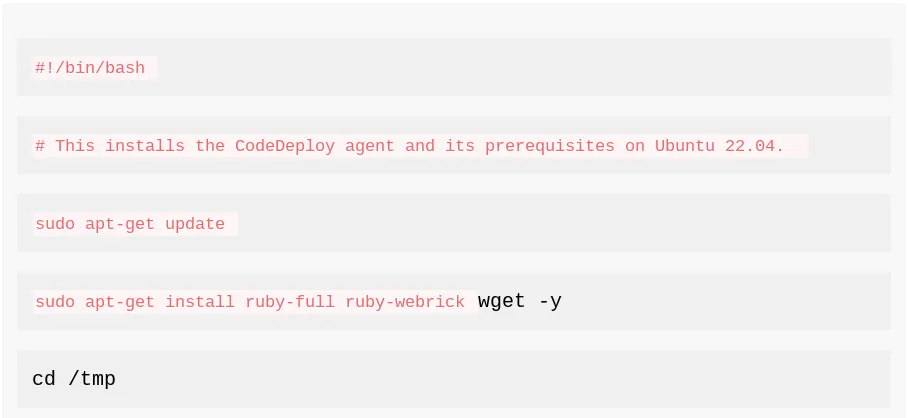

Create a Vim/Nano file and paste it and run the file

It should look like this and the state needs to be actively running
Now go to VS Code and create these

These are the commands used to install nginx

Now as before we have created a buildspec.yml file for CodeBuild , similar to that we will create appspec.yml file for CodeDeploy
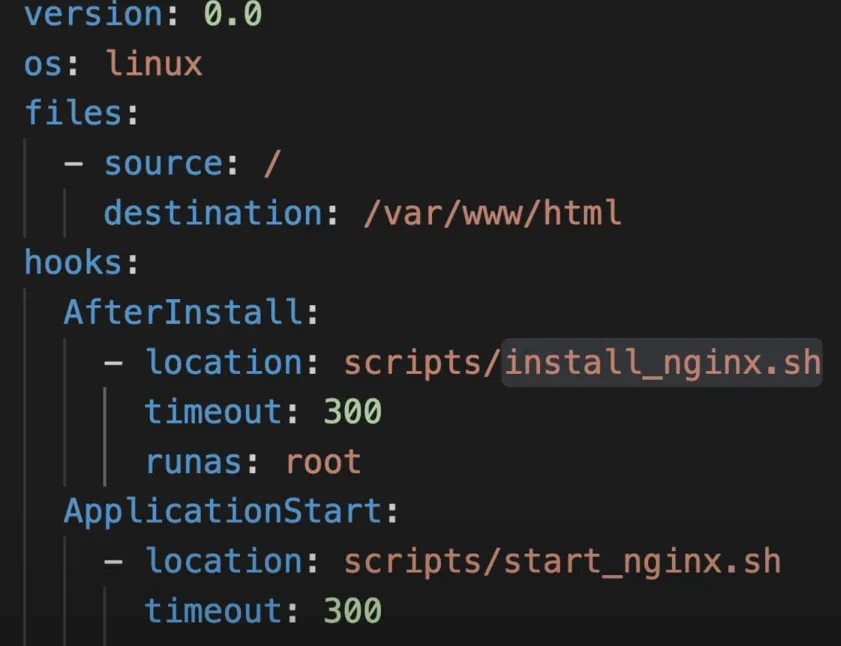
Now go to the terminal and use git commands to push them to the server

After the deployment is successful , now go to CodePipeline and create a pipeline
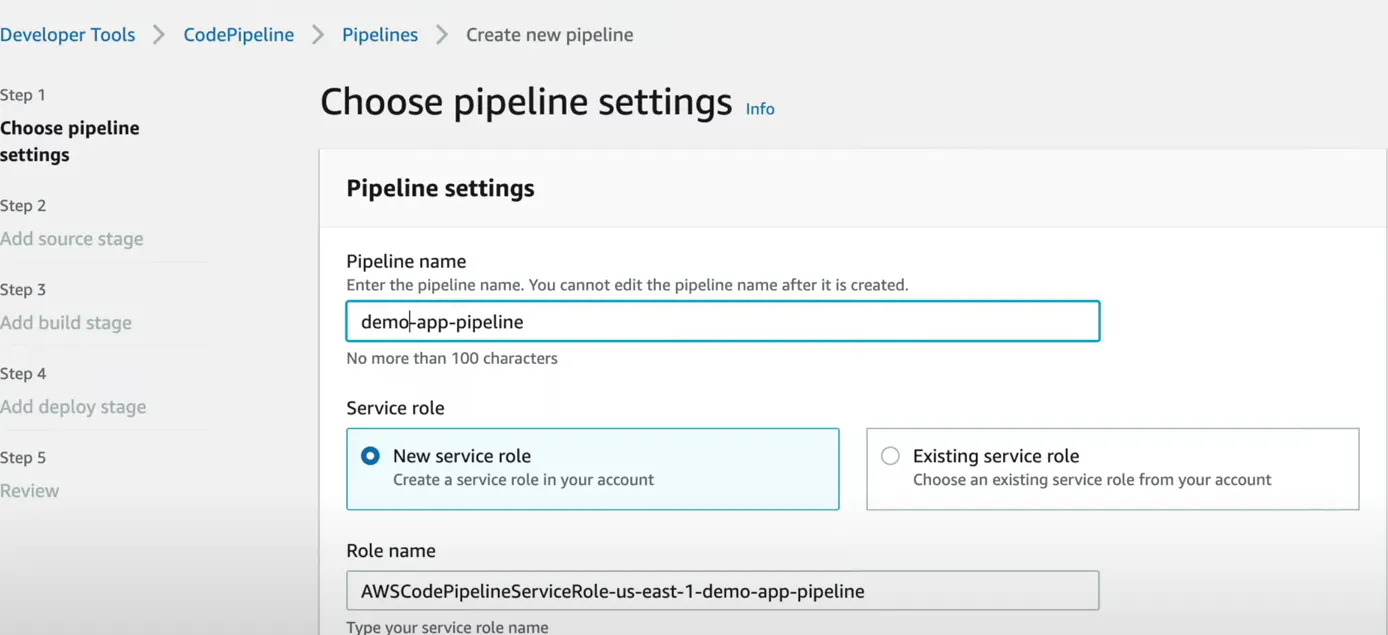
Add storage stage
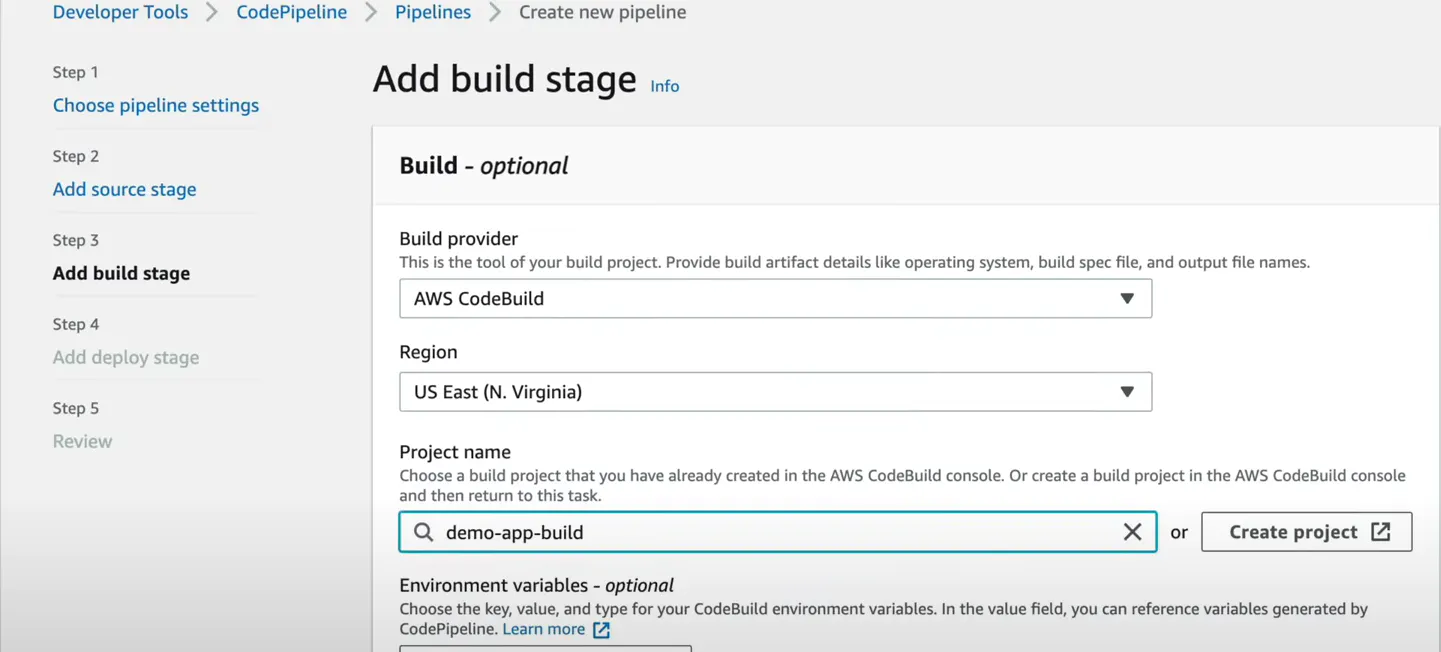
Adding the build stage

Add the Deploy stage from CodeDeploy
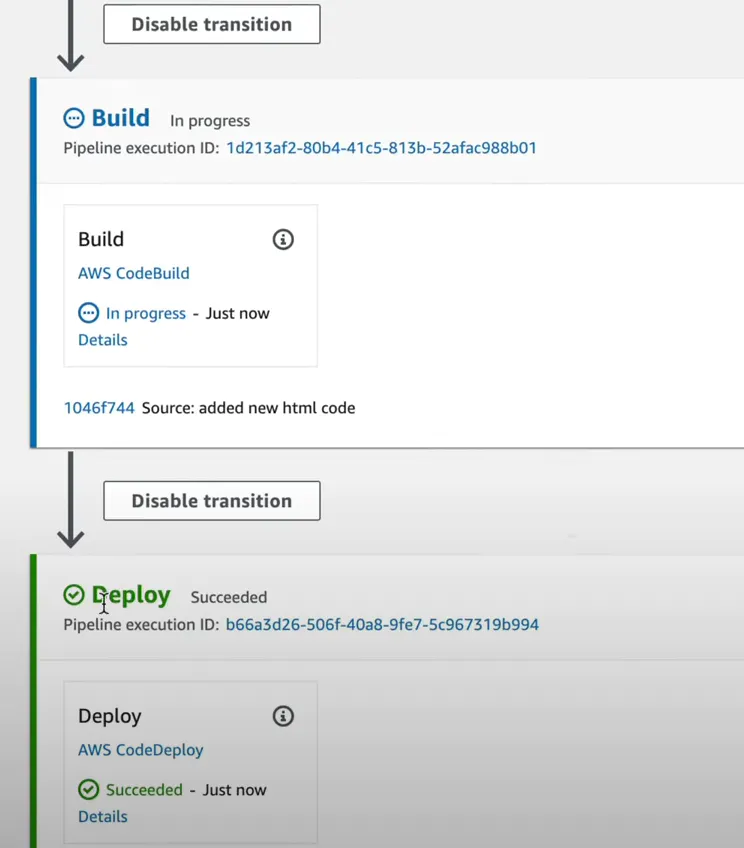
That's it now build the pipeline and checks the status

Conclusion:
In conclusion, streamlining AWS CI/CD pipeline is an important project that can significantly improve the software development process. To streamline the pipeline, it is important to follow best practices such as creating a modular and scalable architecture, automating the build, test, and deployment processes, and using tools such as AWS CodePipeline, AWS CodeBuild, and AWS CodeDeploy. Additionally, it is important to implement security and compliance measures to ensure that the pipeline is secure and meets industry standards. With proper planning and execution, streamlining the AWS CI/CD pipeline can lead to faster and more efficient software development and better-quality software.
Subscribe to my newsletter
Read articles from Monu batham directly inside your inbox. Subscribe to the newsletter, and don't miss out.
Written by

Monu batham
Monu batham
Hi there! I'm a DevOps enthusiast with a passion for creating seamless and scalable systems. You'll often find me tinkering with Jenkins, Docker, Kubernetes, Ansible, and Terraform to optimize development and deployment processes. I'm all about learning and embracing agile practices to keep pushing the boundaries of what's possible in the DevOps world. Let's learn and craft innovative solutions that drive success for businesses. Happy Learning! :)