Email contact form using NextJS (App router)
 Abil Savio
An overview of what we’ll be doing here
You must have come across contact forms on a lot of websites on the internet. We will be building a similar contact form. We will be using NextJS with the app router and first, build our Contact Form UI. Then we will use route handlers to create an API route to send an email to our gmail with the form details using Nodemailer.
Create a new NextJS project
I’m using NextJS version 13.4 for this tutorial. The app router is now stable from this version onwards. To create a new project type:
pnpm create next-app
Provide a project name and continue with the defaults. TailwindCSS will be now installed by default which we can use for styling the form. Open the project folder in VSCode (or any IDE that you are using).
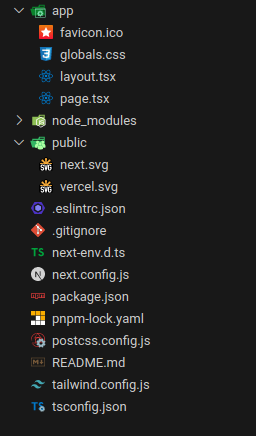
This is the basic project structure. Now let's start the NextJS development server using:
npm run dev
The server now starts at http://localhost:3000. You can view the website by going to this URL.
Creating a simple contact form
Let's start by editing app/page.tsx. Now let's remove the boilerplate code and just retain the main tag. We will be building our form inside it. Since will be doing some client-side interactions with our form, It must be a client component. So we can either convert the file page.tsx into a client component (which is not recommended as we usually use components in that file as server components) or we can create a new file and then make it a client component which is what we’re going to do. Let’s create a component folder and then new file contact.tsx where we will be creating the form. We will be installing react-hook-form for managing our forms.
To install react-hook-form:
pnpm i react-hook-form
Also, we will be separating the email sending logic into a separate file in the utils folder for simplifying our codebase. Check the following images to remove any confusion as of now.
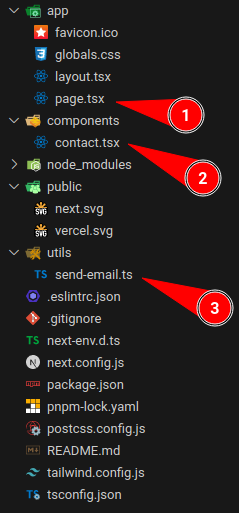
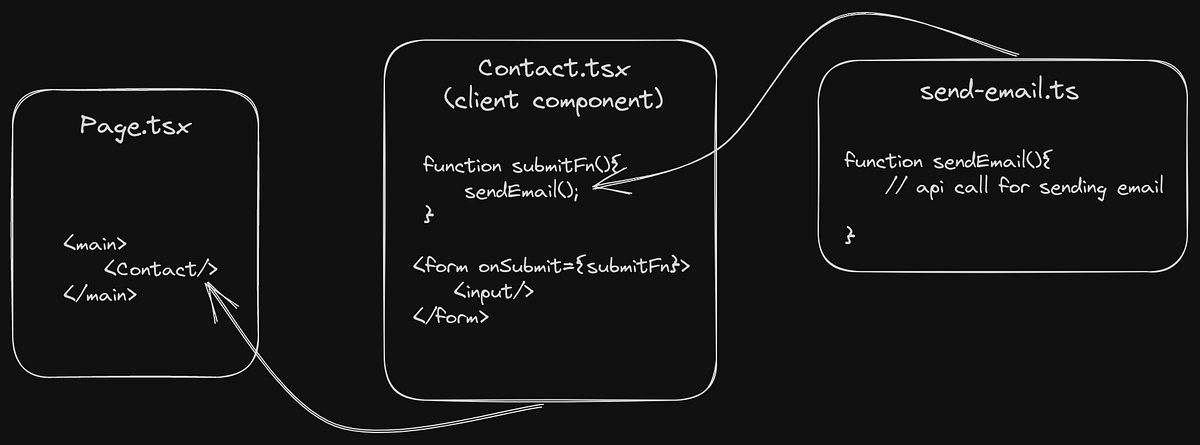
I will be adding here the code snippets for page.tsx and contact.tsx below for your reference
app/page.tsx
components/contact.tsx
Note that I have added ‘use client’; to the first line which makes Contact a client component. We need to use this syntax from now on in NextJS if we are using app router because by default every components are server components. Go to this link to know more about server and client components.
utils/send-email.ts
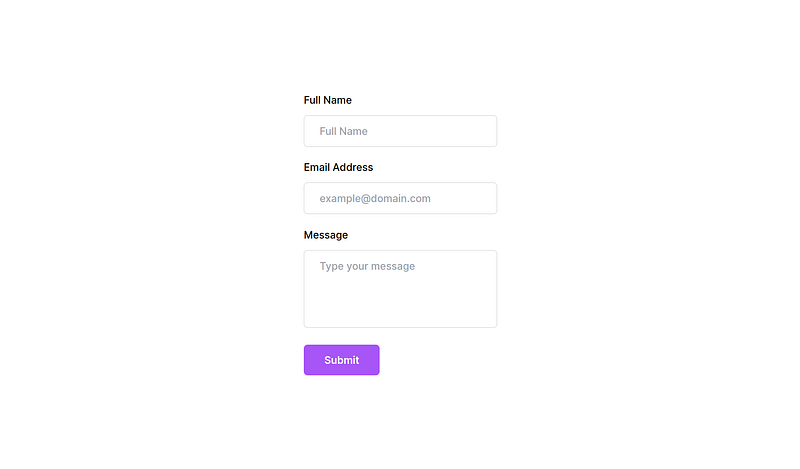
For now our form UI is completed, and as you can see the data from the form will be just logged to the console by the sendEmail function as of now. We just need to call an api to send the email inside that function. As you can see in the snippet I have added some styling for our components using tailwindcss classes just that it looks nice. Also the logic for the form is handled by react-hook-form which simplifies a lot of stuff regarding handling of forms in react. Right here I have used only a basic implementation of the library. You can go to react-hook-form.com or read through this tutorial from freecodecamp to learn more about it.
This is how our form looks now:
Setting up Nodemailer and API
Now that our basic form is completed, let’s build our API using route handlers in NextJS. But first, we need to install nodemailer. Nodemailer is a module for Node.js that makes sending emails from a server an easy task. To install it along with its types:
pnpm i nodemailer @types/nodemailer
Create a new folder api and another folder email inside it. Now create a new file route.ts inside it. The file path will be app/api/email/route.ts. It is done this way to create our api with the endpoint as “api/email”. Check out this doc for more information. The current project structure will be as follows:
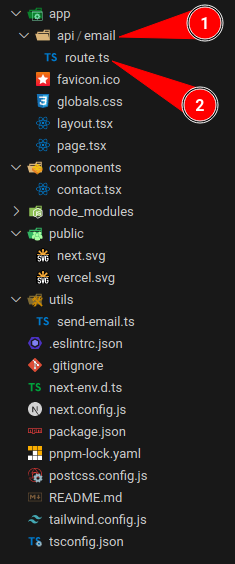
We can create a simple POST req route using the following snippet:
import { type NextRequest, NextResponse } from 'next/server';

export async function POST(request: NextRequest) {
  return NextResponse.json('Hello from API!');
}
We will be building the rest inside this function. But first we need our Gmail credentials for nodemailer which we will store as environment variables in a .env file.
MY_EMAIL=youremail@gmail.com
MY_PASSWORD=*******(App password)
From now onwards we cannot provide our actual gmail password for this purpose. Previously we could have enabled less secure apps option and continue with our actual password. But from now on we need App password to be used here. For getting an app password we need to first enable 2FA (2 Factor Authentication) in our google account. For that we need to go to myaccount.google.com and enable 2FA first which is a simple process. After that go to myaccount.google.com/apppasswords to setup app password. You might be asked to verify its you again.
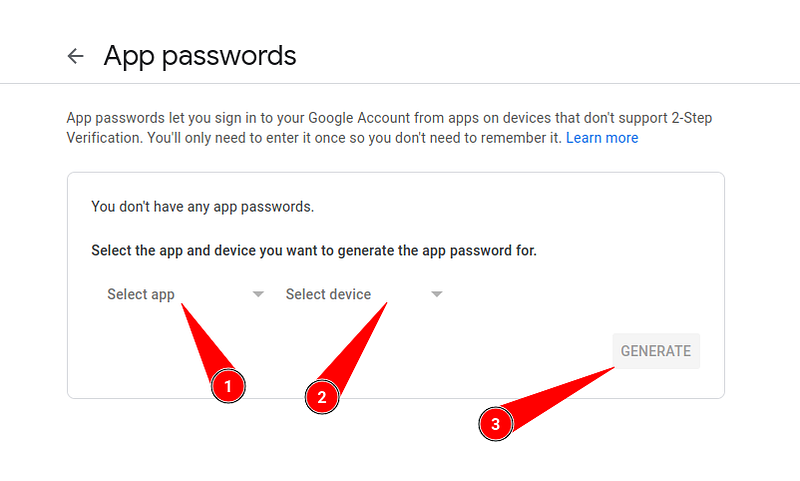
From the UI select app as Mail and device as custom and then provide any name you want. (I provided nodemailer here).
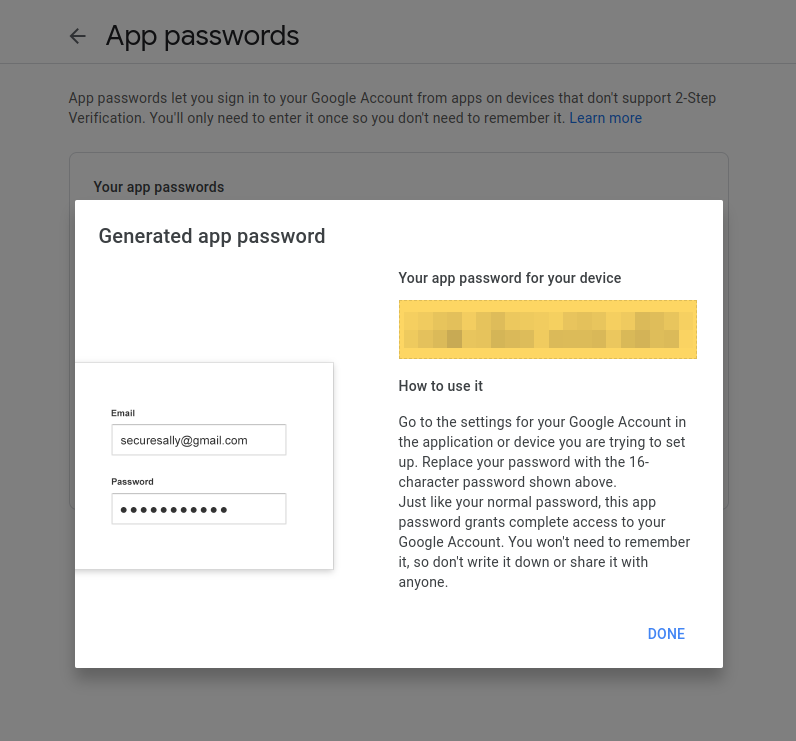
Copy the generated app password and then paste it in your .env file. Now we can continue setting up nodemailer.
We need to create and SMTP transport with nodemailer to configure it to send emails from our gmail. For that we will use the following snippet:
import nodemailer from 'nodemailer';

const transport = nodemailer.createTransport({
  service: 'gmail',
  /*
      setting service as 'gmail' is same as providing these setings:

      host: "smtp.gmail.com",
      port: 465,
      secure: true

      If you want to use a different email provider other than gmail, you need to provide these manually.
      Or you can go use these well known services and their settings at
      https://github.com/nodemailer/nodemailer/blob/master/lib/well-known/services.json
  */
  auth: {
    user: process.env.MY_EMAIL,
    pass: process.env.MY_PASSWORD,
  },
});
Next we need to set up the mail options which includes the message we are sending via email. For that we will use the following snippet:
import Mail from 'nodemailer/lib/mailer';

const mailOptions: Mail.Options = {
  from: process.env.MY_EMAIL,
  to: process.env.MY_EMAIL,
  // cc: email, (uncomment this line if you want to send a copy to the sender)
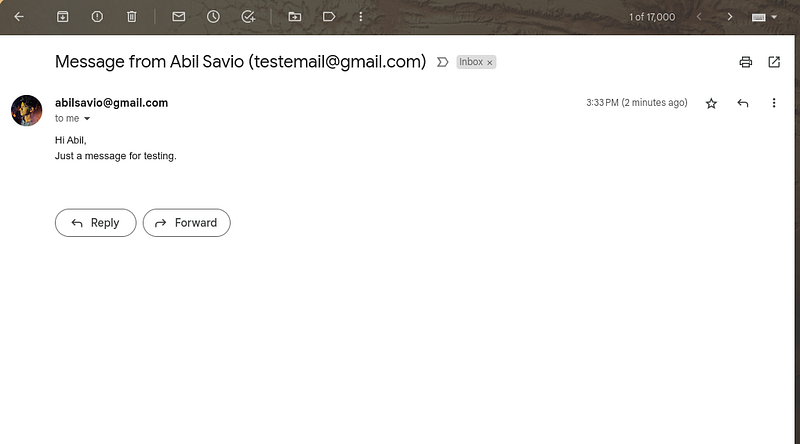
  subject: `Message from ${name} (${email})`,
  text: message,
};
We are basically sending an email from our address to our own address itself. If we want to send a copy of this mail back to the sender, we can use cc (Carbon Copy) option in the mailOptions and provide in the email. We can then use transport.sendMail function along with these mailOptions to send our email. The sendMail function is a synchronous function and hence we will be wrapping it with a promise to make it asynchronous. The snippet for it will be as follows:
const sendMailPromise = () =>
  new Promise<string>((resolve, reject) => {
    transport.sendMail(mailOptions, function (err) {
      if (!err) {
        resolve('Email sent');
      } else {
        reject(err.message);
      }
    });
  });
The fully complete code for route.ts will be as follows:
app/api/email/route.ts
Completing our form
Now our api is complete and the only thing left is to send the data from our form. Remember we had created a function sendEmail previously right? Now we just have to send the form data to our endpoint api/email via a POST request which can be done easily with the fetch function. The completed send-email.ts file will be as follows:
utils/send-email.ts
You can see that I’m sending alerts for confirmation. You can customise this behaviour in whatever way you like. Here is a sample message that I sent from the form:
This tutorial is complete and we have a fully working form😌. You can check this repository for the entire project.
Further reading
You can optimise the form logic by adding loading states to improve user experience. Also check out libraries like SWR and React-Query to improve data fetching and sending. Also check out React Email to send beautiful emails using react rather than just sending plain text messages.
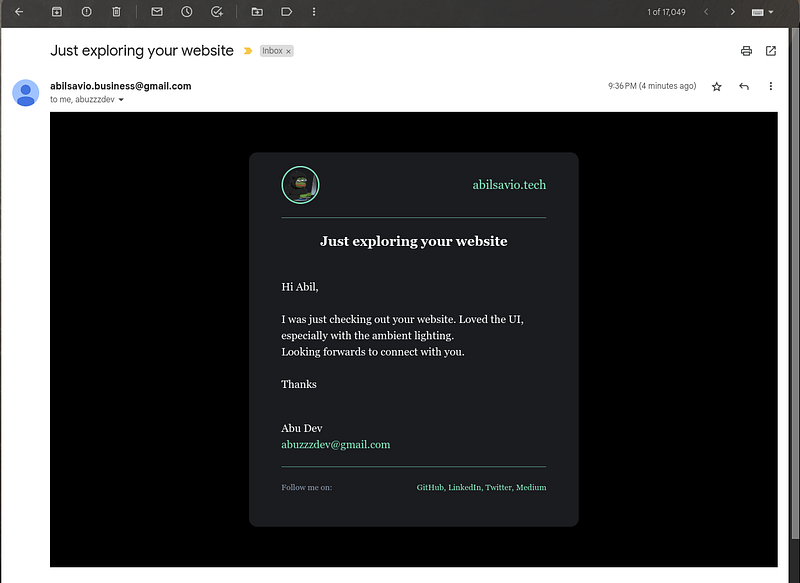
Go check out my website at abilsavio.dev to know more about me. I have used SWR and React Email to send emails from my contact form. This is how an email from my website by filling the contact form looks like which was built using React Email.
Subscribe to my newsletter
Read articles from Abil Savio directly inside your inbox. Subscribe to the newsletter, and don't miss out.
Written by

Abil Savio
Abil Savio
I'm a Full Stack Web & Blockchain Developer and DevOps Engineer from Kerala, India. An expert in Next.JS and React.