Advance Git & GitHub for DevOps Engineers: Part-2
 Divyansh Jain
🌟Introduction🌟
Welcome to Day 11 of the #90DaysOfDevOps challenge! Today, we'll learn about GIT Advance concepts. In the fast-paced world of software development, collaboration, version control, and continuous integration are vital components of successful DevOps practices.
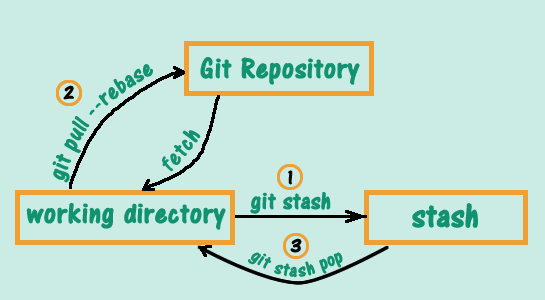
What is Git Stash?
Git stash is a command that allows you to temporarily save changes you have made in your working directory, without committing them.
This is useful when you need to switch to a different branch to work on something else, but you don't want to commit the changes you've made in your current branch yet.
To use Git stash, you first create a new branch and make some changes to it.
Then you can use the command git stash to save those changes.
This will remove the changes from your working directory and record them in a new stash.
You can apply these changes later.
git stash list command shows the list of stashed changes.
You can also use git stash drop to delete a stash and git stash clear to delete all the stashes.
Stashed changes are saved separately from your commits.
You can use
git stash saveto create a new stash with an optional message.Stashes can be listed using
git stash listand applied withgit stash apply.Stashes are helpful when you need to switch branches or perform other operations without committing your changes.
Some git stash commands
Command | Description |
| Save changes to a new stash with an optional message. |
| List all stashes with their references. |
| Show changes stored in a specific stash. |
| Apply changes from a specific stash to the working directory. |
| Apply changes from a stash and remove it from the stash list. |
| Create a new branch from a stash and apply it. |
| Delete a specific stash. |
| Delete all stashes. |
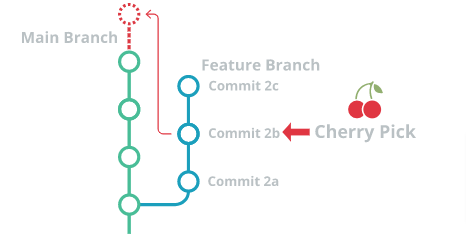
What is Cherry-pick?
Git cherry-pick is a command that allows you to select specific commits from one branch and apply them to another.
This can be useful when you want to selectively apply changes that were made in one branch to another.
To use git cherry-pick, you first create two new branches and make some commits to them.
You can cherry-pick a single commit or multiple commits in a specified order.
Then you use
git cherry-pick <commit_hash>command to select the specific commits from one branch and apply them to the other.
Some git cherrypick commands in git
Command | Description |
| Applies the changes of the specified commit onto the current branch. |
| Applies the changes of a range of commits onto the current branch. The range includes both the start and end commits. |
| Applies the changes of the specified commit onto the current branch but does not create a new commit. Allows making further modifications before committing. |
| Completes the cherry-pick operation after resolving conflicts. |
| Aborts the cherry-pick operation and restores the branch to its original state before the cherry-pick started. |
| Aborts the cherry-pick operation but keeps any changes that have been applied. Useful when you want to save the changes but not continue with the cherry-pick. |
| Opens the commit message in an editor, allowing you to modify it before committing the cherry-picked changes. |
| Appends a "Signed-off-by" line with your name and email to the commit message of the cherry-picked changes. |
| Specifies a merge strategy to be used during the cherry-pick operation. The default is the 'recursive' strategy. |
| Applies the changes of the specified commit but does not automatically create a new commit. Allows making further modifications or combining changes. |
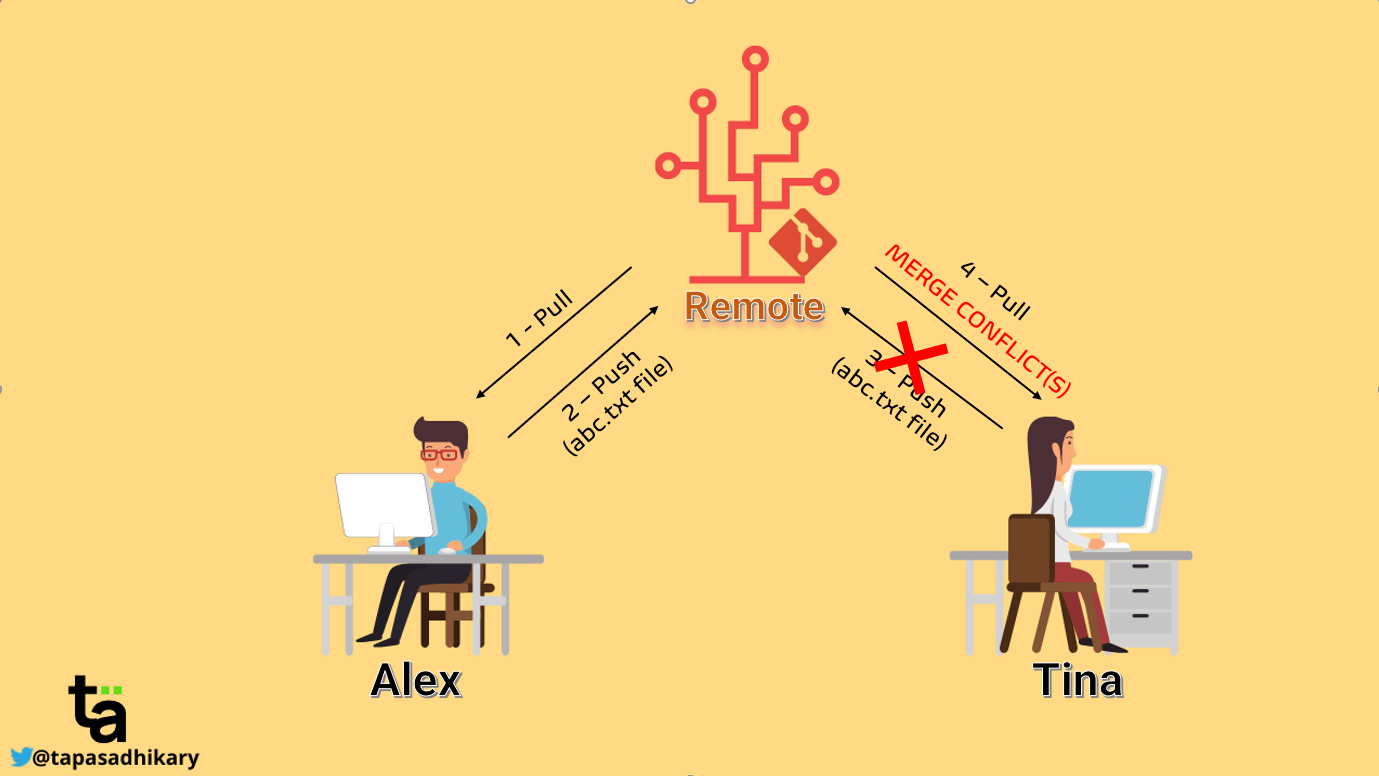
What is Resolving Conflicts?
In Git, conflicts can arise when two or more developers make changes to the same file(s) and attempt to merge their changes together. Git is designed to detect and highlight such conflicts, and it is up to the developers to resolve them manually.
Resolving conflicts in Git involves identifying the conflicting changes and deciding how to integrate them into a new, merged version of the file. This can be done using Git's built-in merge tools or manually by editing the conflicting sections of the file.
✔️Task 1:
Create a new branch and make some changes to it.
   git checkout -b feature
   git branch
   vim version01.txt
   git add .
Use git stash to save the changes without committing them.
   git stash
   git status
Switch to a different branch, make some changes and commit them.
   git checkout development
   vim version01.txt
   git add .
   git commit -m "version file commited"
Use git stash pop to bring the changes back and apply them on top of the new commits.
 git stash list
 git stash pop
 git add .
 git commit -m "git stash file commited"
 git log --oneline
✔️Task 2:
In version01.txt of the development branch add the below lines after "This is the bug fix in development branch" that you added in Day10 and reverted to this commit.
    git checkout dev
    vim version01.txt  :- "This is the bug fix in development branch"
    cat version01.txt
    git add version01.txt
    git commit -m "commited file on dev"
Line2>> After bug fixing, this is the new feature with minor alteration
Commit this with the message "Added feature2.1 in development branch"
   vim version01.txt :- "After bug fixing, this is the new feature with minor alteration"
   git add version01.txt
   git commit -m "Added feature 2.1 in development branch"
Line3>> This is the advancement of previous feature
Commit this with the message "Added feature2.2 in development branch"
   vim version01.txt  :- "This is the advancement of  previous feature "
   git add version01.txt
   git commit -m "Added feature 2.2 in development branch"
Line4>> Feature 2 is completed and ready for release
Commit this with the message "Feature2 completed"
   vim version01.txt  :- "Feature 2 is completed and ready for release"
   git add version01.txt
   git commit -m "Feature2 completed"
All these commits messages should be reflected in the Production branch too which will come out from the Master branch.
   git checkout prod
   git rebase dev
   git log --oneline
✔️Task 3:
In Production branch Cherry pick Commit “Added feature2.2 in development branch” and added below lines in it:
   git log --oneline
   git cherry-pick <commit_id>
   vi version01.txt
Line to be added after Line3>> This is the advancement of previous feature
   vi version01.txt :- "This is the advancement of previous feature"
   git add version01.txt
   git commit -m "adv feature"
Line4>>Added few more changes to make it more optimized. Commit: Optimized the feature
  vi version01.txt  :- "Added few more changes to make it more optimized"
  git add version01.txt
  git commit -m "Optimized the feature"
Conclusion
Congratulations, dear reader! 🎊 You've mastered the art of Git and GitHub, joining the ranks of legendary DevOps engineers! 🎓 Embrace version control and collaboration, and your coding adventures shall know no bounds!
Stay in the loop with my latest insights and articles on cloud ☁️ and DevOps 🚀 by following me on Hashnode, LinkedIn (www.linkedin.com/in/Divyansh-Jain), and GitHub (https://github.com/Divyansh-jain).
Thank you for reading! 🙏 Your support means the world to me. Let's keep learning, growing, and making a positive impact in the tech world together.
Subscribe to my newsletter
Read articles from Divyansh Jain directly inside your inbox. Subscribe to the newsletter, and don't miss out.
Written by
Divyansh Jain
Divyansh Jain
I'm a DevOps Engineer with over 3+ years of experience.