Git Stash/Cherry-pick/Merge Conflicts: #Day11 of 90DaysofDevOps
 Namrata Kumari
What is Git Stash?
Suppose a developer is working on a feature in a branch and he needs to pull changes from some other developer’s branch or if he has to work urgently on some other branch, but the feature he is currently working on is incomplete.
In this case, you cannot commit the partial code of the currently working feature branch. To add this new feature, you have to remove your current changes and store them somewhere else.
For this type of situation, Git offers a very useful command known as ‘git stash‘. git stash command saves the previously written code and then returns to the last commit for a fresh start.
Git stash: The Git stash command can be used to accomplish this if a developer is working on a project and wants to preserve the changes without committing them. This will allow him to switch branches and work on other projects without affecting the existing modifications. You can roll back modifications whenever necessary, and it stores the current state and rolls back developers to a prior state.
Cherry-pick:
Cherry-picking in git means choosing a commit from one branch and applying it to another branch. This is in contrast with other ways such as merge and rebase which normally apply many commits into another branch.
Cherry-picking is just like rebasing, an advanced concept and also a powerful command. It is mainly used if you don’t want to merge the whole branch and you want some of the commits.
How to resolve merge conflicts?
Merging means combining changes from one branch into another branch.
Resolving merge conflicts in Git is a common situation that occurs when Git cannot automatically merge changes from different branches. When this happens, Git will mark the conflicting files with conflict markers, and it's up to you to manually resolve the conflicts. Here's how you can do it:
Identify the Conflict: When you attempt to merge branches, Git will inform you about the conflict and the affected files. You can also use git status to see which files have conflicts.
Open the Conflicting File(s): Open the files with conflicts in a text editor. Inside the file, you will see sections marked with conflict markers, like this:
<<<<<<< HEAD // Your changes in the current branch (e.g., master)
================
// Changes from the other branch (e.g., dev)
>>>>>>>>>>devResolve the Conflicts: Review the conflicting sections and decide which changes to keep. You can modify the content to include the desired changes or remove lines that are no longer necessary. Remove the conflict markers
(<<<<<<<, =======, and >>>>>>>)once you've resolved the conflicts.Save the File(s): After resolving the conflicts, save the changes in the file.
Stage the Changes: Use git add<file> to stage the resolved file once you have edited it.
Complete the Merge: Once all conflicts are resolved and staged, use git commit to complete the merge commit.
git commit -m "Merge branch 'dev' into 'master' "
Review Your Changes: Use git log or any other Git visualization tools to review your merge commit and verify that everything looks correct.
Push Your Changes: If you resolved the conflicts in a local repository and are pushing the merged branch to a remote repository, use git push to update the remote branch.
📌Task-01
Create a new branch and make some changes to it.
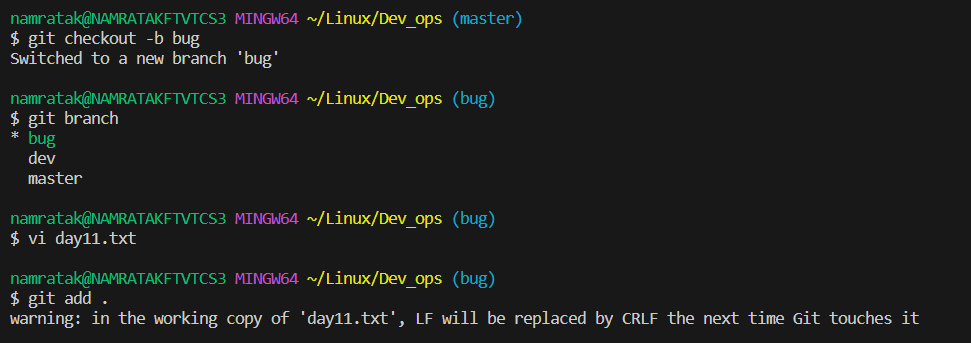
Use git stash to save the changes without committing them.

Switch to a different branch, make some changes and commit them.
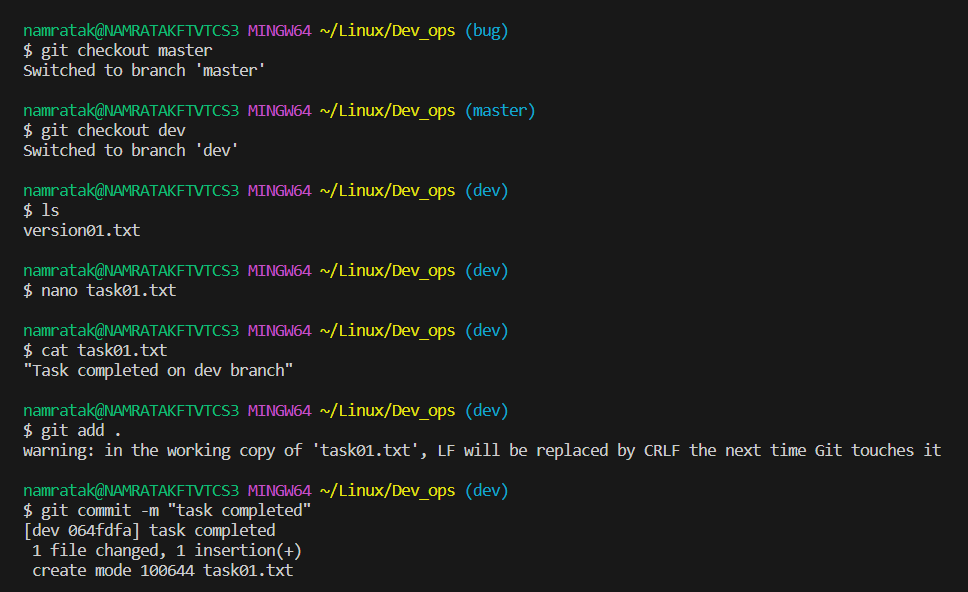
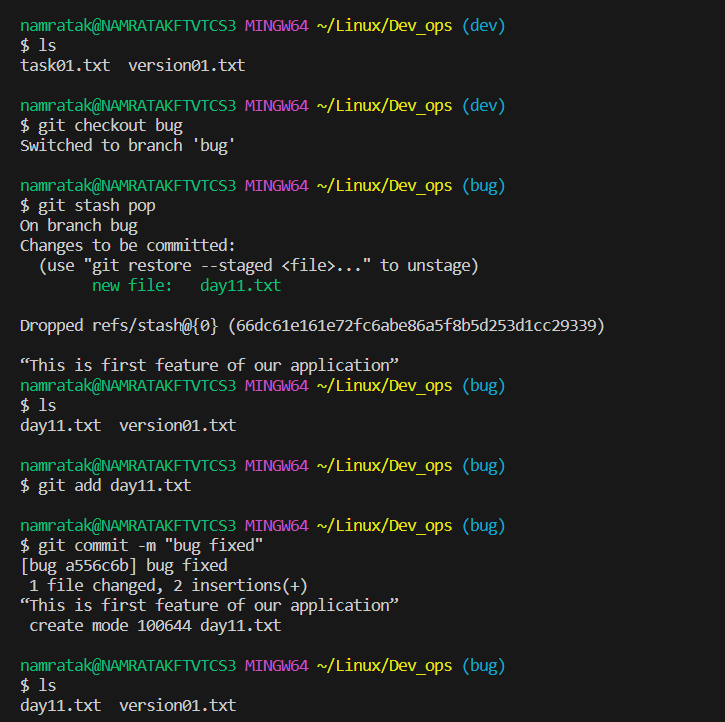
Use git stash pop to bring the changes back and apply them on top of the new commits.
📌Task-02
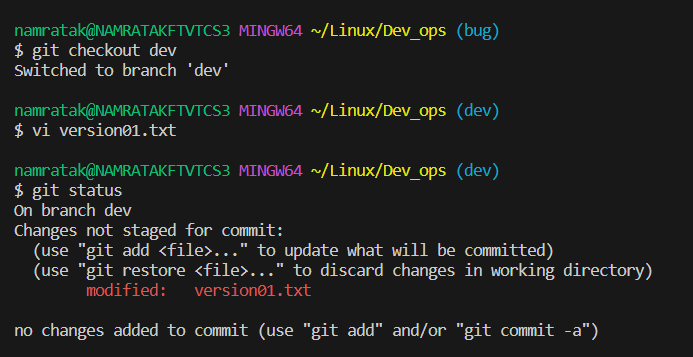
In version01.txt of the development branch add the below lines after “This is the bug fix in development branch” that you added in Day10 and reverted to this commit.
Line2>> After bug fixing, this is the new feature with minor alterations”
Commit this with the message “ Added feature2.1 in development branch”
Line3>> This is the advancement of the previous feature
Commit this with the message “ Added feature2.2 in development branch”
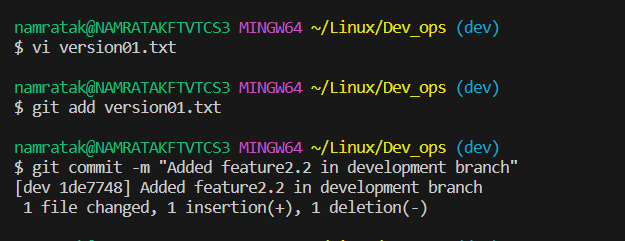
Line4>> Feature 2 is completed and ready for release
Commit this with the message “ Feature2 completed”

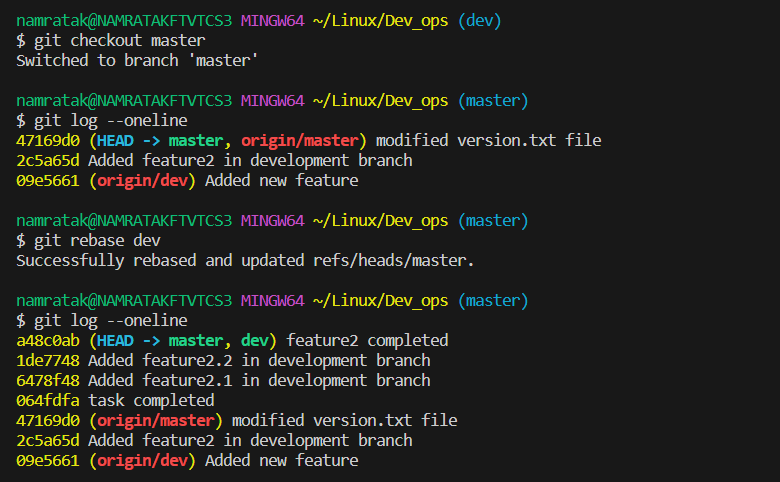
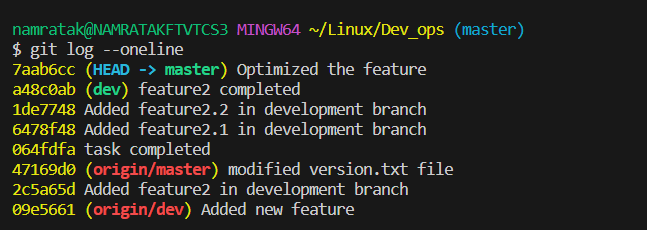
All these commits messages should be reflected in the Production branch too which will come out from the Master branch (Hint: try rebase).
📌Task 03
In the Production branch Cherry pick Commit “Added feature2.2 in development branch” and added the below lines in it:
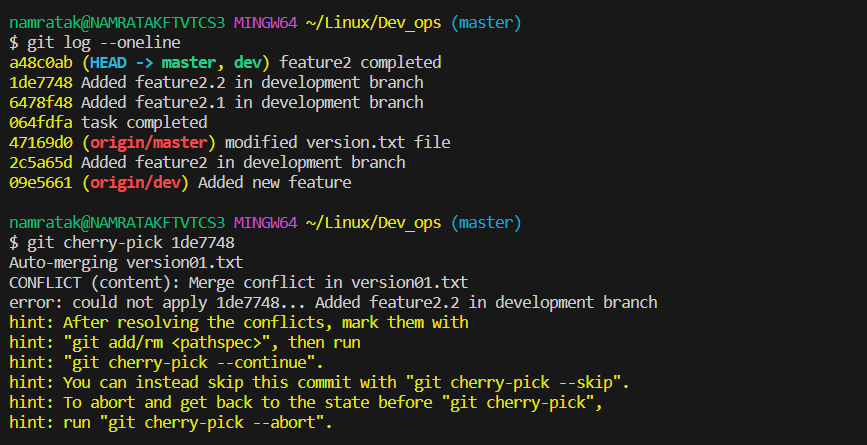
The line to be added after Line3>> This is the advancement of the previous feature
Line 4>>Added a few more changes to make it more optimized.
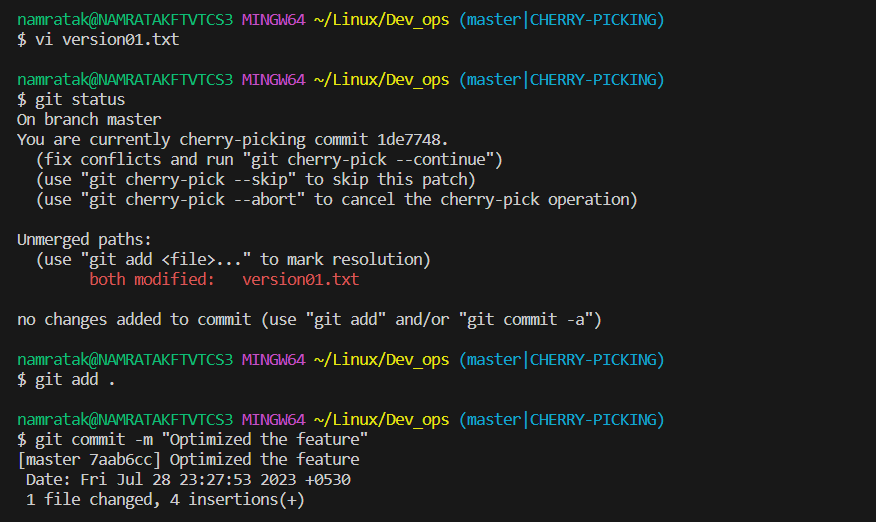
Commit: Optimized the feature
Thank you for reading this article. Happy Learning
Subscribe to my newsletter
Read articles from Namrata Kumari directly inside your inbox. Subscribe to the newsletter, and don't miss out.
Written by

Namrata Kumari
Namrata Kumari
Proficient in a variety of DevOps technologies, including AWS, Linux, Python, Shell Scripting, Docker, Terraform, Kubernetes and Computer Networking.