Get Started with Low-code REST API Development using Syncloop
 Tanmay Sarkar
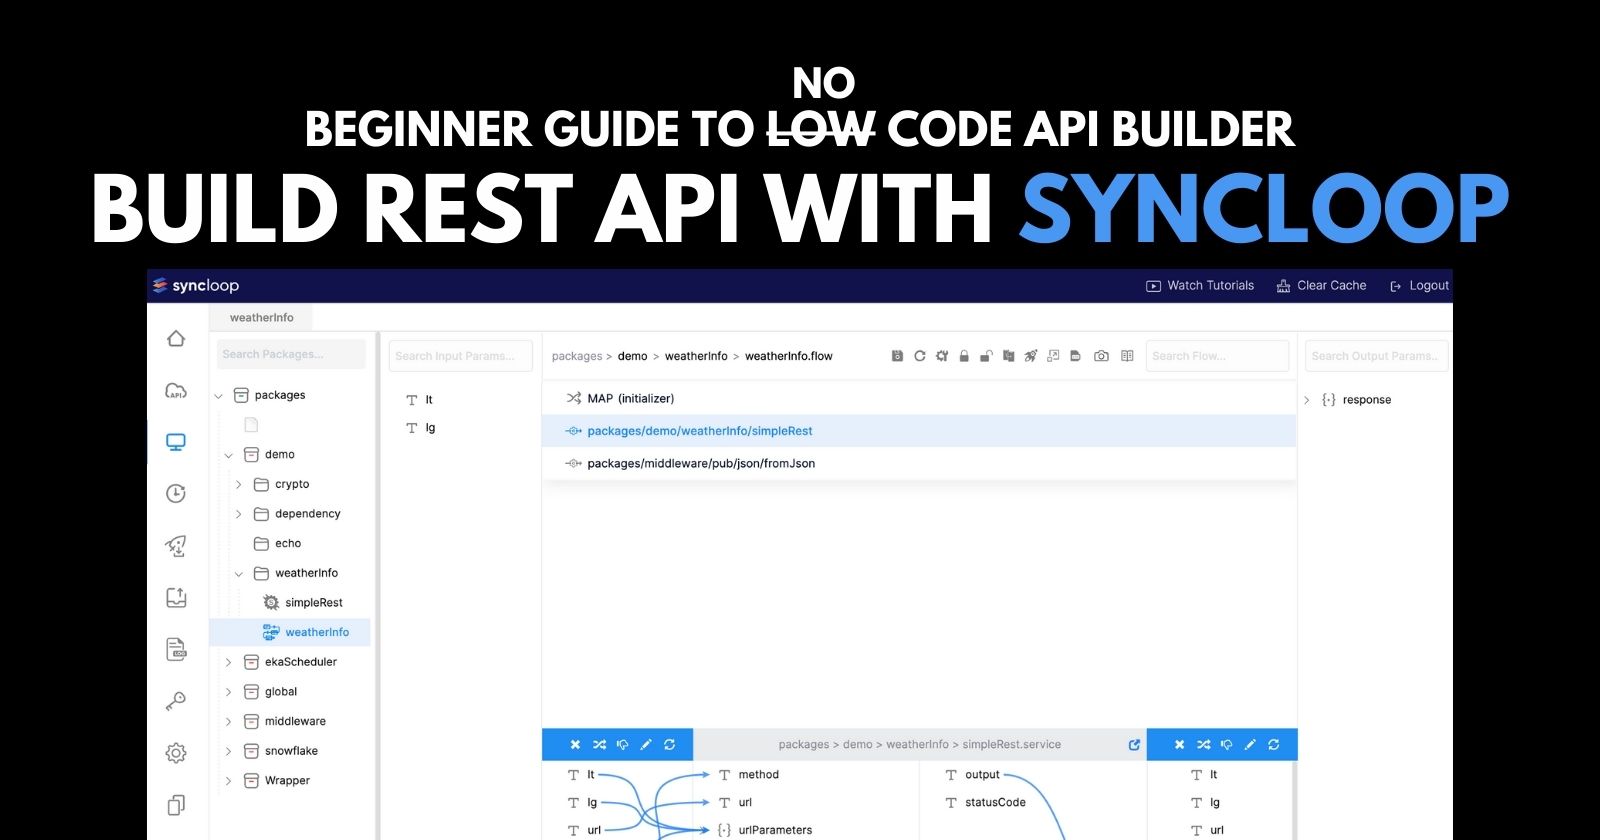
Introduction 🙋🏻♂️
Hey Champs, this is Tanmay again. And today's topic is a little different, in the sense We are coders but trying to embrace low-code tools also. It is not that we are trying to transition to this kind of tool but to increase productivity as a developer.

Using this tool, we will remove the repeated same tasks for building a rest API of a low-complexity project. Suppose you are building a health tracking project and you need a simple backend service for performing various logic of available data, in that scenario building a backend server in the project is comparatively time-consuming and hectic.
And that position, we can use tools like Syncloop to build a Rest API with ease and use it in our project. In that way, we can remove the need for a dedicated backend server and the time of a developer to code a backend.
With that being said, let's see what are the possibilities with Syncloop.
Overview of Syncloop
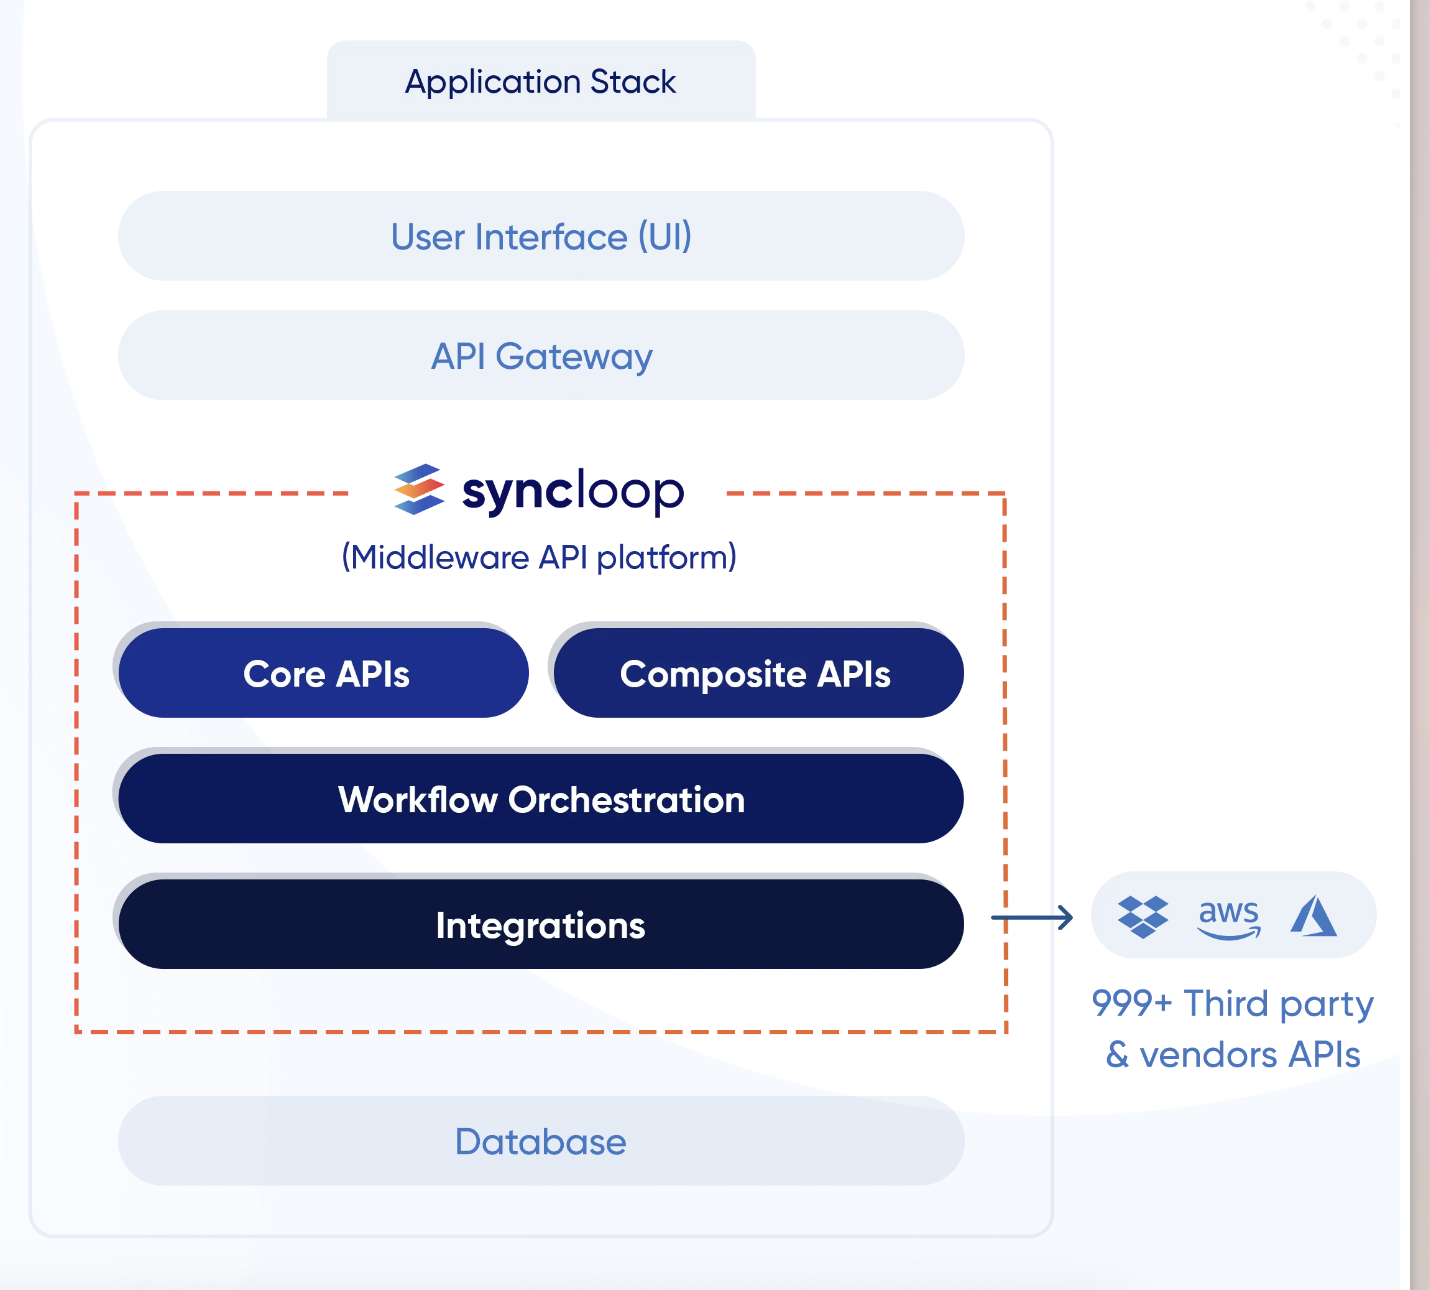
Syncloop is an innovative no-code API service that simplifies the process of creating and managing APIs. With its user-friendly interface, developers and non-developers alike can effortlessly design, deploy, and monitor APIs without writing a single line of code.
Syncloop offers a wide range of features, including data integration, authentication, and endpoint customization, enabling users to seamlessly connect their applications and services. It's intuitive workflow and robust security measures make it an ideal choice for businesses and individuals seeking a quick and efficient way to build powerful APIs without the complexities of traditional coding.
Let's get started with Syncloop 🚀
Now I'll walk you through the whole process to build an API which will give us a list of quotes and the authors' names.
Create an account with Syncloop:
Visit https://www.syncloop.com/ and create a free account there. Now log in to the dashboard with your account.
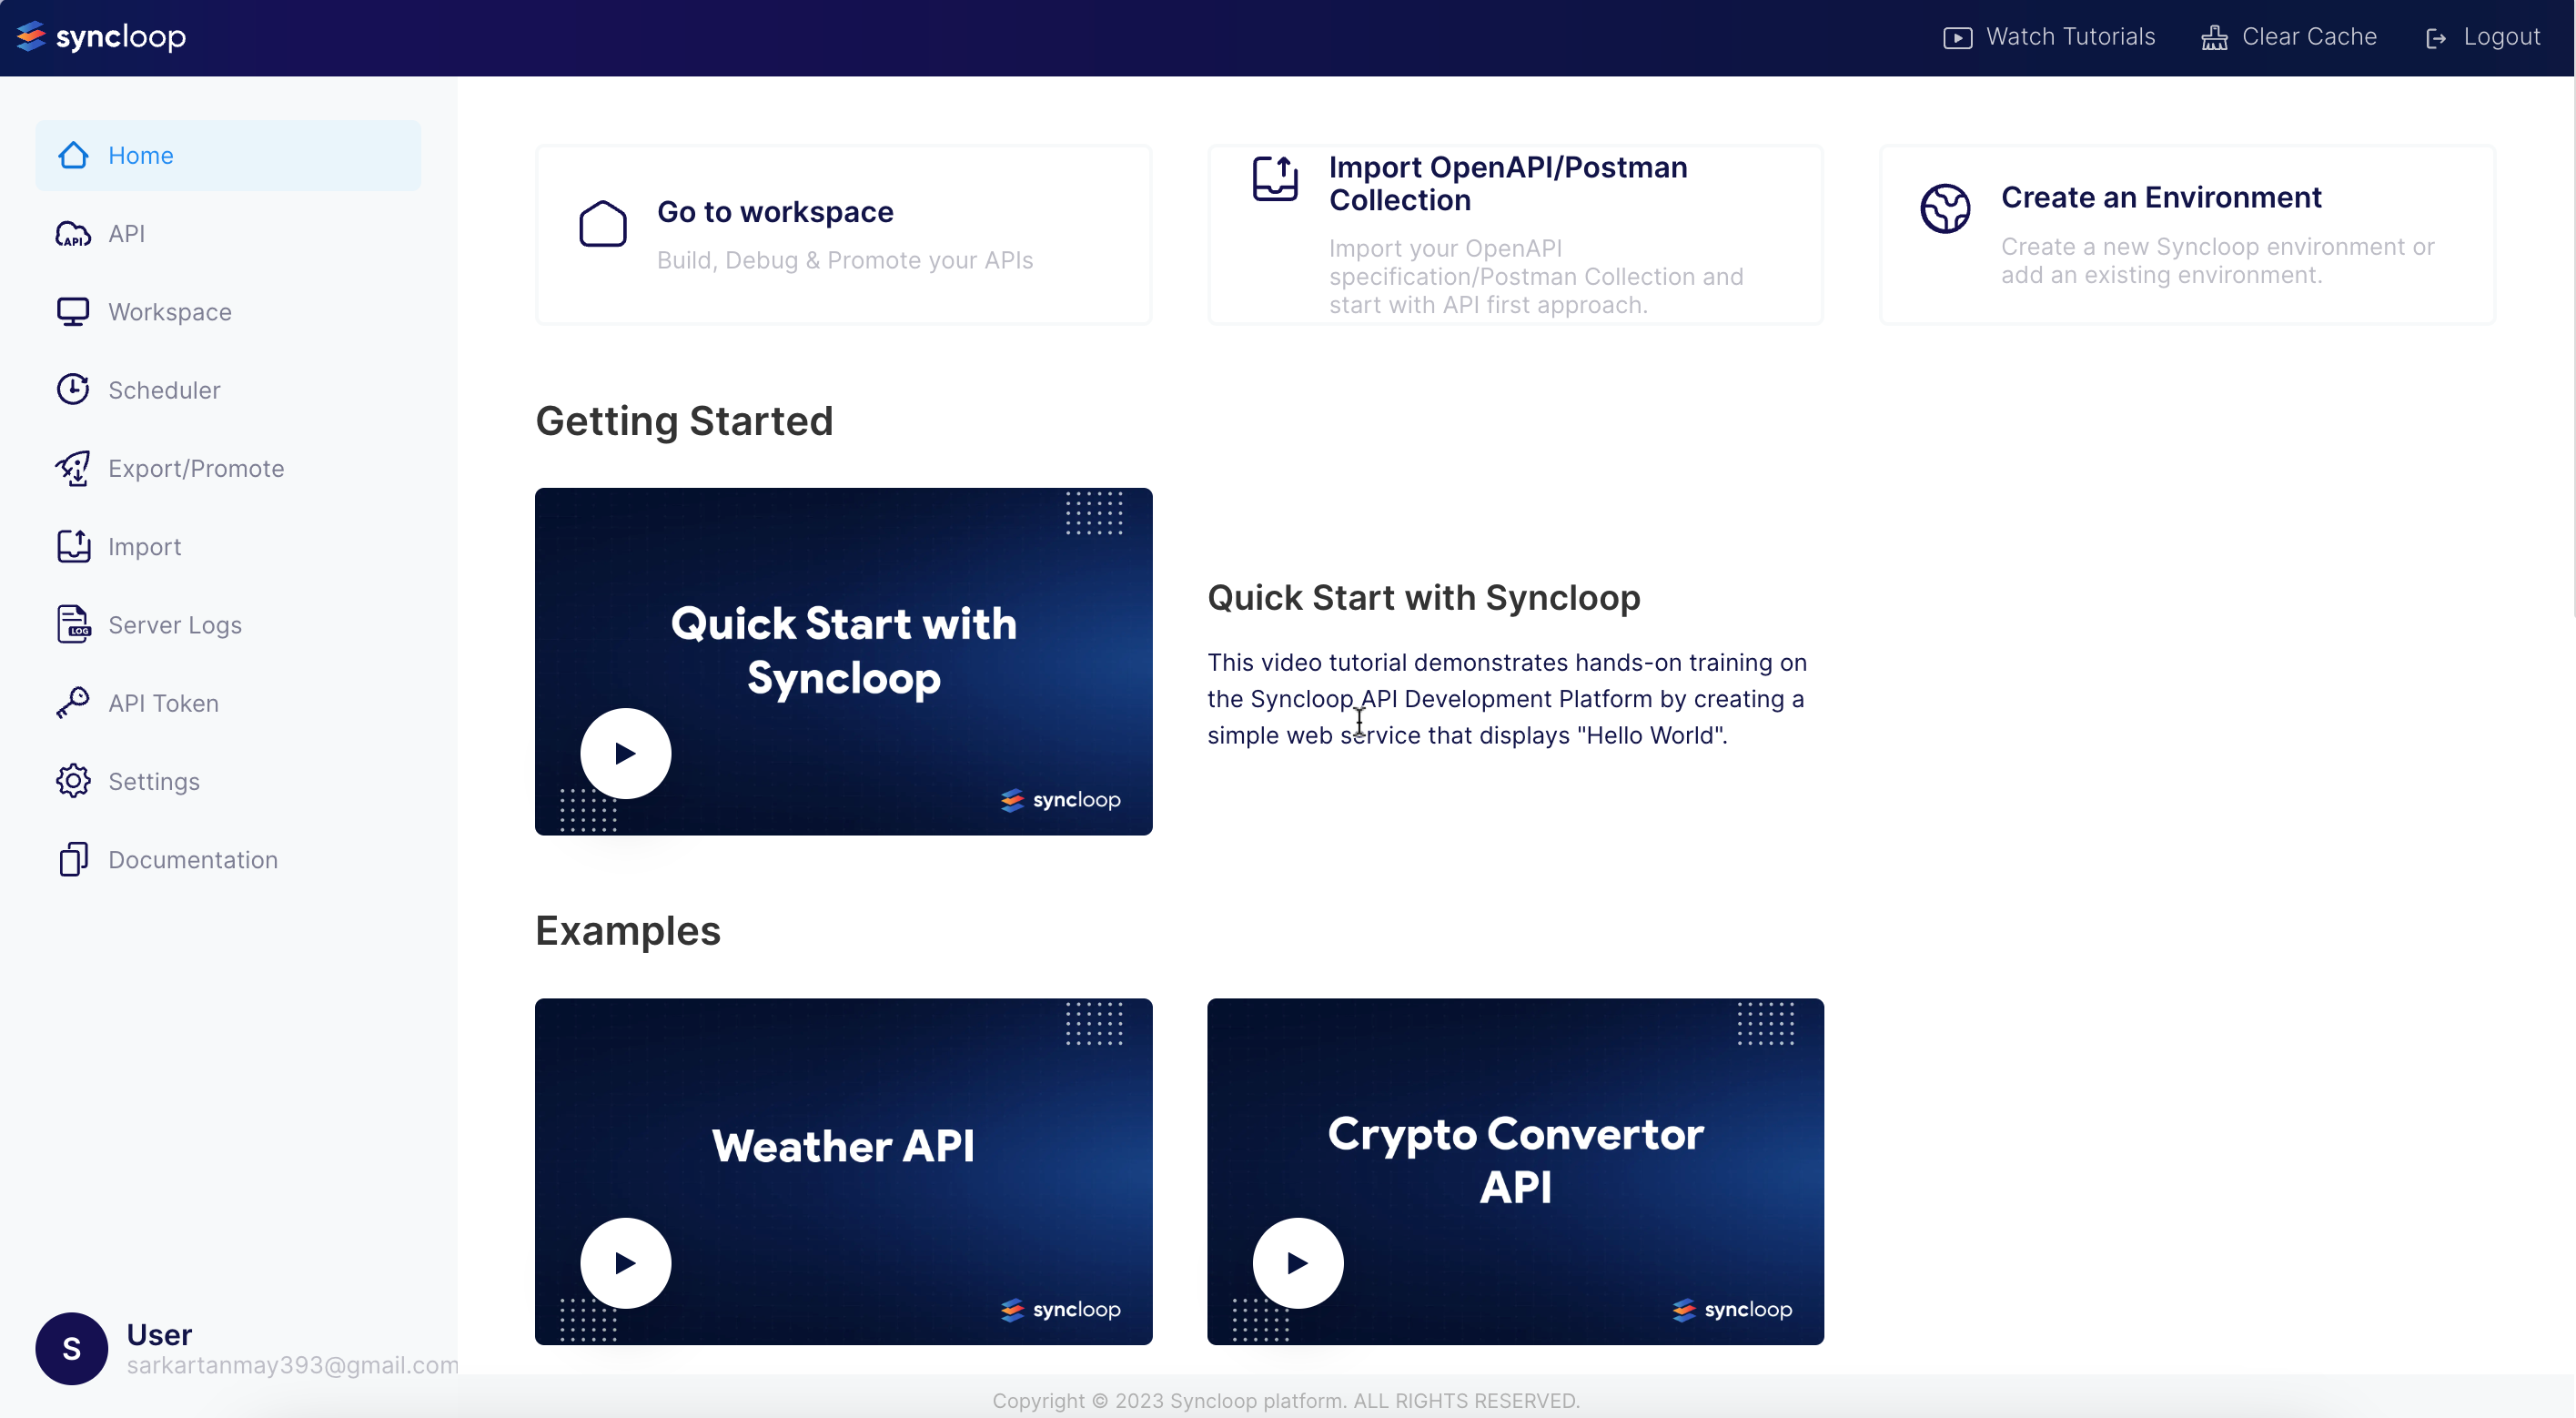
As you can see, you will find useful resources to understand the tool in their documents and training videos. If you are serious about using it, you should watch and understand the tool more.
Head over to Workspace:
Here in the workspace, we will work. Everything related to building APIs is here.
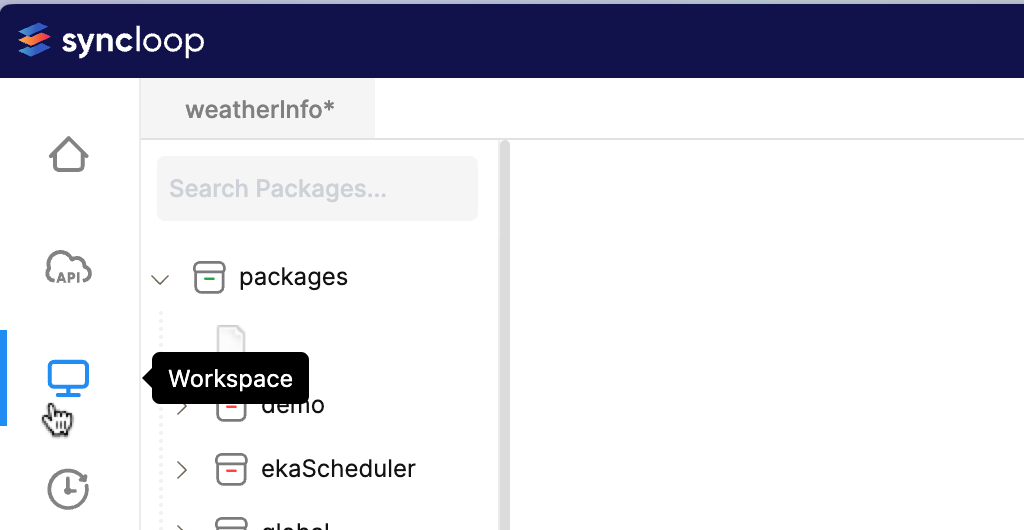
You will find `packages` there, inside it there are demos and pre-built services. Now maybe you are thinking about what are services.
💡The service in the Syncloop tool behaves like functions in the programming languages. A function is first defined and then called for its proper usage. The main advantage of using services is that it aids in better reusability of program code. Find more about the service here.Create the folders and files:
First, you need to create a dedicated package for our quote API by right-clicking and selecting new.
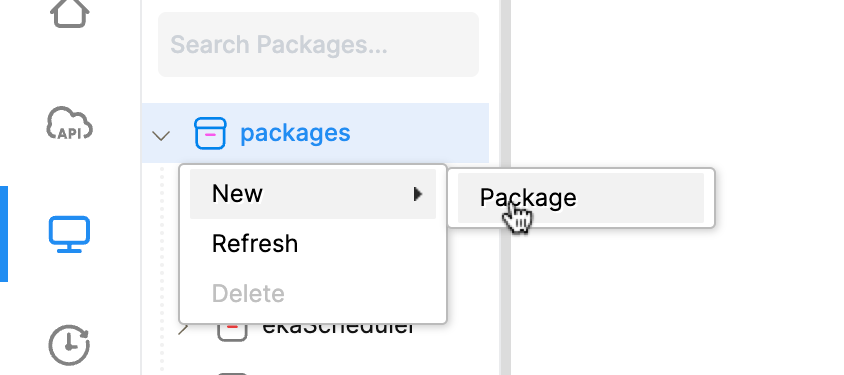
Second, you'll see the new package
quoteAPIwith a dependency folder inside it. Now create a folder there. I'm naming itgenerateQuotes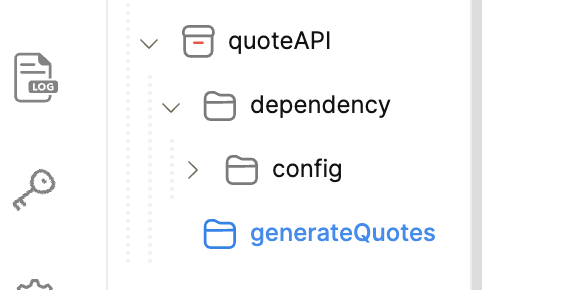
Third, create a last file which is a service of the API category. And in this file, we will drag and drop stuff to make the quote generation work.
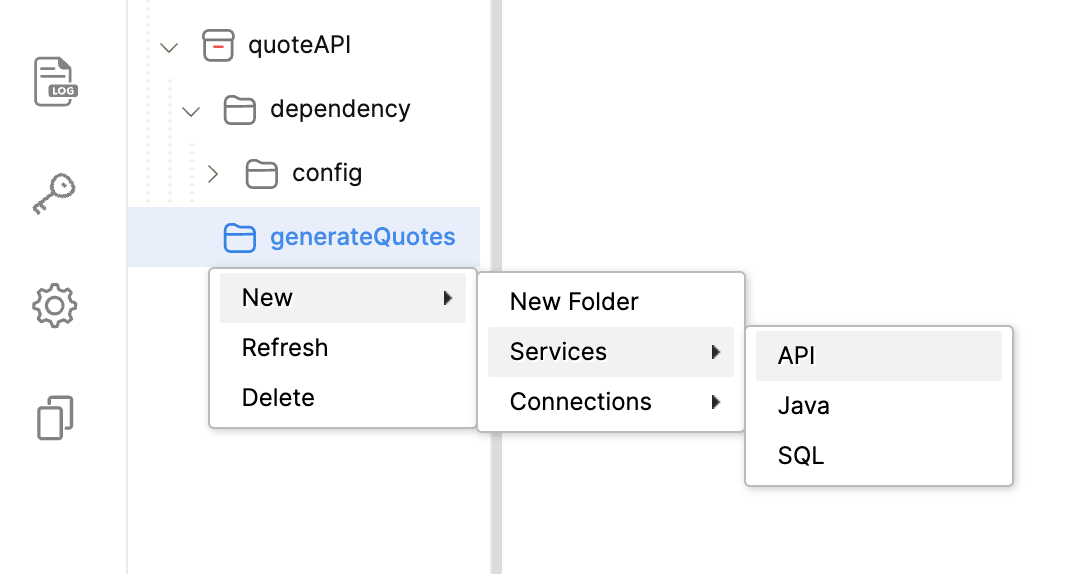
We can use a dedicated database to fetch quotes to our Rest API but I don't want to make this beginner-friendly tutorial more complex. So I will fetch quotes from another free available API and route it to our API, so that we can use our API to fetch quotes but deep inside our API will also fetch the quote from another API.
As you can see there are Consumers and Developers fields, it is for better role-based permissions.
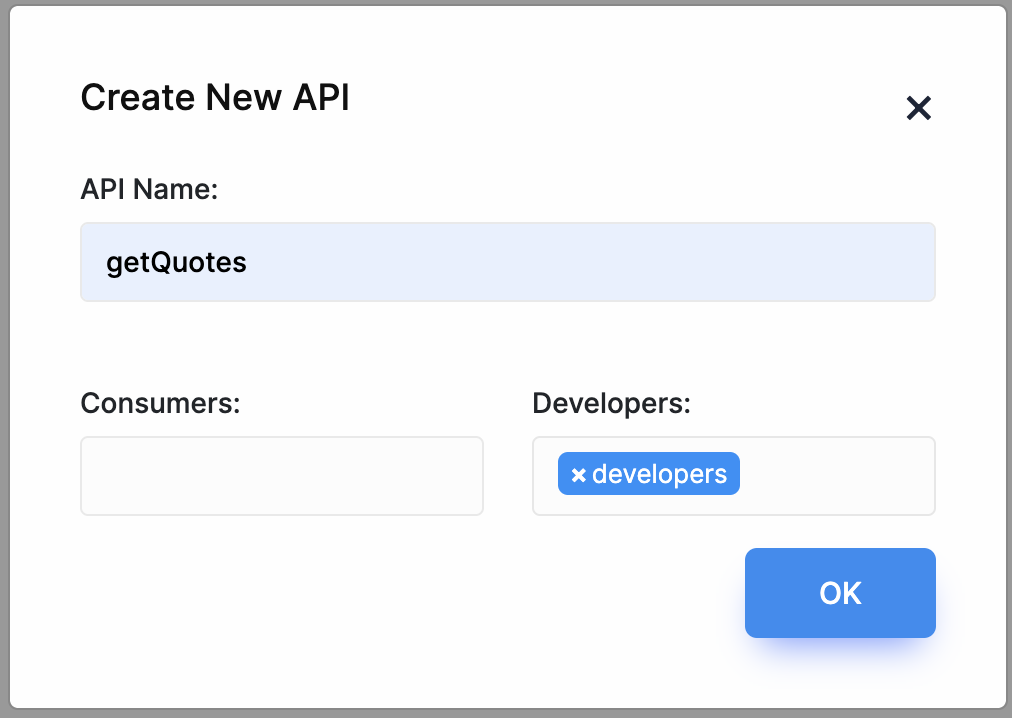
With that, we have created our first API service which has an endpoint that we will use as an API link. Now we have to customize it to our needs. Let us see what to be done now.
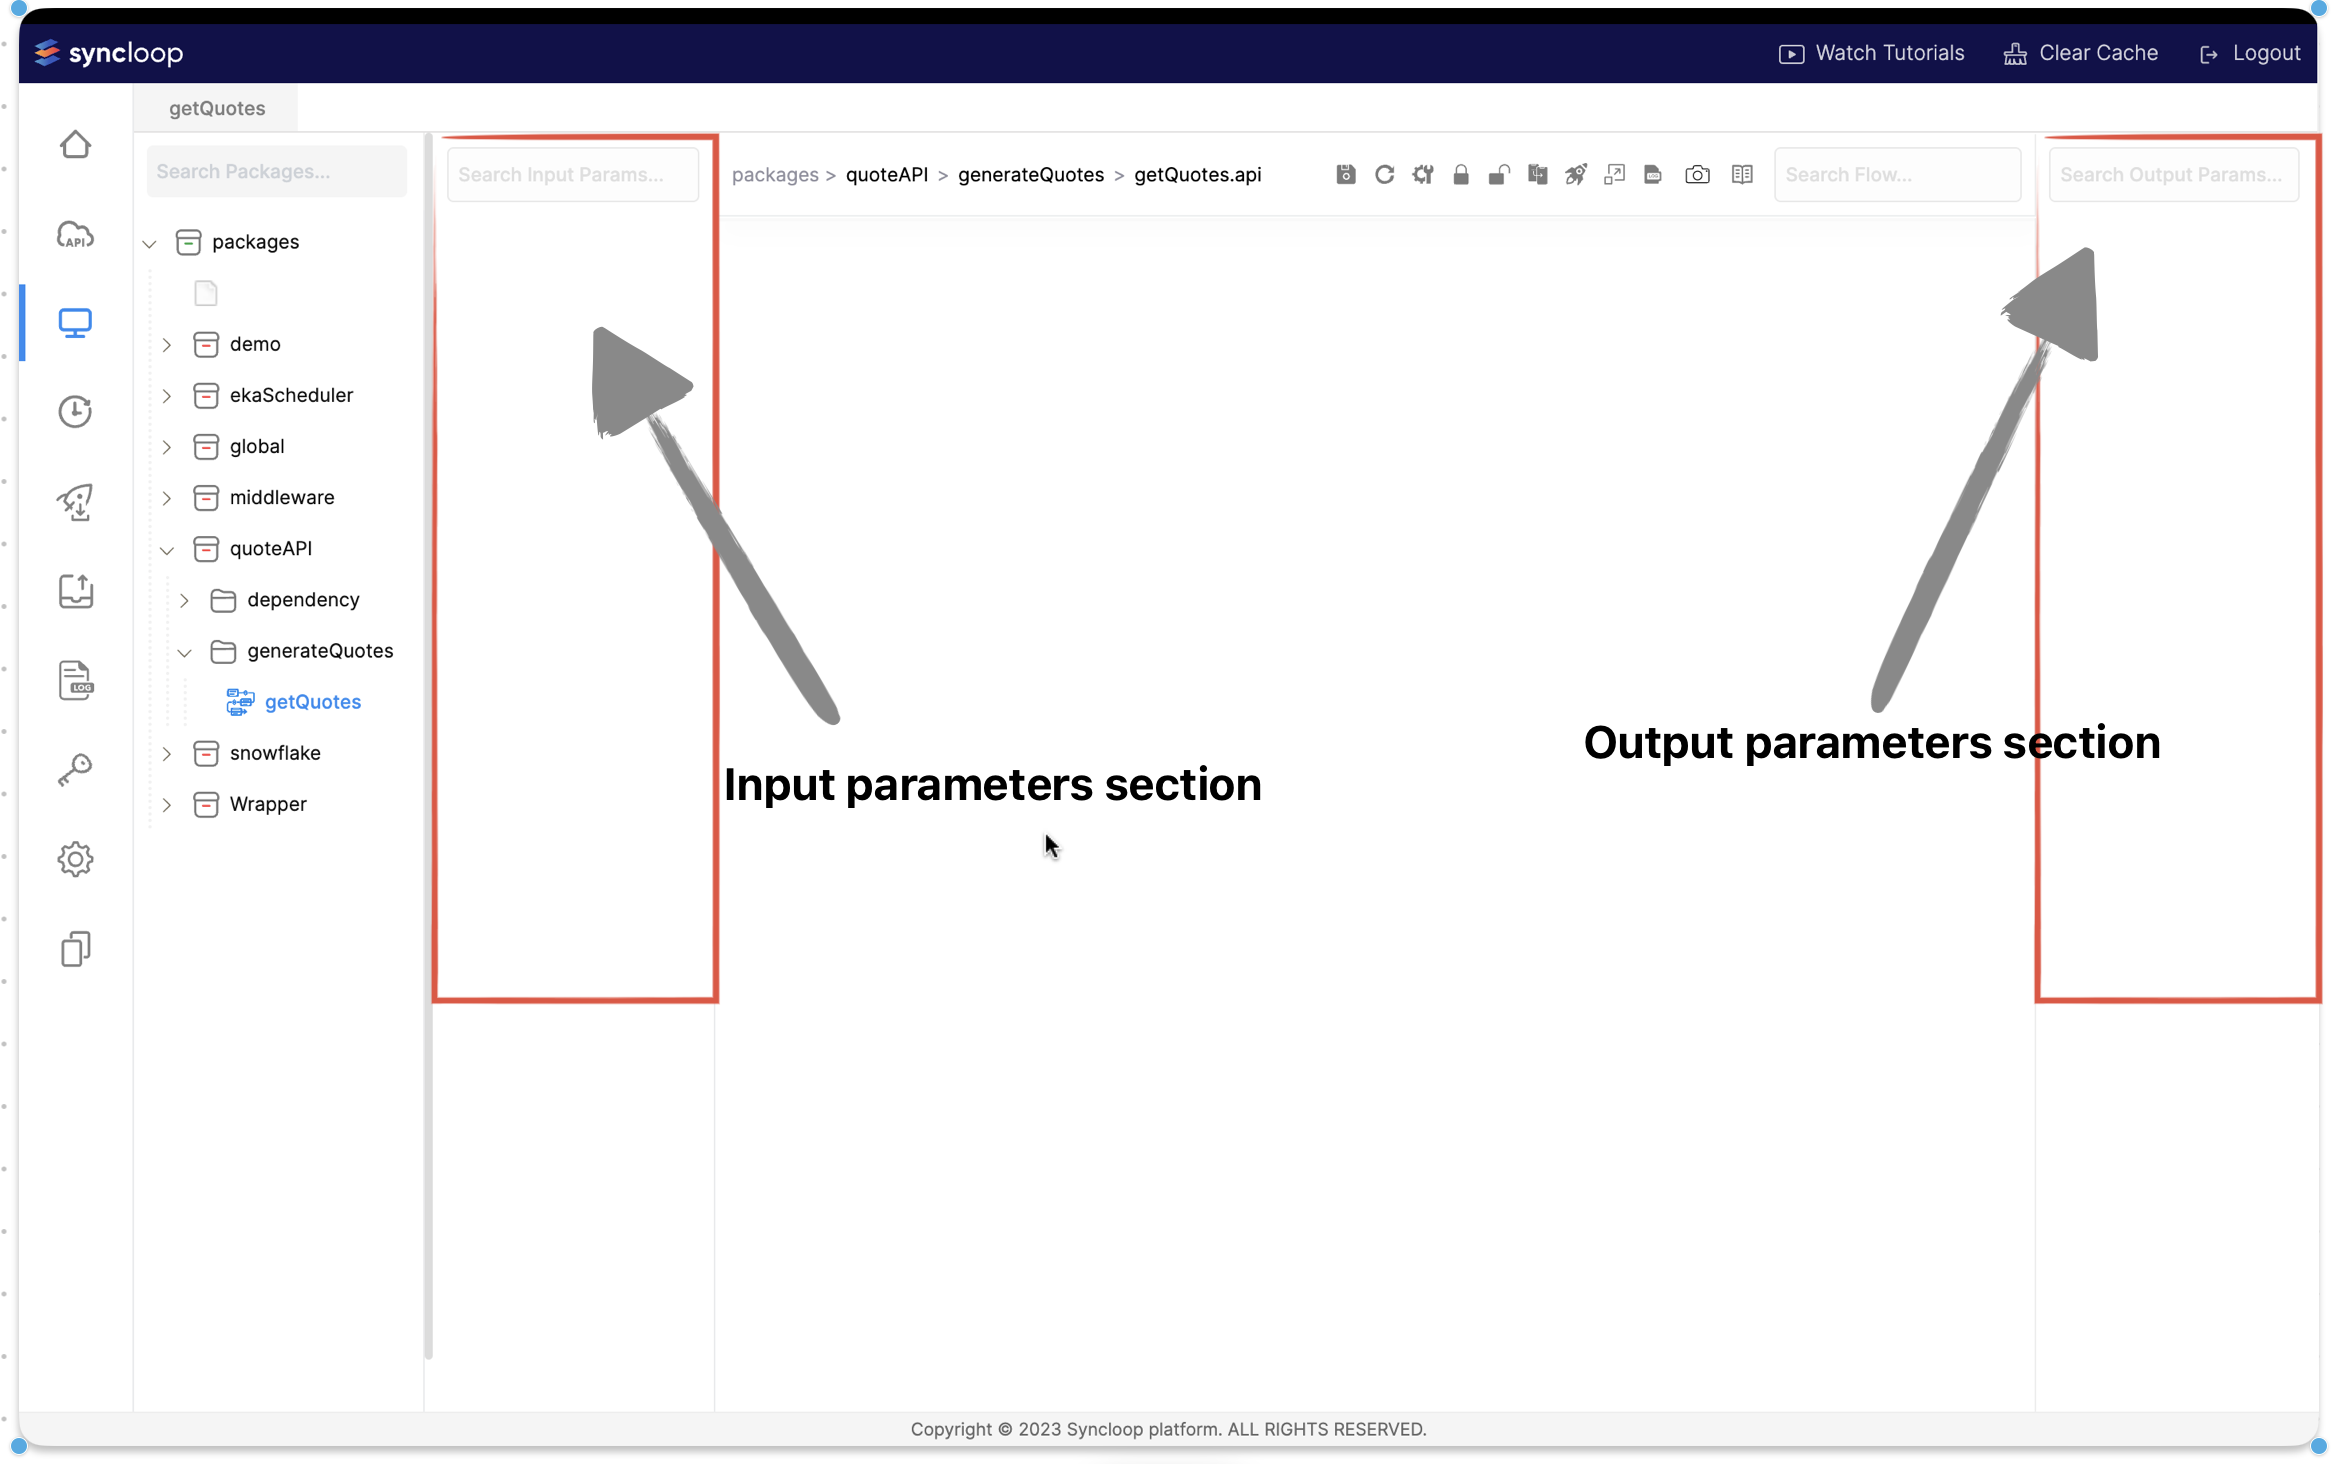
Build API Service File:
You understood the input and output parameters area. Now first we have to use a Map or Transformer to map flow data in further steps.
💡Transformer is a Syncloop term, this is one of the most frequently used statements on the platform. A Transformer statement is created by right-clicking on the control flow section and selecting Transformer from the context menu strip. A Transformer is created in the control flow section of the Syncloop workspace.So, right-click on the centre and choose Transformer.
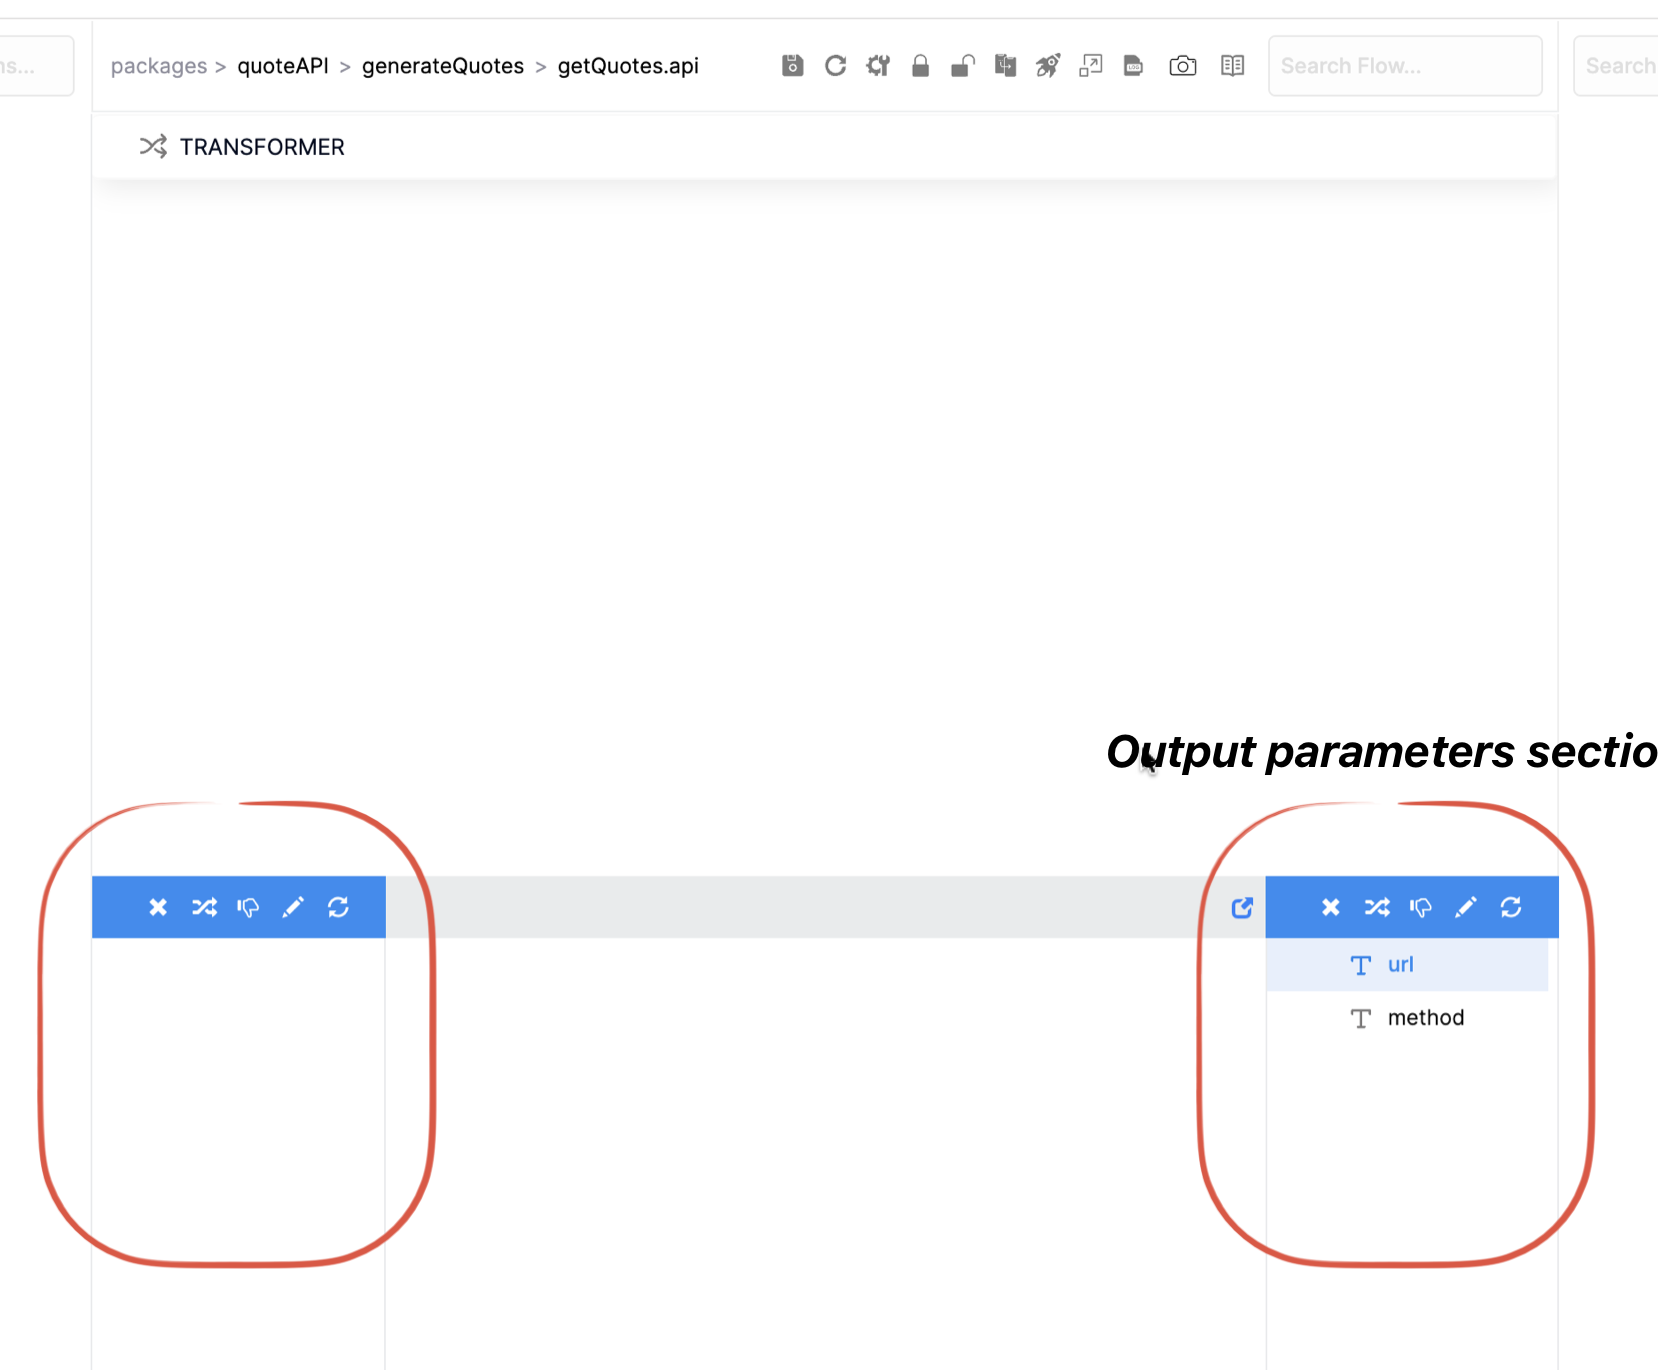
With that, you will see a new layout. Each transformer has two fields also input and output. You can right-click to create new files or fields there.
💡We plan to make a get request to an existing quote API, get the quotes, convert the quotes from JSON to object and output the response with it.First, we are making a transformer with output parameters
urlwith https://type.fit/api/quotes andmethodwith GET.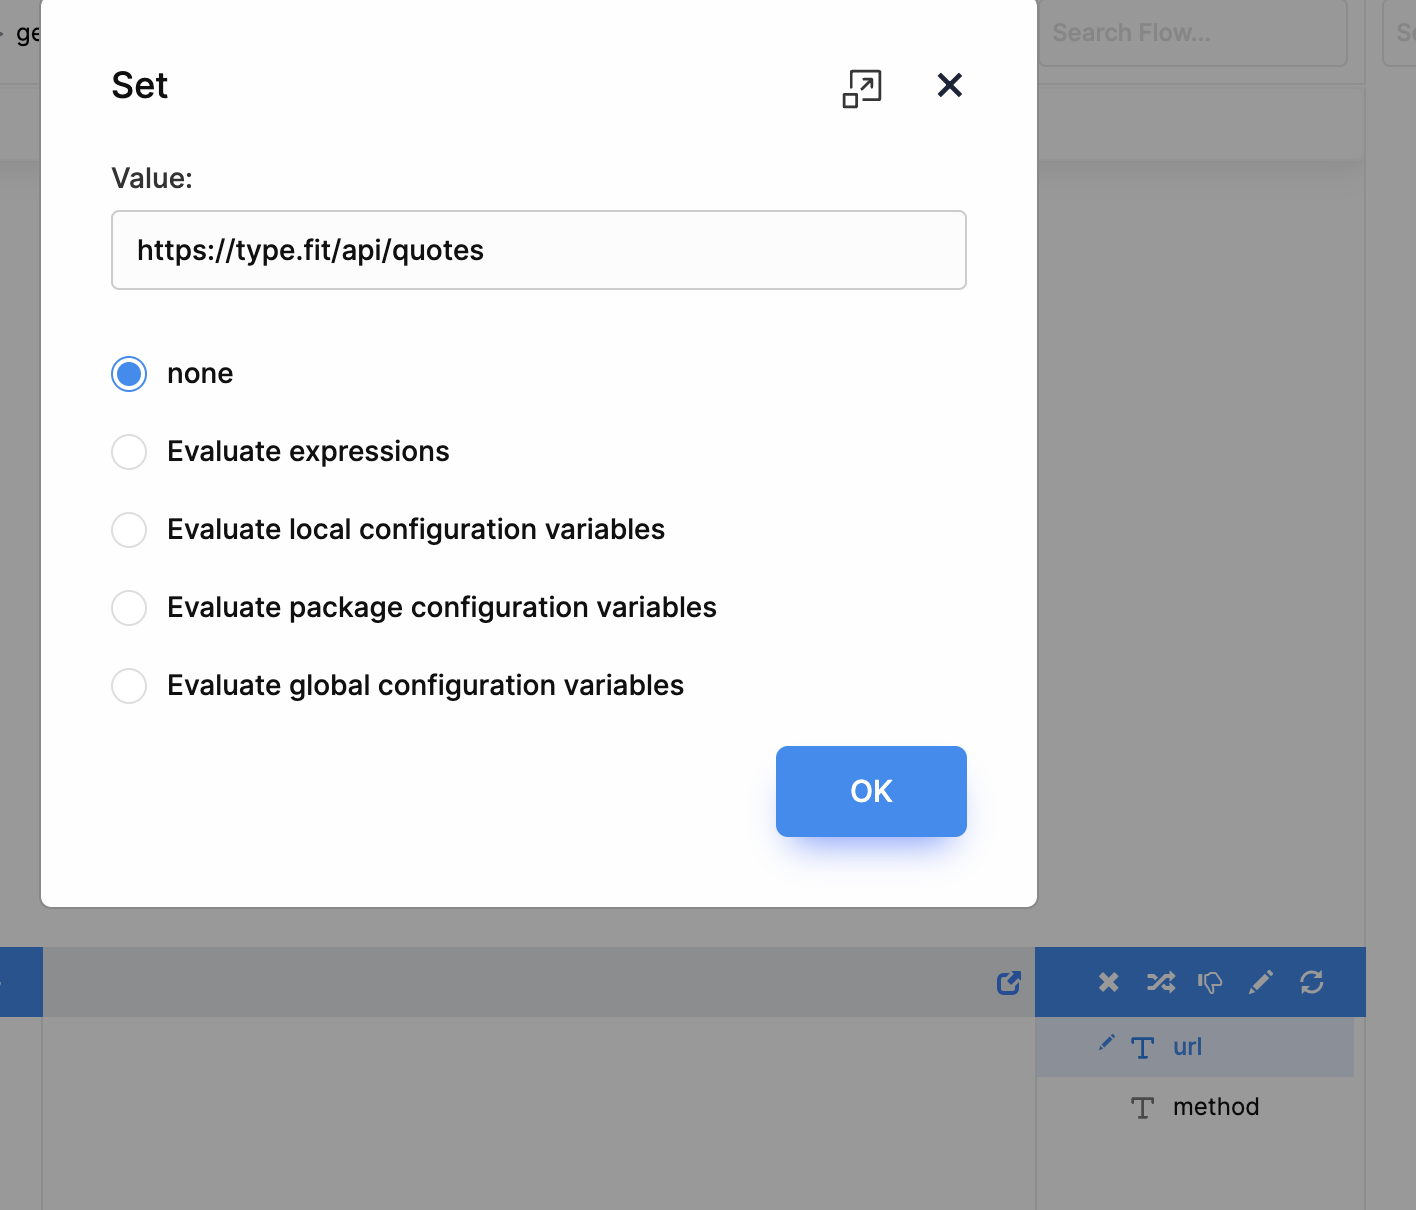
You can just select any parameter and click on the pen icon ✎ to set default values to the parameters. So just set url value and method value.
With that, you are sure that our transformer is outputting these two parameters.
Second, right-click on the dashboard area and this time select a service and this popup will arise. So without interfering with the pop-up, search in the packages section with 'request', select the requestV2 and click on Done.
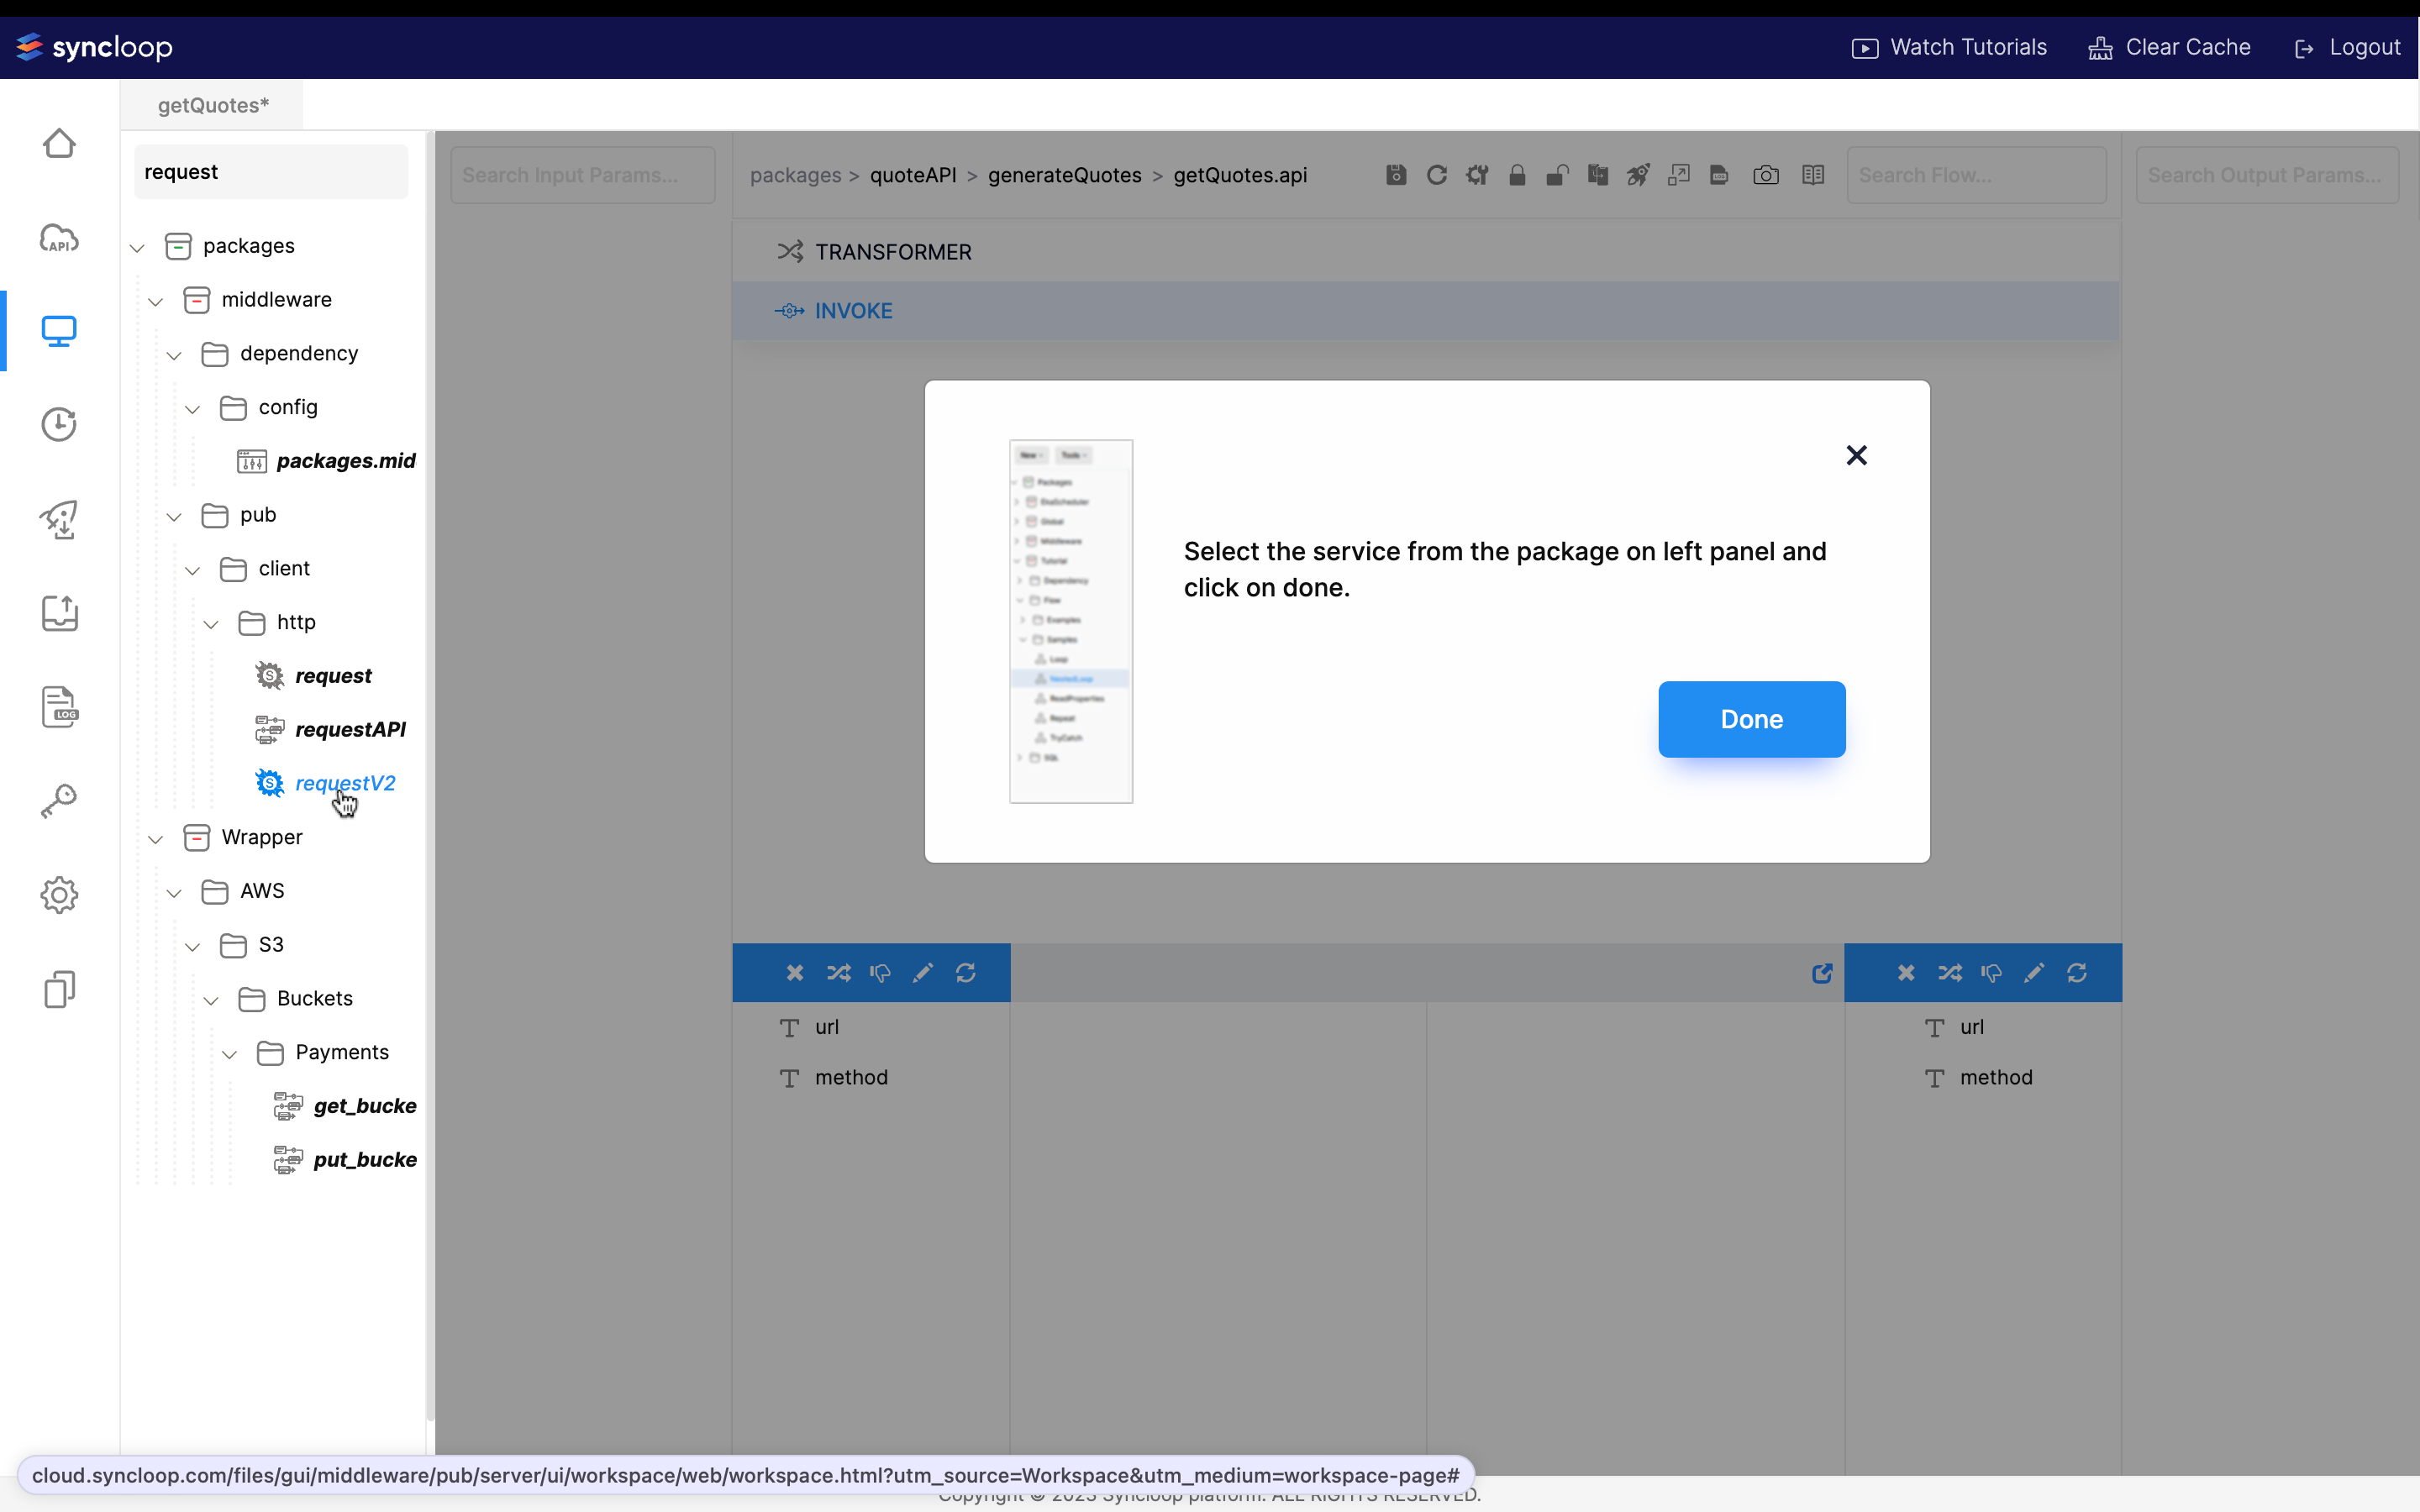
Now we have a transformer and a service in our API in respective order. So the transformer will send its output data to the service now.
Select the requestV2 service in the dashboard, you will see a new layout in the bottom part. You have to just make the route lines just by dragging.
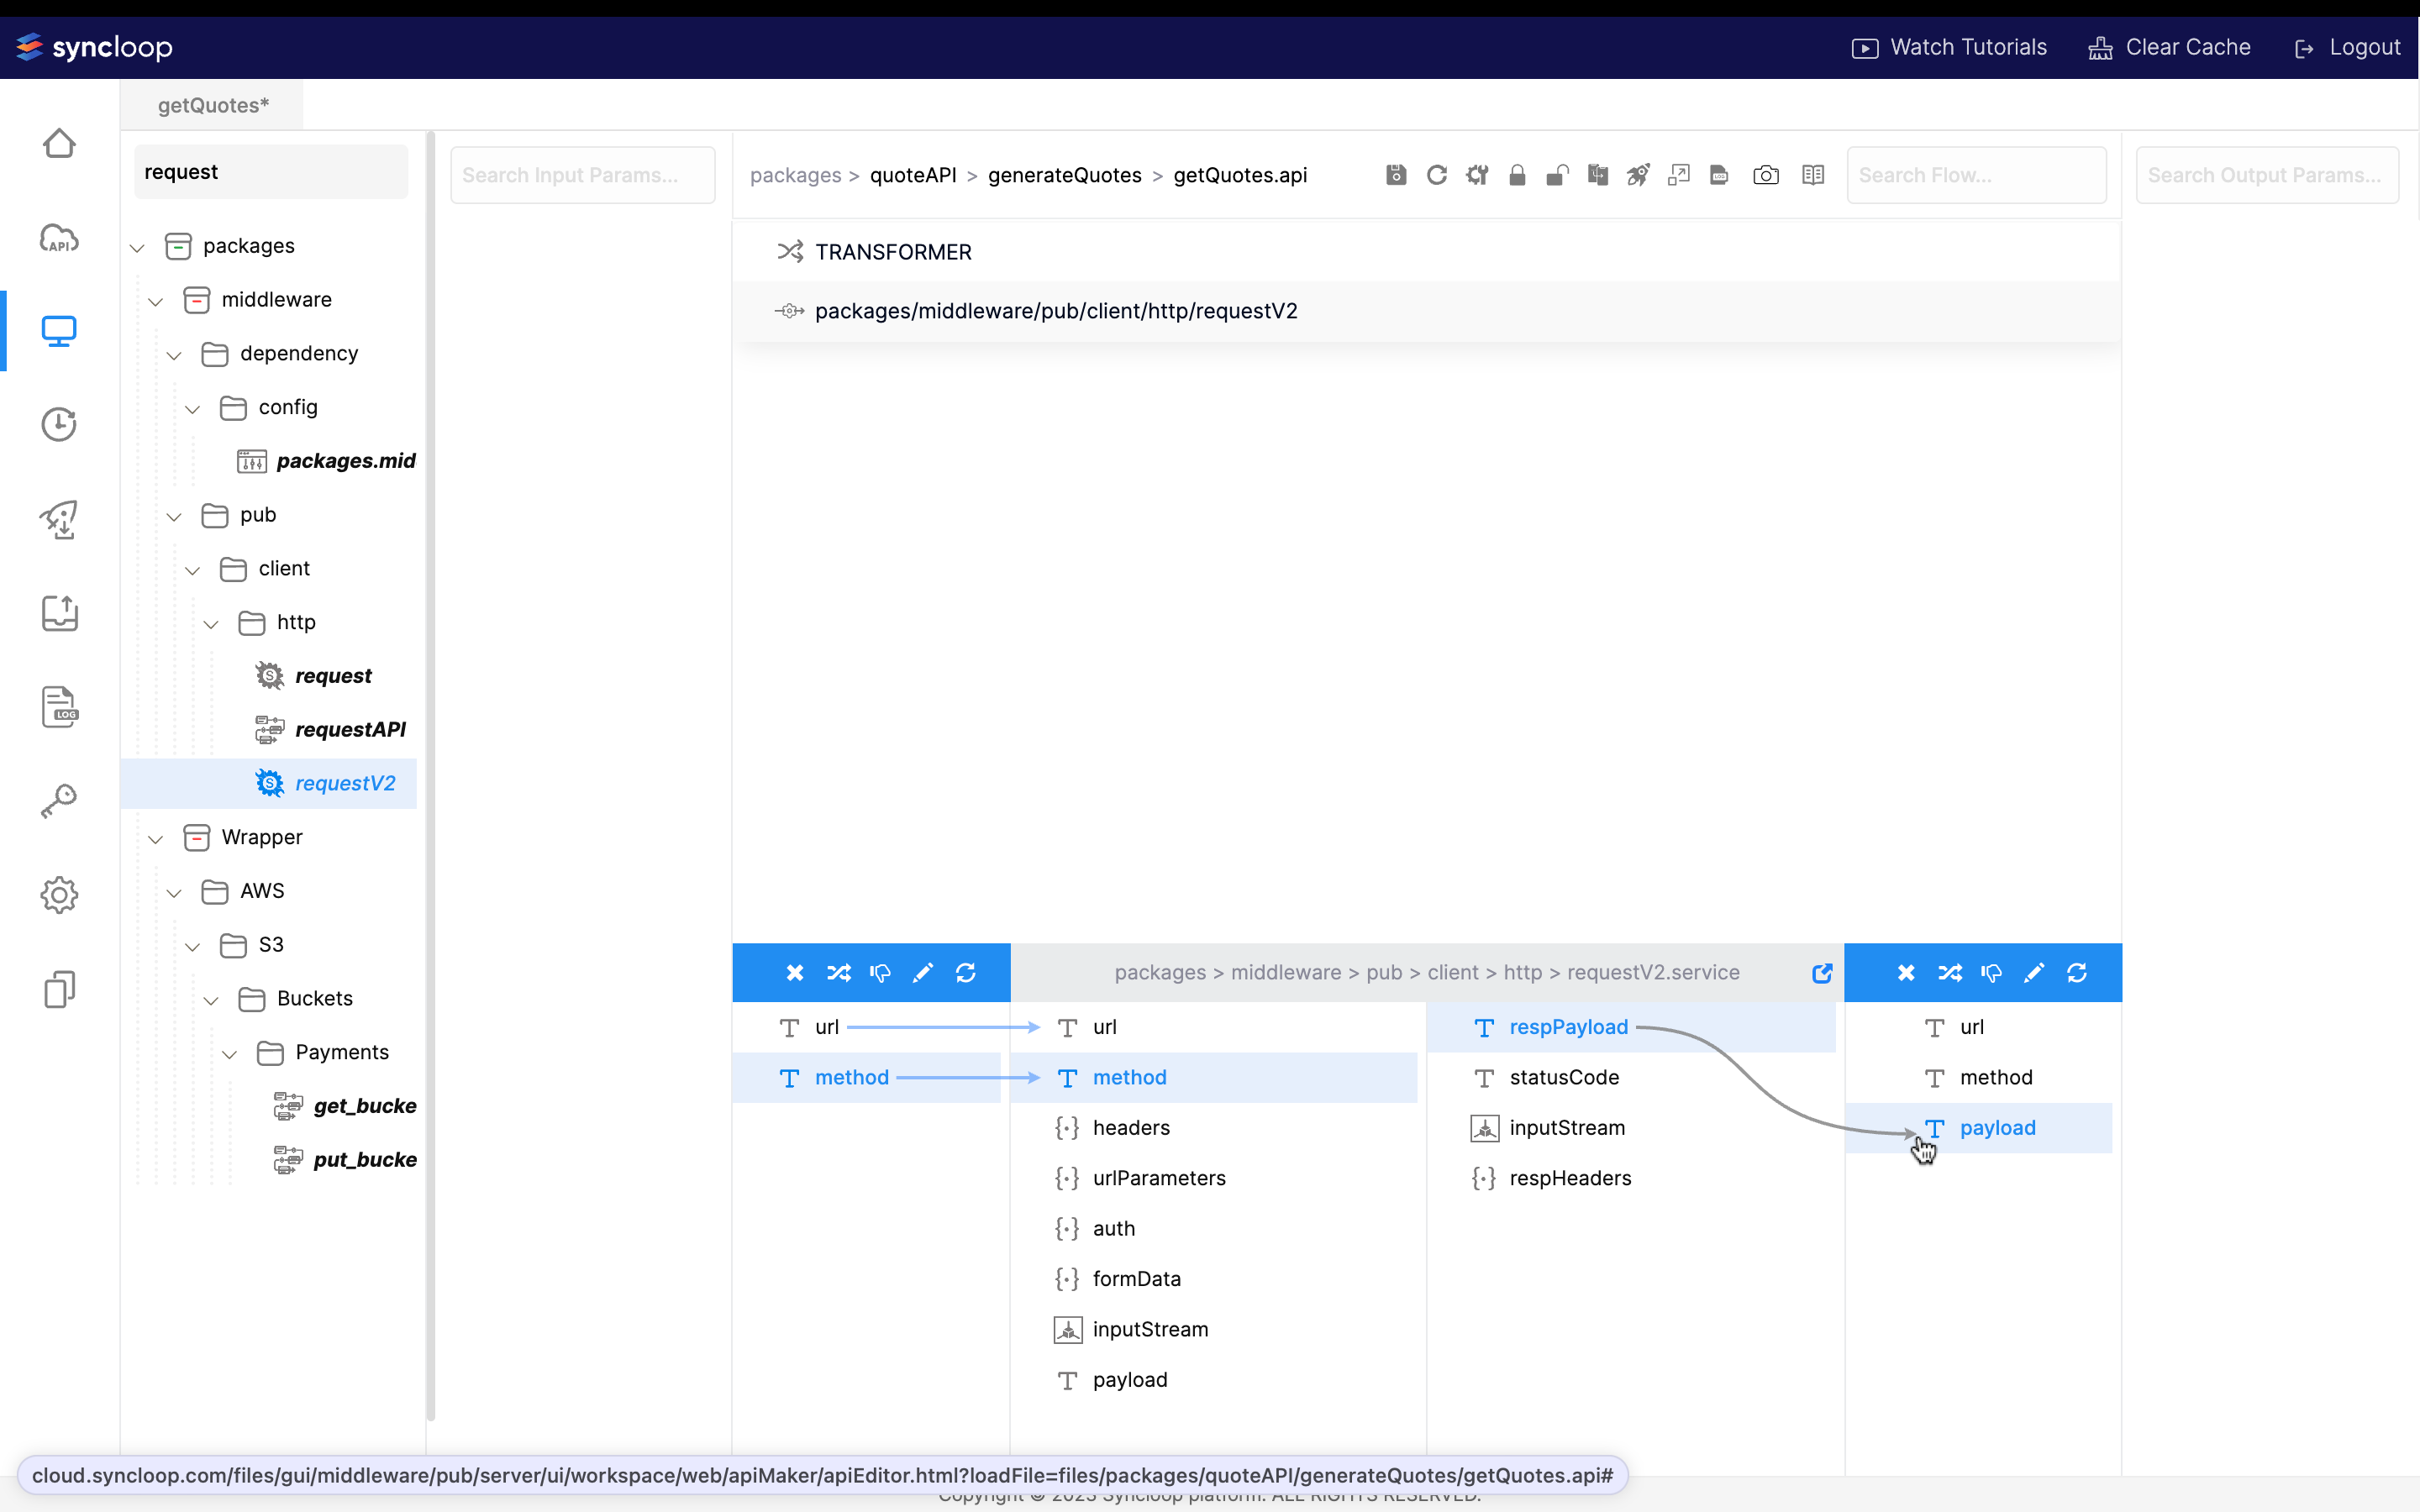
So, url from the previous transformer will go to the requestV2 service's URL param and method to method param. And also the service's respPayload to a newly created payload output parameter string.
Now, create the same name param in the main output section and that param will hold the payload also.

Now let's test our API with Postman:
Before that, extract our API's endpoint by clicking on the configuration icon.

And, get the bearer token from the sidebar,
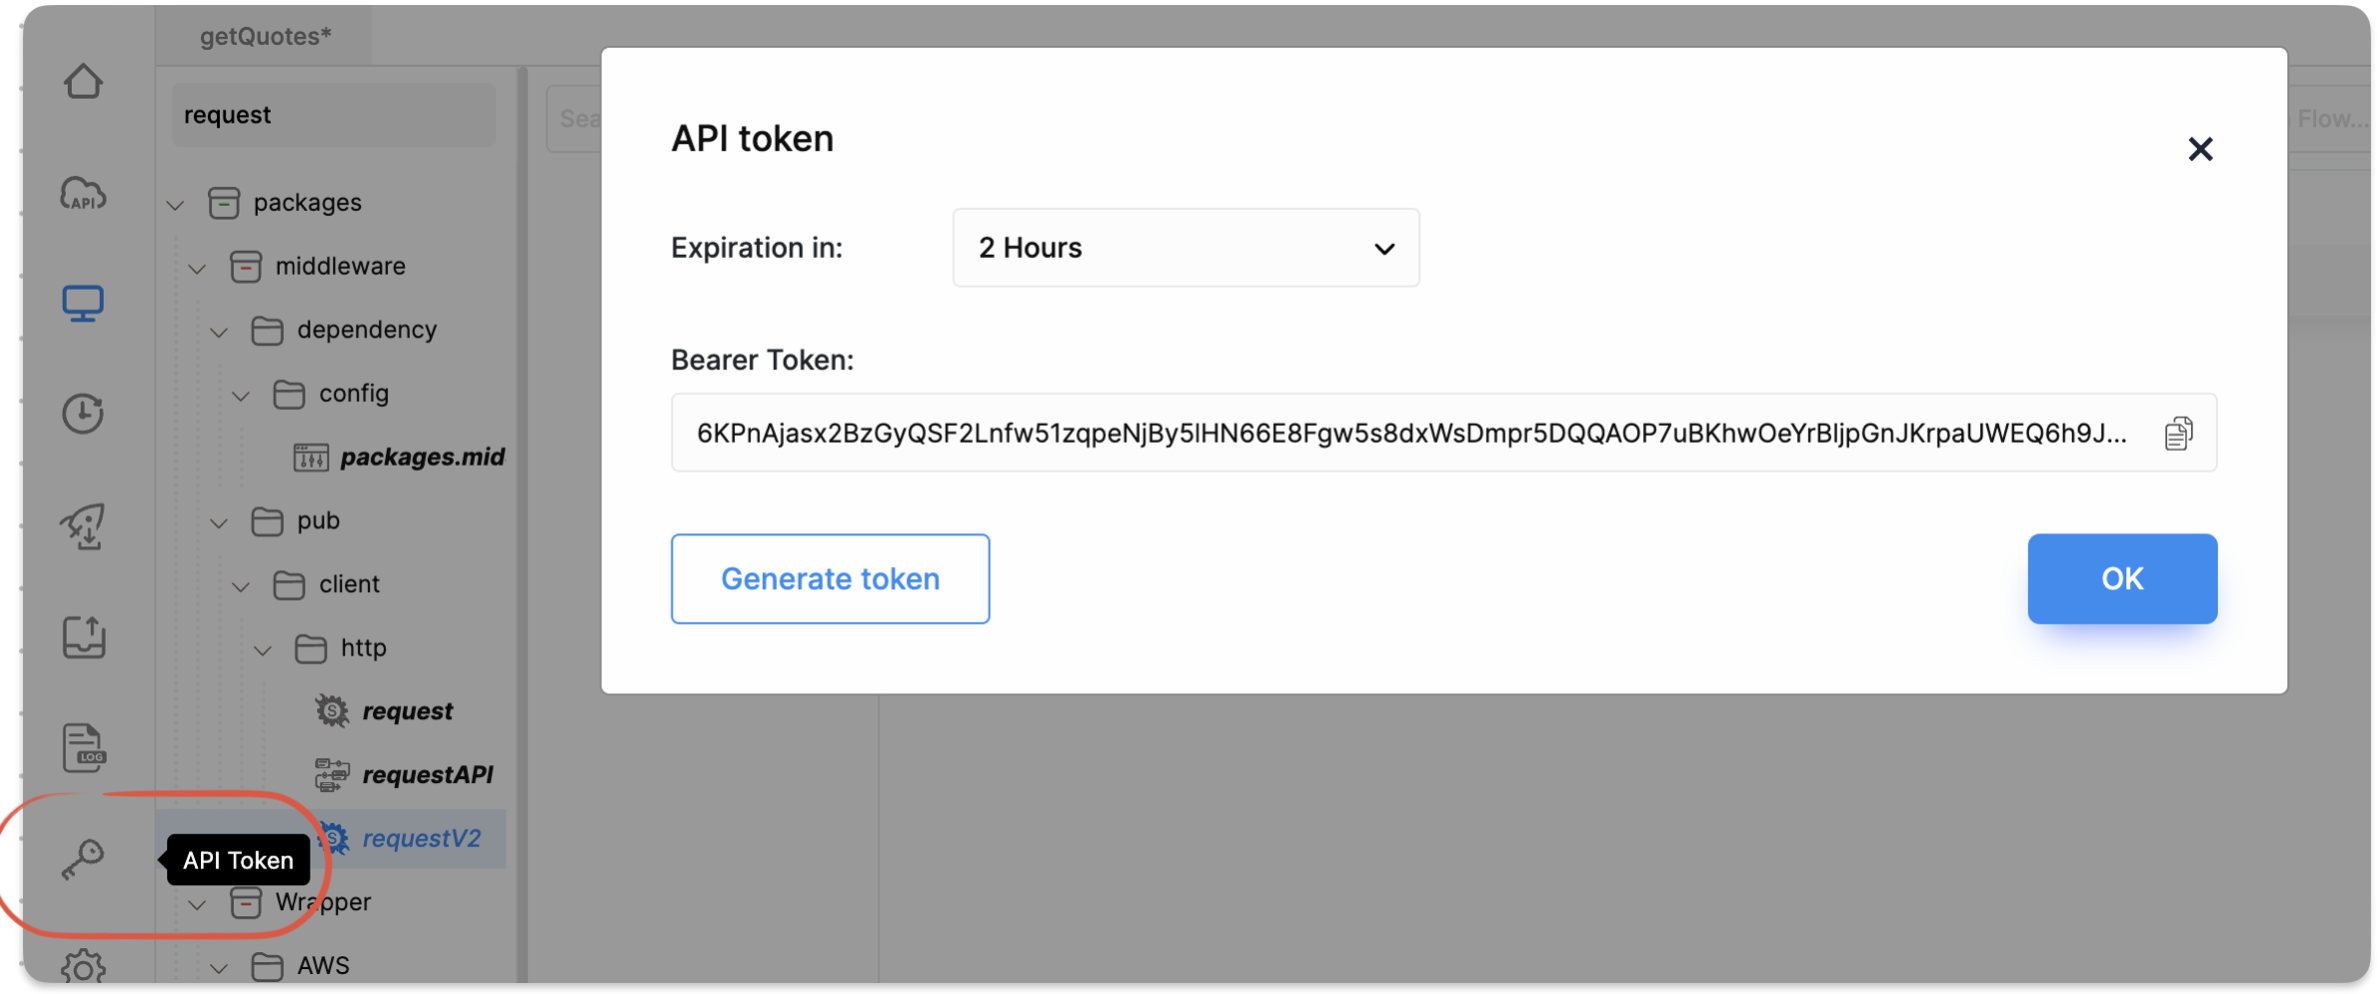
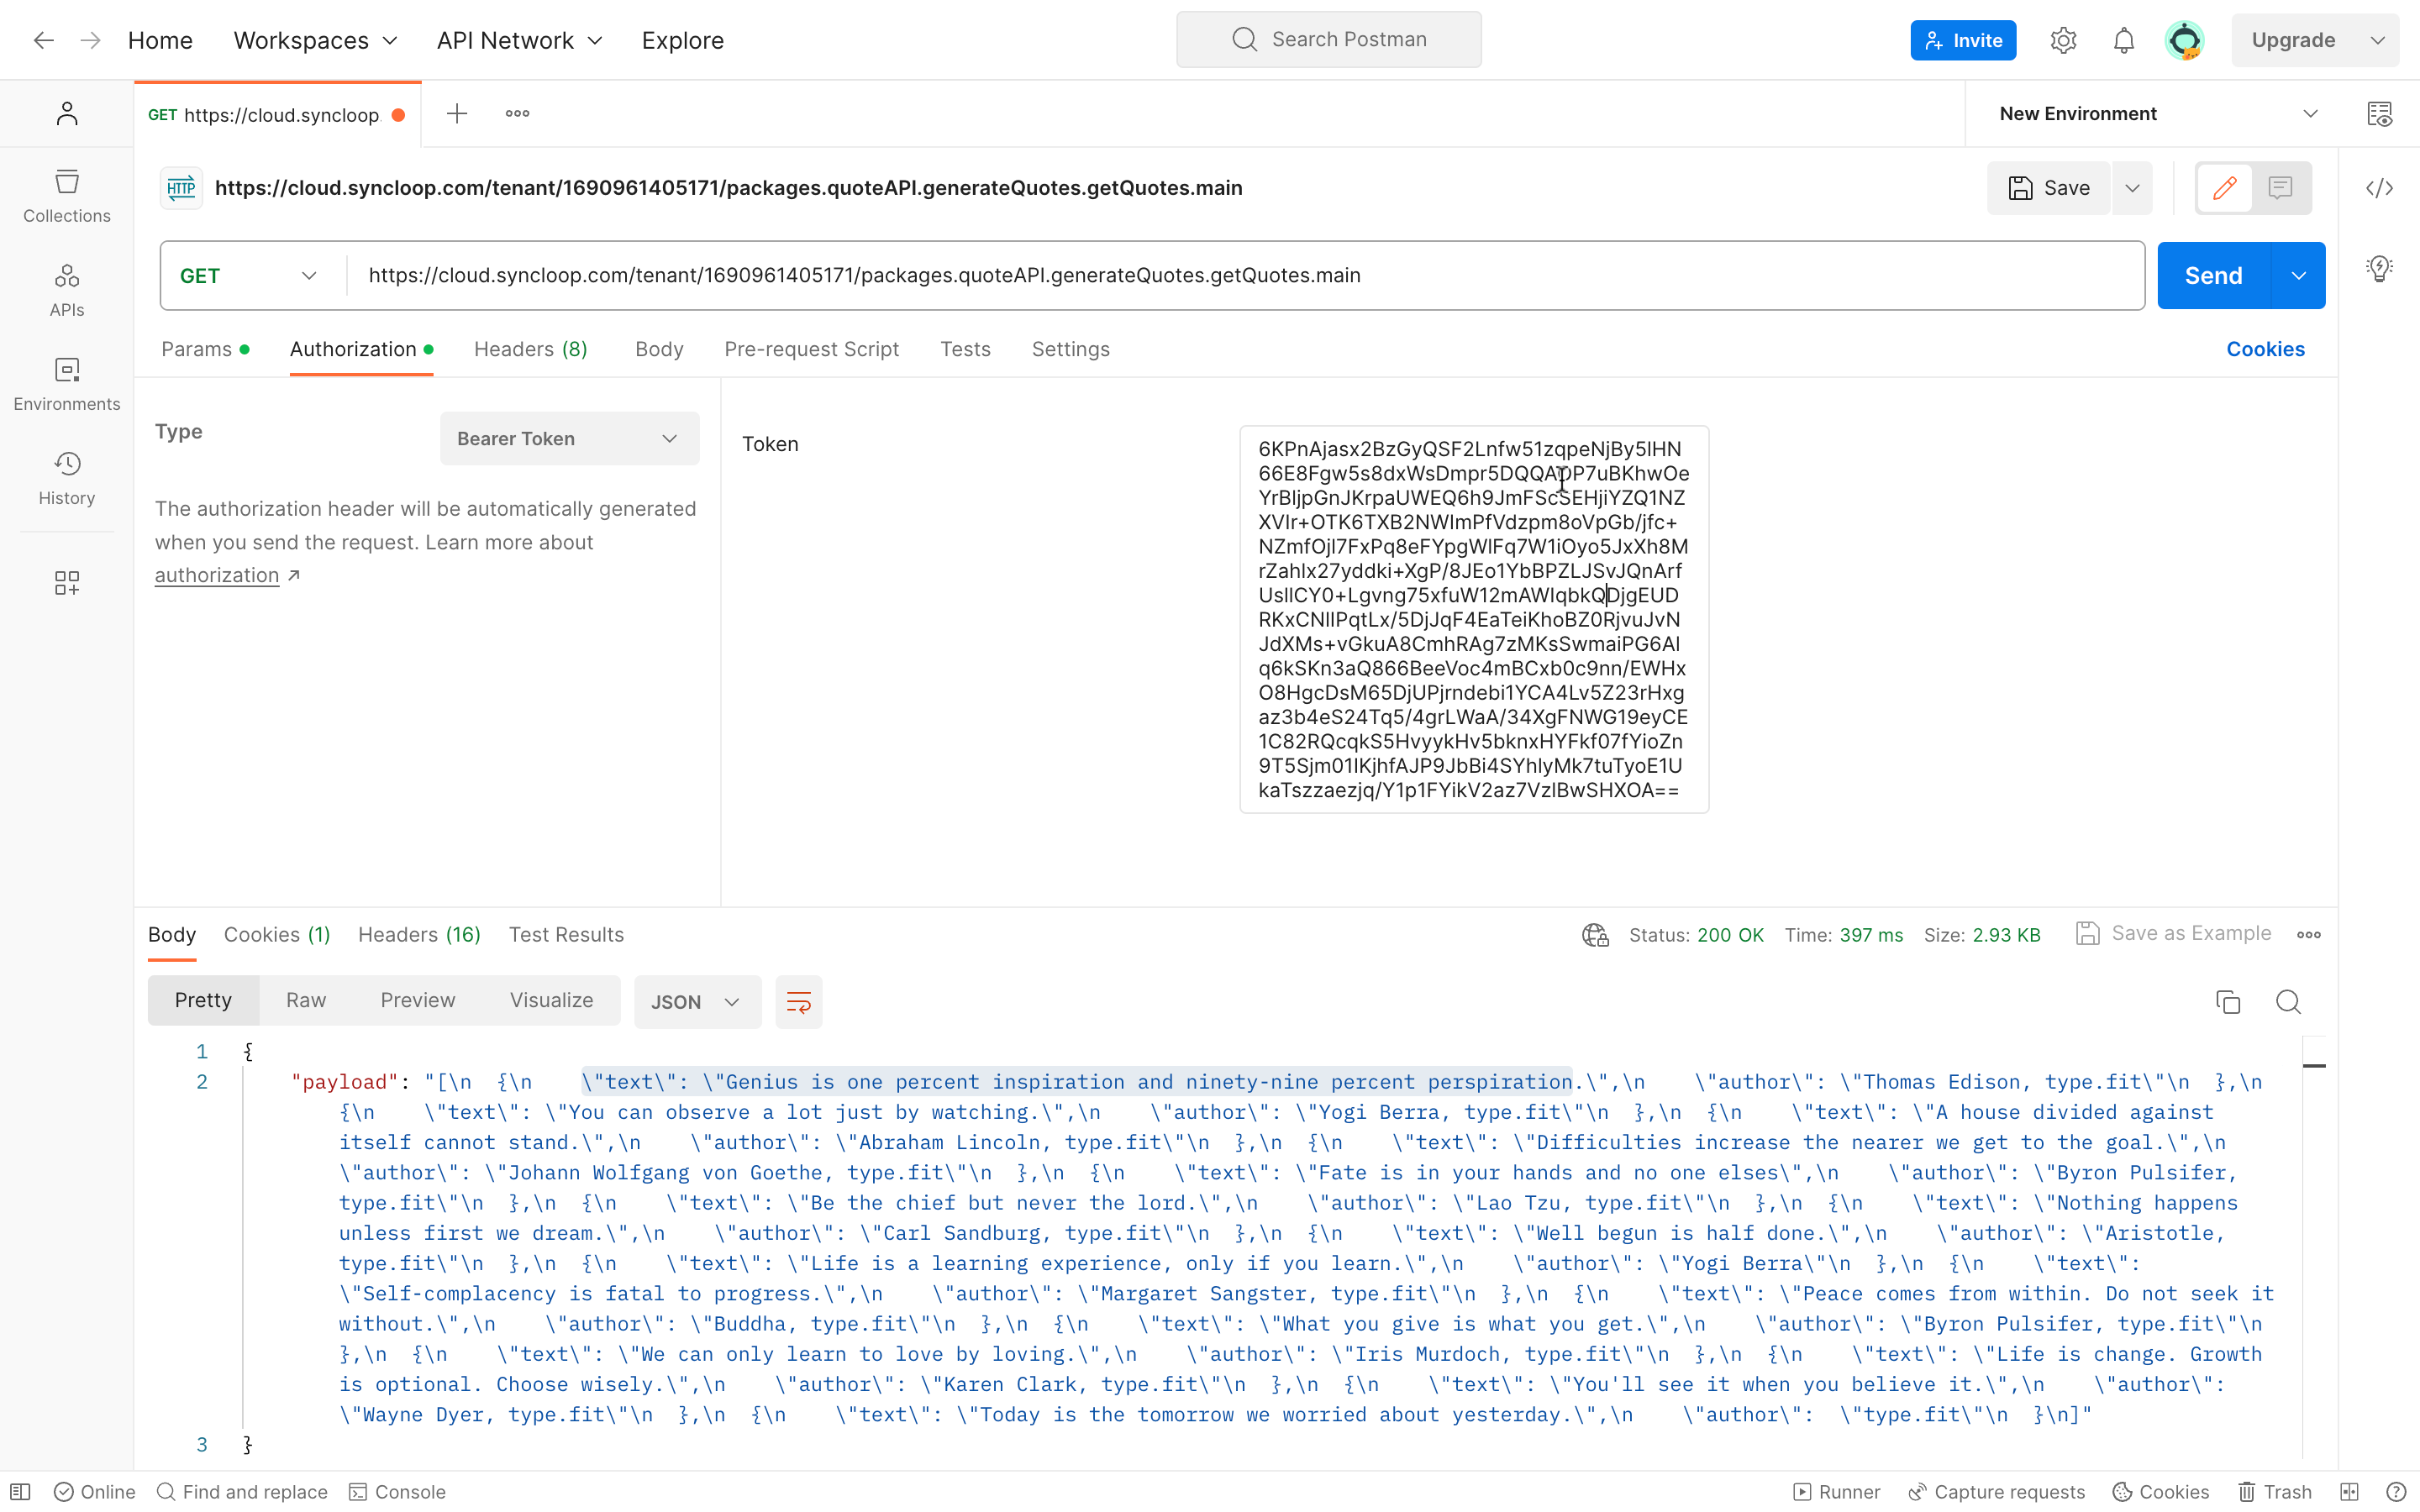
Now, just put the endpoint of the token in Postman and perform a GET request.
Video Solution 📀
If you found the article a little confusing, I've got your back too. Watch this video:
Conclusion ⏰
This tool proves especially useful for projects with straightforward backend requirements, eliminating the need for dedicated backend servers and saving valuable time for developers.
As we wrap up, I hope this blog has sparked your interest in delving into the world of low-code tools. We covered the following topics:
What is Syncloop?
Who should use it?
How to use it.
Building a very simple quote-generating API.
I hope this blog has inspired you to get involved in open source also! Because as an active contributor, I stay updated with the community. And I'm writing this blog with the challenge from the WeMakeDevs community. If you have any questions, please feel free to comment or reach out to me on Twitter.

With that have an amazing day, sayonara 👋🏼
Follow me on @sarkartanmay393 🐦
Direct mail me at sarkartanmay393@gmail.com 📧
Subscribe to my newsletter
Read articles from Tanmay Sarkar directly inside your inbox. Subscribe to the newsletter, and don't miss out.
Written by

Tanmay Sarkar
Tanmay Sarkar
DevOps and Open Source Enthusiast and CSE Student