IntelliJ and Java on Immutable Linux
 Niklas
Immutable Linux Distributions are the future of the Linux Desktop. Simply deploying an image and keeping the core filesystem read-only has many advantages, including increased reliability and decreased breakage from system packages. It also presents a lot of challenges for folks who need code on their machines, be it in Java or other programming environments, especially when they want to use a Jetbrains IDE.
In this article, we will cover the process of setting up a Java Dev Environment (the steps can be replicated for every other environment, such as NodeJS, Rust and Python, btw.) on Fedora Kinoite with the help of Distrobox and Podman. Let's get started! (*snap*)
Getting your IDE installed
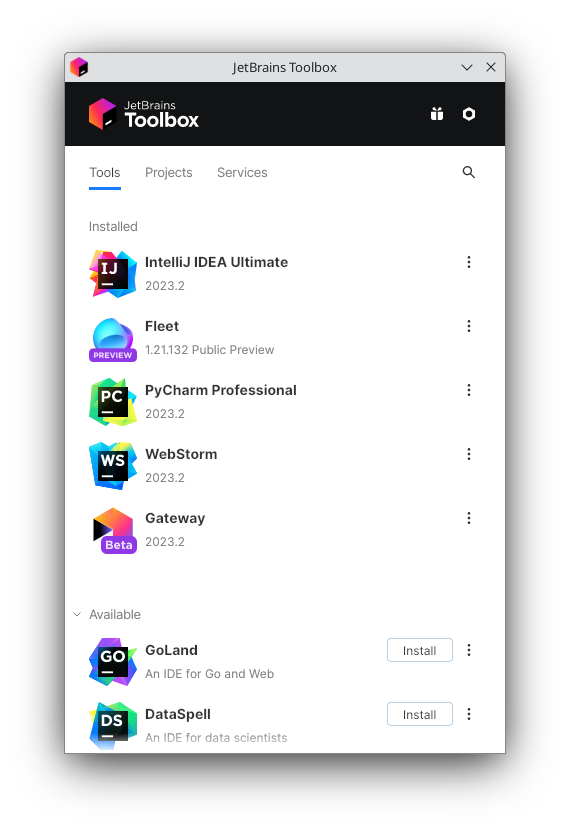
The first order of business is to get your IDE installed. I did this via JetBrains Toolbox on the Host OS and not in a container. Since we can access our home directory, in which Toolbox installs the IDEs, later in our dev container anyway, this is not an issue. It is also preferred if you want to use the same IDE in multiple different environments.
Download Toolbox from this link: https://www.jetbrains.com/toolbox-app/
Extract the archive and run the provided AppImage. JetBrains Toolbox will pop up in a welcome window to accept their terms and conditions. Once that's done, you can install IntelliJ on your system.

We don't need to do anything with this now, until later.
Setting up a development container
First make sure you have Distrobox installed on your system (in my case it already came with the system image provided by https://universal-blue.org, awesome stuff they're doing over there btw!). Instructions for installing Distrobox on your system can be found here: https://github.com/89luca89/distrobox#installation
Let's whip up a terminal if you haven't already. :P
First let's create a new container with Distrobox:
distrobox create --name javabox -H /home/niklas/.homes/javabox --image fedora
Adjust names and paths as necessary. After it's created, enter it for the first time with:
distrobox enter javabox
Distrobox will configure, update and install a bunch of stuff. Give it a few good minutes and take a sip from your coffee.
Output should look like this:
niklas@fedora /v/h/niklas> distrobox enter javabox
Container javabox is not running.
Starting container javabox
run this command to follow along:

 podman logs -f javabox

 Starting container...                           [ OK ]
 Installing basic packages...                    [ OK ]
 Setting up read-only mounts...                  [ OK ]
 Setting up read-write mounts...                 [ OK ]
 Setting up host's sockets integration...        [ OK ]
 Setting up read-write mounts...                 [ OK ]
 Setting up host's sockets integration...        [ OK ]
 Integrating host's themes, icons, fonts...      [ OK ]
 Setting up package manager exceptions...        [ OK ]
 Setting up rpm exceptions...                    [ OK ]
 Setting up sudo...                              [ OK ]
 Setting up groups...                            [ OK ]
 Setting up users...                             [ OK ]
 Setting up package manager exceptions...        [ OK ]
 Setting up rpm exceptions...                    [ OK ]
 Setting up sudo...                              [ OK ]
 Setting up groups...                            [ OK ]
 Setting up users...                             [ OK ]
 Executing init hooks...                         [ OK ]

Container Setup Complete!
Welcome to fish, the friendly interactive shell
Type help for instructions on how to use fish
niklas@javabox /v/h/niklas> cd ~
Let's install the OpenJDK 17 Runtime with:
sudo dnf install java
Again, give dnf a good few minutes so it can setup and download everything properly.
Now comes a bit of a janky part. We need to copy the IntelliJ Desktop File, which was created by Toolbox when we installed IJ earlier, to the /usr/share/applications/ directory where the Distrobox-Export script can find it. Do it like so (adjust folders and names accordingly):
sudo cp /var/home/niklas/.local/share/applications/jetbrains-idea.desktop /usr/share/applications/javabox-idea.desktop
Now we can export the IDE to run in the container with distrobox-export :
distrobox-export --app idea
With that done, you should see an entry in your application list / menu that looks similar to this (notice the (on javabox which is the import part here):

Your IDE should start up like it were installed on a normal Host OS:

Now we need to login to activate the IDE. But clicking on the button does not open the browser.
Fix Host browser not opening
To fix this, we need only a simple command:
We need to make a symlink to the distrobox-host-exec script which will forward our request to the host OS, which will handle the request from xdg-open .
sudo ln -s /usr/bin/distrobox-host-exec /usr/local/bin/xdg-open
After that, relaunch the IDE, the browser should now open and you can login to your browser.
That's it. You now have a fully-functional Jetbrains IDE which you can use your container and not clutter your host OS with development libraries and other dependencies.
Sources:
https://github.com/89luca89/distrobox/issues/194#issuecomment-1445032633
Subscribe to my newsletter
Read articles from Niklas directly inside your inbox. Subscribe to the newsletter, and don't miss out.
Written by
