How to Install Laravel on Ubuntu 20.04 with Nginx
 Kalaivani Rajendran
Configure Nginx Server on Ubuntu 20.04
This guide will walk you through the process of installing Nginx on your Ubuntu 20.04 server and then configuring it alongside PHP and a Laravel Project.
What is Nginx?
Nginx (pronounced "engine-x") is a popular open-source web server, reverse proxy server and load balancer. Created by Igor Sysoev in 2004, Nginx has gained significant popularity due to its high-performance capabilities and efficient architecture.
Nginx is designed to efficiently handle a large number of concurrent connections and deliver web content quickly and reliably.
Install the Nginx web server on Ubuntu 20.04, you can follow these steps:
To open the Terminal, simply use the Ctrl+Alt+T shortcut. Then, enter the following command
Update Package Repositories
sudo apt update
Install Nginx
Use the following command to install the Nginx package.
sudo apt install nginx
Start Nginx
After the installation is complete, start the Nginx service.
sudo systemctl start nginx
Enable Nginx to Start on the Boot
To ensure Nginx starts automatically whenever the system boots, enable it with the following command.
sudo systemctl enable nginx
Check Nginx Status
You can verify if Nginx is running properly by checking its status.
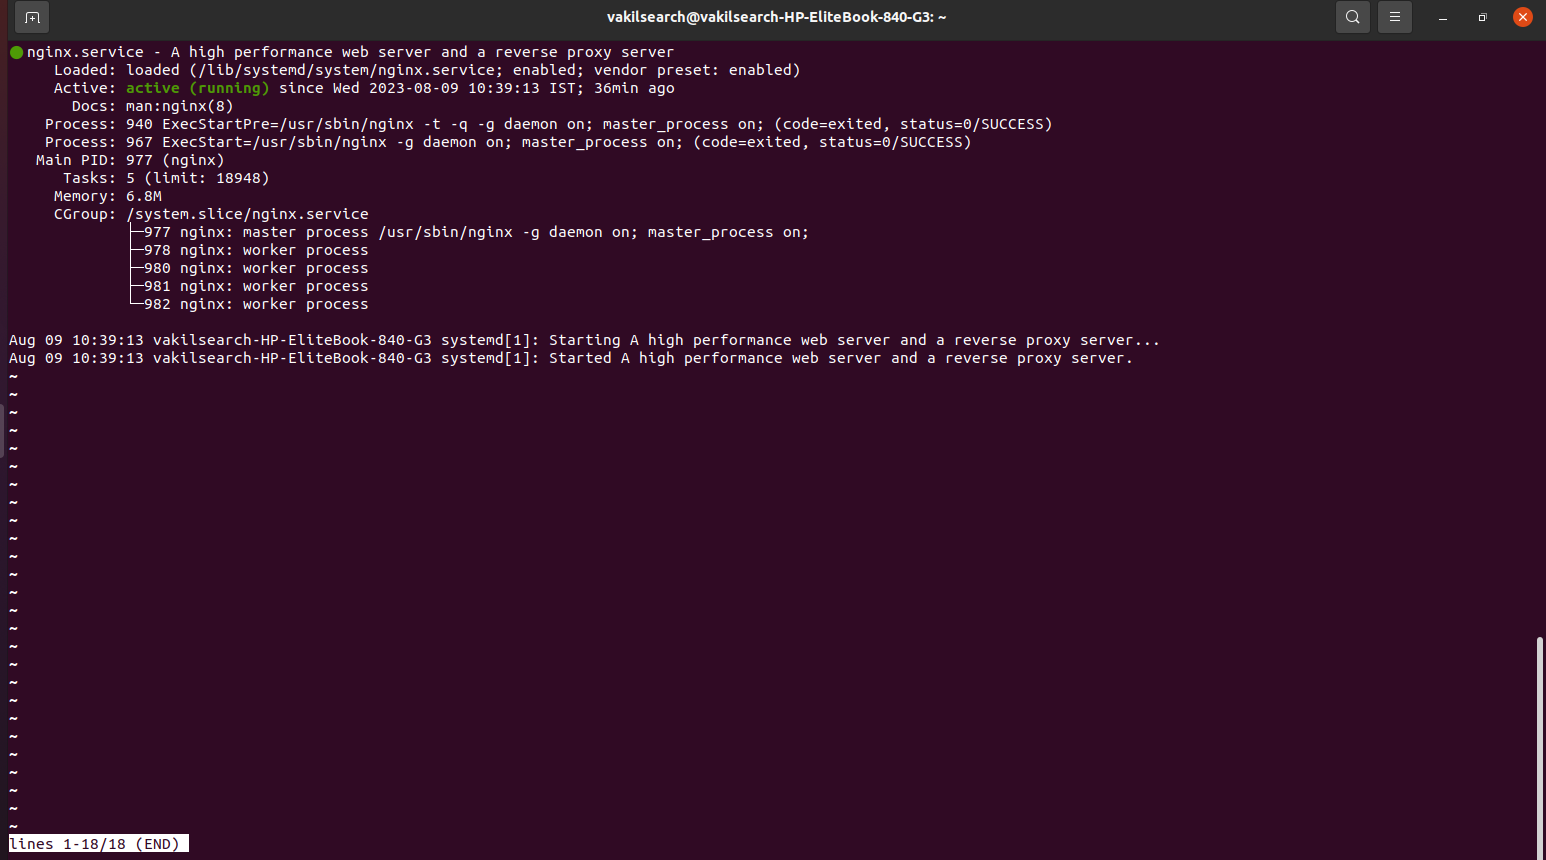
sudo systemctl status nginx
If the terminal displays the status below, it indicates that Nginx has started successfully:

If your system's firewall is enabled, you might need to allow incoming traffic on port 80 (HTTP) and port 443 (HTTPS) to allow Nginx to serve web pages.
sudo ufw allow 'Nginx Full'
With the Nginx installation now complete, you can access the default page to verify it using a web browser.
Open a web browser and enter your server's IP address or domain name. You should see the default Nginx welcome page.
Exploring the Core File Structure
Nginx configuration files are located in the /etc/nginx/ directory. The main configuration file is nginx.conf, and sites' configuration files are stored in the sites-available and sites-enabled directories.
Now successfully installed Nginx on your Ubuntu server. You can proceed to configure Nginx to host your websites or applications by creating server blocks (virtual hosts) and modifying the relevant configuration files
Certainly, here's a list of advanced Nginx server management commands for checking various aspects of your server:
Reload Nginx Configuration:
sudo nginx -s reloadTest Configuration Syntax:
sudo nginx -tRestart Nginx:
Stop Nginx
Start Nginx:
Disable Nginx Service at Boot:
Enable Nginx Service at Boot:
View Nginx Logs:
Check Nginx Version:
Install Laravel on Ubuntu 20.04
The first step to check whether you can install Laravel on your Ubuntu system is to ensure you have the required prerequisites, such as PHP and Composer. You can use the following command to check if PHP is installed:
php -v
If PHP is not installed, you will need to install it using the appropriate package manager.
To check if Composer is installed, you can use the following command:
composer --version
If Composer is installed, it will display the Composer version information. If it's not installed, you'll need to install it as well.
Quick Commands to Install PHP and Composer on Ubuntu Nginx Server
Setting up PHP and Composer on your Ubuntu Nginx server is essential for seamless Laravel development. Follow these concise commands to get started quickly.
sudo apt update && sudo apt upgrade
sudo apt install software-properties-common
sudo add-apt-repository ppa:ondrej/php

sudo apt install php-fpm php-mbstring php-xml php-imagick
sudo apt install php-zip php-json php-cli
sudo apt install composer

php -v
composer --version

sudo nano /etc/nginx/sites-available/default
fastcgi_pass unix:/var/run/php/php7.4-fpm.sock; # Adjust version if needed
sudo systemctl restart nginx
With these quick commands, your Ubuntu Nginx server is ready for efficient Laravel development. Stay updated by referring to the official documentation.
Step-by-Step guide to installing Laravel on an Ubuntu Nginx server
Step 1: Create Laravel Project
Navigate to your desired project directory and run:
composer create-project --prefer-dist laravel/laravel your-project-name
Step 3: Configure Nginx for Laravel
sudo nano /etc/nginx/sites-available/project-name.conf
Insert the content provided below into the project-name.conf file:
fastcgi_pass unix:/run/php/php7.4-fpm.sock;Step 4: Enable Site and Restart Nginx
sudo ln -s /etc/nginx/sites-available/project-name.conf /etc/nginx/sites-enabled/
sudo systemctl restart nginx
Step 5: Configure Laravel .env
Navigate to your Laravel project directory and copy the .env.example file to .env. Generate a unique application key:
php artisan key:generate
Step 6: Set Permissions
Set proper permissions for storage and bootstrap/cache directories:
sudo chown -R www-data:www-data /path-to-your-project/storage /path-to-your-project/bootstrap/cache
That's it! You've successfully installed Laravel on your Ubuntu Nginx server. Access your Laravel application by visiting your server's IP address or domain name in a web browser.
Please replace /path-to-your-project with the actual path to your Laravel project directory. This guide assumes you have basic knowledge of Ubuntu and Nginx.
I hope these instructions will assist you in successfully installing the Laravel project on your Ubuntu system.
Subscribe to my newsletter
Read articles from Kalaivani Rajendran directly inside your inbox. Subscribe to the newsletter, and don't miss out.
Written by

Kalaivani Rajendran
Kalaivani Rajendran
Passionate about clean code, problem-solving, and enhancing user experiences. Let's connect!