API voyage through Syncloop Platform
 Dhanush
Introduction
Hey there, tech explorers and data enthusiasts! Have you ever wondered how all those applications, websites, and devices connect and share information so seamlessly? Now it's time to start on a digital adventure as we explore the world of API with a Syncloop Platform. Whether you're a coding whiz or a curious cat, get ready to understand the mysteries of APIs and uncover Syncloop's superpowers. Let's get started.....🚀
Understanding API's
Before we get into the complex world of APIs, let's take a moment to draw a parallel that will make the concept crystal clear.

Like a strong bridge connecting two cities, an API serves as an intermediary point between various software applications. It serves as a digital link that allows applications to communicate, collaborate, and share data in the way that a bridge permits transportation and interaction between cities. Like bridge has entry and exit points, APIs have 'endpoints.' Consider endpoints as the bridge's entry and exit gates but in the context of software, Each endpoint serves as a specified location where one application can make a request and another application can respond.
Consider the constant flow of traffic on a bridge between two cities. This dynamic flow of movement mimics the transmission of data via an API. Data, like traffic on the bridge, goes in both ways between apps. When a programmer requires specific information, the programmer makes a 'request' using the API, The API then analyses the request and returns the corresponding 'response', much like cars bringing people and goods on the bridge.
A Peek Into API Steps
Building an API has some interesting similarities with building a bridge. Developers create the API architecture in the same way as architects develop the layout of a bridge. Engineers that assure traffic flow and safety are the same as API developers who create replies and error messages. Developers create API endpoints in the same way that bridge builders create endpoints in the bridge. Thorough testing ensures that both the bridge and the API can handle stresses, while extensive documentation acts as an explanation for users to navigate easily.
Syncloop: Toolkit to Master API
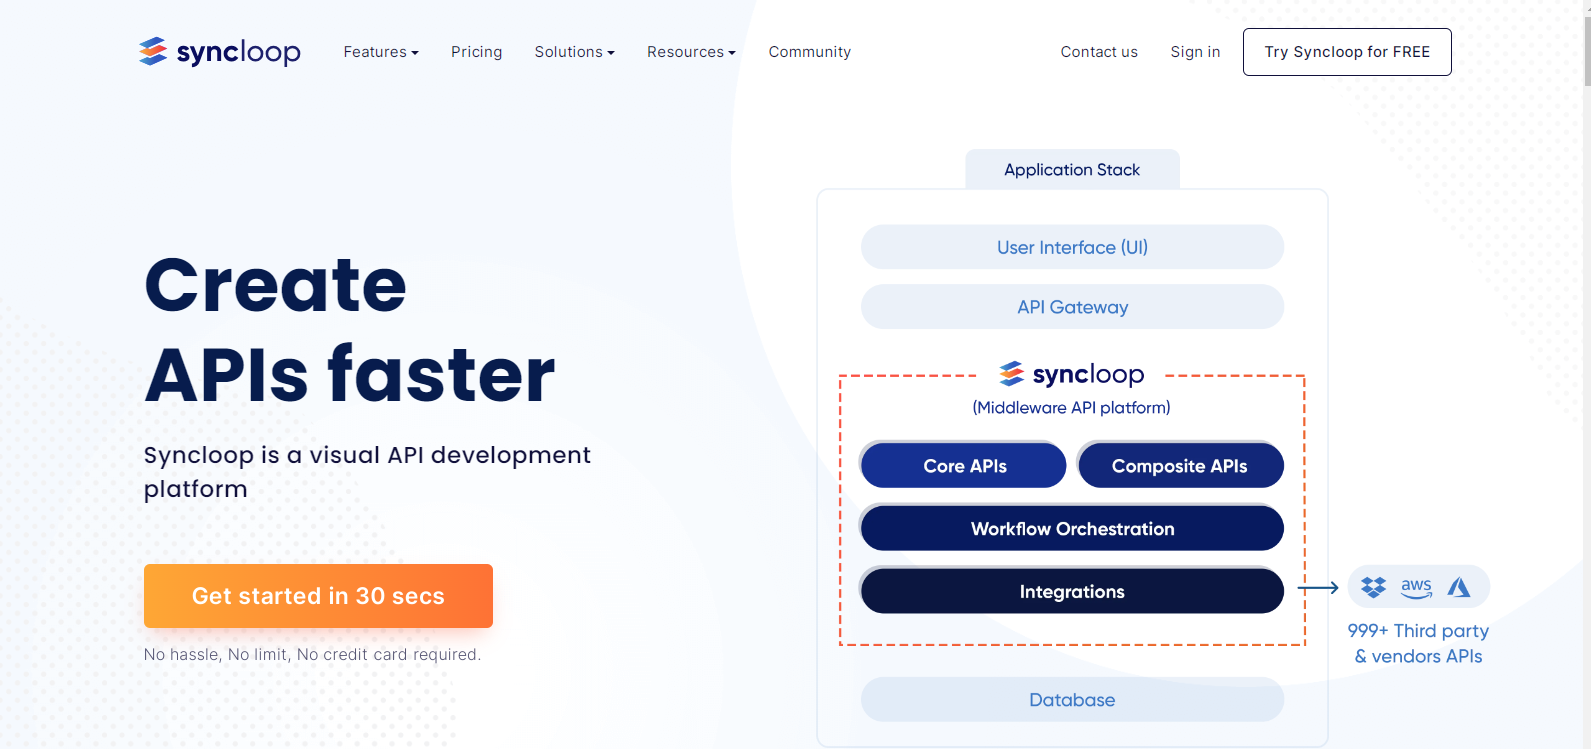
Syncloop is a game-changing visual API development tool that changes the way we think about API development and maintenance. This dynamic solution serves developers, architects, and tech executives by providing a varied platform for quickly creating APIs.
Syncloop's strength is in speeding up API development from concept to deployment while maintaining high-quality standards. Syncloop fuels speed, adaptability, and competitive edge by increasing efficiency without sacrificing perfection.
Furthermore, Syncloop is a fantastic equalizer in API development. Its approachable nature simplifies the workflow, making it accessible to developers of all skill levels. API creation and deployment become as simple as a few mouse clicks, removing the difficulties of code and implementation. Accept Syncloop for a smooth API development path that expands possibilities.
Benefits of Syncloop
What if I told you that "you could create powerful APIs without the complexities of writing complex code?" Yes, Syncloop provides that. This unique platform brings in a new era of API development by making it simple and accessible to individuals without much coding knowledge.
It makes you interesting, right? But wait, it doesn't end there. 🔥
Simplified Creation: Syncloop provides a visual editor, which makes the API creation as simple as dragging and dropping. No coding is required, which is ideal for all levels of developers.
Single-Click Deployment: Syncloop allows you to deploy APIs with a single click across key cloud platforms like AWS, Azure, and GCP.
Automatic Documentation: Syncloop automates API documentation production, pulling crucial facts from your code to keep you informed without the need for manual work.
Real-Time Testing: With Syncloop's interactive interface, you can create APIs while testing them in real-time. Send API calls, receive immediate replies, and assure API accuracy.
Enhanced Security: Syncloop seamlessly integrates security features such as authentication, authorization, and HTTPS encryption, reinforcing your APIs.
Getting Started with Syncloop platform
Resources For Getting Started
Are you ready to start using Syncloop? Explore these vital tools to help you navigate your API development journey and ensure a smooth and successful start.
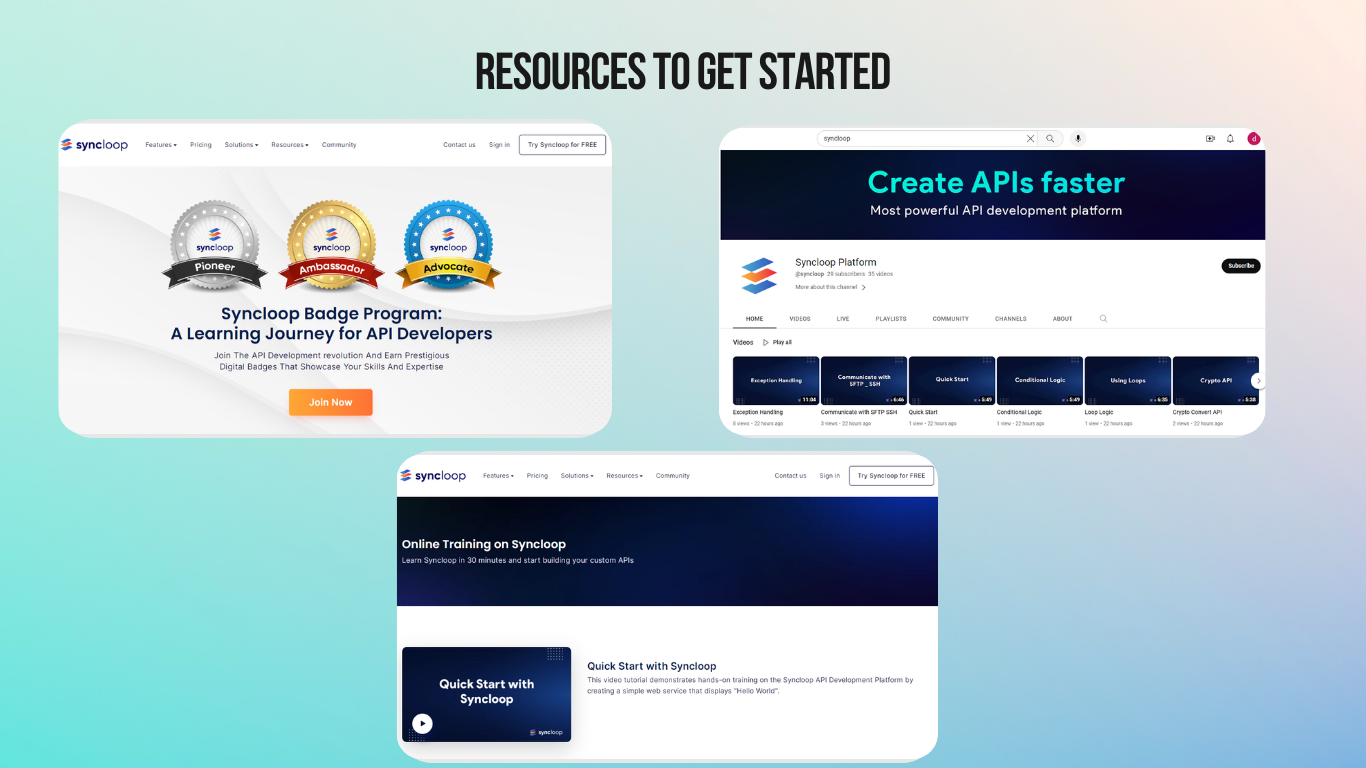
Syncloop Badge Programme: If you want to quickly demonstrate your API competence, try Syncloop's Badge Programme. Get a short online badge that showcases your abilities. If you're not the kind to dive into documentation straight immediately.
Syncloop YouTube Channel: If you prefer to learn visually, the Syncloop YouTube Channel is an excellent resource. Explore an extensive collection of video tutorials, demos, and explanations.
Syncloop Documentation: With Syncloop's extensive documentation, you can go deep into the world of API programming. This resource is ideal for individuals who value deep understanding.
Online Syncloop Training: Looking for a hands-on approach? Syncloop's online lessons are designed for practical learners. These step-by-step guides provide an engaging experience that allows you to put theory into practice.
Craft Your First API ⬆️
Follow the steps to create a simple API......
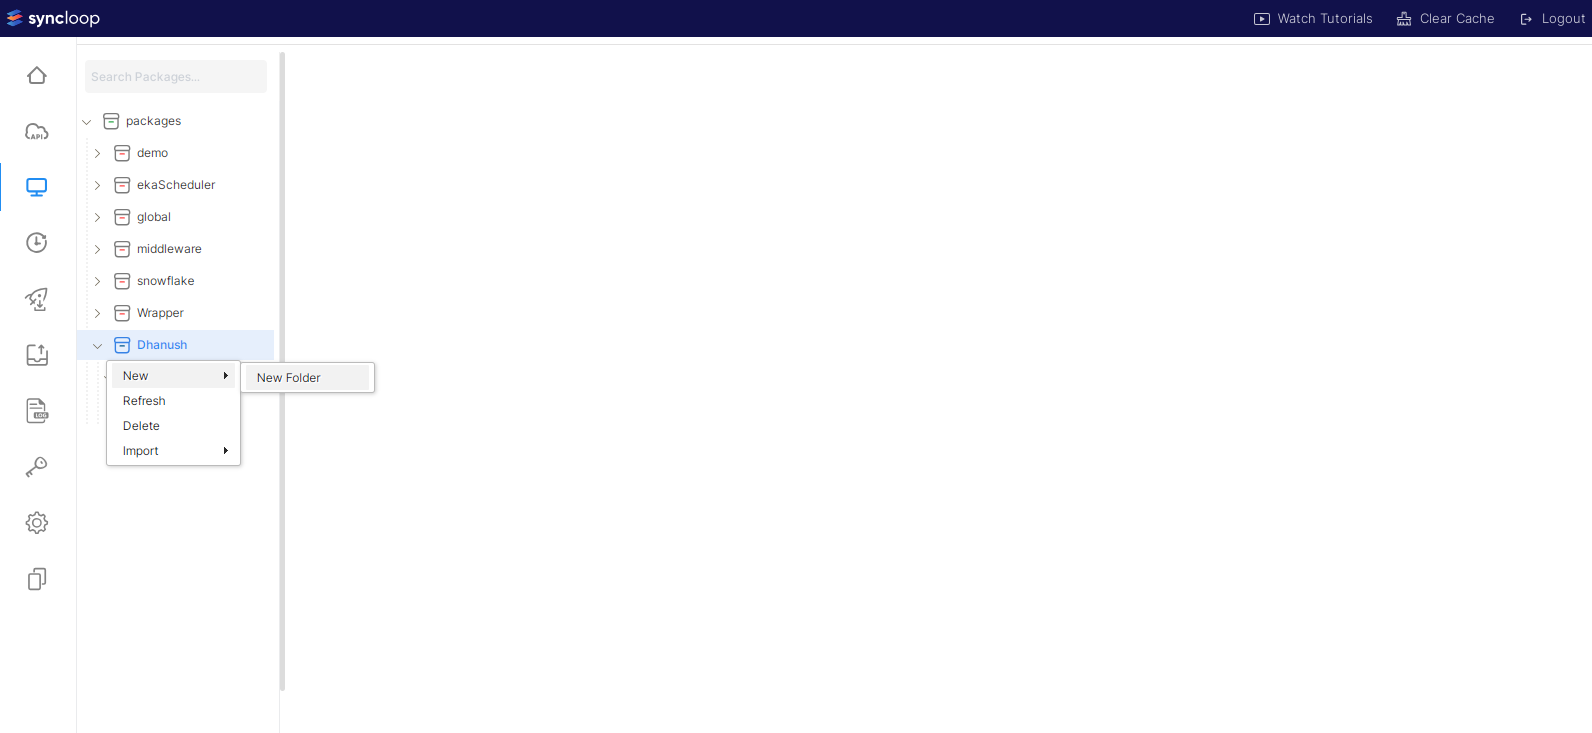
Begin by signing up and signing in to your Syncloop account. Navigate to Workspace and right-click on the packages to create a new package.

Within the newly created package, establish a new folder by right-clicking it.
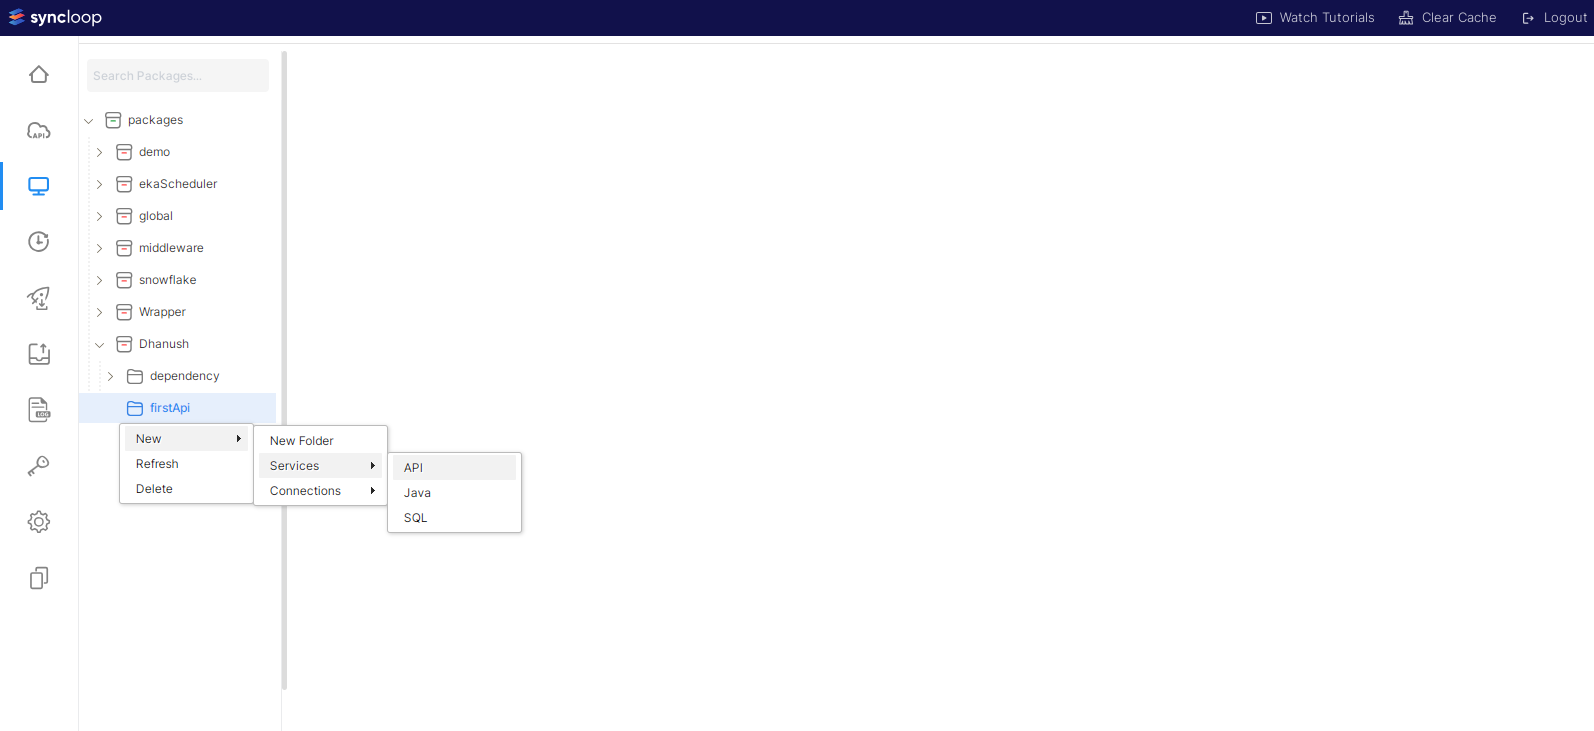
Right-click the new folder and select "Services," followed by "API." to create an API service.
Within the workspace, click in the center, and the API Designer will appear. Choose the "Map" option.

In the lower-right corner, click and select "String," naming it "message."

To set the value for the message, click the pen icon above the string. Type "Hello world."

In the output tab on the right, again select "String," using the same name as before. Click "Map" and save your progress.

Open the configuration menu and copy the service endpoint.

Launch Postman, create a new workspace and paste the copied endpoint into the designated space. In the Authentication tab, select "Bearer Token" and return to Syncloop.

In Syncloop's left panel, access the "API key" and copy the bearer token.
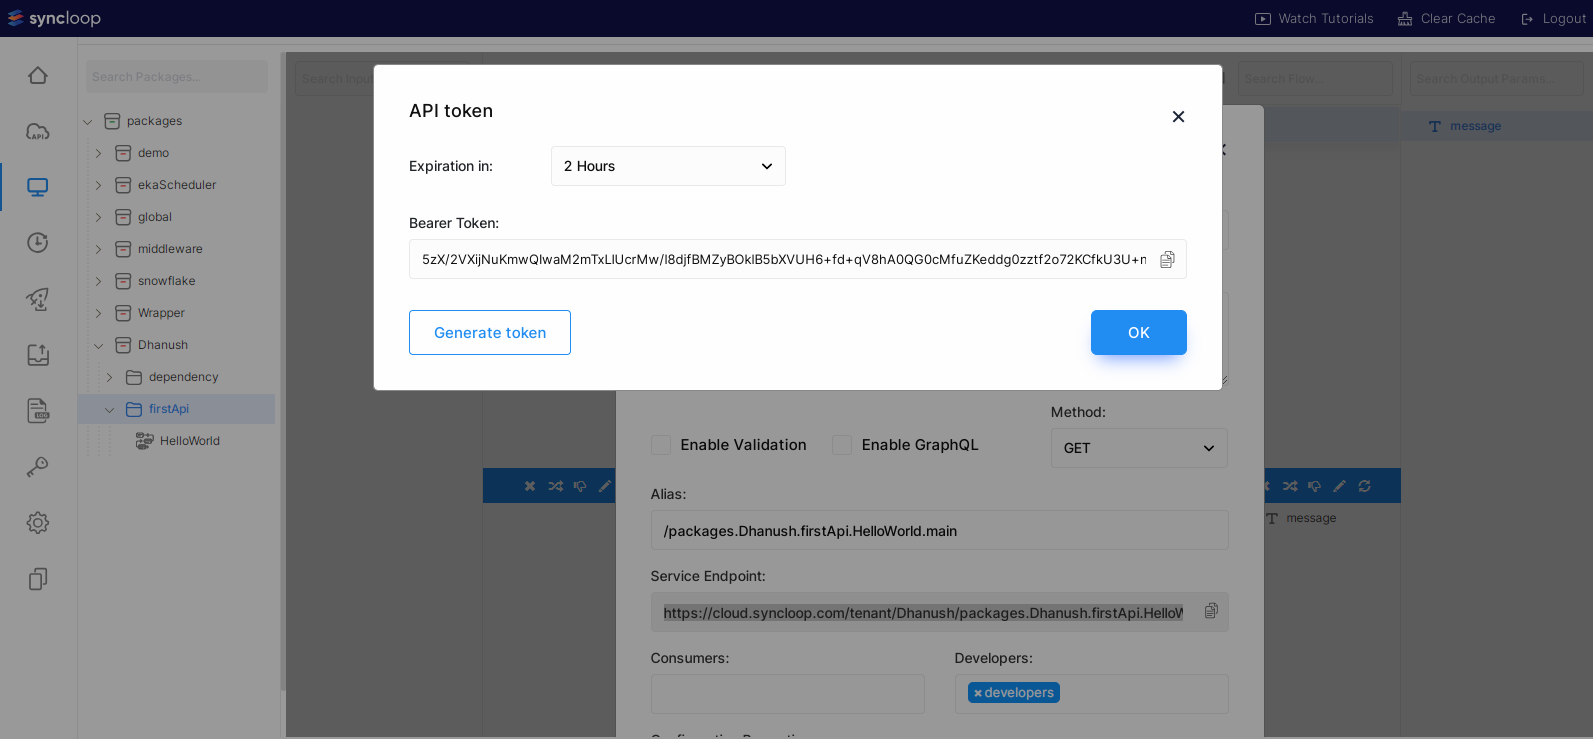
Paste the copied bearer token into Postman. Ensure the method is set to GET and click "Send."
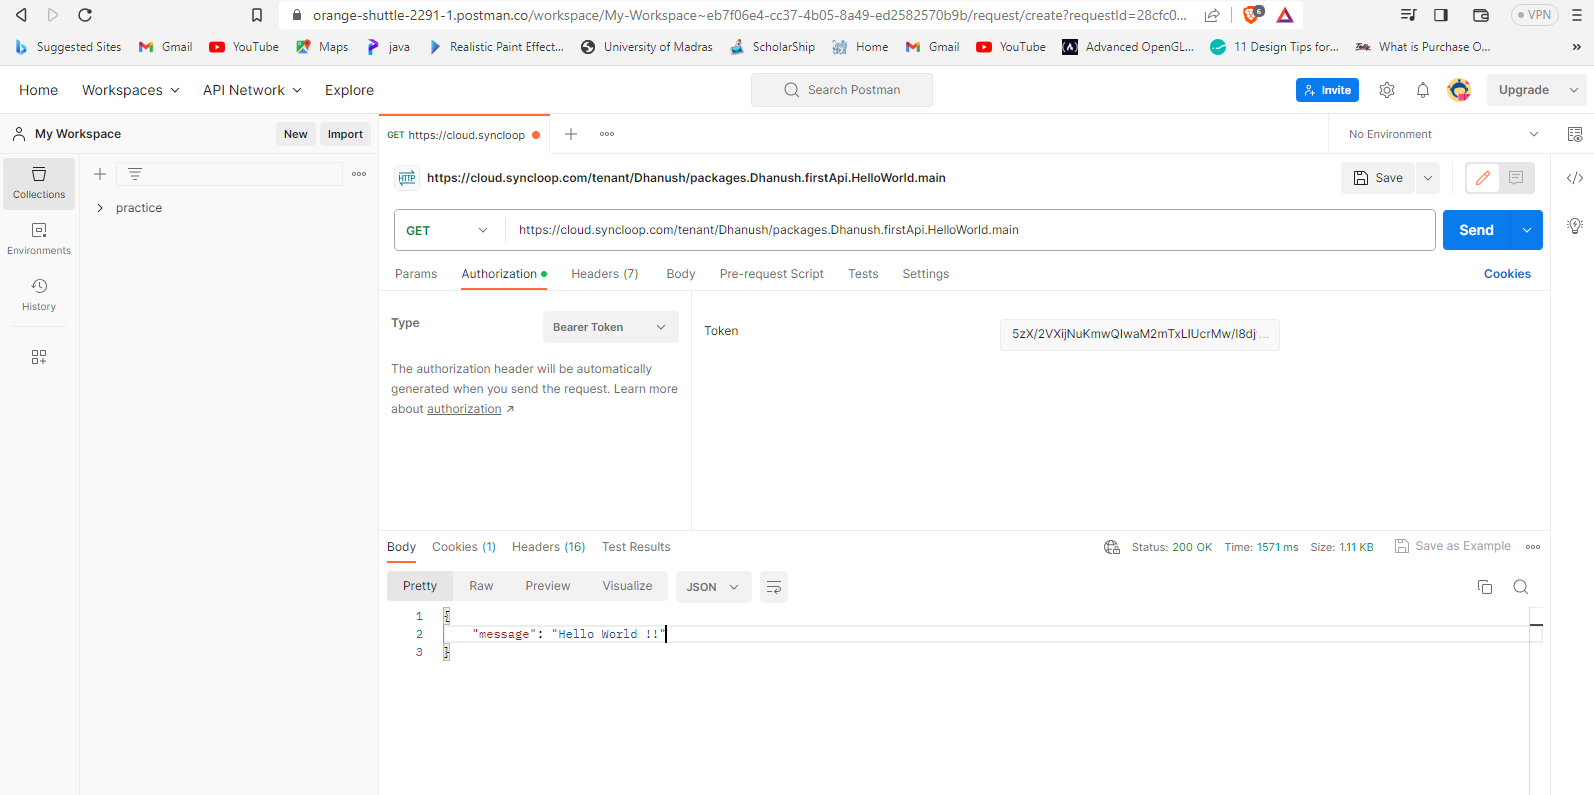
Woohoo, we've crafted a simple API on our own! 🎉
Community Support
Exploring the world of API programming is even more exciting when you are a member of an active community. Syncloop allows developers to connect, learn, and share their experiences. Join the conversation on Twitter and dive into the interactive Discord group to gain access to plenty of knowledge and perspectives from other API fans. Whether you're looking for help or inspiration, or simply want to interact with like-minded people, Syncloop Community is here to help you every step of the journey.
Conclusion
Let us take time to enjoy the greatness of Syncloop as we complete this voyage. It's more than just a tool; it's a friend who simplifies the complex, a mentor who leads your API desires, and a portal to a vibrant community. Crafting APIs becomes an experience with Syncloop, and your ideas become an actual reality in lines of code. So, here's to you, the creator of possibilities, and to Syncloop, the companion that converts ideas into creations. Accept the power, explore new vistas, and let your API story evolve. 🚀
As this is my first blog, your feedback means the world to me! If you come across any hiccups or suggestions, please don't hesitate to leave your comments. Together, we'll journey towards improvement. 😊
Subscribe to my newsletter
Read articles from Dhanush directly inside your inbox. Subscribe to the newsletter, and don't miss out.
Written by
