Developing GUI Application using LVGL on Raspberry Pi
 Aries
Aries
LVGL, typically used for developing GUIs for microcontrollers that have limited resources, can also be used to create GUIs for more powerful boards, such as Raspberry Pi. In this article, I'll demonstrate how to use the LVGL framework to create an embedded GUI on a Raspberry Pi with a 3.5-inch TFT display. I'll detail the setup process and the configuration steps as well.
Hardware
You are going to need these:
Raspberry Pi 3 Model B+.
3.5 inch Rpi LCD (A). Check this wiki.
LVGL
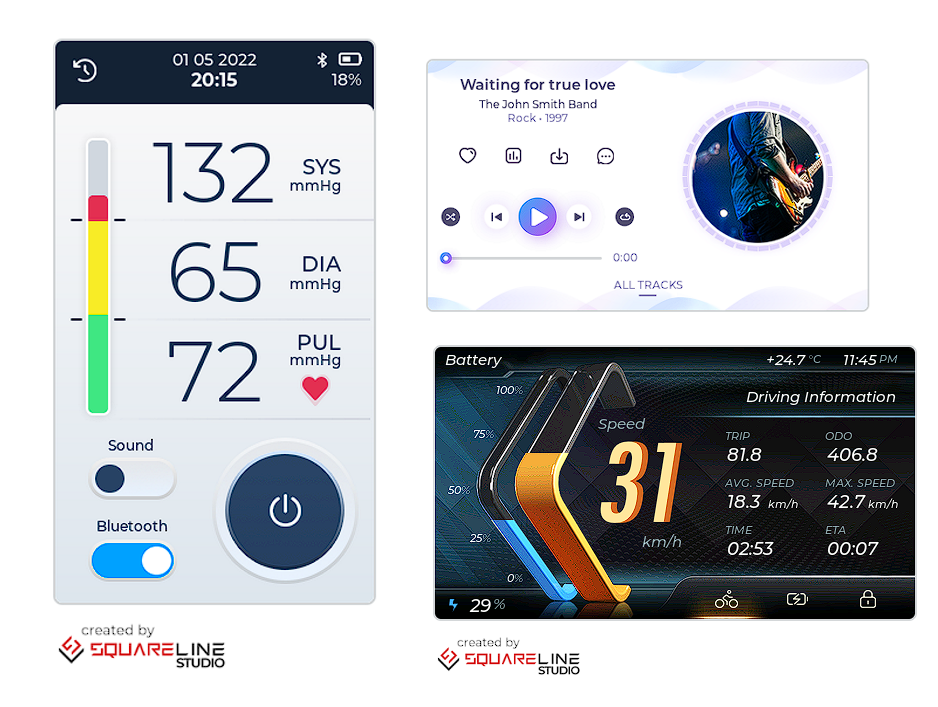
LVGL stands for Light and Versatile Graphics Library is quite popular for creating an embedded GUI with easy-to-use graphical elements and a minimal memory footprint. The framework has provided lots of beautiful and customizable widgets that can be directly incorporated in your projects. It also provides layout functionality, such as flex and grid, akin to those used in CSS for web development. You can check the examples here and you are gonna be amazed at how beautiful the GUIs can be created.

Setting Up TFT Display
The hardware installation is pretty straightforward because the build factor of the display fits nicely onto the form factor of the Raspberry Pi. Unfortunately, the same thing cannot be said about the software installation. If you look at the wiki page provided by Waveshare, they recommend we run a script provided in the LCD-show project. I tried it but it did not work. Then I found another LCD-show project here and it worked this time. So if you don't have the same display as I have, probably you need to try and see which one work for you.
You just need to follow the instructions provided by the project.
git clone https://github.com/goodtft/LCD-show.git
chmod -R 755 LCD-show
cd LCD-show/
sudo ./LCD35-show
The script copies the display's dtb file to the /boot/overlays/ directory, enables the TFT LCD by modifying /boot/config.txt with suitable values, and updates /boot/cmdline.txt to display the console on the LCD. Additionally, it adds configuration files to the X11 directory, allowing the display server to recognize touch input.
On Raspberry Pi, there are two frame buffer devices: /dev/fb0 and /dev/fb1 . /dev/fb0 represents the HDMI output and /dev/fb1 represents the TFT display output. By default, the script configures the system so that the output on /dev/fb0 is mirrored to /dev/fb1 (TFT display). This is achieved through the fbcp application which is running in the background.
To see if everything is properly configured, you can run the following commands.
cat /dev/urandom > /dev/fb0
cat /dev/urandom > dev/fb1
There are two options for the embedded GUI. The first one is to display the GUI on /dev/fb0 which will be mirrored to /dev/fb1. This requires disabling lightdm, the display manager if you are not installing a headless OS. The second option is to display it only on /dev/fb1 and it won't interfere with the normal desktop GUI on the HDMI output. You might want to disable your touch input on the HDMI by adding the following line in the ~/.bashrc file.
DISPLAY=:0 xinput disable 6
/dev/fb0 and then mirror it to /dev/fb1, the framerate is much more stable. In my project, I observed that the frame rate stays at around 33 FPS. If I write it directly to /dev/fb1, the frame rate drops whenever I interact with the GUI (i.e., touch events).For the second option, you also have to remove the line that contains fbcp & in the ~/.bashrc file as well to prevent the HDMI output from being mirrored to the TFT display.
Installing LVGL
The best resource I found is an article written by LVGL itself [1]. This article explains how to set up a GUI project for Raspberry Pi or similar platforms. To get started quickly, I cloned the GitHub repository mentioned in the article.
Most of the configurations can be found in lv_conf.h and lv_drv_conf.h.
COLOR to 32 if writing to /dev/fb0 (HDMI), and 16 if writing to /dev/fb1 (SPI).
USE_FBDEV 1
Screen width and height should be 480 and 320, to avoid scaling issues when mirroring.
Activate MEASURE_PERF is optional
Creating a Simple GUI
Most of the configurations can be found in lv_conf.h and lv_drv_conf.h.
//...

#ifndef USE_EVDEV
#  define USE_EVDEV           1
#endif

#if USE_EVDEV || USE_BSD_EVDEV
#  define EVDEV_NAME   "/dev/input/event0"        /*You can use the "evtest" Linux tool to get the list of devices and test them*/

//...

/*-----------------------------------------
 *  Linux frame buffer device (/dev/fbx)
 *-----------------------------------------*/
#ifndef USE_FBDEV
#  define USE_FBDEV           1
#endif

#if USE_FBDEV
#  define FBDEV_PATH          "/dev/fb0"
#endif

// ...
// lv_conf,h

// Color Settings
/*Color depth: 1 (1 byte per pixel), 8 (RGB332), 16 (RGB565), 32 (ARGB8888)*/
#define LV_COLOR_DEPTH 32

//...

/*1: Show CPU usage and FPS count*/
#define LV_USE_PERF_MONITOR 1
#if LV_USE_PERF_MONITOR
    #define LV_USE_PERF_MONITOR_POS LV_ALIGN_BOTTOM_RIGHT
#endif
In this introductory project, I aimed to explore the process of constructing an embedded GUI using LVGL. Upon examining the code, you'll notice several callbacks that update other widgets when a particular widget is interacted with. Additionally, it is possible to animate changes on the progress bar UI.
The final code looks like this.
#include "lvgl/lvgl.h"
#include "lvgl/demos/lv_demos.h"
#include "lv_drivers/display/fbdev.h"
#include "lv_drivers/indev/evdev.h"
#include <unistd.h>
#include <pthread.h>
#include <time.h>
#include <sys/time.h>

#define DISP_BUF_SIZE (10 * 480)

static lv_obj_t* meter = NULL;
static lv_meter_indicator_t* indic1 = NULL;
static lv_obj_t* label1 = NULL;
static int prev_value = 0;

static void my_event_cb(lv_event_t* event)
{
    lv_obj_t* obj = lv_event_get_target(event);
    lv_obj_t* label = lv_obj_get_child(obj, 0);
    char* text = lv_label_get_text(label);
    int i = atoi(text) + 1;

    lv_label_set_text_fmt(label, "%"LV_PRIu32"", i);
}

static void set_value(void * indic, int32_t v)
{
    lv_meter_set_indicator_end_value(meter, indic, v);
    prev_value = v;
}


static void slider_event_cb(lv_event_t* e)
{
    lv_obj_t* slider = lv_event_get_target(e);
    int new_value = lv_slider_get_value(slider);

    // Animations
    lv_anim_t a;
    lv_anim_init(&a);
    lv_anim_set_exec_cb(&a, set_value);
    lv_anim_set_values(&a, prev_value, new_value);

    lv_anim_set_time(&a, 500);
    lv_anim_set_var(&a, indic1);
    lv_anim_start(&a);

    char buf[32];
    char color[7];
    if (new_value < 30) {
        strcpy(color, "00ff00");
    } else if (new_value < 60) {
        strcpy(color, "ffd500");
    } else {
        strcpy(color, "ff0000");
    }
    lv_snprintf(buf, sizeof(buf), "#%s %d %%#", color, new_value);
    lv_label_set_text(label1, buf);

}

void lv_label_progress(const lv_obj_t* parent)
{
    label1 = lv_label_create(parent);
    lv_label_set_recolor(label1, true);
    lv_label_set_long_mode(label1, LV_LABEL_LONG_WRAP);
    lv_label_set_recolor(label1, true);
    lv_label_set_text(label1, "#00ff00 0 %#");

    // lv_obj_set_width(label1, 50);
    lv_obj_align(label1, LV_ALIGN_CENTER, 0, 0);
}

void lv_custom_slider(const lv_obj_t* parent)
{
    static const lv_style_prop_t props[] = {LV_STYLE_BG_COLOR, 0};
    static lv_style_transition_dsc_t transition_dsc;
    lv_style_transition_dsc_init(&transition_dsc, props, lv_anim_path_linear, 300, 0, NULL);

    static lv_style_t style_main;
    static lv_style_t style_indicator;
    static lv_style_t style_knob;
    static lv_style_t style_pressed_color;

    lv_style_init(&style_main);
    lv_style_set_bg_opa(&style_main, LV_OPA_COVER);
    lv_style_set_bg_color(&style_main, lv_color_hex3(0xbbb));
    lv_style_set_radius(&style_main, LV_RADIUS_CIRCLE);
    lv_style_set_pad_ver(&style_main, -2);

    lv_style_init(&style_indicator);
    lv_style_set_bg_opa(&style_indicator, LV_OPA_COVER);
    lv_style_set_bg_color(&style_indicator, lv_palette_main(LV_PALETTE_CYAN));
    lv_style_set_radius(&style_indicator, LV_RADIUS_CIRCLE);
    lv_style_set_transition(&style_indicator, &transition_dsc);

    lv_style_init(&style_knob);
    lv_style_set_bg_opa(&style_knob, LV_OPA_COVER);
    lv_style_set_bg_color(&style_knob, lv_palette_main(LV_PALETTE_CYAN));
    lv_style_set_border_color(&style_knob, lv_palette_darken(LV_PALETTE_CYAN, 3));
    lv_style_set_border_width(&style_knob, 2);
    lv_style_set_radius(&style_knob, LV_RADIUS_CIRCLE);
    lv_style_set_pad_all(&style_knob, 6);
    lv_style_set_transition(&style_knob, &transition_dsc);

    lv_style_init(&style_pressed_color);
    lv_style_set_bg_color(&style_pressed_color, lv_palette_darken(LV_PALETTE_CYAN, 2));

    lv_obj_t* slider = lv_slider_create(parent);
    lv_obj_remove_style_all(slider);
    lv_obj_add_event_cb(slider, slider_event_cb, LV_EVENT_VALUE_CHANGED, NULL);

    lv_obj_add_style(slider, &style_main, LV_PART_MAIN);
    lv_obj_add_style(slider, &style_knob, LV_PART_KNOB);
    lv_obj_add_style(slider, &style_indicator, LV_PART_INDICATOR);
    lv_obj_add_style(slider, &style_pressed_color, LV_PART_INDICATOR | LV_STATE_PRESSED);
    lv_obj_add_style(slider, &style_pressed_color, LV_PART_KNOB | LV_STATE_PRESSED);

    lv_obj_center(slider);

}

void lv_custom_progress_bar(const lv_obj_t* parent)
{
    meter = lv_meter_create(parent);
    lv_obj_center(meter);
    lv_obj_set_size(meter, 220, 220);

    // Remove the circle from the middle
    lv_obj_remove_style(meter, NULL, LV_PART_INDICATOR);

    // Add a scale first
    lv_meter_scale_t* meter_scale = lv_meter_add_scale(meter);
    lv_meter_set_scale_ticks(meter, meter_scale, 11, 3, 10, lv_palette_main(LV_PALETTE_NONE));
    // lv_meter_set_scale_major_ticks(meter, meter_scale, 1, 2, 30, lv_color_hex3(0xeee), 10);
    lv_meter_set_scale_range(meter, meter_scale, 0, 100, 270, 135);

    indic1 = lv_meter_add_arc(meter, meter_scale, 10, lv_palette_main(LV_PALETTE_BLUE_GREY), 0);

    lv_label_progress(meter);
}

void lv_custom_widgets()
{
    // // A container with COLUMN flex direction
    static lv_style_t style;
    lv_style_init(&style);
    lv_style_set_flex_flow(&style, LV_FLEX_FLOW_COLUMN);
    lv_style_set_flex_main_place(&style, LV_FLEX_ALIGN_END);
    lv_style_set_layout(&style, LV_LAYOUT_FLEX);

    lv_obj_t* cont_col = lv_obj_create(lv_scr_act());
    lv_obj_set_size(cont_col, 460, 300);
    lv_obj_center(cont_col);

    lv_obj_set_flex_align(cont_col, LV_FLEX_ALIGN_CENTER, LV_FLEX_ALIGN_CENTER, LV_FLEX_ALIGN_CENTER);
    lv_obj_set_flex_flow(cont_col, LV_FLEX_FLOW_COLUMN);
    lv_obj_set_style_pad_row(cont_col, 20, 0);
    lv_obj_set_style_border_width(cont_col, 5, 0);

    lv_custom_slider(cont_col);
    lv_custom_progress_bar(cont_col);
}


int main(void)
{
    /*LittlevGL init*/
    lv_init();

    /*Linux frame buffer device init*/
    fbdev_init();

    /*A small buffer for LittlevGL to draw the screen's content*/
    static lv_color_t buf[DISP_BUF_SIZE];

    /*Initialize a descriptor for the buffer*/
    static lv_disp_draw_buf_t disp_buf;
    lv_disp_draw_buf_init(&disp_buf, buf, NULL, DISP_BUF_SIZE);

    /*Initialize and register a display driver*/
    static lv_disp_drv_t disp_drv;
    lv_disp_drv_init(&disp_drv);
    disp_drv.draw_buf   = &disp_buf;
    disp_drv.flush_cb   = fbdev_flush;
    disp_drv.hor_res    = 480;
    disp_drv.ver_res    = 320;
    lv_disp_drv_register(&disp_drv);

    evdev_init();
    static lv_indev_drv_t indev_drv_1;
    lv_indev_drv_init(&indev_drv_1); /*Basic initialization*/
    indev_drv_1.type = LV_INDEV_TYPE_POINTER;

    /*This function will be called periodically (by the library) to get the mouse position and state*/
    indev_drv_1.read_cb = evdev_read;
    lv_indev_t *mouse_indev = lv_indev_drv_register(&indev_drv_1);

    /*Set a cursor for the mouse*/
    LV_IMG_DECLARE(mouse_cursor_icon)
    lv_obj_t * cursor_obj = lv_img_create(lv_scr_act()); /*Create an image object for the cursor */
    lv_img_set_src(cursor_obj, &mouse_cursor_icon);           /*Set the image source*/
    lv_indev_set_cursor(mouse_indev, cursor_obj);             /*Connect the image  object to the driver*/

    /*Create a Demo*/
    lv_custom_widgets();

    /*Handle LitlevGL tasks (tickless mode)*/
    while(1) {
        lv_timer_handler();
        usleep(5000);
    }

    return 0;
}

//...
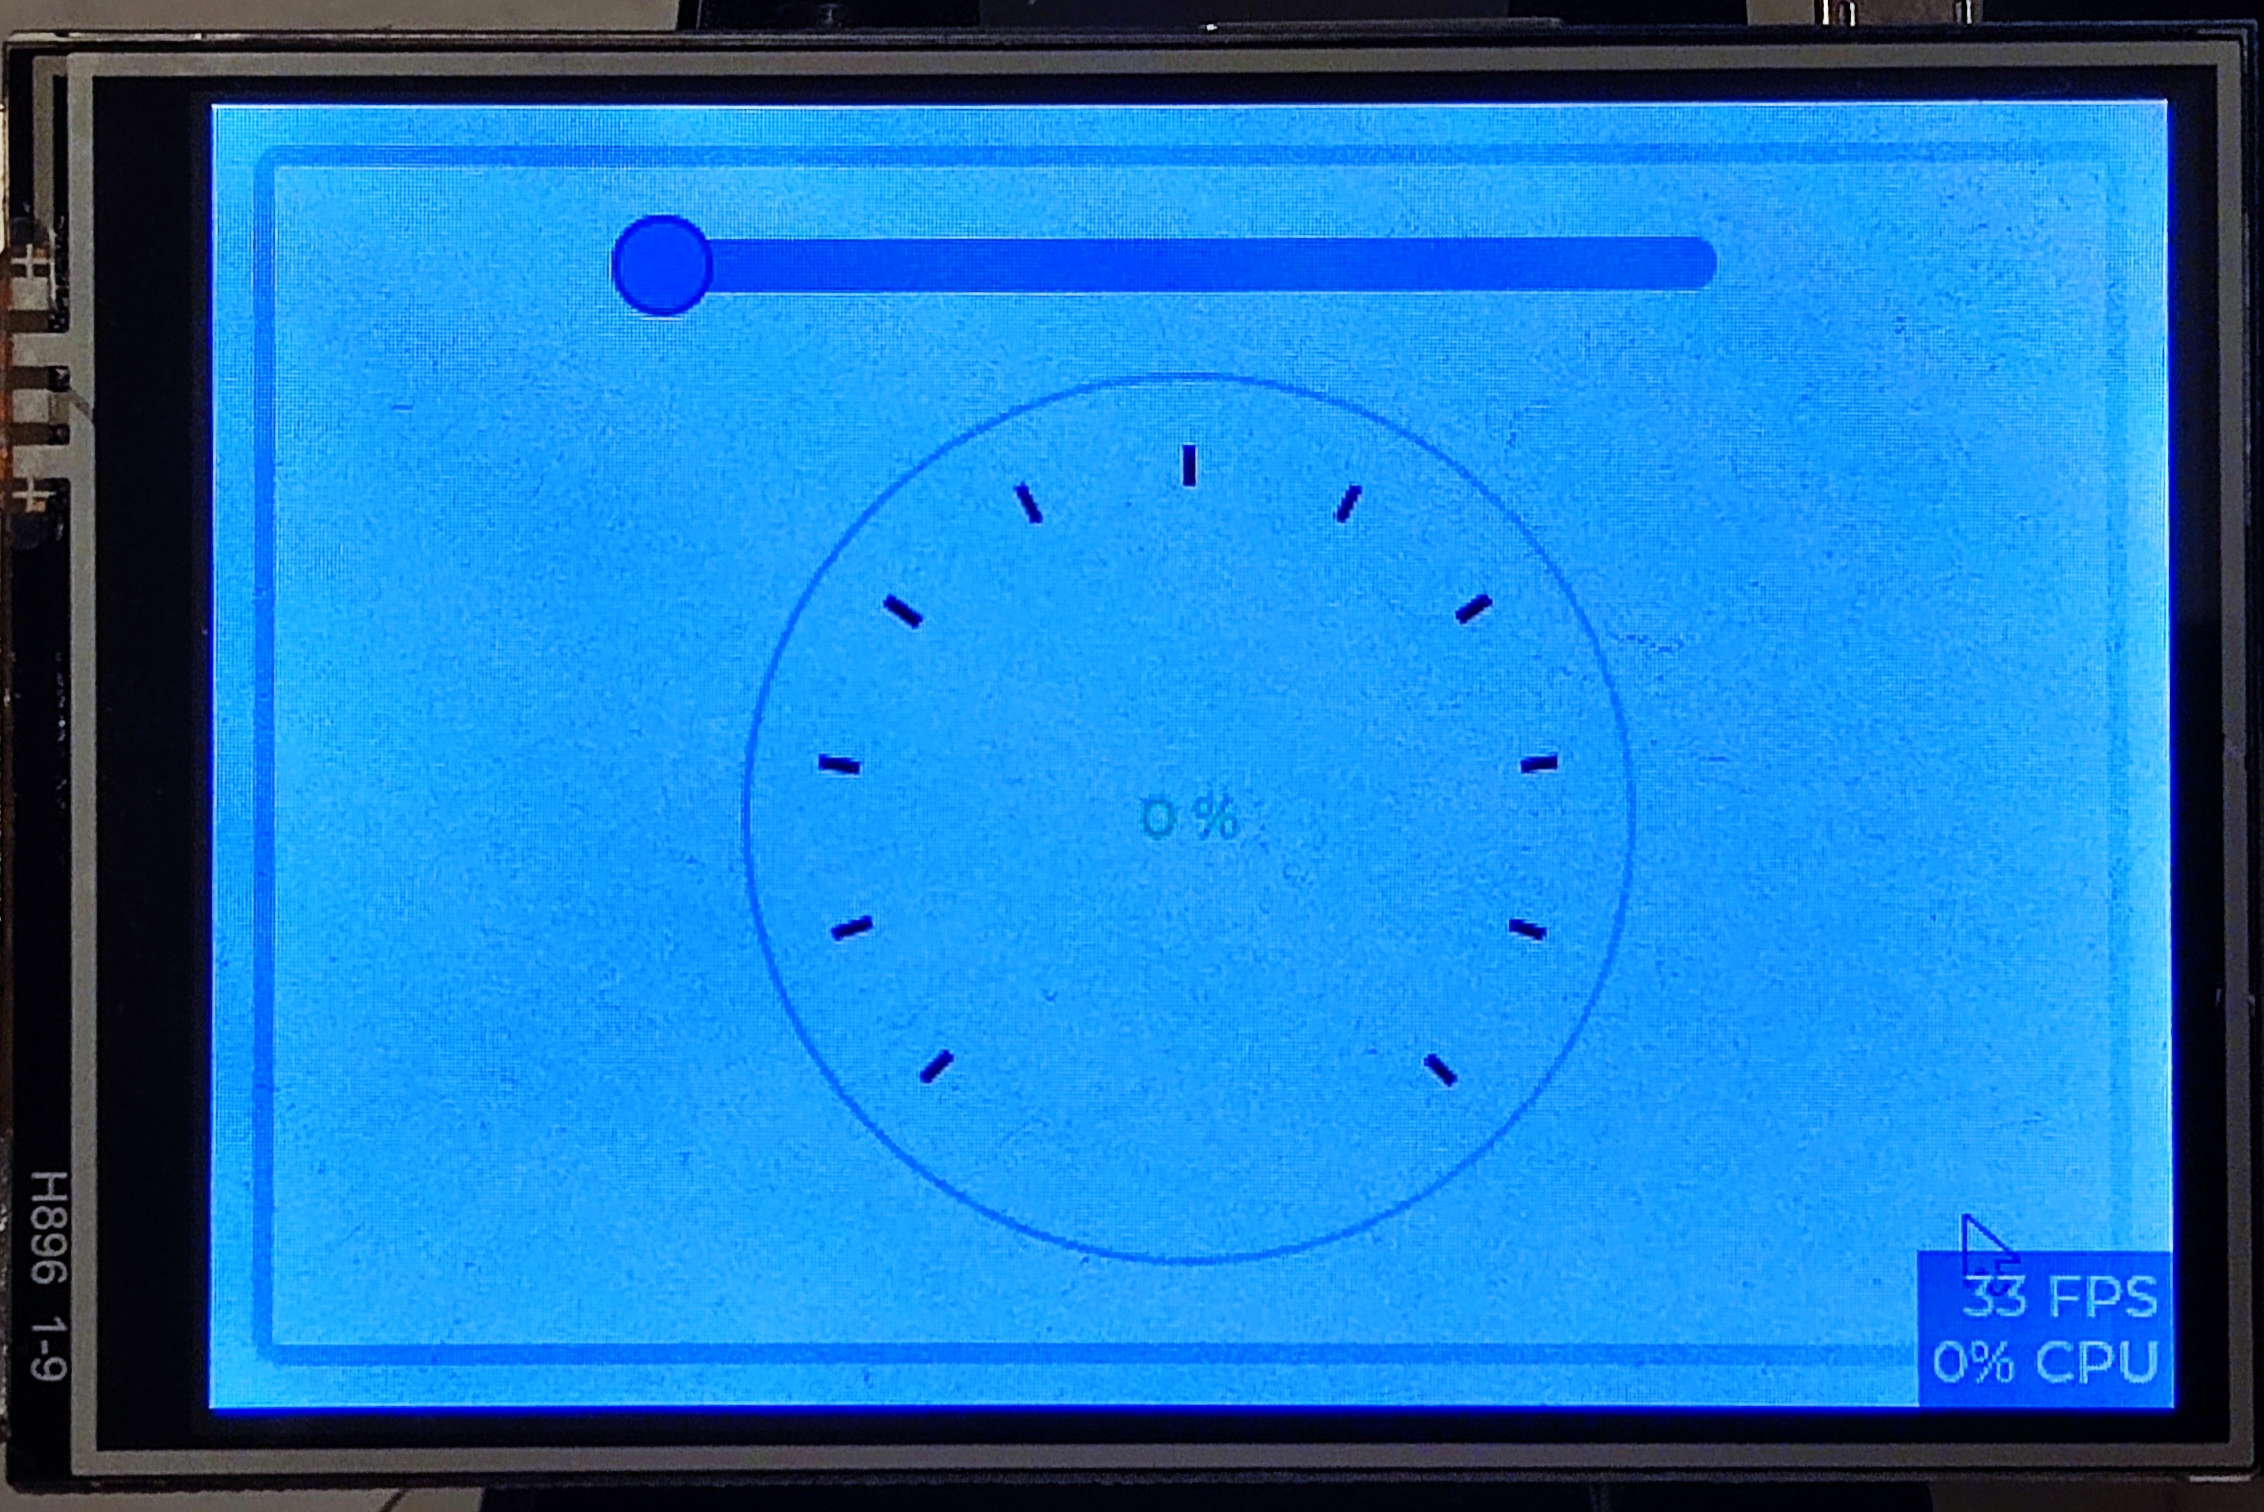
The simple GUI looks like this.

This is just a starter project featuring a basic GUI, but I'm quite pleased with the results. It demonstrates how easy it is to use LVGL to create a GUI. As a lightweight framework, it offers excellent performance and usability.
Next Steps
I am looking forward to experimenting more with this framework to build more sophisticated GUIs. LVGL supports several interesting third-party libraries; the ones I am interested in are the GIF player and Lottie player, which allow you to render animations and display them on the GUI. I really appreciate the work showcased in the YouTube video below.
For the next steps, I'm considering how to integrate this into a C++ project with an MVC-like architecture. There are a couple of options, and one of them is using event loops to separate the view (GUI) from the models.
Another option is to explore the framework's performance when the GUI is much more complex. Can we maintain 33 fps when there are significantly more interactive UI elements in the GUI? There's an interesting project called fbcp-il, which offers a very fast display rate for TFT displays. It might be intriguing to see if it's possible to integrate LVGL with this project to achieve a higher frame rate.
References
Subscribe to my newsletter
Read articles from Aries directly inside your inbox. Subscribe to the newsletter, and don't miss out.
Written by
