🚀🚀Jenkins CI/CD project using GitHub web hooks. 🪝🏗️
 Yashraj Jaiswal
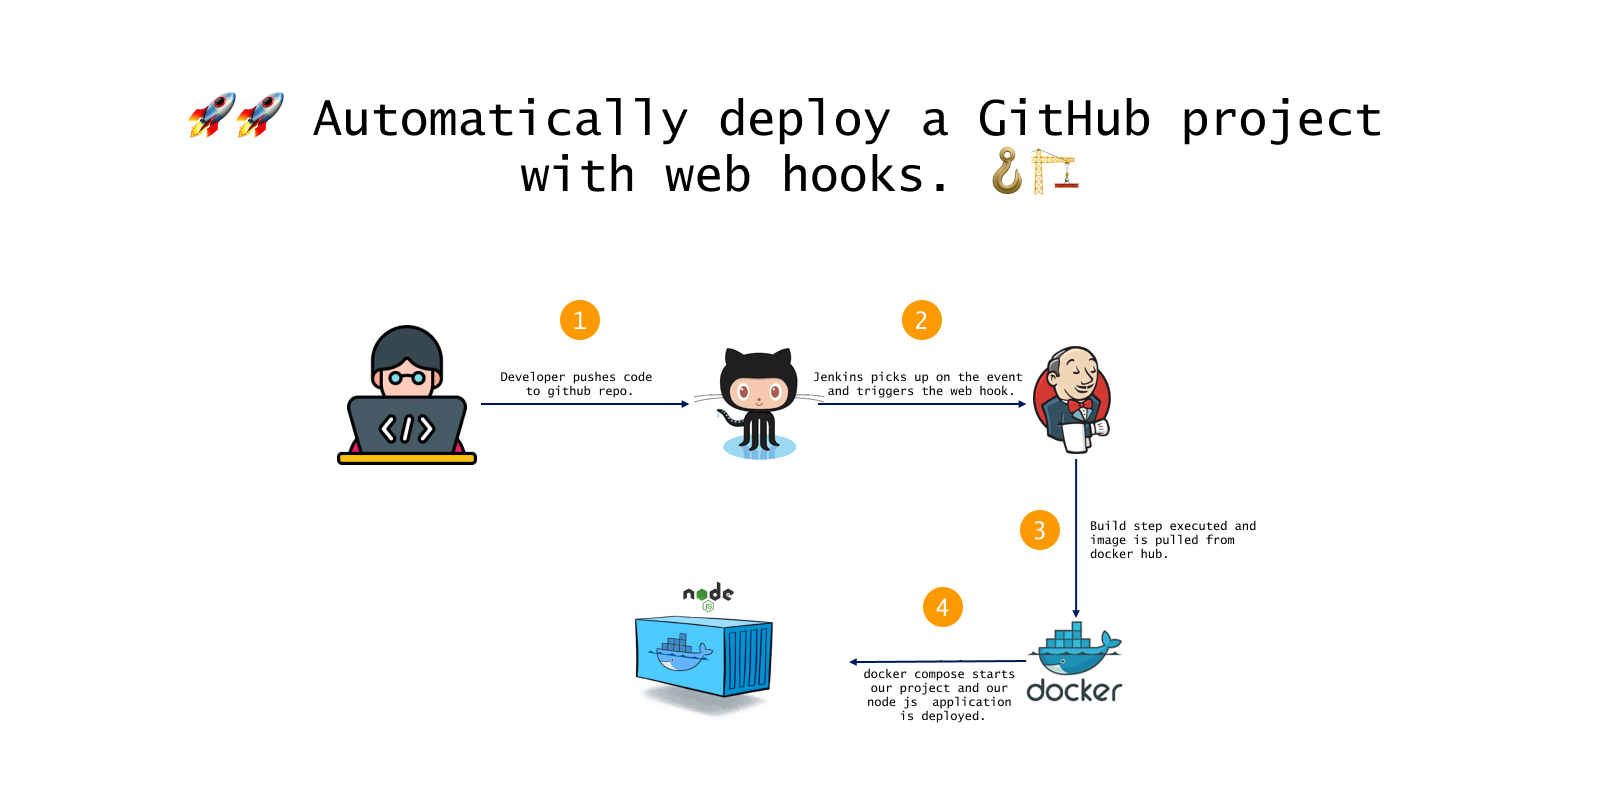
📍 Introduction:
Hello readers! 👋👋 Welcome to today's blog, where we will explore a fascinating concept called webhook and learn how to utilize its functionality by deploying our project. Actually, the deployment will be done automatically😏🤩, want to know how🤔? Let's begin by first understanding what a GitHub webhook is and how it works.
✔️ What is a GitHub webhook?
GitHub webhook is a feature that can be used to automate aspects of our development workflow. With GitHub webhooks, we can set up various responses to events occurring in our GitHub project repositories. These events include pushing code to a branch, opening/closing a pull request, or creating a release.
For example, if we want the changes to be deployed whenever code is pushed to a certain branch ( which allows us to test our modifications immediately ) we can implement that behavior with GitHub webhooks.
✔️ How GitHub Webhooks Work?
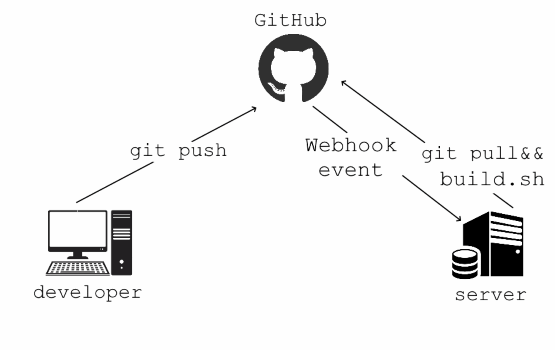
When creating a webhook, we need to specify the types of events our webhook should respond to and provide a payload URL. Once these settings are configured, our webhook is created.
Now, in our repository, if any of the specified events occur, the payload URL will be called using a POST method, and its request body will contain all the information about the event. We can then use this information to perform actions accordingly.
✔️ Jenkins freestyle project using GitHub webhooks.
Now that we understand how GitHub webhooks function, let's create a freestyle project in Jenkins that utilizes GitHub webhooks to initiate an automatic build when code is pushed to the master branch.
If you are unfamiliar with creating a freestyle project in Jenkins, feel free to check out my previous blog post, which provides an in-depth explanation of how to create a freestyle project in Jenkins.
If you would like to follow along with this project, ensure that you have the following prerequisites in place.
EC2 instance with Jenkins and Docker installed.
8000 port allowed through security group inbound rule.
ubuntu user must be added to the Docker group.
Fork this GitHub project into your account.
Familiarity with configuring Jenkins freestyle projects.
🔸Step 1: Creating a freestyle project.
Let's begin by creating a freestyle project and providing an appropriate description.

🔸 Step 2: Adding GitHub repository.
Now, we will provide the link to our GitHub repository and the branch from which our code will be pulled and deployed.
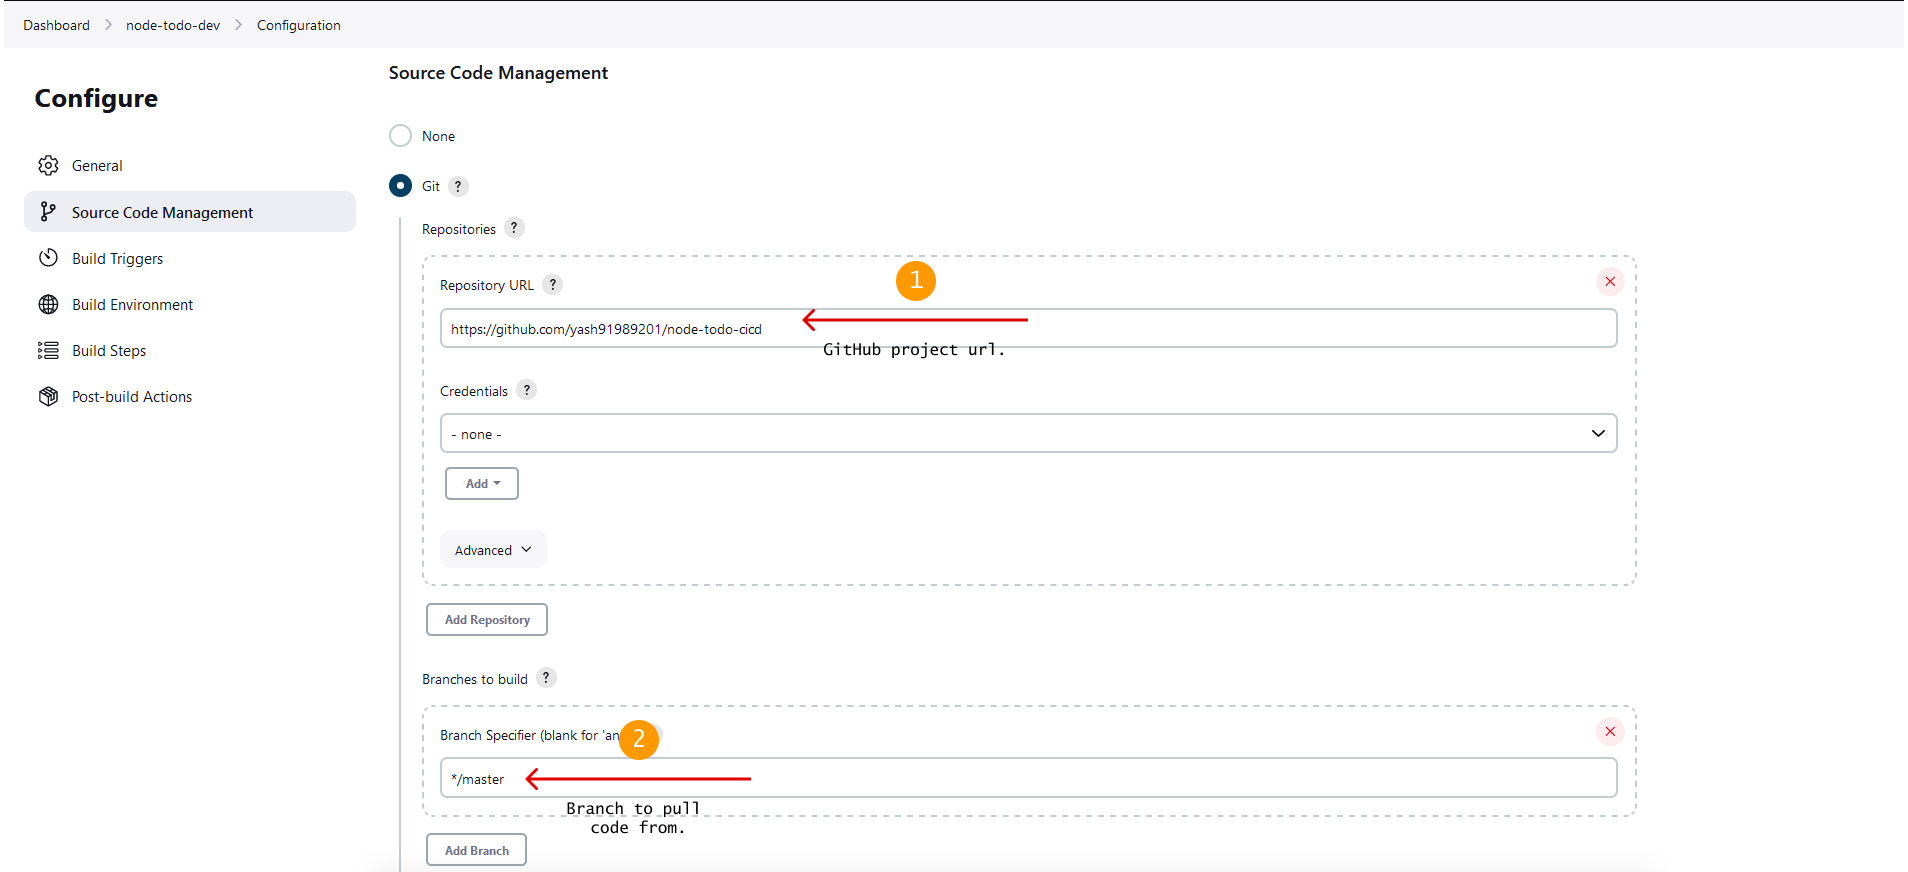
🔸 Step 3: Configuring GitHub WebHook.
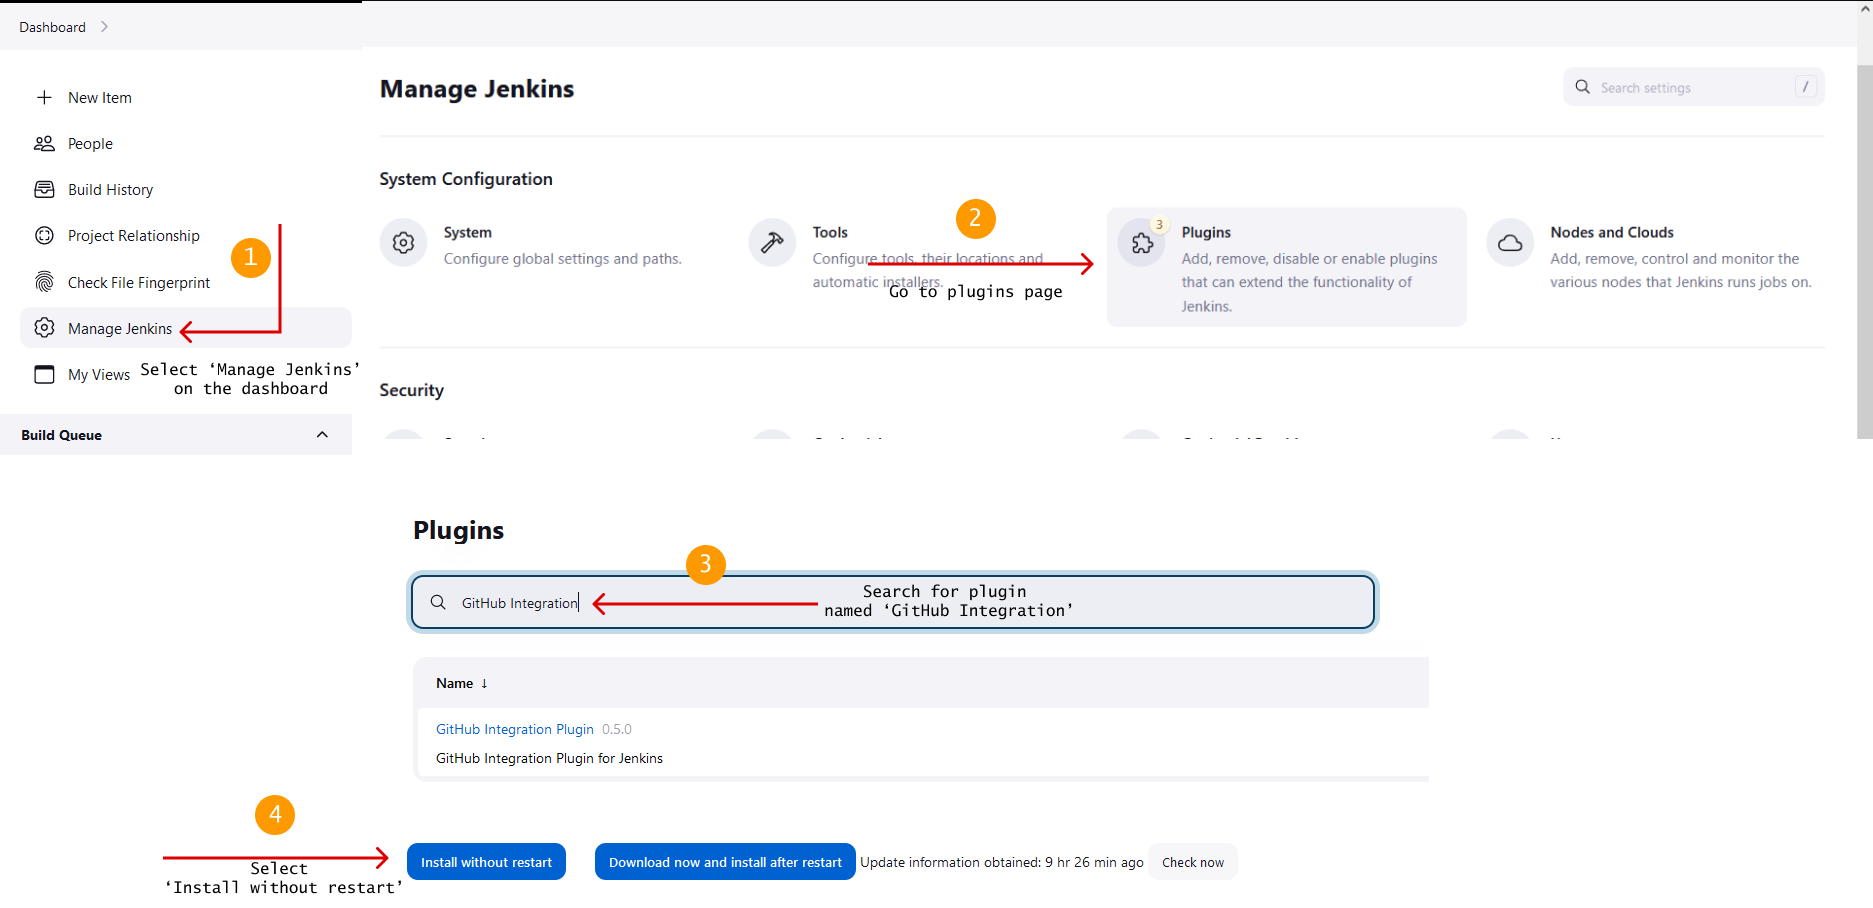
For our GitHub webhook to function, we first need to install a plugin on our Jenkins server.
Go to Manage Jenkins > Plugins > Available Plugins > Search for 'GitHub Integrations' and then click on 'Install without restart'.
- Under the 'Build Triggers' section select 'GitHub hook trigger for GITScm polling'

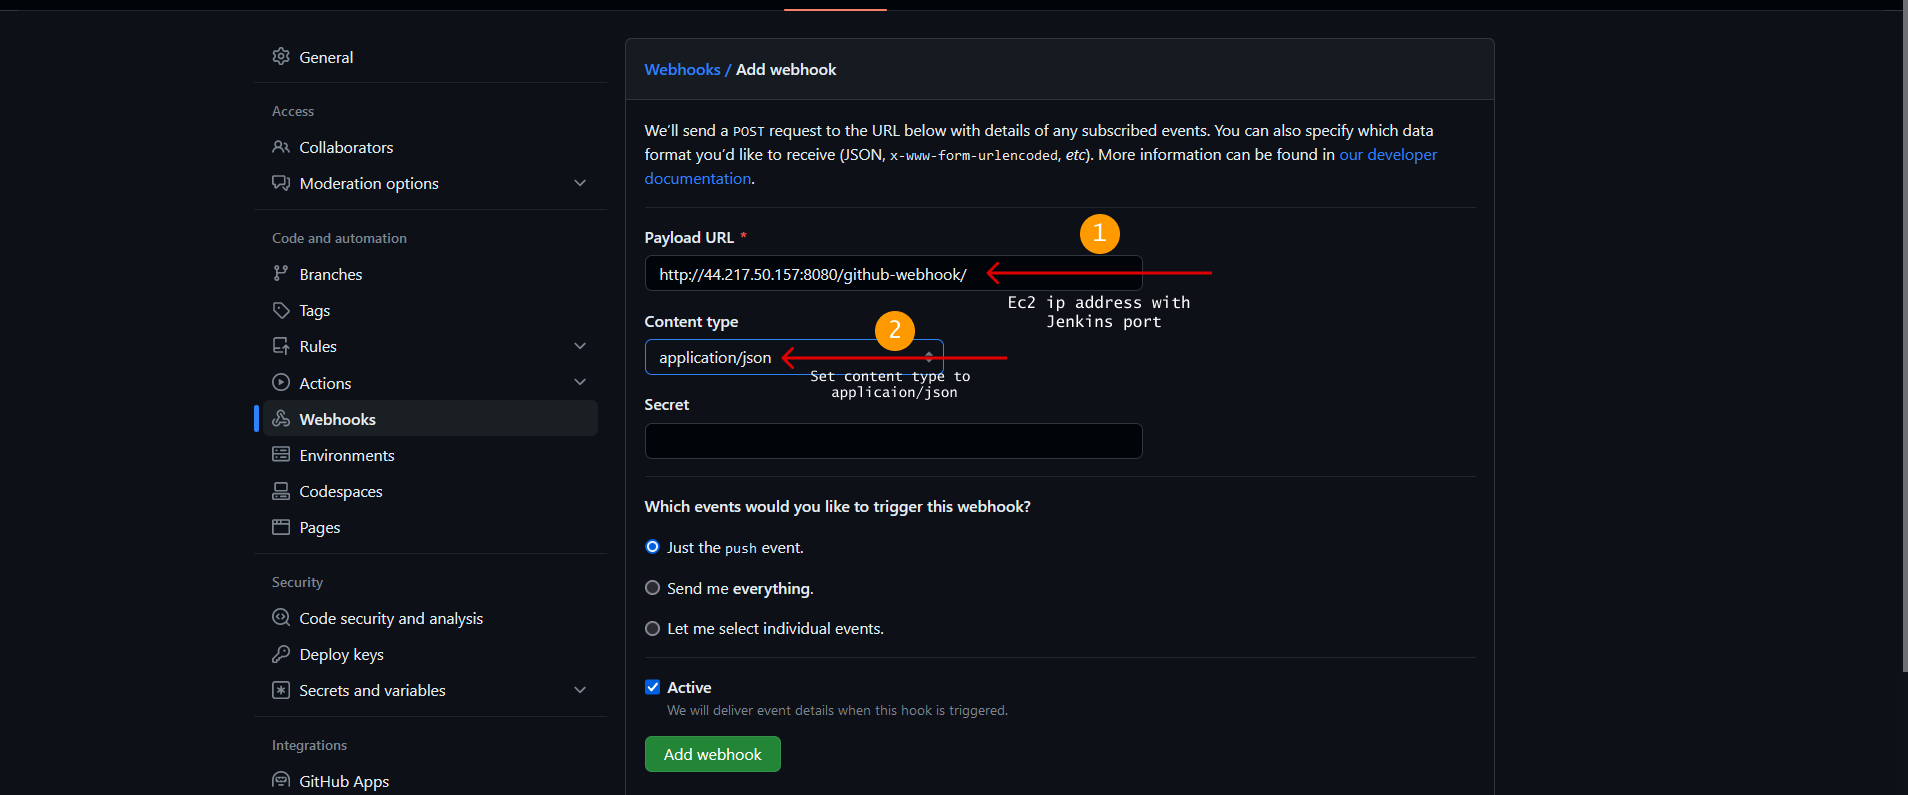
Next, navigate to the forked repository, access the settings page, and locate the 'Webhooks' section. Add the payload URL, and then set the content type to 'application/json'.
Then click on
Add webhookto save your webhook.
- Make sure there is a green tick left to the added webhook, this indicates that the webhook has been added successfully.

If you don't see the green tick, there might be an error. To find what went wrong, click on the
Editbutton below the webhook and navigate to theRecent Deliveriessection. Here, you can identify the probable cause of the error.
🔸 Step 4: Adding a build step.
Now in the build step section add the command that will build your project. In our case, we can add a single docker compose command to spin up our project within a container i.e. docker compose up -d

🔸 Step 5: Triggering build by changing source code.
Now for the interesting part, triggering a build with a push event on the master branch.
Make some changes to your forked repository.
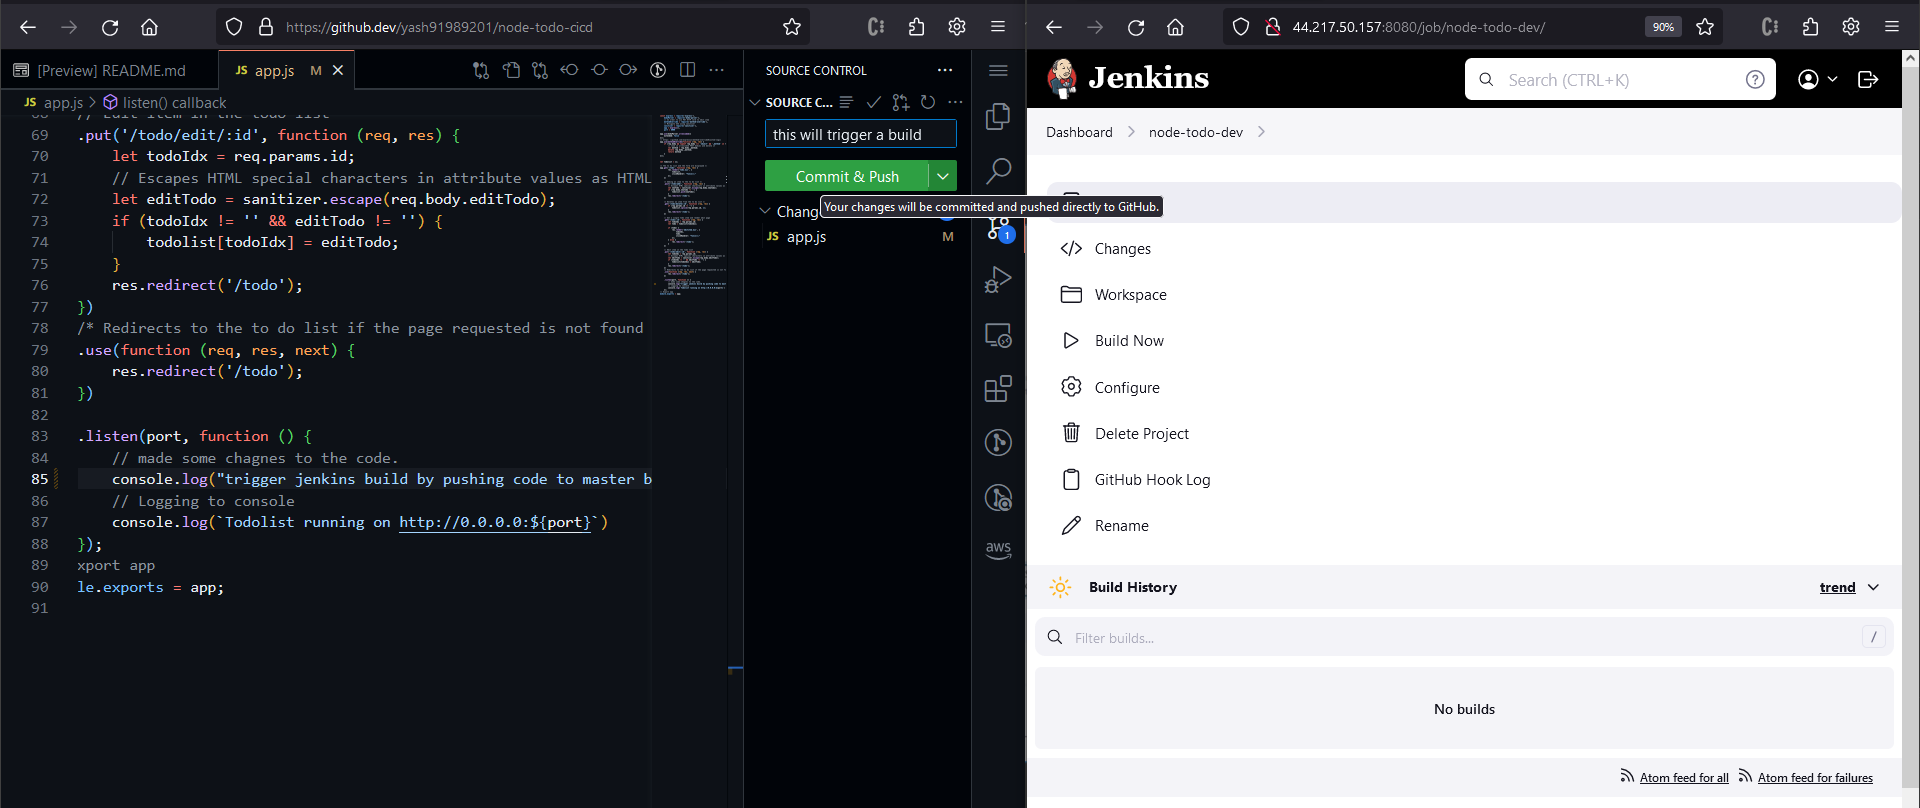
After your commit and push your changes you will see a build job has been triggered and our application has been deployed successfully, all this happened automatically with the power of GitHub webhooks.

🔸 Step 6: Let's see the deployed application.
Go to the ec2 instance's ip address with port 8000 to see the application running.

📍 Conclusion:
By utilizing the concept of webhooks, we can streamline our development process. This enables us to quickly see our changes reflected, and instantly accessible through a URL, allowing us to test our code and iterate or correct it as needed.
In the future, our blog posts will explore more complex Jenkins ideas, helping us understand its detailed features and discover additional opportunities in software development. Till then keep learning and upskilling.
Thanks for reading this blog! I hope you learned something useful. Stay tuned for more easy-to-understand DevOps concepts by following me on:
Hashnode: Yashraj Jaiswal
Subscribe to my newsletter
Read articles from Yashraj Jaiswal directly inside your inbox. Subscribe to the newsletter, and don't miss out.
Written by

Yashraj Jaiswal
Yashraj Jaiswal
Hey there! 👋 I'm Yashraj Jaiswal, a friendly web developer who's super excited about diving into the world of DevOps. I love coding and can't wait to learn more every day. As I go on this adventure, I'll be sharing my thoughts and discoveries about DevOps on my Hashnode blog. So, come along and let's explore the amazing world of web development and DevOps together! Don't forget to connect and share your own experiences too! 😊