Day-22 : Getting Started with Jenkins 😃
 Gopal Gautam
🔹What is Jenkins?
Jenkins is an open-source automation tool written in Java with plugins built for continuous integration. Jenkins is used to build and test your software projects continuously making it easier for developers to integrate changes to the project, and making it easier for users to obtain a fresh build. It also allows you to continuously deliver your software by integrating with a large number of testing and deployment technologies.
With Jenkins, organizations can accelerate the software development process through automation. Jenkins integrates development life-cycle processes of all kinds, including build, document, test, package, stage, deploy, static analysis, and much more.
Jenkins achieves Continuous Integration with the help of plugins. Plugins allow the integration of Various DevOps stages. If you want to integrate a particular tool, you need to install the plugins for that tool. For example Git, Maven 2 project, Amazon EC2, HTML publisher etc.
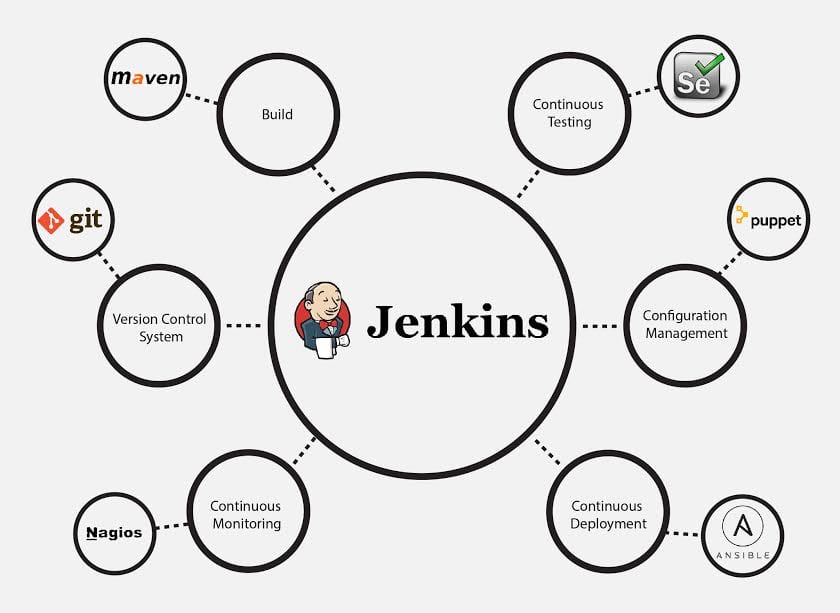
🔹Advantages of Jenkins include:
It is an open-source tool with great community support.
It is easy to install.
It has 1000+ plugins to ease your work. If a plugin does not exist, you can code it and share it with the community.
It is free of cost.
It is built with Java and hence, it is portable to all the major platforms.
🔹Jenkins Installation:
On Ubuntu (using apt):
sudo apt update
sudo apt install openjdk-11-jre
#Install Jenkins
curl -fsSL https://pkg.jenkins.io/debian-stable/jenkins.io-2023.key | sudo tee \
  /usr/share/keyrings/jenkins-keyring.asc > /dev/null
echo deb [signed-by=/usr/share/keyrings/jenkins-keyring.asc] \
  https://pkg.jenkins.io/debian-stable binary/ | sudo tee \
  /etc/apt/sources.list.d/jenkins.list > /dev/null
sudo apt-get update
sudo apt-get install jenkins
#Start jenkins
sudo systemctl enable jenkins
sudo systemctl start jenkins
sudo systemctl status jenkins

🔹Create a freestyle pipeline to print "Hello World!!
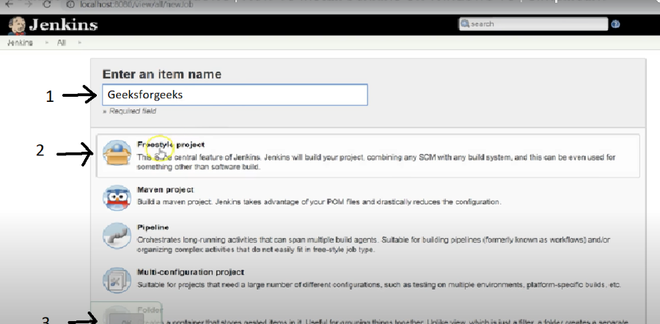
Step 1: Click on a new item, and then you will have a page on which you have to give your name to your job and choose ‘freestyle project’ or any other option according to your need and then click ‘ok’.
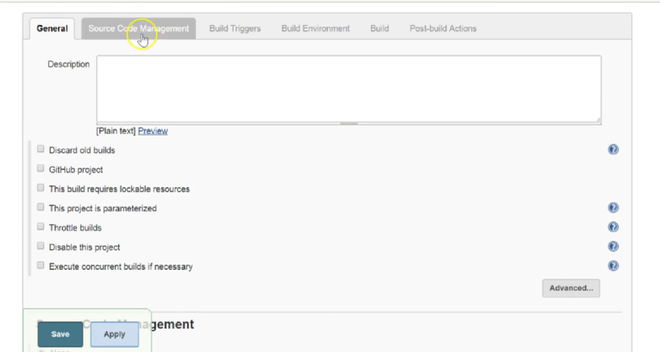
Step 2: After this, you will reach a page where you have different options(like build, build triggers, source code management) that help you manage your job.
Step 3: Now, we will give some description of our job.
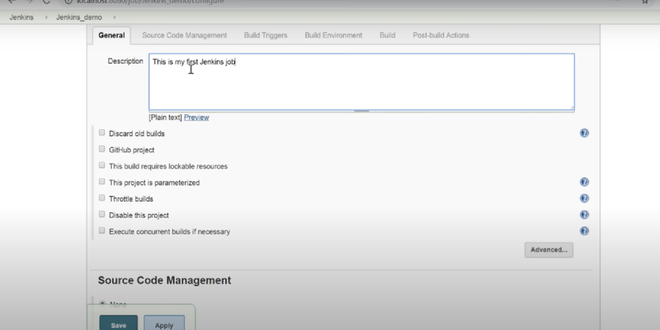
Step 4: Now, you have to provide which source code management tool you are using since here we are not using anyone so will choose the ‘none’ option.
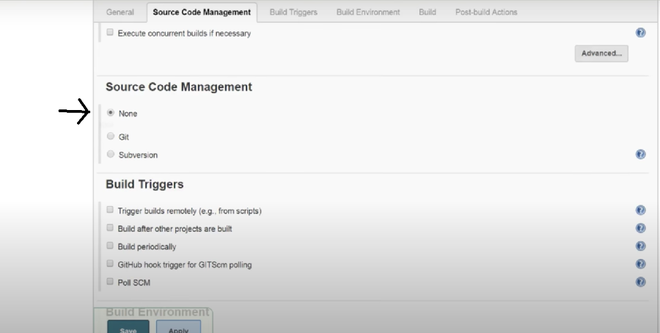
Step 5: After this, if you want to give some triggers then you can choose accordingly even Jenkins provides us scheduled triggers. And you can choose to build an environment also accordingly. But, here we are making a simple job, so we are not using any triggers and build environment options.
Step 6: In the build section we have an option ‘Execute Windows batch command’ by which we can write some command or code.
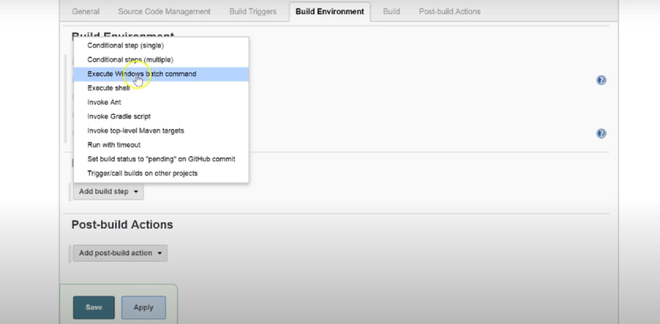
Step 7: Now, you can give the command according to your need.
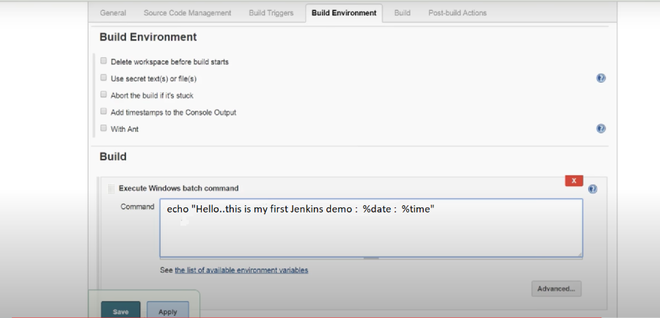
Then click apply and save. So, your job is created.
Step 8: Now, we will run it for which click the ‘build now’ option and a building history will be created then click on it.
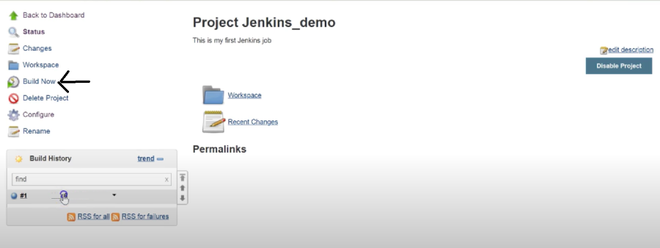
Step 9: Now, Click on console output, and you can see your output. Also, by console output, you can see whether your job is failed or successful.

By now we are over with the procedural part and Jenkins is installed on the machine. Lets us finally do discuss out the meaning of some terms listed as follows:
Console output- gives details on how/what it runs behind.
Run any job== build now.
The symbol of the sun means the success of your job.
The symbol of the cloud means the failure of your job.
The trigger means automatic run and also we can give a schedule in it.
Subscribe to my newsletter
Read articles from Gopal Gautam directly inside your inbox. Subscribe to the newsletter, and don't miss out.
Written by

Gopal Gautam
Gopal Gautam
Hii I am a backend/DevOps engineer.I have a experience with development and automation.I mostly work with Python, django, Cloud based technologies.