A step-by-step guide to collaborating on Github for printf
 Peace Chinagwam
In this post, I outline the steps to collaboratively set up and populate a repository, particularly focusing on integrating partners and working together. This process is crucial for efficient teamwork and version control on the project.
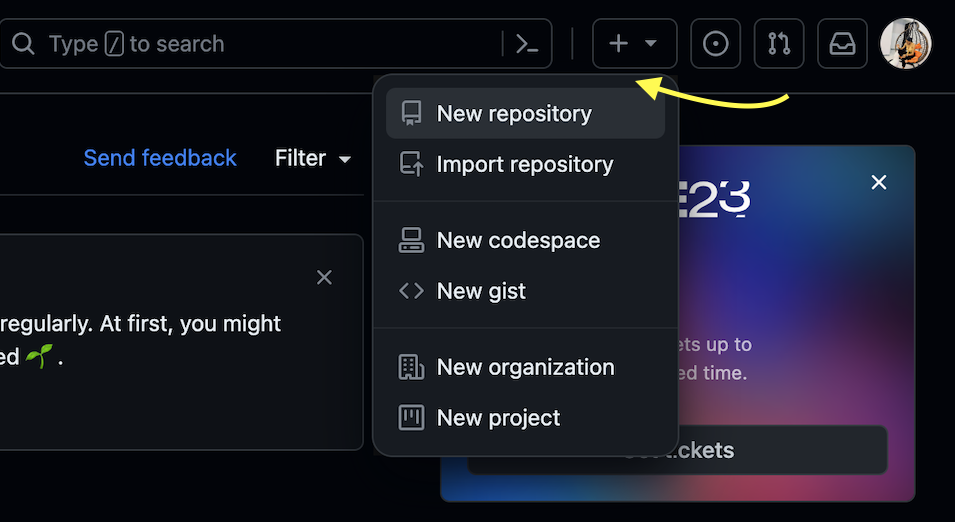
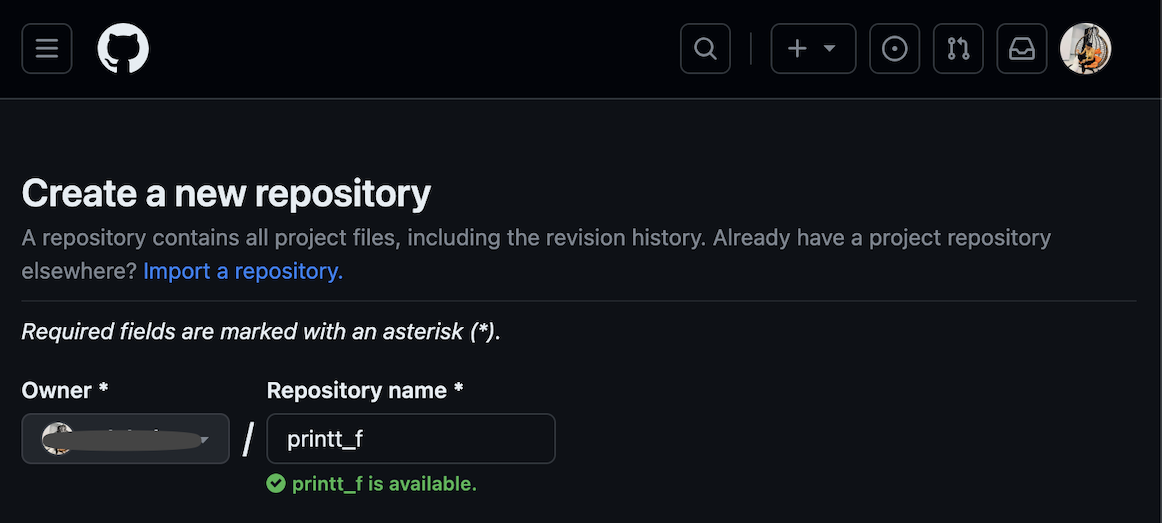
- Create the Repository
Start by initiating a new repository on GitHub, then create the repository with an appropriate name and description.
- Add Partner as a Collaborator
Invite your partner to join the repository as a collaborator. This step varies depending on the platform you're using. Collaborators typically have read-and-write access to the repository, enabling them to contribute to the project.
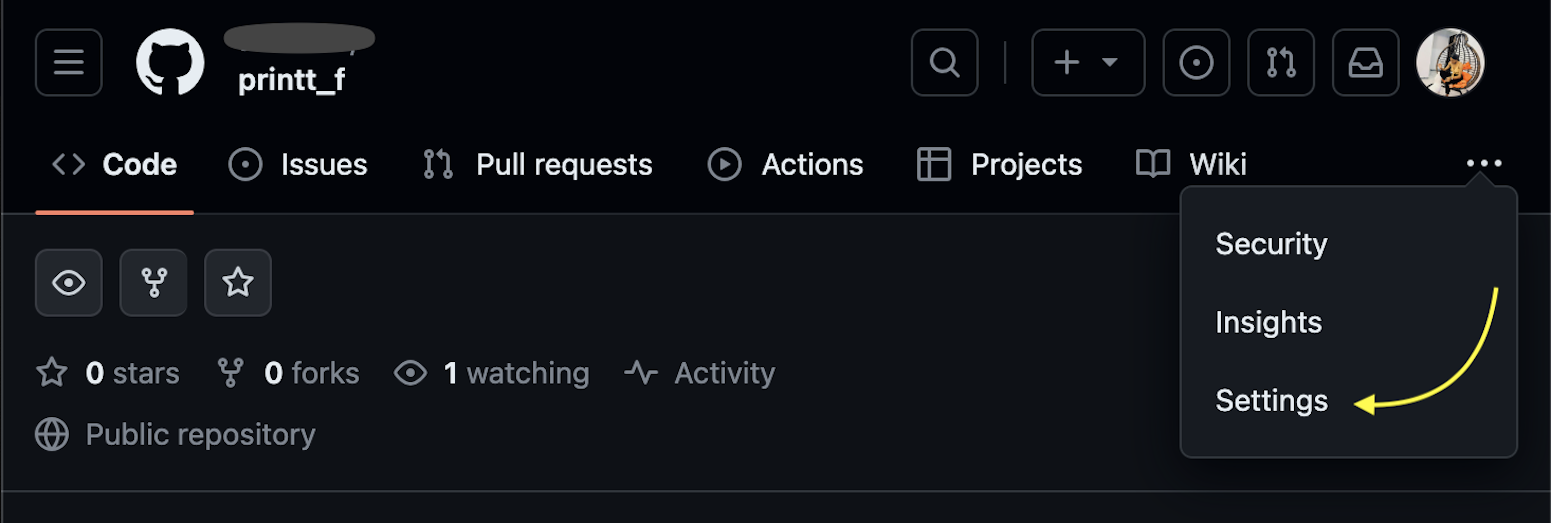
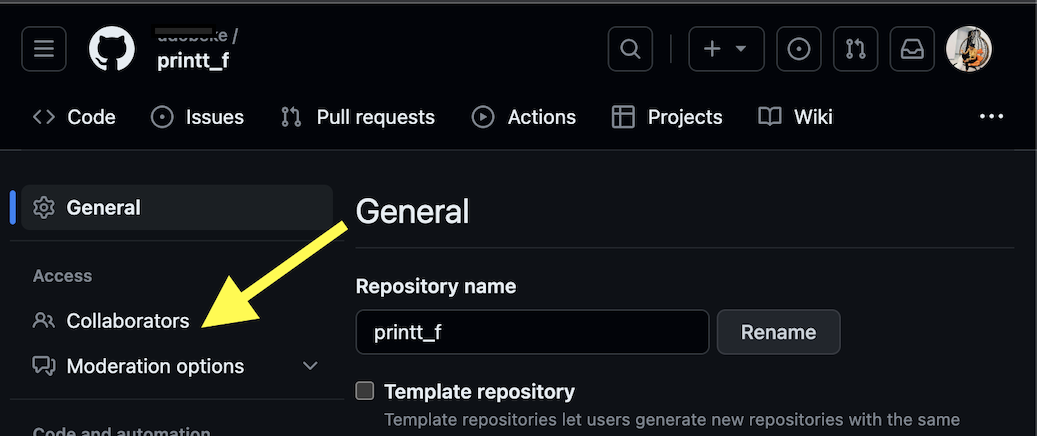
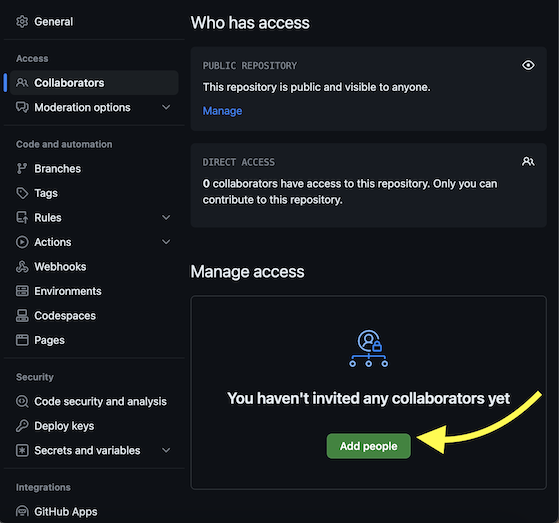
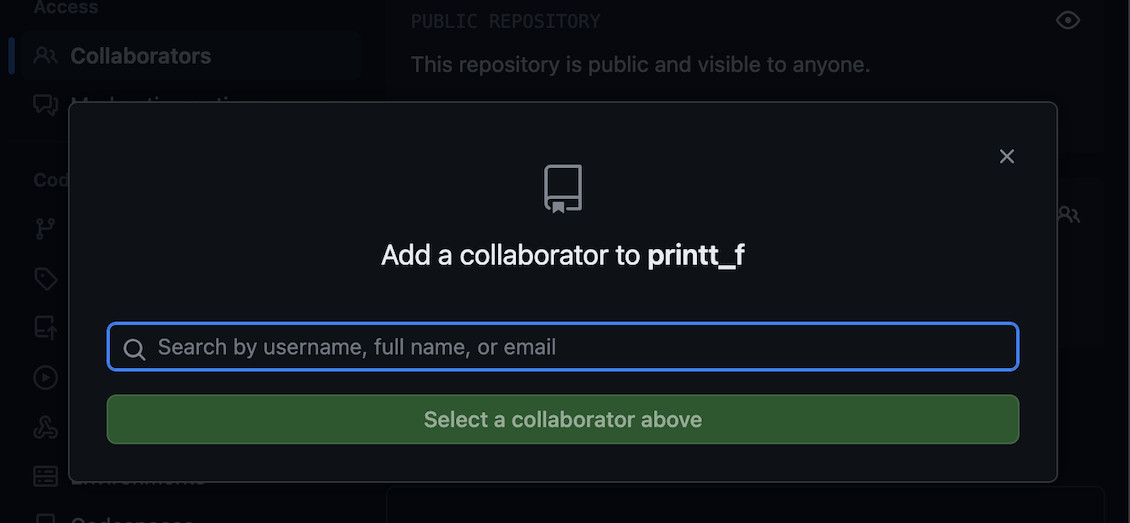
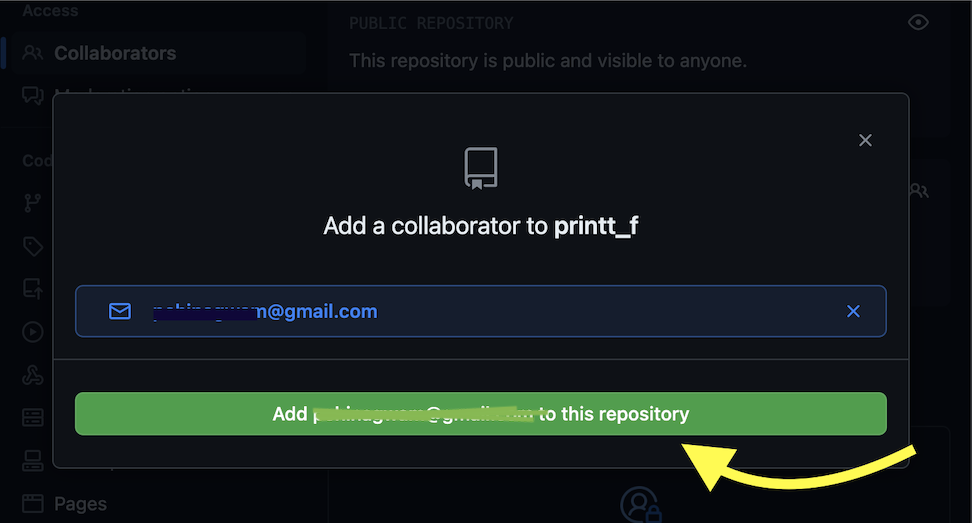
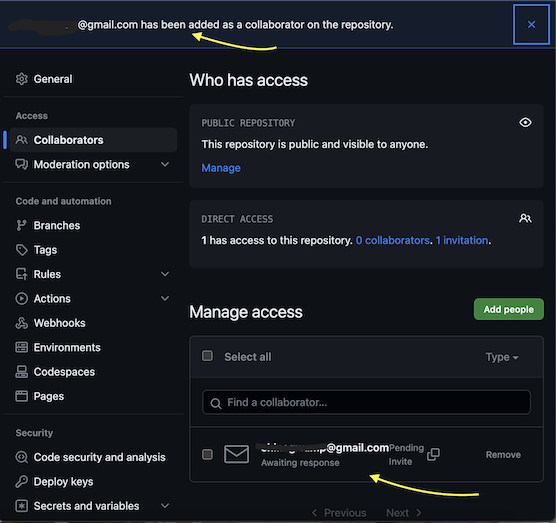
Yayyyyyyyy... Collaborator added 😊
- For the Collaborator Integration Steps
a. Clone the repository, Do not FORK
b. Change Directory to the 'printf' Repository: Navigate to the local repository folder.
c. git pull
- Collaborative File Addition and Commit
a. Either You or Your Partner Can:
i. Execute 'git pull': Pull any recent changes from the remote repository
ii. Create Necessary Files
iii. Add Changes Using 'git add': Stage the created files for commit git add.
iv. Commit Changes with Message: Commit the staged changes with an informative message: git commit -m "Group Project: Added printf files"
v. Push Changes Using 'git push'
By following these detailed steps, you will ensure a seamless collaborative process in setting up and populating a repository while maintaining version control and clear communication between partners.
Subscribe to my newsletter
Read articles from Peace Chinagwam directly inside your inbox. Subscribe to the newsletter, and don't miss out.
Written by

Peace Chinagwam
Peace Chinagwam
I am a front-end developer and technical writer who loves creating user-friendly designs and explaining tricky things in simple words.