Deploy a Windows Virtual Machine (VM) in Microsoft Azure and connect to it using Remote Desktop Protocol (RDP)
 Jones A Jones
Here's a step-by-step guide on how to deploy a Windows virtual machine (VM) in Microsoft Azure and connect to it using Remote Desktop Protocol (RDP):
Log in to Azure Portal: Log in to your Azure account at Azure Portal
Create a Virtual Machine:
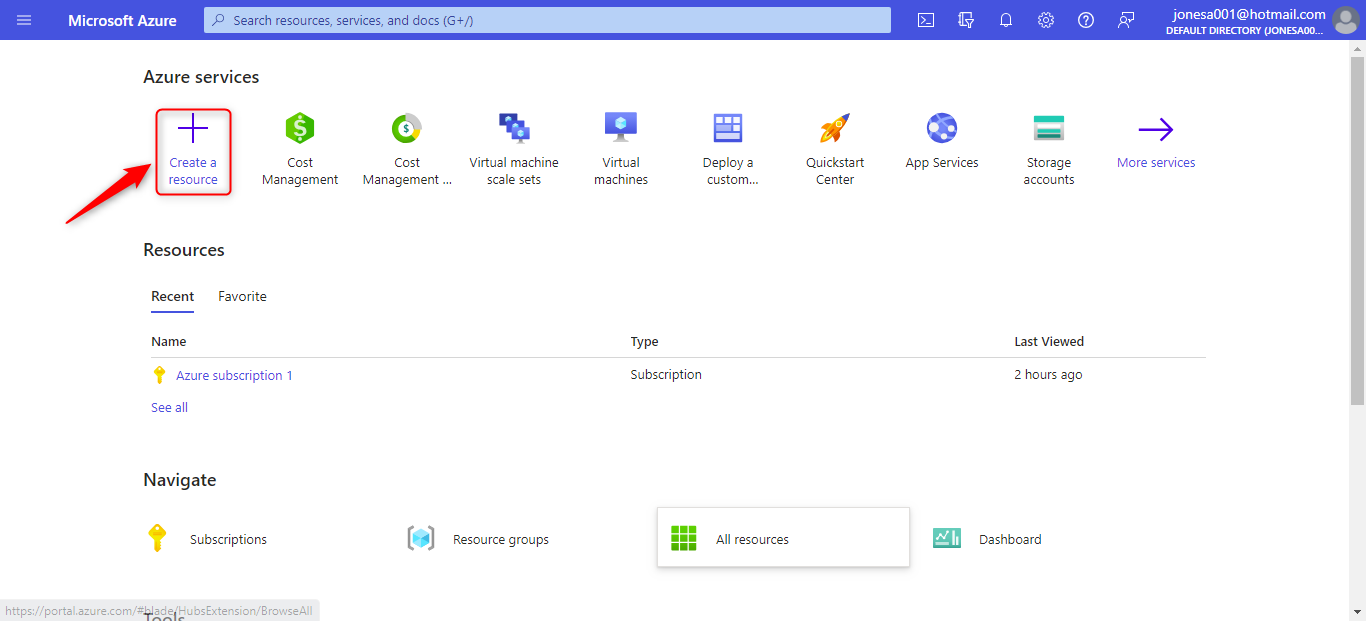
Click on the "+ Create a resource" button on the Azure portal dashboard.
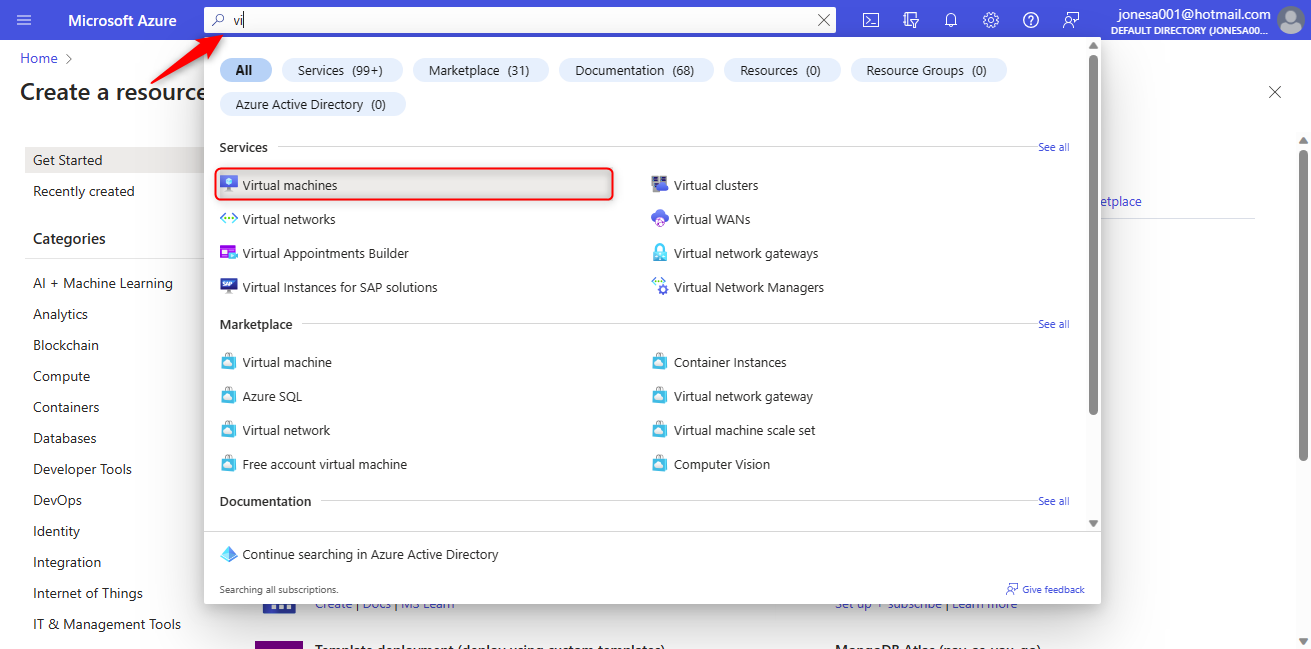
Search for "Virtual Machine" and select the "Virtual Machine" option from the search results. Basic Settings:
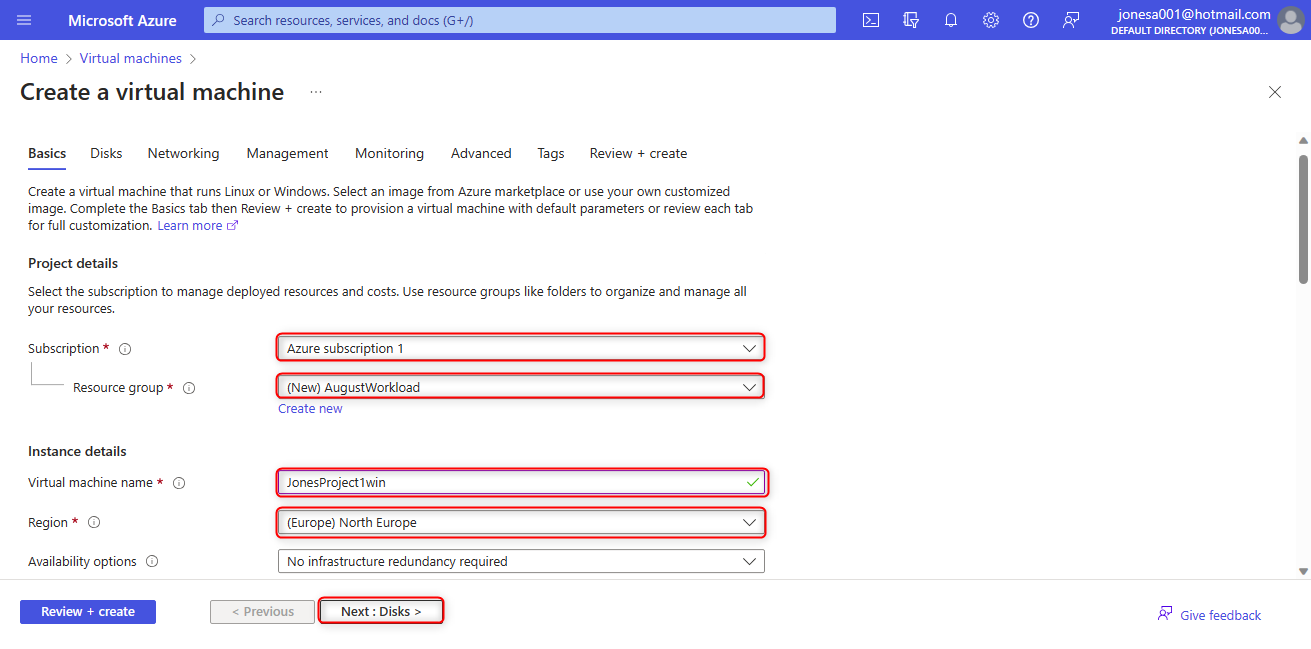
Choose your subscription. Create or select a resource group to organize your resources. Enter a virtual machine name. Choose a region for deployment. Select a Windows Server image from the "Image" options. Administrator

Account:
Under the "Administrator account" section, enter a username for the VM. Set a strong password for the administrator account.

Size:
Choose a VM size based on your requirements (CPU, memory, etc.).

Settings:
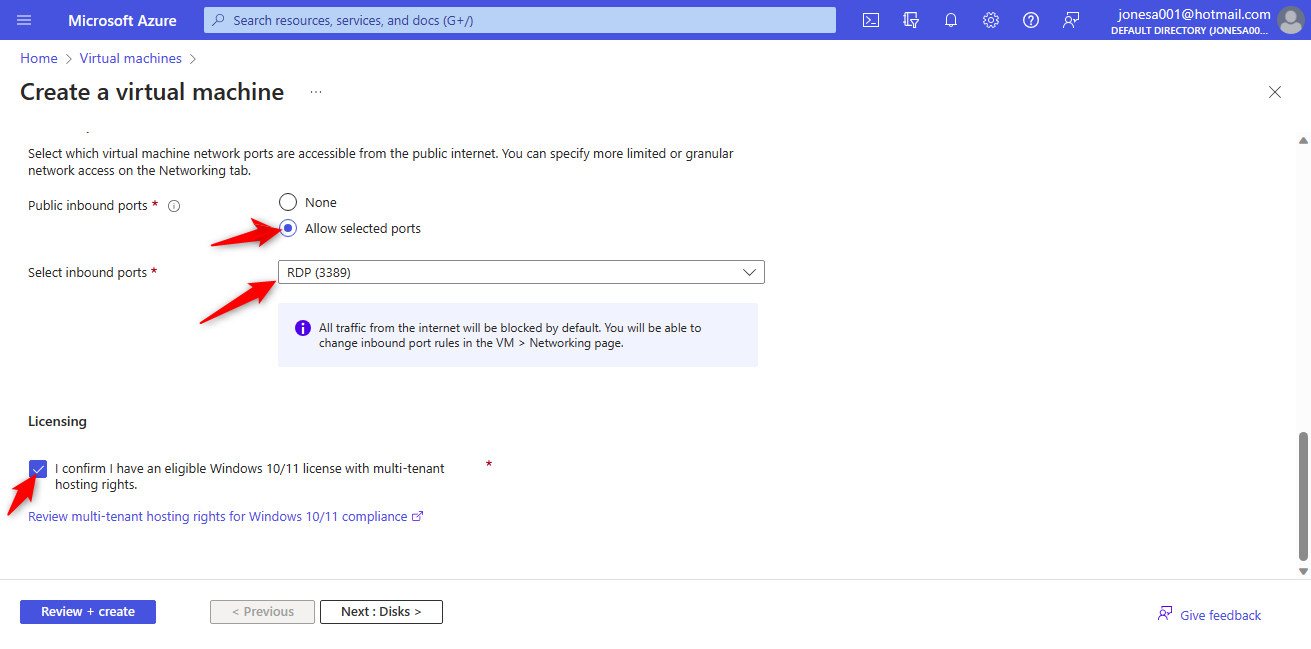
Configure optional settings such as disk, networking, and management. Open port 3389 (RDP) in the inbound port rules to allow RDP traffic.
Review +Create:
Review your VM configuration. Click the "Create" button to start the deployment process. Wait for Deployment:
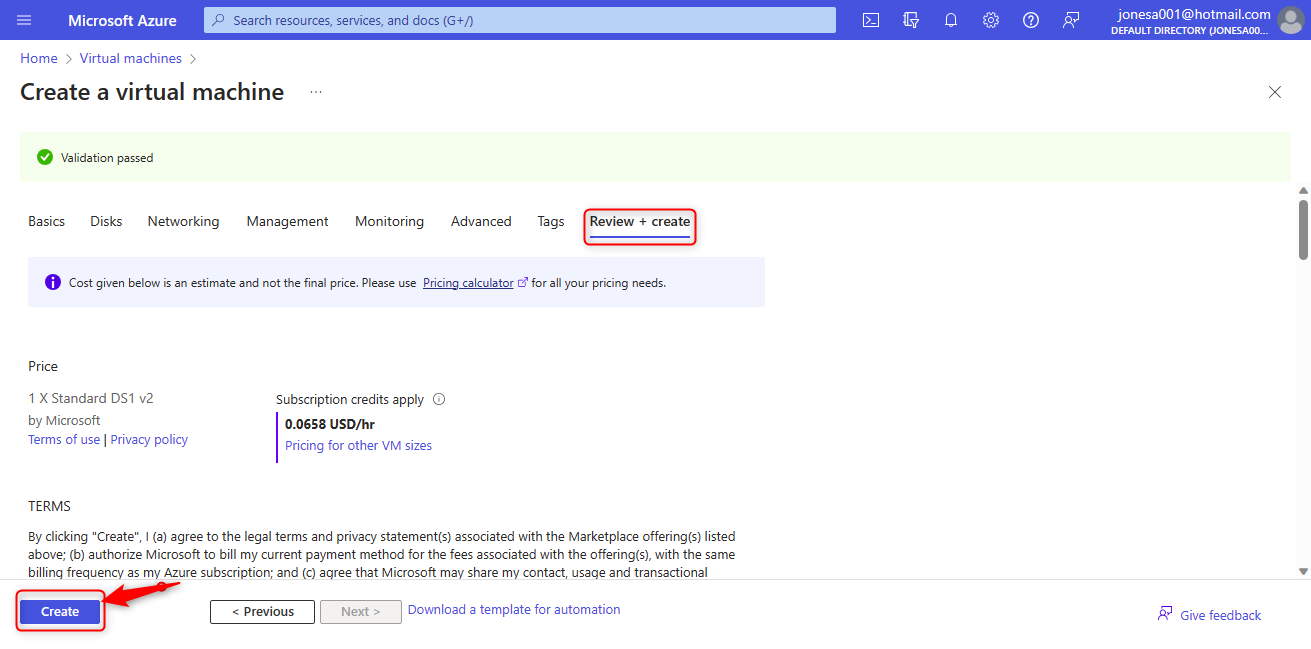
Azure will deploy the VM based on your settings. Wait for the deployment to complete. Get Public IP Address:
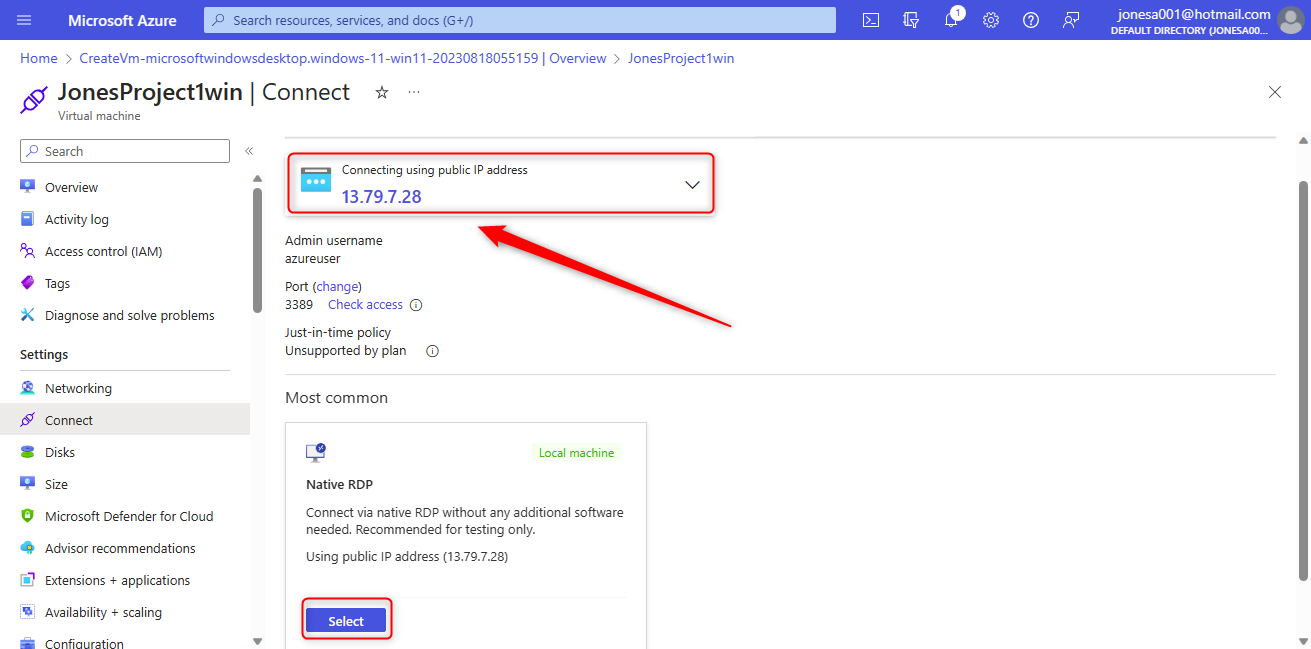
Once the VM is deployed, go to the VM's details page. Note down the public IP address of the VM. Connect Using RDP:
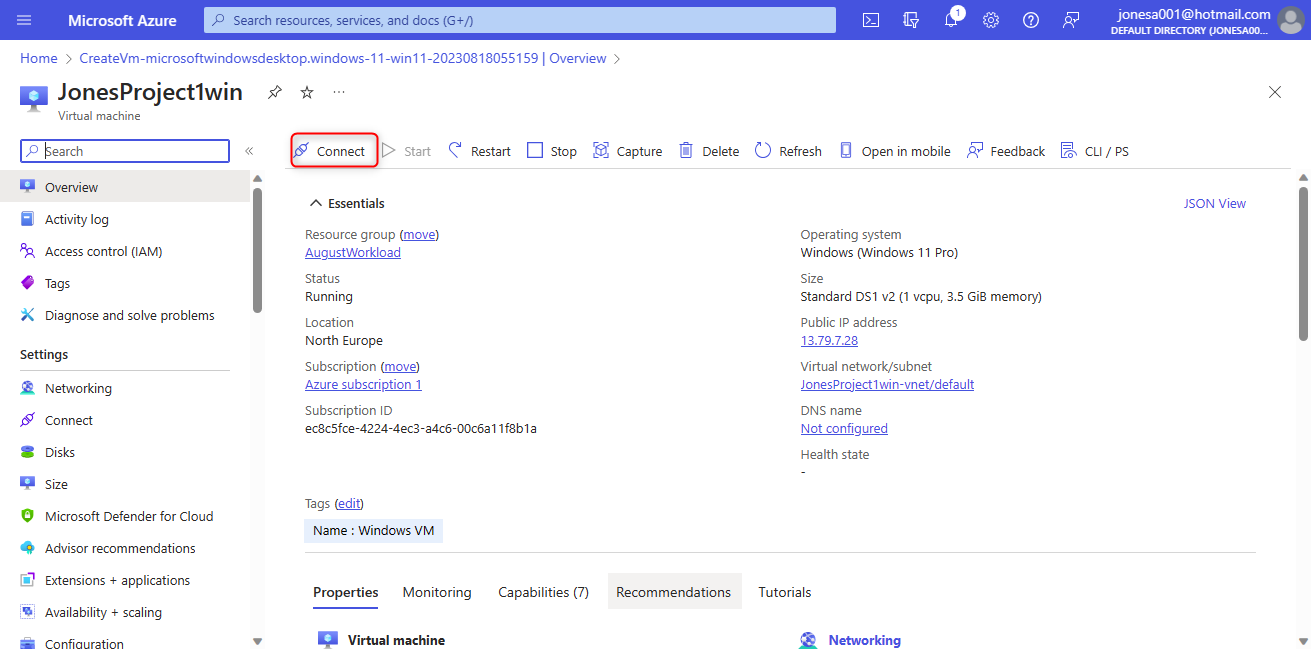
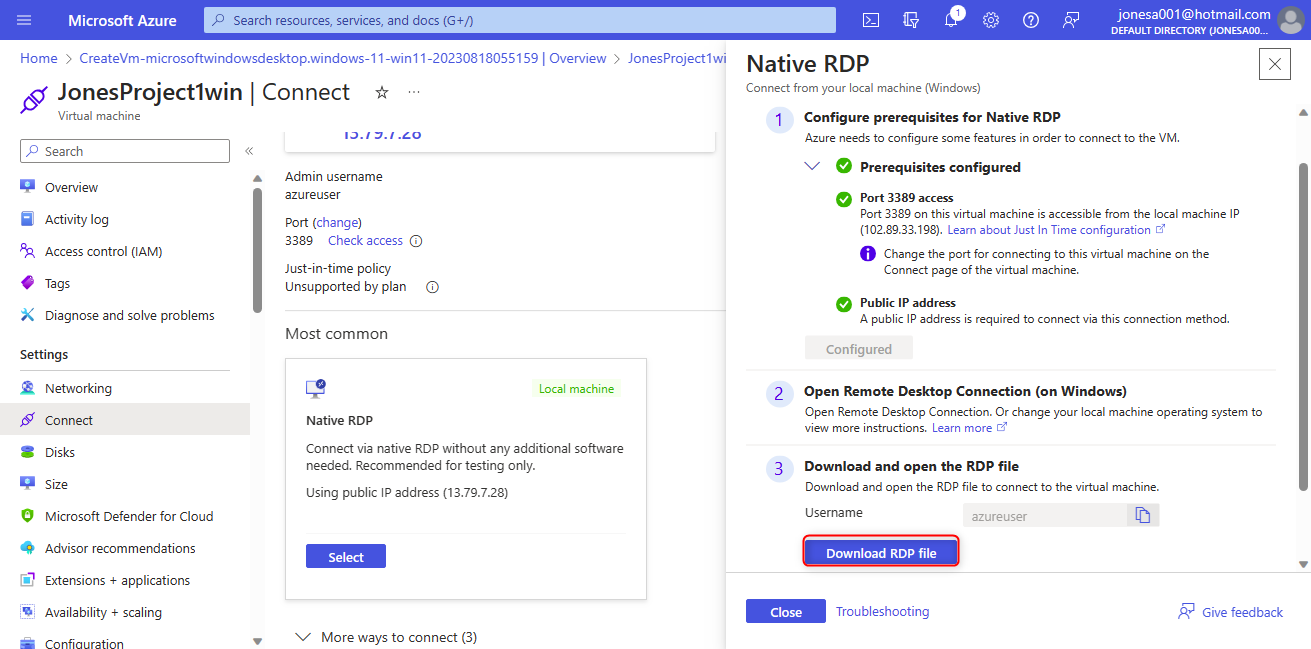
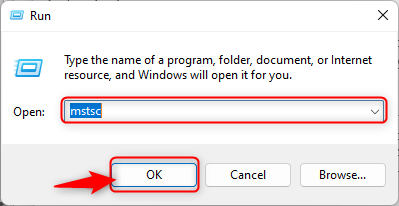
There are two ways to connect to your VM, you can download and open the RDP file from the Azure portal to your local Windows machine, or On your local Windows machine, press Windows + R to open the "Run" dialog. Type "mstsc" and press Enter to open the Remote Desktop Connection application. Remote Desktop Connection:
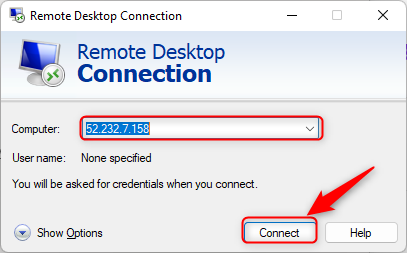
In the Remote Desktop Connection window, enter the public IP address of the VM in the "Computer" field. Click the "Connect" button. Authentication:
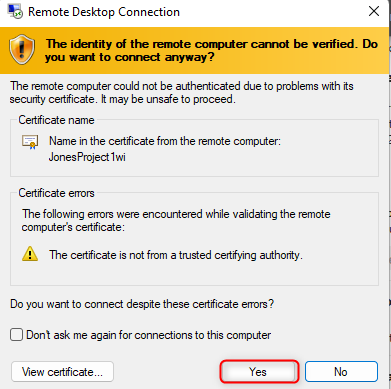
Enter the username and password you've set for the Windows VM during its setup. If this is the first time connecting, you might see a security warning. Accept it to proceed. RDP Session:
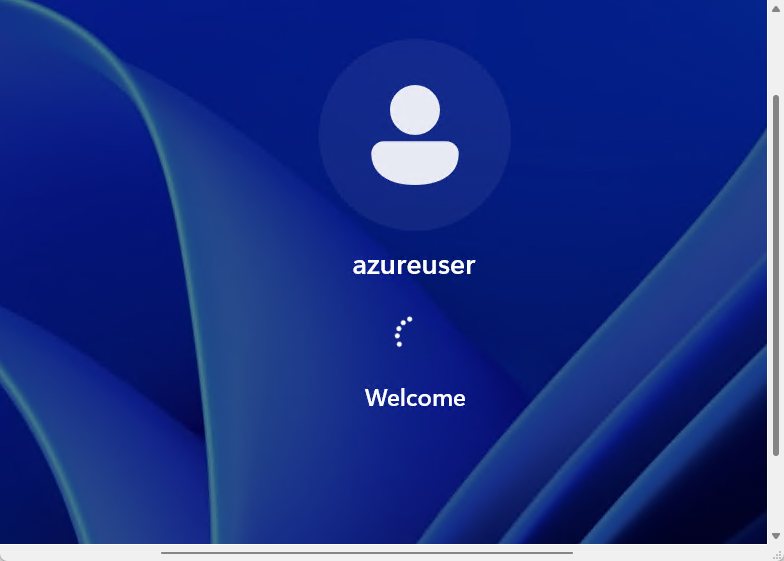
Once connected, you'll see the Windows desktop of the virtual machine on your local machine. You can now interact with the VM as if you were using it directly. That's it! You've successfully deployed a Windows VM in Azure and connected to it using RDP.

Note:
Always remember to shut down and disassociate the IP address of your virtual machine to avoid overcharging costs, and also delete the VM when not needed anymore.
Subscribe to my newsletter
Read articles from Jones A Jones directly inside your inbox. Subscribe to the newsletter, and don't miss out.
Written by

Jones A Jones
Jones A Jones
I am a Computer support Engineer