Jenkins Step-by-Step Guide on Crafting a Continuous Delivery and Deployment Pipeline
 Varun Margam
📍Introduction
Welcome to my Jenkins blog series! In this guide, we'll explore the world of Continuous Delivery and Deployment using Jenkins. From implementing Continuous Delivery for a Django todo app to achieving Continuous Deployment for a Node.js application, you'll gain practical insights into setting up Jenkins jobs, configuring webhooks, and orchestrating deployments. Whether you're a seasoned developer or a newcomer, join me on this journey to streamline your development workflow and master the art of automated application delivery with Jenkins. Let's dive in!
📍Implementing CI/CD (Delivery) with Jenkins: Django Todo App Freestyle Project
We're setting up a Jenkins Job for deploying the Django todo app with Continuous Delivery. i.e. for every change committed to the code, we would manually have to run this Jenkins job to start the process of cloning, building, and deploying.
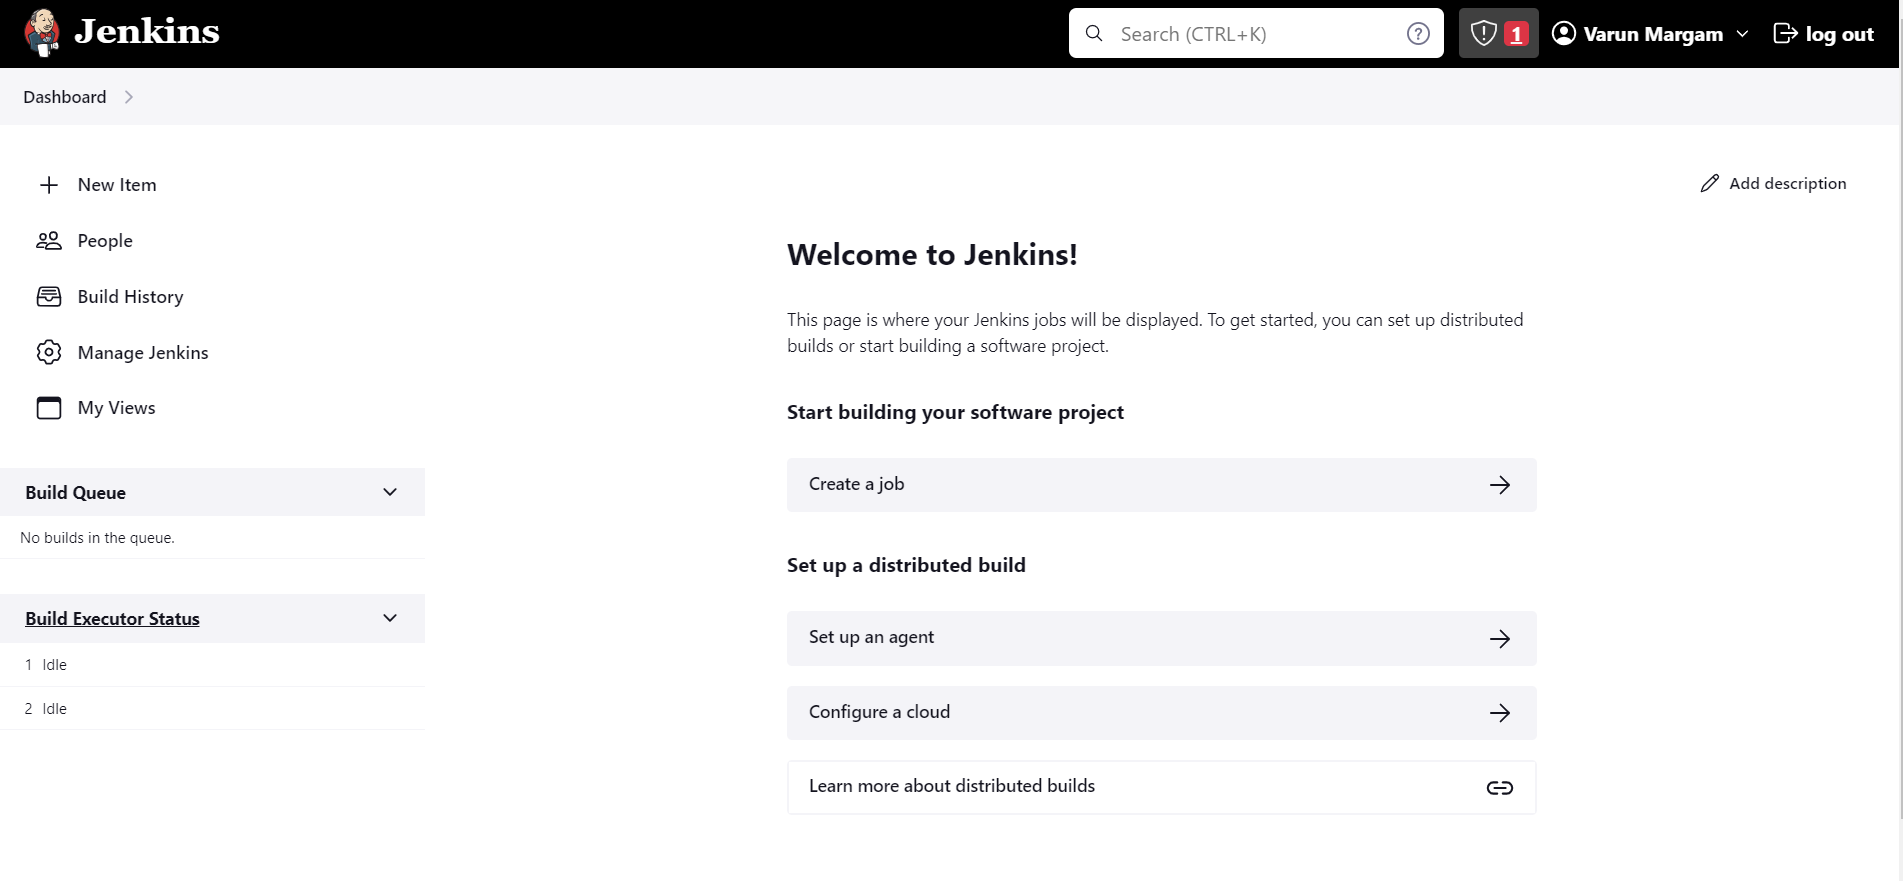
Step 1: Click on "New Item"
Change the Photo
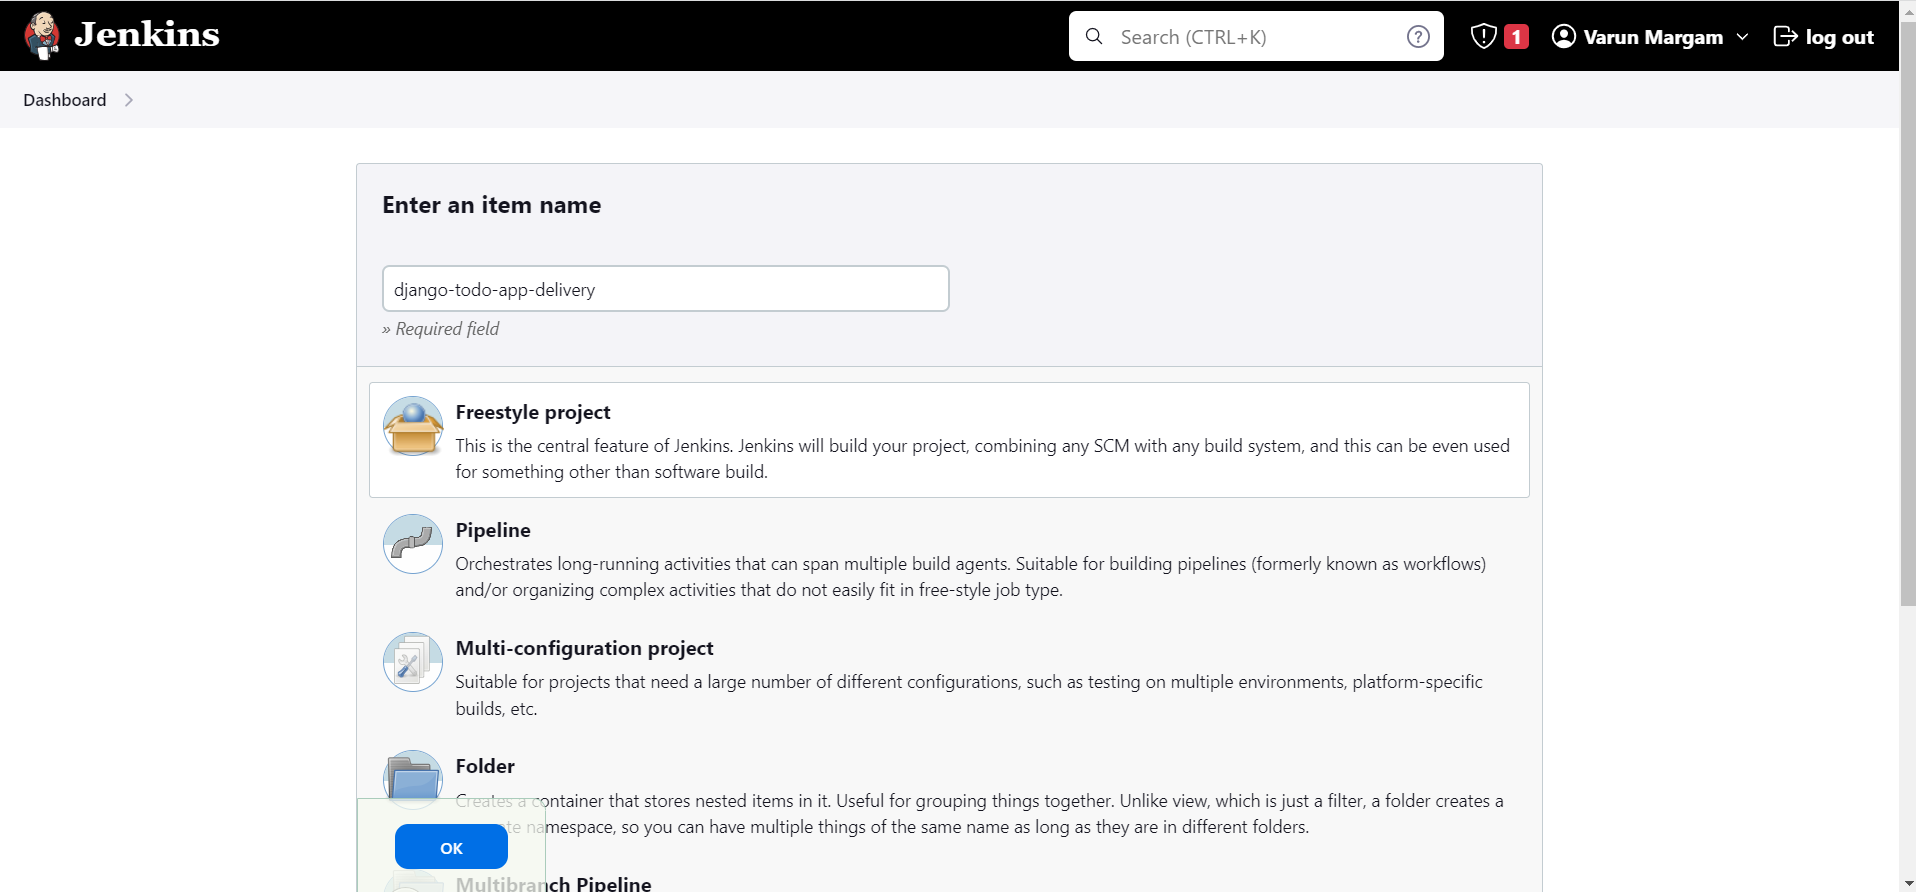
Step 2: Name the job "django-todo-app-delivery", select "Freestyle project", and click "OK".
Step 3: Add this Description:
This project/job is the delivery of my Django-todo-app. I am using Jenkins to automate the task of getting the code from GitHub, building, and deploying it.
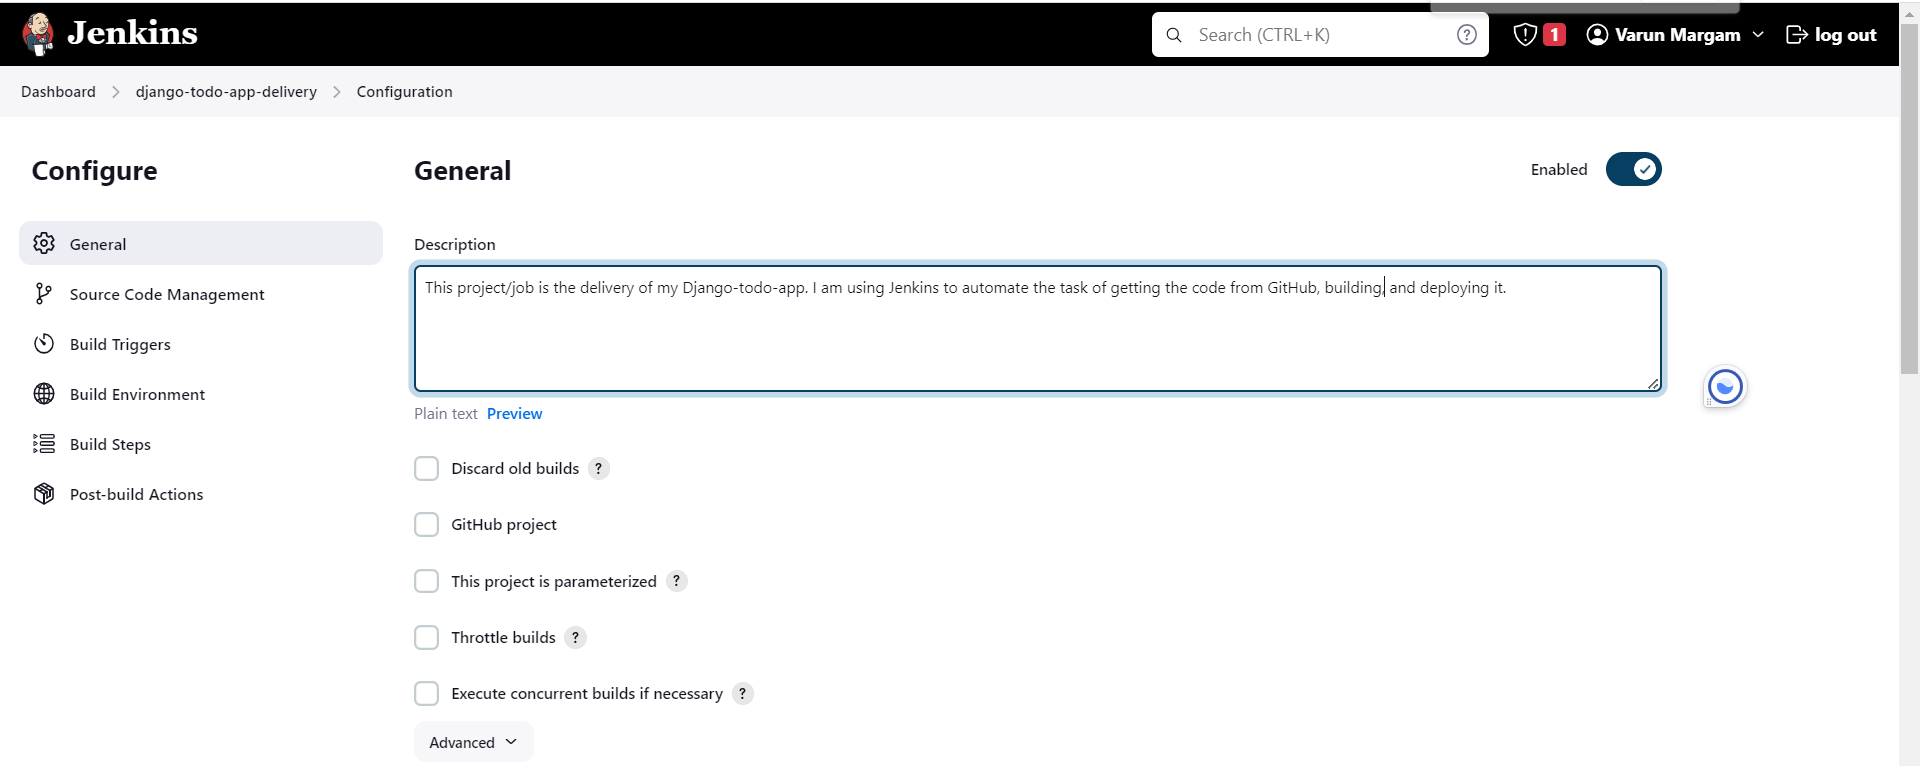
Step 4: Since this is a GitHub project click on the "GitHub project" and add this URL(https://github.com/LondheShubham153/django-todo-cicd) in the "Project url" section.
This is the repository:
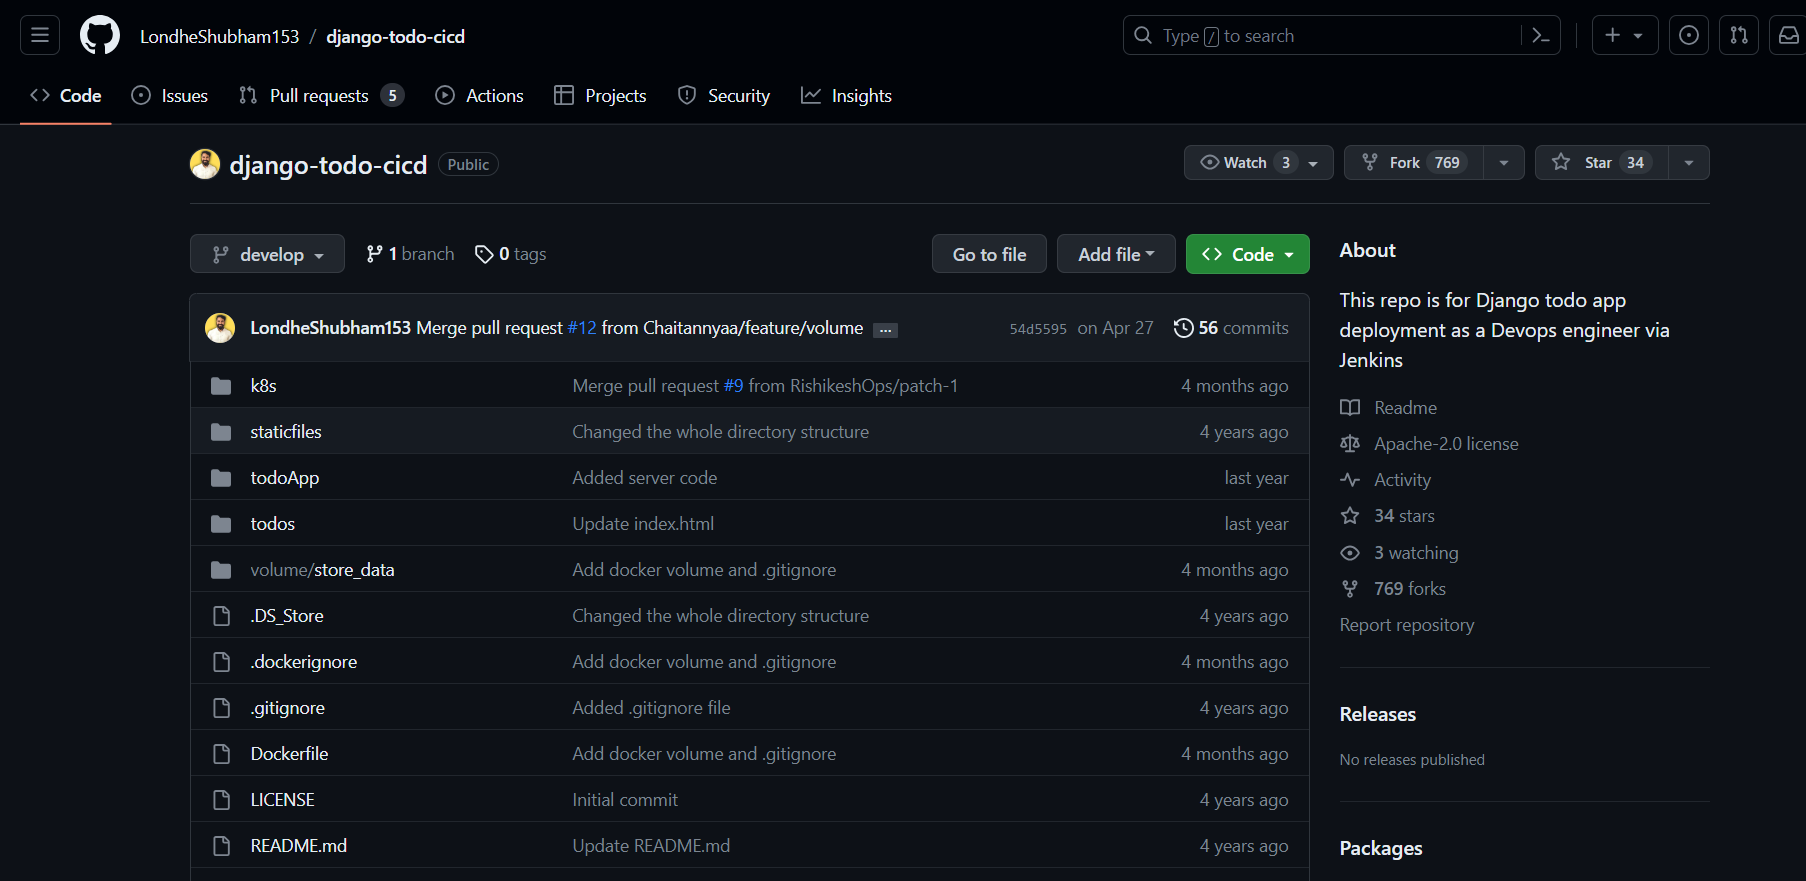

You can see what the other project options mean by clicking on them.
Step 5: Come to the "Source Code Management" section and select "Git".
It will ask you for the repository URL i.e. the HTTPS URL that is used to clone the repository.
HTTPS URL: https://github.com/LondheShubham153/django-todo-cicd.git

In the "Credentials section," you need to give the credentials like "PAT (Personal access token)" or "ssh-key" for private repositories. Since GitHub has now removed accessing the repository through username and password for other users.
We don't need to provide any Credentials since this is a Public Repository.
Step 6: In the "Branches to build" section we have to specify the branch we want to build.
Since the code resides in the "develop" branch:

In this Section at the bottom, you will see the "Additional Behaviours" with the "Add" dropdown, here you can select any option and do things like To copy, run a particular file of another branch or particular commit, etc. can be done.
Step 7: Go to the "Build Steps" section where you can specify the actions or commands to execute the code which you have cloned.

Step 8: Click on the "Add build step" and select "Execute shell" and add these commands:
echo "This job worked and successfully cloned the code."
whoami
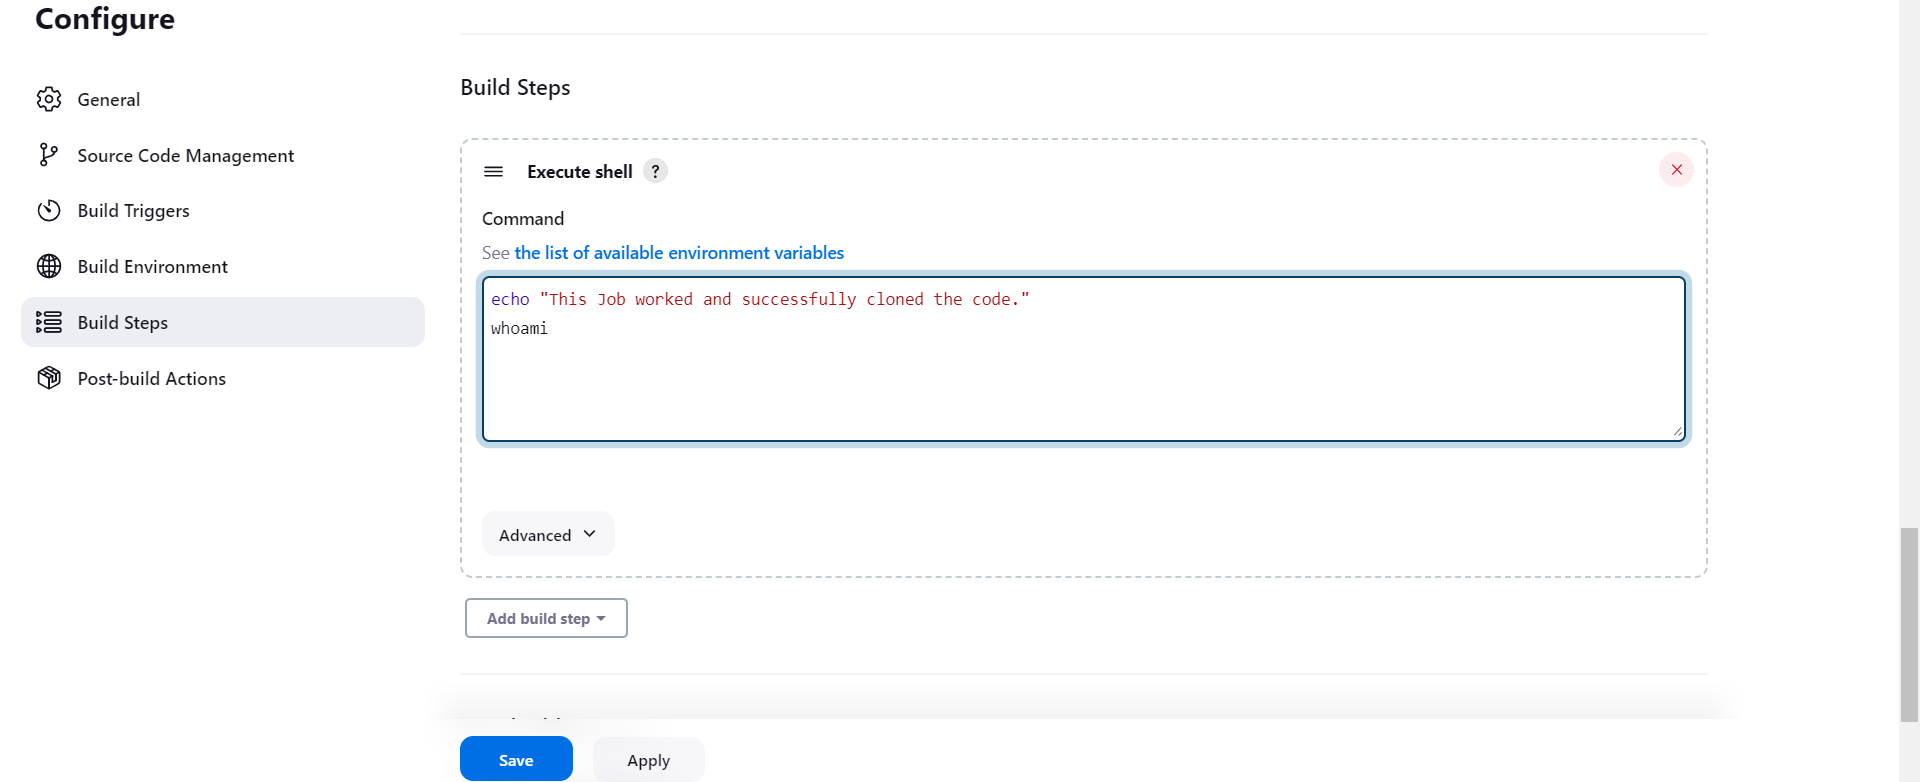
Step 9: And Click "Save".
Your job has now been created:
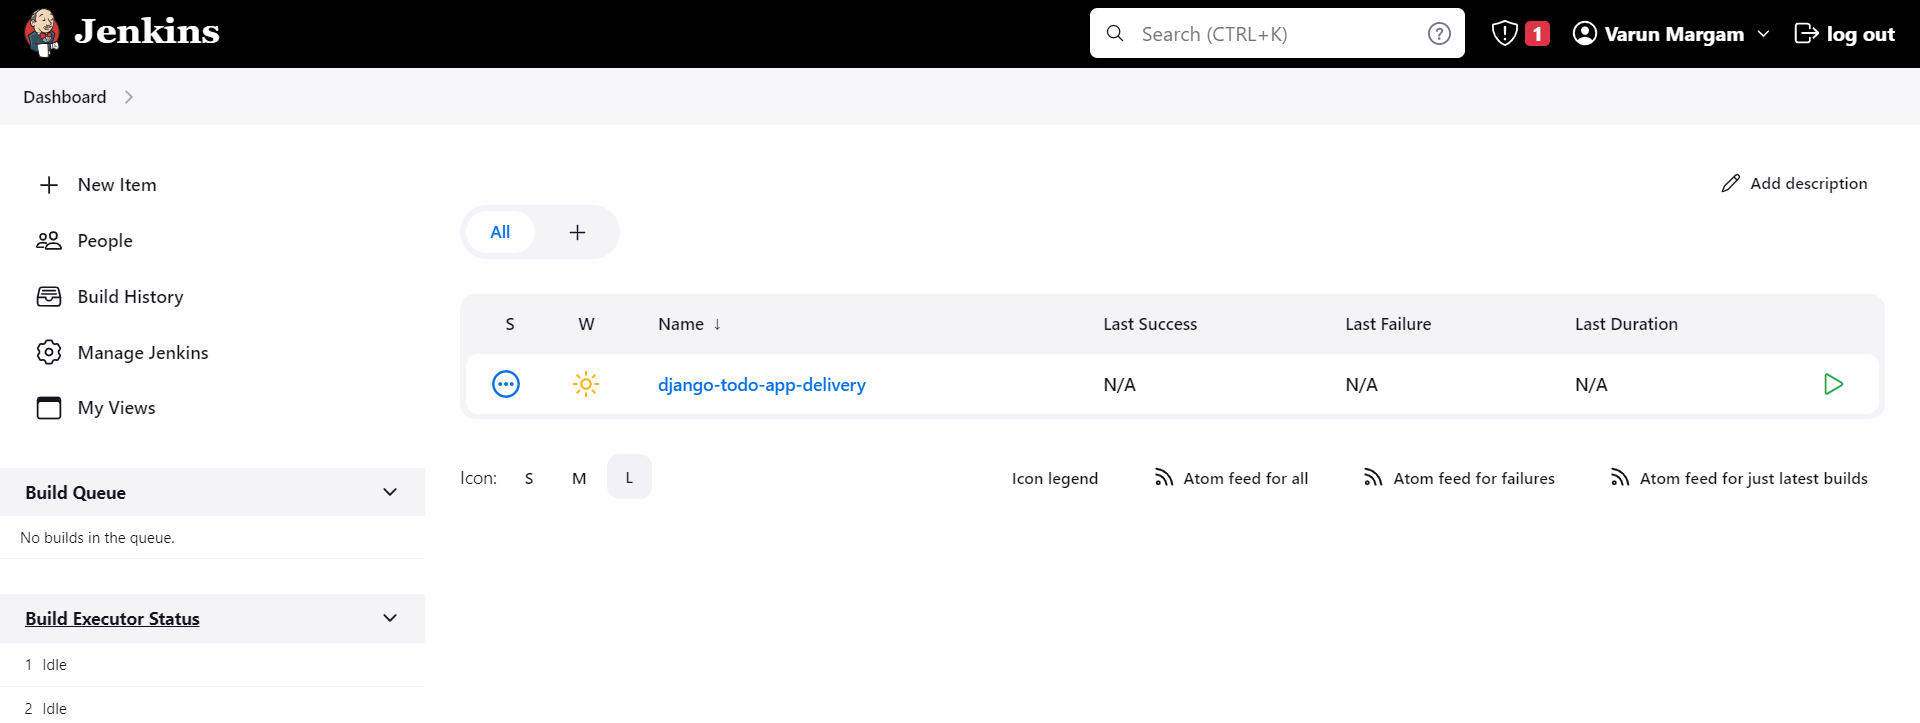
At the extreme right of where your job is displayed, you can see a green triangle. That sign represents starting the "Build" process.

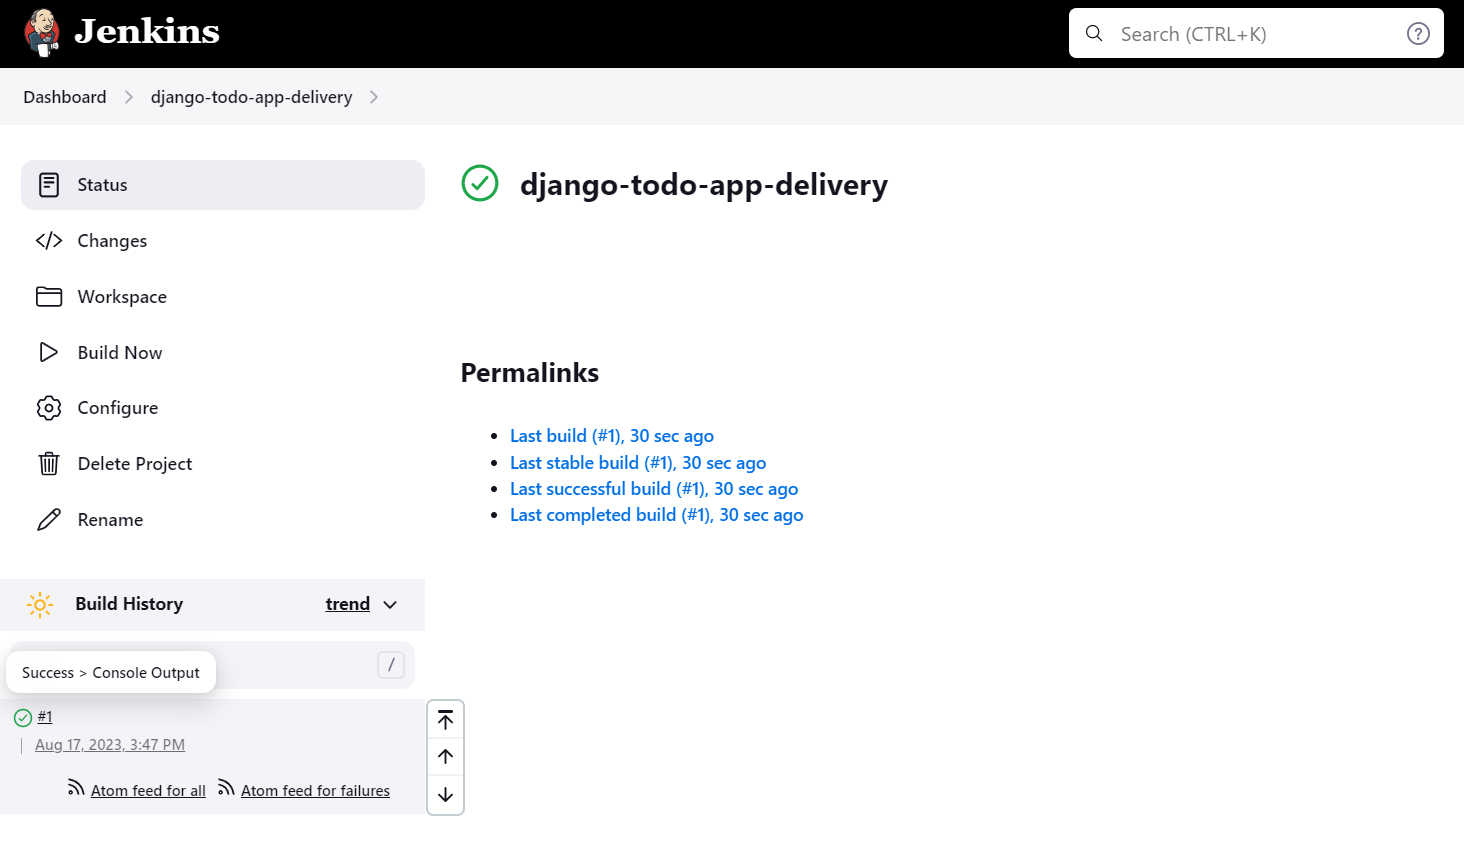
Step 10: Click on that icon and your build process will start. You can see the build process on the bottom left side of the screen in the "Build History" section.
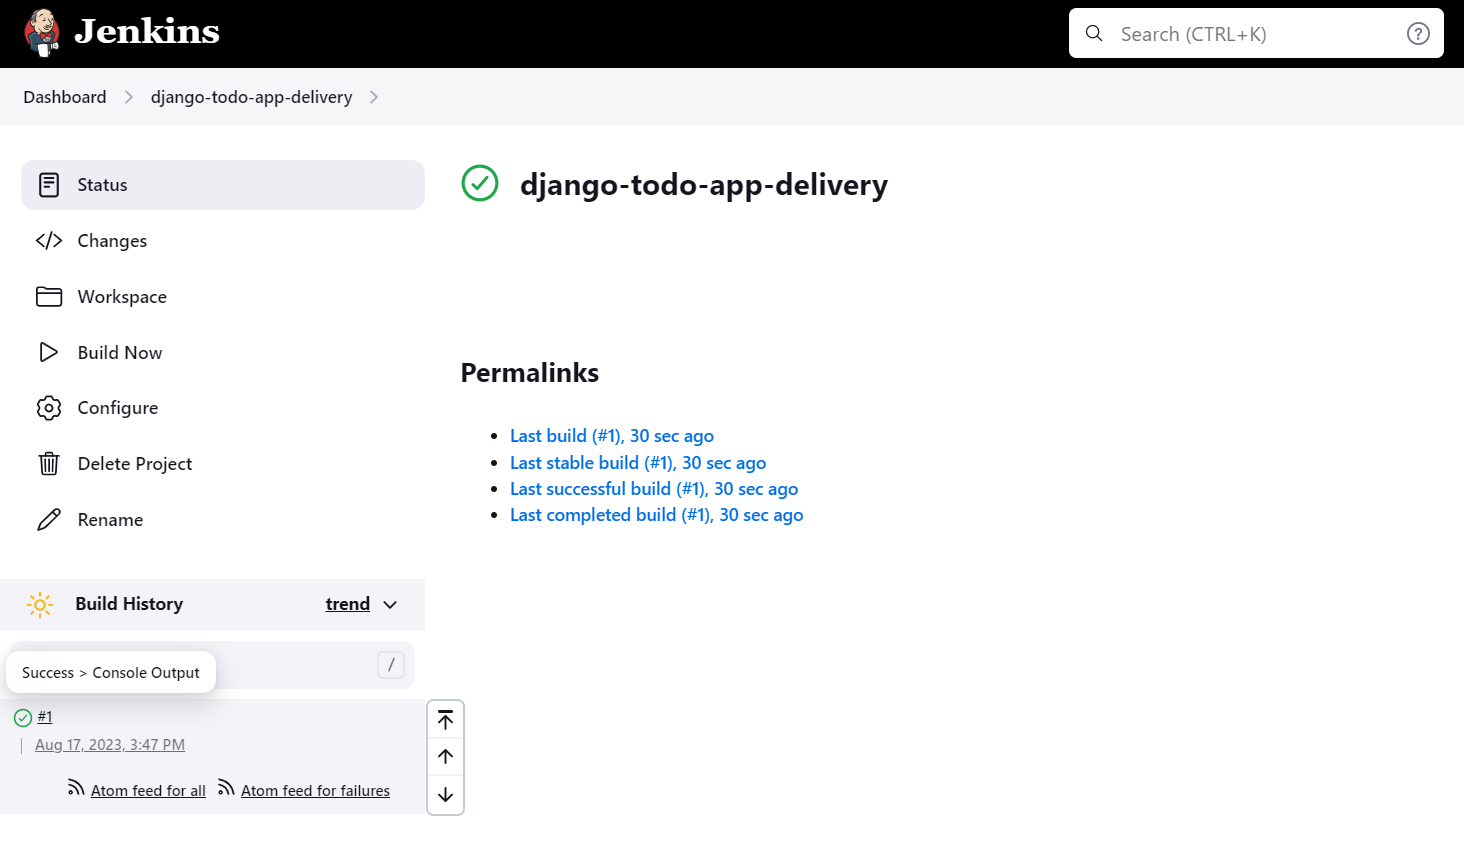
You can see our build has been successful, now click on the #1 tick icon in the "Build History" section to see the "Console Output":
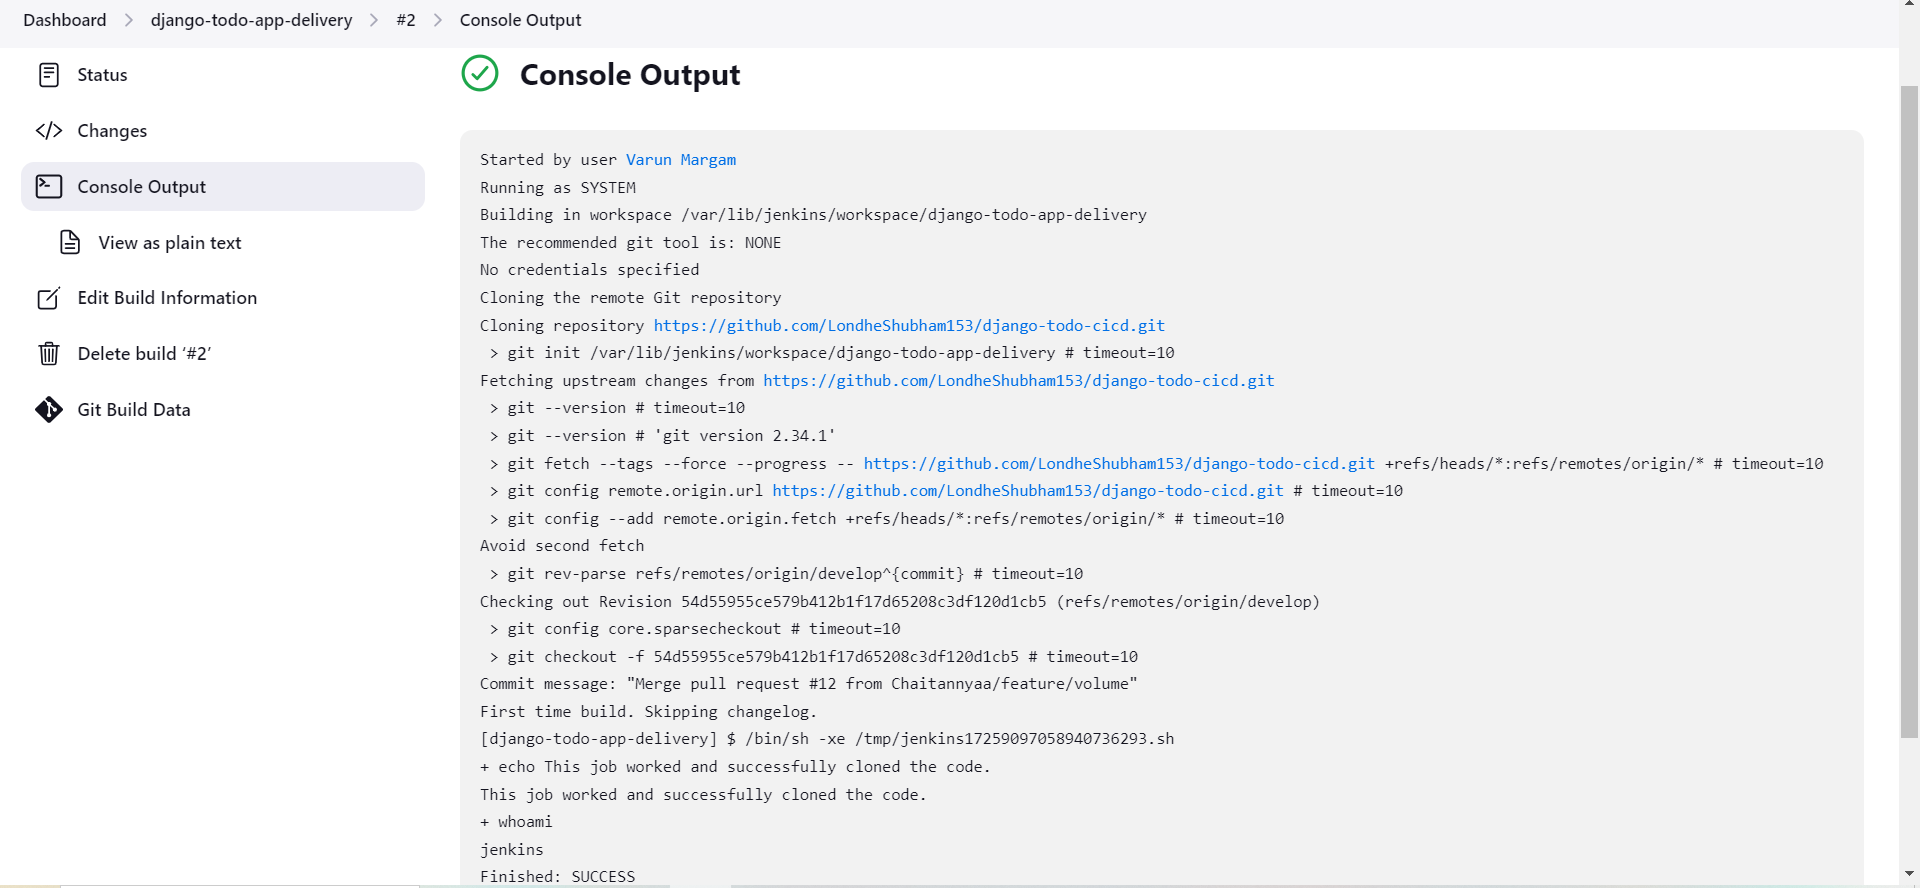
You can see all the steps it executed during the build process:
Cloning the code from the git repository.
Executing the command we had written in the build steps.
The output for the command
whoamiis jenkins.
Therefore, this tells that all Jenkins's actions during the build process are done by the "jenkins" user.
You can also see the cloned repository in your terminal. As in the "Console output it specifies Building in workspace /var/lib/jenkins/workspace/django-todo-app-delivery.
To see the use the command:
ls /var/lib/jenkins/workspace/django-todo-app-delivery

You can see it has automatically cloned this repository as we have mentioned the URL while configuring this job.
Let's build and deploy this Django-todo-app using Jenkins. For that:
Step 1: Go to your Job "django-todo-app-delivery" and Click on "Configure".
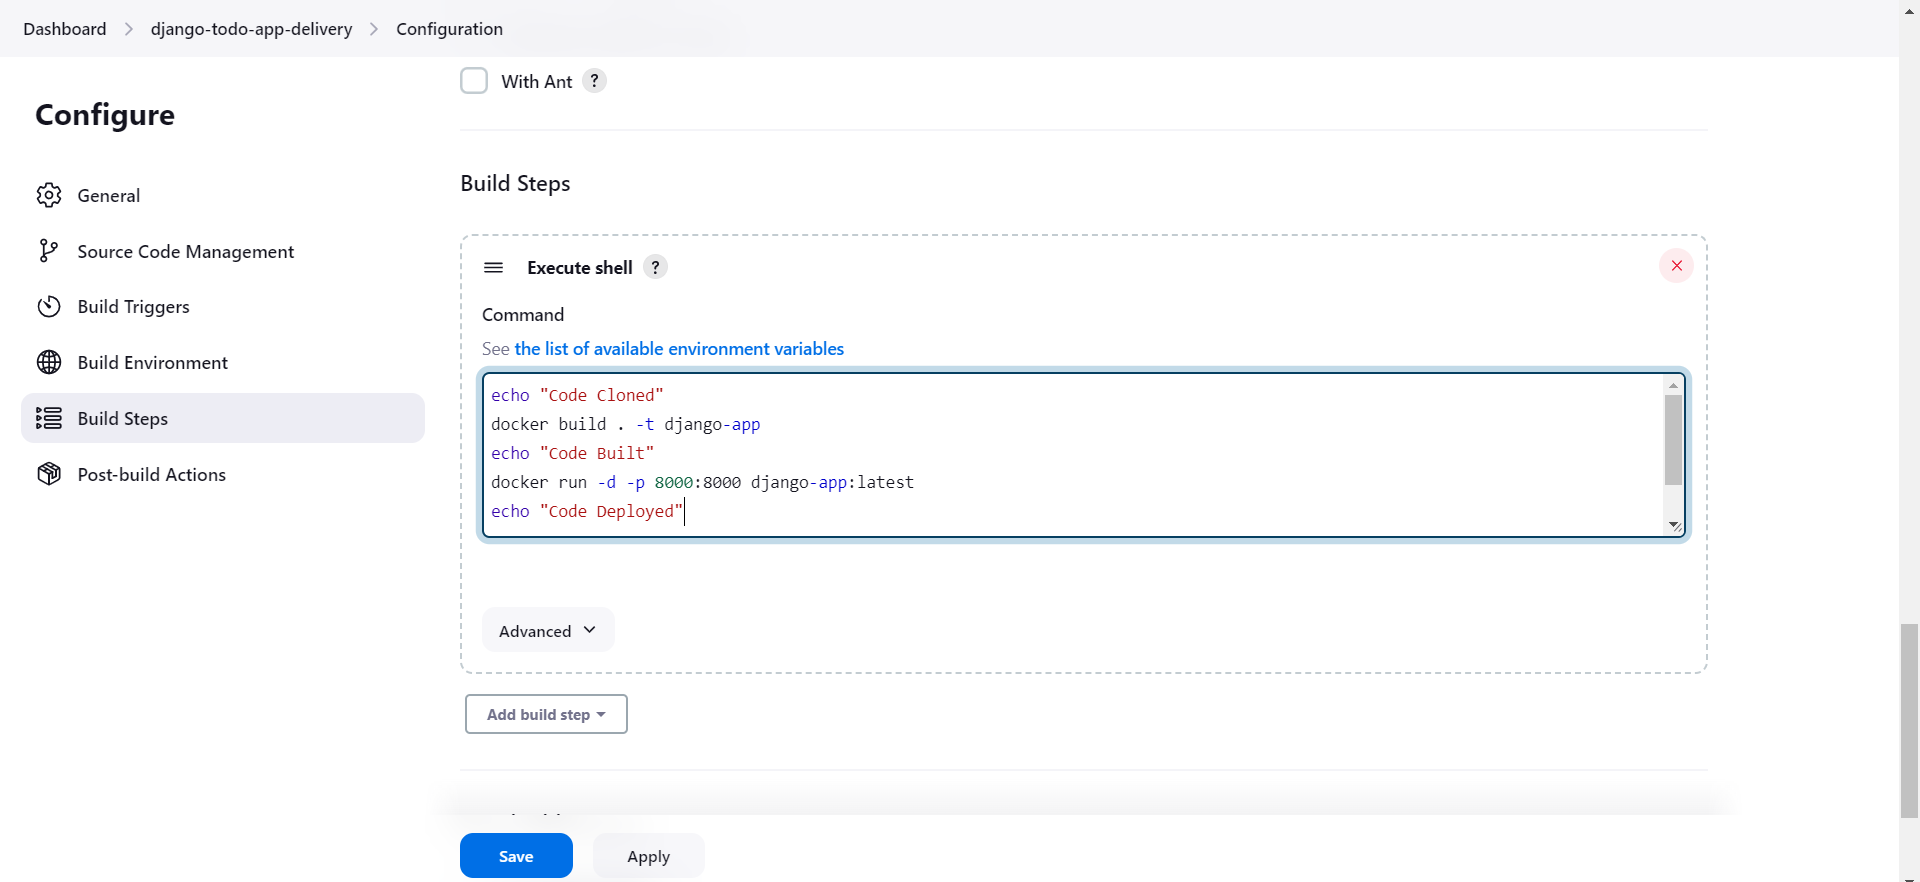
You will see the same screen as we saw while Configuring/Defining the New Job after clicking on Configure. Go to the "Build Steps" section and type these commands and Save it:
docker build . -t django-app
docker run -d -p 8000:8000 django-app:latest
But before running the build process we know that all these processes and commands are executed by the "jenkins" user. Therefore, we have to make sure that the "jenkins" user has permission to execute these docker commands.
Therefore:
Step 2: Go to your terminal and add the "jenkins" user to the docker group.

Step 3: Since we have rebooted the system, refresh the Jenkins Web Interface Page and log in to Jenkins
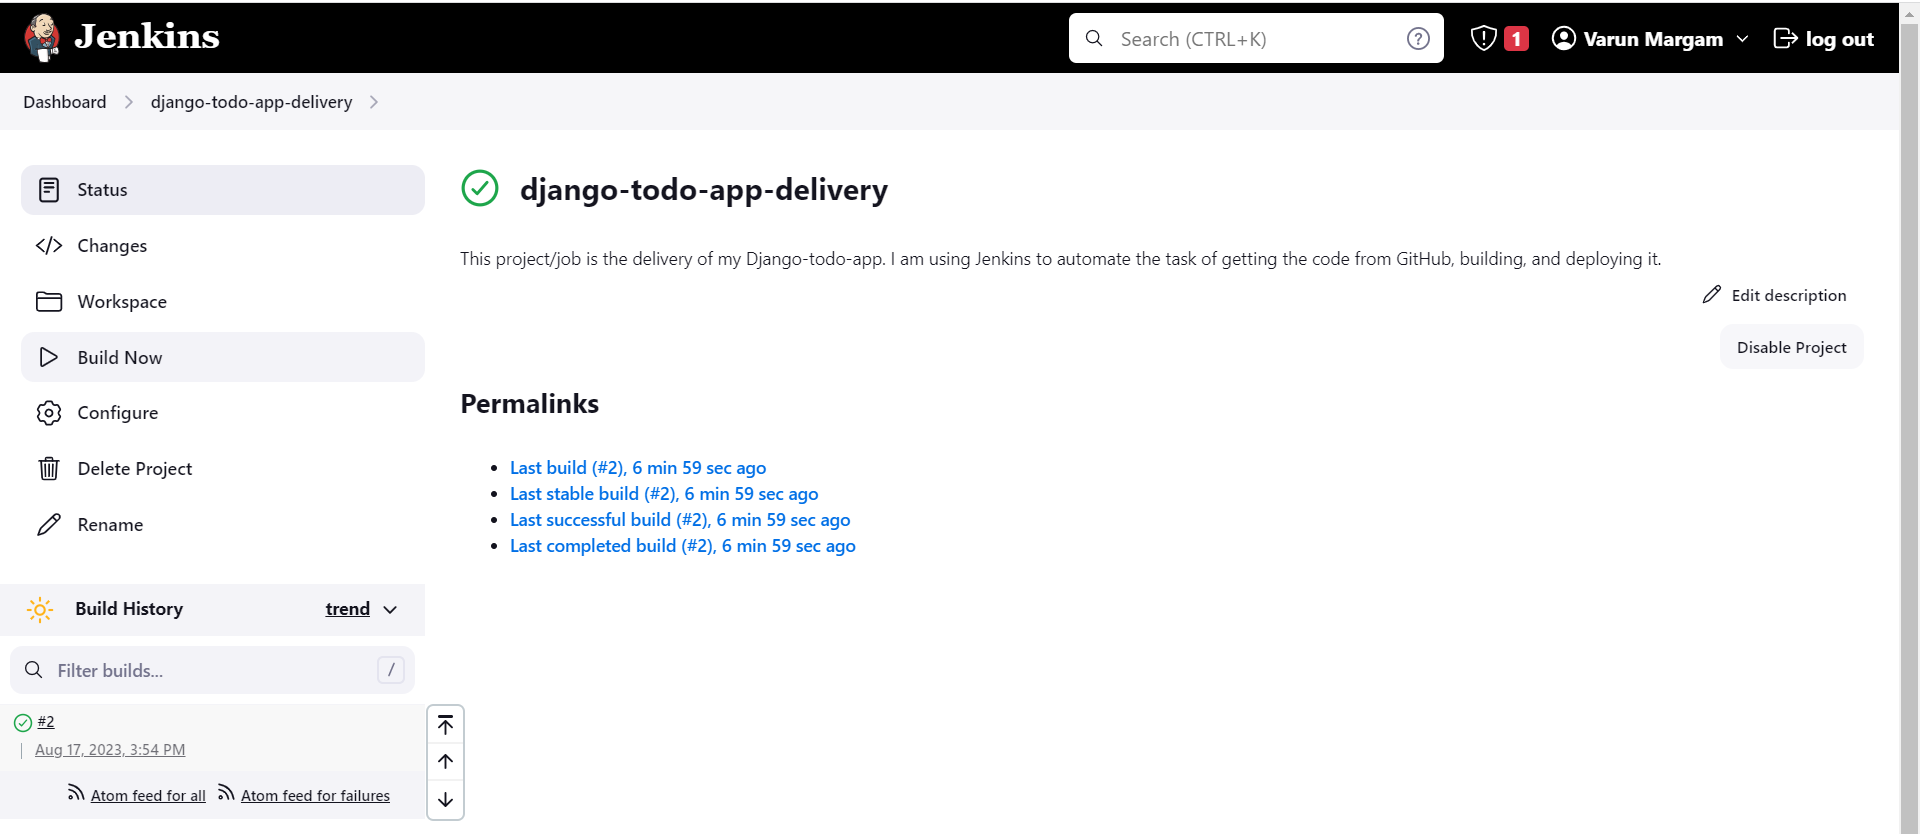
Step 4: Now Click on the "Build Now" button above "Configure".
You can see the Build has been successful and it is shown as #2 since this is the 2nd build of the job.
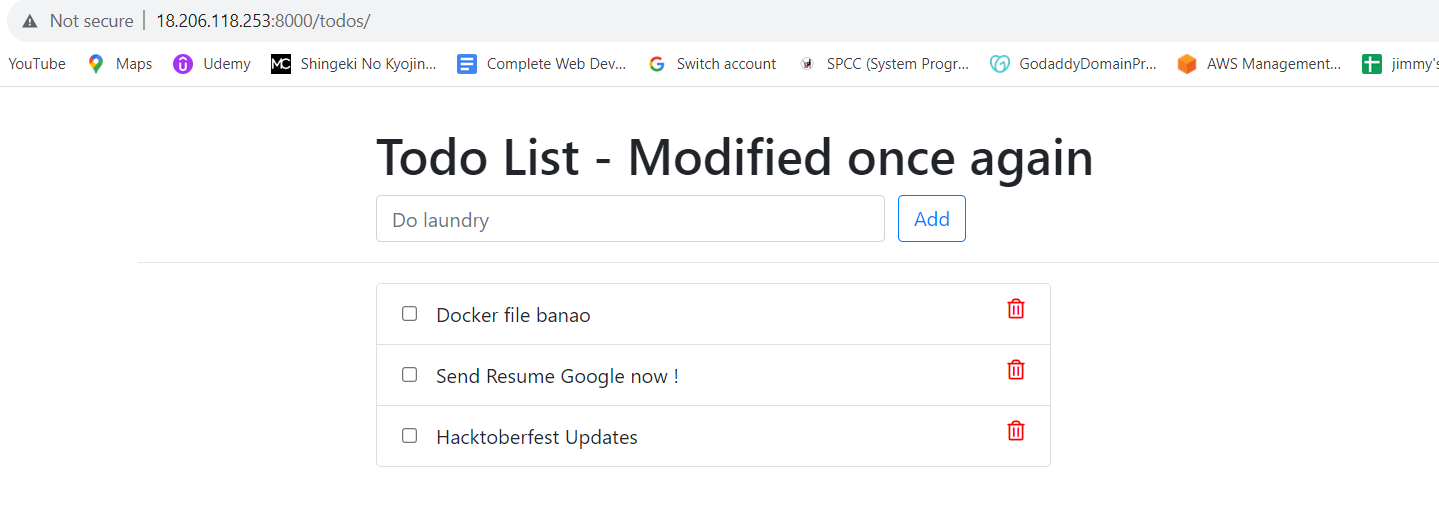
You can see on the same port where your Jenkins Web Interface is running at port 8000 Django-todo-app has been deployed and running:
📝Note: Make sure you have updated the Inbound rules of your AWS EC2 Instance's Security Group allowing access to port 8000.
You can see the Console Output and see all the steps executed.
Now, If I built this Job again there would be a "port conflict error" because there is still a container running on port 8000 and now you are trying to run a new container on the same port.
For the new container to run you would have to stop and remove the previous container and only then you can create and run a new container.
To achieve this we can use Docker-compose since docker-compose has a command called docker-compose down that stops and removes the existing containers created by the docker-compose.yml file.
Step 1: Go to "Configure" of your "django-todo-app-delivery" job and scroll down to the "Build Steps" section and replace the docker commands with these docker-compose commands and click "Save":
docker-compose down
docker-compose up --no-deps --build web
# web is the name of the service you can check the docker-compose.yml file.
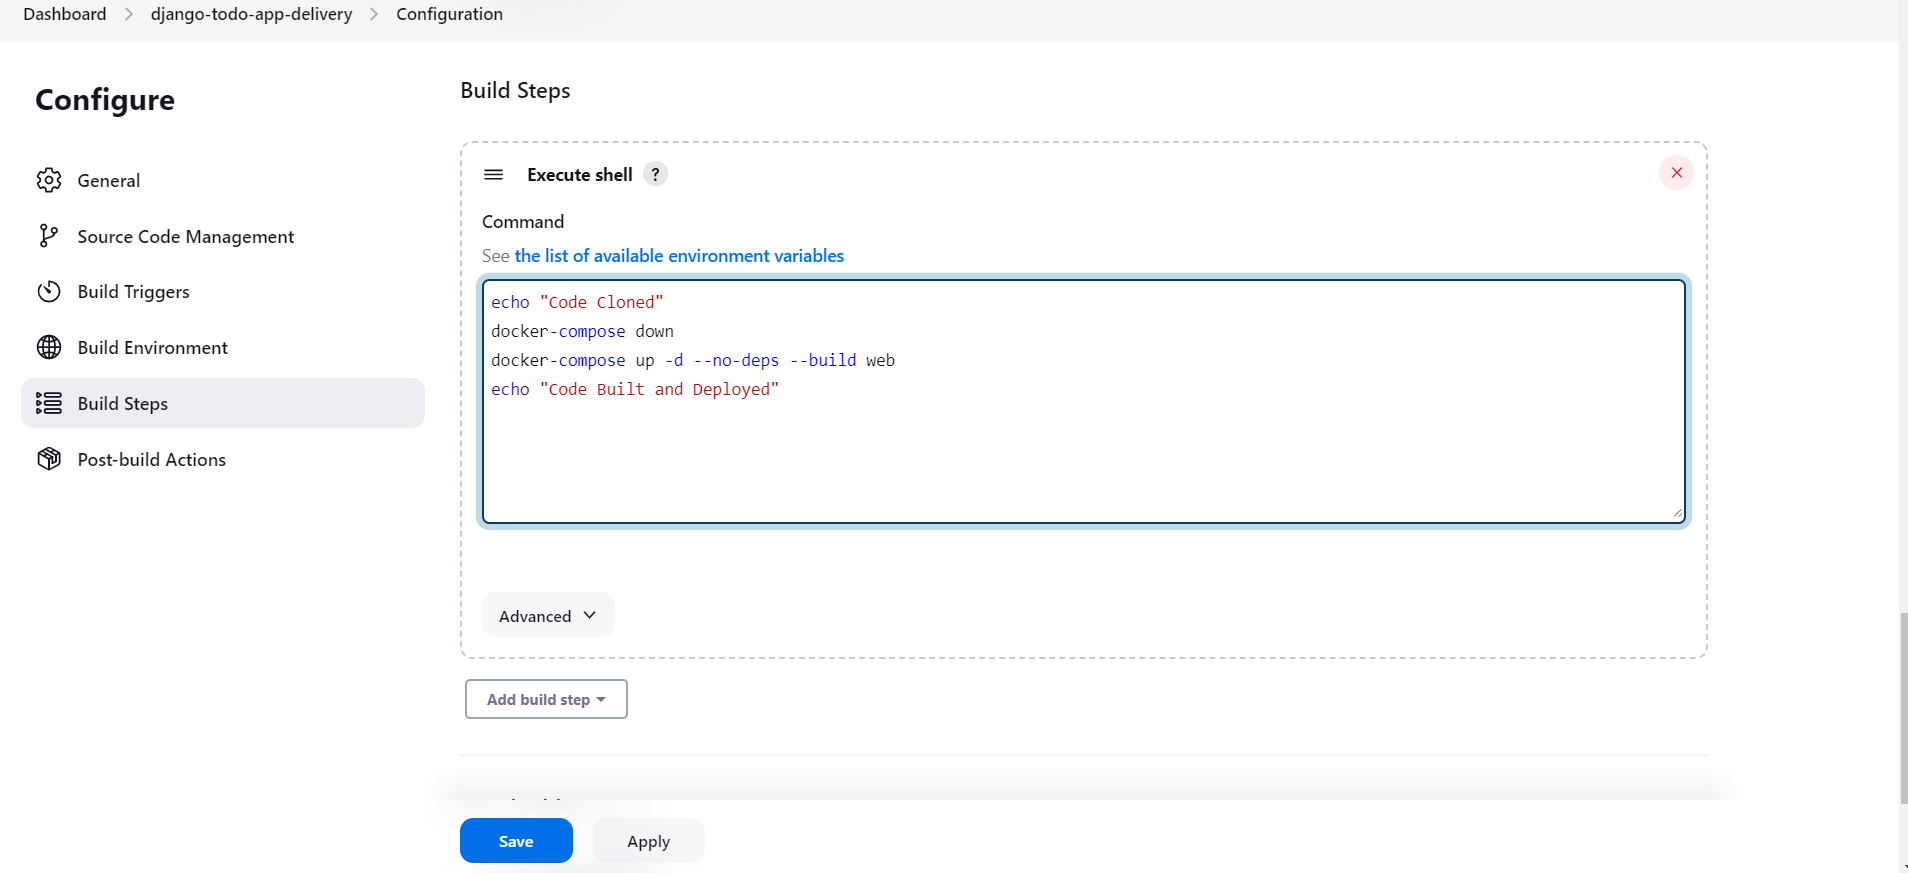
Here, is why I did not simply write docker-compose up command:
docker-compose up --no-deps --build web
The command docker-compose up --no-deps --build web is used to start the web service defined in the Docker Compose configuration. The --no-deps flag ensures that dependent services are not started automatically. The --build flag indicates that the specified service (web in this case) should be rebuilt before starting.
The reason for specifying --build is that, during repeated builds, Docker tries to leverage cached layers from previous builds to improve build speed. However, in some cases, especially when there are changes in the project's source code or build context, the cached layers might not reflect the latest changes accurately. By using --build, you ensure that the web service is built from scratch, disregarding the cache and incorporating any recent changes. This guarantees that the resulting image is up to date and includes the latest modifications to the project. This is particularly important when you want to see immediate changes reflected in the service's behavior, as relying solely on cached layers might not always capture all updates.
Step 2: Start the Build of the modified "django-todo-app-delivery" job.
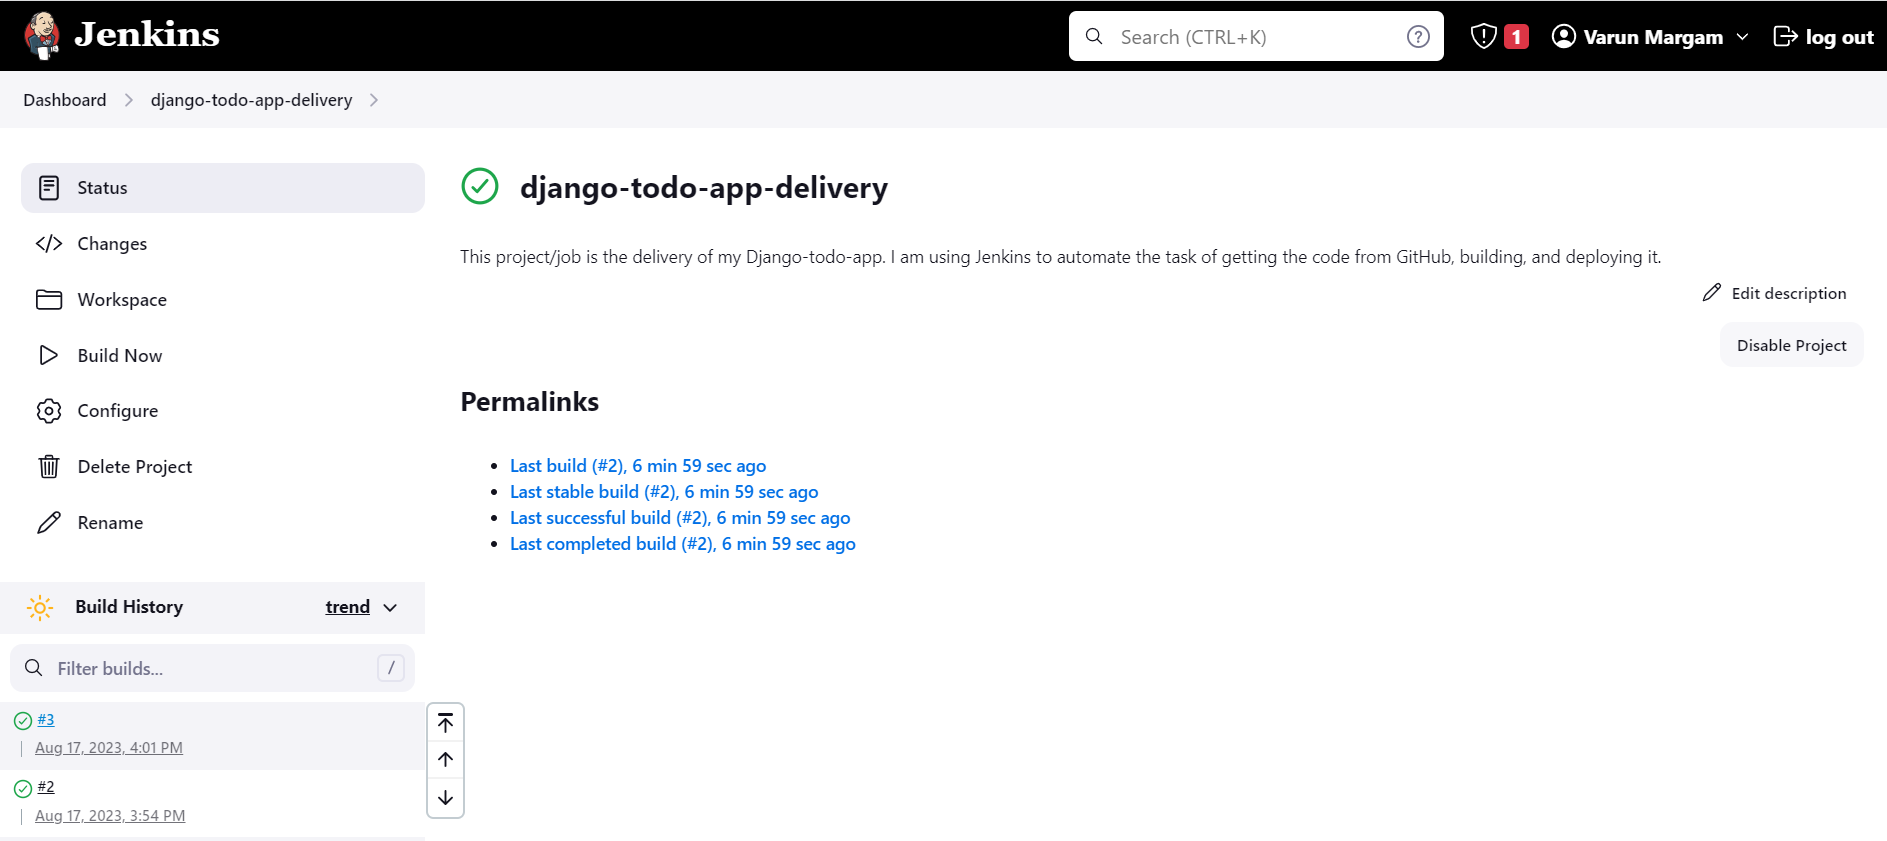
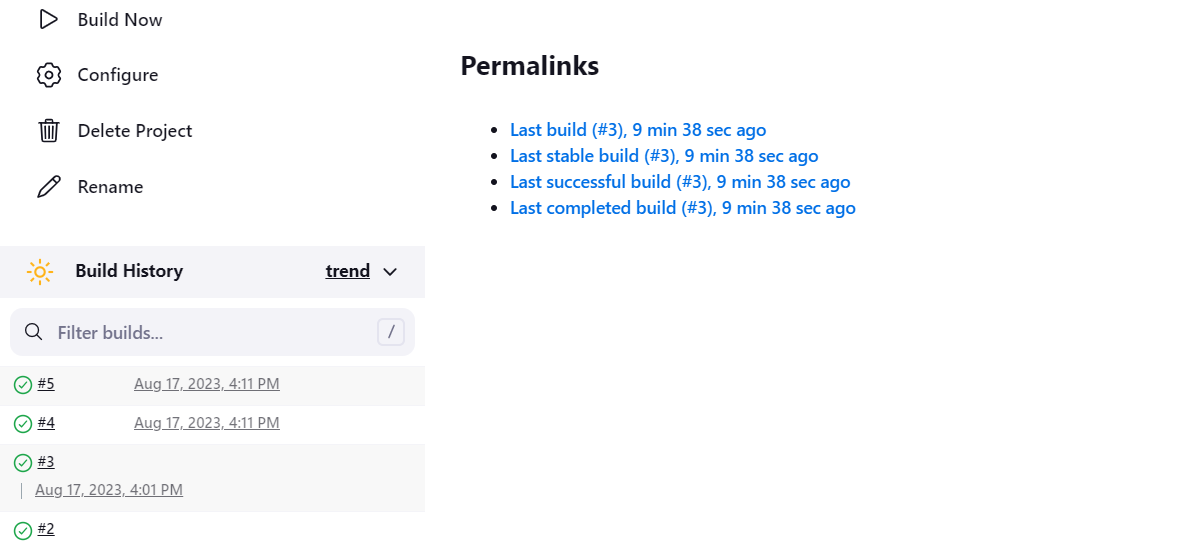
You can see the #3 build has been successful, now I can build this job as many times as I want and there will be no "port conflict error".
📍Exercise
Here is a fun exercise for you:
Fork this repository Django-todo-cicd to your GitHub.
Make some changes in the index.html file (or preferably changes that are instantly visible like HTML or CSS).
Commit these changes.
Build this Jenkins Job and see if the changes are instantly visible or not.
📝Note: Make sure the link you have provided while Configuring the Jenkins job is the link to your GitHub repository where you will make the changes.
📍Implementing CI/CD (Deployment) with Jenkins: Node Todo App Freestyle Project
We're setting up a Jenkins Job for deploying the Nodejs todo app with Continuous Deployment. This will automatically trigger the action to build the Jenkins job as soon as changes are committed to the code.
Step 1: Fork this GitHub Repository https://github.com/LondheShubham153/node-todo-cicd to your GitHub account.
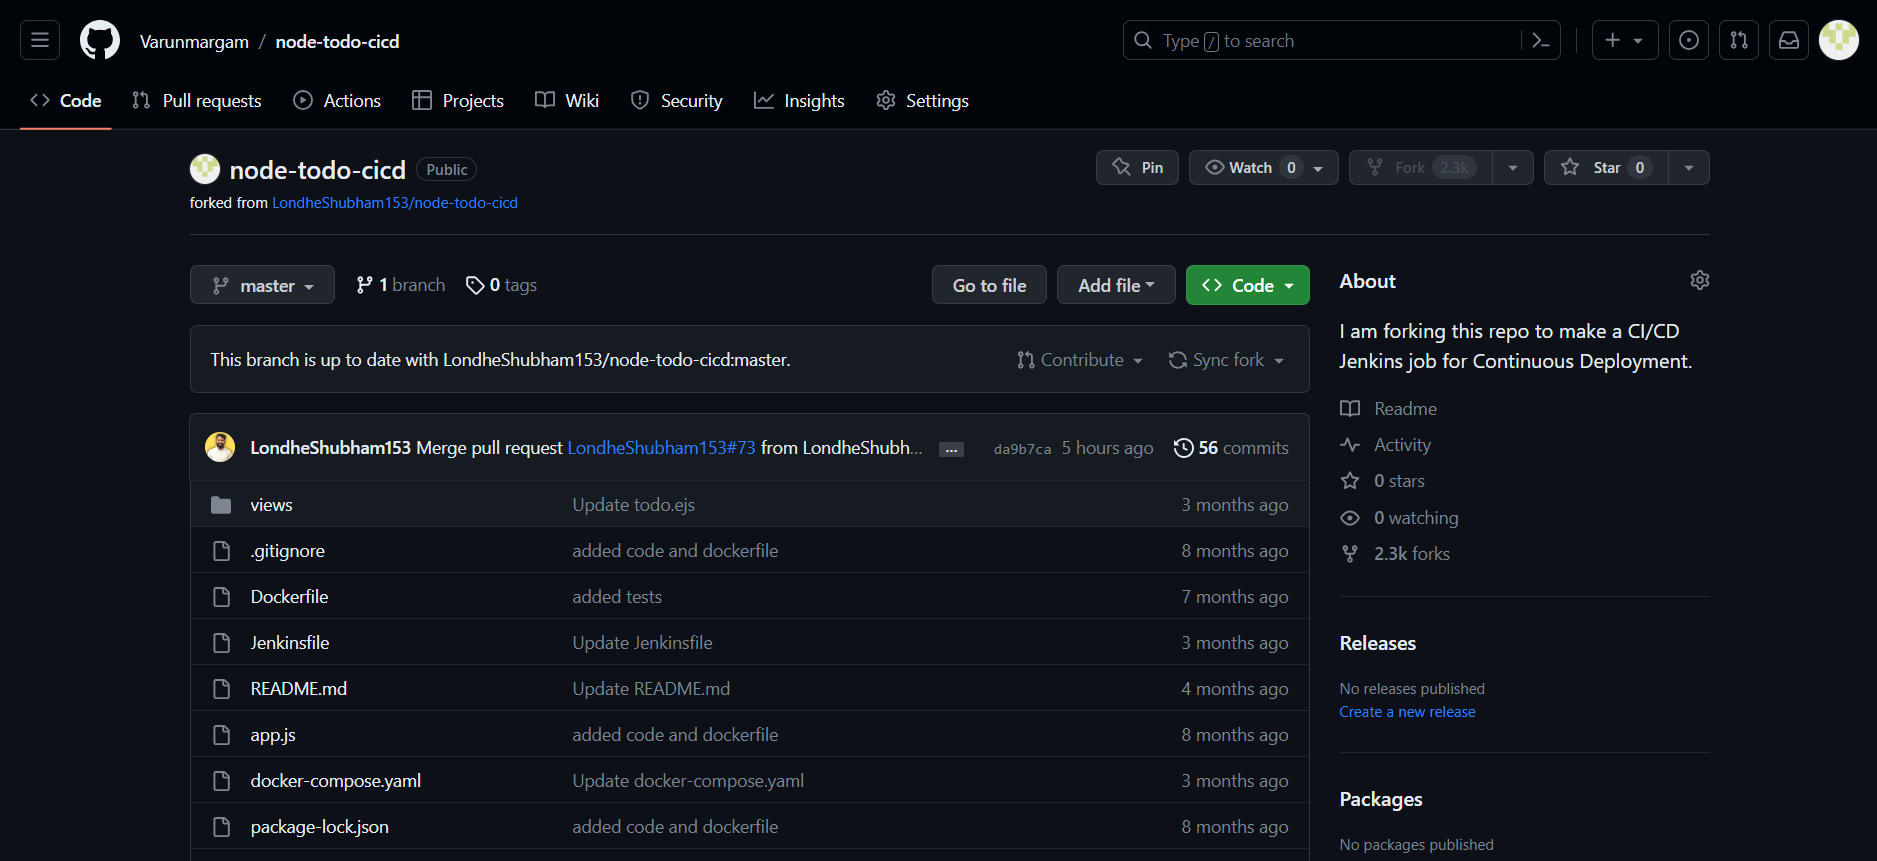
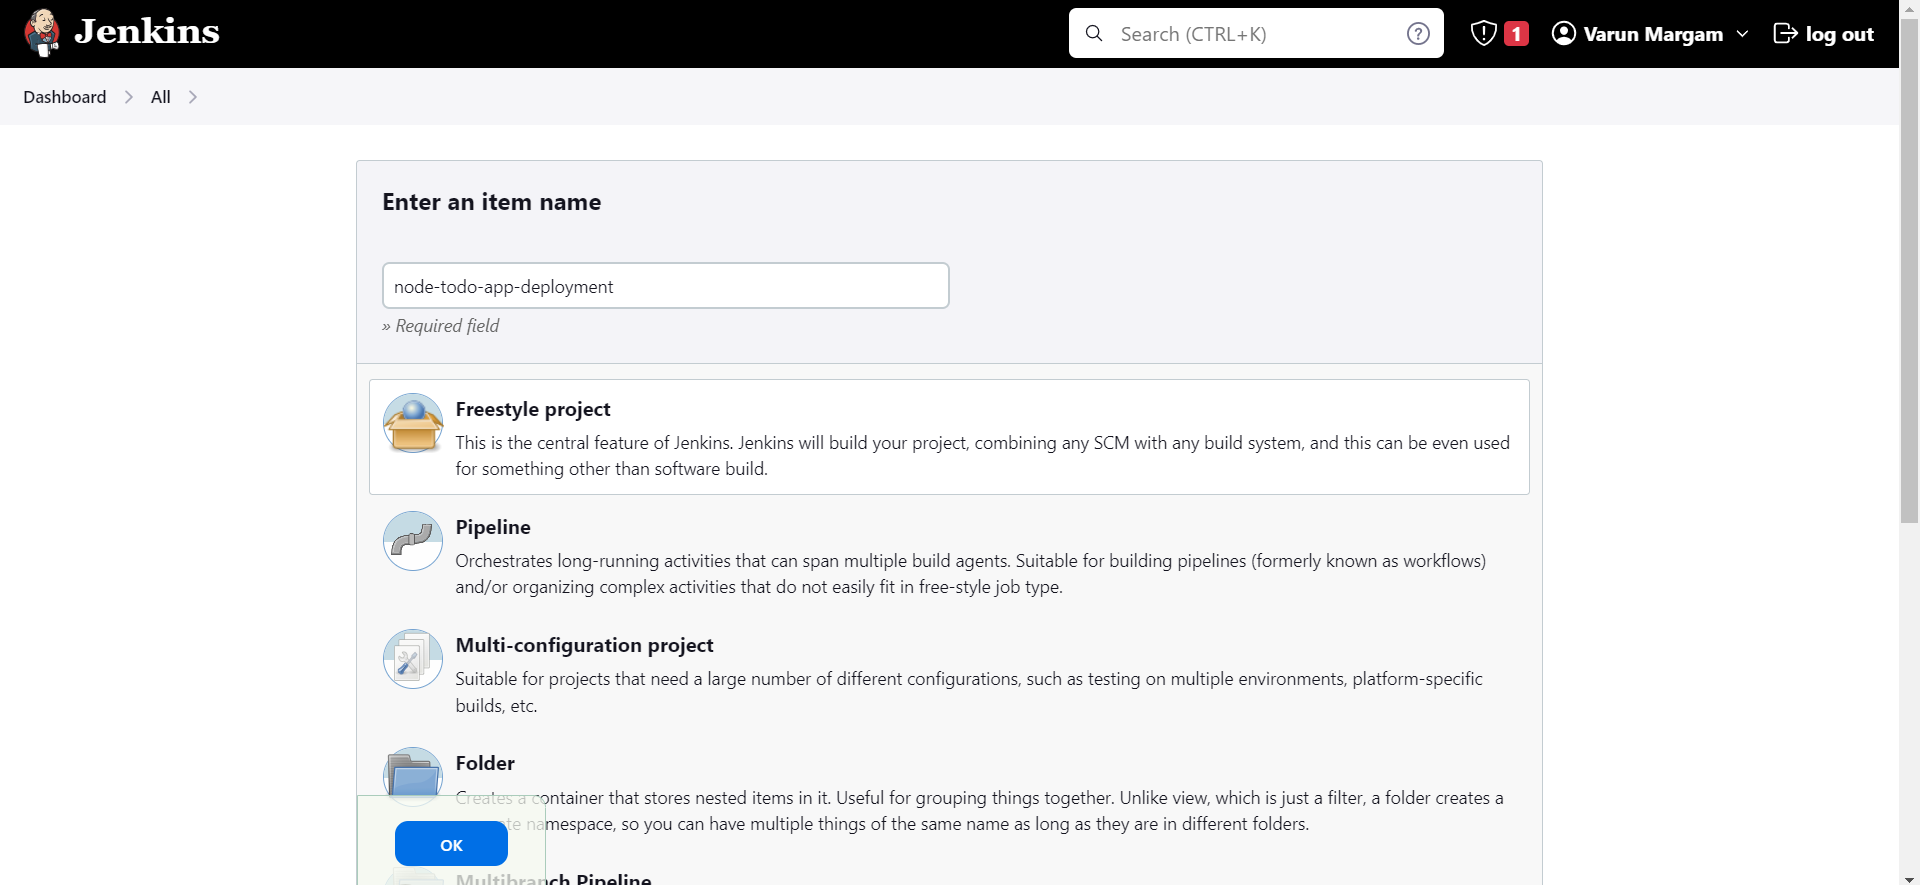
Step 2: Create a new job by clicking on "New Item", give a name to the job "node-todo-app-deployment", and select "Freestyle Project"
Step 3: Add a Description about this Jenkins job and select it as a "Git Project" and provide the URL of your forked GitHub repository in the "Project URL" section.
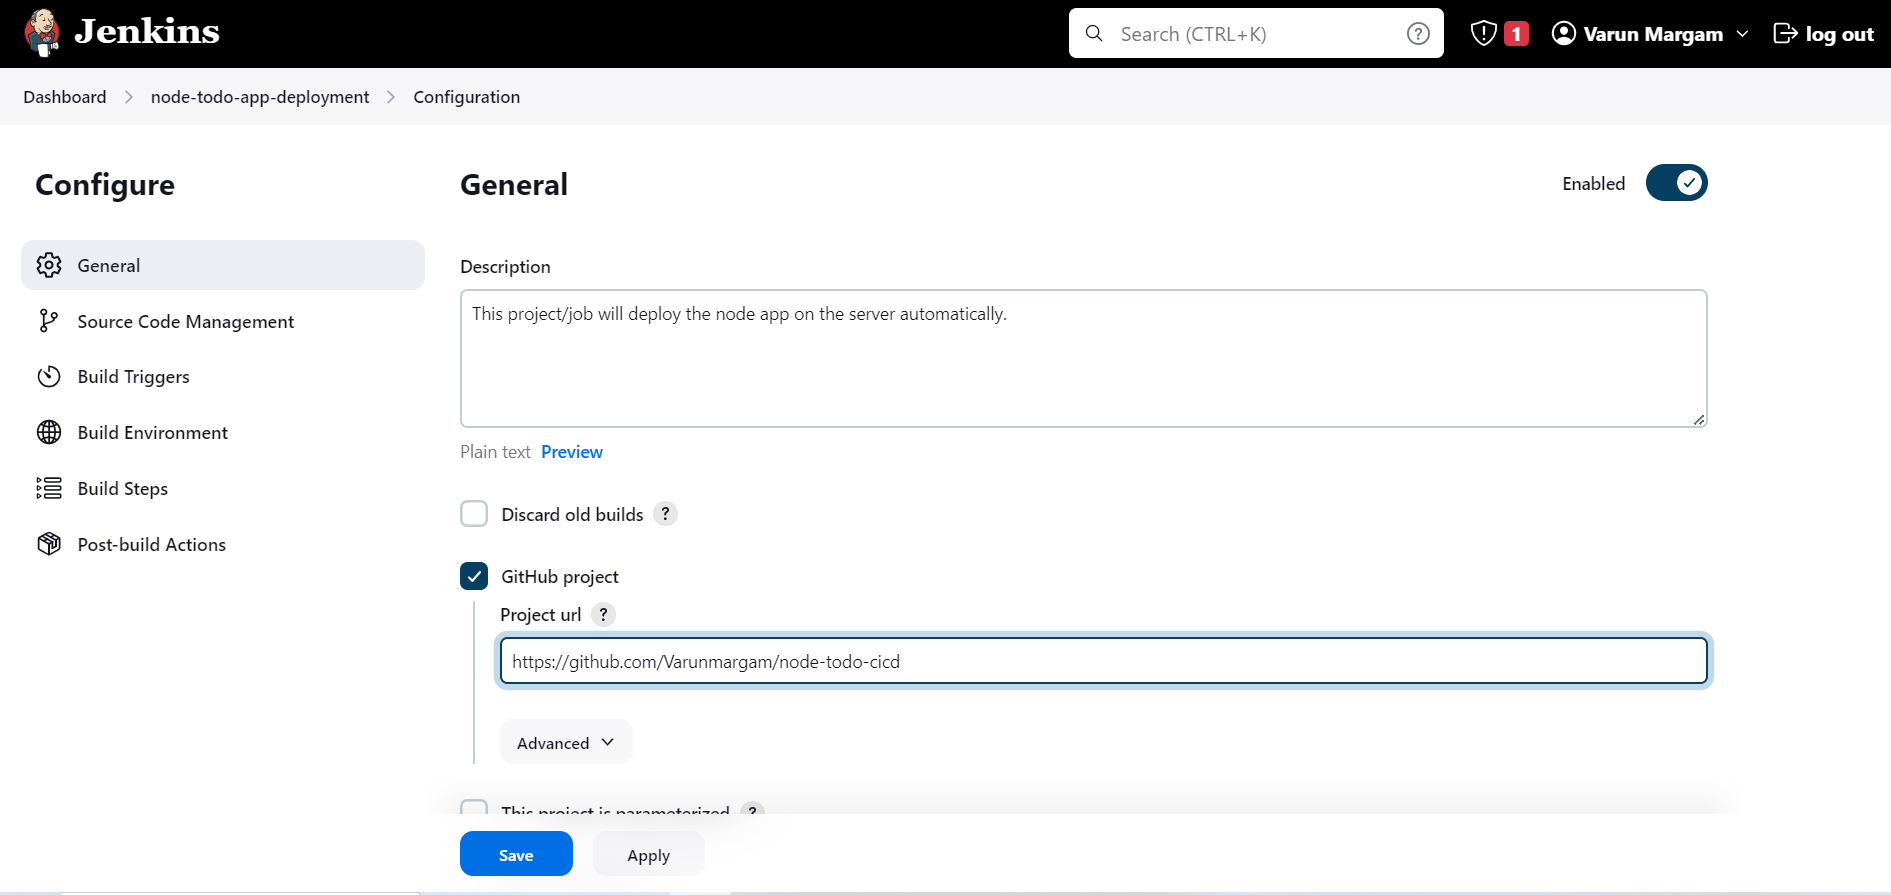
Step 4: Go to the "Source Code Management" section and select "Git" Add the HTTPS URL in the Repository URL field.
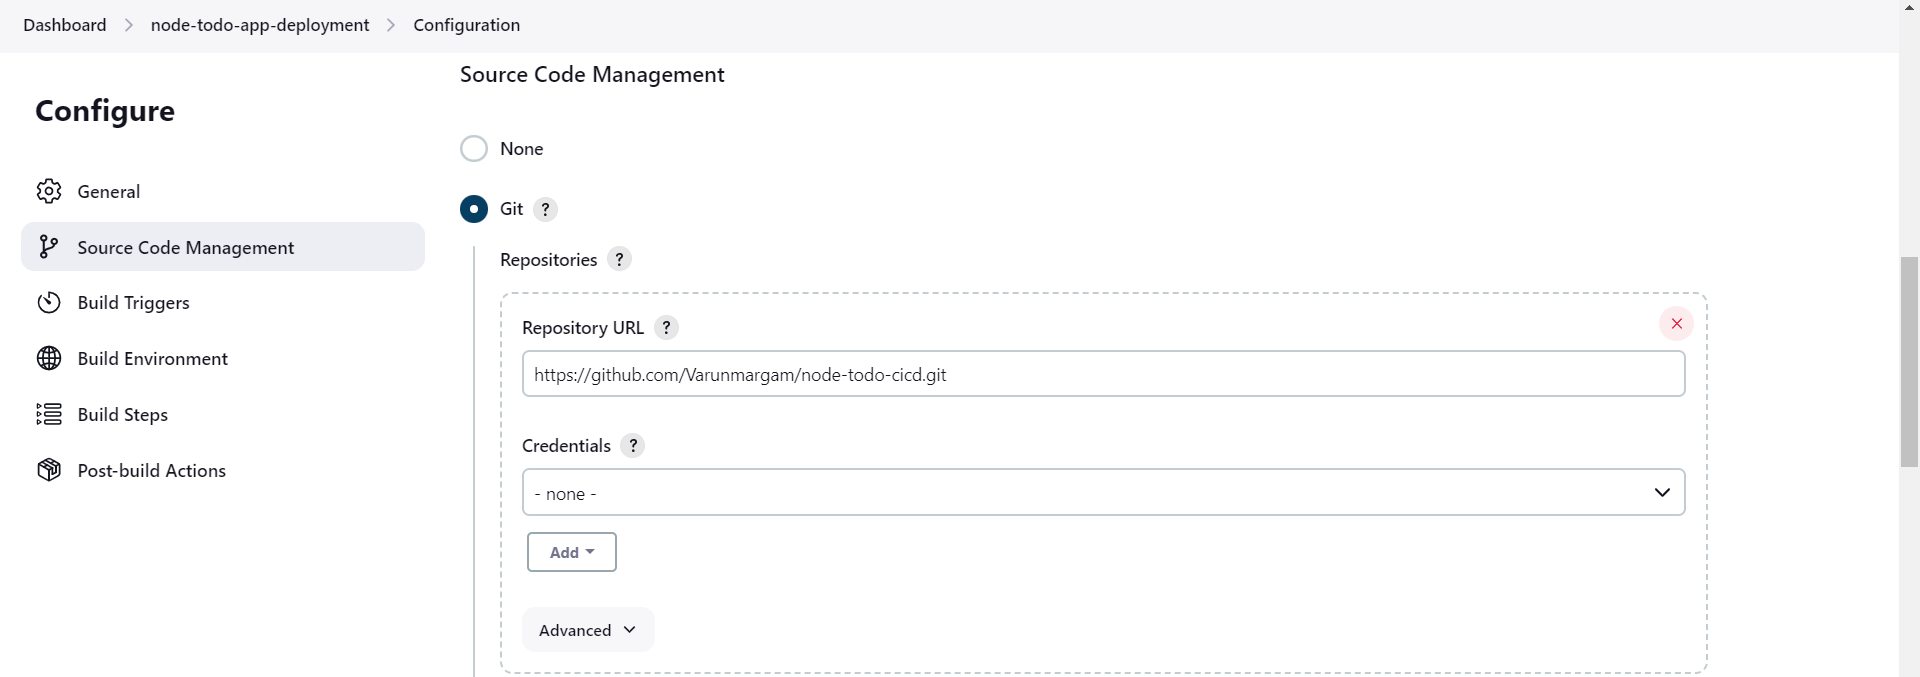
Add the branch you want to build here there is only one branch master.

Step 5: Scroll down to the "Build Triggers" section and select "GitHub hook trigger for GITScm polling"
This option is available because we have a GitHub plugin installed.

Step 6: Go to your GitHub repository "Settings"
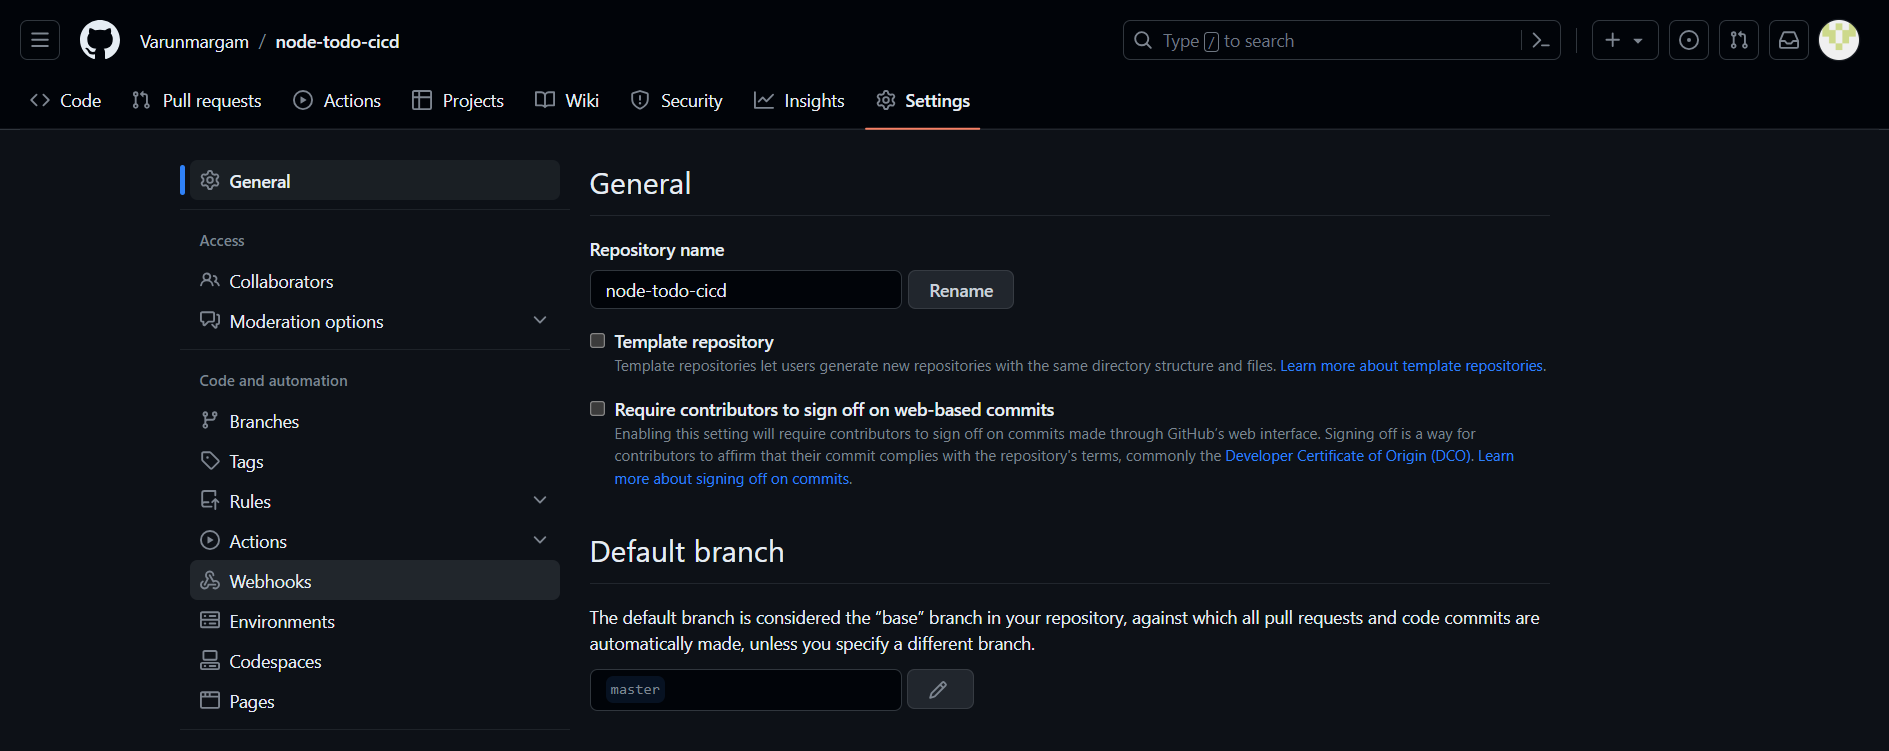
Step 7: Select "Webhooks" at the left and select "Add webhook".
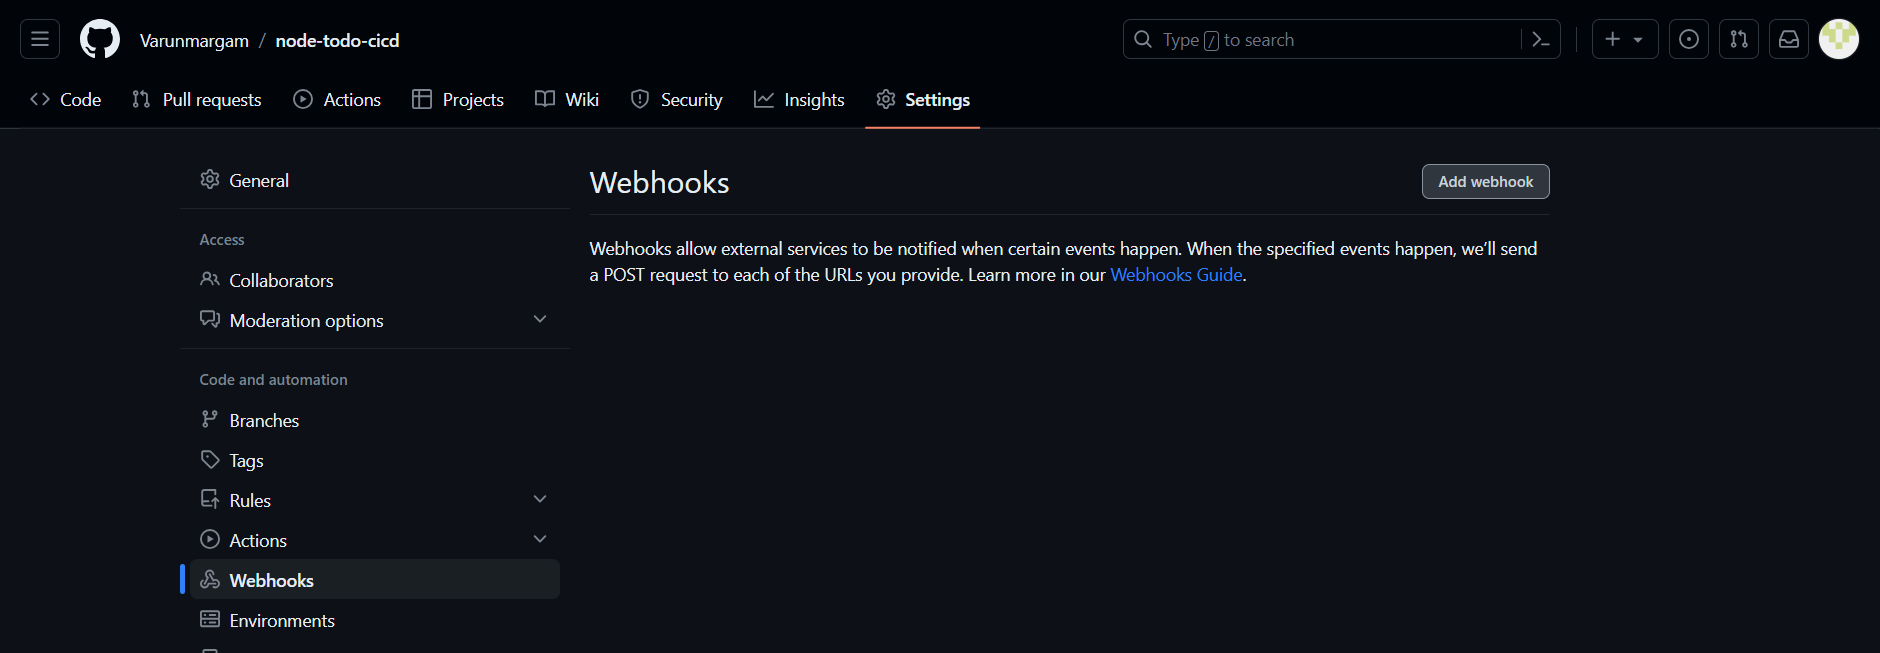
Step 8: In the Payload URL add the URL of your Jenkins Web Interface in this format:
<jenkins_url>/github-webhook/and select the push event as the trigger for this webhook.Select this option: Just the push event.
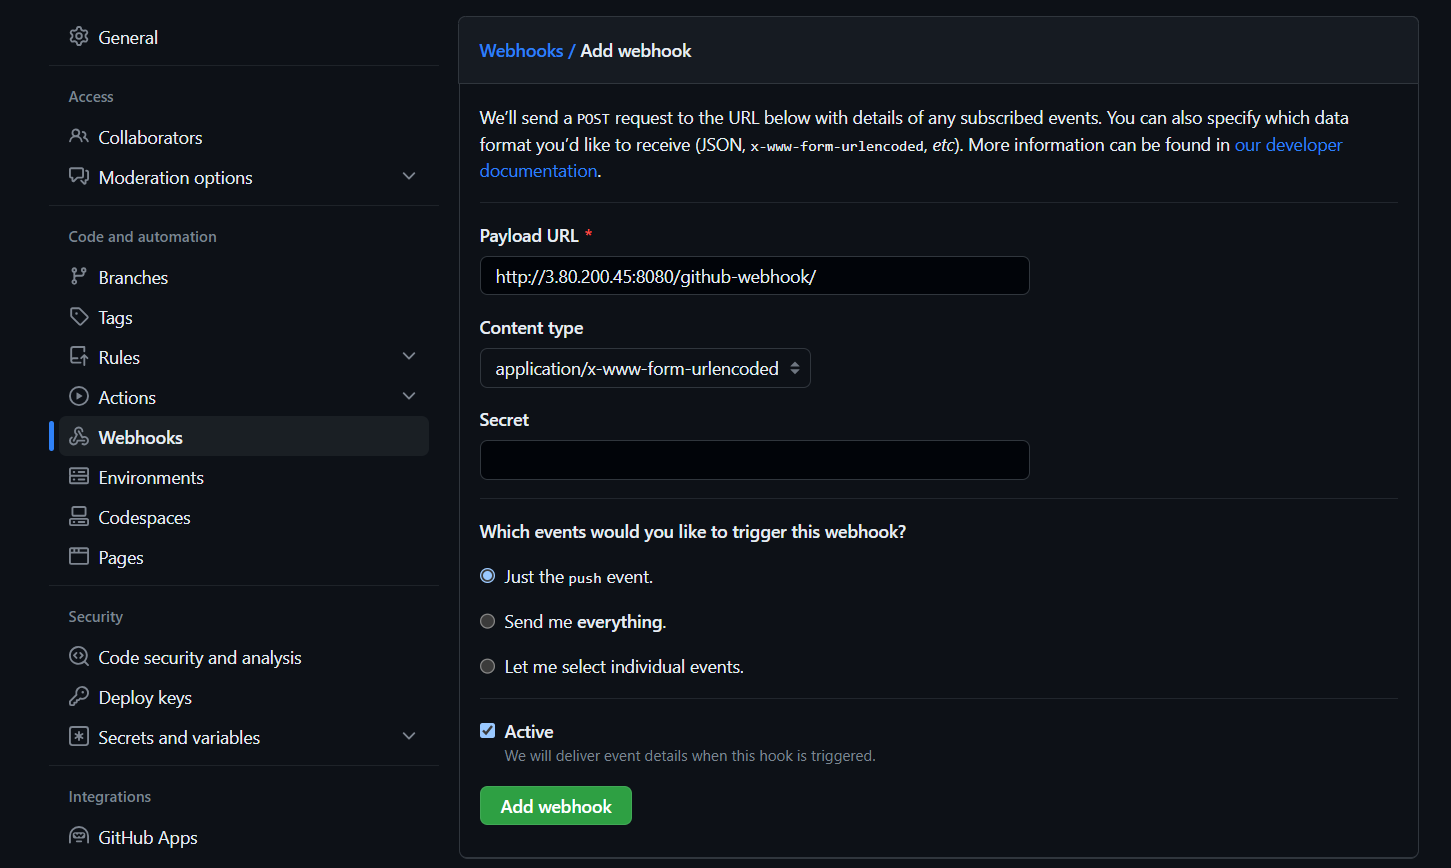
Step 9: Add click on "Add webhook" Your webhook has been added.
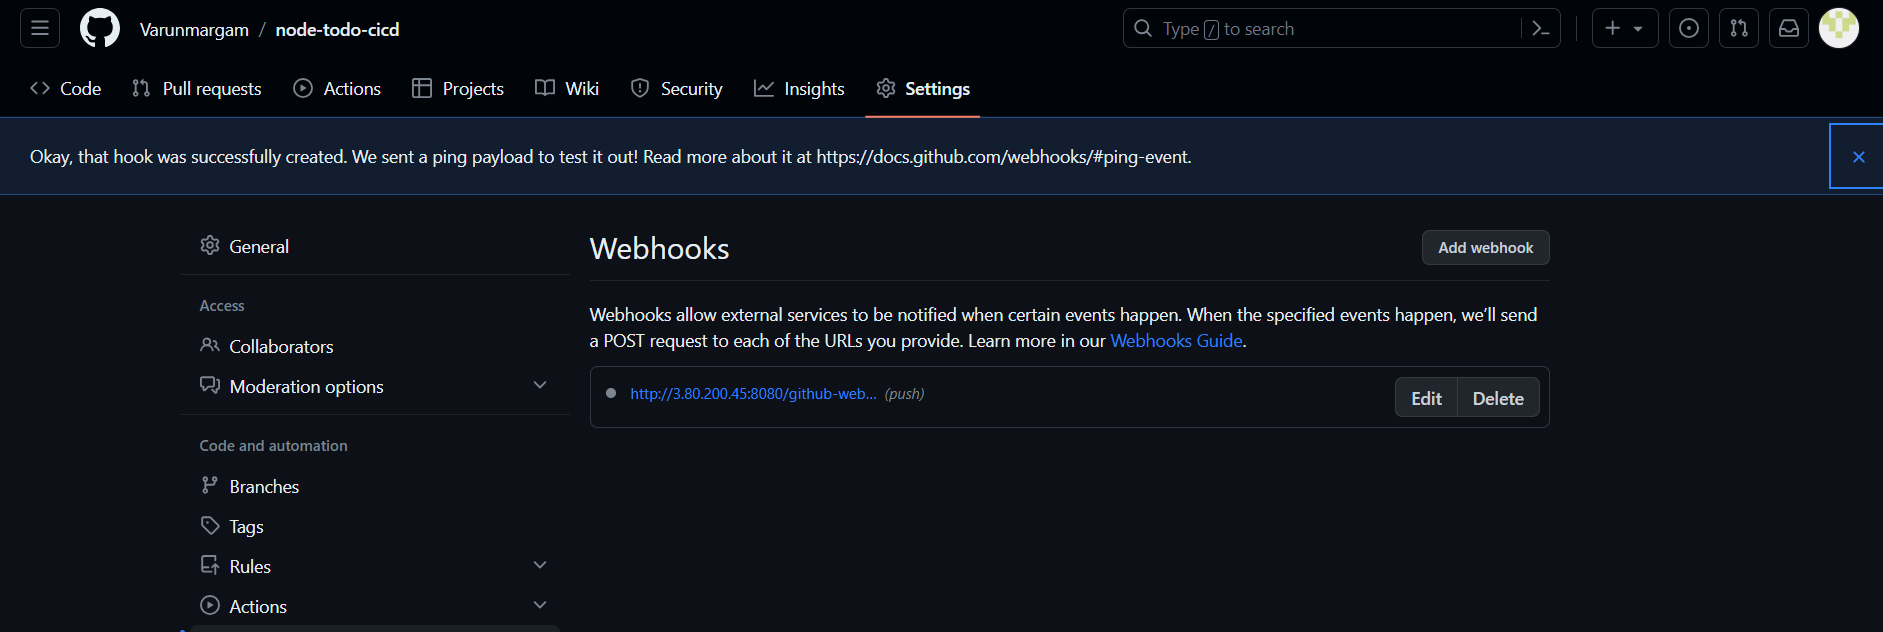
Refresh the page and you will see a tick mark at the beginning of your Webhook indicating that it is active.

Step 10: Come to the Jenkins server in the "Build section" and select "Execute shell"
We will be writing the same commands as we did for the Django-app
echo "Code cloned"
docker-compose down
docker-compose up -d --no-deps --build web
# Check in the docker-compose.yml file the service name is "web".
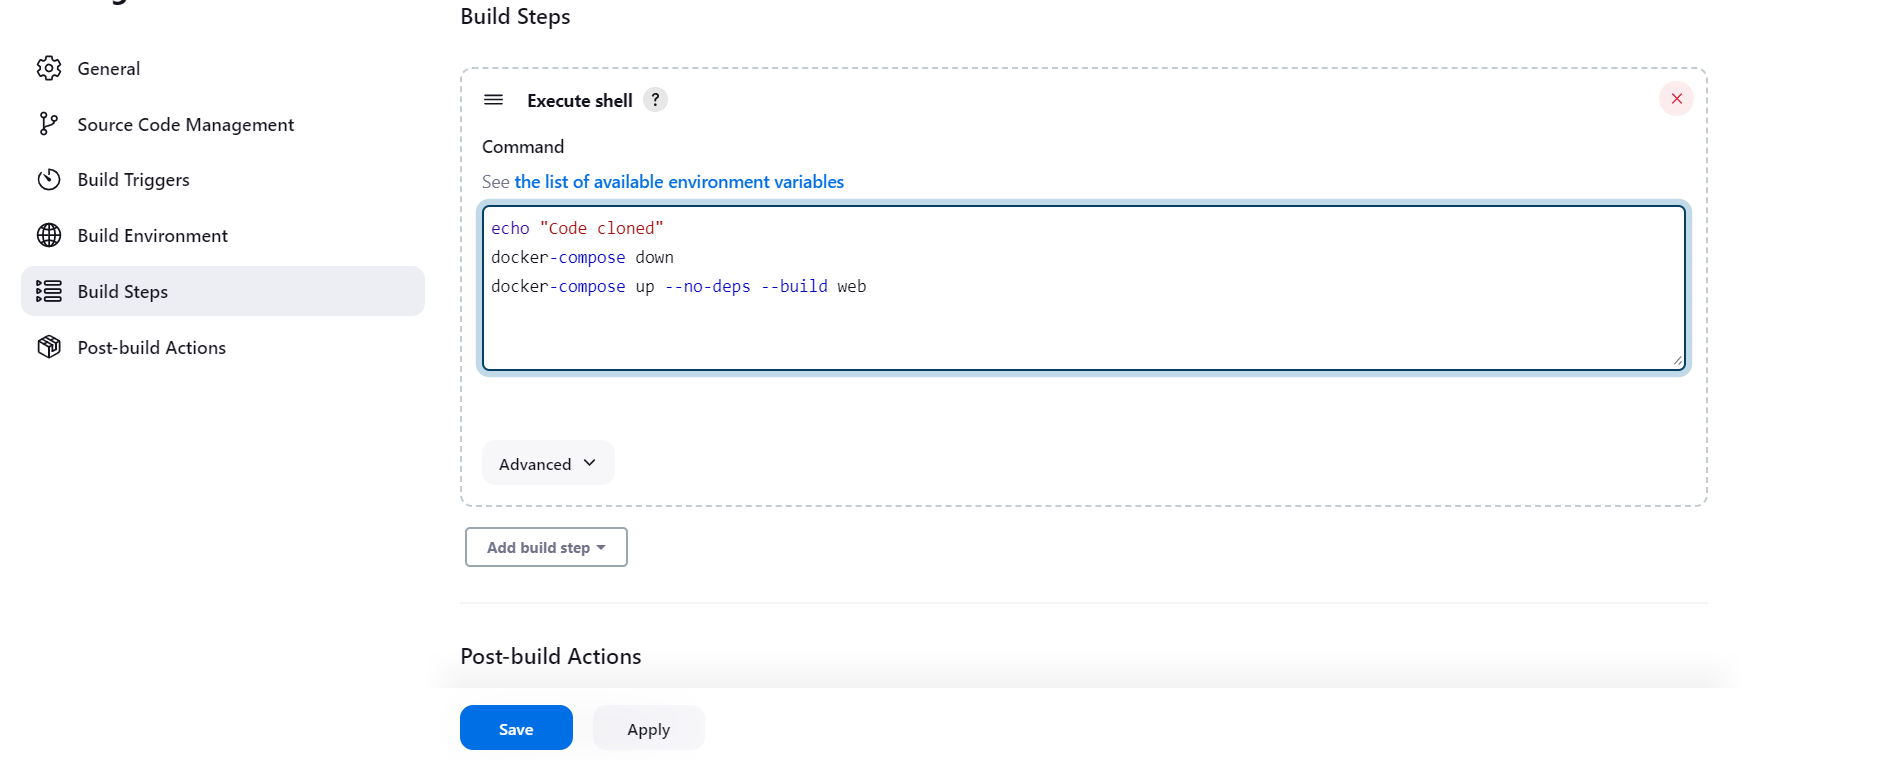
Click "Save" Your Job is created:
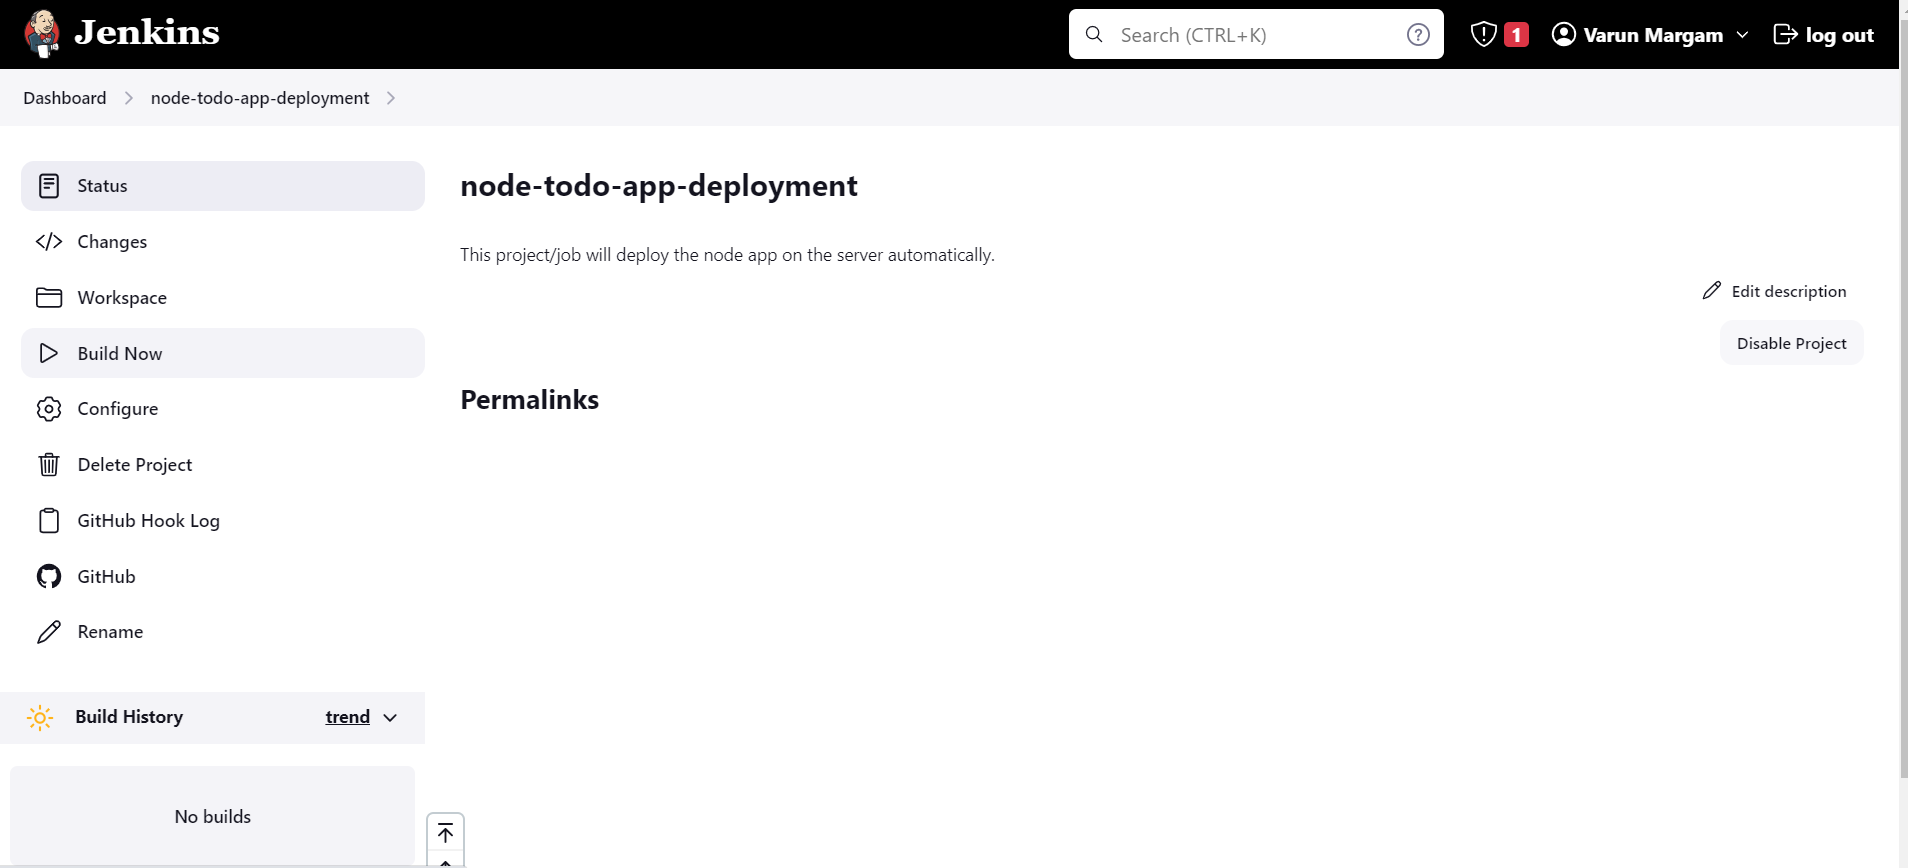
Now let's make commit some changes to the code.
While committing the code keep the Jenkins tab and the GitHub tab side-by-side like this:
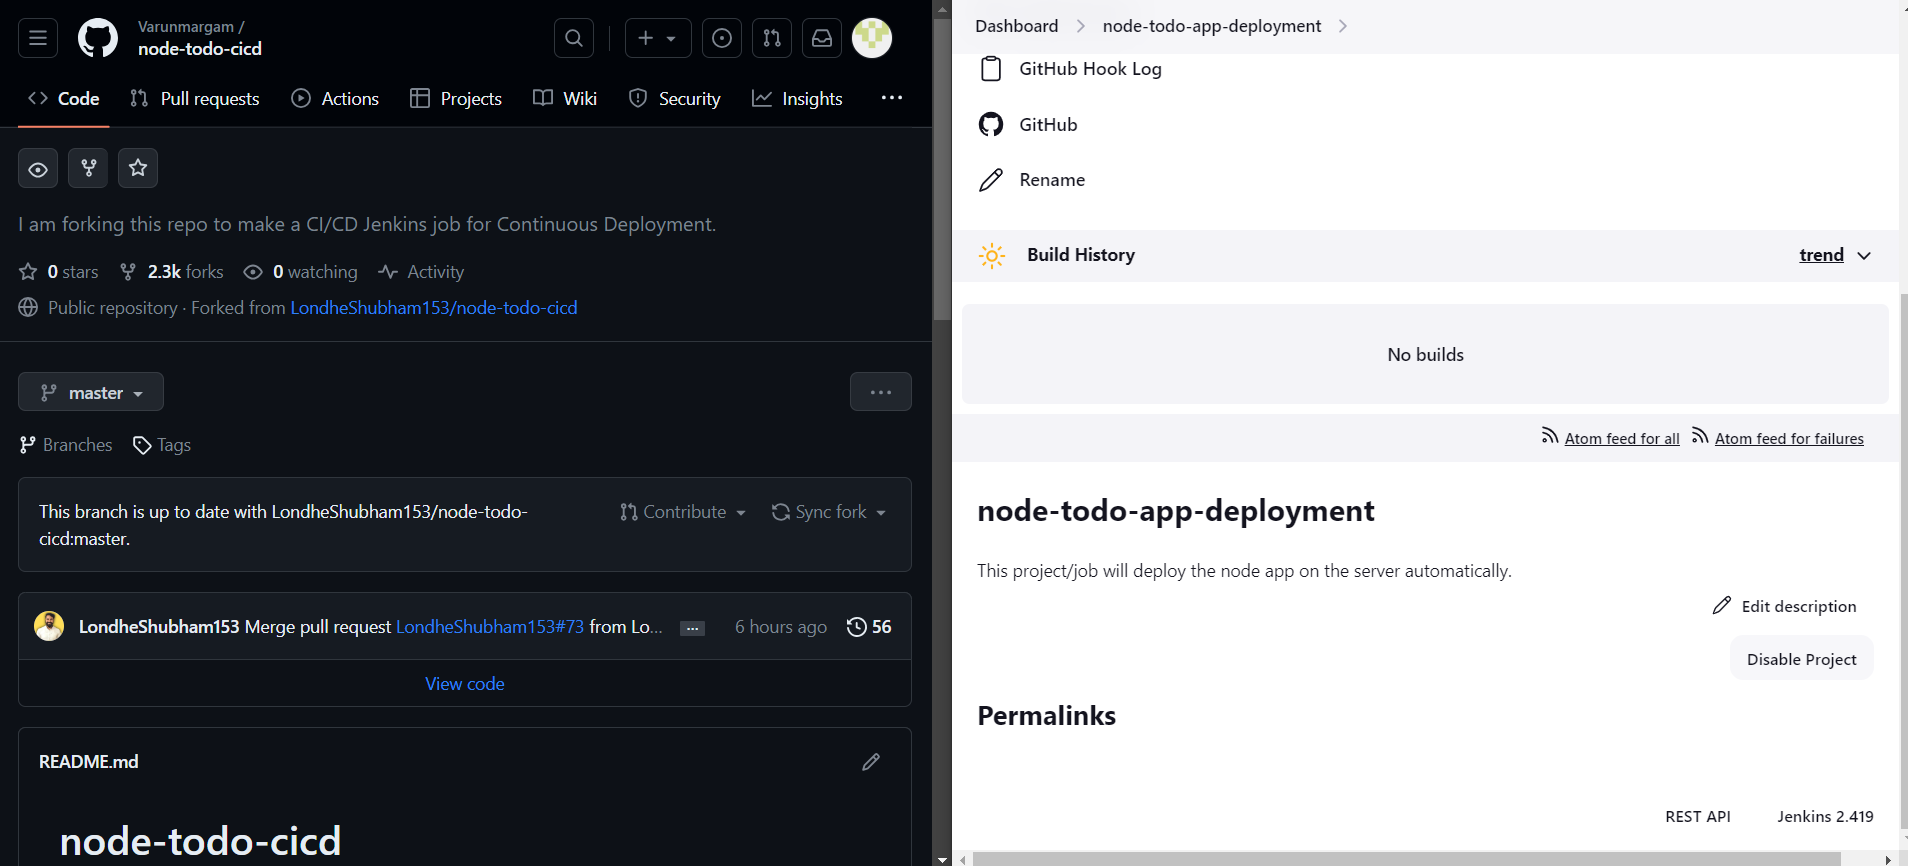
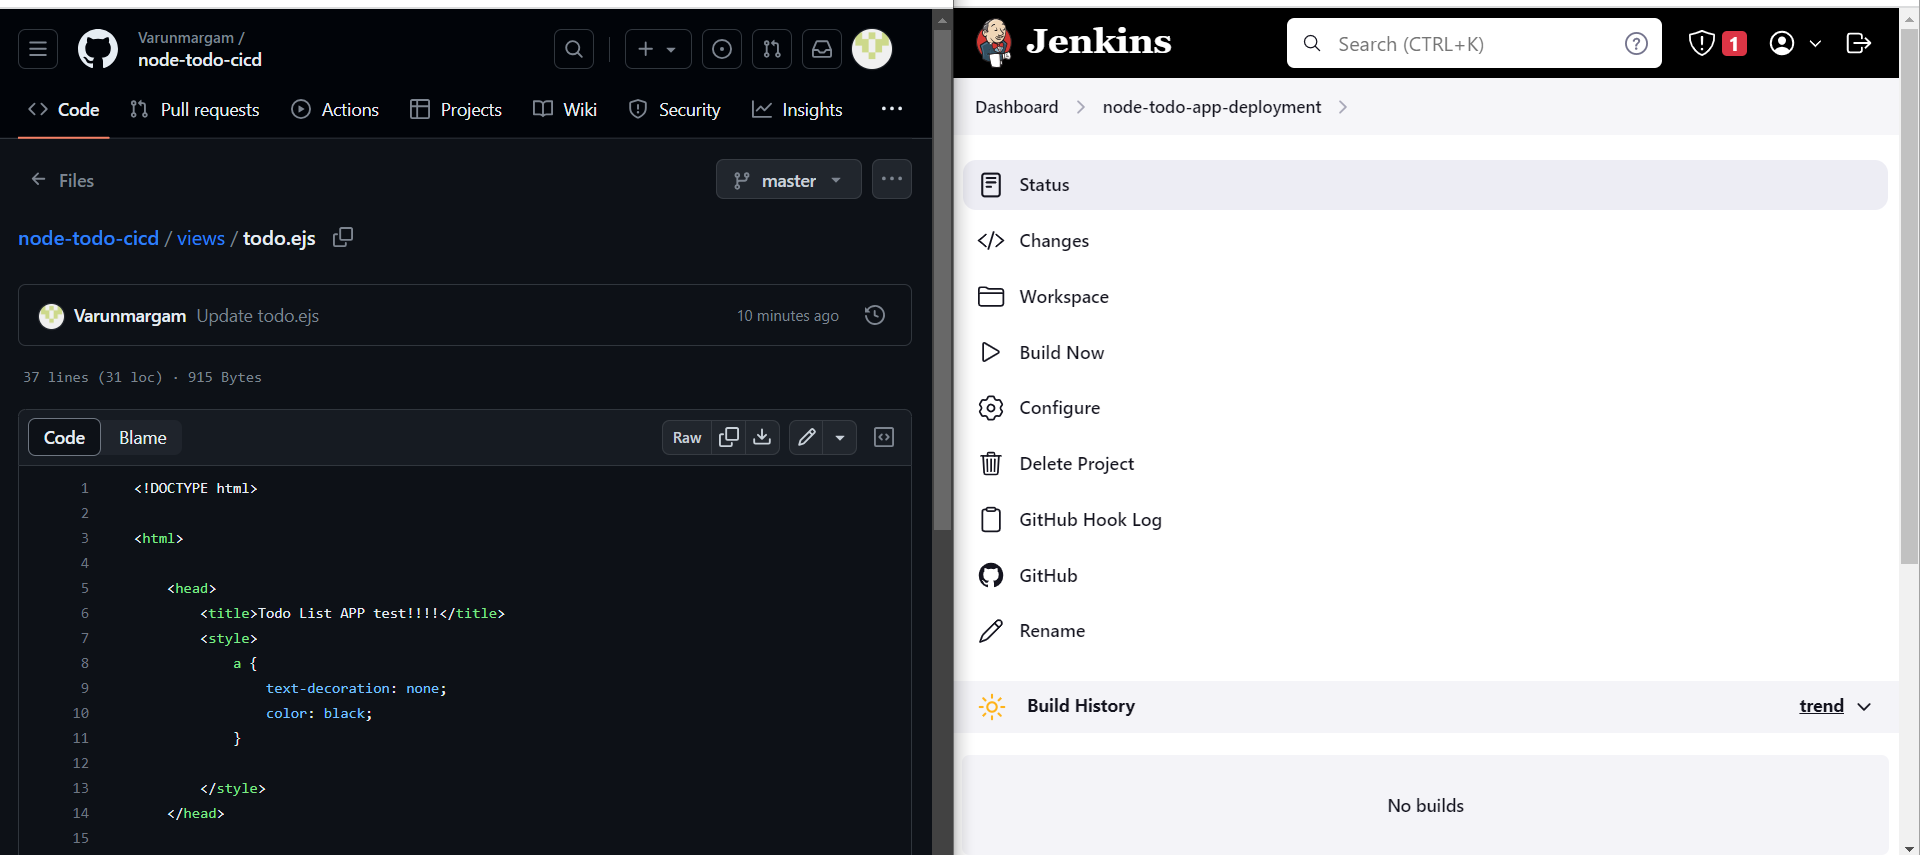
Making changes:
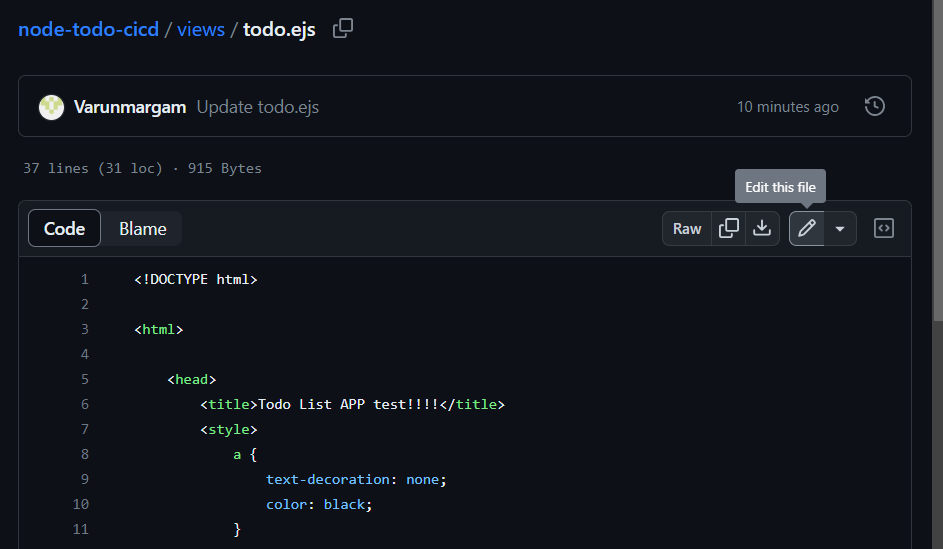
Going into the todo.ejs file inside the views directory.
Changing the <h1> tag:
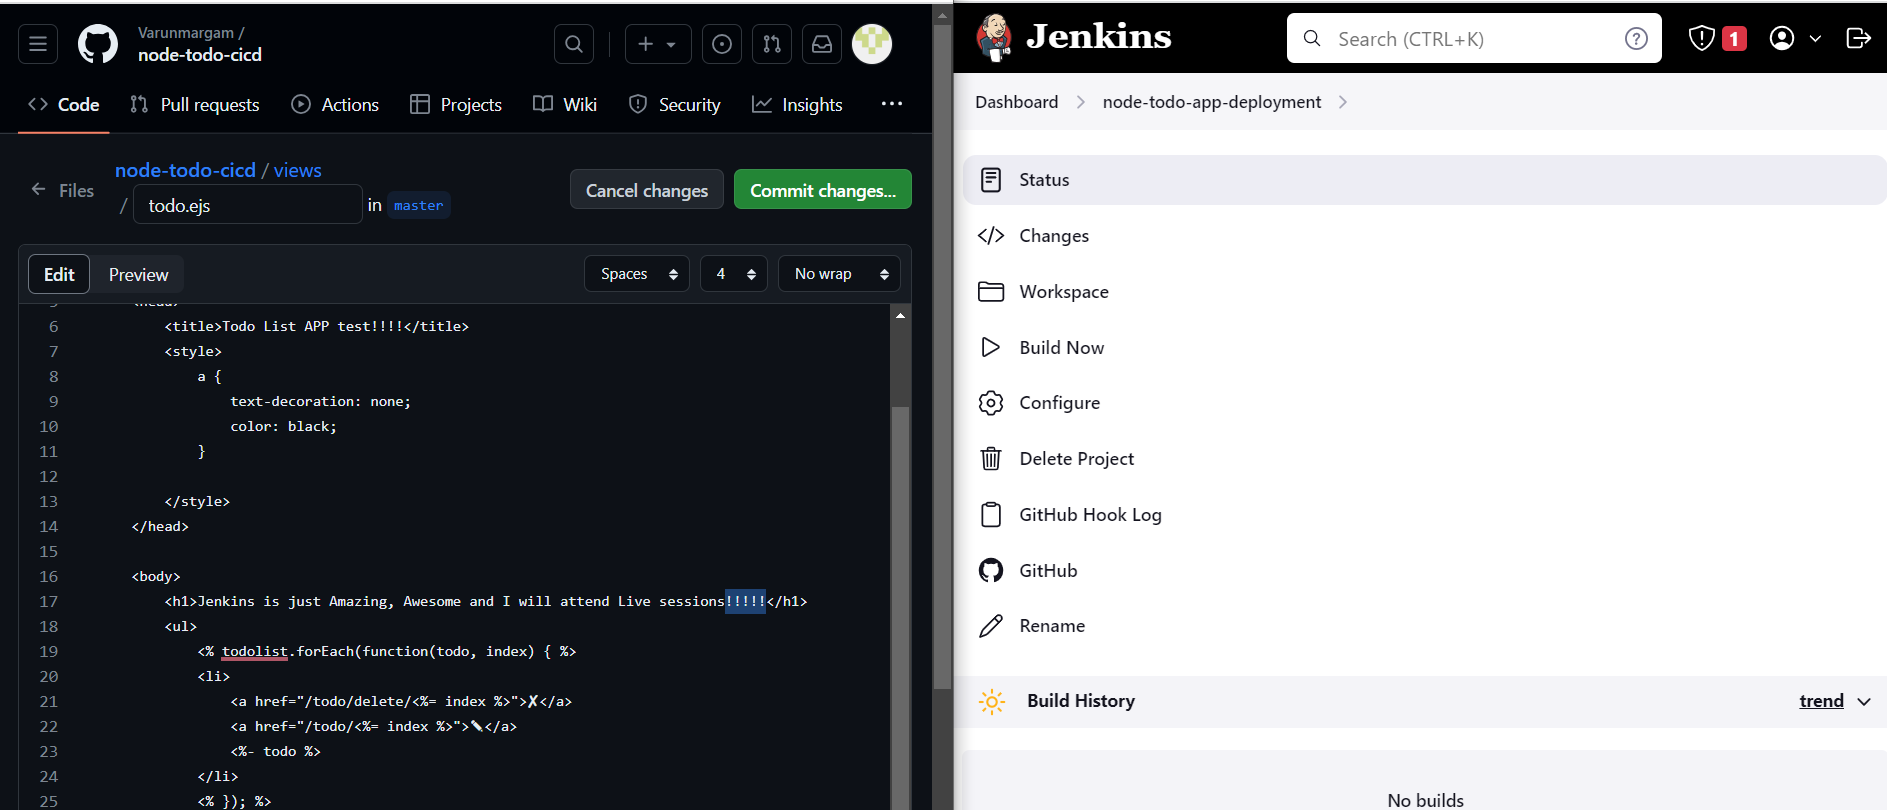
Committing the changes:
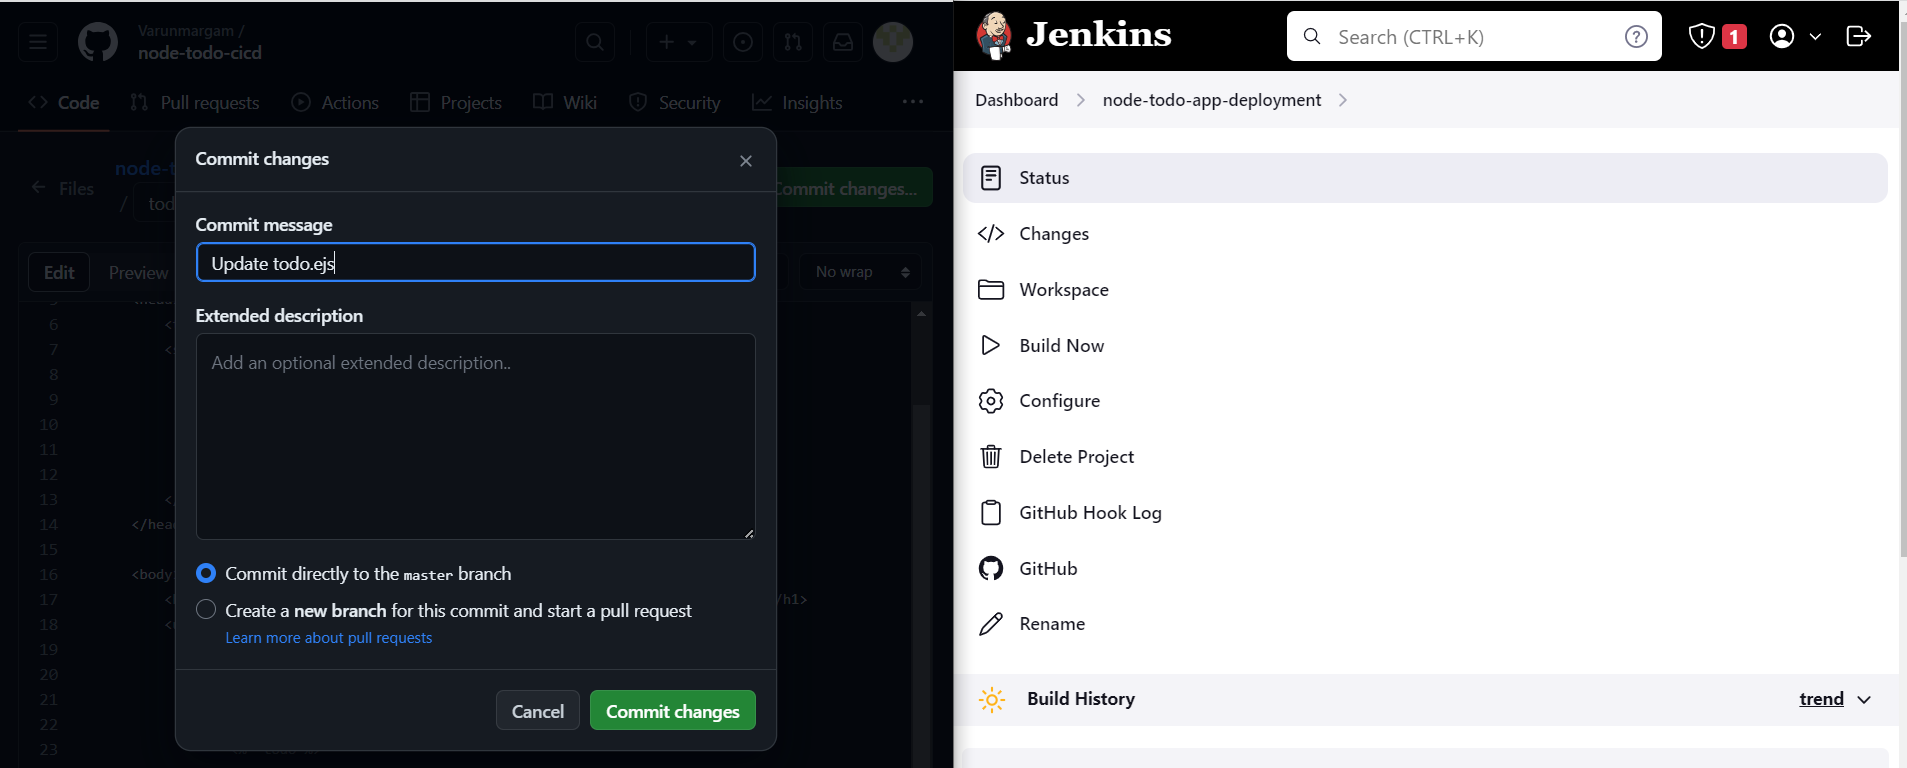
You can see as soon as you commit changes the build process has been automatically started via Webhooks.
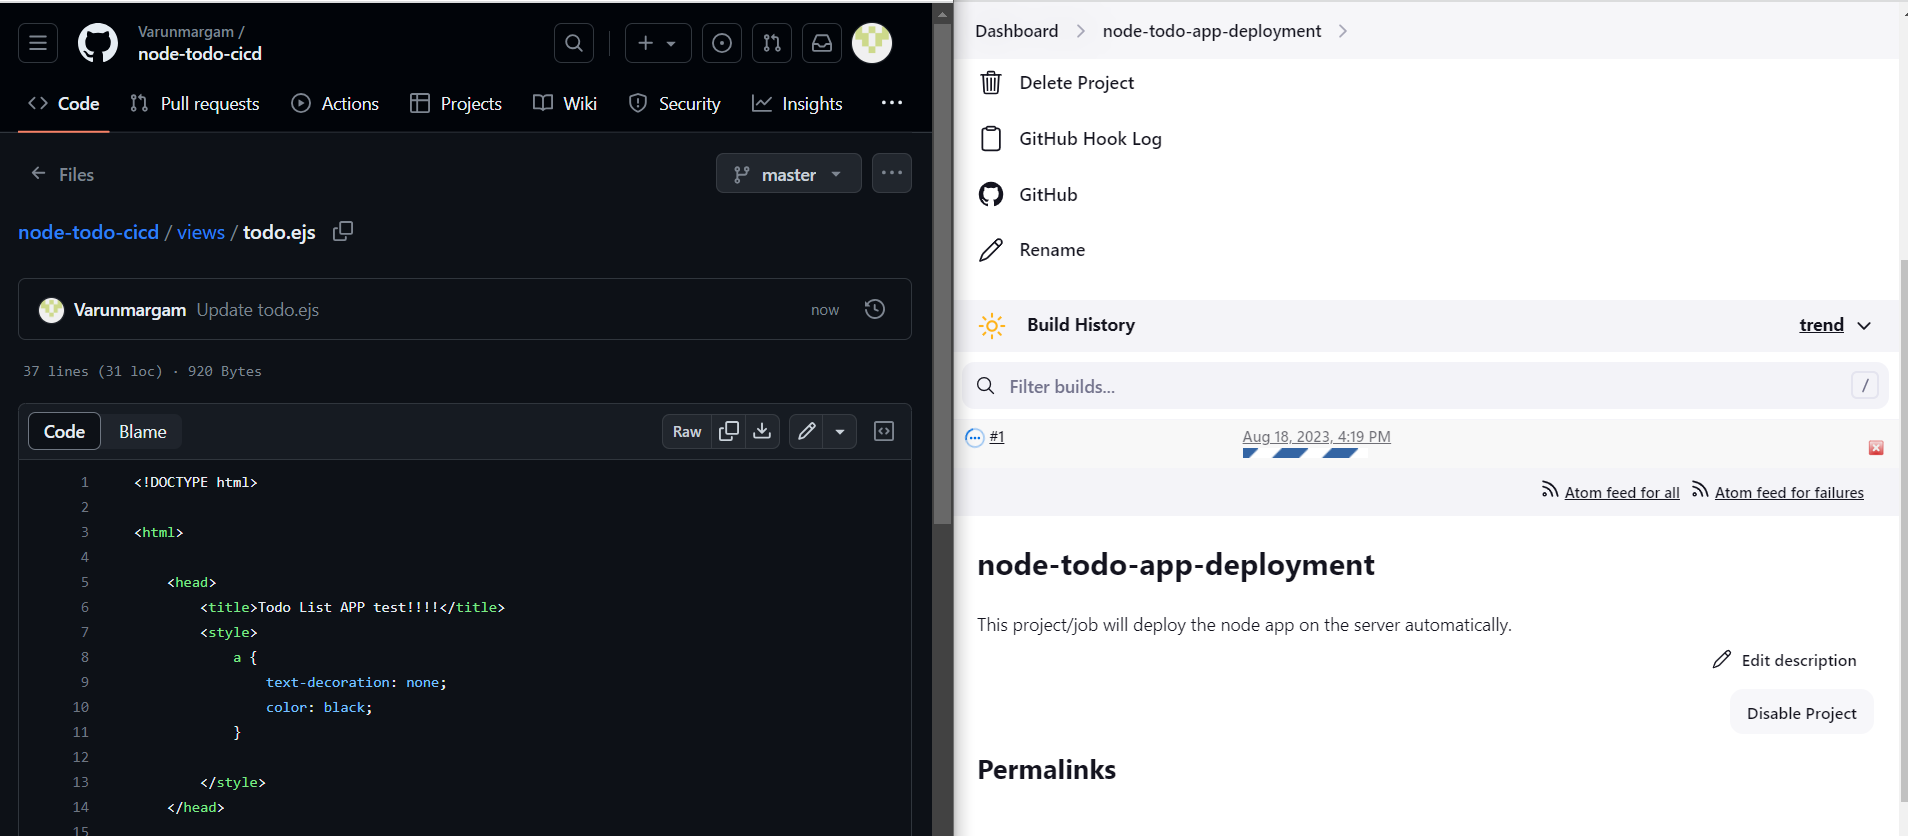
After the build is successful you can see the app has been deployed with the latest commit.
I apologize for the inconvenience but the changes made in this file were not being reflected therefore I configured the "django-todo-app-delivery" job by adding Webhooks following the same steps as we discussed earlier.
Try to configure this Django job by yourself.
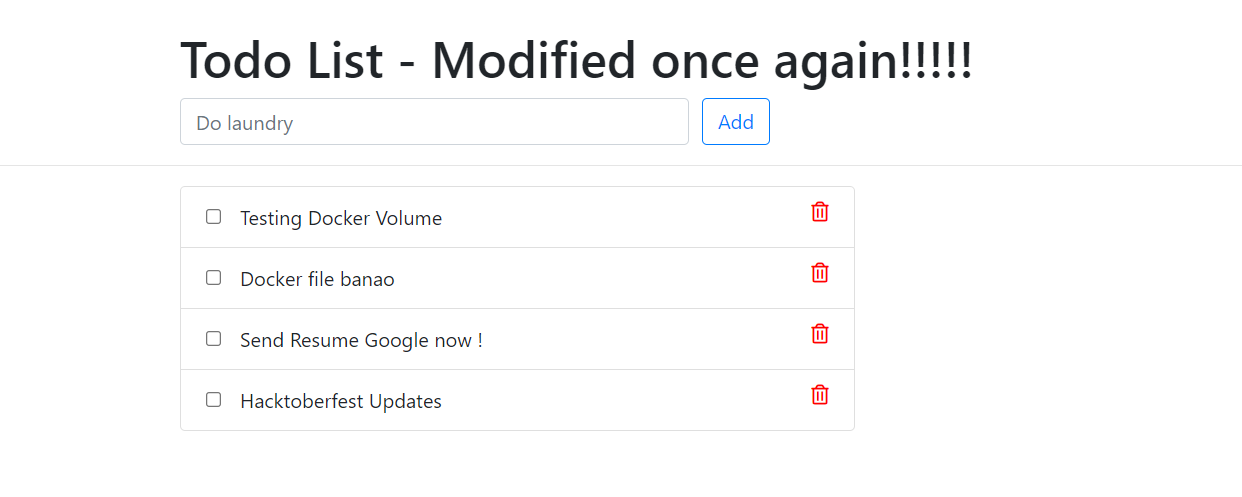
Made changes in the index.html file by adding !!!!
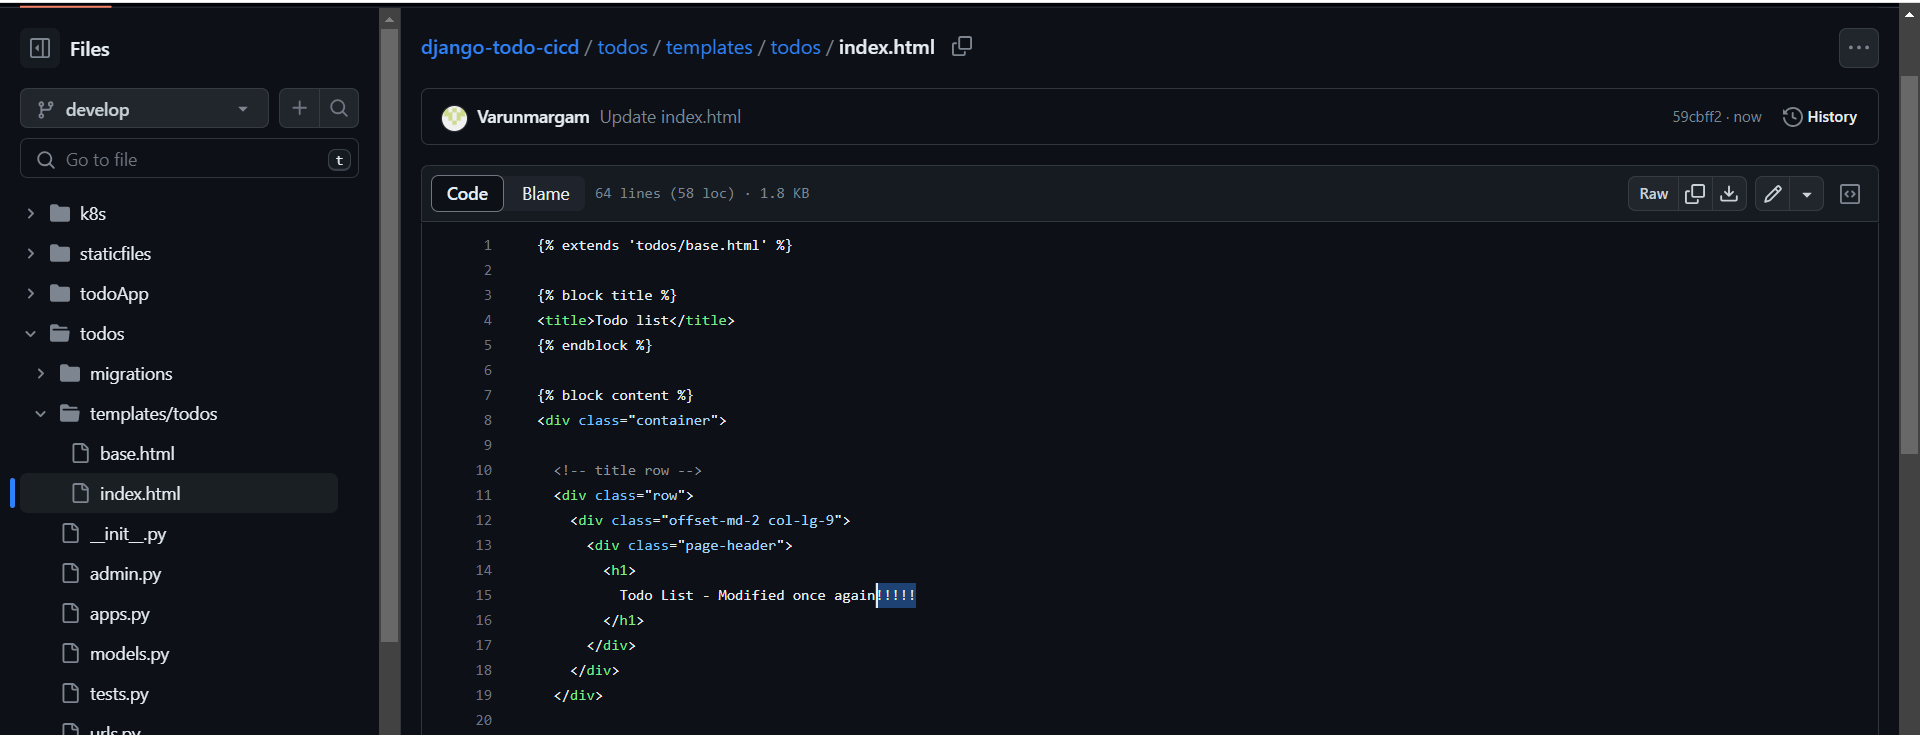
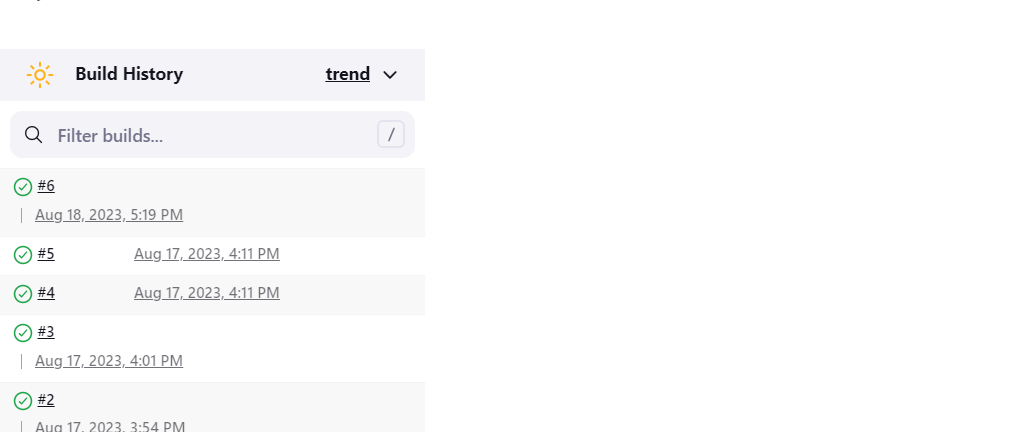
The Jenkins job was automatically built and the changes were reflected:
This #6th build was automatically triggered as soon as the changes were committed.
📍Conclusion
Thank you for reading this blog! 📖 Hope you have gained some value. In the future blog, we will be creating and exploring Jenkins pipelines.
If you enjoyed this blog and found it helpful, please give it a like 👍, share it with your friends, share your thoughts, and give me some valuable feedback.😇 Don't forget to follow me for more such blogs! 🌟
Subscribe to my newsletter
Read articles from Varun Margam directly inside your inbox. Subscribe to the newsletter, and don't miss out.
Written by
