Interacting with AWS: Exploring the Three Core Interaction Methods
 sudip pokhrel
Introduction
Amazon Web Services (AWS) offers a diverse set of robust tools that empower you to engage with its cloud services. Proficiency in creating an account and adeptly utilizing these interaction methods is fundamental. This comprehensive guide unravels the realm of AWS interaction, leading you from initial account setup to seamlessly employing these strategies in practical situations. Additionally, it will walk you through the process of configuring CLI in your local device and Harnessing AWS Services (S3 Bucket) through CLI and SDKs.
Creating AWS Account
To embark on your AWS journey, you need to create an AWS account (for starters AWS Free Tier is available). I'll guide you through the account setup process.
Creating a root user account.
Click here or visit the AWS homepage and click the button, “Create an AWS Account", which will redirect you to the signup page.
Provide your email address and name. Verify your email address by entering the verification code sent to your email, create a password, and then click "Continue" to proceed.
Select an account type
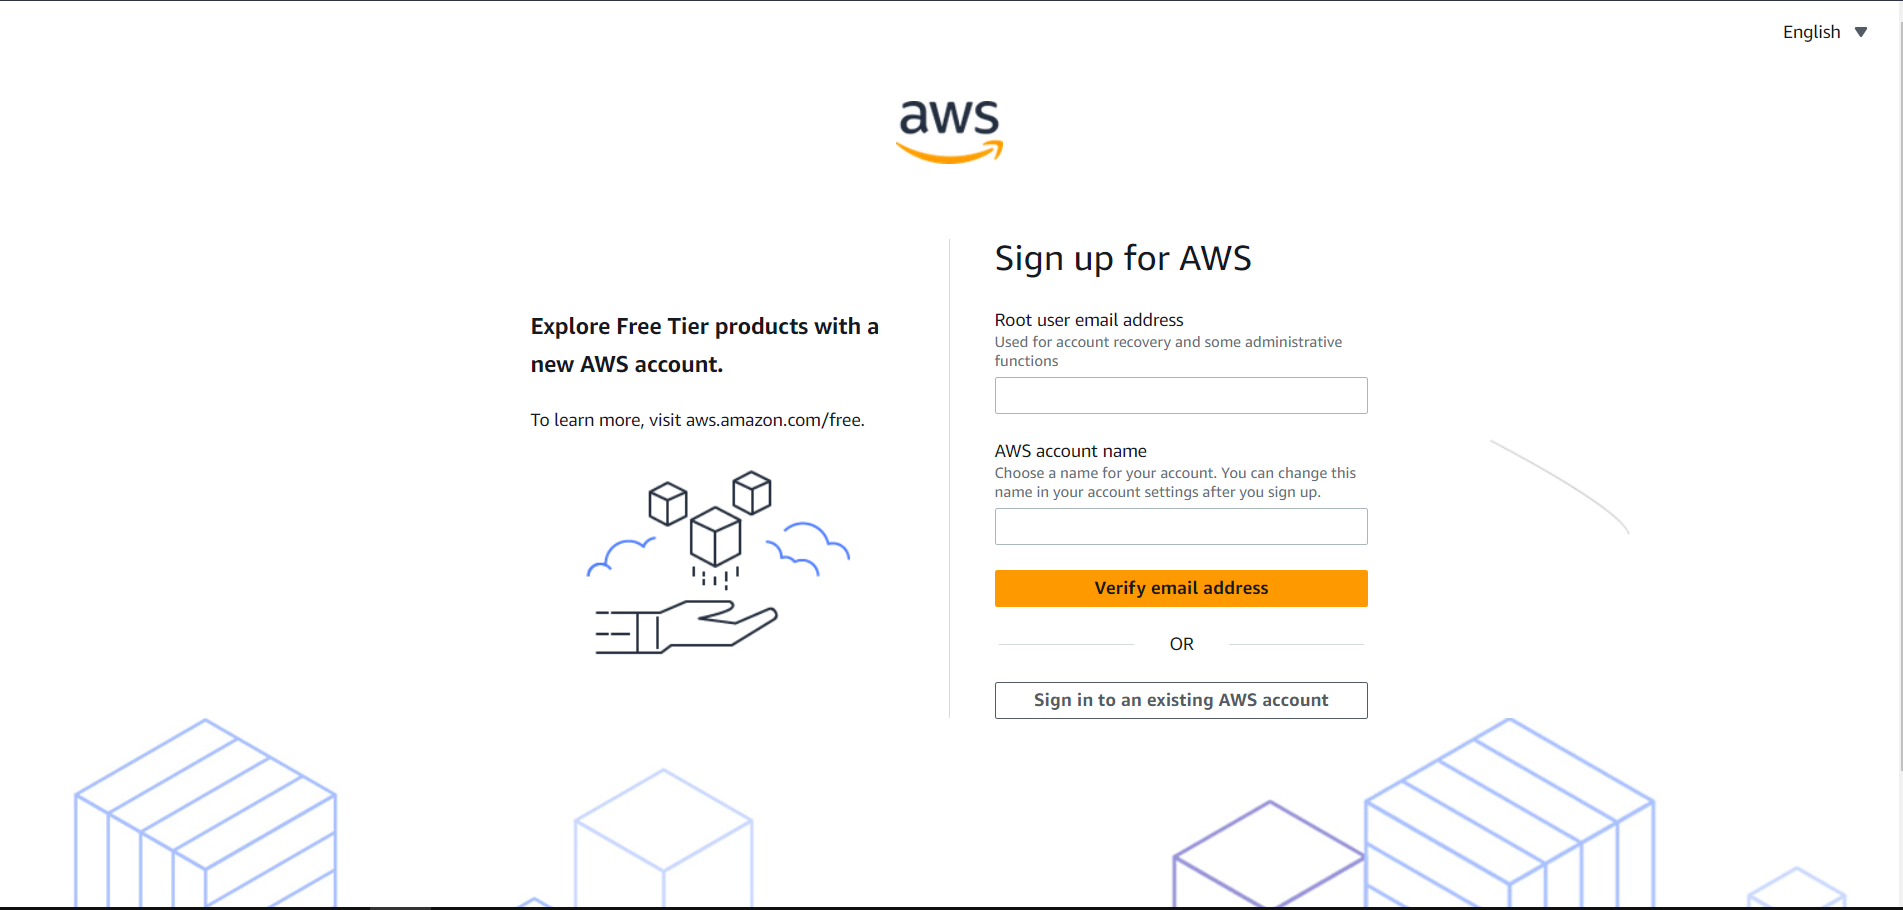
Select either personal (for learning and development) or business (for work/professional use). Personal accounts are recommended for beginners as both types function the same way.
Choose "Personal - for your own projects" as the account type.
Provide a phone number, country/region, and address for validation.
Mark the checkbox to agree to the AWS customer agreement and proceed by clicking "Continue (step 2 of 5)."
Paying and billing
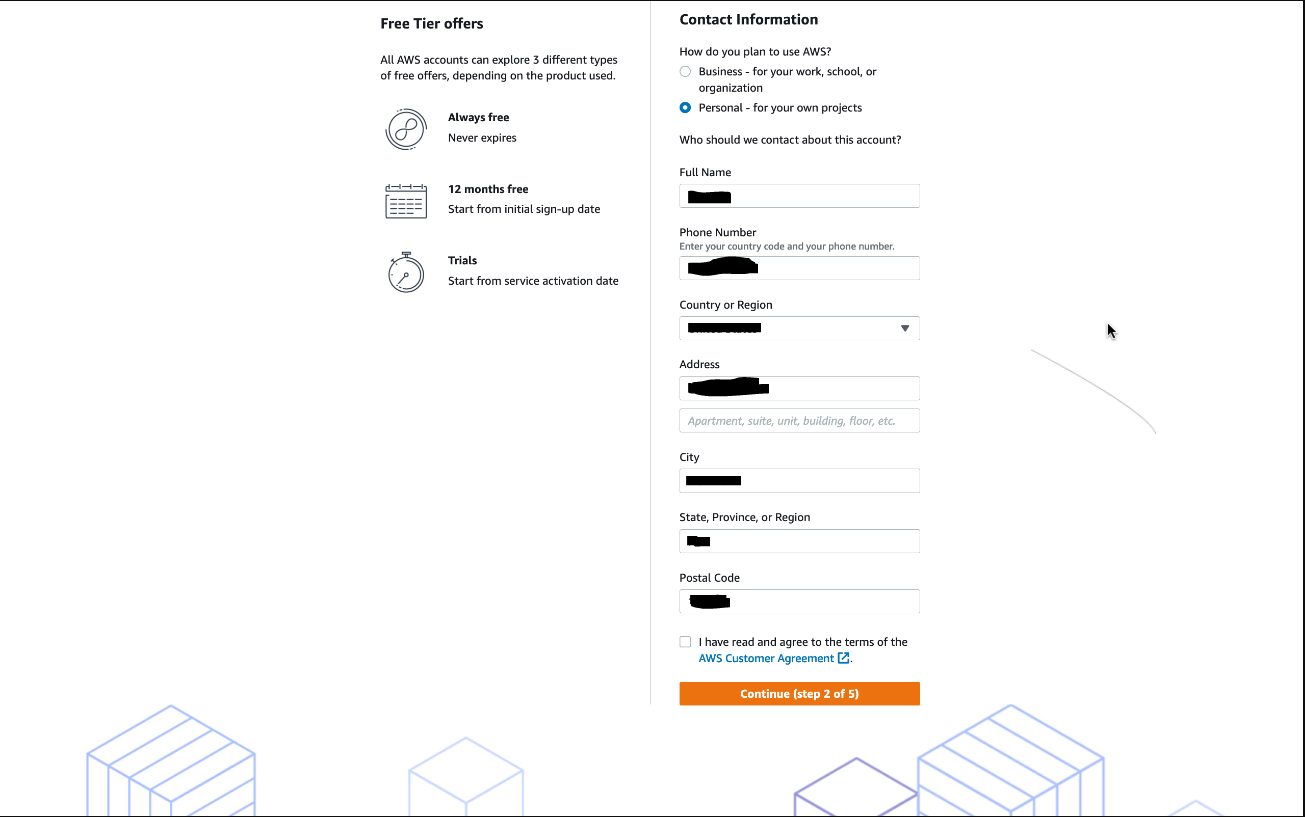
Input credit or debit card information.
Then, select “Verify and Continue.”
Identification
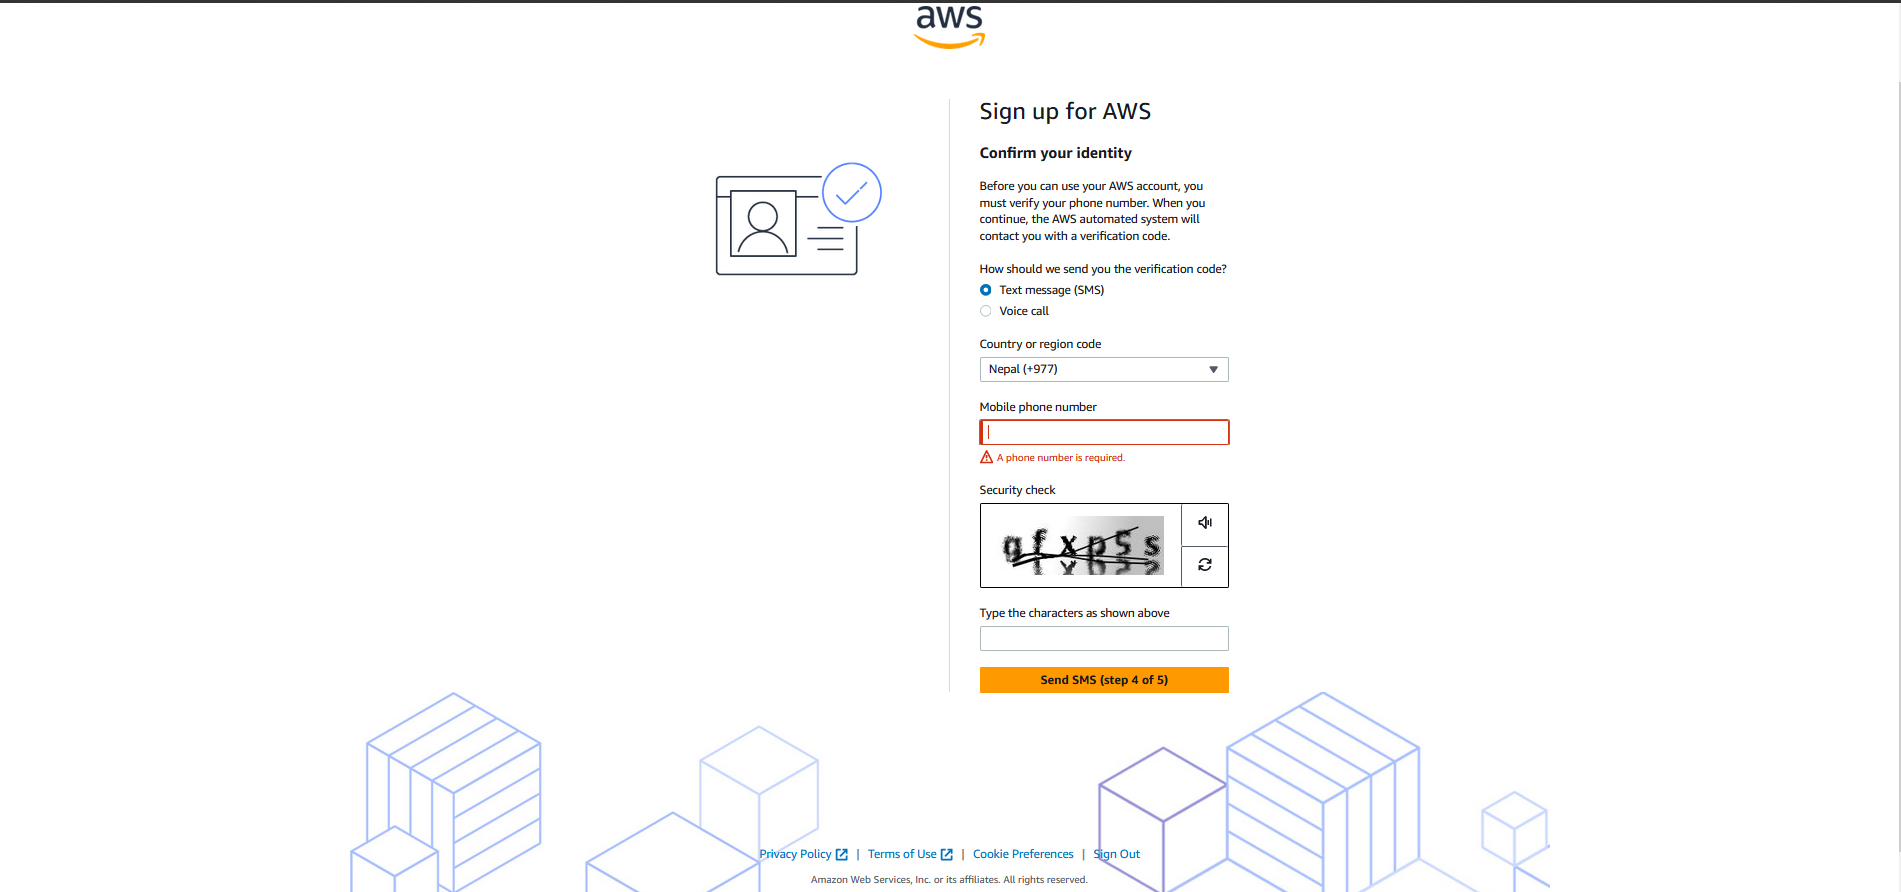
confirm your identity using a verification code:
Choose a text message or a voice call to receive the code, based on your preference.
After entering the code in the captcha text box, click "Verify Code," and upon successful verification, proceed by clicking "Continue."
Select a Plan
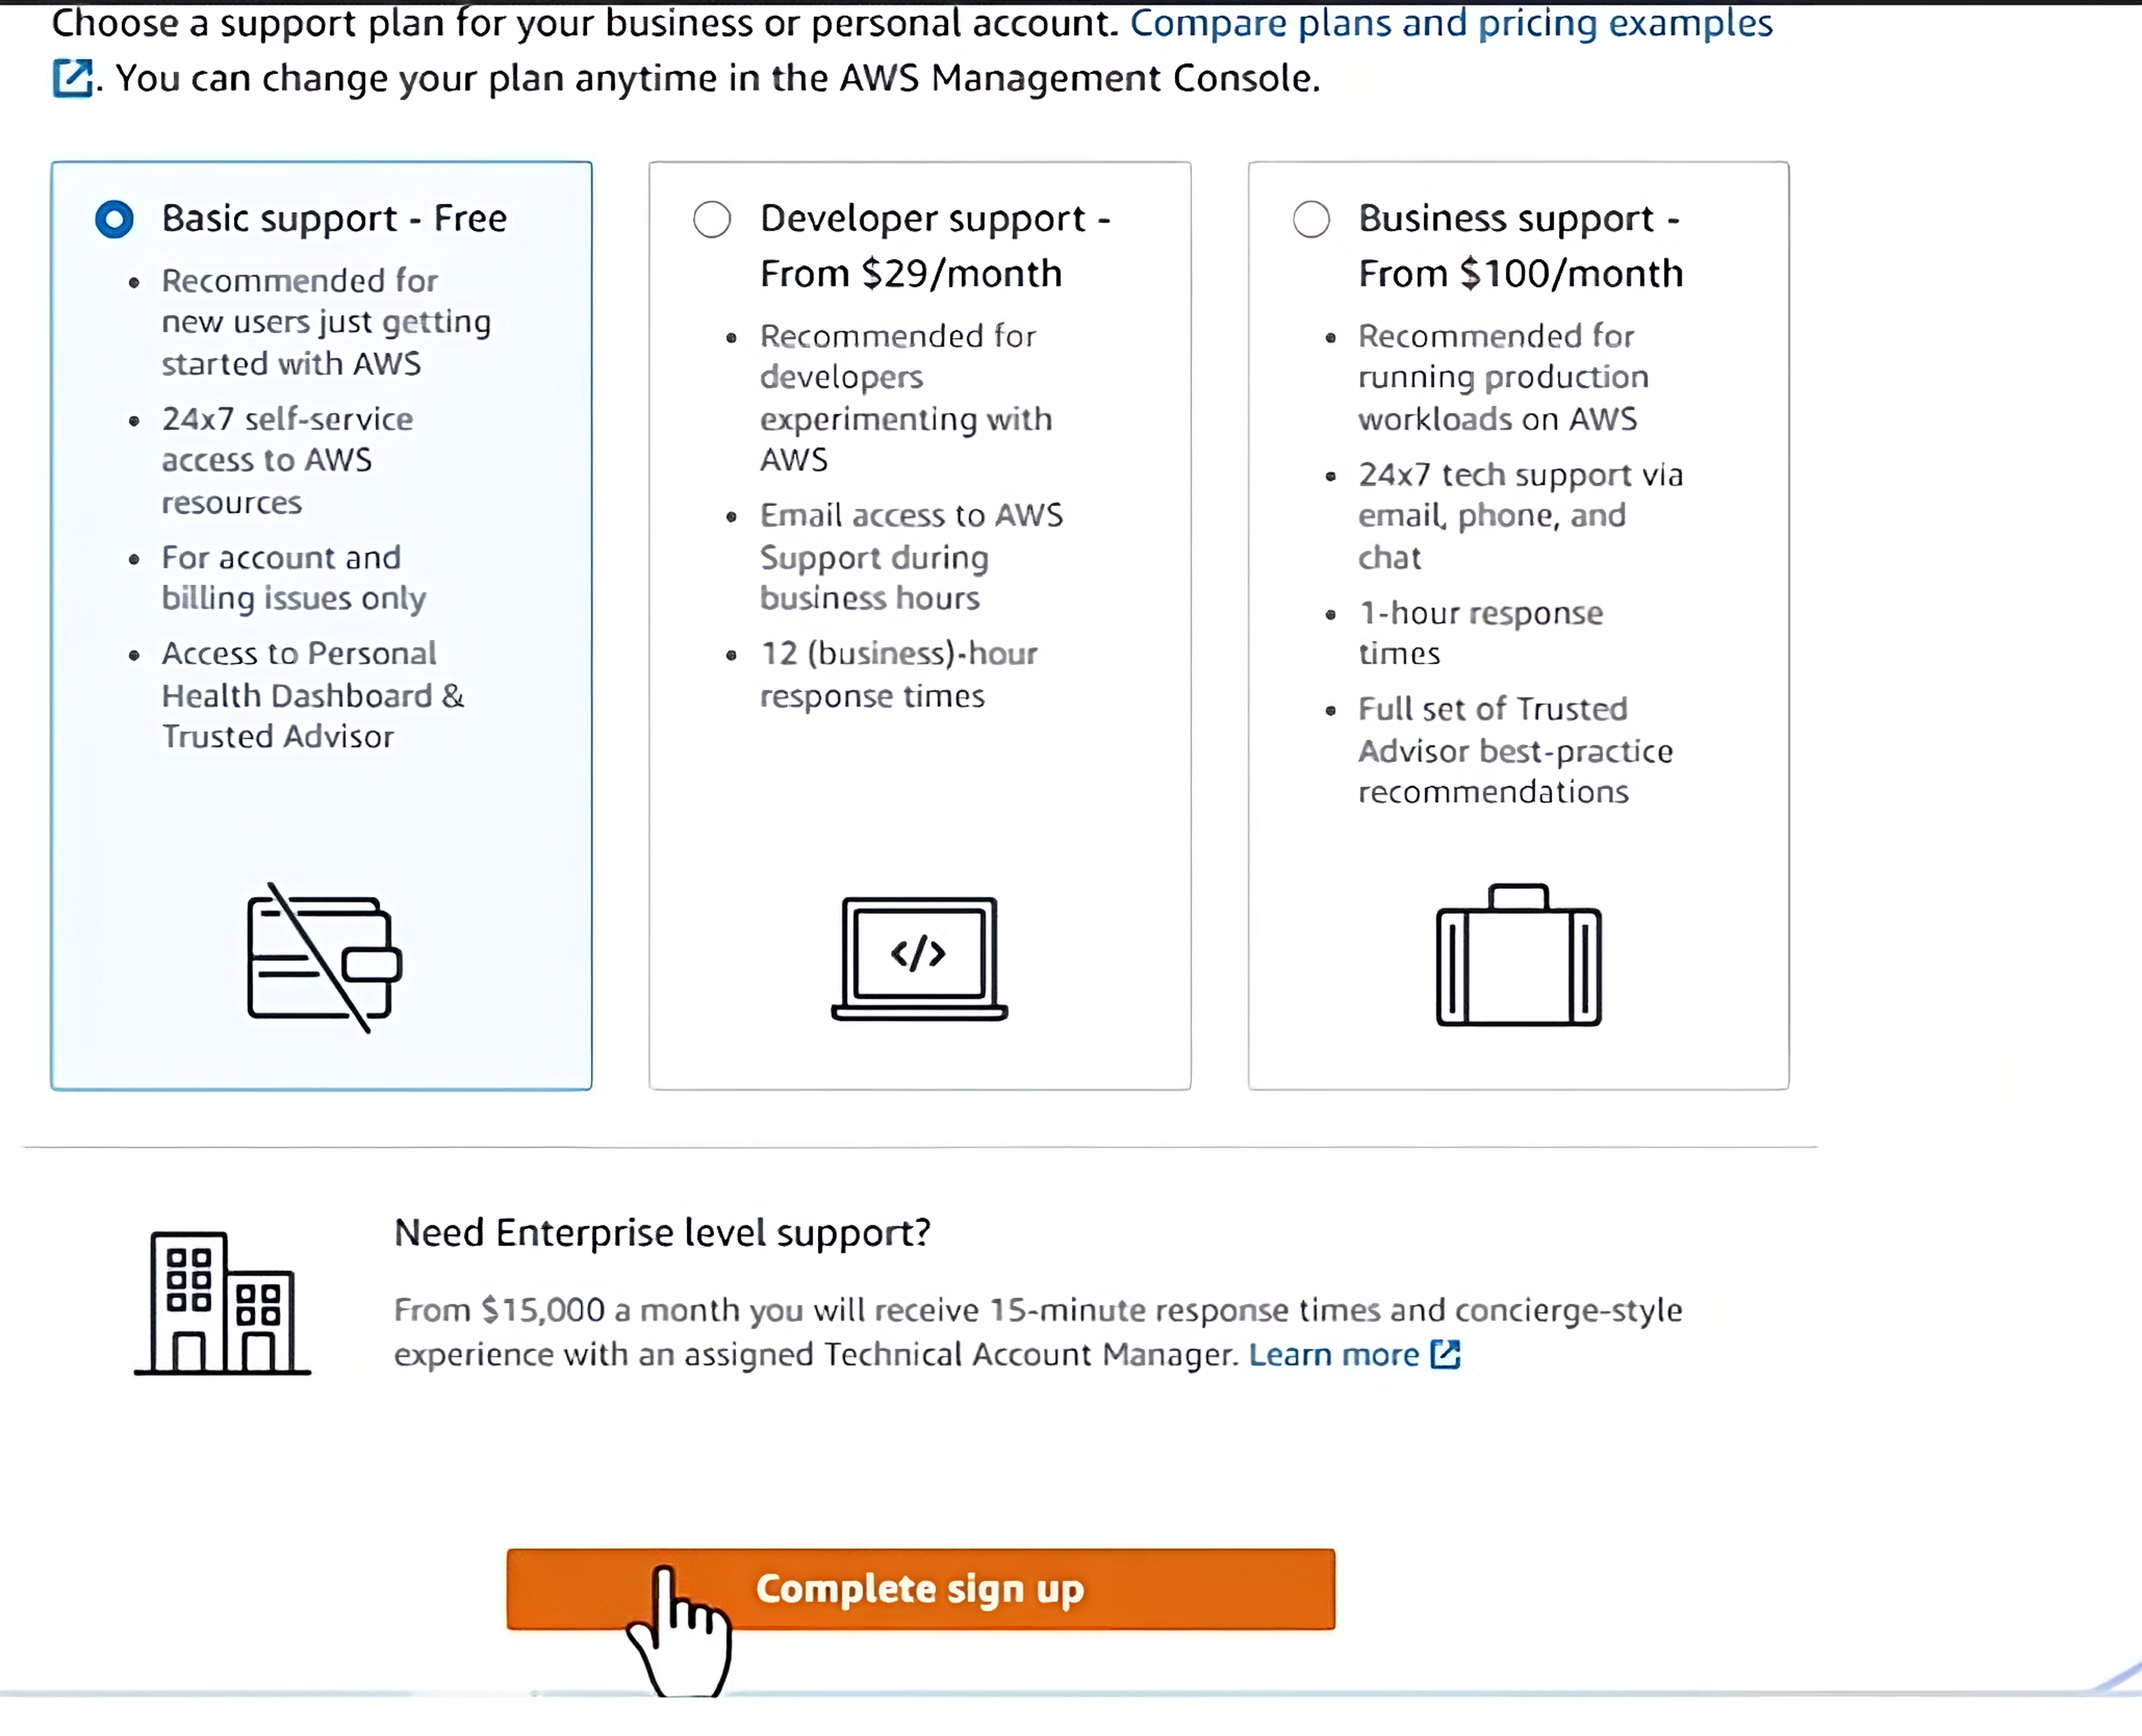
AWS provides multiple plans with additional services like 24/7 support, best practice advisors, and guidance. As you move to higher-tiered plans, more services become available, along with additional costs.
for free select the "Basic support - Free" plan. and enter Signup
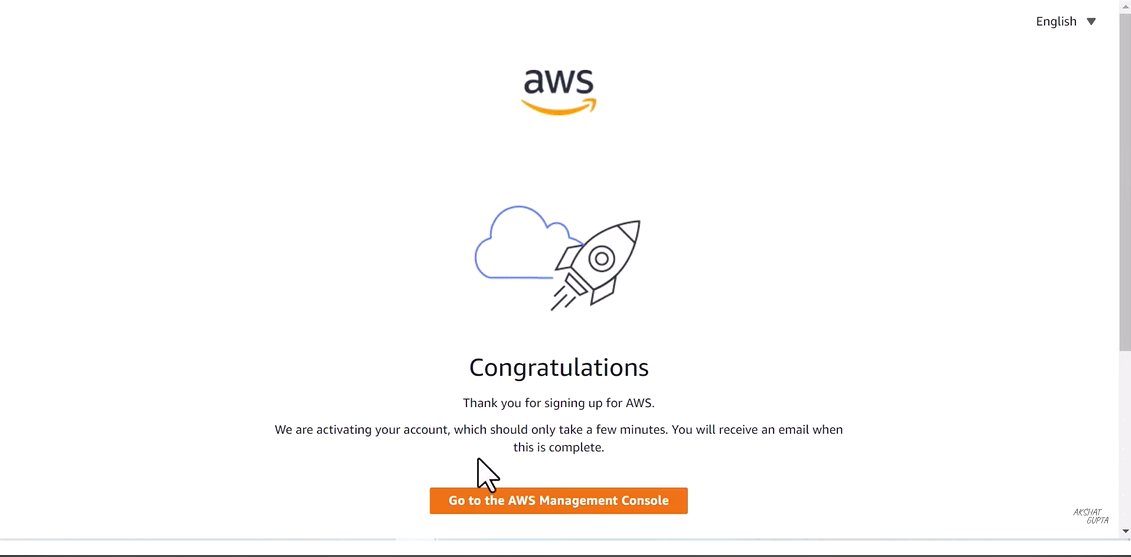
Amazing! You just finished setting up your AWS basic account. You should see a message from AWS that says your account is being activated, after which you will get an email once that is complete.
AWS Interaction Techniques
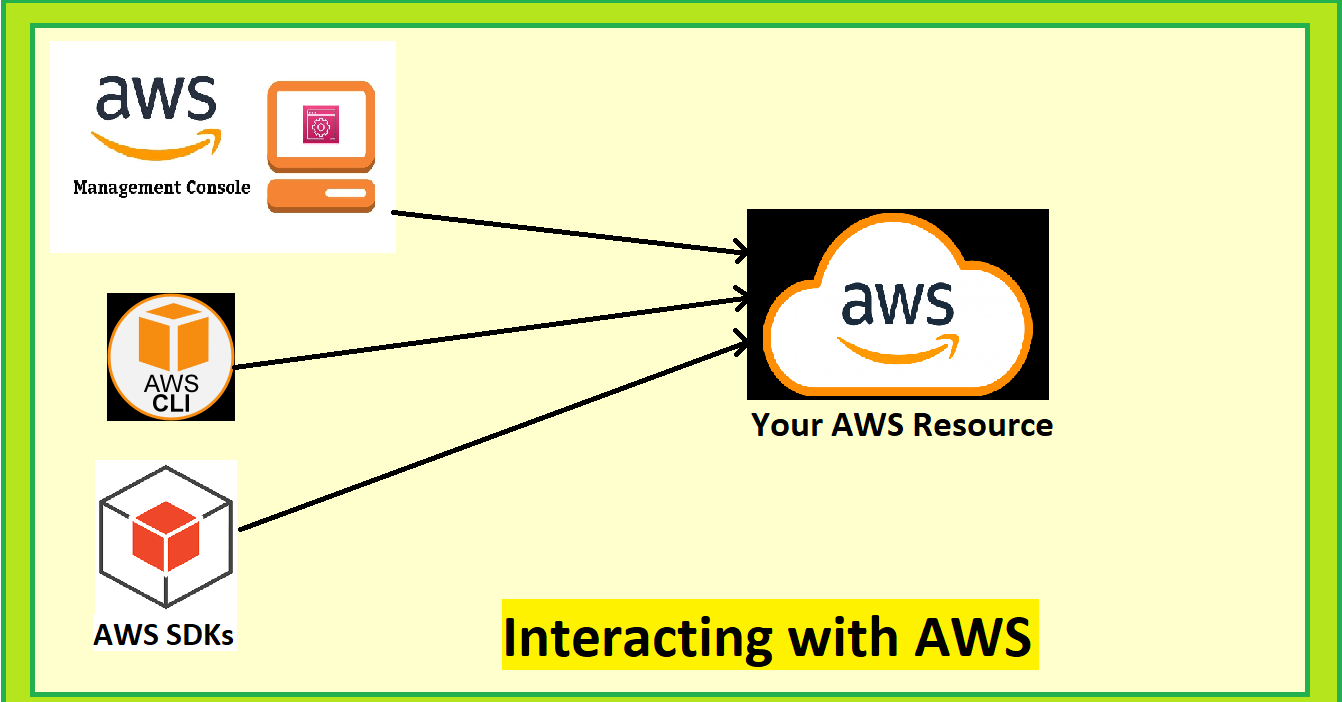
AWS offers three core methods for engaging with its services, each tailored to different needs and preferences. In this section, we'll delve into these methods, providing you with a comprehensive understanding of how to effectively interact with AWS.
AWS Management Console
One of the most accessible and user-friendly ways to interact with your AWS resources is through the AWS Management Console. This web-based interface provides an intuitive and visual approach to managing your cloud infrastructure. Whether you're new to cloud computing or a seasoned professional, the AWS Management Console offers a straightforward way to create, configure, and monitor various services.
Log in to get into Your AWS Management Console Landing Page.
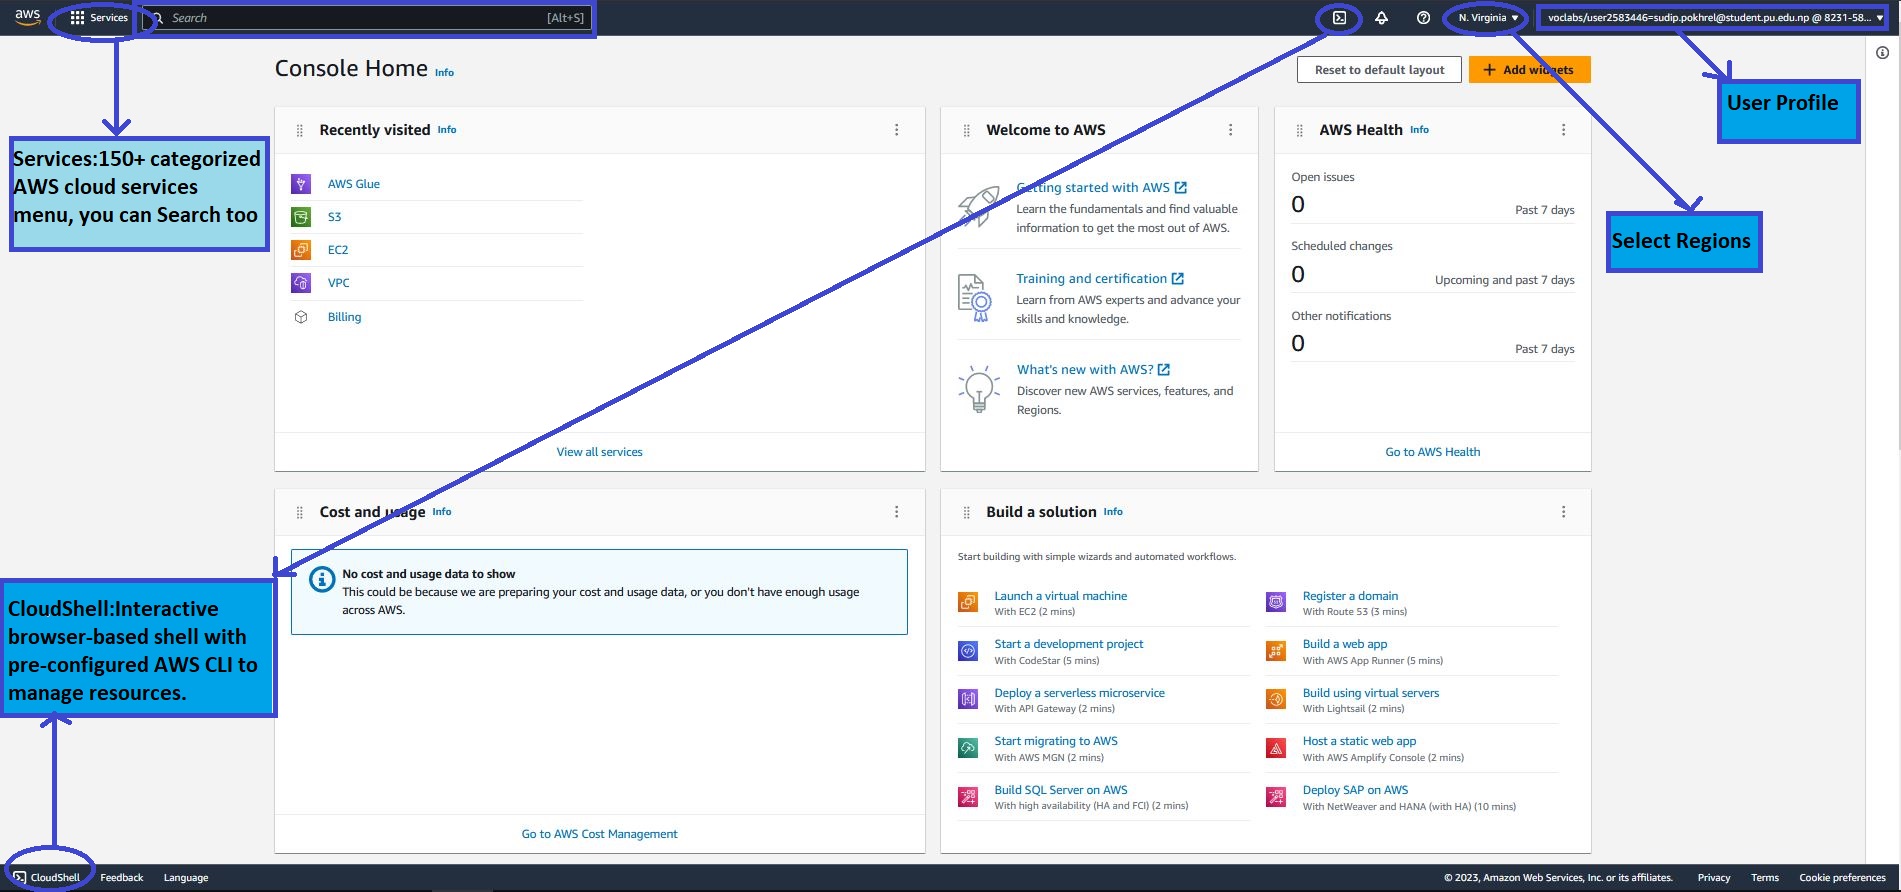
The console serves as the primary gateway to access and manage various AWS services and resources in the cloud. The page is intuitively designed, offering a simple, straightforward approach to managing your cloud resources.
💡Click here, to learn more about the AWS management console.AWS CLI
You can access Amazon Web Services (AWS) with unprecedented efficiency and control through the AWS Command Line Interface (CLI). When it comes to interacting with your AWS resources and services through the command line, AWS provides multiple options to choose from. This blog post delves into two prominent methods: Local Installation of the AWS CLI and CloudShell Integration.
Local Installation
With local installation, you bring the power of the AWS CLI directly to your local development environment. By installing the AWS CLI on your machine, you enable quick and convenient access to a plethora of AWS services right from your terminal. This method provides seamless integration between your workflow and the AWS ecosystem, allowing you to script, automate, and manage resources efficiently.
To setup AWS CLI for various platforms click here
For Windows follow the instructions below:Download and install AWS CLI for Windows (64-bit):
https://awscli.amazonaws.com/AWSCLIV2.msiTo confirm the installation, open the Start menu, search for
cmdto open a command prompt window, and at the command prompt use theaws --versioncommand.
It will show your current version
Copy the
Access Key IDandSecret Access Keyof a user from IAM of AWS Console. I recommend creating a new user for daily use rather than using a root AWS account.Open the command Prompt and enter aws configure, It will ask for AWS Access Key ID, AWS Secret Access Key, Default region name and Default output format.
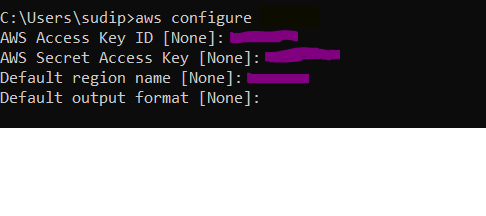
Enter the Credentials you copied earlier, and select the favorable region for you.
You, have successfully configured AWS CLI for your AWS account. Now, you can use AWS services directly from CLI
Lets Create a simple S3 bucket using CLI
Open the console and enter
aws s3 mb s3://mybucketaws s3 mb s3://mybucketIt will display the output
make_bucket: s3://mybucketThe bucket will be created on your Configured AWS account.
CloudShell Integration
For a hassle-free interaction experience, AWS offers CloudShell, a fully managed shell environment directly within the AWS Management Console. CloudShell comes pre-configured with the AWS CLI, SDKs, and other useful tools. This means you can access the power of the AWS CLI without any installation, setup, or configuration on your local machine. With CloudShell, you can focus on managing your resources and executing commands without worrying about environment setup.
💡For full details go to AWS Cloudshell User Guide. For full AWS CLI documentation go to AWS CLI Reference.
AWS SDKS
API calls to AWS are made seamlessly through AWS Software Development Kits (SDKs). These SDKs, available for popular languages like C++, Go, Java, JavaScript, .NET, Node.js, PHP, Python, and Ruby, abstract the complexity of direct API interaction. Developers integrate their application source code with AWS services effortlessly, focusing on building features rather than navigating intricate APIs. For instance, with the AWS SDK for Python (Boto3), you can directly upload images to an AWS storage service from your Python frontend. These SDKs embody AWS's power in code, enabling developers to access and utilize AWS services programmatically.
Imagine you want to establish a brand new Amazon S3 bucket to host your data in the cloud. Here is a short example of how you can use the AWS SDK for Python (Boto3) to smoothly create your own space in Amazon S3.
    import logging
    import boto3
    from botocore.exceptions import ClientError

    def create_bucket(bucket_name, region=None):
    try:
        s3_client = boto3.client('s3')
        s3_client.create_bucket(Bucket=bucket_name)

    except ClientError as e:
        logging.error(e)
        return False
    return True
Conclusion
In this blog, We went from creating an AWS account to Interacting with AWS through the AWS Management Console, AWS CLI and AWS SDKs. We also have created an S3 bucket using CLI and SDK. It's up to you to choose between these 3.
I am always open to feedback and suggestions, so feel free to share your thoughts as you embark on your cloud adventure with AWS.
Happy cloud adventuring!
Subscribe to my newsletter
Read articles from sudip pokhrel directly inside your inbox. Subscribe to the newsletter, and don't miss out.
Written by

sudip pokhrel
sudip pokhrel
A Passionate AI and Software Engineering enthusiast, currently pursuing my Msc and working on cutting-edge projects in recommendation systems for Software Engineering. Feel free to reach out to me at sudipupadhyay369@gmail.com