Deploying a Linux Virtual Machine in Azure: Step-by-Step Guide
 Lawal Azeez
An Azure Linux Virtual Machine (VM) is a cloud-based computing instance provided by Microsoft Azure that runs a Linux operating system. Azure VMs are virtualized computing resources hosted on Microsoft's Azure cloud platform, allowing users to create, manage, and deploy virtual machines without the need for physical hardware.
This write-up will take you into the graphical step-by-step procedures in deploying a Linux virtual machine in Microsoft Azure. Stay tuned...
Step 1
Login to your Microsoft Azure portal via https://portal.azure.com/ and sign in to your subscription
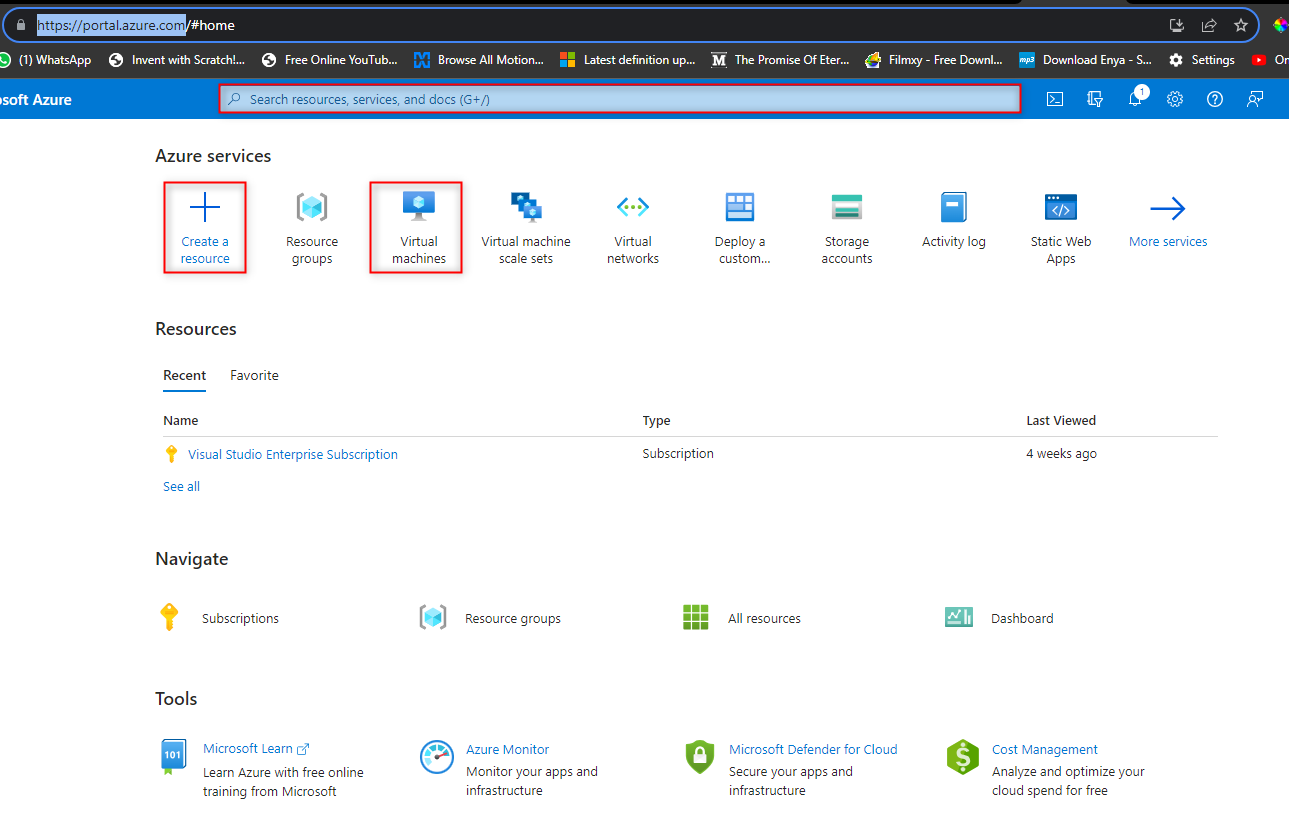
From the homepage, click on "Create" or click on "Virtual machine" or use the search bar above to search for Virtual machine (see highlights in the image below)
Step 2
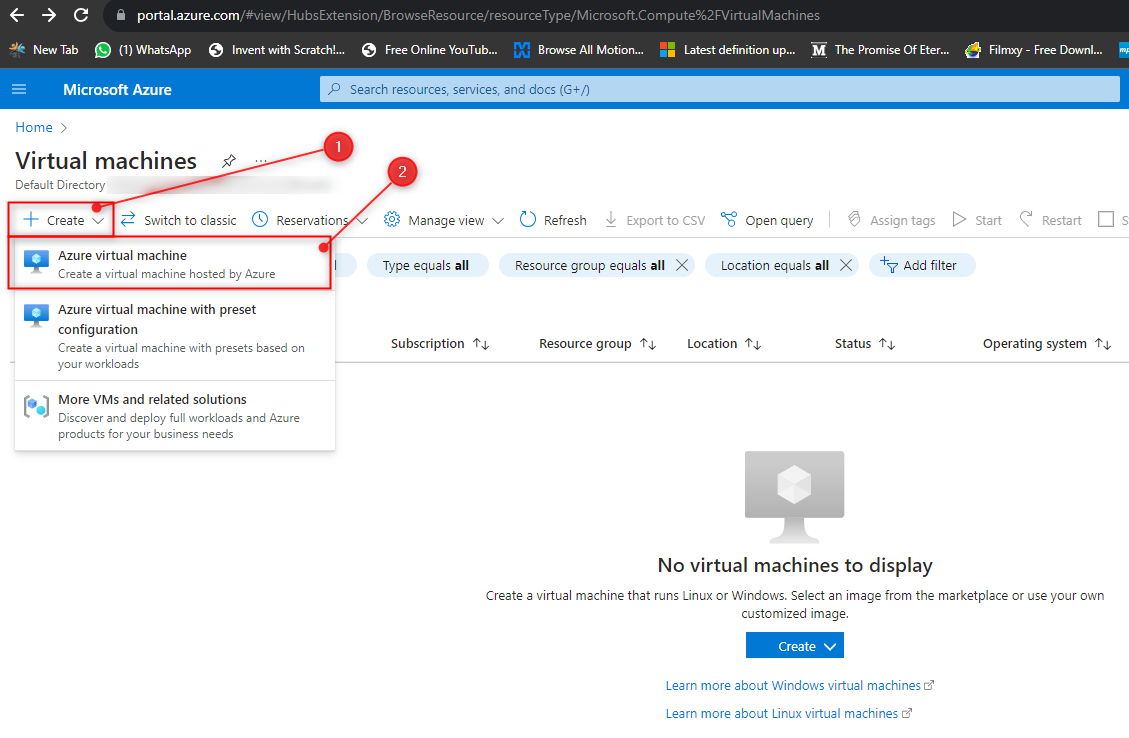
Click on "Create" and select "Azure virtual machine" from the drop down
Step 3
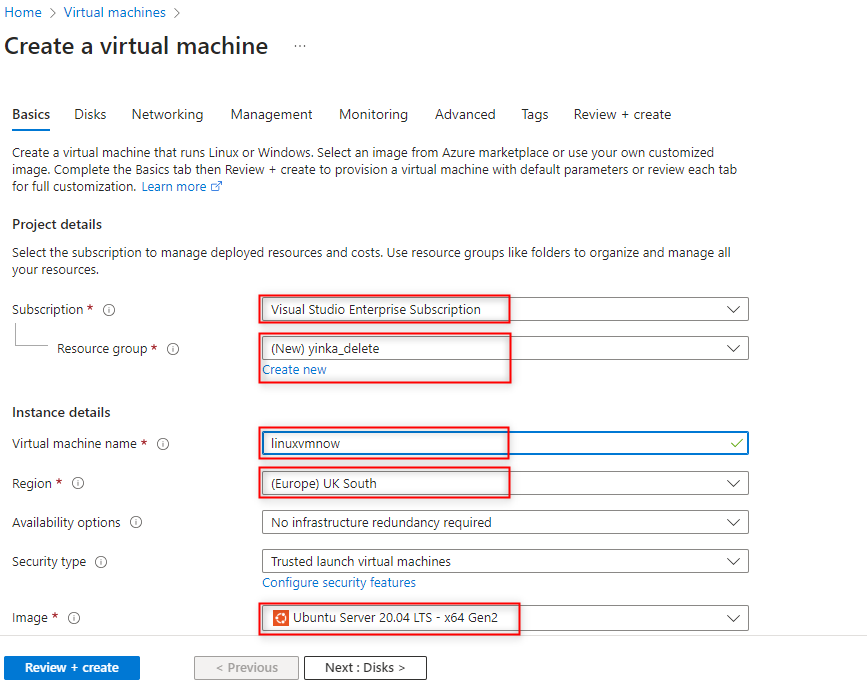
Supply the information as shown below; ensure the right subscription is selected, select your Resource group or create a new Resource group using the "Create new" link. enter your Virtual machine name (ensure compliance to the naming convention). Select your Region, and create an Availability option and Availability zone for higher availability. Select the Ubuntu server image for a Linux vm or other linux vm, you can use the "See all images" to view any other images not captured on the dropdown.
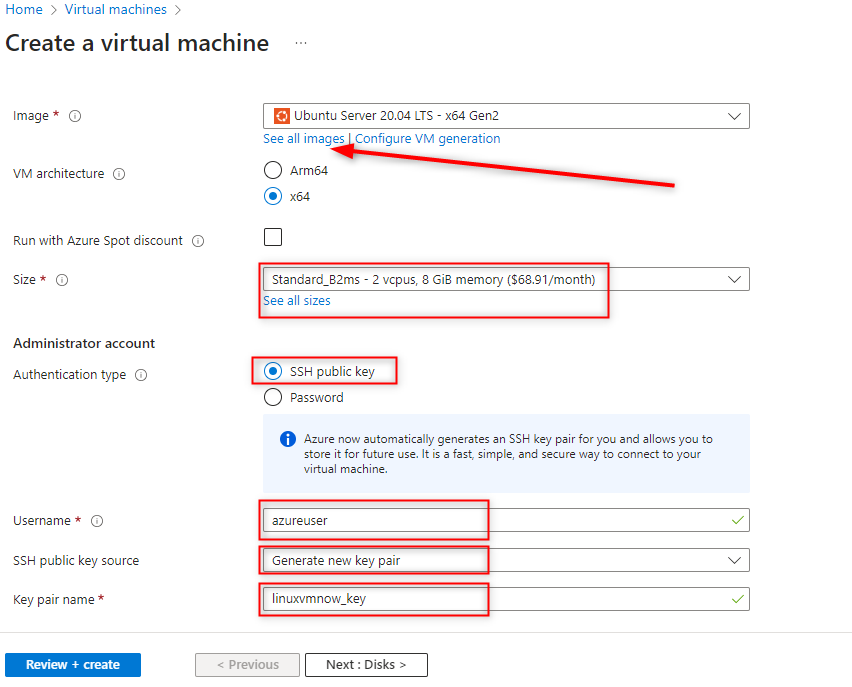
You can select the preferred image size to accommodate your workload using the "See all sizes" link or just stick to the default
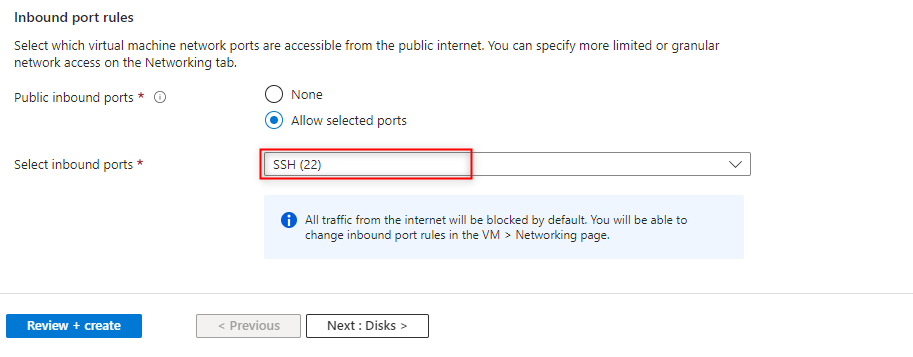
Ensure inbound port is selected as "SSH (22)" this will allow you access your linux vm via secure powershell command interface. Click "Next: Disk" to move to the next tab
Step 4
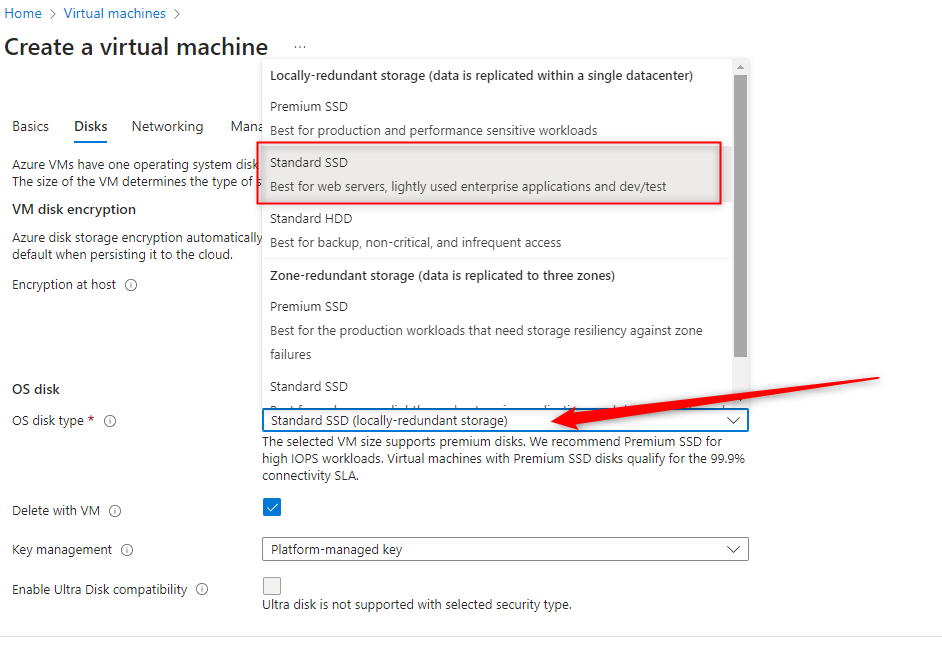
From the Disks tab, click on "OS disk type" and select "Standard SSD" for this project, you can choose another option based on your requirement. Click next until you get to the Monitoring tab (leave other setting as it is).
Step 5
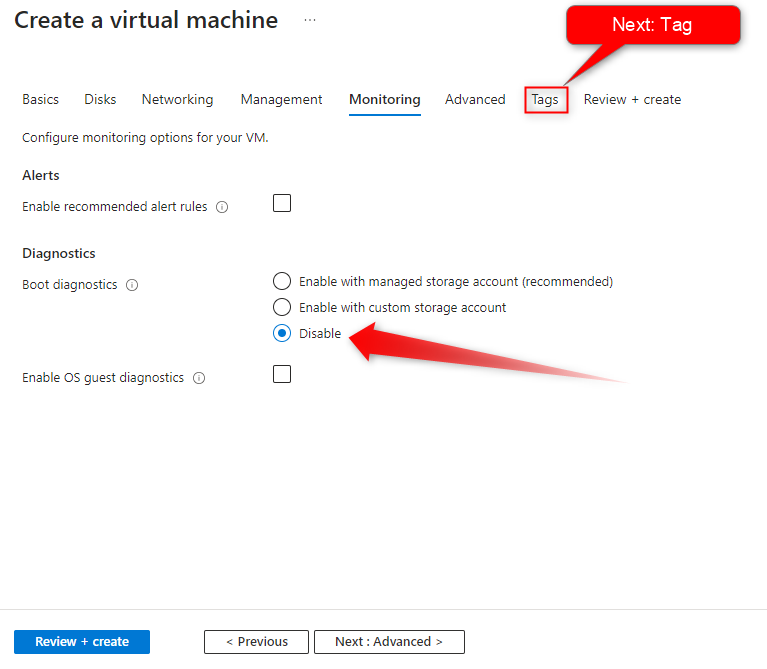
On the Monitoring tab, disable boot diagnostics to control analytics that is being shared with your provider and the public. Click next to the Tag tab.
Step 6
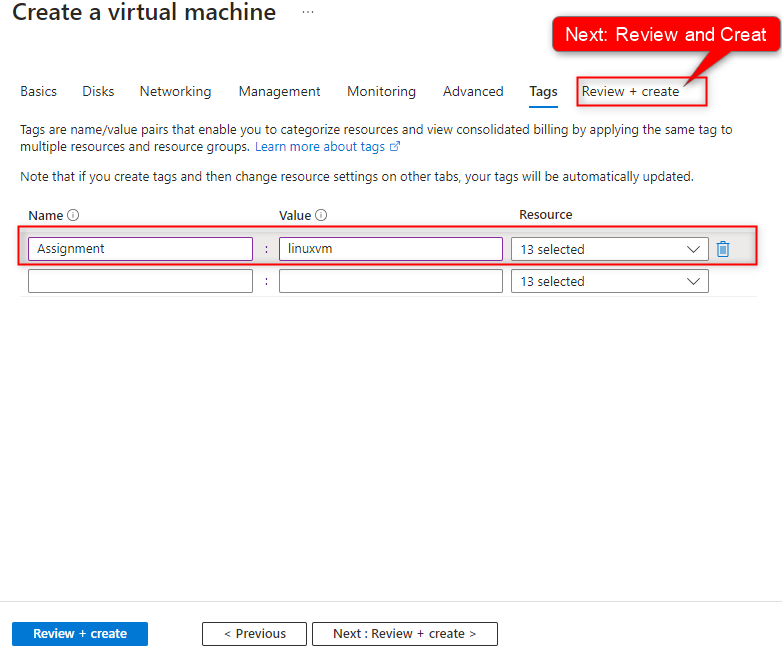
Add a tag to your vm by setting your name value key, for me the name is "Assignment" the value will be what assignment? "linuxvm" (see figure below).
Step 7
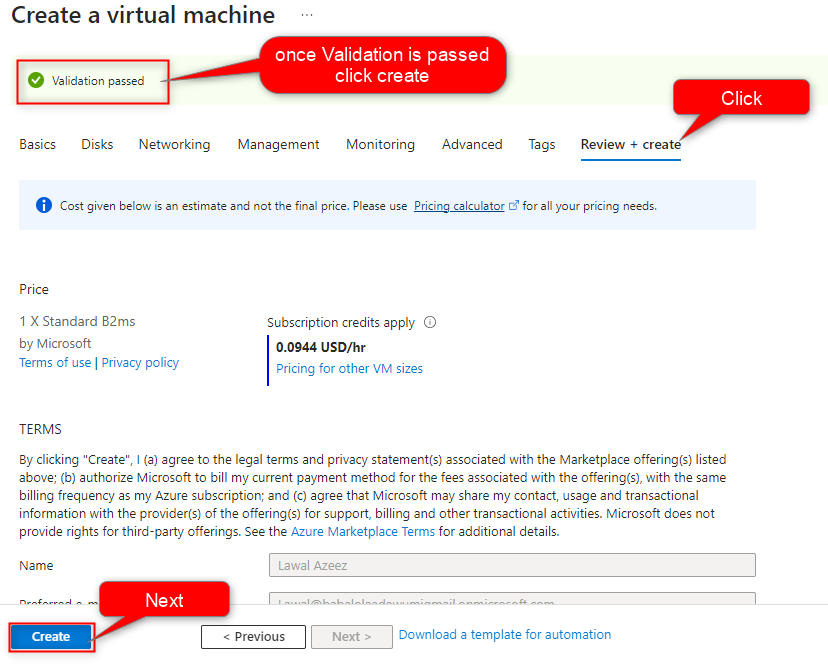
Click "Review and create", allow validation to pass and then click "Create"
Step 8
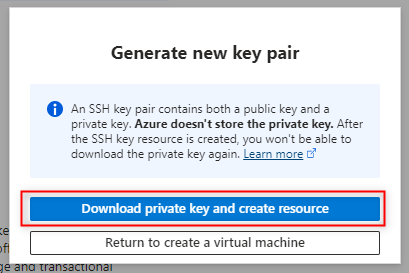
A popup will prompt you to download the ssh private key, click on "Download private key and create resources". kindly note where this private key is been downloaded to and copy the path
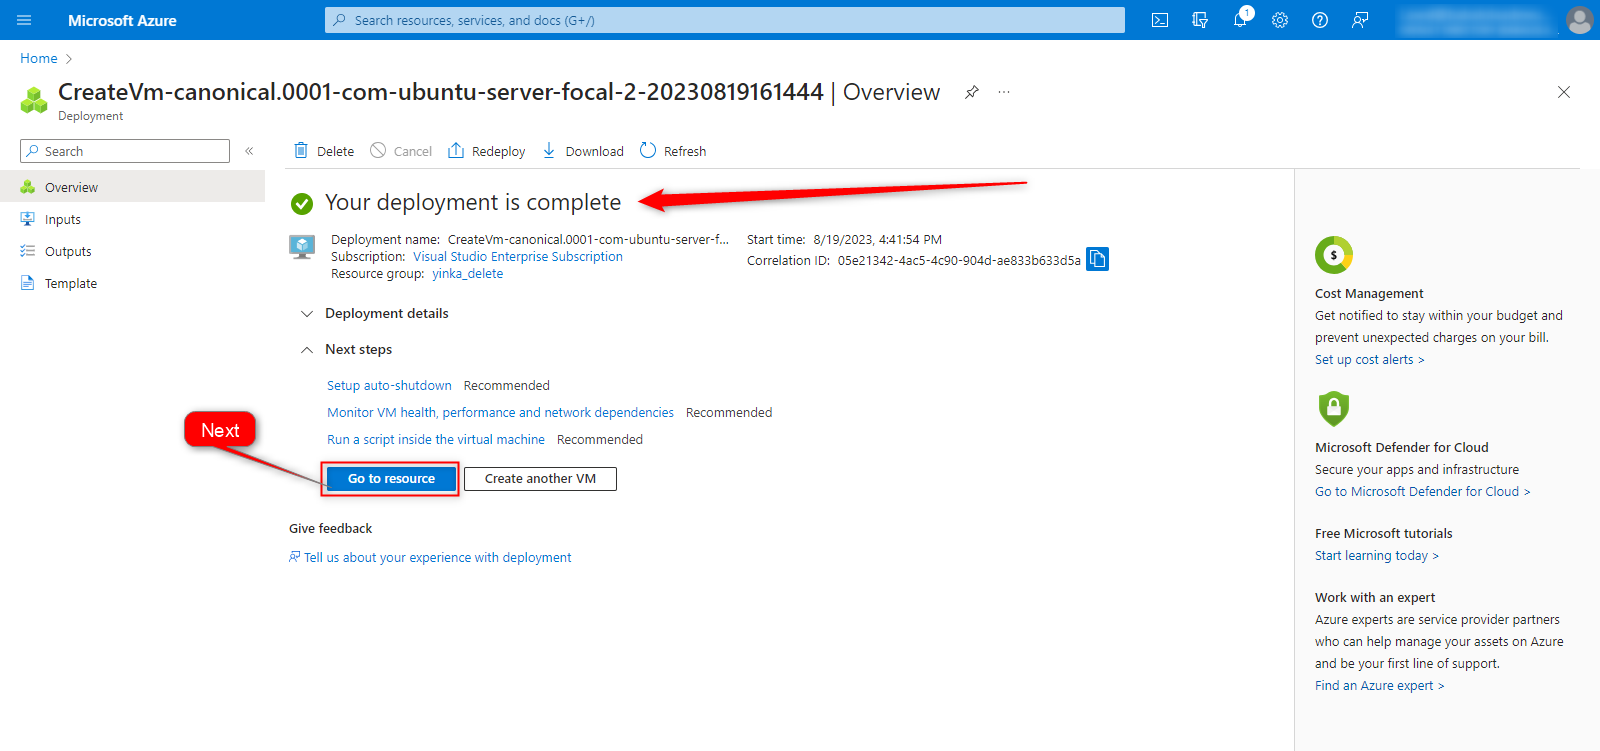
A successful installation will show the page below. Click on "Go to resources" to view the vm overview page.
Step 9
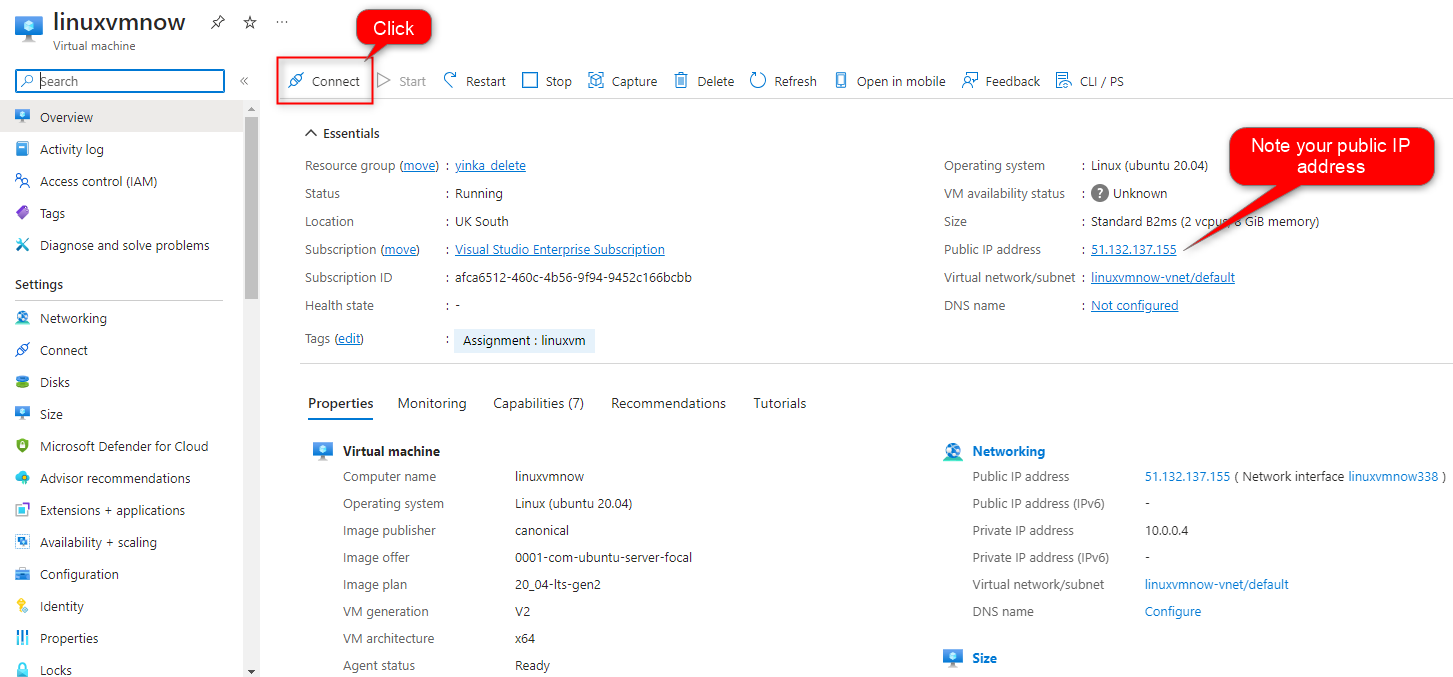
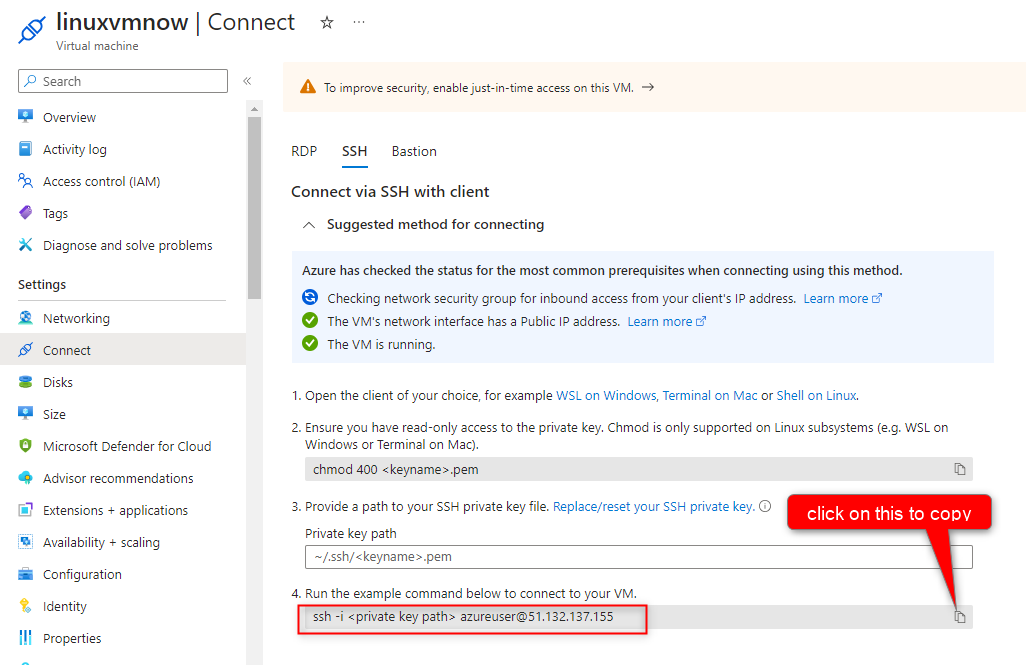
Connecting to your Virtual Machine: to connect to your virtual machine, click on connect from the vm overview page, please note your public ip address for you connect to your vm.
Step 10
From the Connect window, copy the ssh command to your clipboard as shown in the figure below.
Step 11
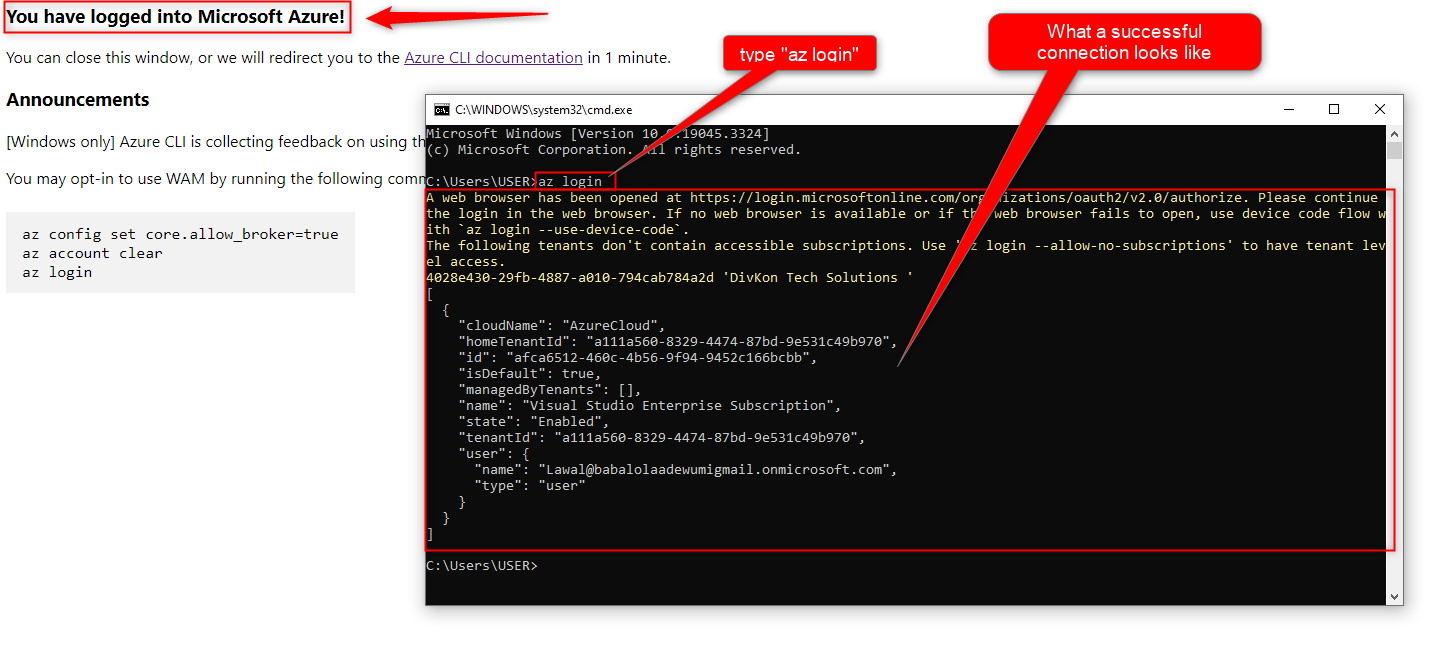
Open your local PC command prompt or PowerShell. Ensure you have installed Azure CLI for Windows on your pc, follow this link if you haven't done so https://learn.microsoft.com/en-us/cli/azure/install-azure-cli-windows. Now type the commant "az login" to connect and login to your Azure account.
Step 12
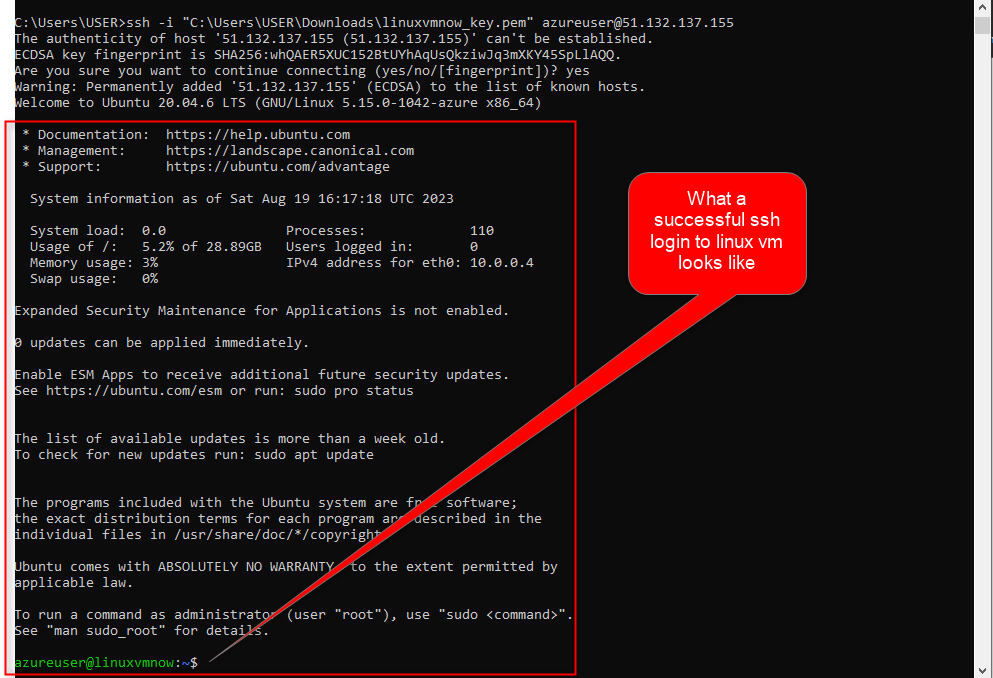
Paste the copied ssh connect code in the command prompts after a successful connection as seen below.

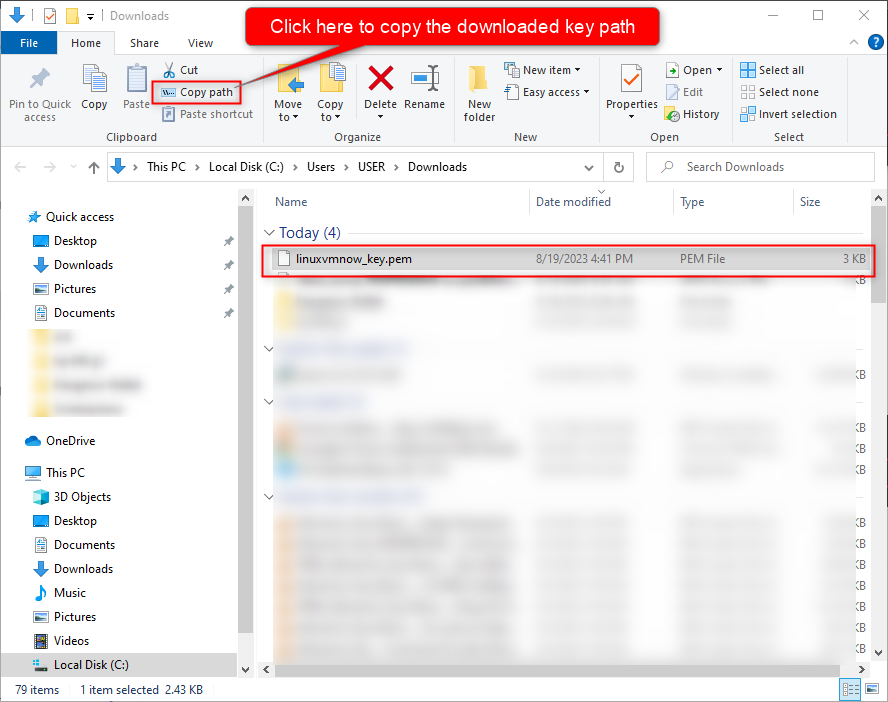
Replace the <private key path> with the downloaded ssh key. Use the figure below to copy your downloaded ssh key path
See replaced path in the figure below.

Click "Enter".
I hope this has been informative enough and I will like to thank you for following.
...The End...
Subscribe to my newsletter
Read articles from Lawal Azeez directly inside your inbox. Subscribe to the newsletter, and don't miss out.
Written by

Lawal Azeez
Lawal Azeez
I am a cloud administrator, simply documenting my cloud computing journey.