How to Attach a Data Disk to your Virtual Machine - Step-by-Step Guide
 Lawal Azeez
Hello everyone and welcome back to my cloud tech channel again. In this blog, I will be showing you how to attach a data disk on your existing Azure Windows virtual machine. If you don't know how to deploy a Windows virtual machine, kindly check my previous blog where I treated that in detail, see the link below. https://yinkacloudathon.hashnode.dev/simple-pictorial-steps-to-creating-a-windows-10-virtual-machine-in-azure
Let's start...
What is a Data Disk? In Microsoft Azure, a data disk refers to a dedicated disk storage resource that can be attached to a virtual machine (VM). It is used to store data, applications, files, and other content separate from the operating system disk. On like OS disk that contains the operating system and its dependent files, data disks provide additional storage capacity for a VM beyond what is available on its primary operating system disk.
How do you add a data disk to an existing virtual machine running Windows 10 or 11?
Step 1
I have created a virtual machine called "datadiskvm" as shown below.
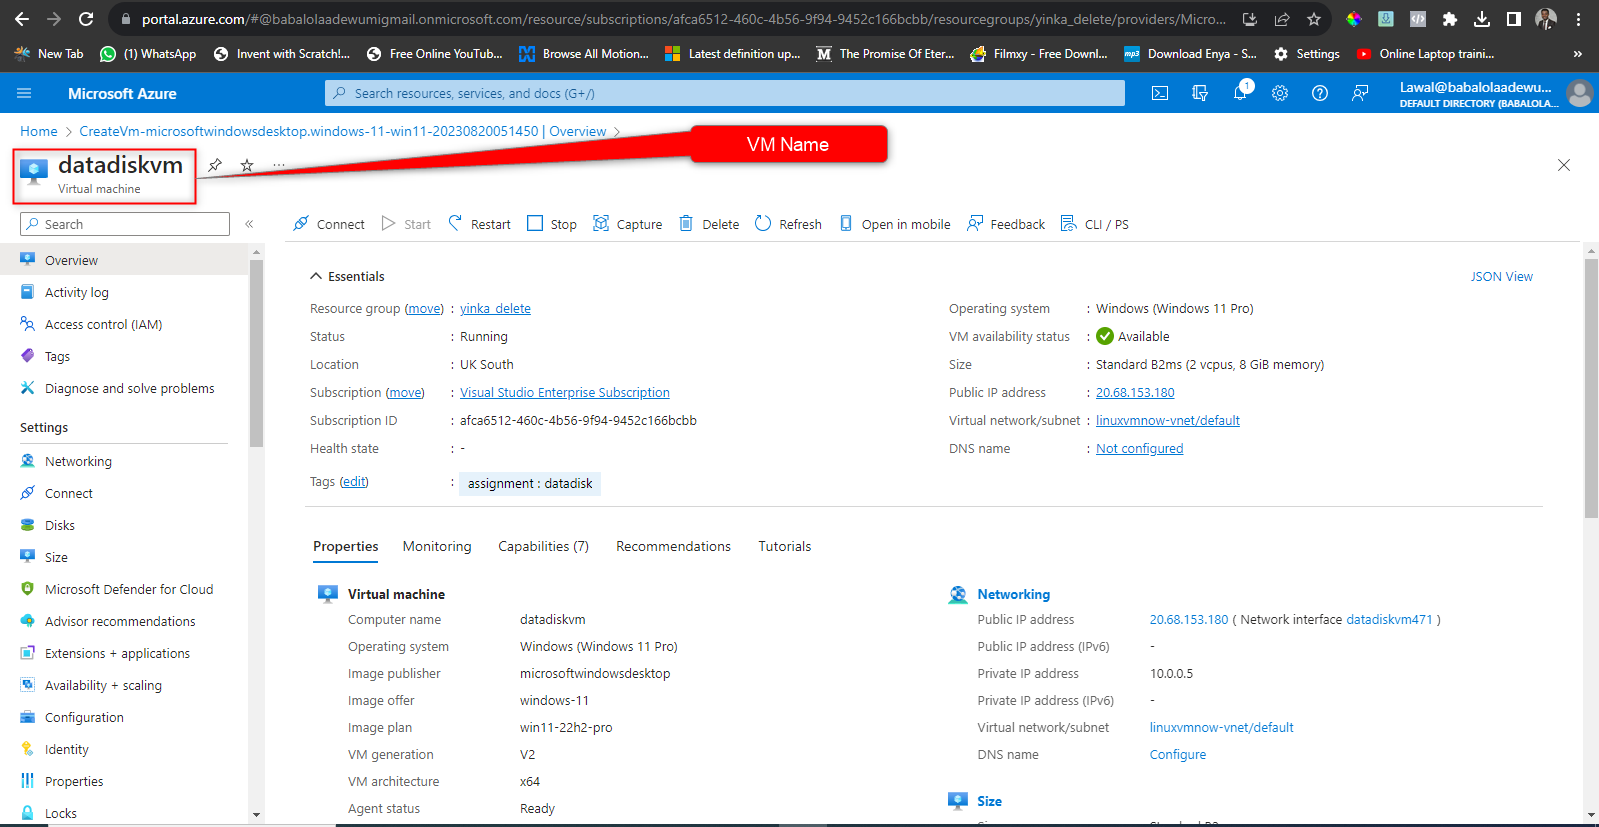
This is what the VM looks like, with just the OS disk and no data disk attached yet.
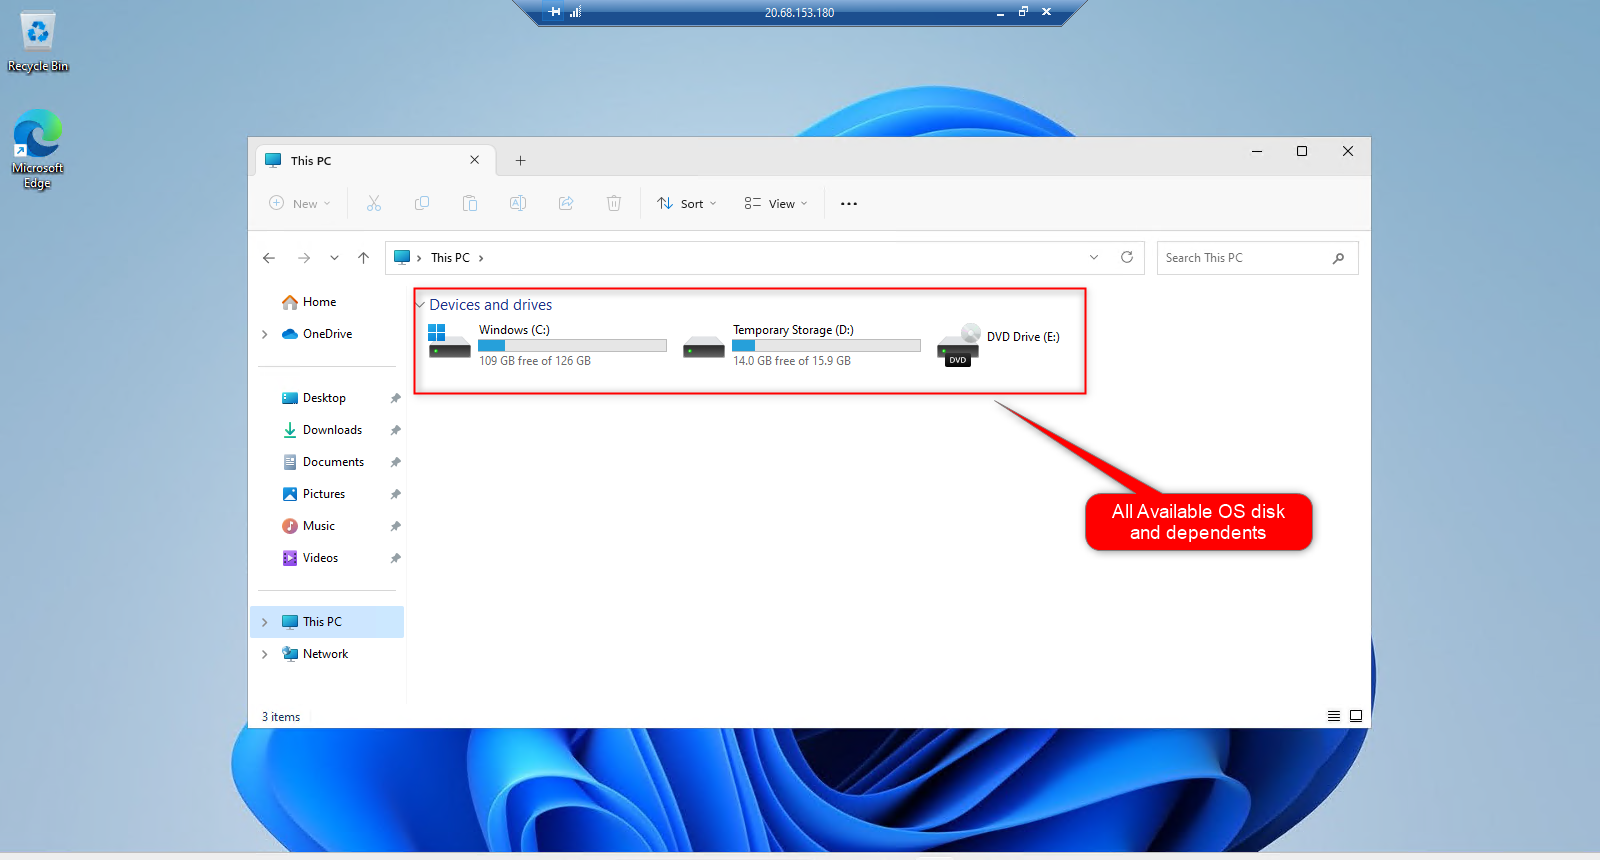
Now we are going to create a Data disk drive "J" and mount it on windows 11.
Step 2
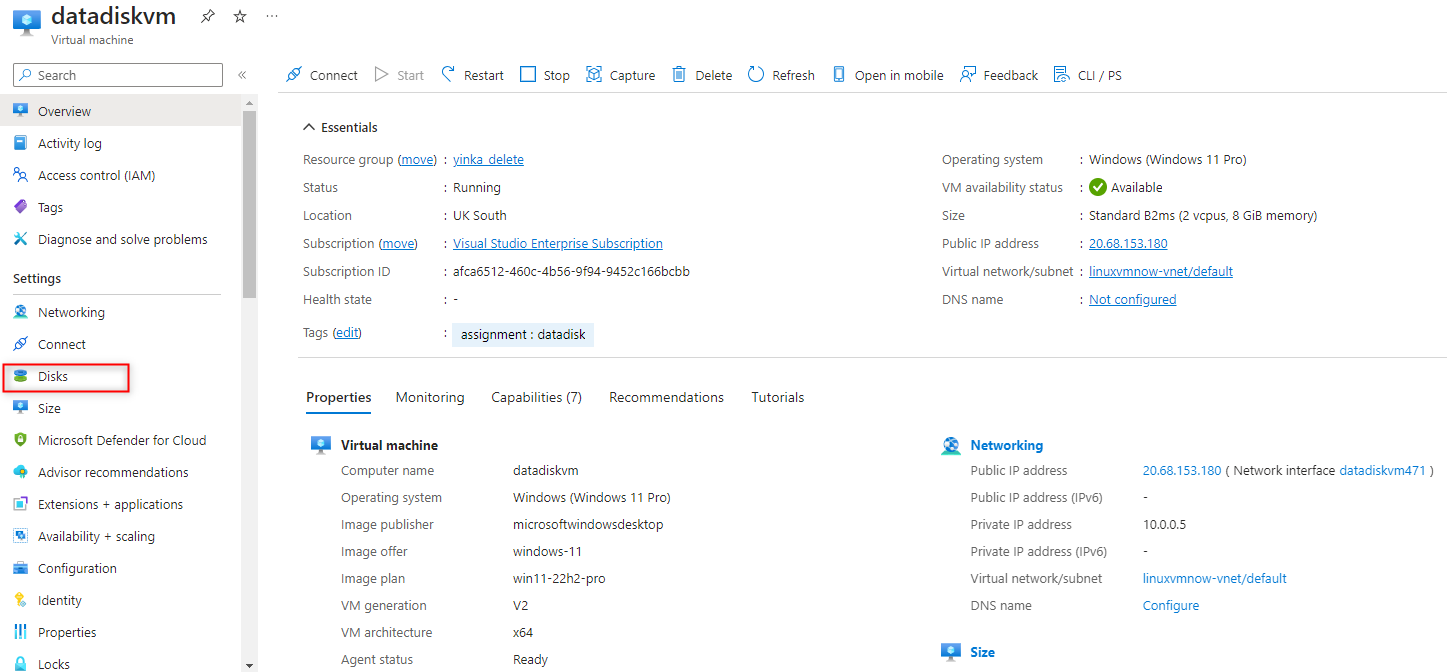
From your Azure portal inside your newly created vm overview page as seen above. On the left navigation bar/blade, click on "Disk" as seen below.
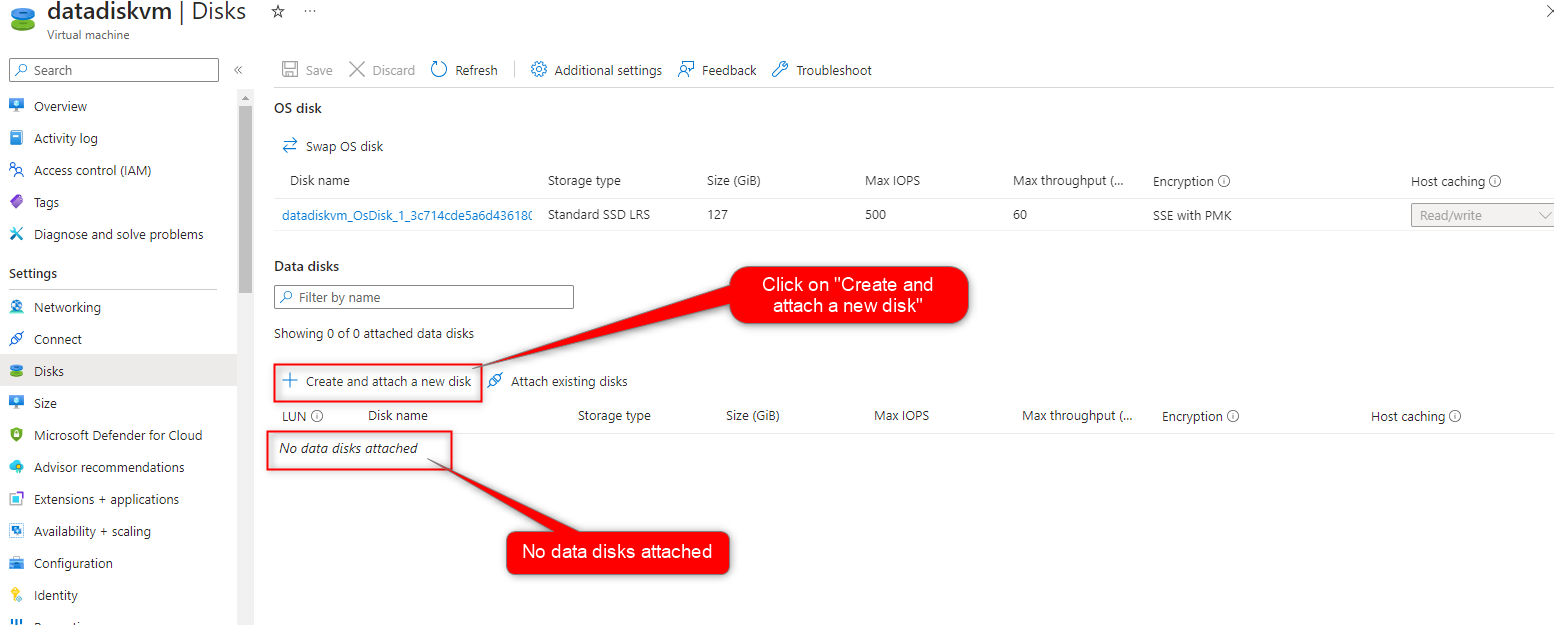
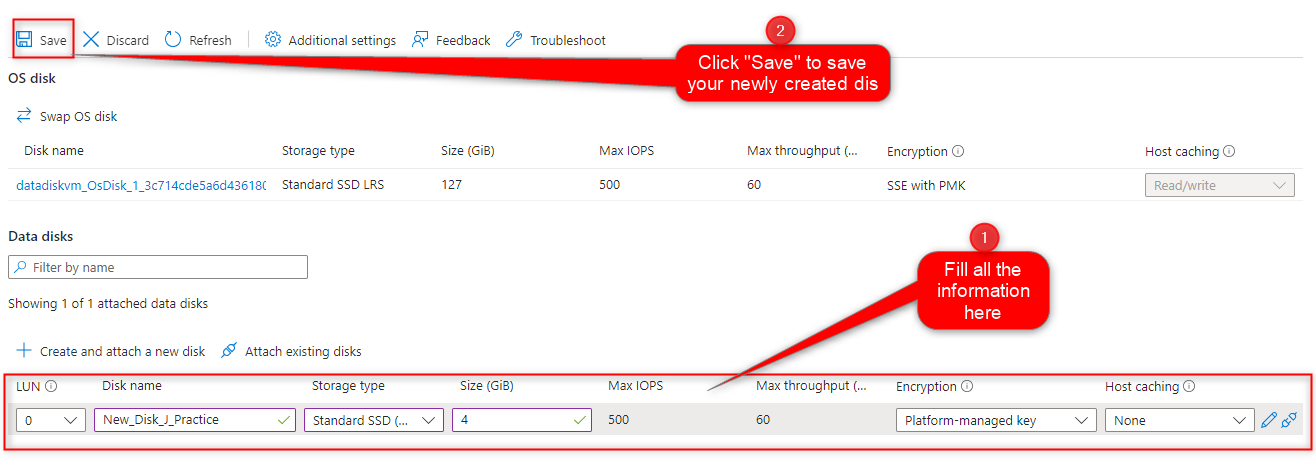
You will notice that there are no attached data disks yet as seen in the image below. Now click on "Create and attach a new disk" to begin.
Fill in the information to create a new disk, Disk name should not contain any special characters apart from the underscore, select "Storage type", enter your disk "Size", and click "Save" when you are done. see details in the image below.
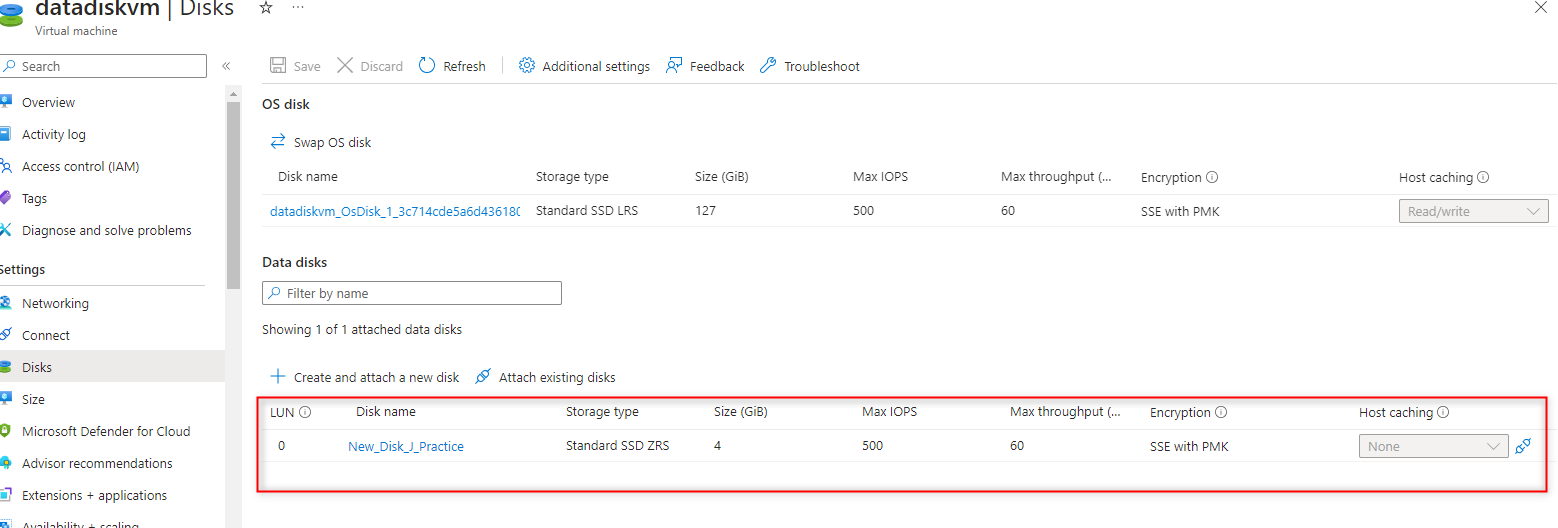
How a successfully attached disk looks like
Step 3
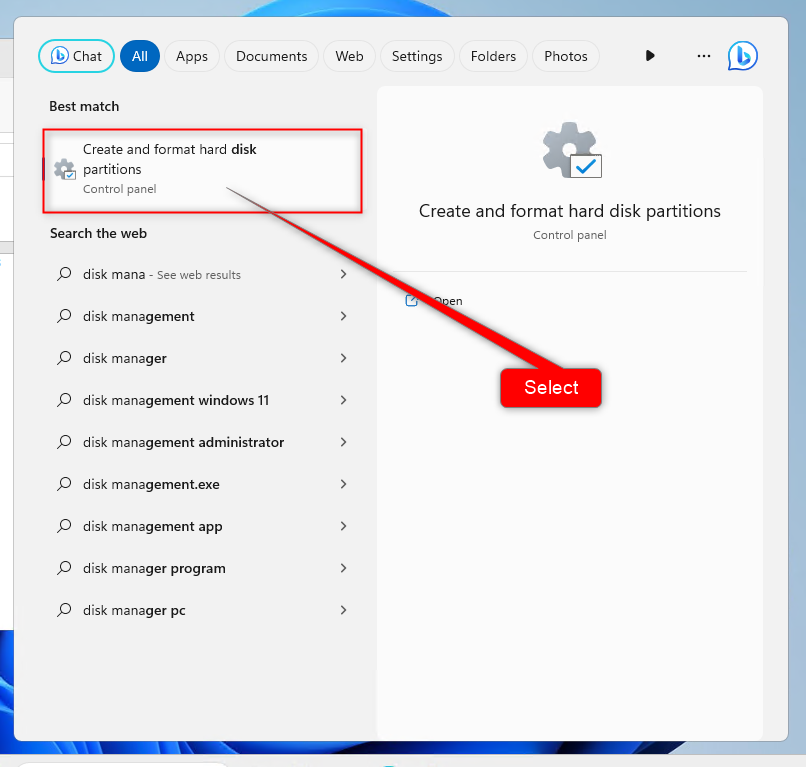
Launch your Windows 11 virtual machine and search for "disk management" from the Windows search bar and select "Create and format disk partitions"
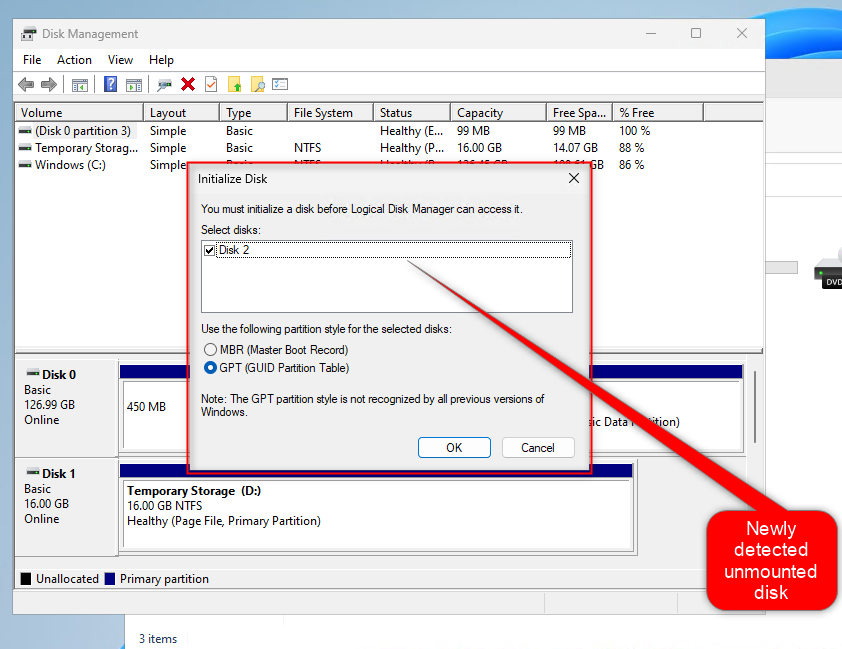
The window will open with a prompt detecting a newly unallocated disk (to allocate a disk means you want to format and prepare it for use), click OK
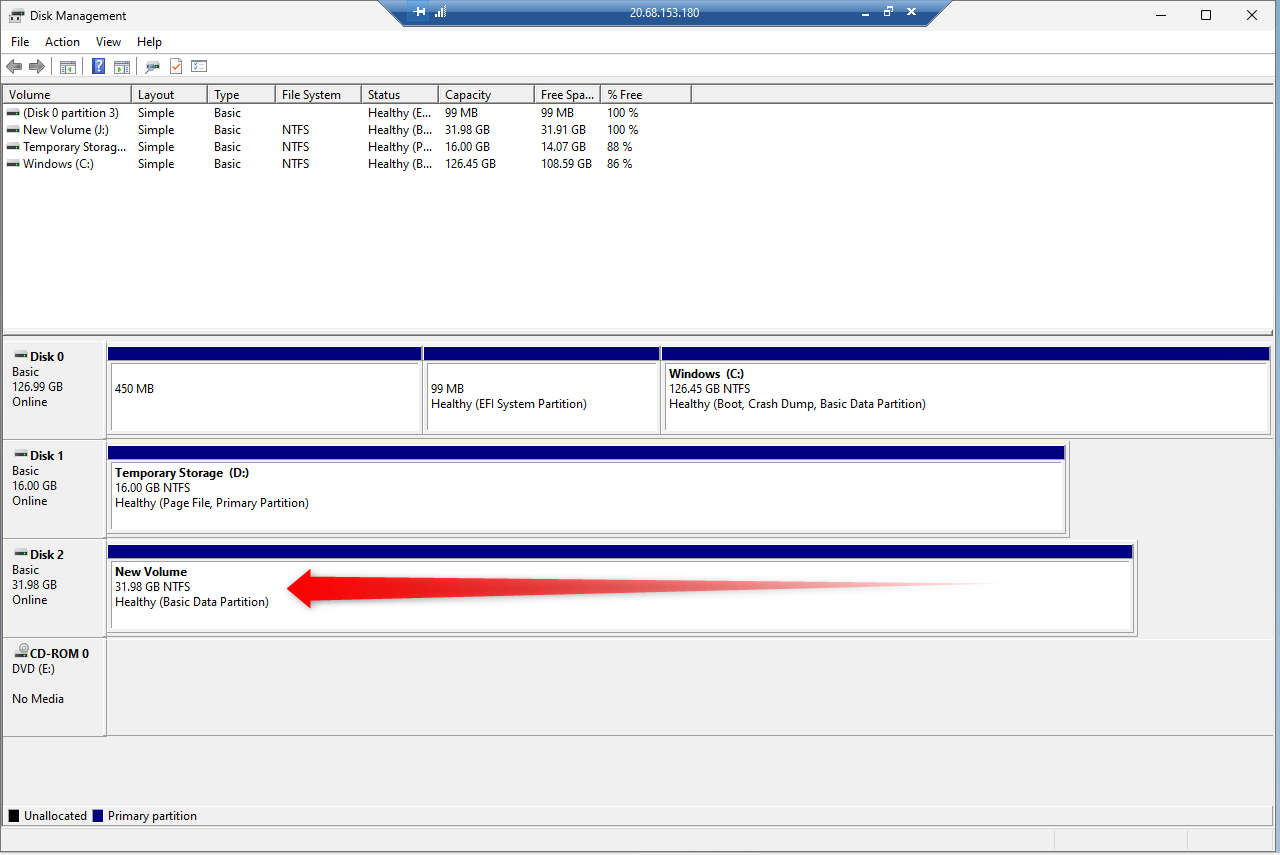
Now we need to configure our disk, first expand your windows to allow you to see all your drive at a glance. The Unallocated drives are usually coloured Black while the allocated drives are coloured Blue.
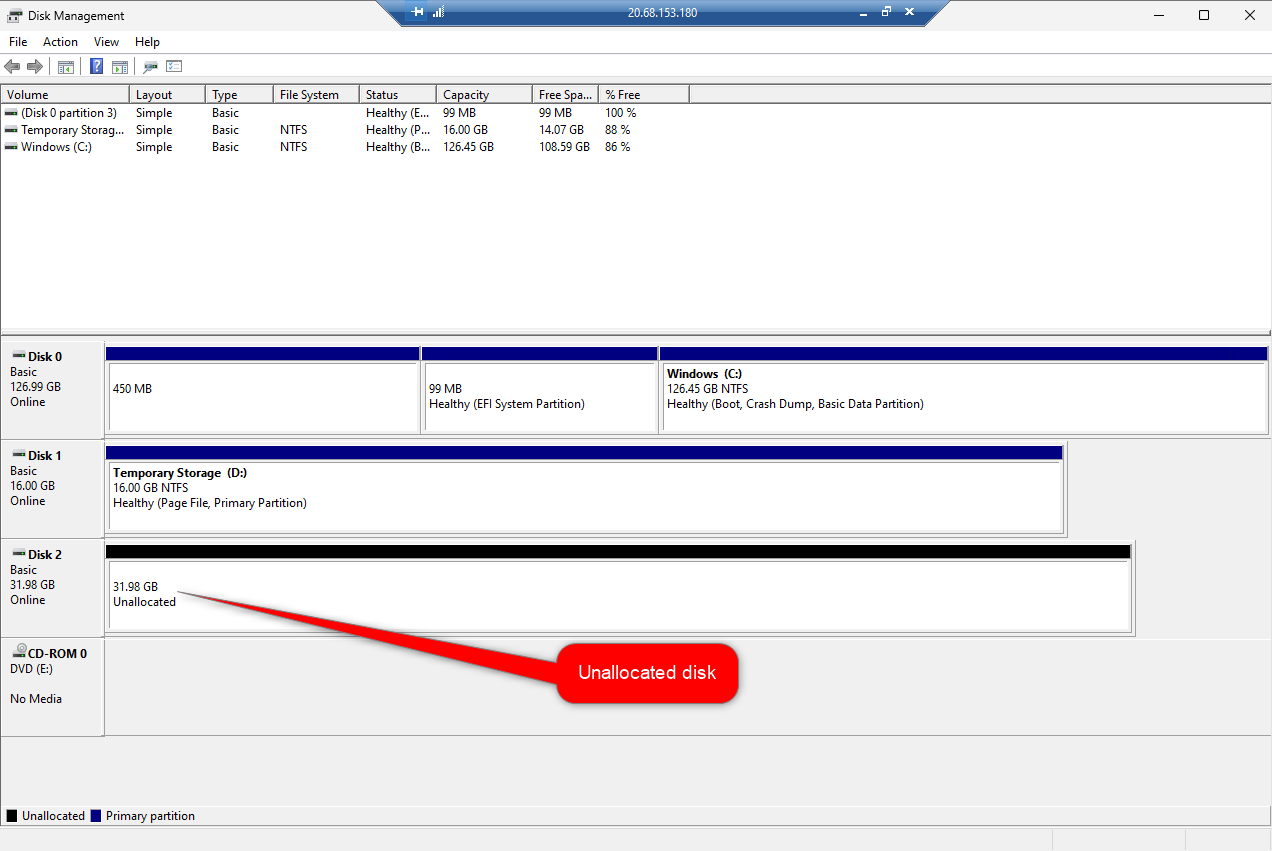
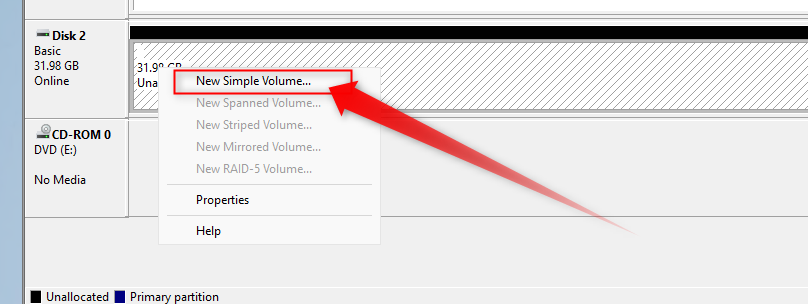
Once you detect an unallocated drive, write-click on it and select "New Simple Volume..." to launch the new system volume wizard.
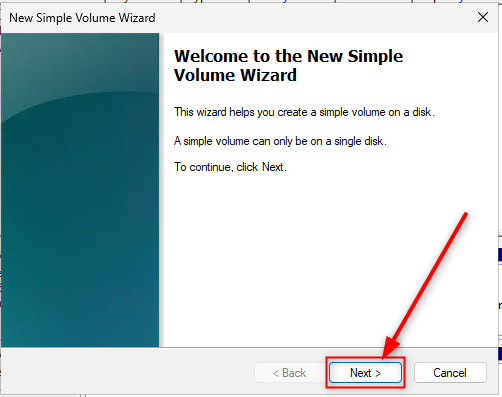
Click Next, next about four (4) times, you can change the default configuration on the wizard as seem fit (I renamed my drive letter to "J" as planned).
Click "Finish" on the figure below to complete the setup wizard
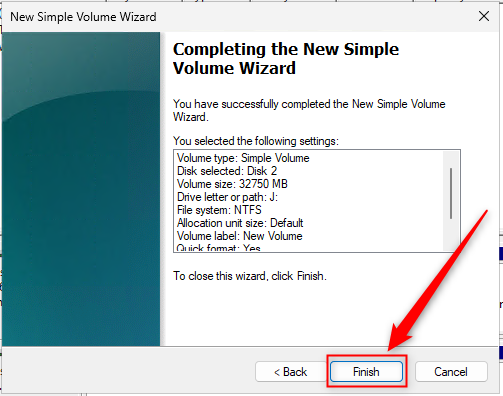
. The 32GB new data disk volume J has been added successfully.
Let's confirm from our PC. Open a folder and click on "This PC" to view.
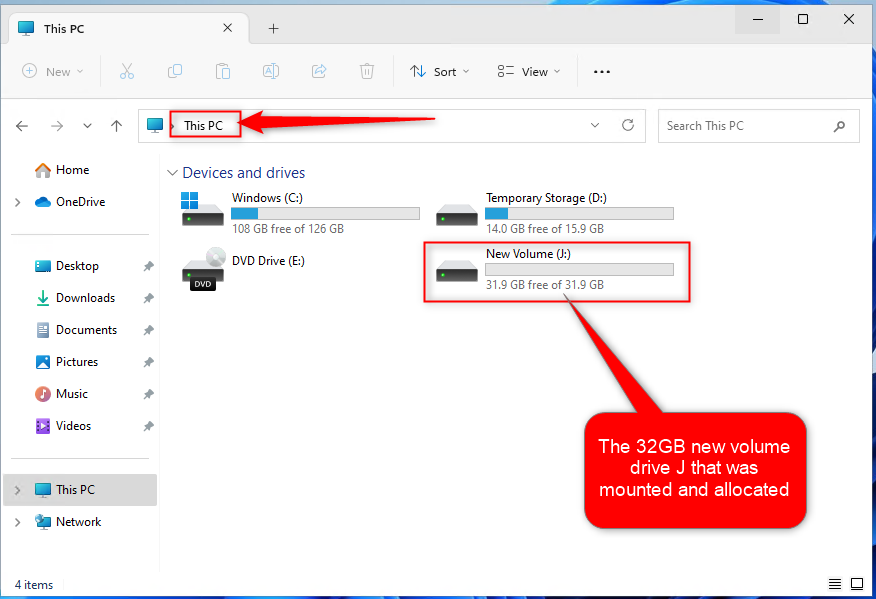
Just open your drive and start storing your data inside.
I hope this has been informative and I would like to thank you for following.
Subscribe to my newsletter
Read articles from Lawal Azeez directly inside your inbox. Subscribe to the newsletter, and don't miss out.
Written by

Lawal Azeez
Lawal Azeez
I am a cloud administrator, simply documenting my cloud computing journey.