Step on How to Add a Data Disk to a Windows Virtual Machine (VM) in Azure Portal
 Jones A Jones
Here's a step-by-step guide on how to add a data disk to an existing Windows Virtual Machine (VM) in Azure:
Log in to the Azure Portal: Log in to your Azure account using the Azure portal: Azure Portal
Locate the Virtual Machine: Navigate to the virtual machine to which you want to add a data disk.
Stop the Virtual Machine (if necessary): Depending on the virtual machine's configuration, you might need to stop it before adding a data disk. If required, deallocate the virtual machine.
Add Data Disk: Once the virtual machine is stopped, follow these steps: In the virtual machine's menu, select "Disks" under the "Settings" section. Click the "+ Add data disk" button.
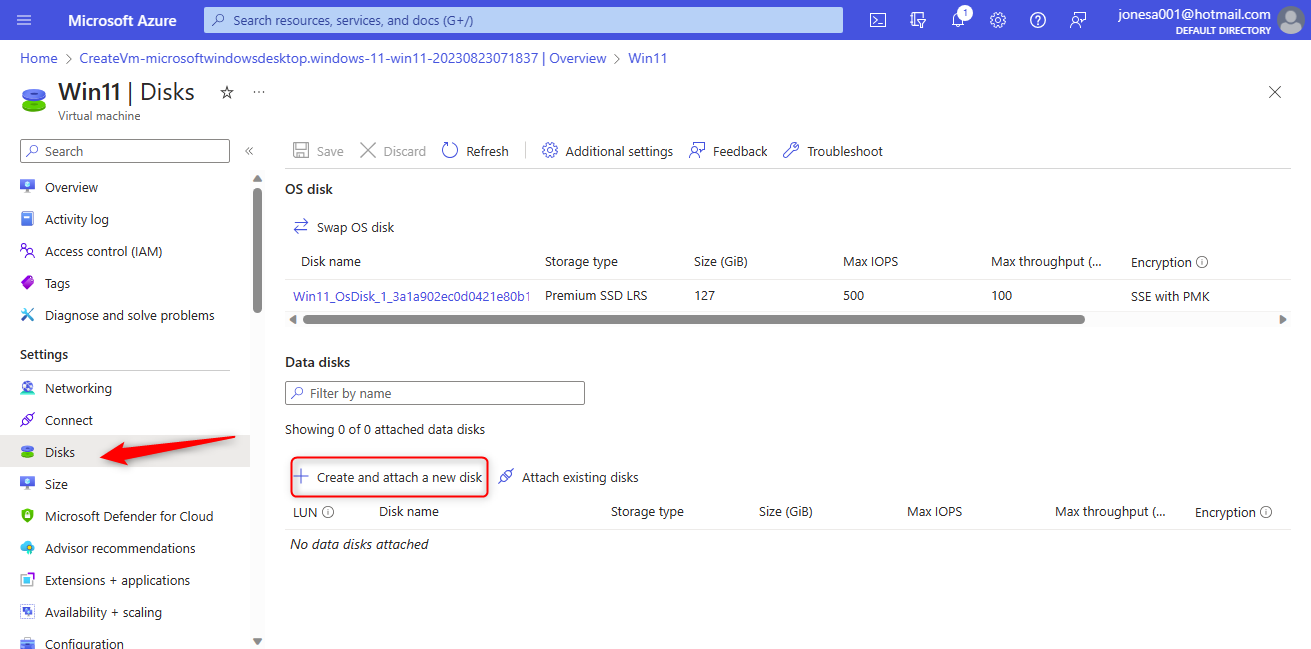
Configure Data Disk: In the "Add data disk" dialog, configure the data disk settings: Choose "Create disk." Specify the name of the new data disk. Choose the disk size in gigabytes (GB). Choose the caching option (None, Read Only, or Read/Write). Choose the storage account to store the data disk. Click "OK" to confirm.
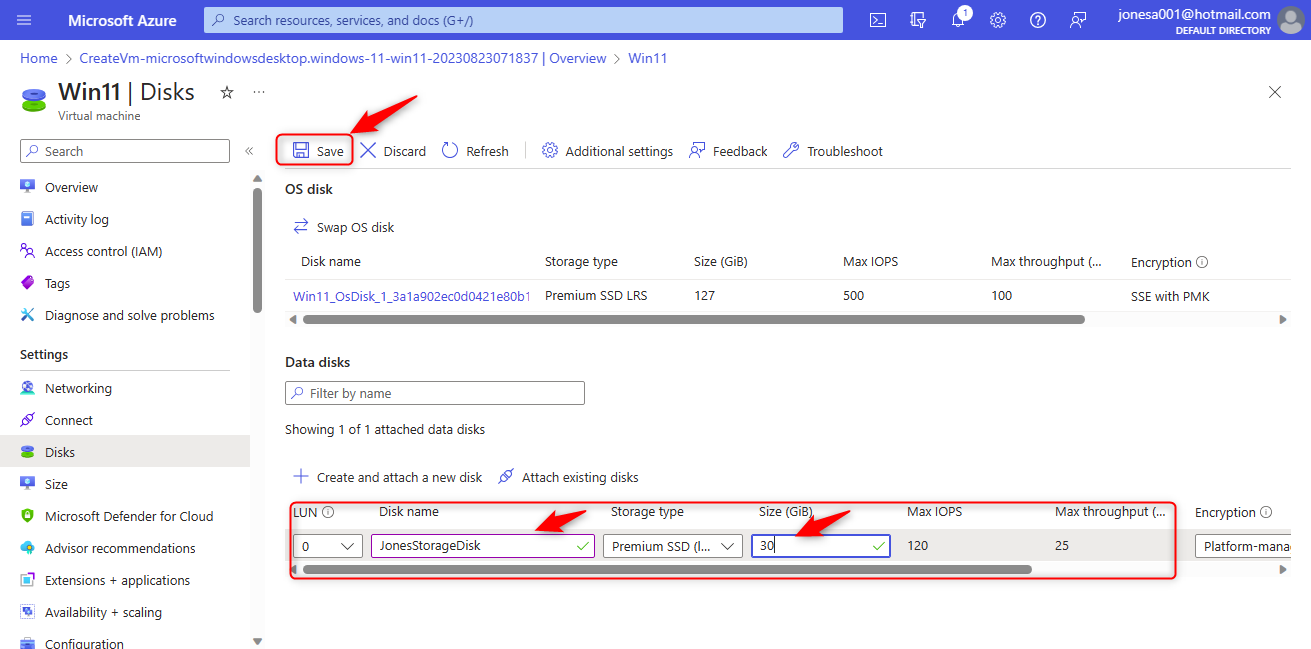
LUN
A LUN stands for Logical Unit Number and it is a number that is used to identify a specific storage device. This means each storage device has a unique number which is used to identify the device on Azure.
The name is the name of your disk and the Type is the type of your disk I have selected the standard just because of the price perspective and this is a demo. if your virtual machine is handling a heavy load and needs faster IO then I recommend you go for the premium disk.
IOPS
It is input-output operations per second or this is the capability of a disk to perform input and output operations per second.
Start the Virtual Machine: After attaching the data disk, you can start the virtual machine: Go back to the virtual machine's overview page. Click the "Start" button.

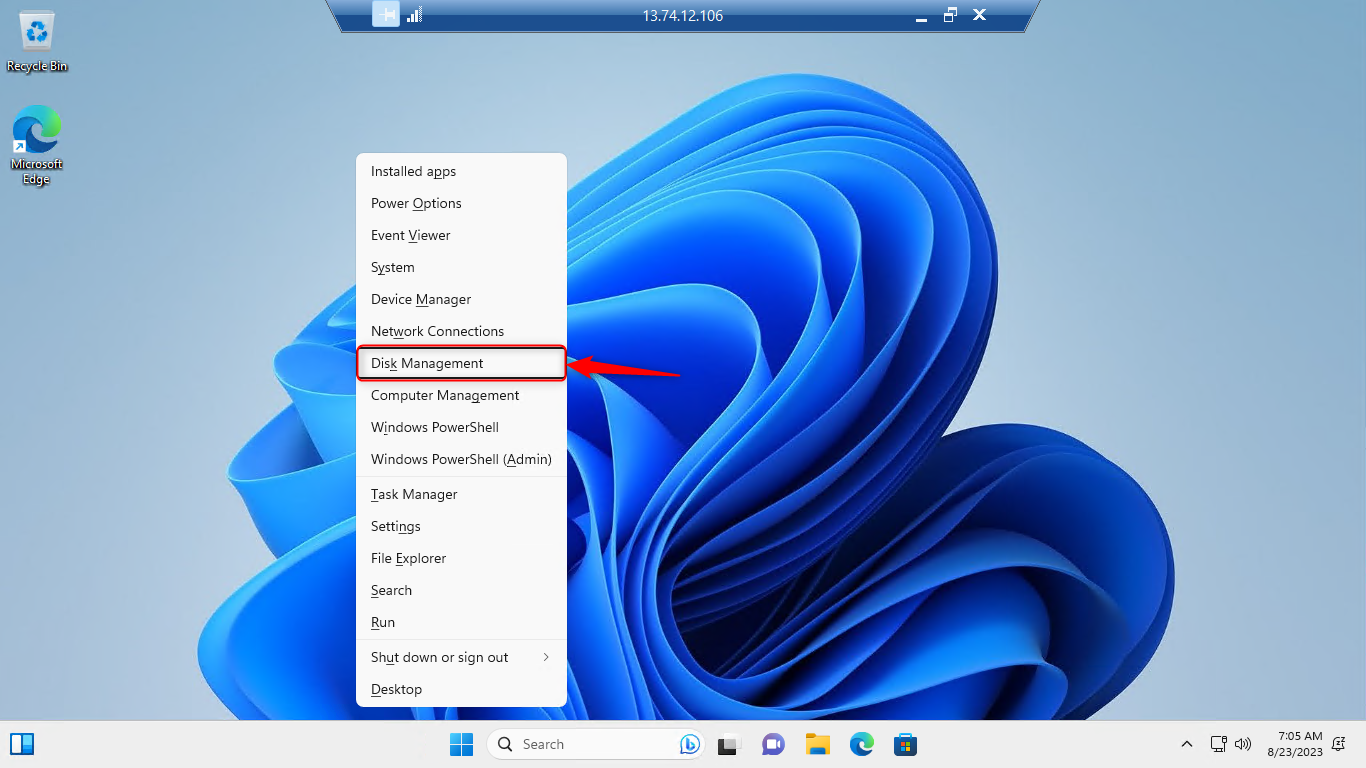
Connect to the virtual machine using Remote Desktop (RDP). Press Win + X (that is pressing the combination of the Windows key on your keyboard and X key together at the same time)and select "Disk Management" to open Disk Management.
Initialize and Format the Data Disk: You need to initialize and format the data disk.
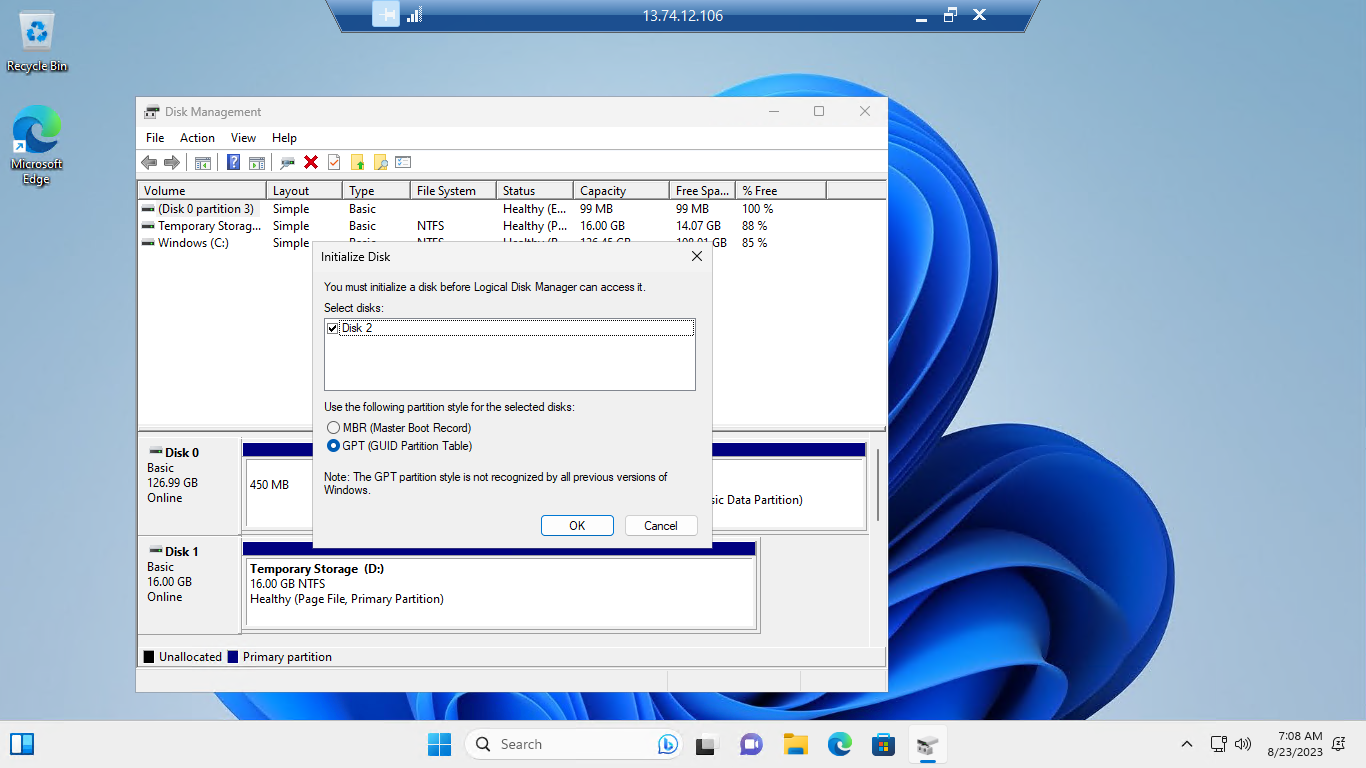
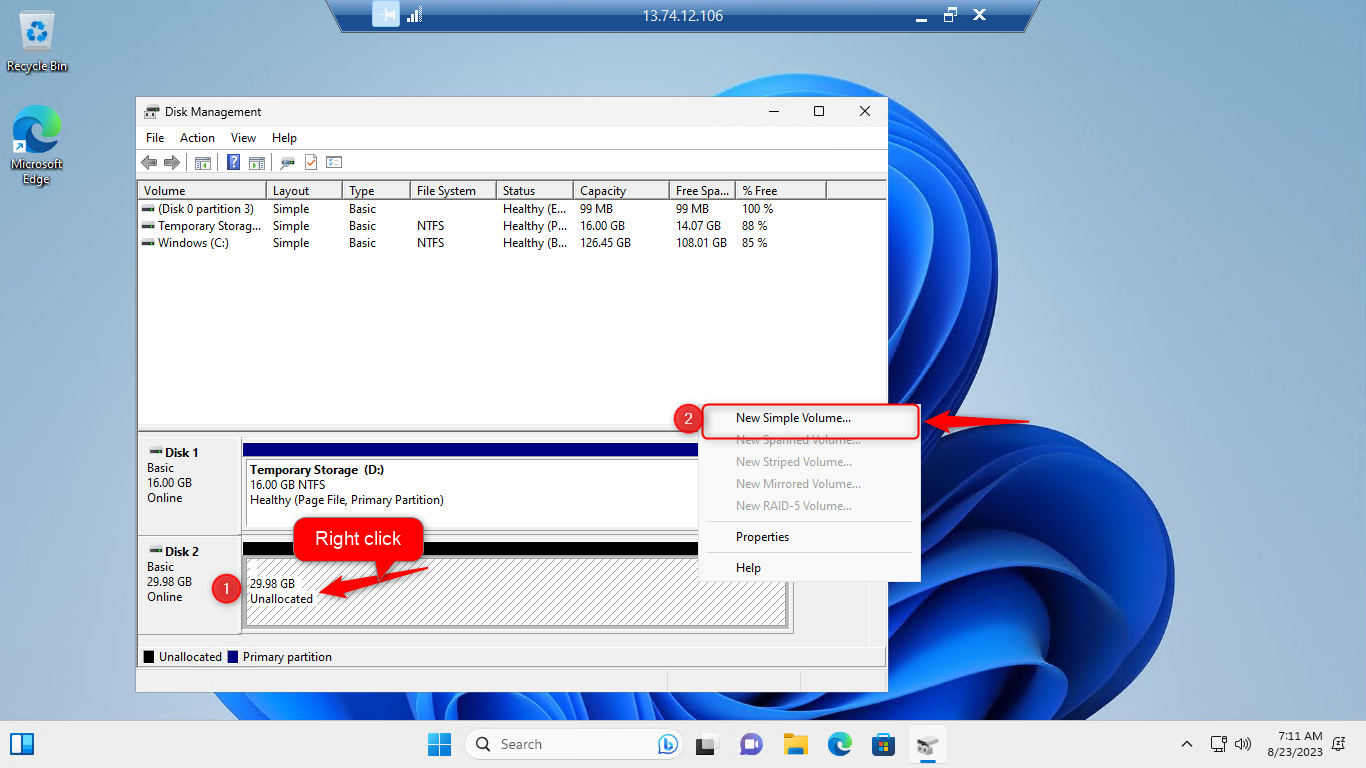
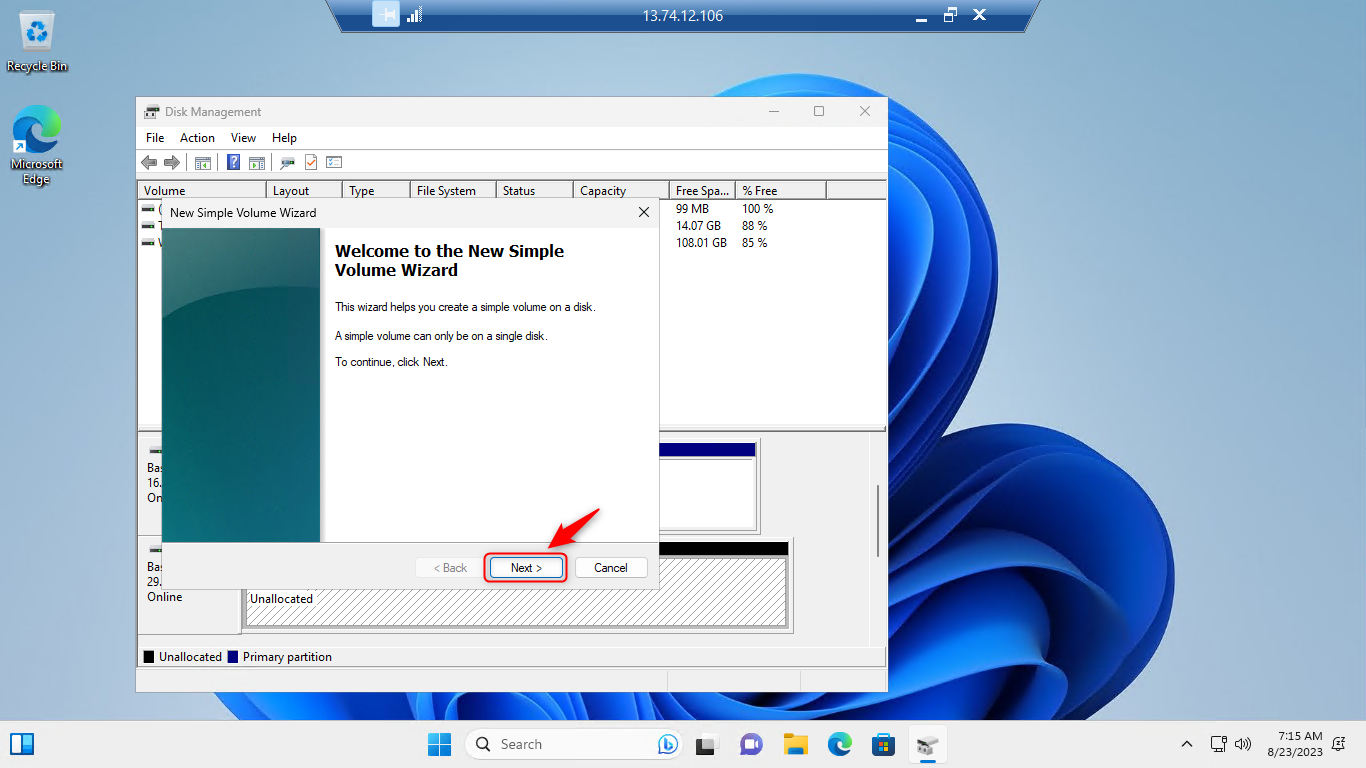
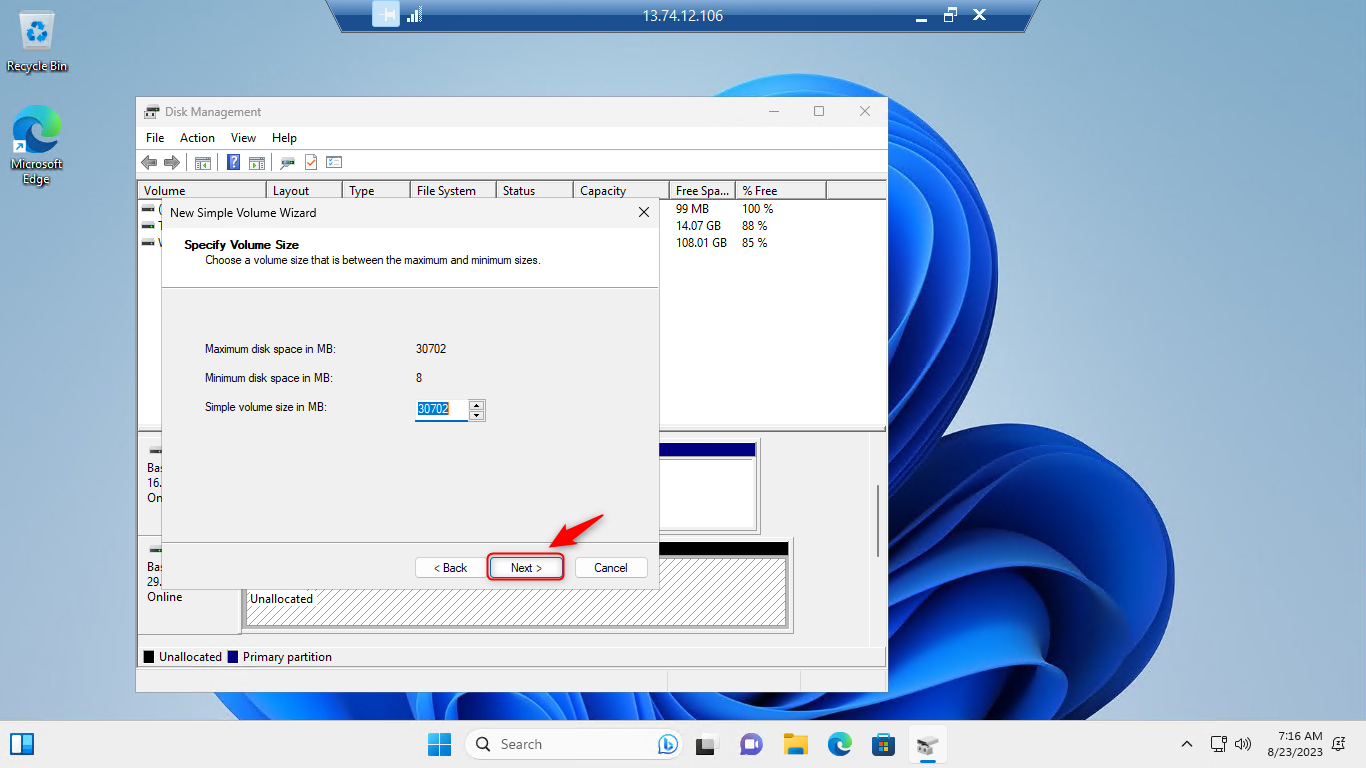
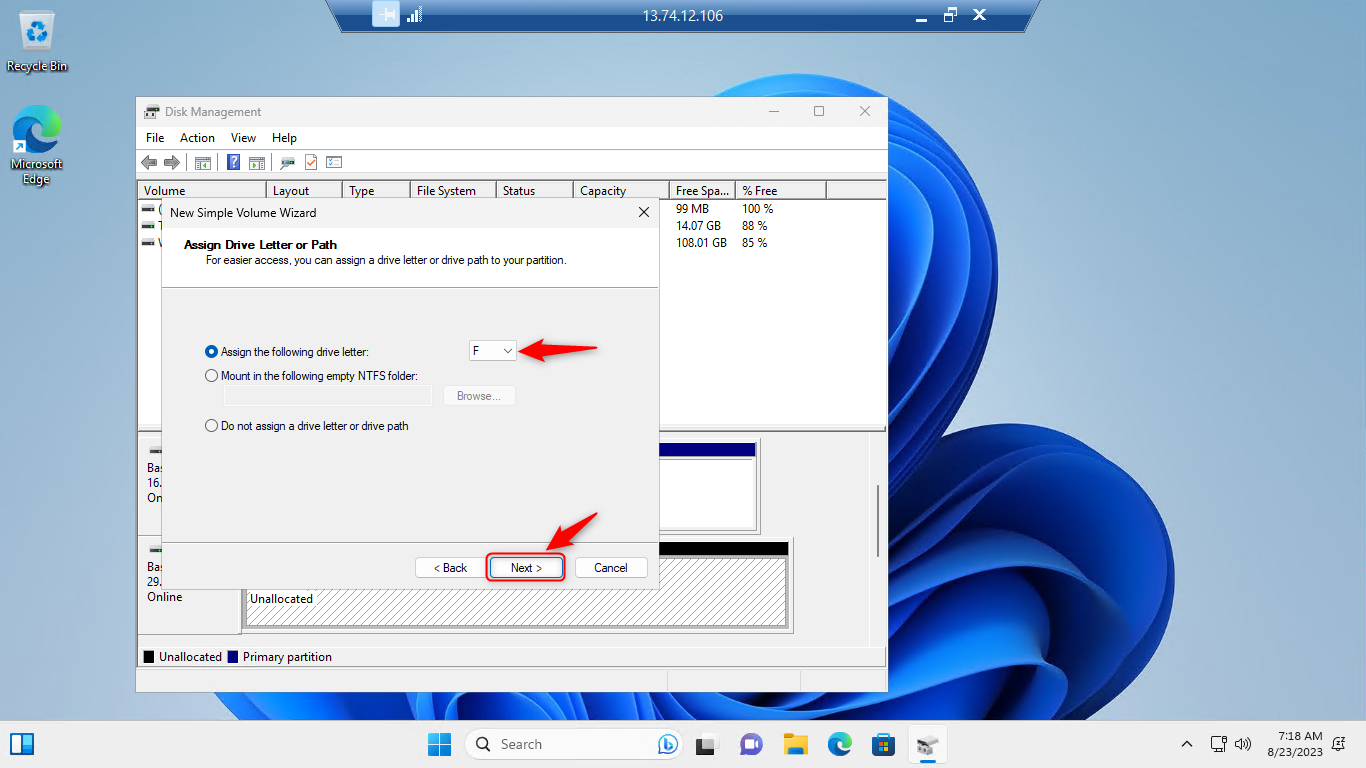
You should see the new disk listed. Right-click on the unallocated space of the disk and choose "New Simple Volume." Follow the wizard to create a new volume, assign a drive letter, and format the disk with a file system (e.g., NTFS).
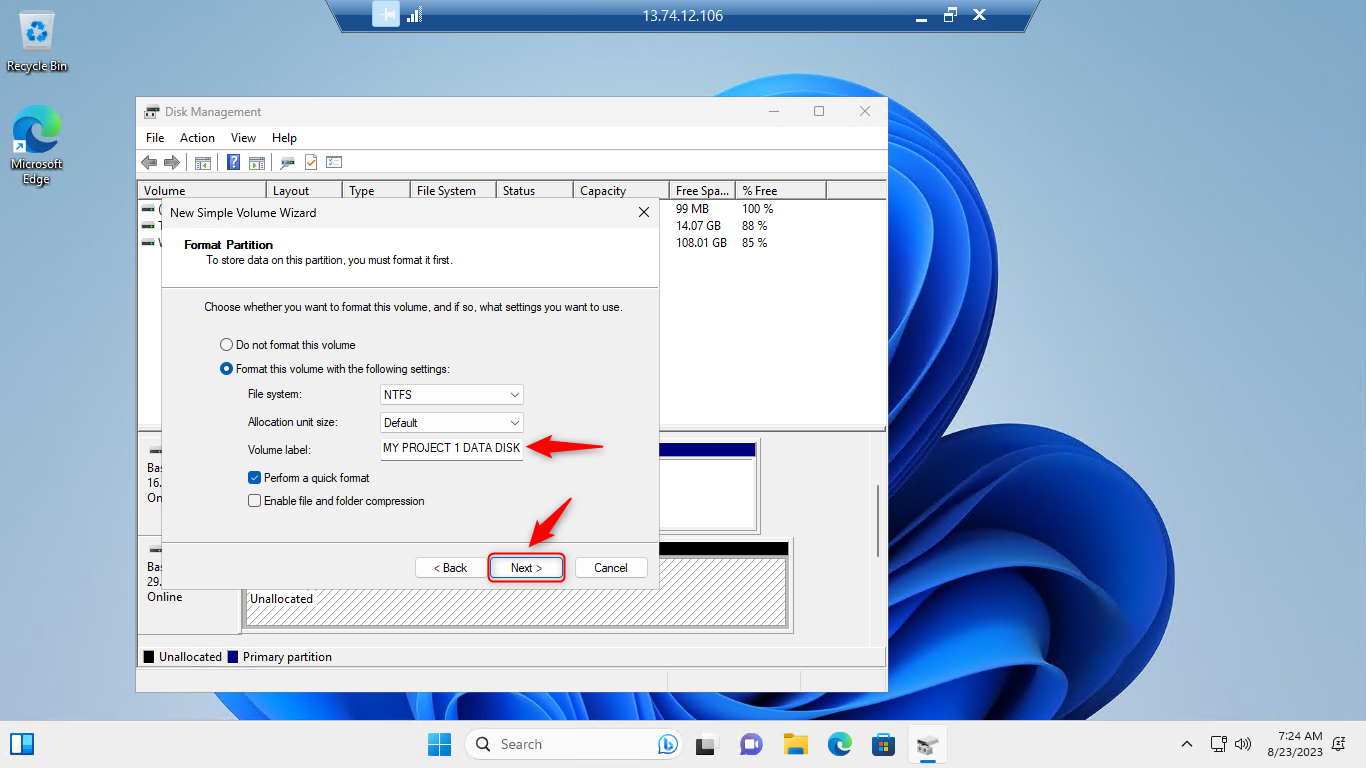
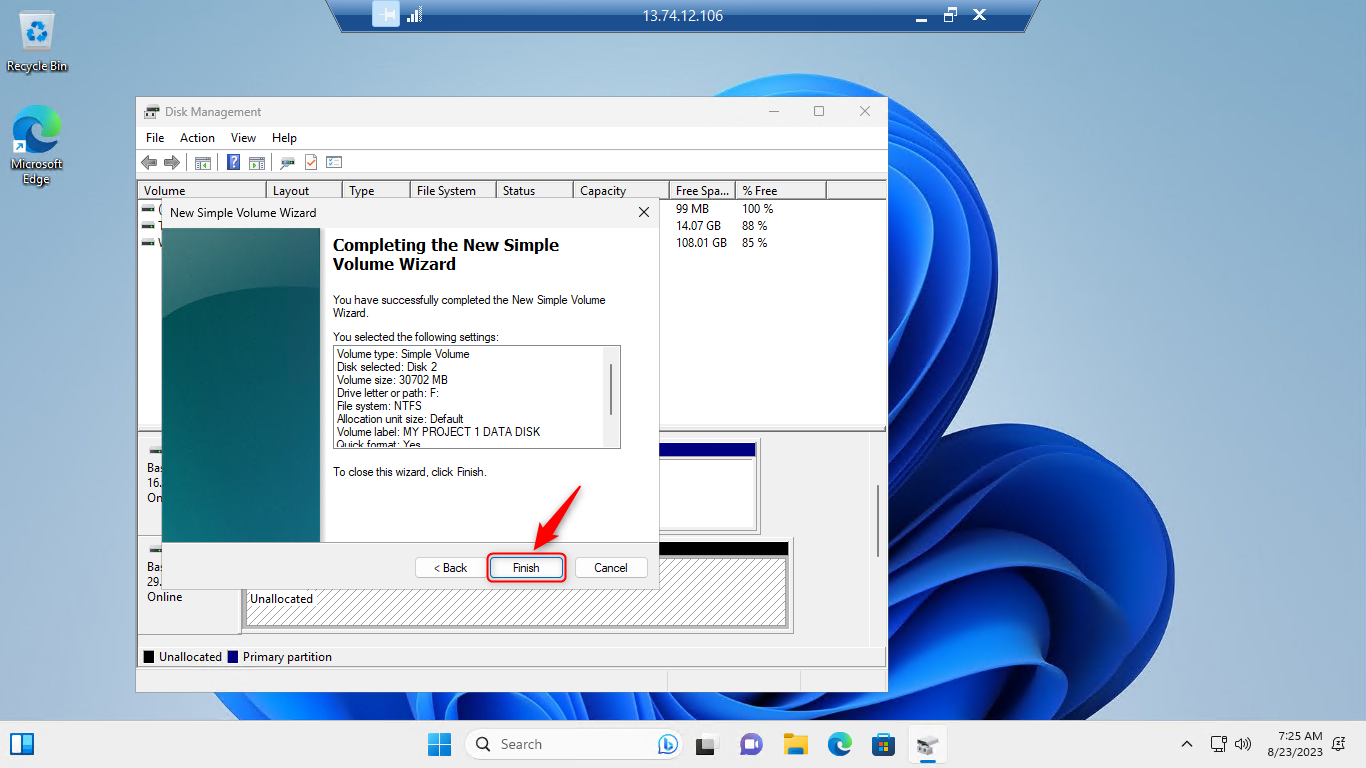
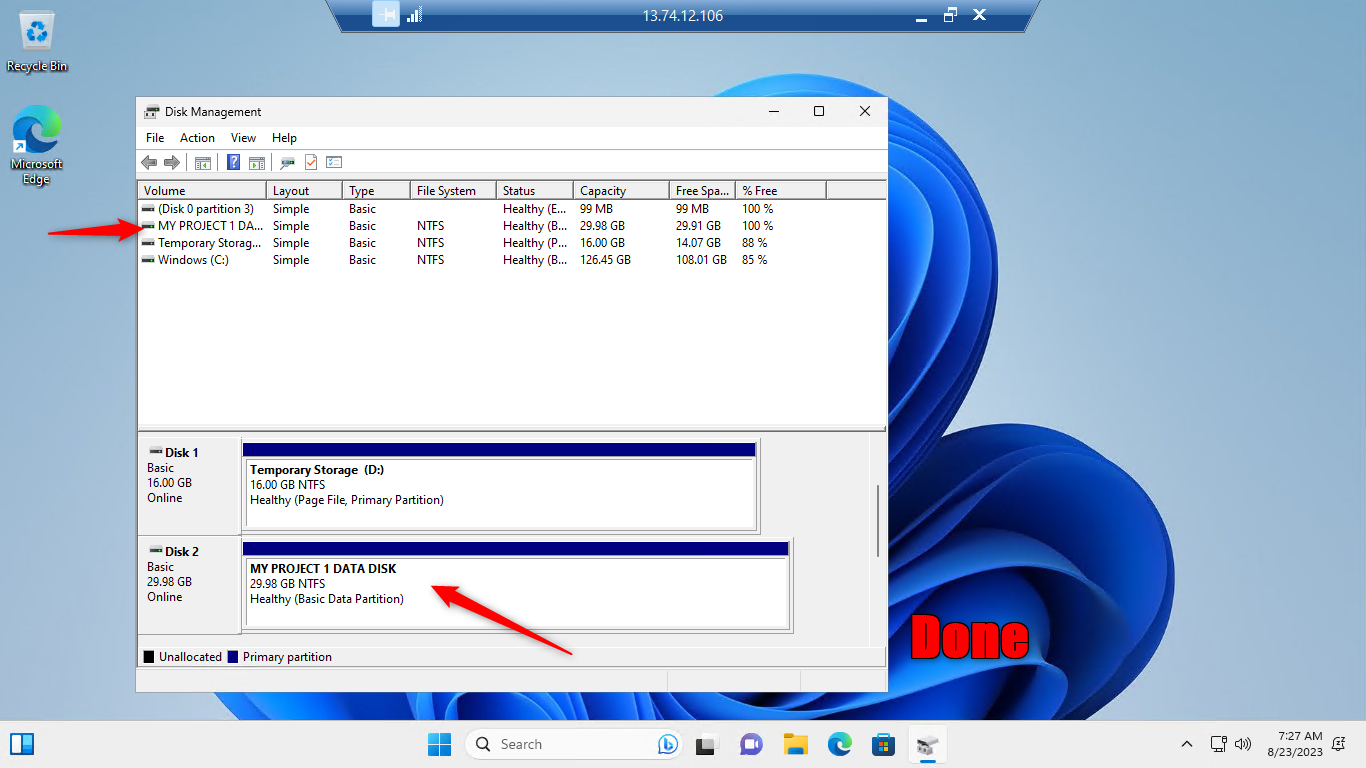
Access the Data Disk: The data disk is now ready to use. You can access it through the assigned drive letter and use it to store files, databases, or other data.
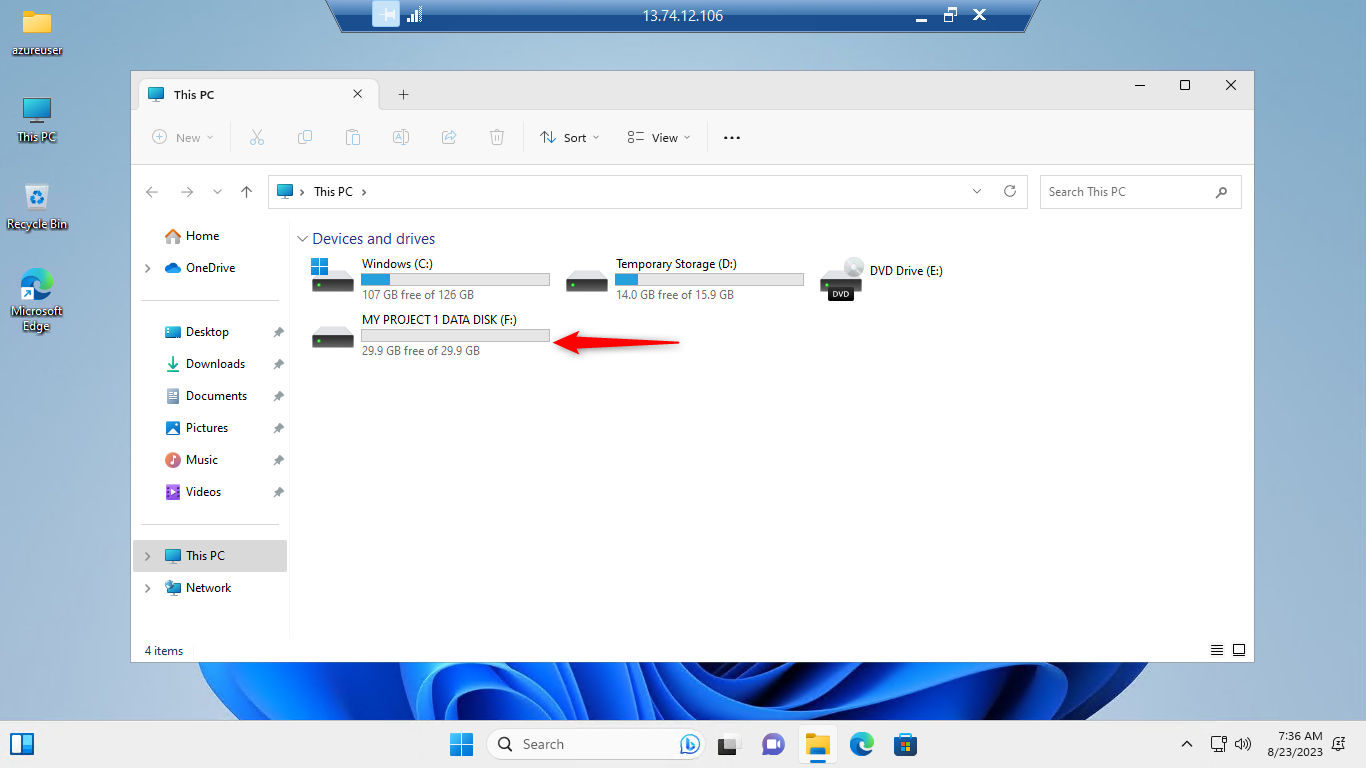
Note:
Always remember to delete unused data disks to avoid overcharging costs.
Subscribe to my newsletter
Read articles from Jones A Jones directly inside your inbox. Subscribe to the newsletter, and don't miss out.
Written by

Jones A Jones
Jones A Jones
I am a Computer support Engineer