Day 31 Task: Launching your First Kubernetes Cluster with Nginx running
 CHANDRESH PATLE
Awesome! We learned the architecture of one of the top most important tools "Kubernetes" in our previous task.
🔶 What is minikube?
Minikube is a tool that quickly sets up a local Kubernetes cluster on macOS, Linux, and Windows. It can deploy as a VM, a container, or on bare metal.
Minikube is a pared-down version of Kubernetes that gives you all the benefits of Kubernetes with a lot less effort.
This makes it an interesting option for users who are new to containers, and also for projects in the world of edge computing and the Internet of Things.
🔶 Features of minikube
Supports the latest Kubernetes release (+6 previous minor versions)
Cross-platform (Linux, macOS, Windows)
Deploy as a VM, a container, or on bare-metal
Multiple container runtimes (CRI-O, container, docker)
Direct API endpoint for blazing-fast image load and build
Advanced features such as LoadBalancer, filesystem mounts, FeatureGates, and network policy
Addons for easily installed Kubernetes applications
Supports common CI environments
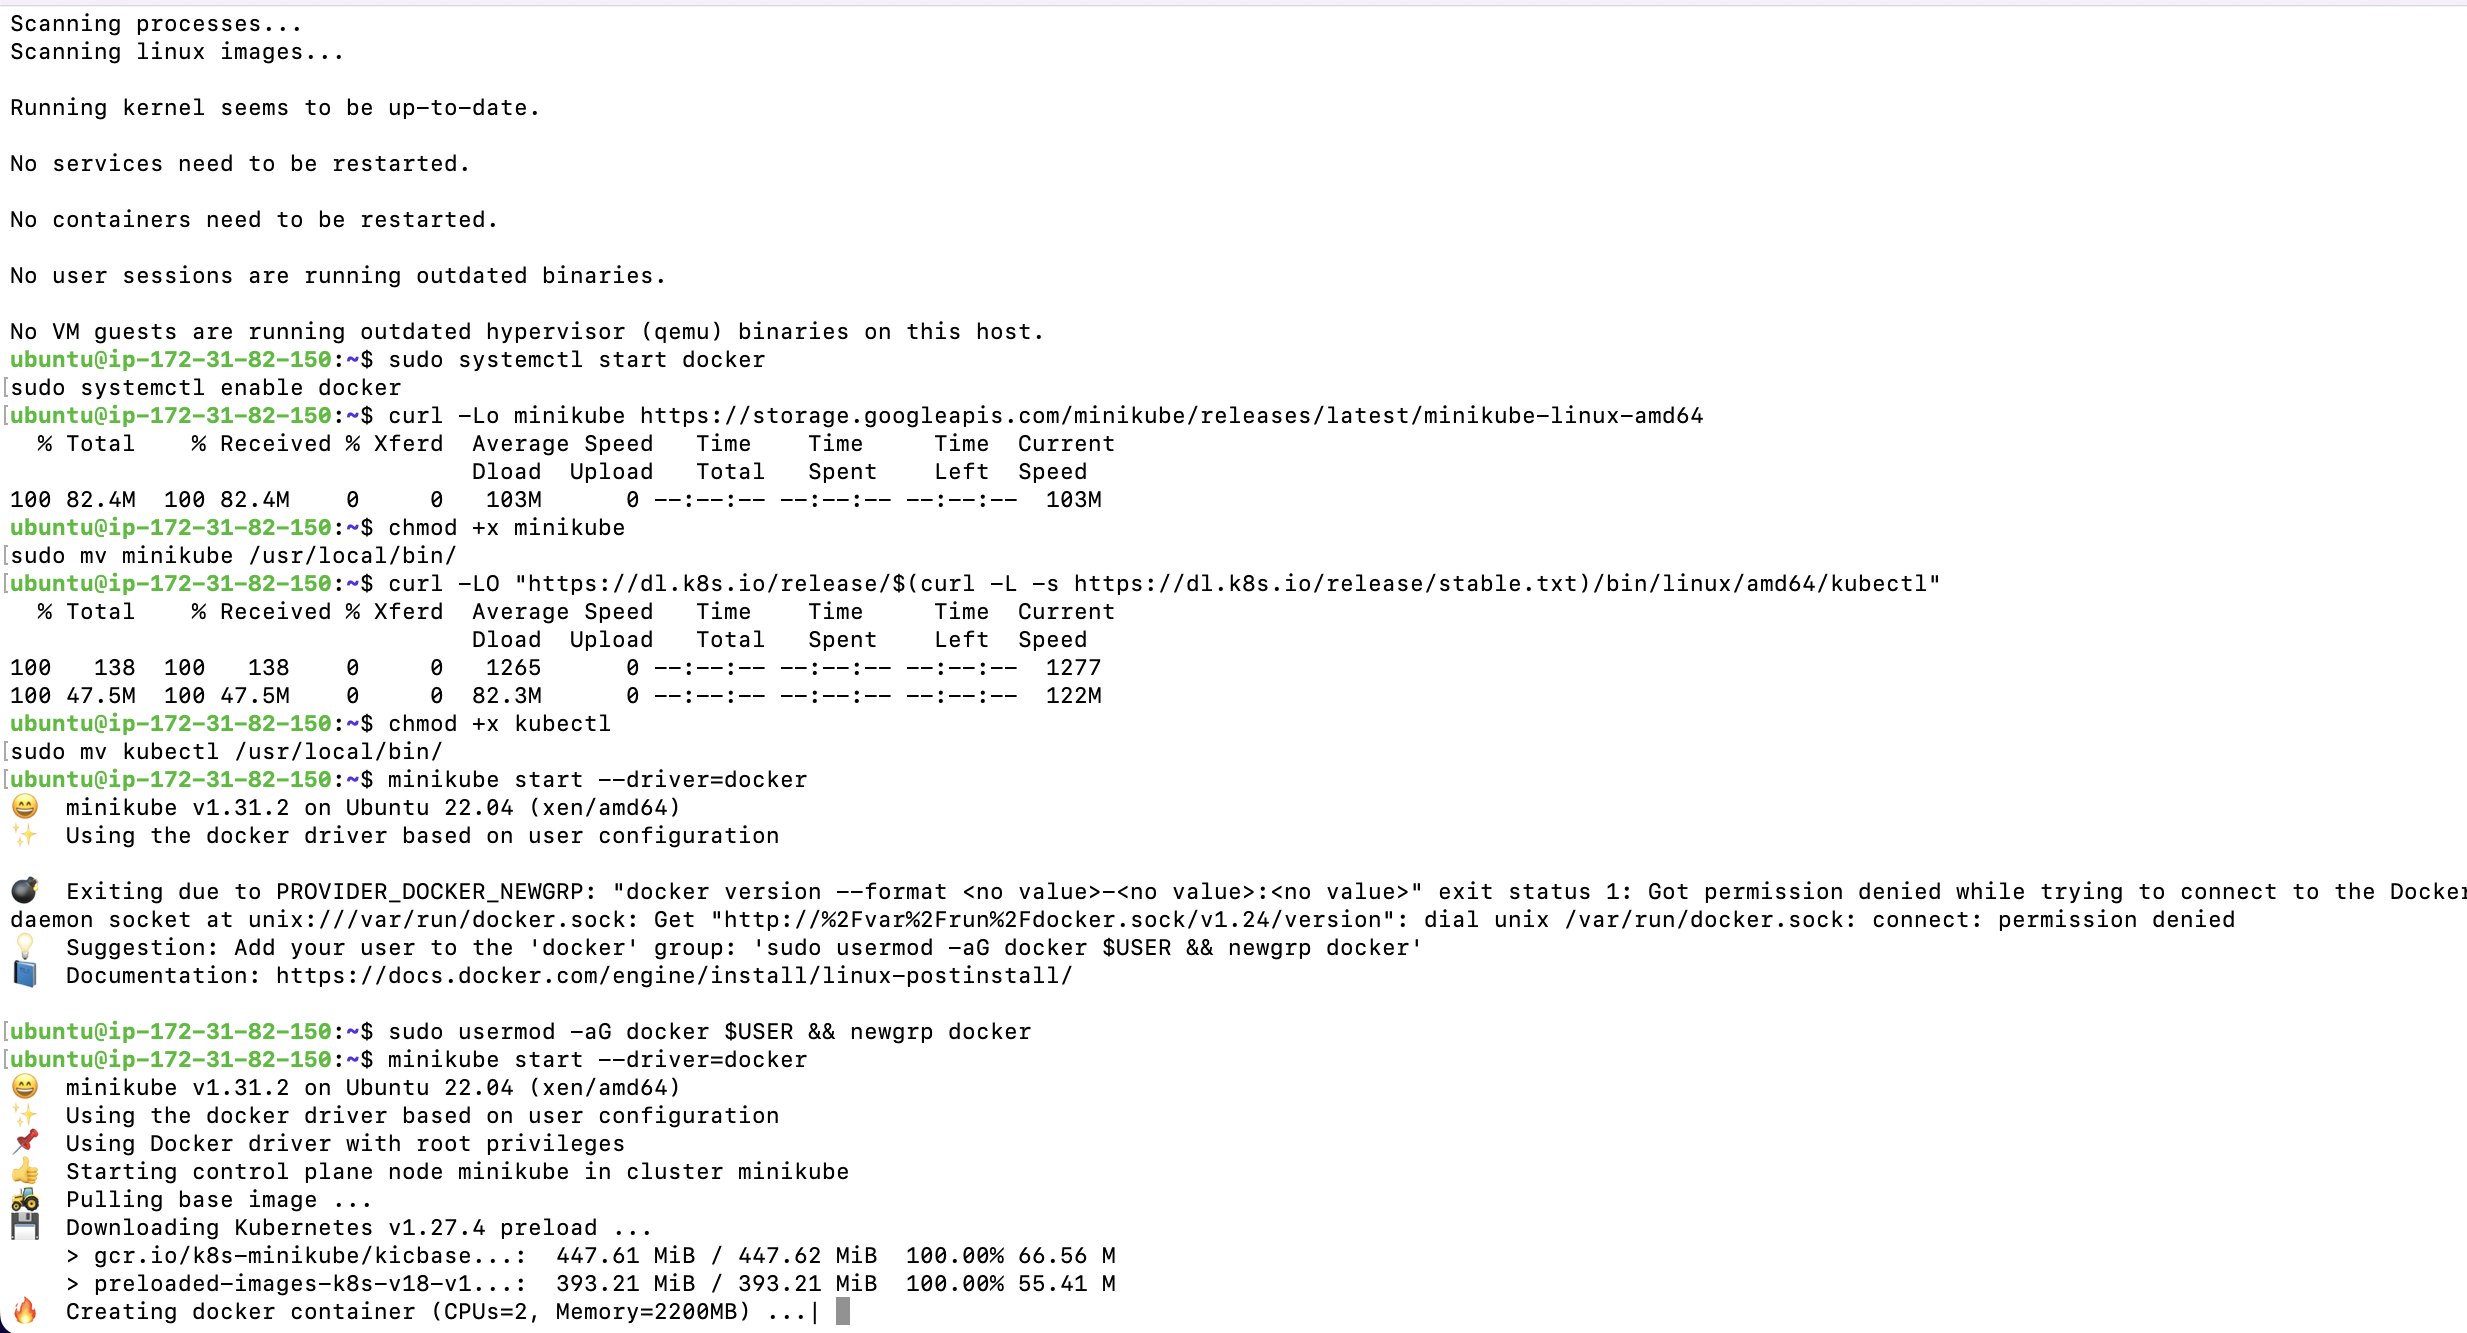
🔶 Task-01: Install Minikube on your local
For installation, you can Visit this page.
If you want to try an alternative way, you can check this.
Minikube Installation Guide for Ubuntu.
Use t2.medium to launch minikube-server and follow the above steps from minikude installation guide for Ubuntu.

🔶 Concept of the pod
Pods are the smallest deployable units of computing that you can create and manage in Kubernetes.
A Pod (as in a pod of whales or pea pod) is a group of one or more containers, with shared storage and network resources, and a specification for how to run the containers. A Pod's contents are always co-located and co-scheduled, and run in a shared context. A Pod models an application-specific "logical host": it contains one or more application containers that are relatively tightly coupled.
You can read more about Pod from here.
🔶 Task-02: Create your first pod on Kubernetes through Minikube.
We are suggesting you make an Nginx pod, but you can always show your creativity and do it on your own.
To create your first pod on Kubernetes through Minikube, follow these steps:
Install Minikube: If you haven't already, install Minikube, which is a tool that lets you run a single-node Kubernetes cluster on your machine.
Start Minikube: Open your terminal and start Minikube by running the following command:
minikube start
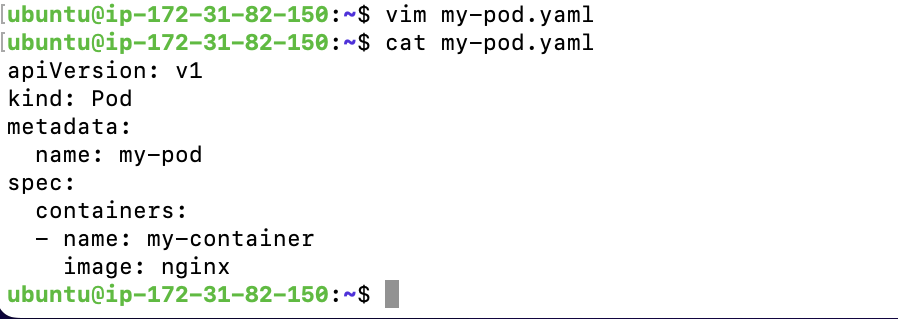
Create a Pod Configuration File: Create a YAML configuration file that defines your pod. For example, create a file named
my-pod.yamlwith the following content:apiVersion: v1 kind: Pod metadata: name: my-pod spec: containers: - name: my-container image: nginx
In this example, the configuration creates a pod named
my-podwith a single container running thenginximage.Apply the Configuration: Apply the pod configuration using the following command:
kubectl apply -f my-pod.yaml
Check the Pod: Verify that the pod is running using the following command:
kubectl get pods
You should see the
my-podpod listed with a status of "Running."Access the Pod: To fetch a list of all pods, We can also use different flags with the
kubectl get pods -o widecommand to filter the results or get more detailed information about the pods and the nodes on which they are running. This command will display a table with an additional column showing any labels associated with each pod. Run the following command:kubectl get all -o wide
That's it! We've created your first pod on Kubernetes through Minikube. This example demonstrates the basic steps of defining a pod configuration, applying it, and accessing the pod.
Having an issue? Don't worry, about adding a sample yaml file for pod creation, you can always refer to that.
Happy Learning :)
Stay in the loop with my latest insights and articles on cloud ☁️ and DevOps ♾️ by following me on Hashnode, LinkedIn (https://www.linkedin.com/in/chandreshpatle28/), and GitHub (https://github.com/Chandreshpatle28).
Thank you for reading! Your support means the world to me. Let's keep learning, growing, and making a positive impact in the tech world together.
#Git #Linux Devops #Devopscommunity #90daysofdevopschallenge #python #docker #Jenkins #Kubernetes

Subscribe to my newsletter
Read articles from CHANDRESH PATLE directly inside your inbox. Subscribe to the newsletter, and don't miss out.
Written by