Getting Started with React: Creating Your Own Blog App - Part 7
 Pradhumansinh Padhiyar
Introduction
What an incredible journey we've had together in this React series! We have explored so many groundbreaking concepts, and I truly hope you've found it super valuable and enlightening. I've had an absolute blast writing this blog, and I can't wait to create an even more thrilling series like this in the future!
I just can't wait to dive into the next series, which could be on Node.js, GraphQL, or even system design! I'm always so pumped to learn by building projects because project-based learning is hands down the most fantastic way to master any new language or framework. Not only do you grasp the concepts like a pro, but by applying them in real-world projects, you truly comprehend how to tackle real-life problems using those very concepts! Let's get ready to rock and roll!
In this article of our React blog series, we will demonstrate how to effectively deploy our code using the npm run build command and Vercel. This approach allows us to easily share our application with others by simply providing a link, and making it accessible on the internet.
Uploading your project to a local server or GitHub alone may not be sufficient when you need to showcase your work to interviewers, friends, or colleagues. By making your project available online, you can effectively demonstrate your skills and knowledge in real-world applications.
If you are new to React, I recommend reading my previous blogposts, in which I explain and demonstrate an entire blogging app covering various concept of React that helps you to get started with React. I strongly encourage you to read those blog posts before proceeding with this one.
Prerequisites
GitHub Account
Vercel Account
Read my previous blog posts to understand where we are in this series.
What will we learn in this blog?
Learning deployment is vital for developers as it offers practical experience in real-world scenarios, exposing compatibility issues and optimizing performance. It provides insights into version control, DevOps practices, and a full-stack understanding, enhancing professionalism and collaboration.
We are going to deploy our app using npm run build cmd which is maunal deployment and vercel platform which is automated deployment. Platforms such as Vercel and Netlify offer free access to deploy any front-end app without any charges. You can deploy as many projects as you desire, but you must upload your project to GitHub, and it should be a public project.
Vercel automatically deploys your changes once you push them to the main branch; you don't need to redeploy anything, as Vercel takes care of it all by itself. This is an excellent feature that allows you to focus on developing your app instead of configuring and manually deploying it to the server.
That's why we use the Vercel platform to deploy our app, as deploying projects showcases your skills, making your portfolio more appealing to potential employers and collaborators.
Let's deploy our app and make it available on the internet for everyone.
Build the app using the command.
You may run npm run build command to build the app.
npm run build
By default, the build output will be located in the dist folder. You can deploy dist folder to any platform of your choice.
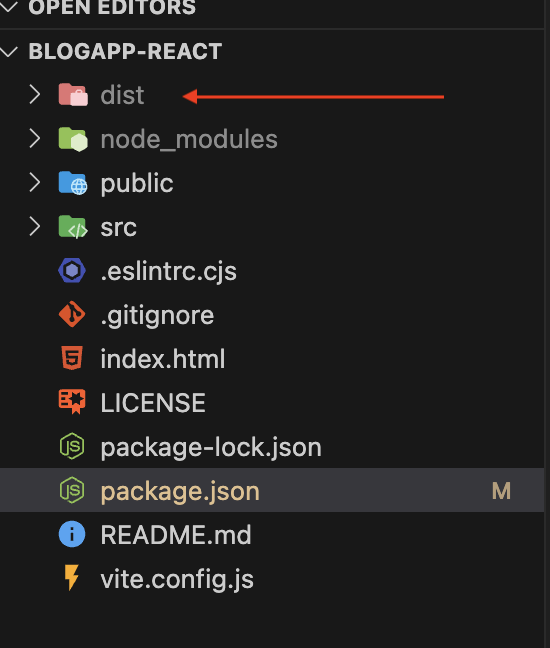
Testing the App Locally
Once you've built the app, you may test it locally by running npm run preview command.
npm run preview
The vite preview command will boot up a local static web server that serves the files from dist at http://localhost:4173. It's an easy way to check if the production build looks good in your local environment.
You may configure the port of the server by passing the --port flag as an argument.
{
  "scripts": {
    "preview": "vite preview --port 8080"
  }
}
Now the preview command will launch the server at http://localhost:8080.
With the dist folder, you can manually transfer it to your preferred hosting server or another server of your choice. However, this method requires you to handle various server-related tasks on your own. Additionally, if you make any changes to your code, you must manually upload and deploy those updates to the server. This process involves a significant amount of manual work.
We have decided not to utilize this method, as it necessitates configuring the server, domain, and managing numerous server-related tasks independently. To simplify the understanding and deployment process, we will be using Vercel instead.
In order to streamline our deployment process, we have chosen to employ Vercel, which will enable us to automate all aspects of deployment and reduce manual effort.
Steps to Deploy Our App on the Vercel Server
Before we deploy our app to Vercel, let me briefly explain what Vercel is.
Vercel is a cloud platform that specializes in deploying and hosting websites and web applications. It's designed to make the deployment process seamless and efficient for developers. Vercel supports various programming languages and frameworks, including React, Next.js, Vue, and more. With features like automatic deployments, serverless functions, and global content delivery, Vercel simplifies the deployment and scaling of web projects while providing a reliable and high-performance infrastructure.
Let's deploy our app to Vercel.
Here are the steps to deploy our blog application:
1️⃣ Login to Vercel
You can choose any method, such as GitHub, GitLab, email magic link, etc., to log in.
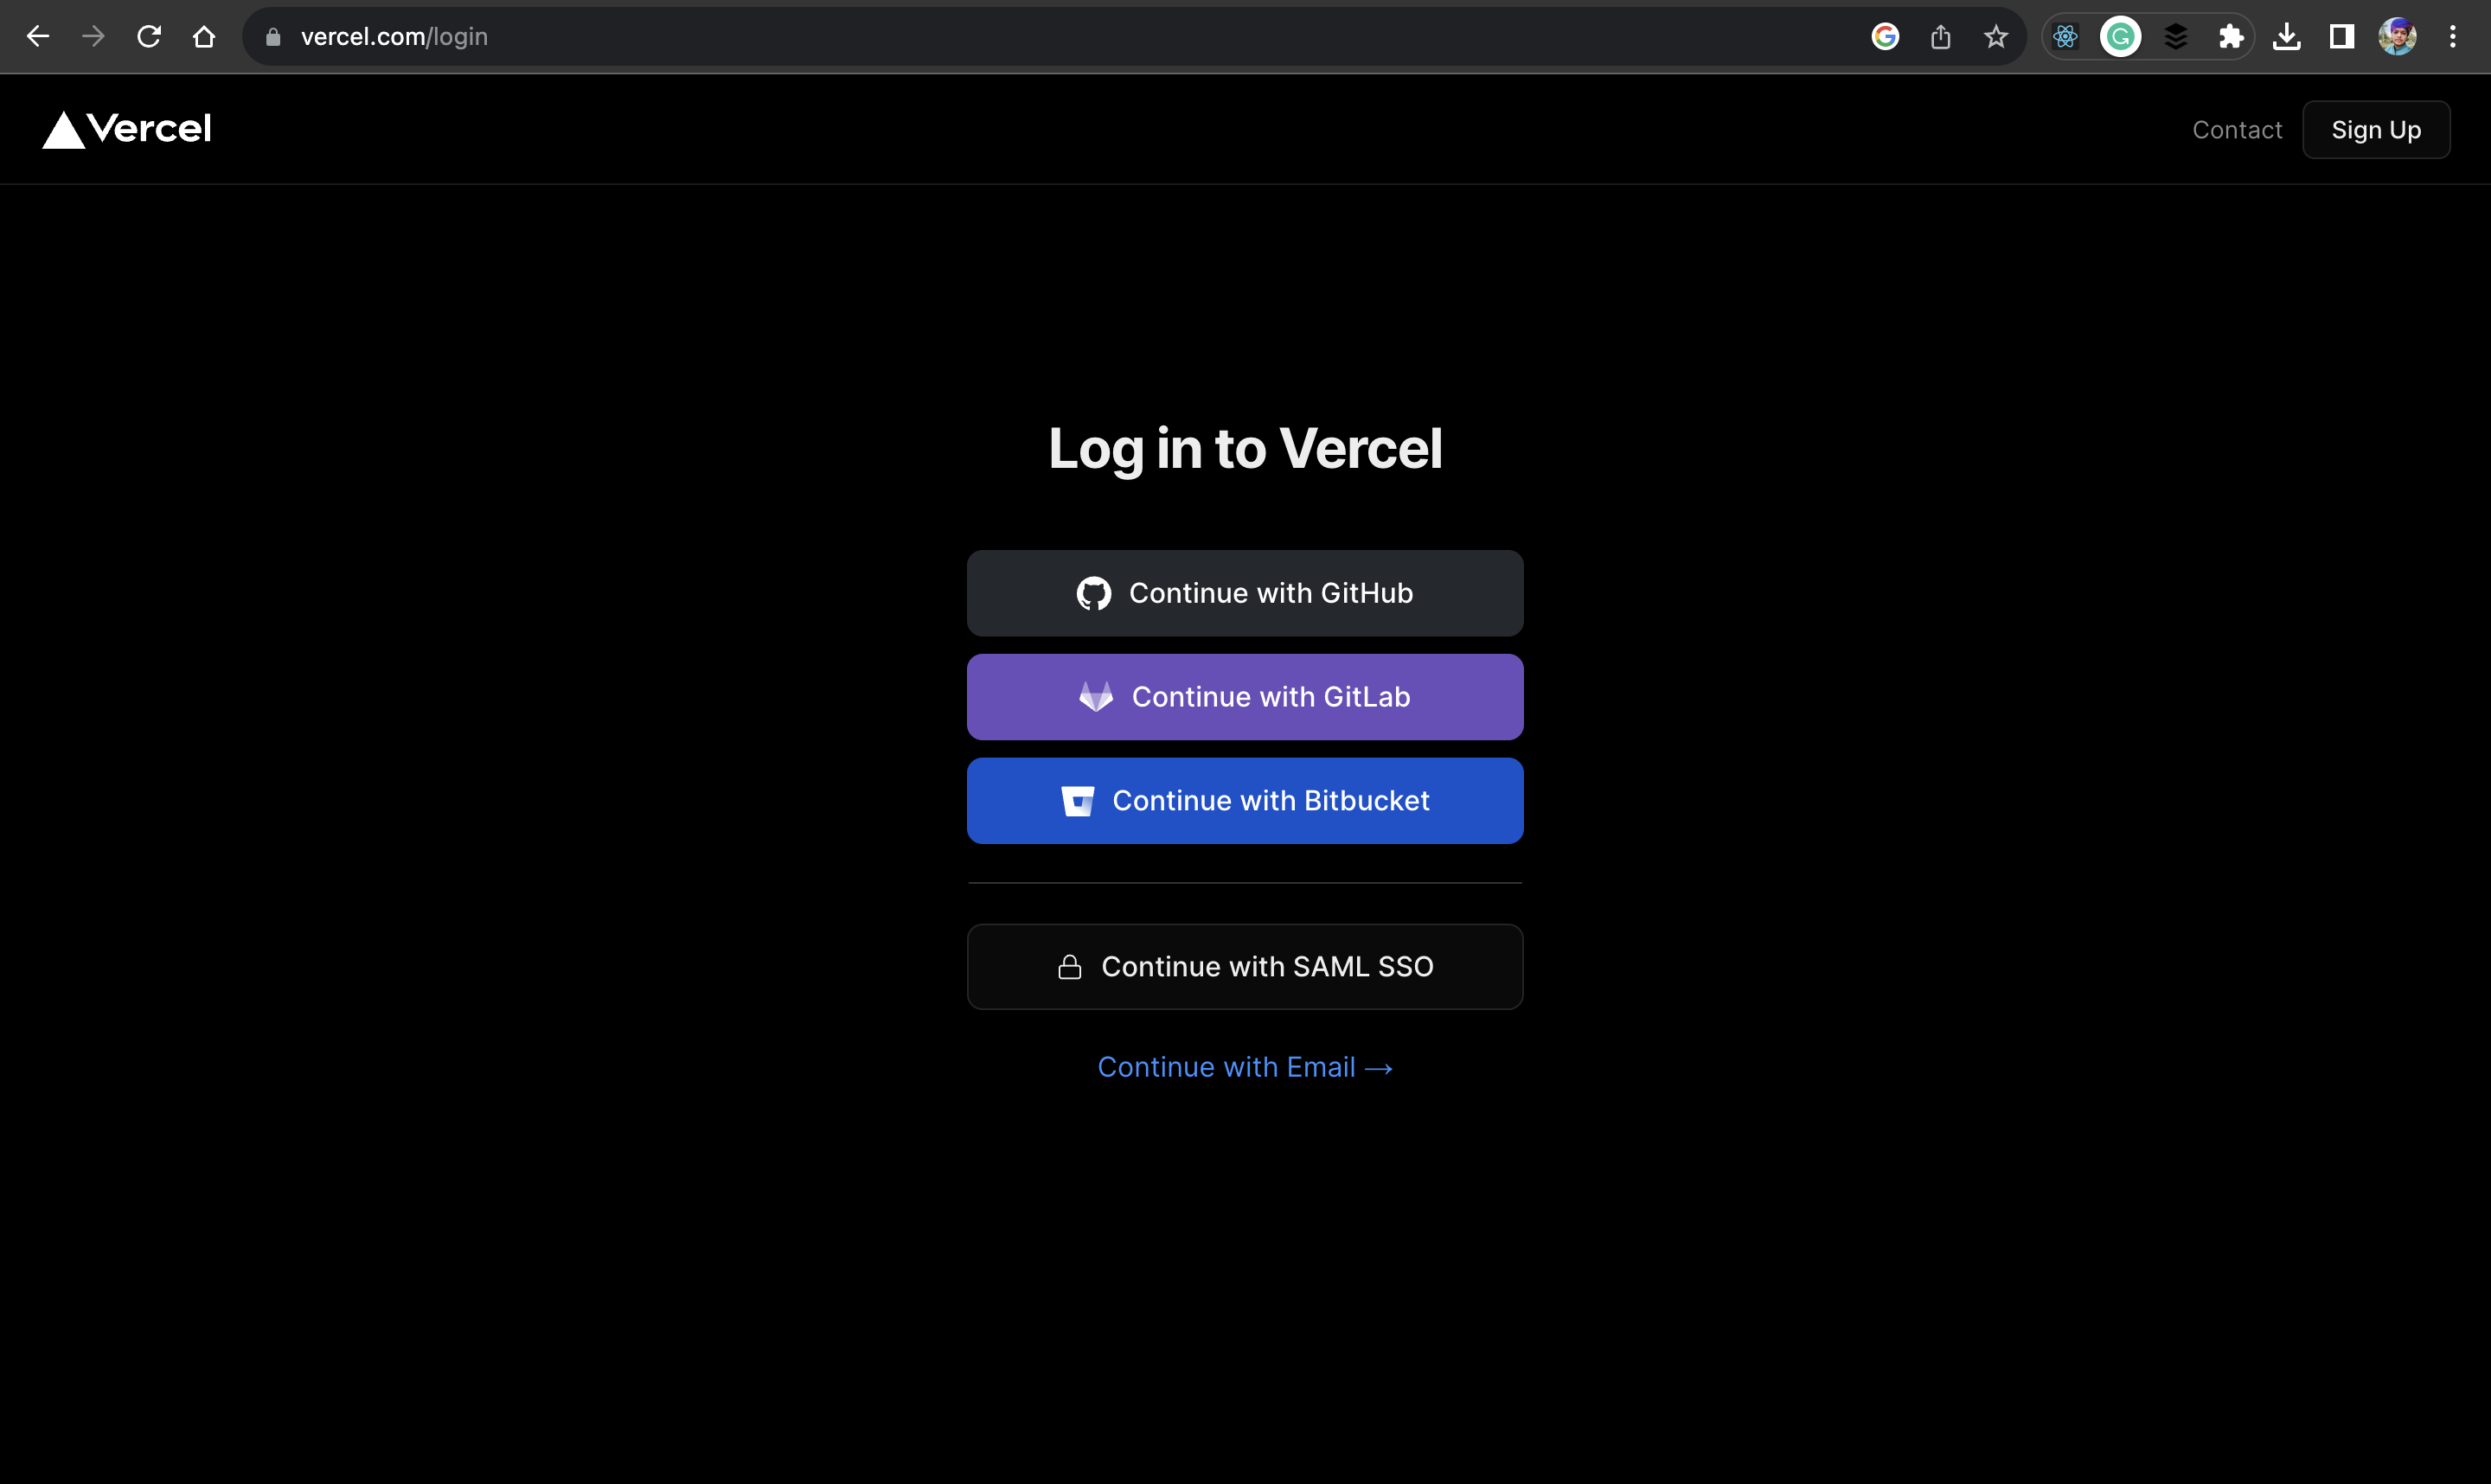
2️⃣ Vercel dashboard
After logging in to your Vercel account, you will be directed to the Vercel dashboard.
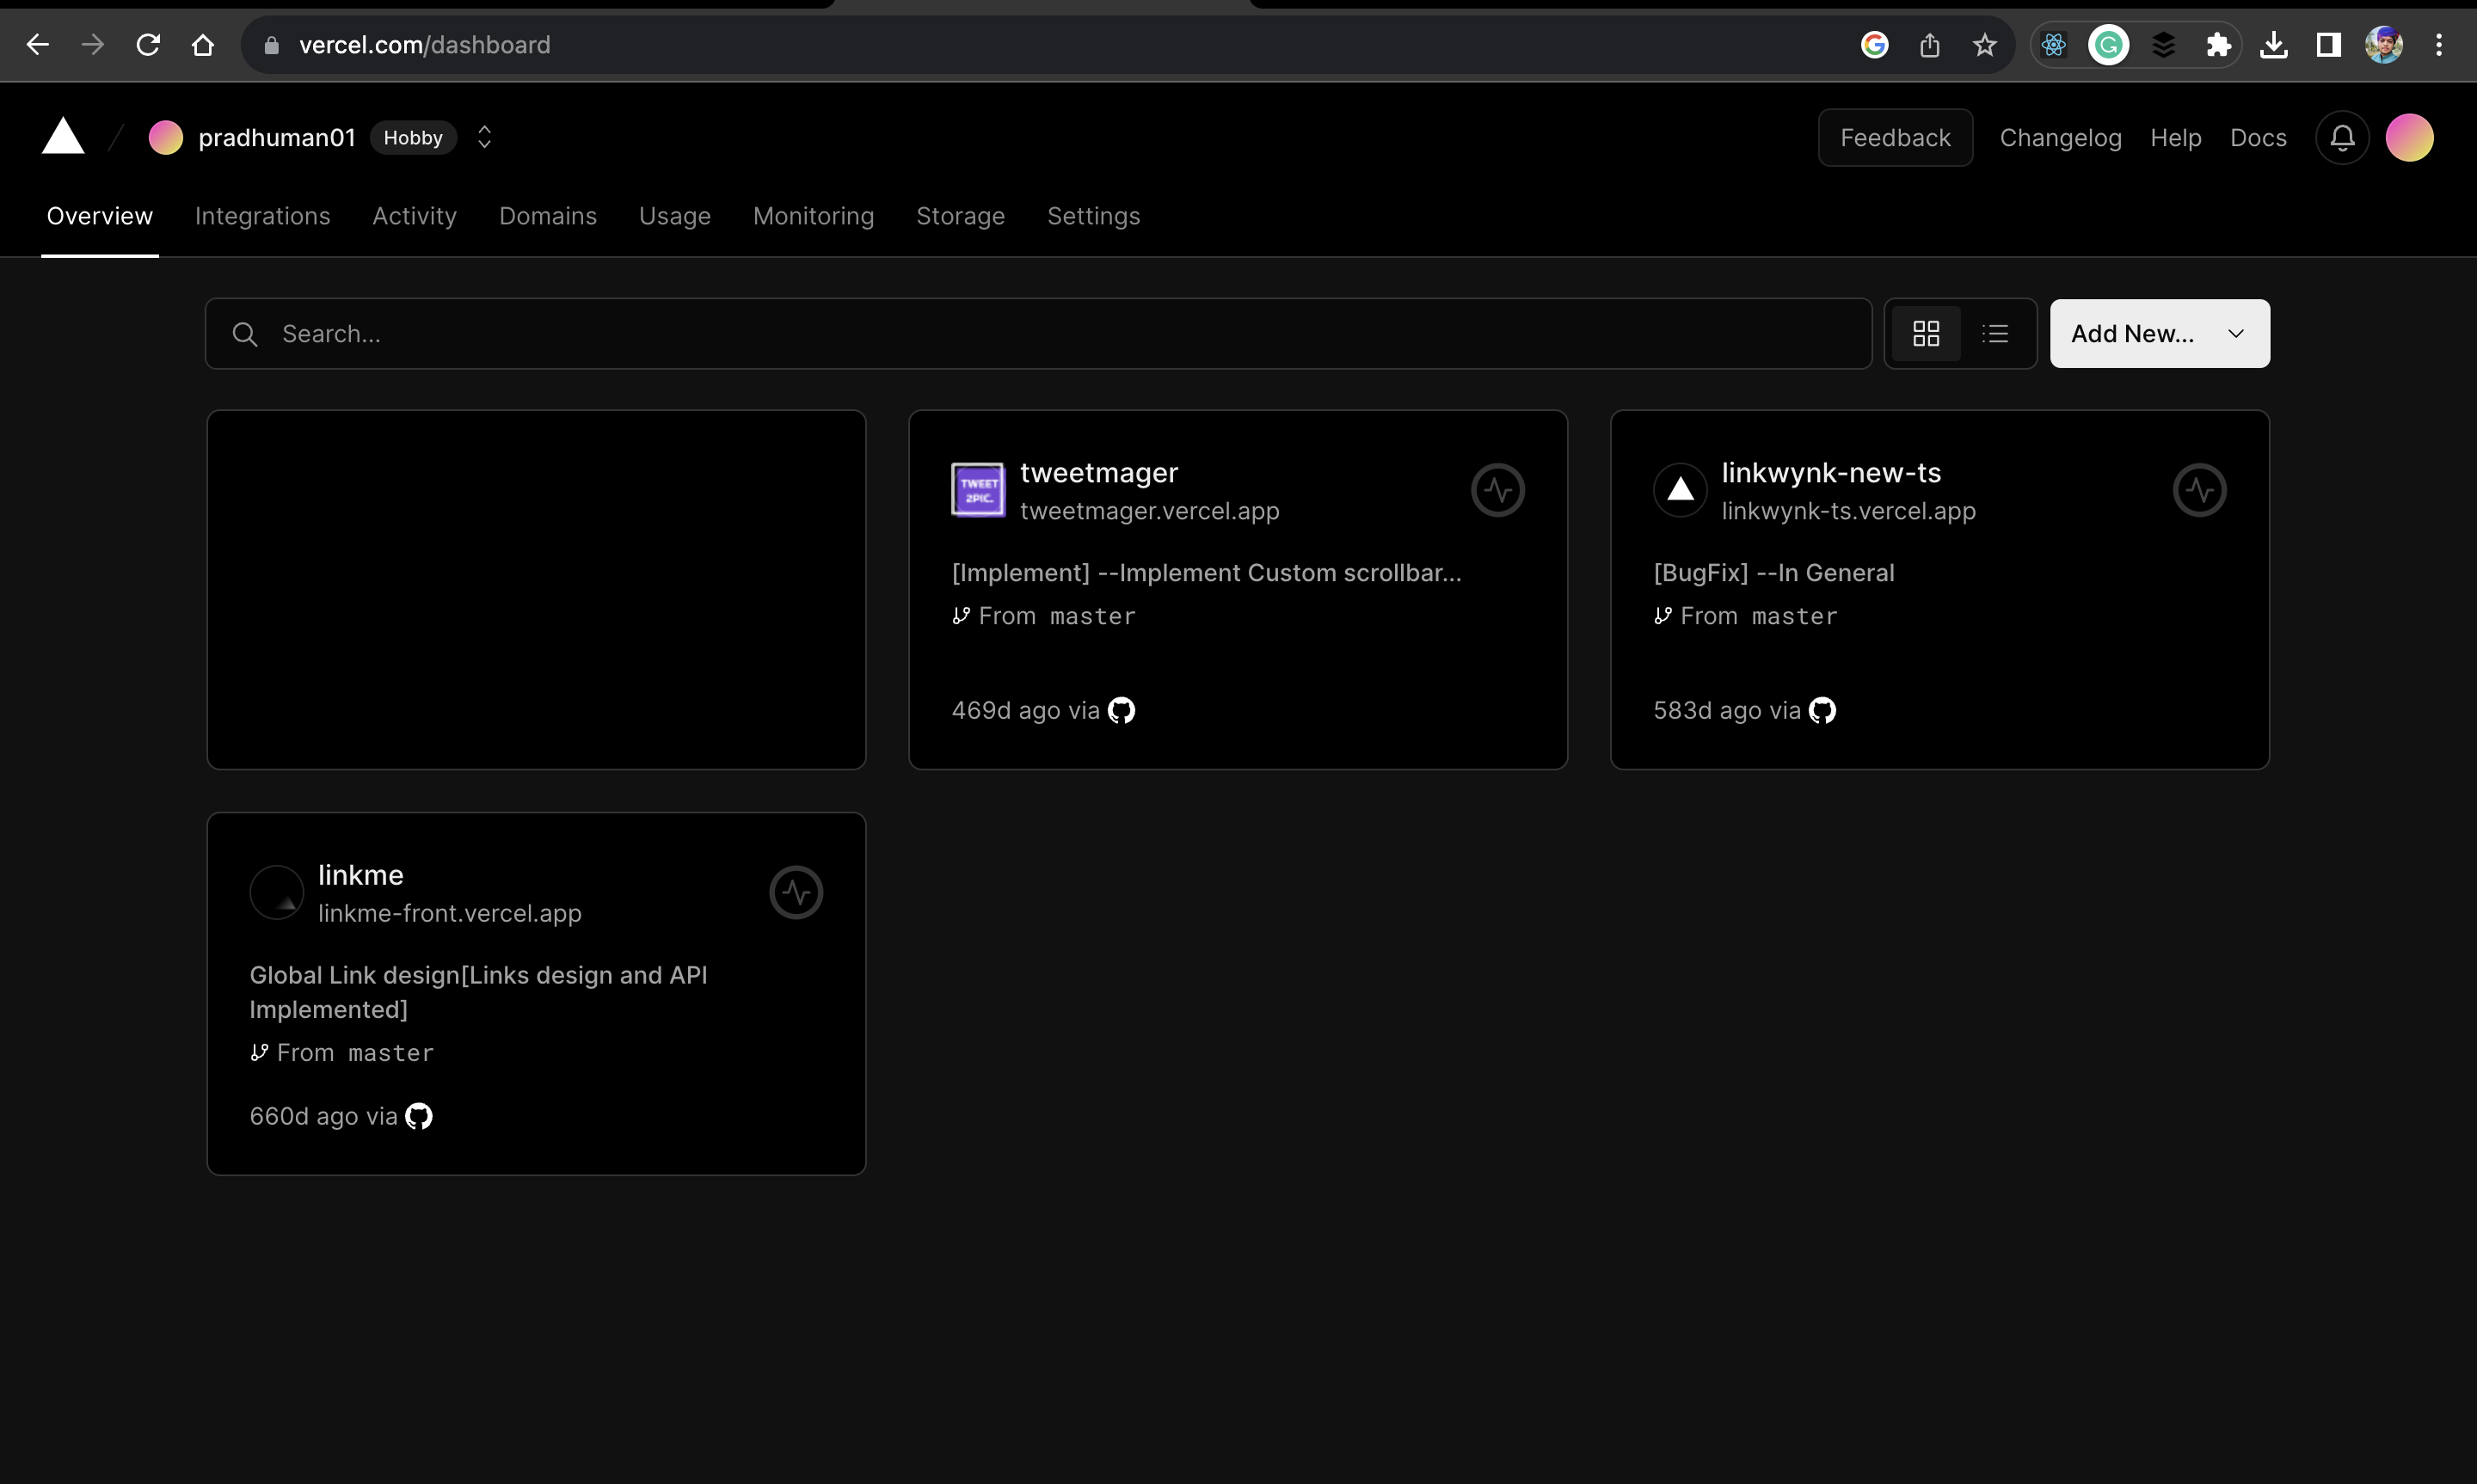
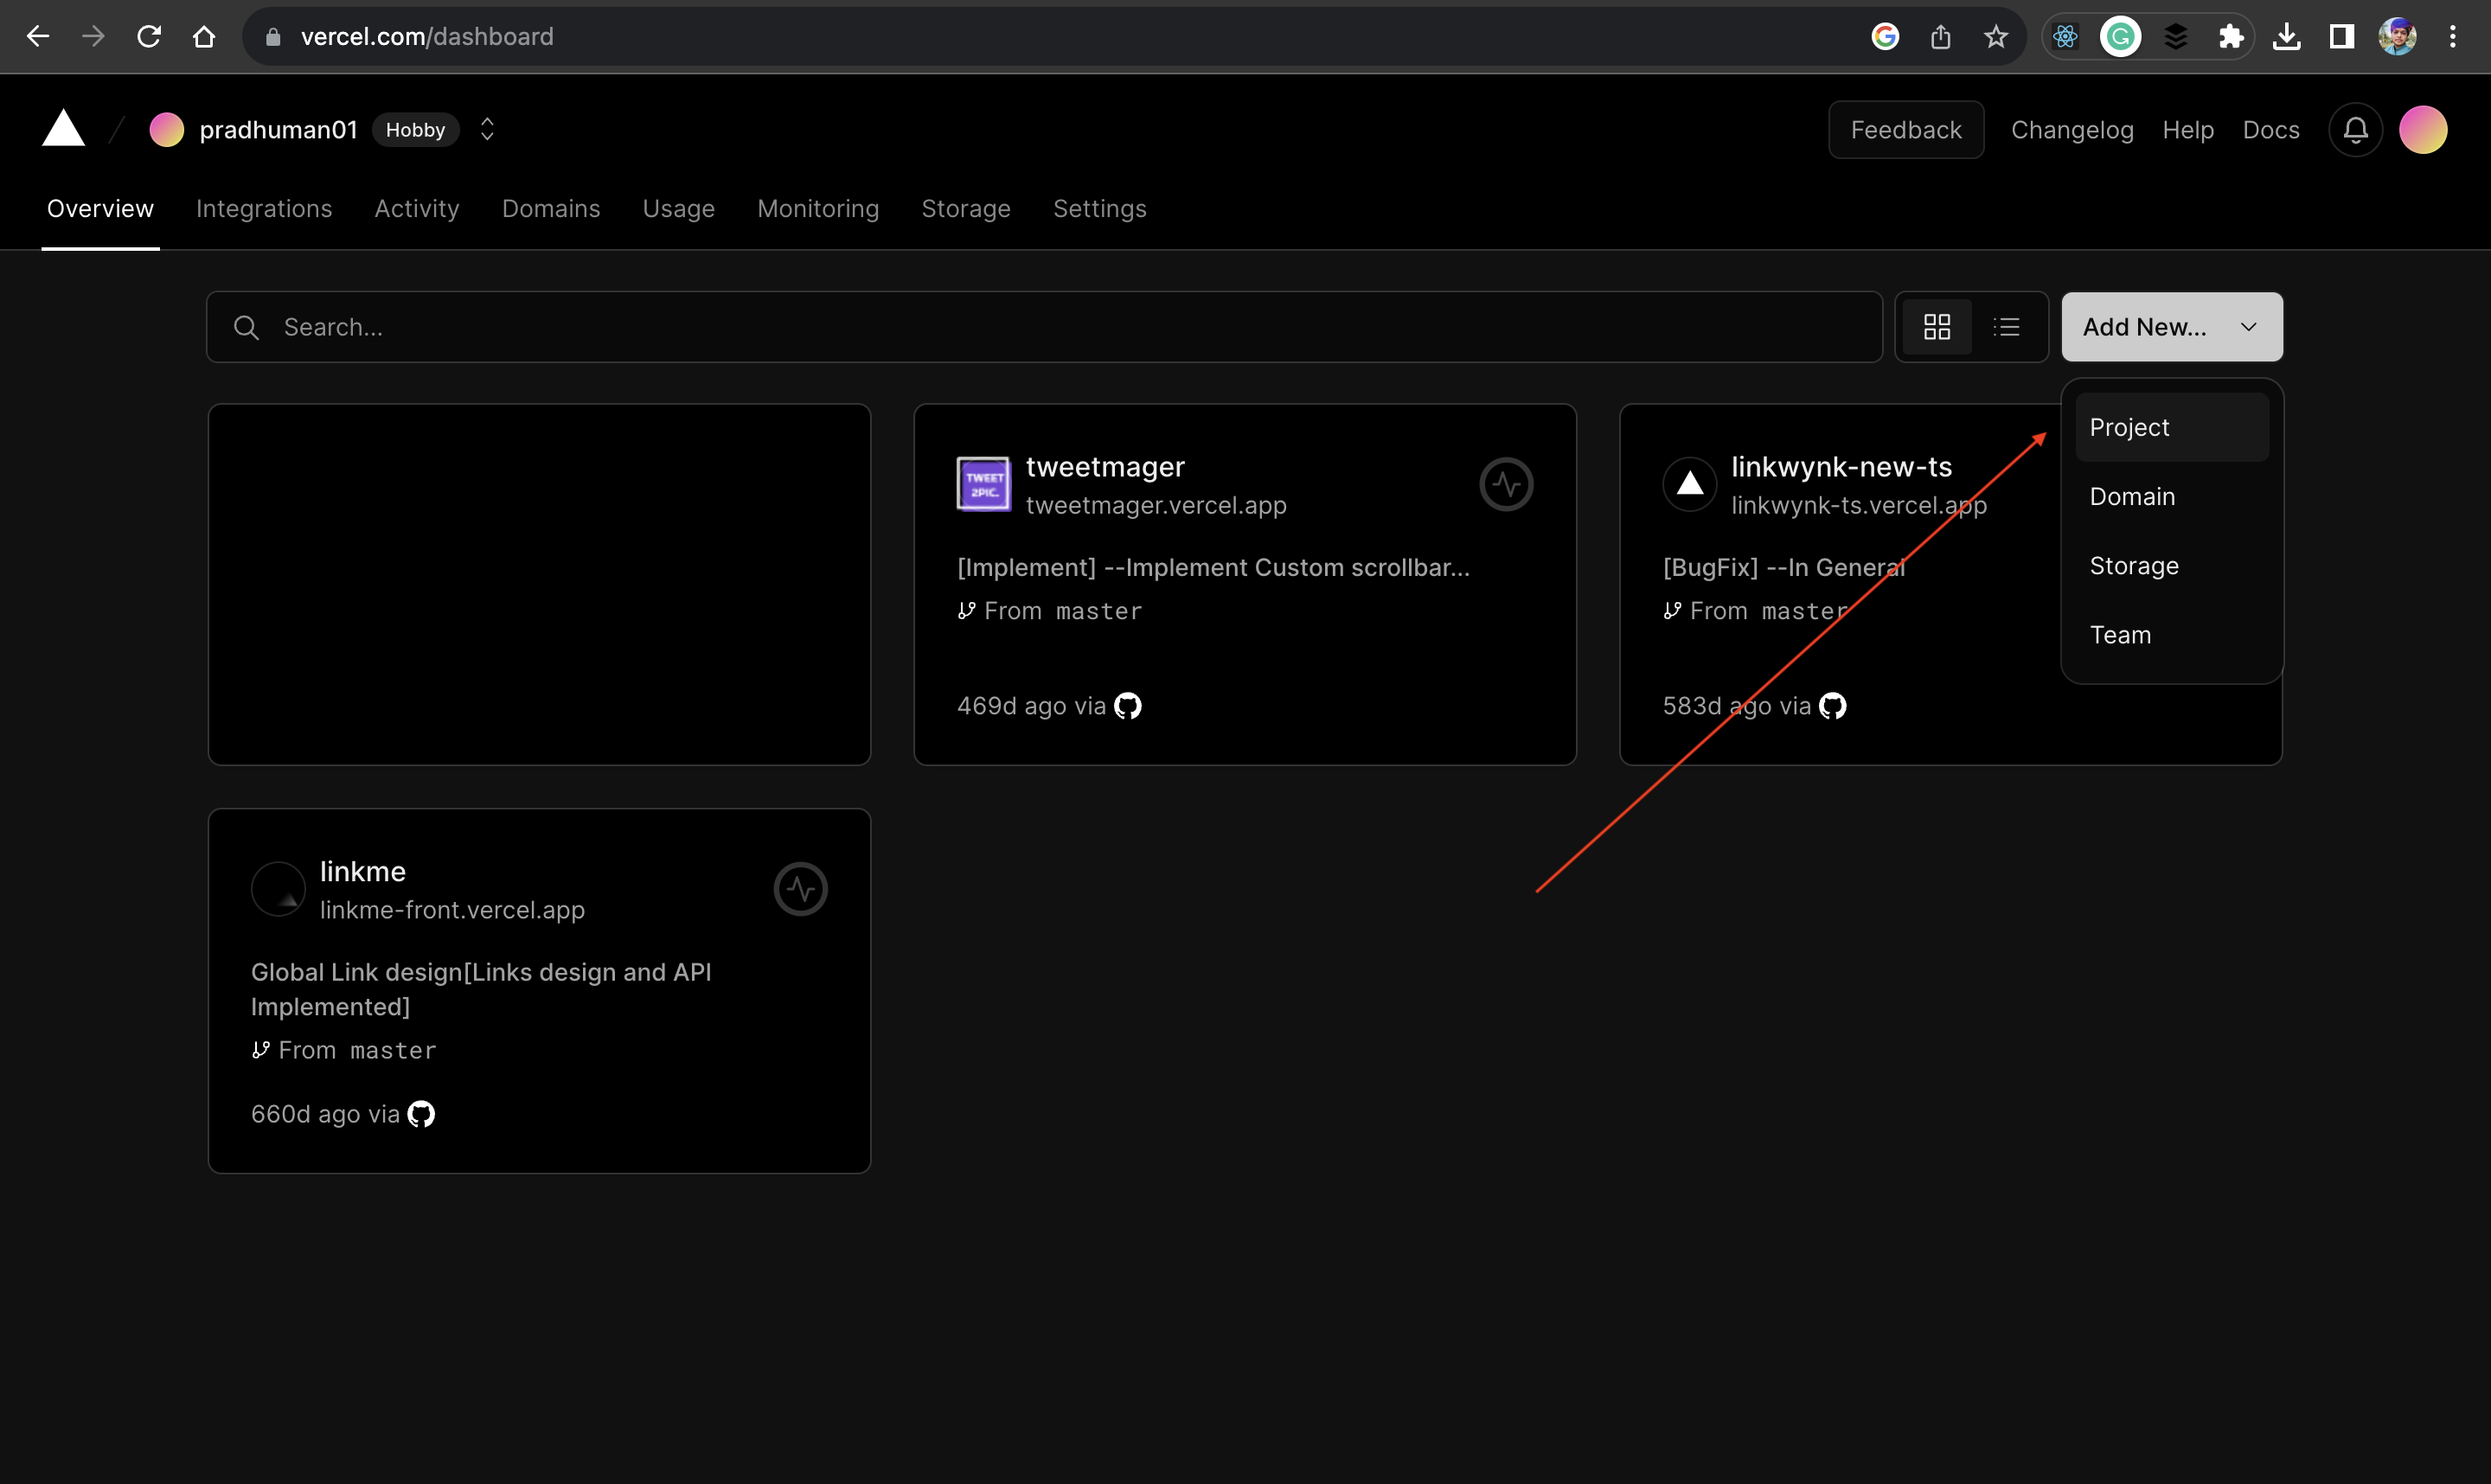
3️⃣ Add project
To add a project, first click on the "Add New" dropdown, and then select "Project" from the dropdown menu.
4️⃣ Configure your GitHub account
Now, configure the GitHub account that contains your blog app repository.
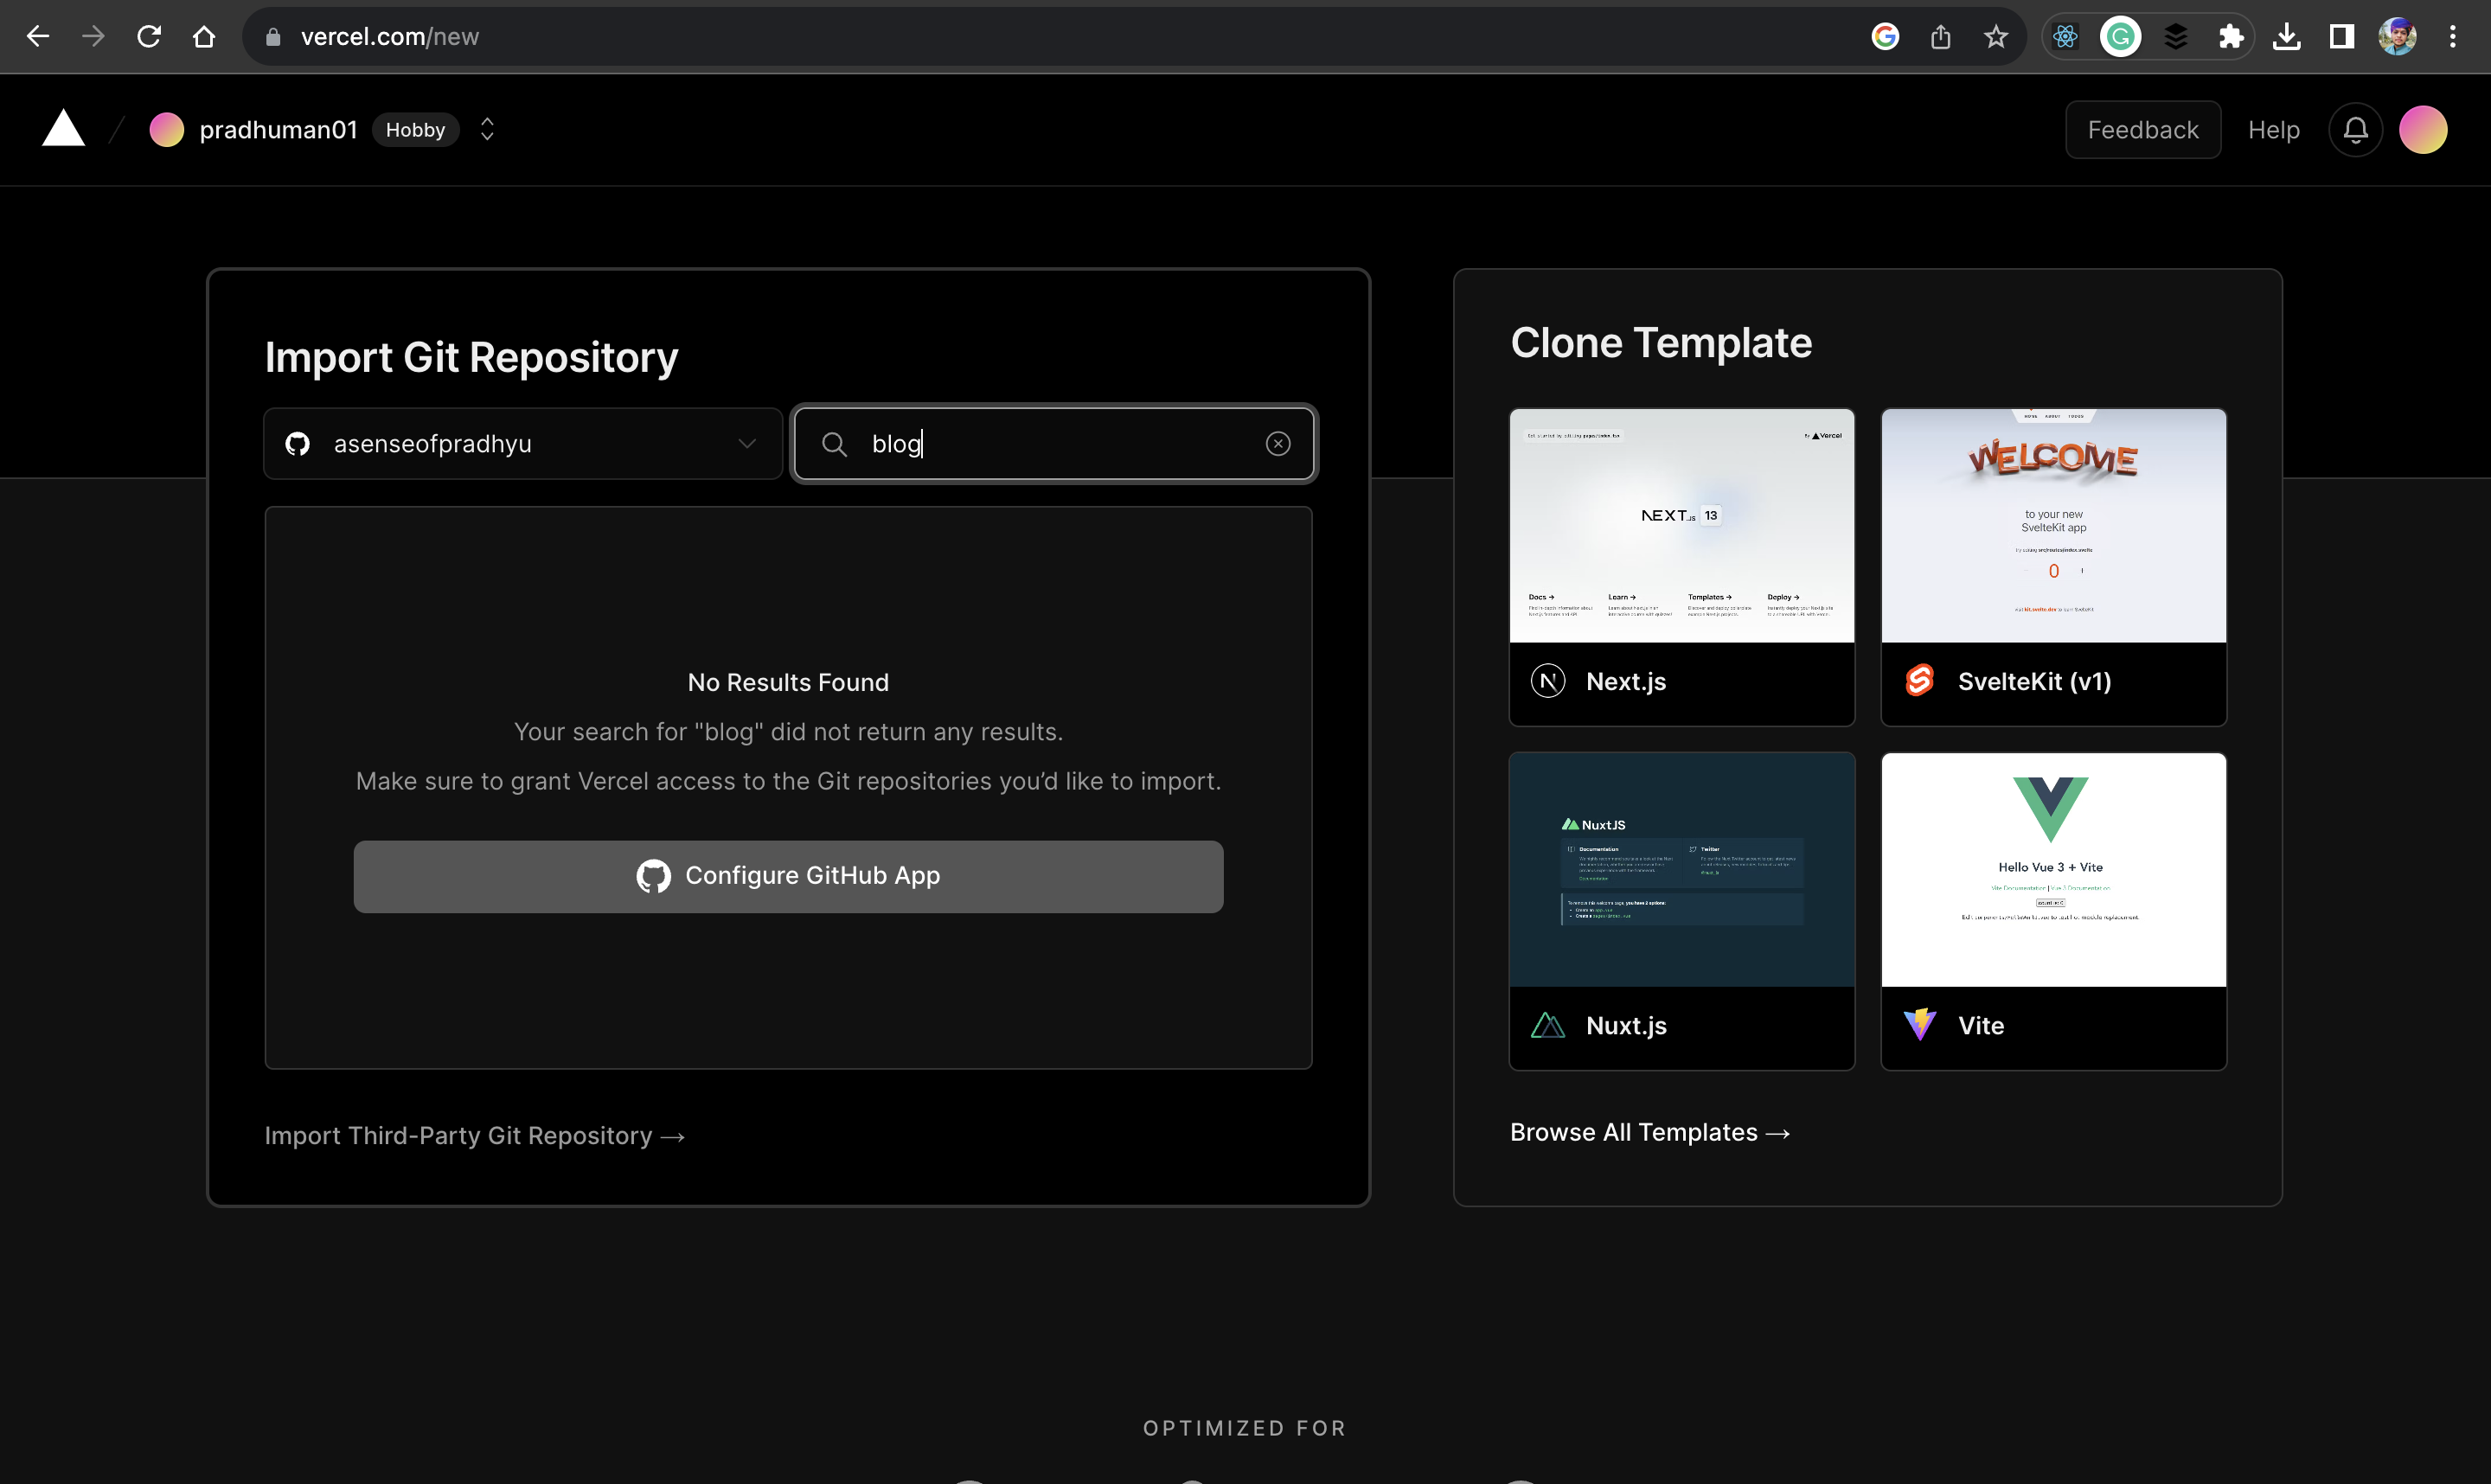
5️⃣ Grant Necessary Permissions to Vercel
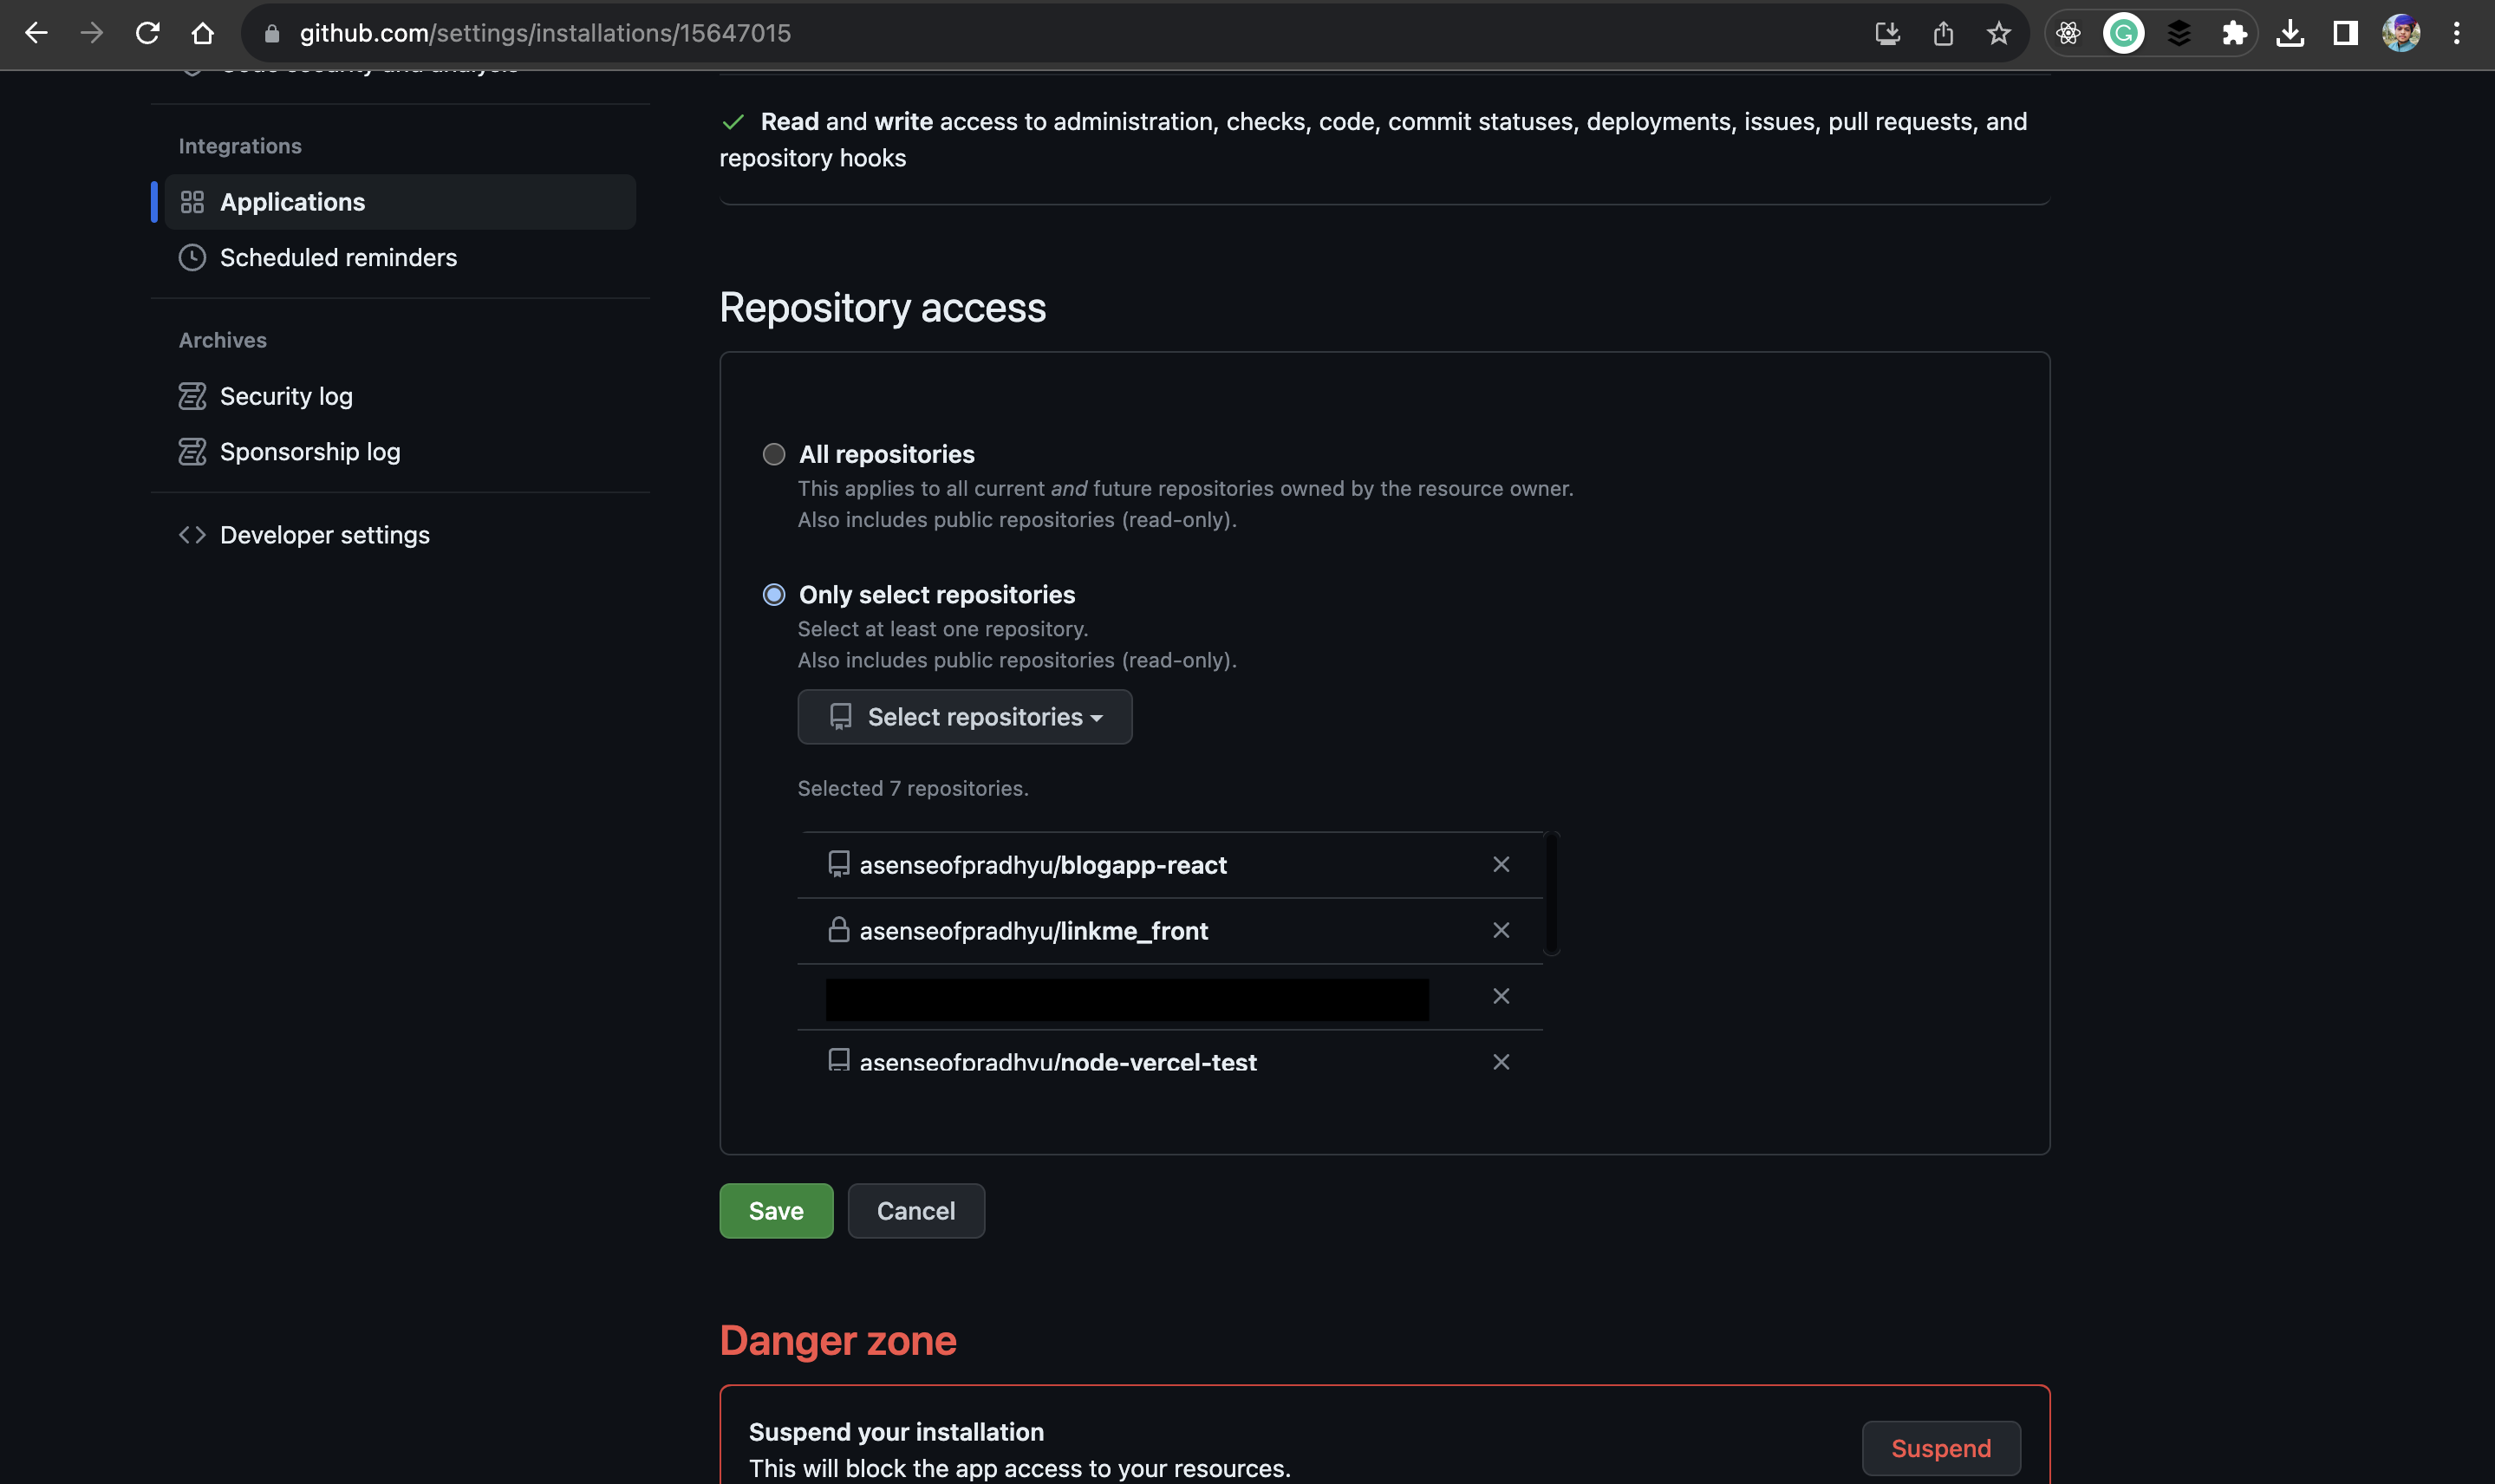
Once you configure your GitHub account, you will be prompted to install Vercel configuration settings to your account. Additionally, you will be asked to add repositories to the Vercel platform.
You can either add all repositories or choose specific ones to add to Vercel. I prefer to add only selected repositories to Vercel.
You can also add both private and public repositories.
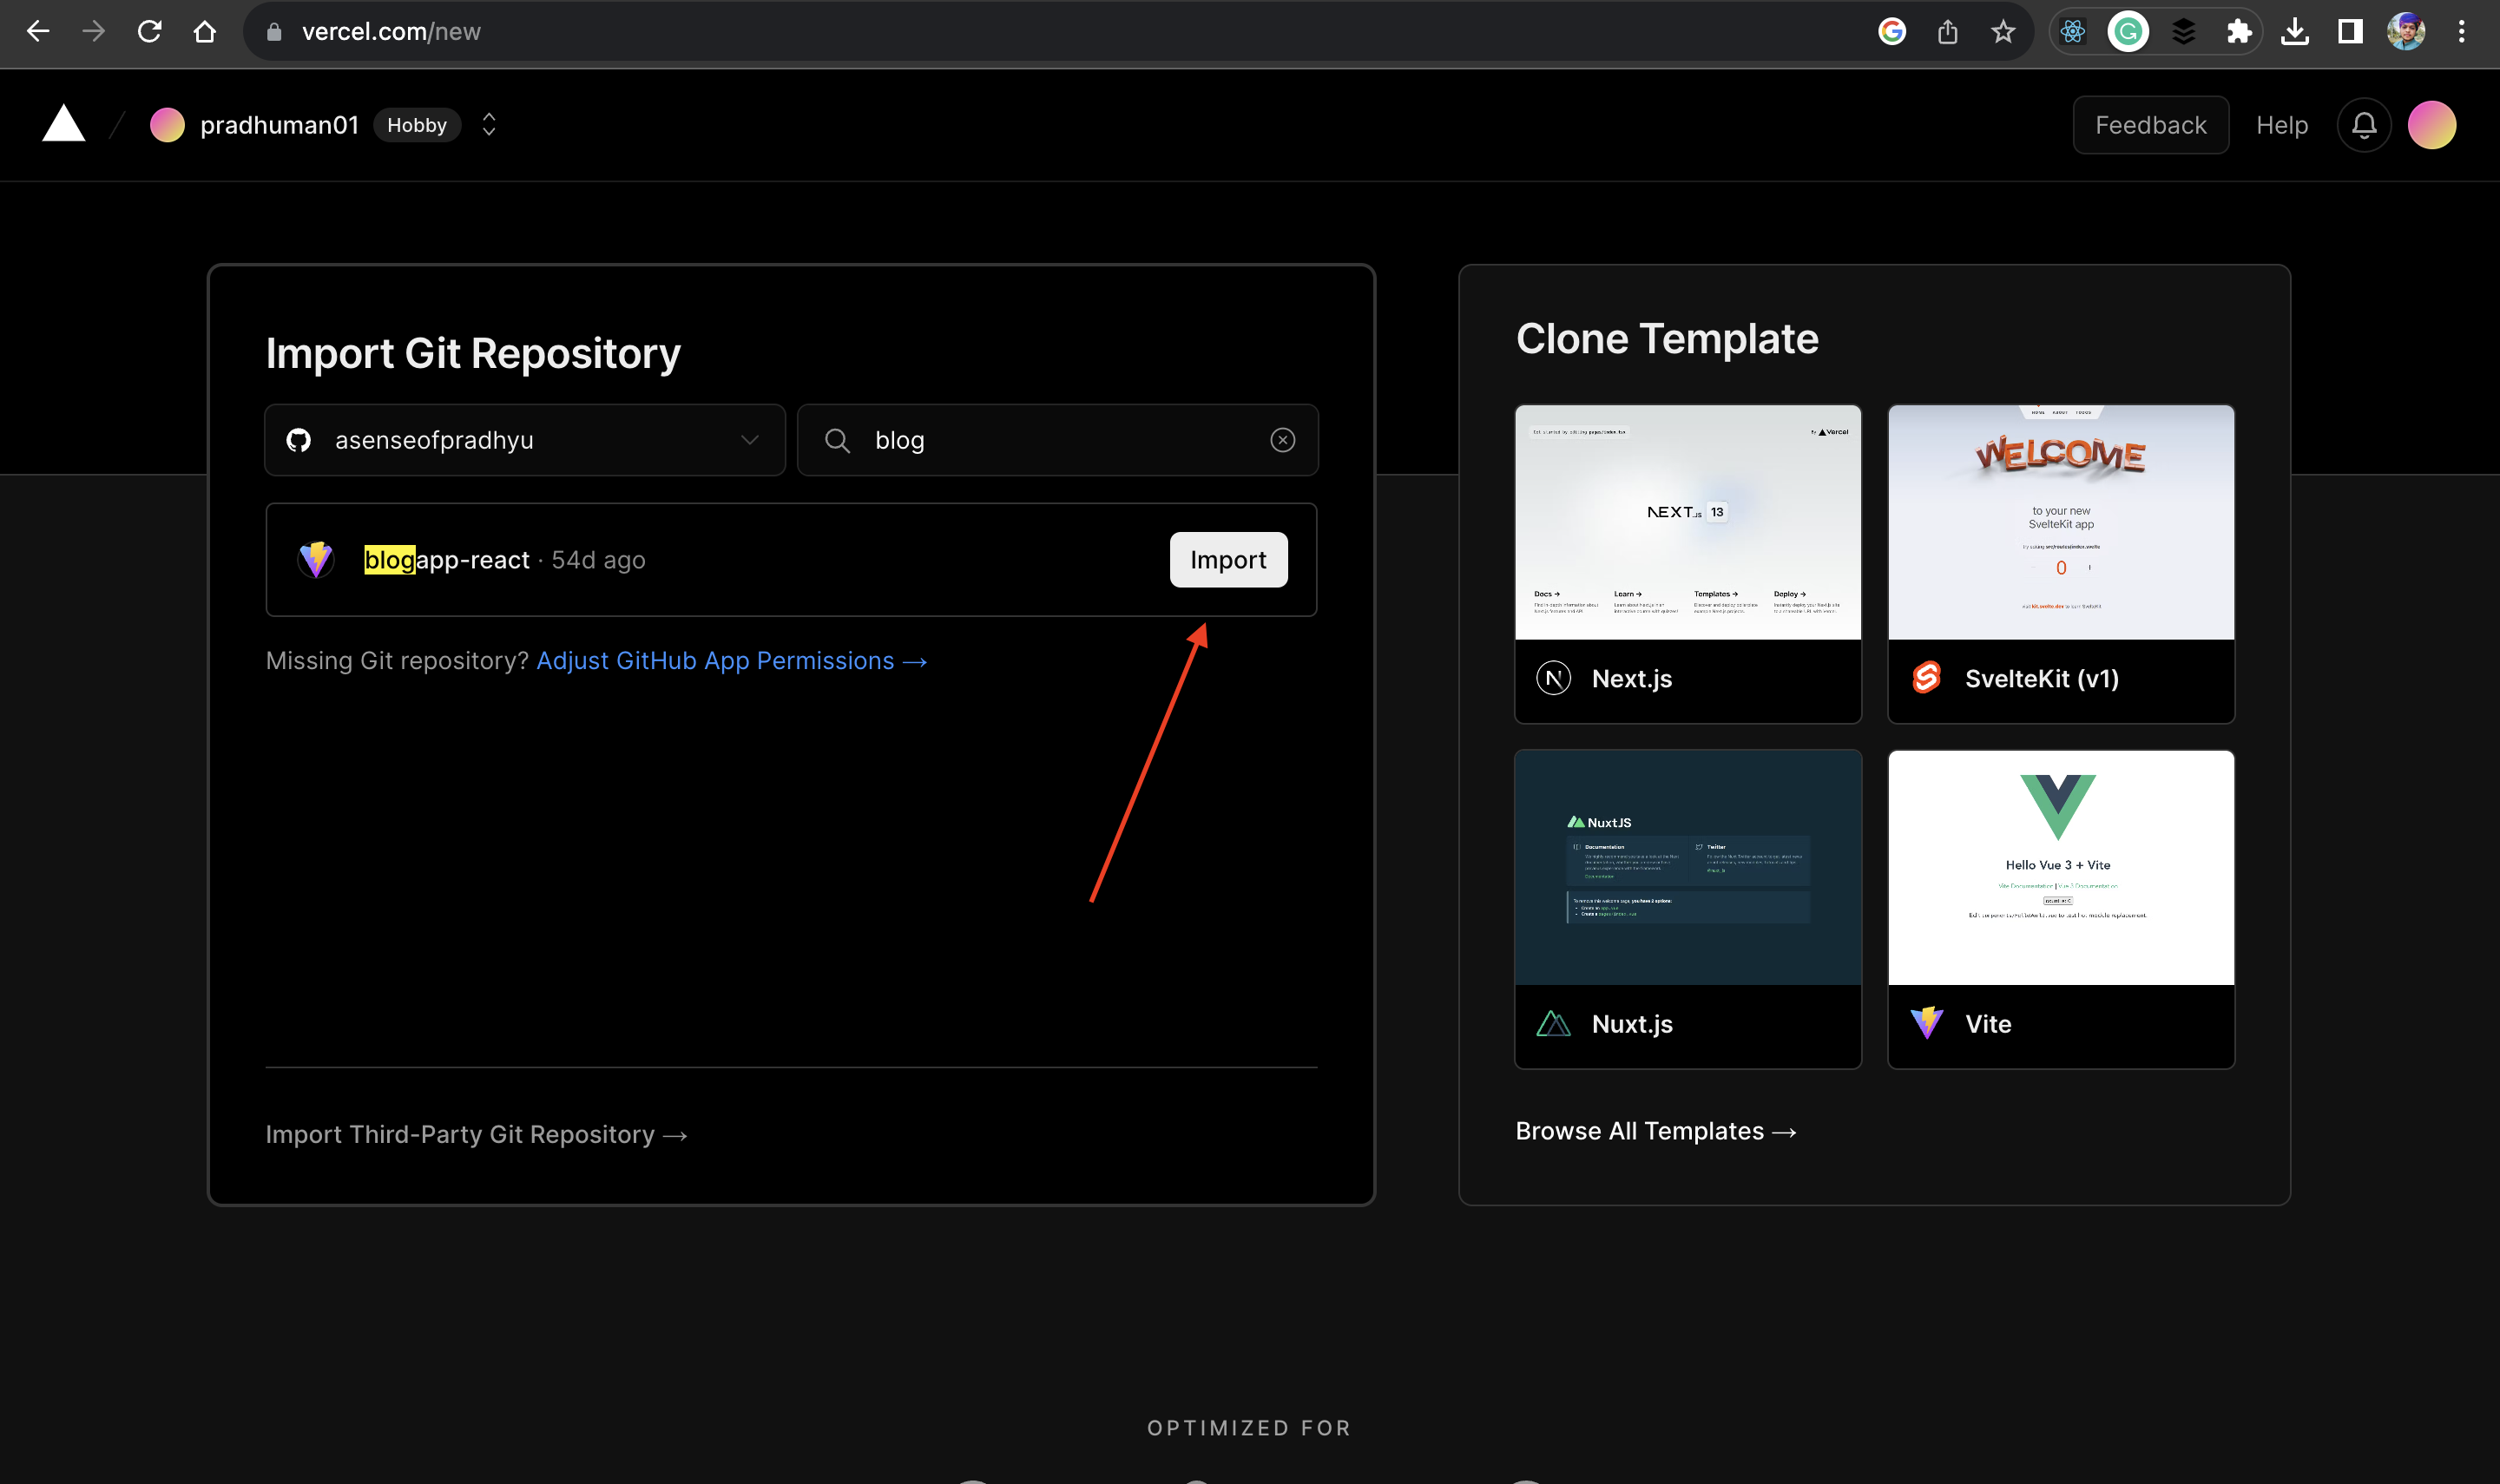
6️⃣ Import your repositories to Vercel
Now, click on the "Import" button.
7️⃣ Configure our project to vercel
Add a project name, and I suggest not making any changes to the other settings. It will automatically adjust according to your Git repositories.
You can learn more about Vercel deployment in Vercel docs
Once everything is set, click on the "Deploy" button.
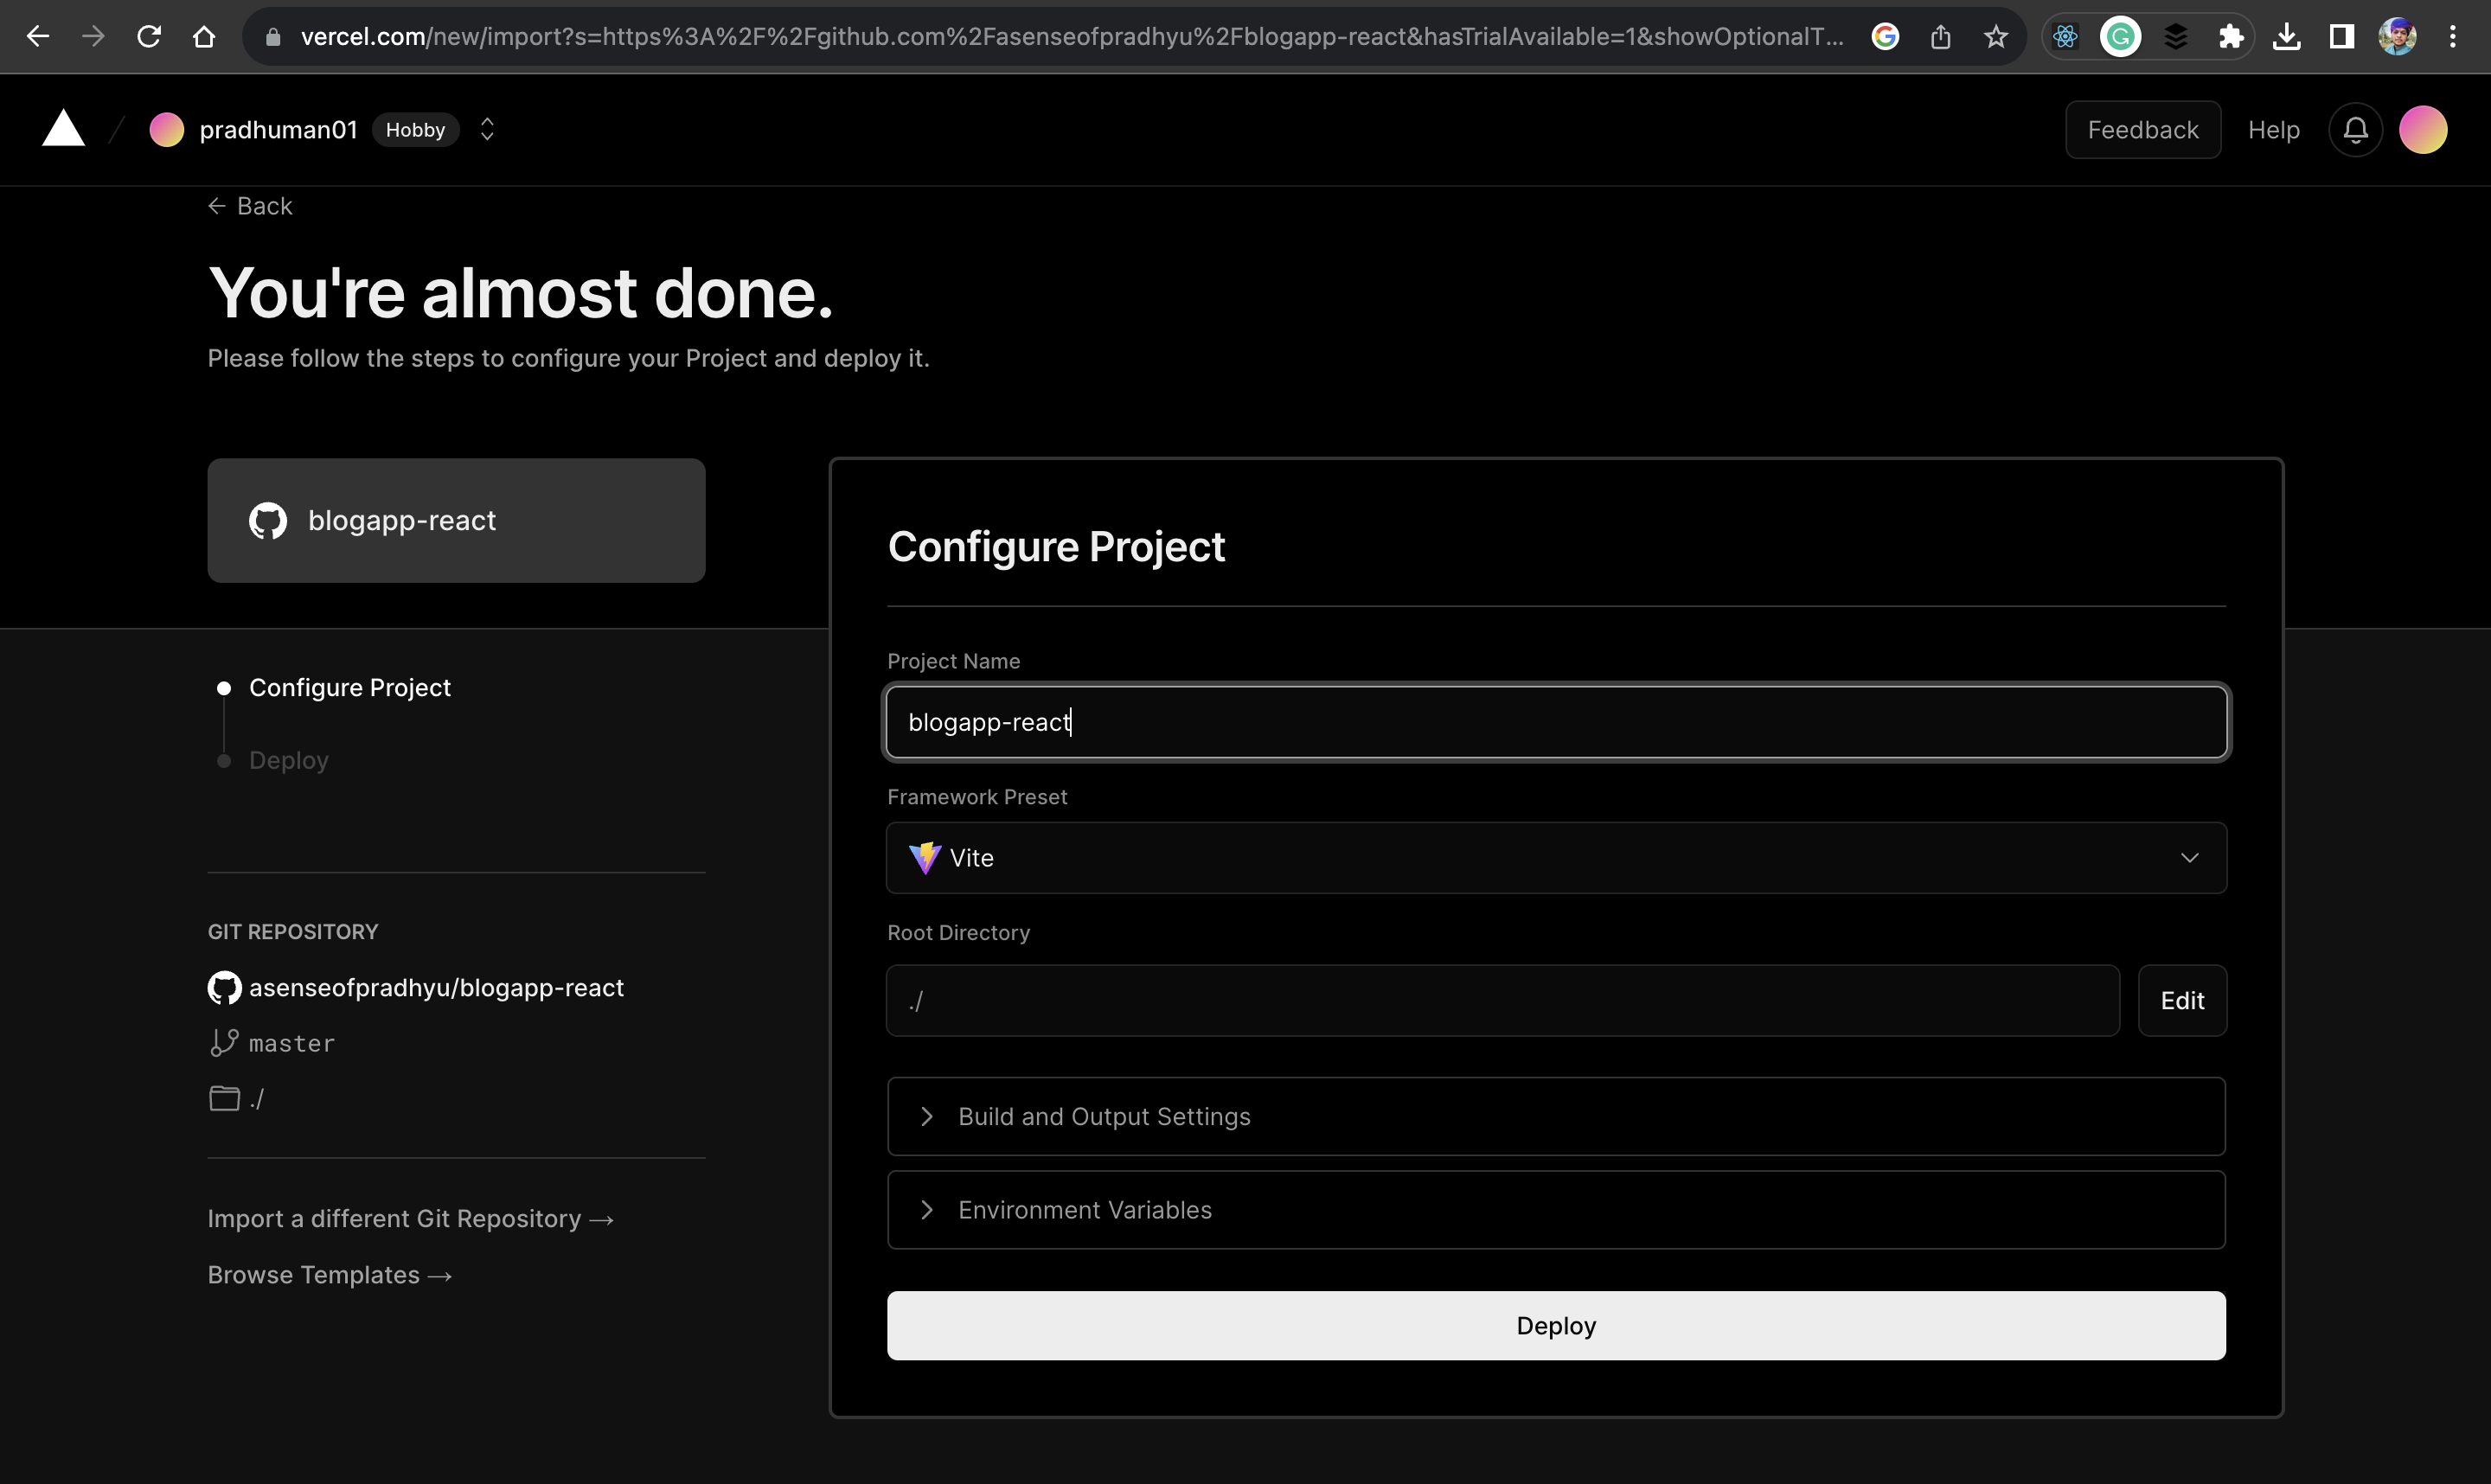
8️⃣ Begin the deployment process
Once you click the "Deploy" button, the deployment process will begin and it will appear as shown below.
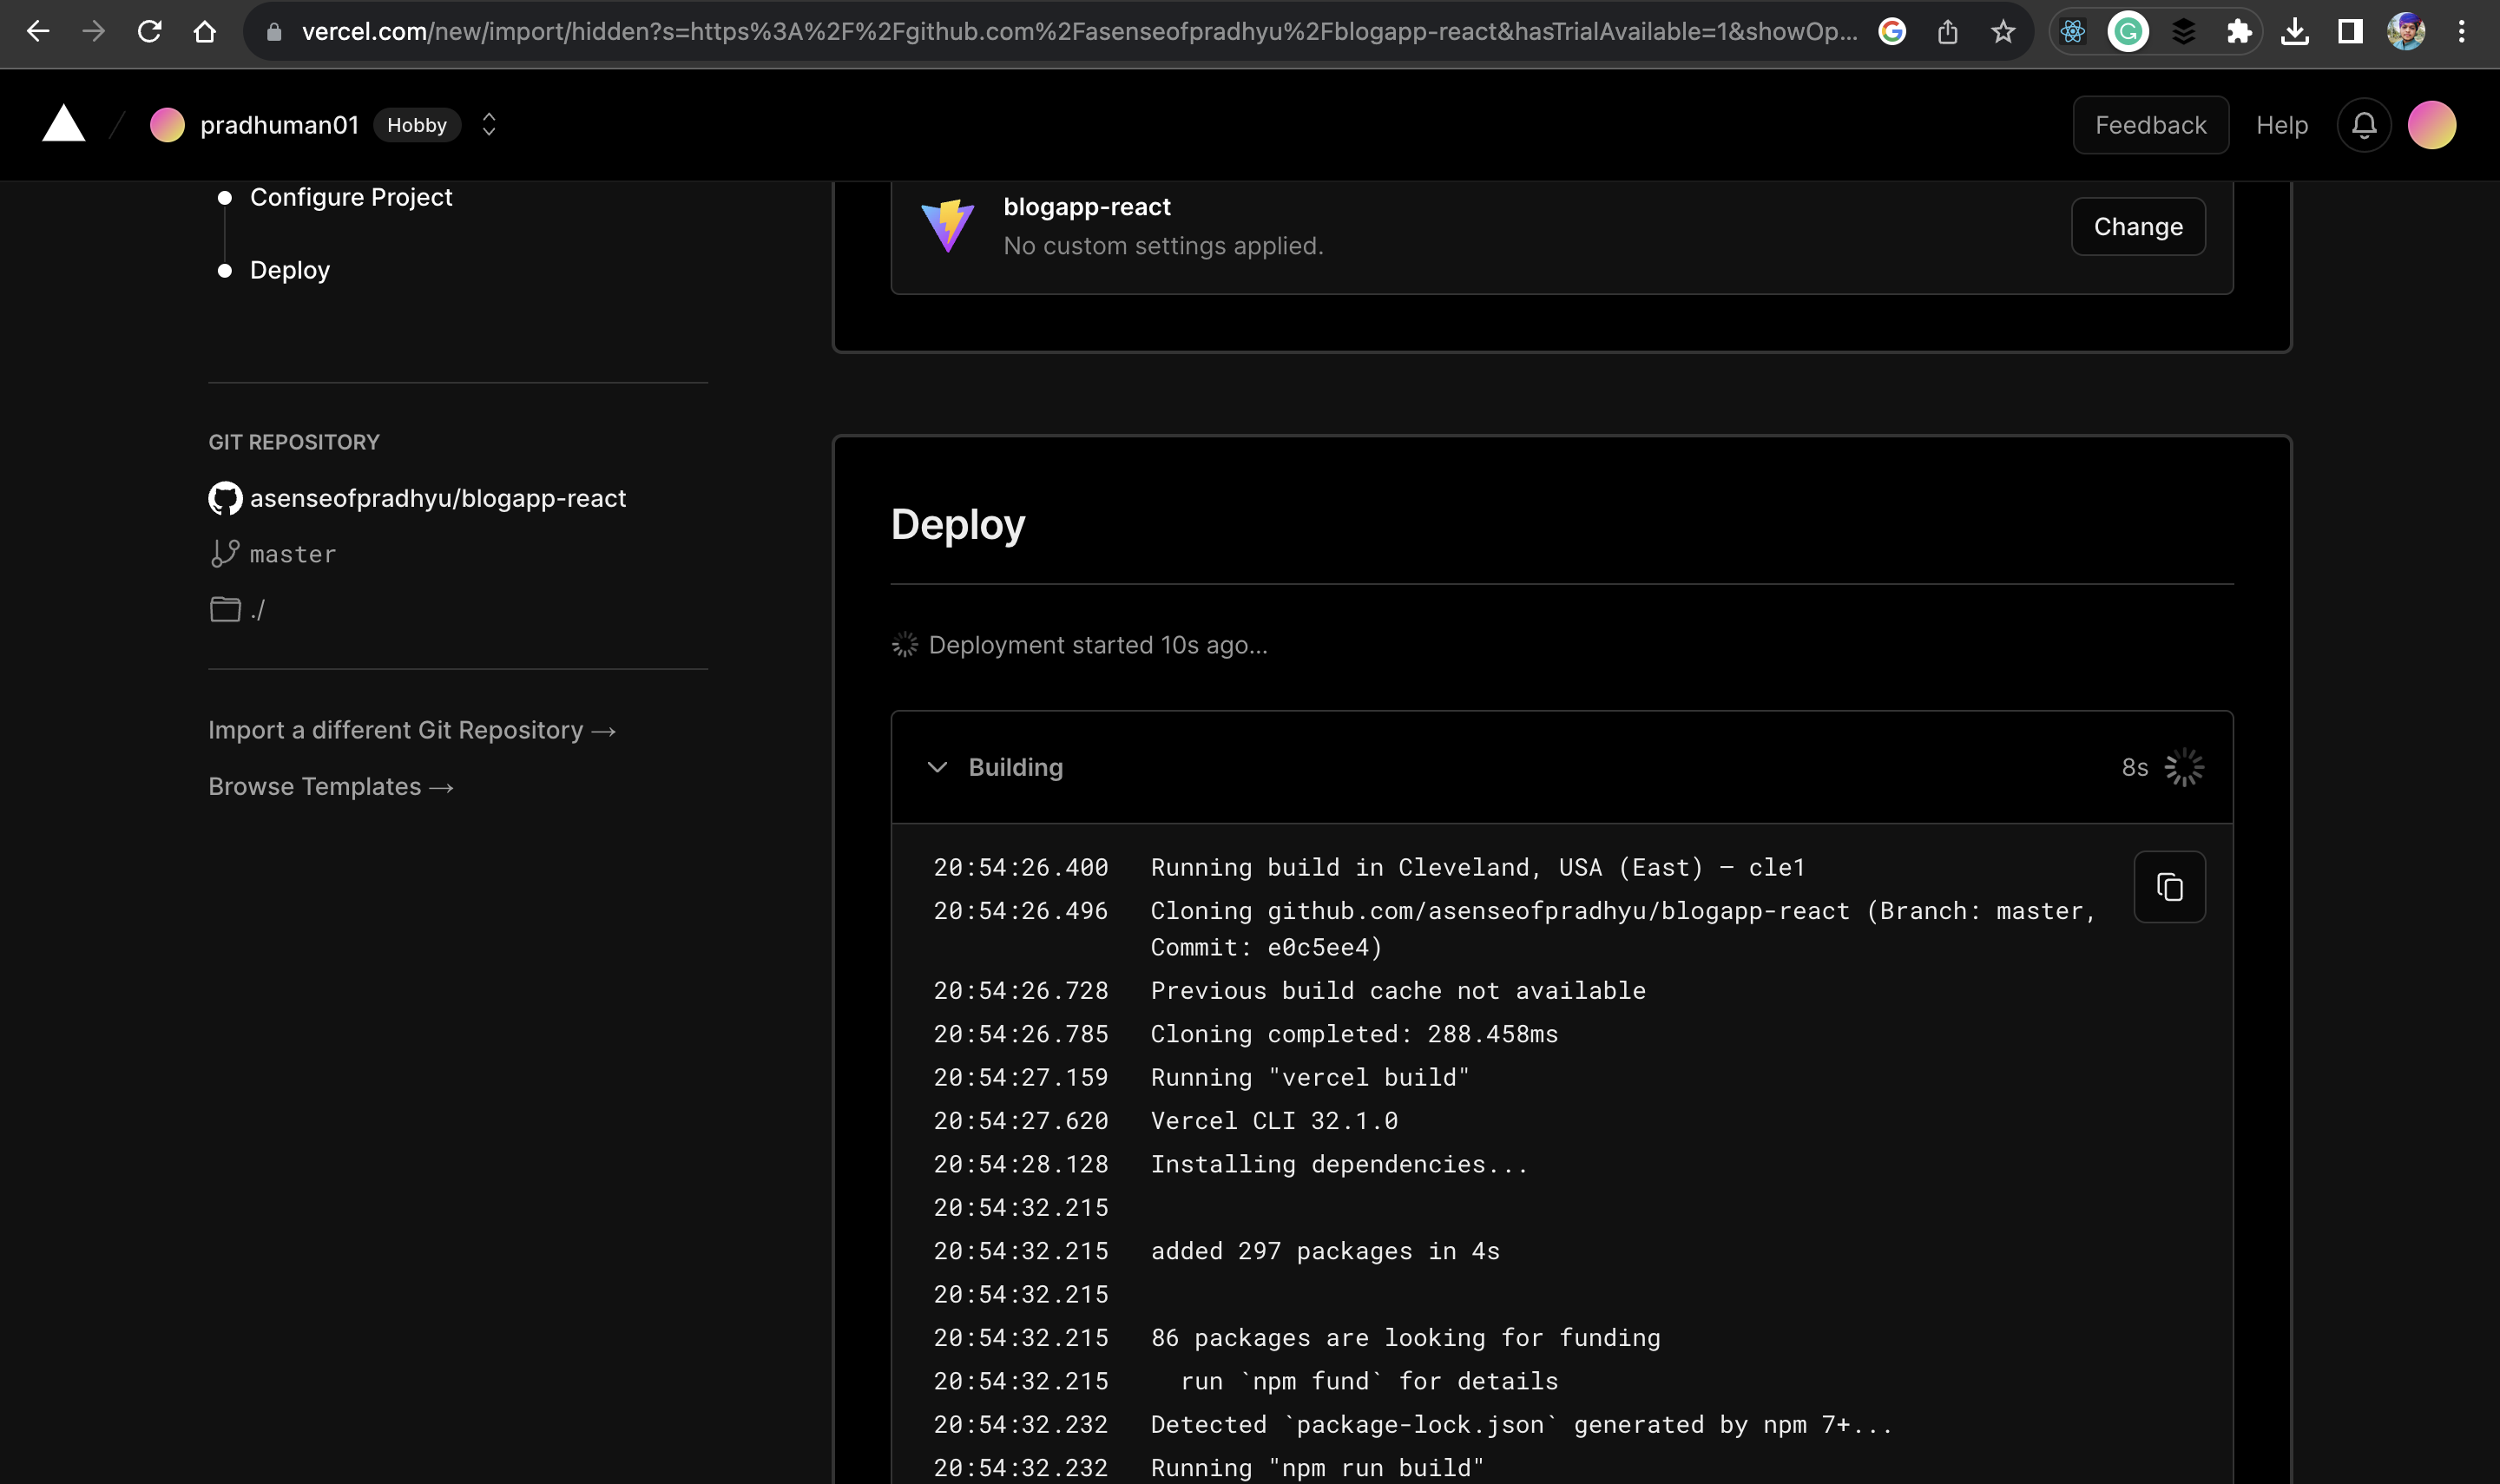
If you encounter any issues with your code, the deployment process will be halted, and the error will be displayed here.
9️⃣ Once everything is deployed successfully
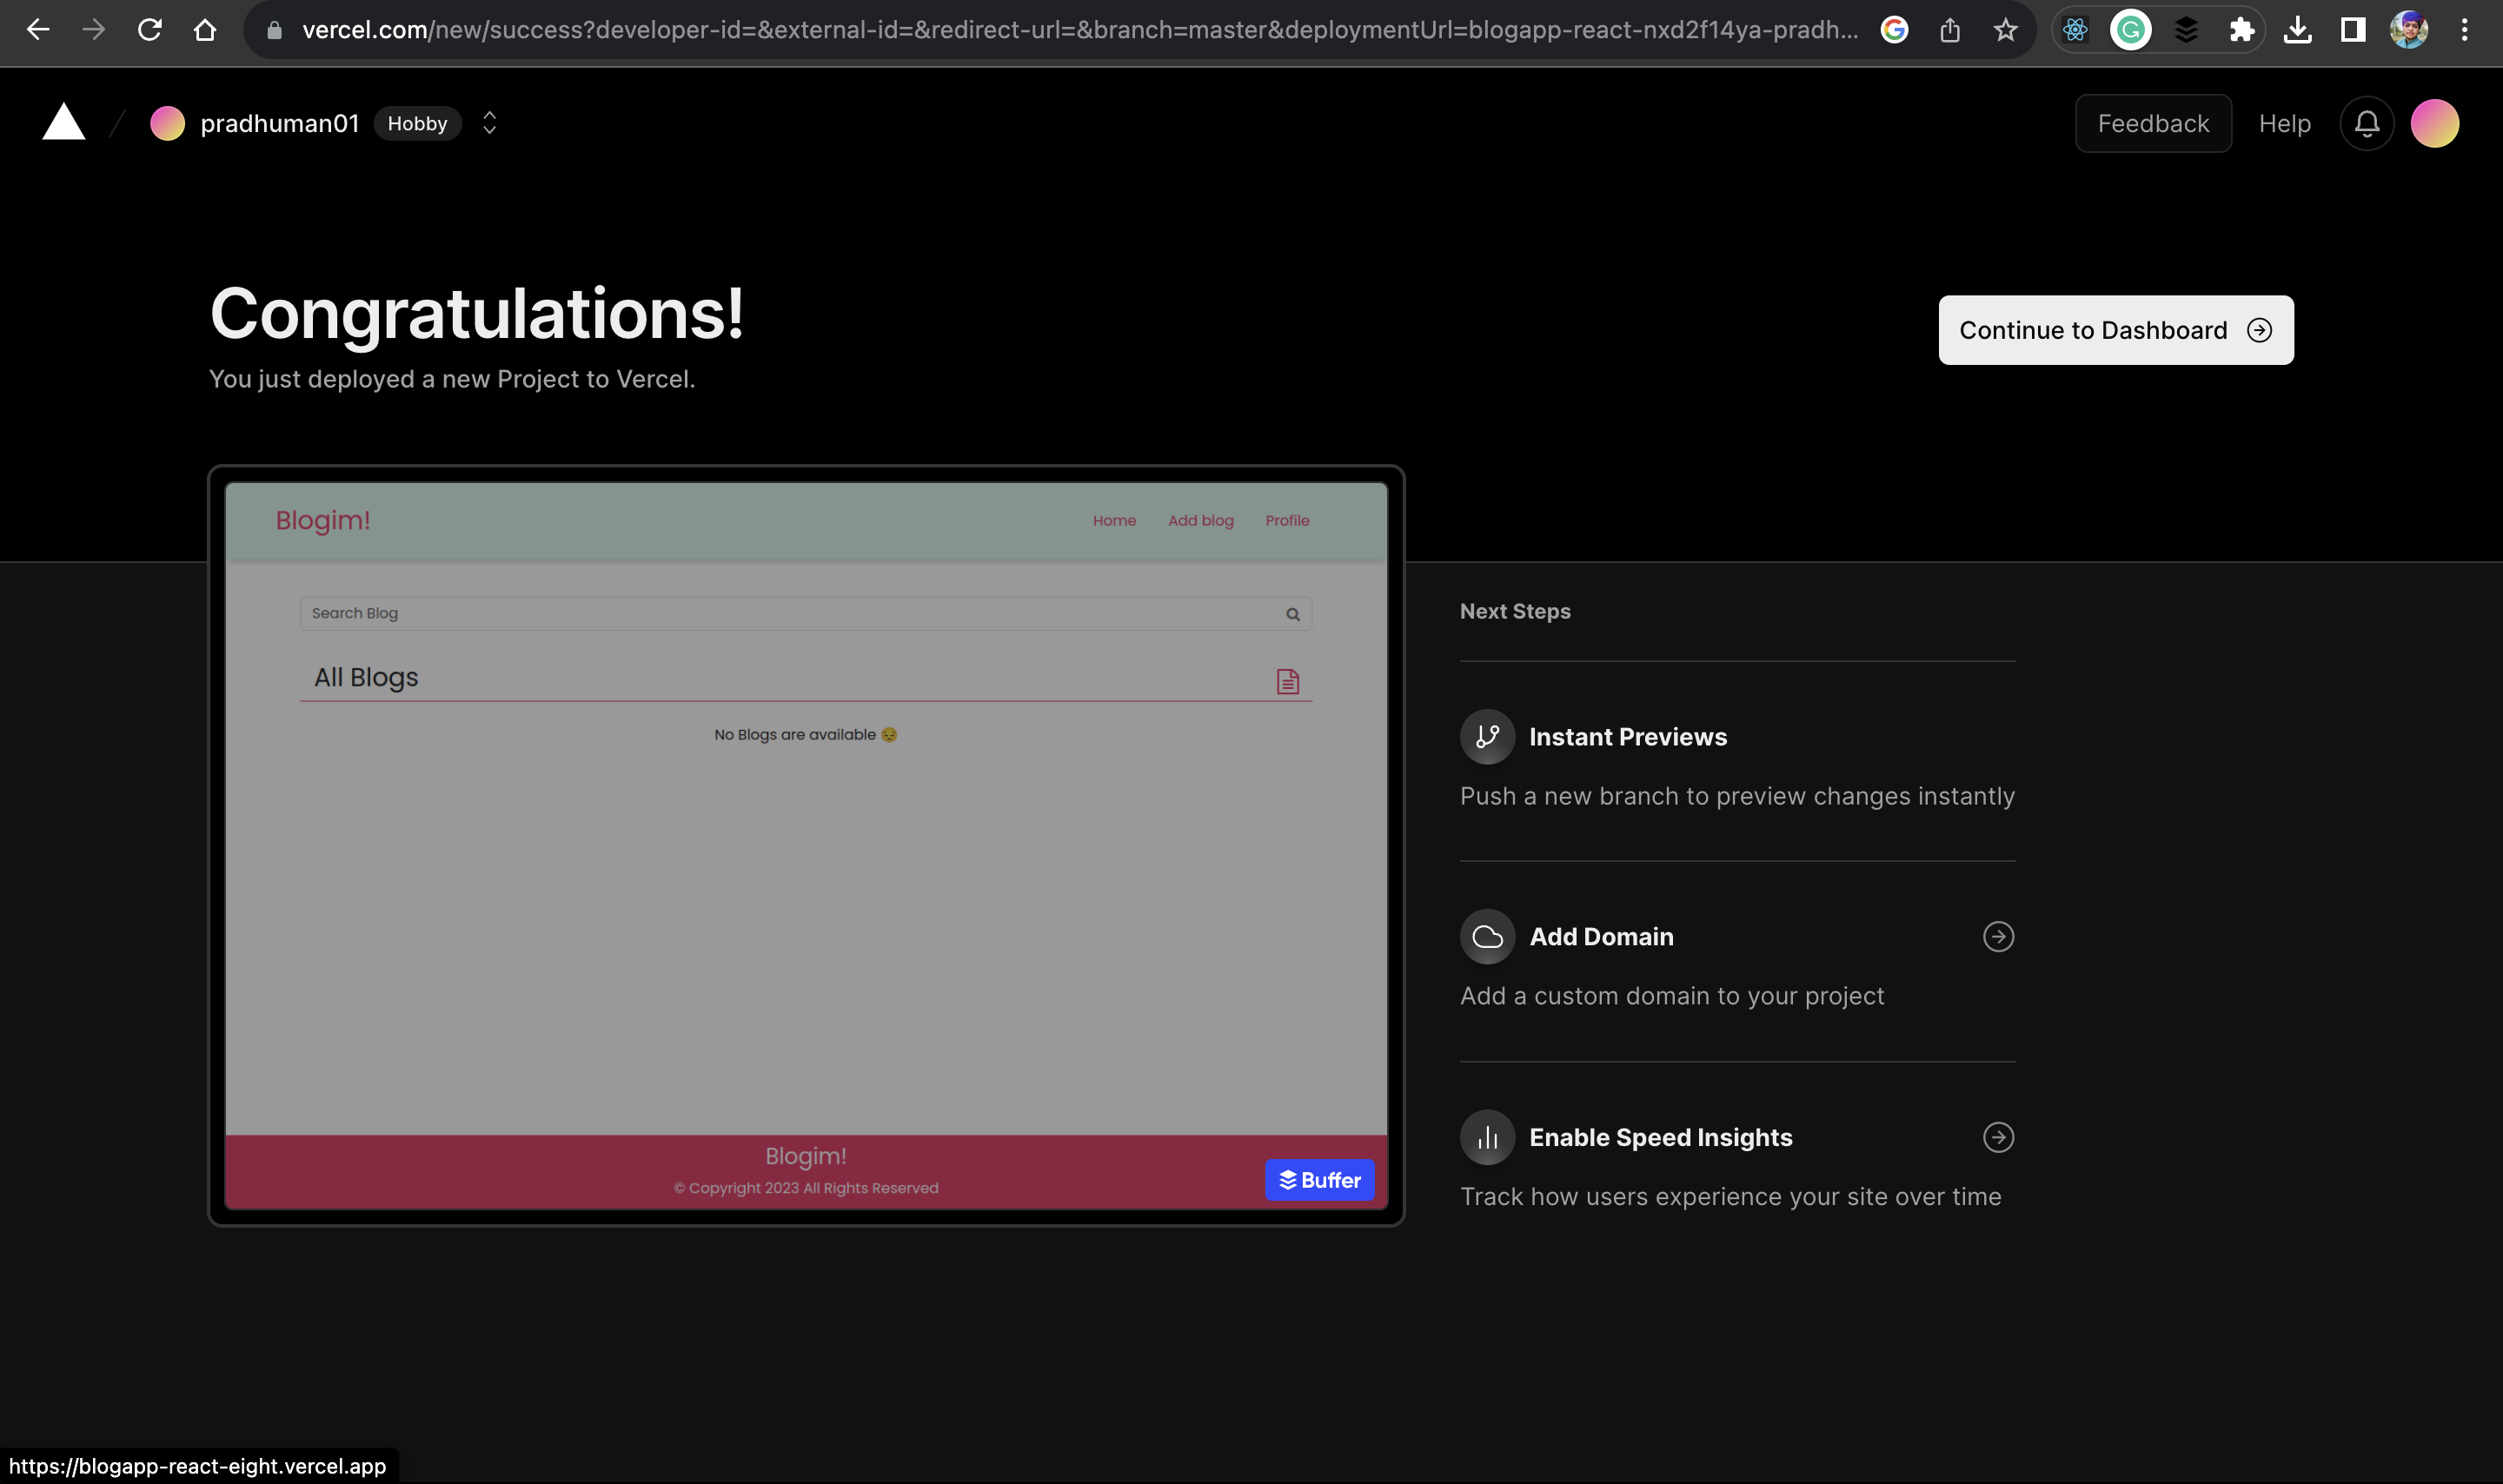
Great job! You've just successfully deployed your first React project to Vercel.
Vercel also allows you to add a custom domain to your project, as well as offering many more tools and insights to help manage your projects.
1️⃣0️⃣ Congratulations
Congratulations 🎉! I'm proud of you for building and deploying your first React app.
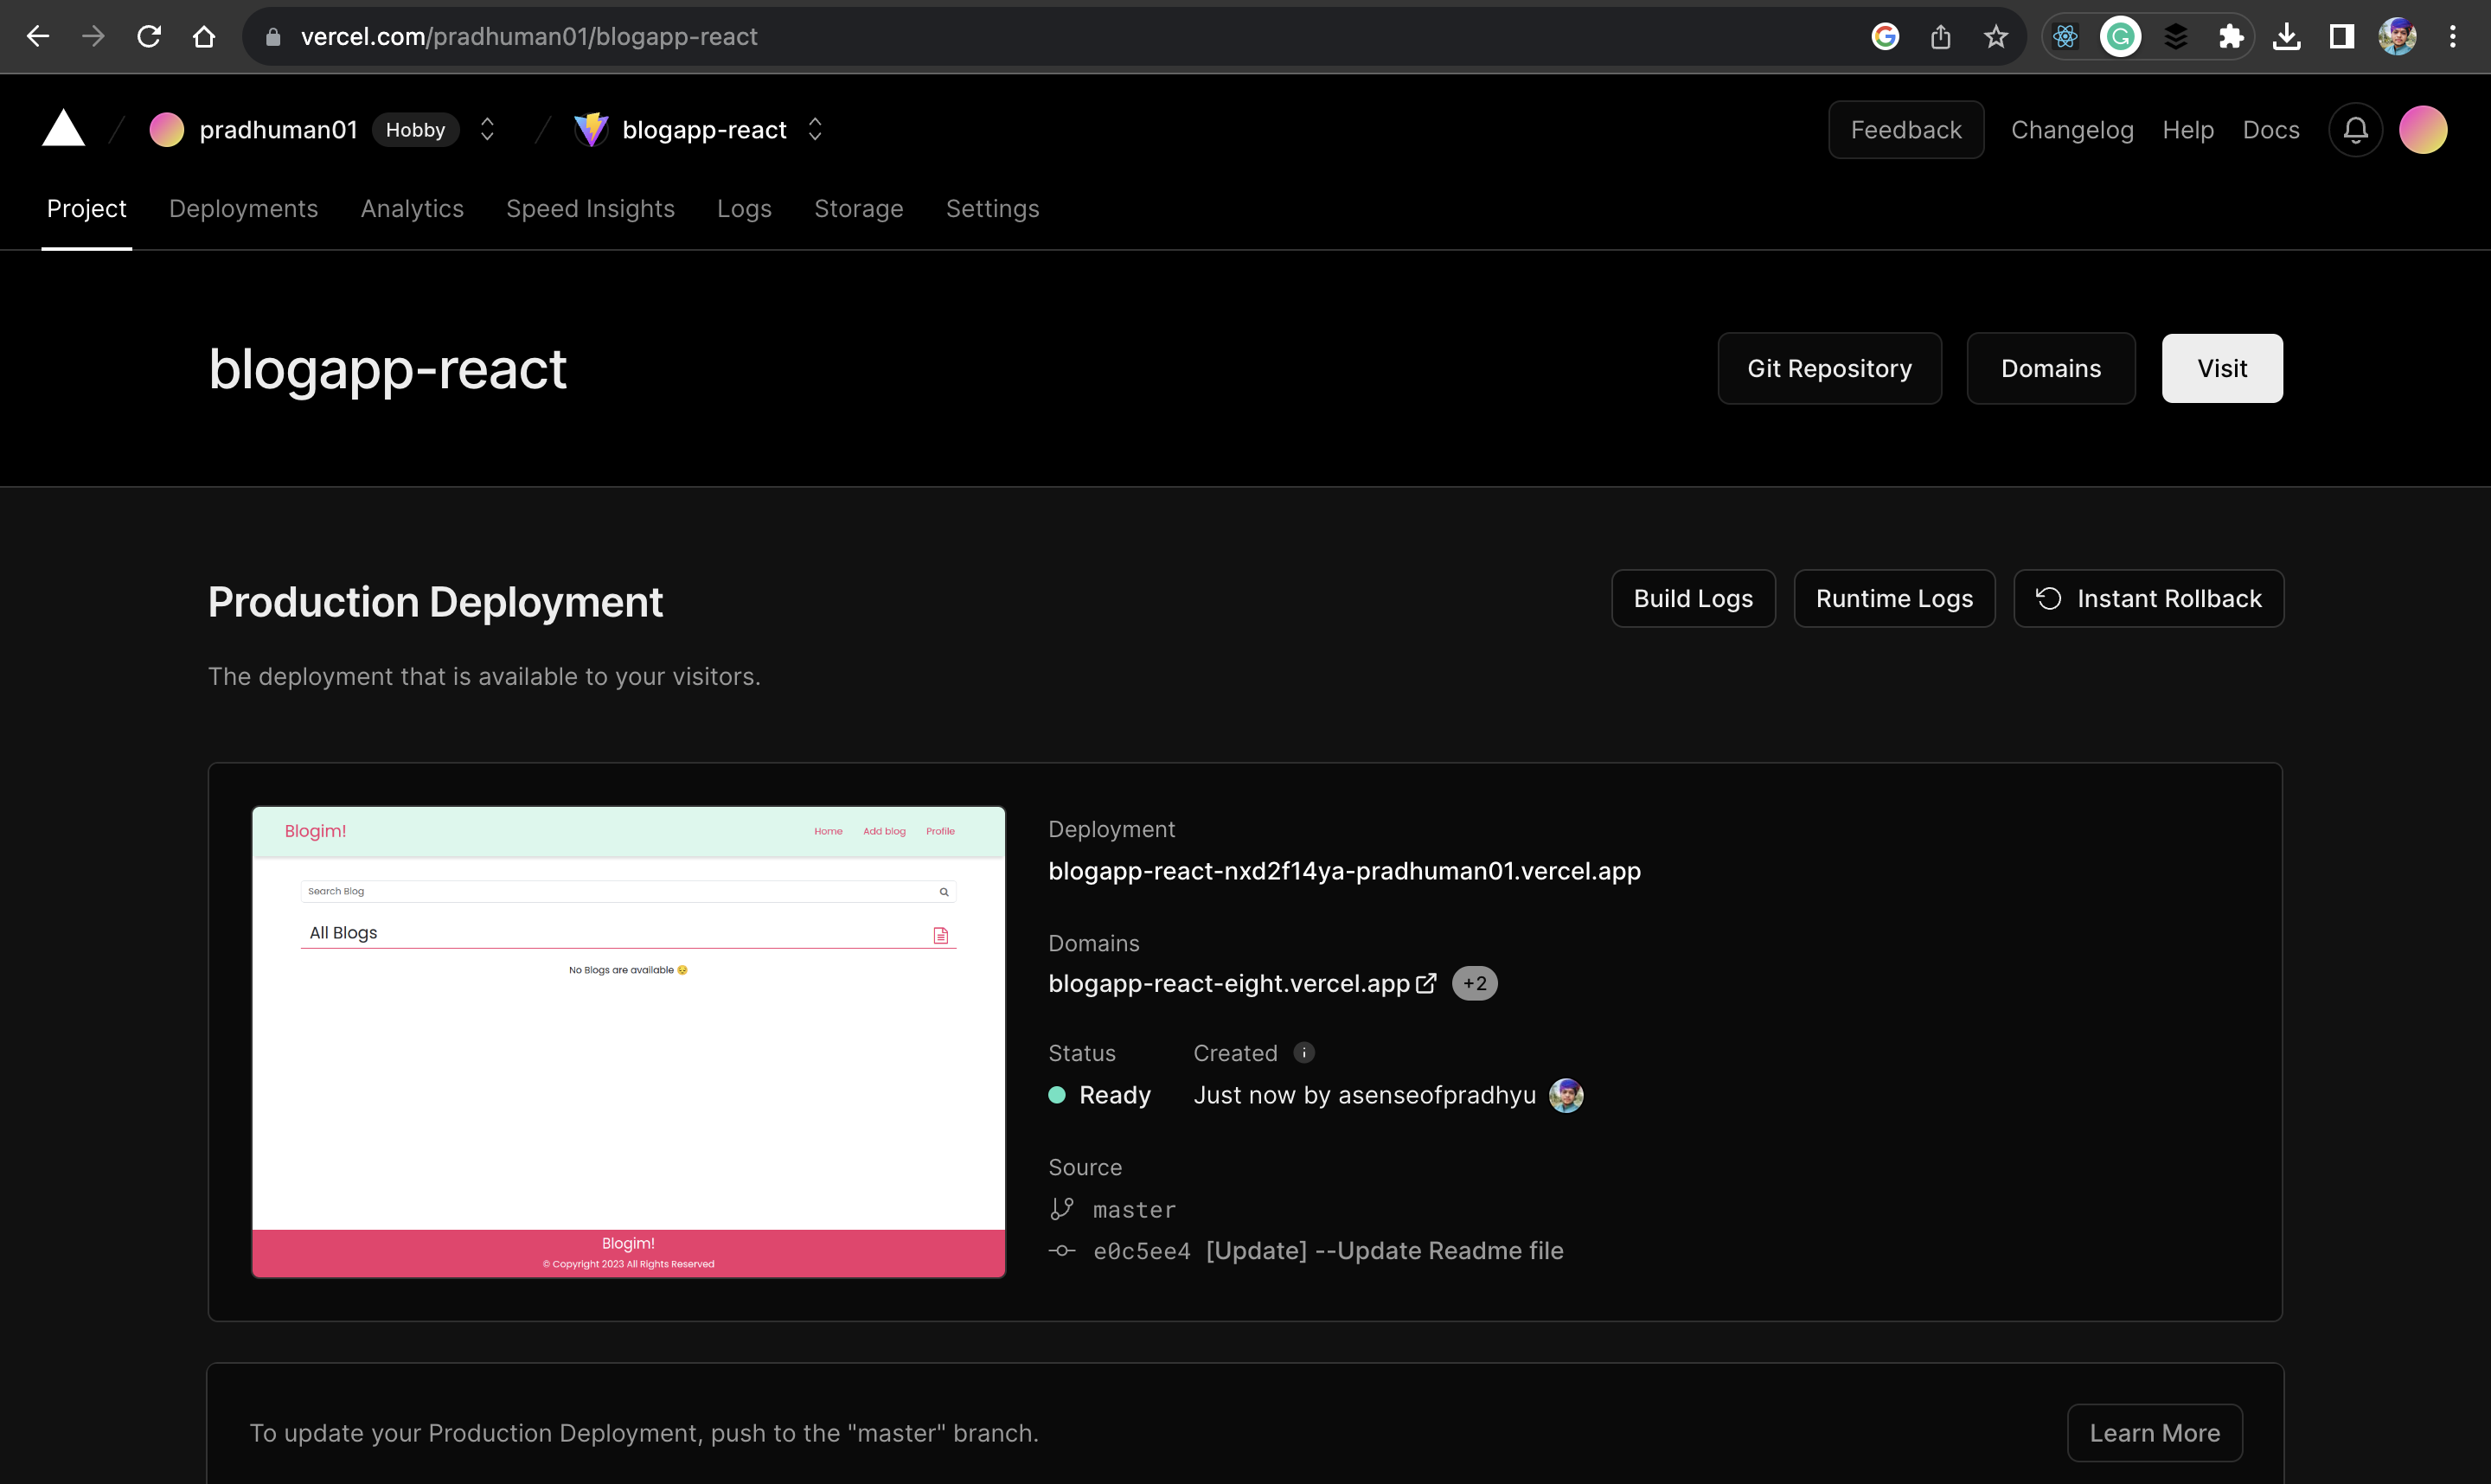
You can use the domain link to share your project. It functions as your project's URL.
Yay! 🎉 You did it! You've successfully built and deployed your very first React app, and I couldn't be happier for you!
Feel free to share your amazing project with others using the domain link, which serves as your project's URL.
By the way, I've also deployed a blog app using Vercel. You can take a look at it here:
Link: https://blogapp-react-eight.vercel.app
And with that, we wrap up this React blog series. Great job! 😊
Conclusion
In conclusion, this article walked you through the process of deploying a React blog app using Vercel, a powerful and efficient cloud platform. By following these steps, you have successfully made your project available online, showcasing your skills and knowledge in real-world applications.
As a developer, understanding deployment is essential for gaining practical experience and enhancing your professional growth.
Follow me on Twitter or Linkedin I share about Cloud, System Design, Code, and many more tech stuff 😊
Resources
Subscribe to my newsletter
Read articles from Pradhumansinh Padhiyar directly inside your inbox. Subscribe to the newsletter, and don't miss out.
Written by

Pradhumansinh Padhiyar
Pradhumansinh Padhiyar
Sharing what I learn about Cloud, System design, and Code • On my journey to becoming a certified AWS Dev • Writing ebook on System Design