Airbyte Connector Builder UI: 3 Success Stories
 Mikhail Masyagin
Hey everyone! My name is Mikhail Masyagin and I am a Senior Software Engineer at Anecdote. Primarily, I specialize in Python development and a substantial aspect of my role involves the creation of new connectors for Airbyte. Since Airbyte released their Low-Code CDK in Autumn 2022 and Connector Builder UI in Winter 2023 I have converted some of our custom sources to them. Also, I have participated in Airbyte's Hacktoberfest and Connector Hackathon, writing new connectors and converting existing ones to Low-Code CDK.
Airbyte is an amazing Open Source project. It allows you to get data from various sources and put it into multiple destinations using a unified JSON protocol. Today it supports 61 destinations and more than 300 sources. Number of available connectors grows day to day.
In this post I would like to tell you how to convert existing Airbyte Sources from Python CDK to Low-Code CDK via Connector Builder UI, using my 3 Hackathon connectors as examples. I am going to tell you about both of them because each one shows different aspects of Low-Code CDK:
First, Plaid, is just a basic story of going No-Code.
Second, BrainTree, is a story about uniting efforts of both No-Code and Python CDKs to achieve a common goal.
Third, Yahoo-Finance-Price, shows how can you trick AIrbyte, just like Jack tricks the giant in an old English fairy tale "Jack and the Beanstalk". And no, you will not steal the Beanstalk from AWS :)
Up and running Airbyte
Before (re)writing your Airbyte Sources with Low-Code CDK, it's essential to initialize Airbyte on your local machine. This process entails installing the dependencies, downloading Airbyte's GitHub repository, and setting up your working environment.
Be careful, Pull Requests, which were mentioned earlier, are already in Airbyte's master branch, so I recommend you switch to the following commit after downloading the repository: b5d3ca857fc80658020d6c7de0548e8222eaba56 to be able to follow this guide step by step.
Now let's install Airbyte on your computer. For example, a server with Amazon Linux:
# airbyte platform dependencies (docker, docker-compose, docker compose)
sudo yum update -y

sudo yum install -y docker
sudo service docker start
sudo usermod -a -G docker $USER
sudo chmod 666 /var/run/docker.sock
docker version

sudo curl -L "https://github.com/docker/compose/releases/download/1.23.2/docker-compose-$(uname -s)-$(uname -m)" -o /usr/local/bin/docker-compose
sudo chmod +x /usr/local/bin/docker-compose
docker-compose --version

sudo mkdir -p /usr/local/lib/docker/cli-plugins/
sudo curl -SL https://github.com/docker/compose/releases/latest/download/docker-compose-linux-x86_64 -o /usr/local/lib/docker/cli-plugins/docker-compose
sudo chmod +x /usr/local/lib/docker/cli-plugins/docker-compose
docker compose version

# airbyte low-code cdk dependencies (git, python, nodejs, npm)
sudo yum install -y git
git help

sudo yum install -y python
python --version

curl -o- https://raw.githubusercontent.com/nvm-sh/nvm/v0.39.3/install.sh | bash
. ~/.nvm/nvm.sh
nvm install --lts

# airbyte
git clone git@github.com:airbytehq/airbyte.git
cd airbyte
git checkout b5d3ca857fc80658020d6c7de0548e8222eaba56
chmod +x run-ab-platform.sh
./run-ab-platform.sh
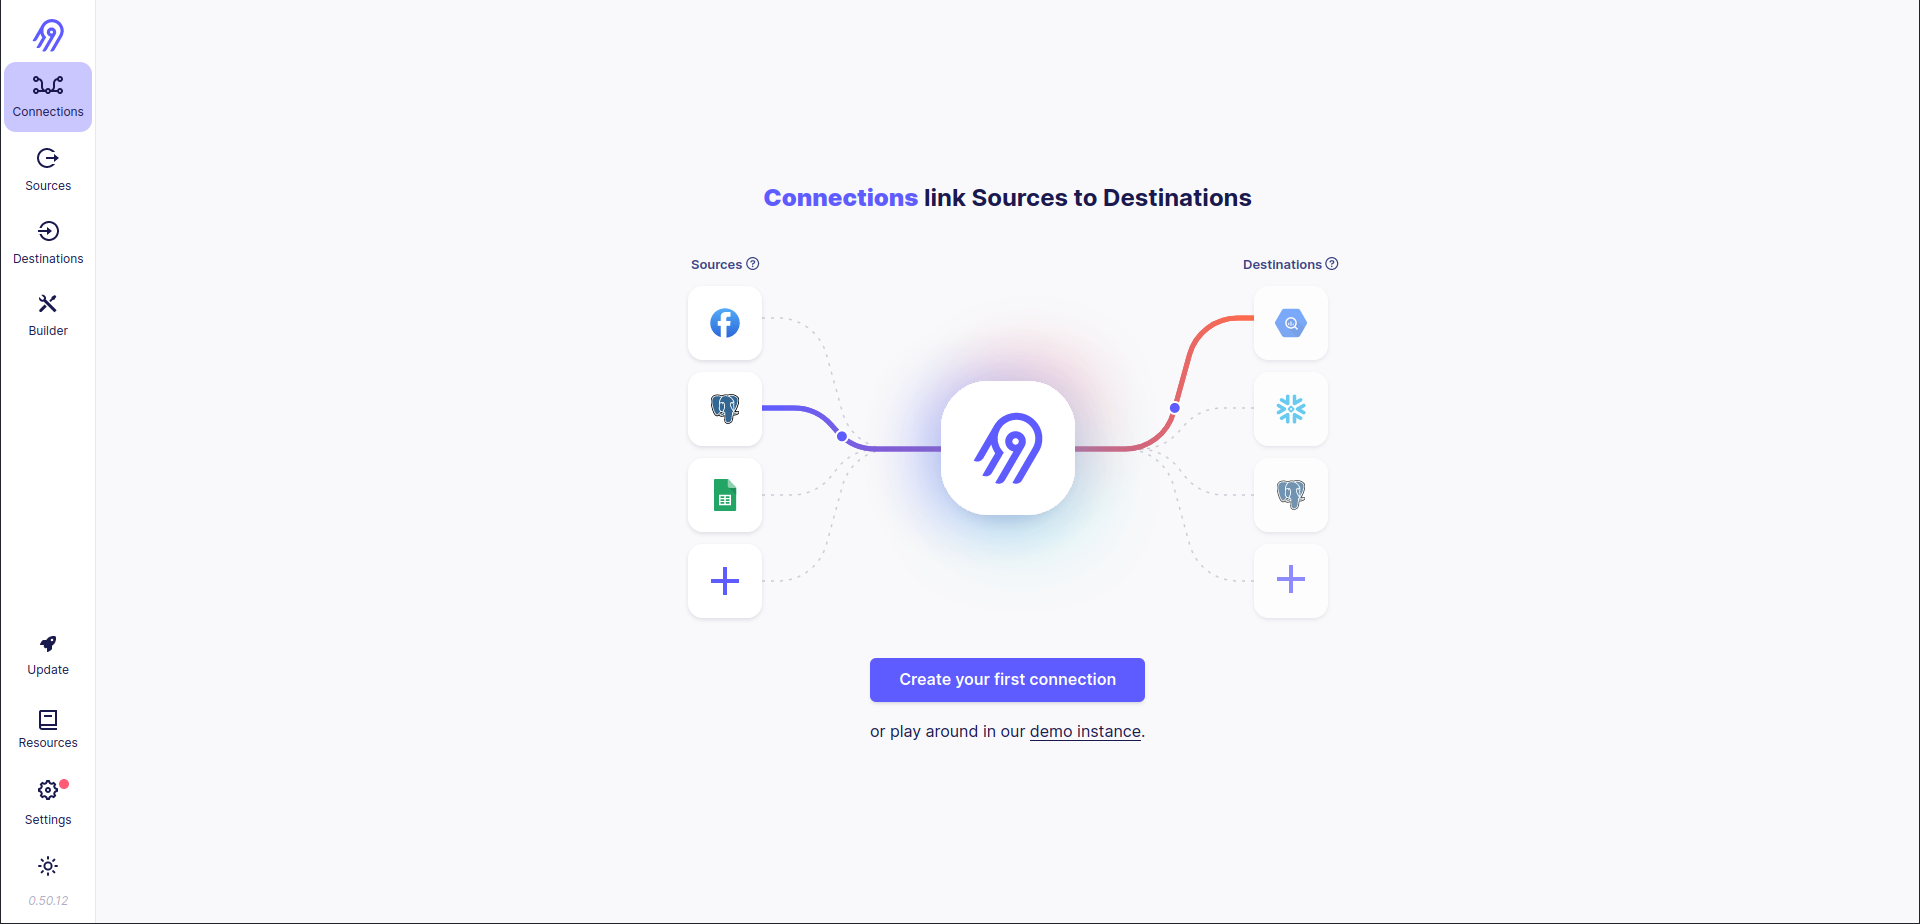
After running these commands list, wait a minute and go to http://localhost:8000. You will see Nginx's form to enter login & password. Put airbyte into username input and password into password input.
Welcome to the Airbyte!
Plan
You have Airbyte up and running, so now you can move to main goal.
Let's imagine that you are working in an IT company and your team lead runs into your room and tells you that this morning he learned Airbyte Low-Code CDK & Connector Builder UI and you need to rewrite all of your sources to them as fast as possible.
How can you do that? By IEEE rule!
I - Investigate. First, you have to investigate the existing source's code. You can find it in
airbyte/airbyte-integrations/connectors/*/directories. It is impossible to rewrite the Python CDK source to Low-Code CDK without any knowledge of the first one, so I recommend you check Airbyte's Python CDK tutorial. In a few words, each Python CDK source consists of 2 main filesspec.json(orspec.yaml),source.pyandschemasdirectory. First defines all connector's settings fields. Second, as it follows from its name, is the connector's source code. Finallyschemasdirectory consists of multiple JSON files, each of which defines one of the connector's streams schema. You have to study all configuration parameters and available streams and then go tosource.py. It always includes oneSource*(AbstractSource)and from one to many*Stream(Stream)classes. First defines the basic connector's logic: stream listing and parameters checking. The second classes define stream settings. You need to read them carefully to know which API calls they perform and do they support incremental syncs and pagination or not.E - Estimate. Second, you have to understand if it is possible to rewrite your source with Low-Code CDK and Connector Builder UI. There is a rule of thumb: if the source returns data in JSON format without any additional format conversions in
*Stream(Stream)classes methods and does not require any complicated logic like authorization tokens withTTLor pagination with combo of bothNext Page TokenandEOFflag, you can easily rewrite it. If the source additionally returns data in reverse time order, you can implement incremental syncs without any line of code too. Otherwise, you might need to reimplement part of the code via Low-Code CDK/Connector Builder UI and leave another part of the code unchanged (frankly, changed too). Sometimes it is too hard to transform complicated Python source into no-code solution, so it is wiser to simply refrain from doing it :)E - Effectuate. You have estimated your efforts on connector rewriting and decided that you need to do it. Now you have to simply (simply, ha-ha) go stream by stream and rewrite all of them from Python to YAML. Of course, testing is required.
E - Execute. After the first three steps, you have a working Low-Code CDK connector. Now it is time to finalize testing and push the source to production.
Beyond my professional duties, I am also working on a Ph.D. in the applied mathematics area, so I have to read many IEEE articles. I am so happy, that I was able to make such an abbreviation for Airbyte :)
Now let's move to the first success story: Plaid source rewriting.
Story 1: Plaid
Investigate
You can find Plaid's spec.json, source.py and schemas in a directory with the following path: airbyte/airbyte-integrations/connectors/source-plaid/source_plaid. The source's specification consists of 5 parameters: access_token, api_key, client_id, plaid_env and start_date. The first four of them are required ones. There are only two streams: balance and transaction. Both of them have short and easy-to-read schemas: schemas/balance.json and schemas/transaction.json.
Now let's check source.py. The first thing you should pay attention to are imports of a non-standard and non-airbyte library plaid:
from plaid.api import plaid_api
from plaid.model.accounts_balance_get_request import AccountsBalanceGetRequest
from plaid.model.accounts_balance_get_request_options import AccountsBalanceGetRequestOptions
from plaid.model.transactions_get_request import TransactionsGetRequest
from plaid.model.transactions_get_request_options import TransactionsGetRequestOptions
These imports mean that you have to dive into the library's source code and find HTTP requests to the Plaid API inside it. You will find API calls for both streams inside plaid/api/plaid_api.py file (def accounts_balance_get(self, accounts_balance_get_request, **kwargs) and def transactions_get(self, transactions_get_request, **kwargs)) and then you can go down to the implementation of call_with_http_info and other internal HTTP methods.
class BalanceStream(PlaidStream):
    # ...
    def read_records(
        self,
        sync_mode: SyncMode,
        cursor_field: List[str] = None,
        stream_slice: Mapping[str, Any] = None,
        stream_state: Mapping[str, Any] = None,
    ) -> Iterable[Mapping[str, Any]]:
        min_last_updated_datetime = datetime.datetime.strptime(
            datetime.datetime.strftime(self.start_date, "%y-%m-%dT%H:%M:%SZ"),
            "%y-%m-%dT%H:%M:%S%z",
        )
        options = AccountsBalanceGetRequestOptions(min_last_updated_datetime=min_last_updated_datetime)
        getRequest = AccountsBalanceGetRequest(access_token=self.access_token, options=options)
        balance_response = self.client.accounts_balance_get(getRequest)
        for balance in balance_response["accounts"]:
            message_dict = balance["balances"].to_dict()
            message_dict["account_id"] = balance["account_id"]
            yield message_dict
After reading the code you can conclude that:
balancestream is quite simple. It sends only one request per connector run and does not support incremental syncs or pagination.transactionis much more complicated. It supports incremental syncs (it can be detected by the presence ofcursor_field,get_updated_stateandsource_defined_cursormethods inIncrementalTransactionStream(PlaidStream)class.
Estimate
Plaid API accepts requests and returns responses in JSON format so that is the first penny in the piggy bank of Low-Code CDK. Moreover, balance stream consists of only one request. transaction stream is the most complicated part of this Python CDK connector: it supports pagination and incremental syncs. However, it uses simple limit & offset pagination and returns data in reverse time order, so its basic features, are supported in Airbyte Low-Code CDK.
Looks like you can easily convert this source from Python CDK to Low-Code CDK via Airbyte Connector Builder UI.
Effectuate
Airbyte No-Code Connector Builder
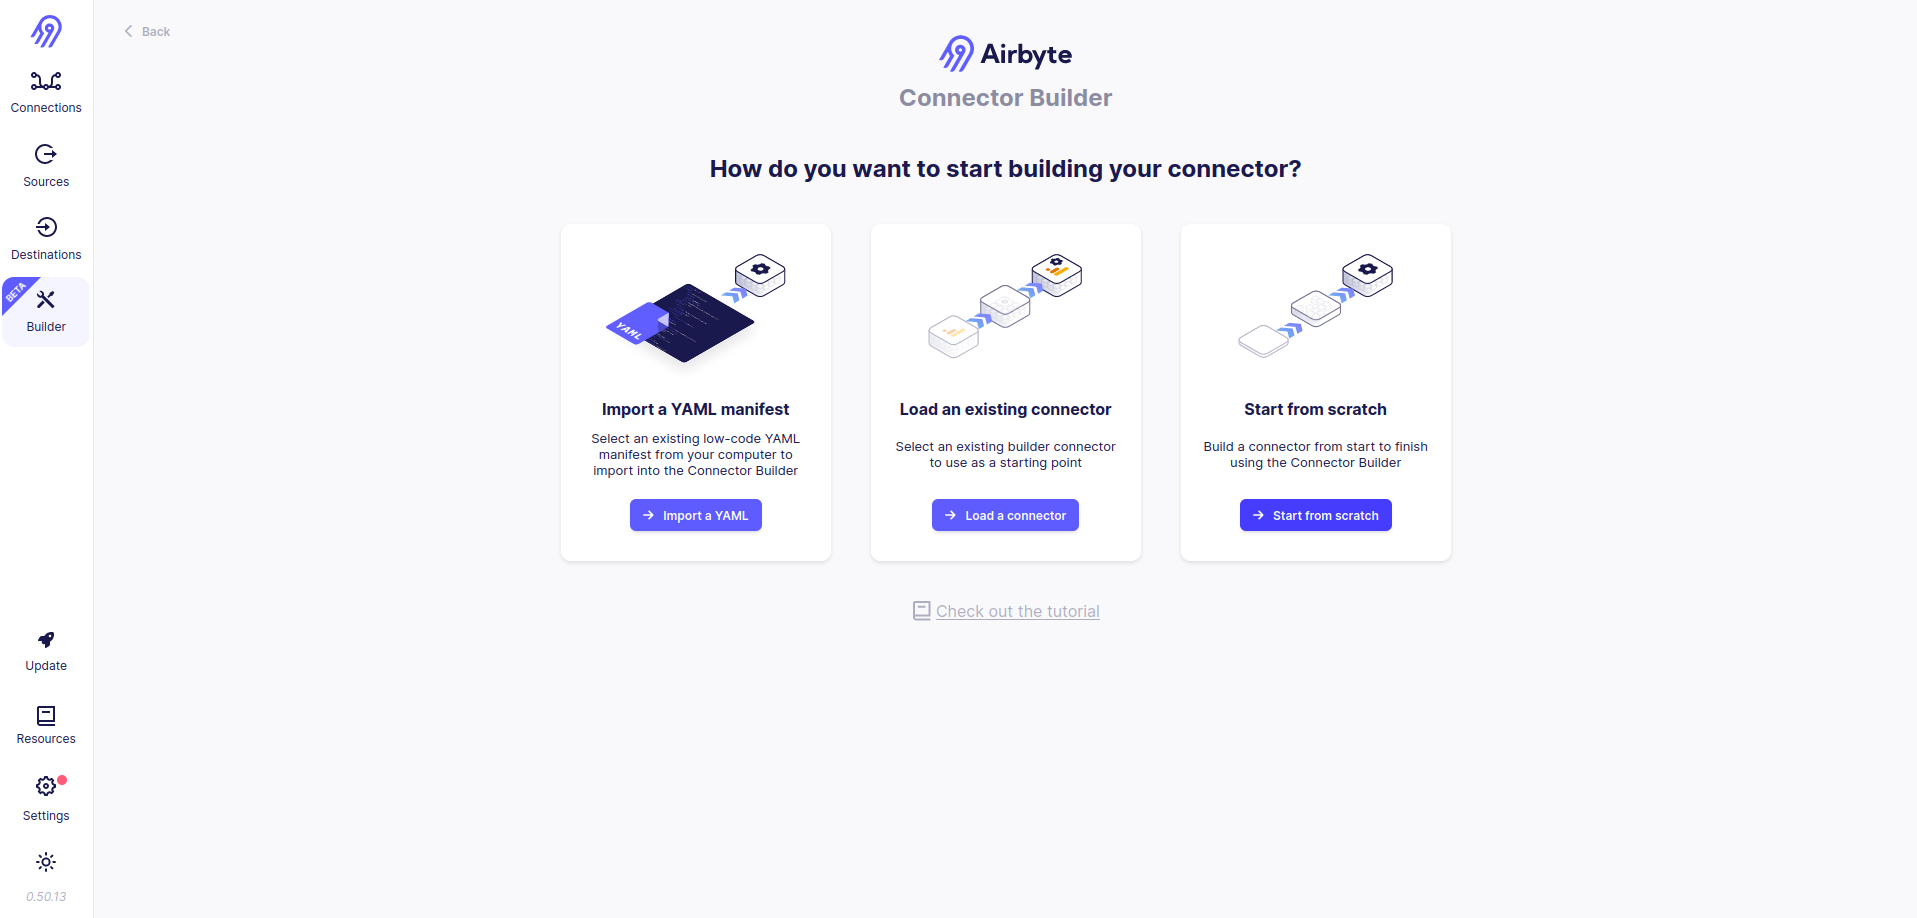
Now let's build a new no-code source. You can start this process directly at Airbyte's Web Page. To do that, you need to click on Builder icon in the middle of the left panel and then click on + New custom connector button on the top right part of the page. Finally, you have to select the right button: Start from scratch.
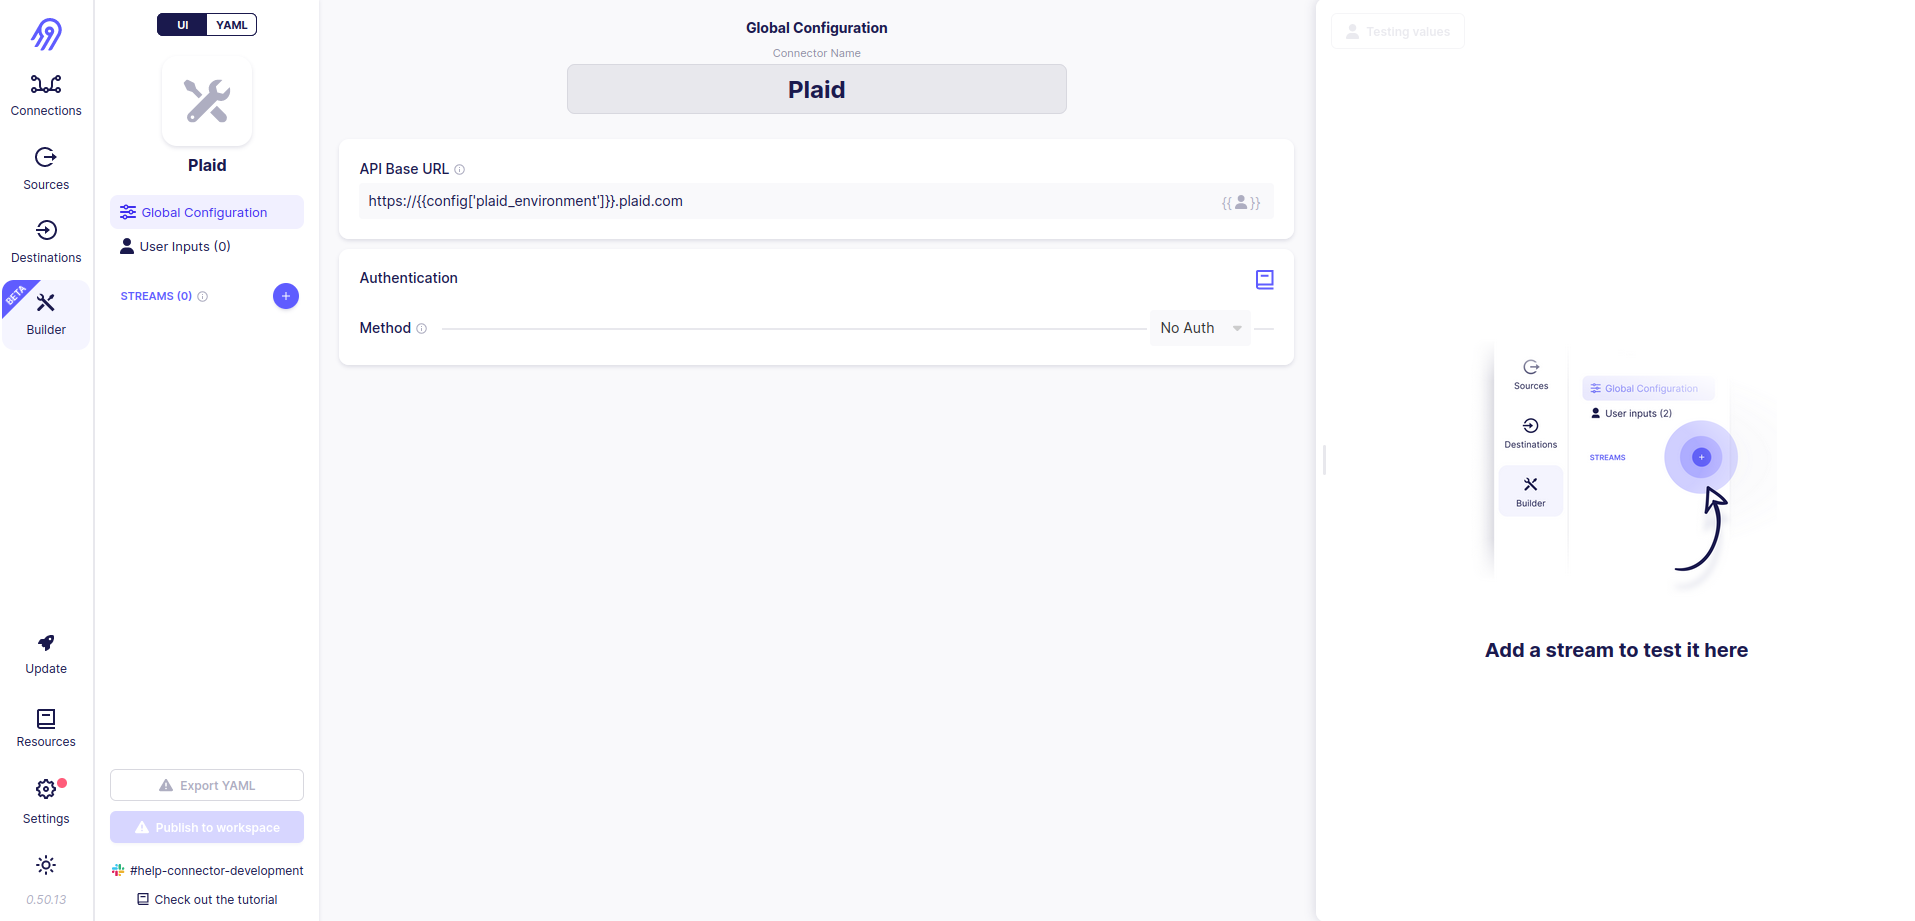
You have to provide a title, base URL and authentication method for the new connector. As you can see in the plaid library's source code its base URL is dependent on the value of the Plaid environment variable. This variadic behavior can be achieved in Airbyte No-Code Connector Builder via Jinja2 Templates: API Base URL value will be set to https://{{config['plaid_environment']}}.plaid.com, so text between https:// and .plaid.com is selected from the source config parameter. Plaid API does not require any complicated authentication so you can leave Authentication Method Selection in No Auth state.
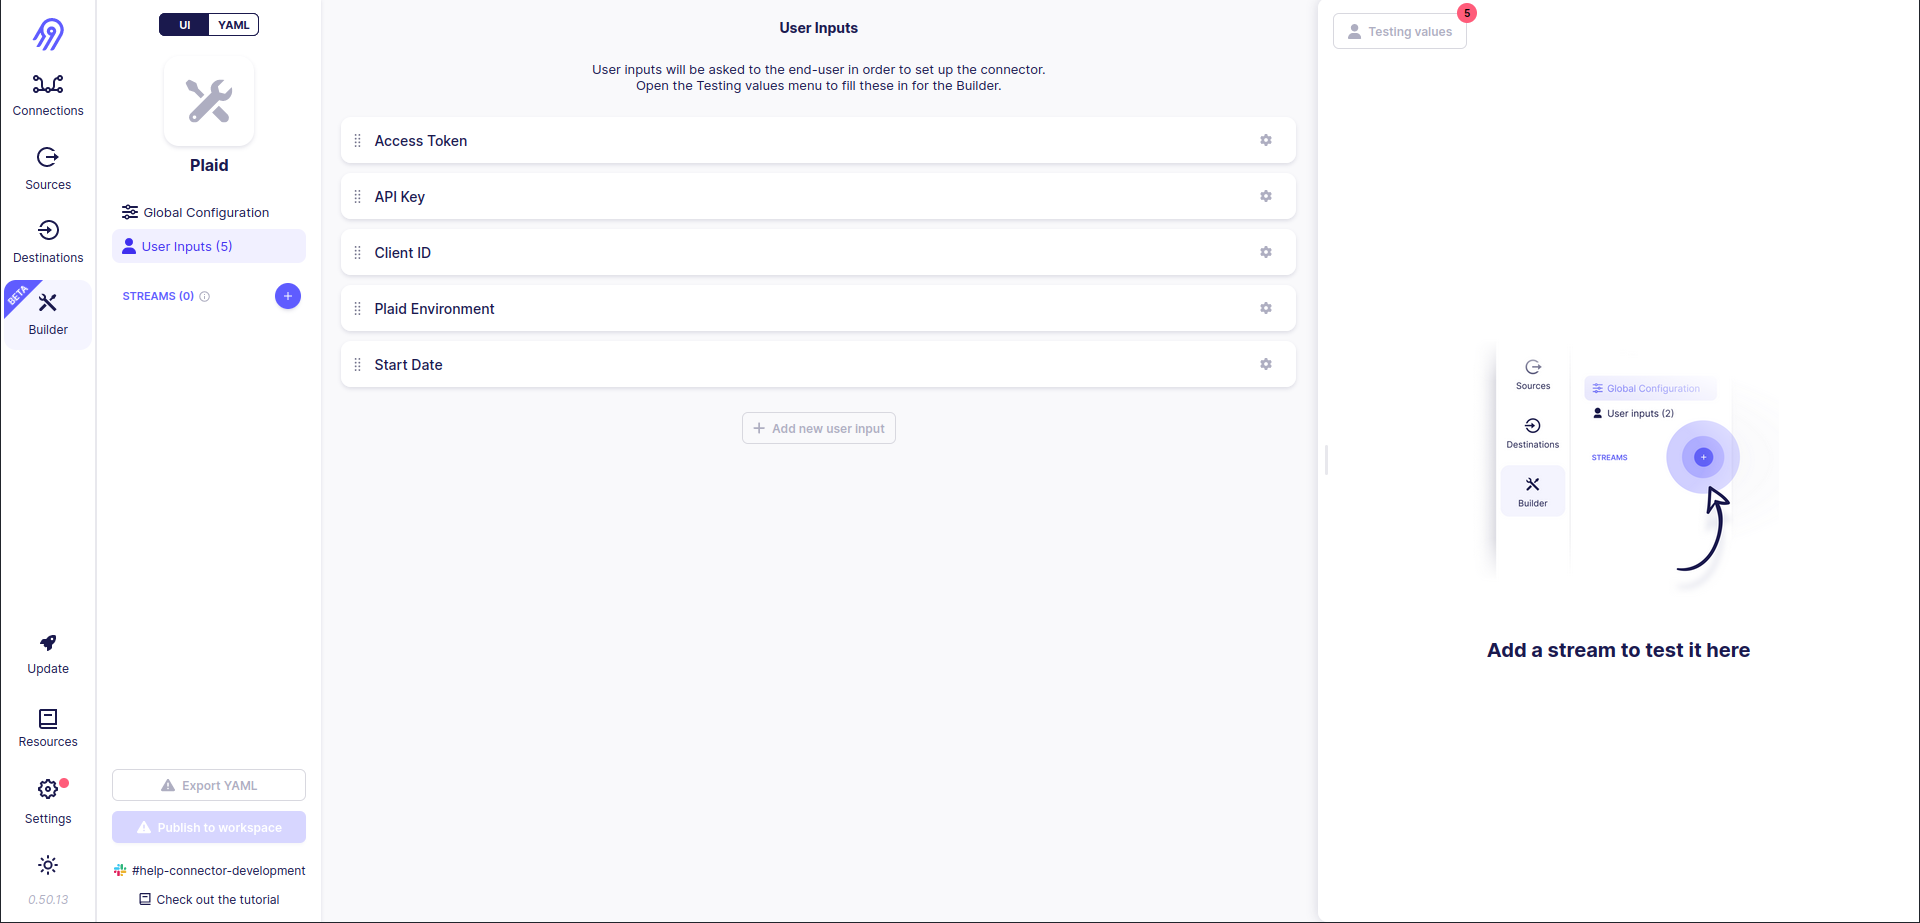
Next, you can define User Inputs corresponding to spec.json. You can use strings, numbers, integers, enums etc. as input types. Be careful with Field IDs because they are generated automatically and can differ from the ones in the original connector specification (however, you can change them in final source's YAML specification)
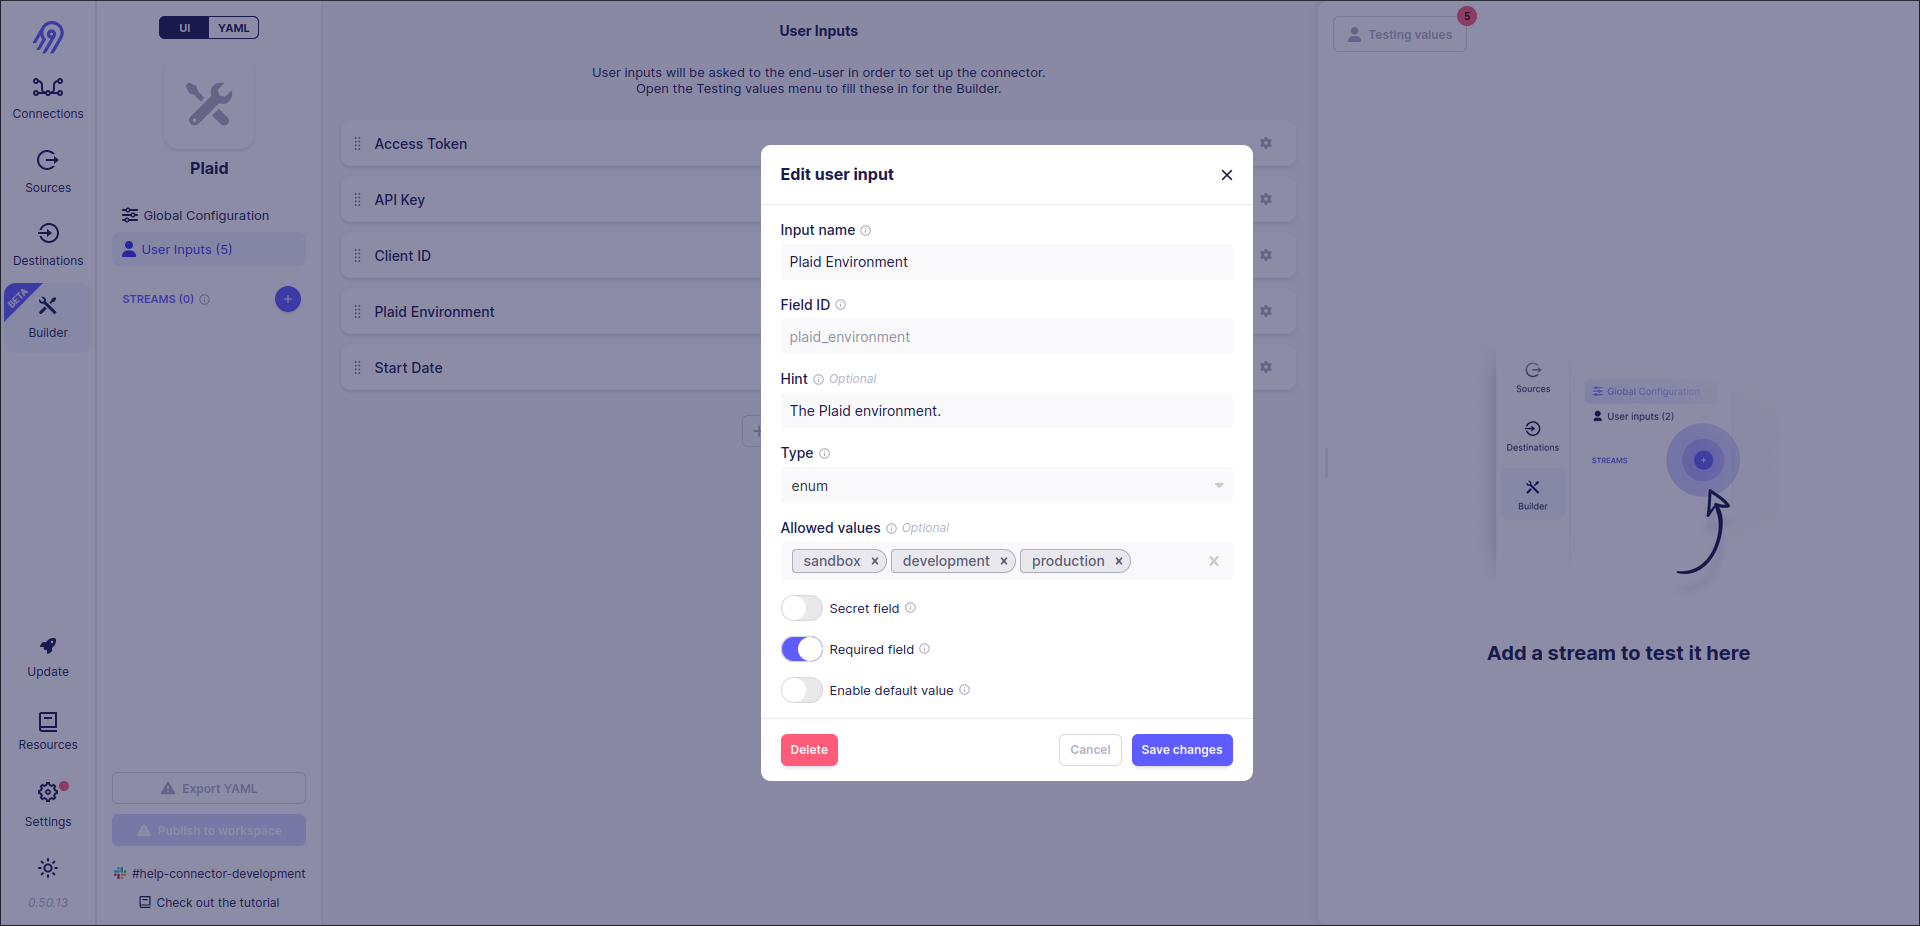
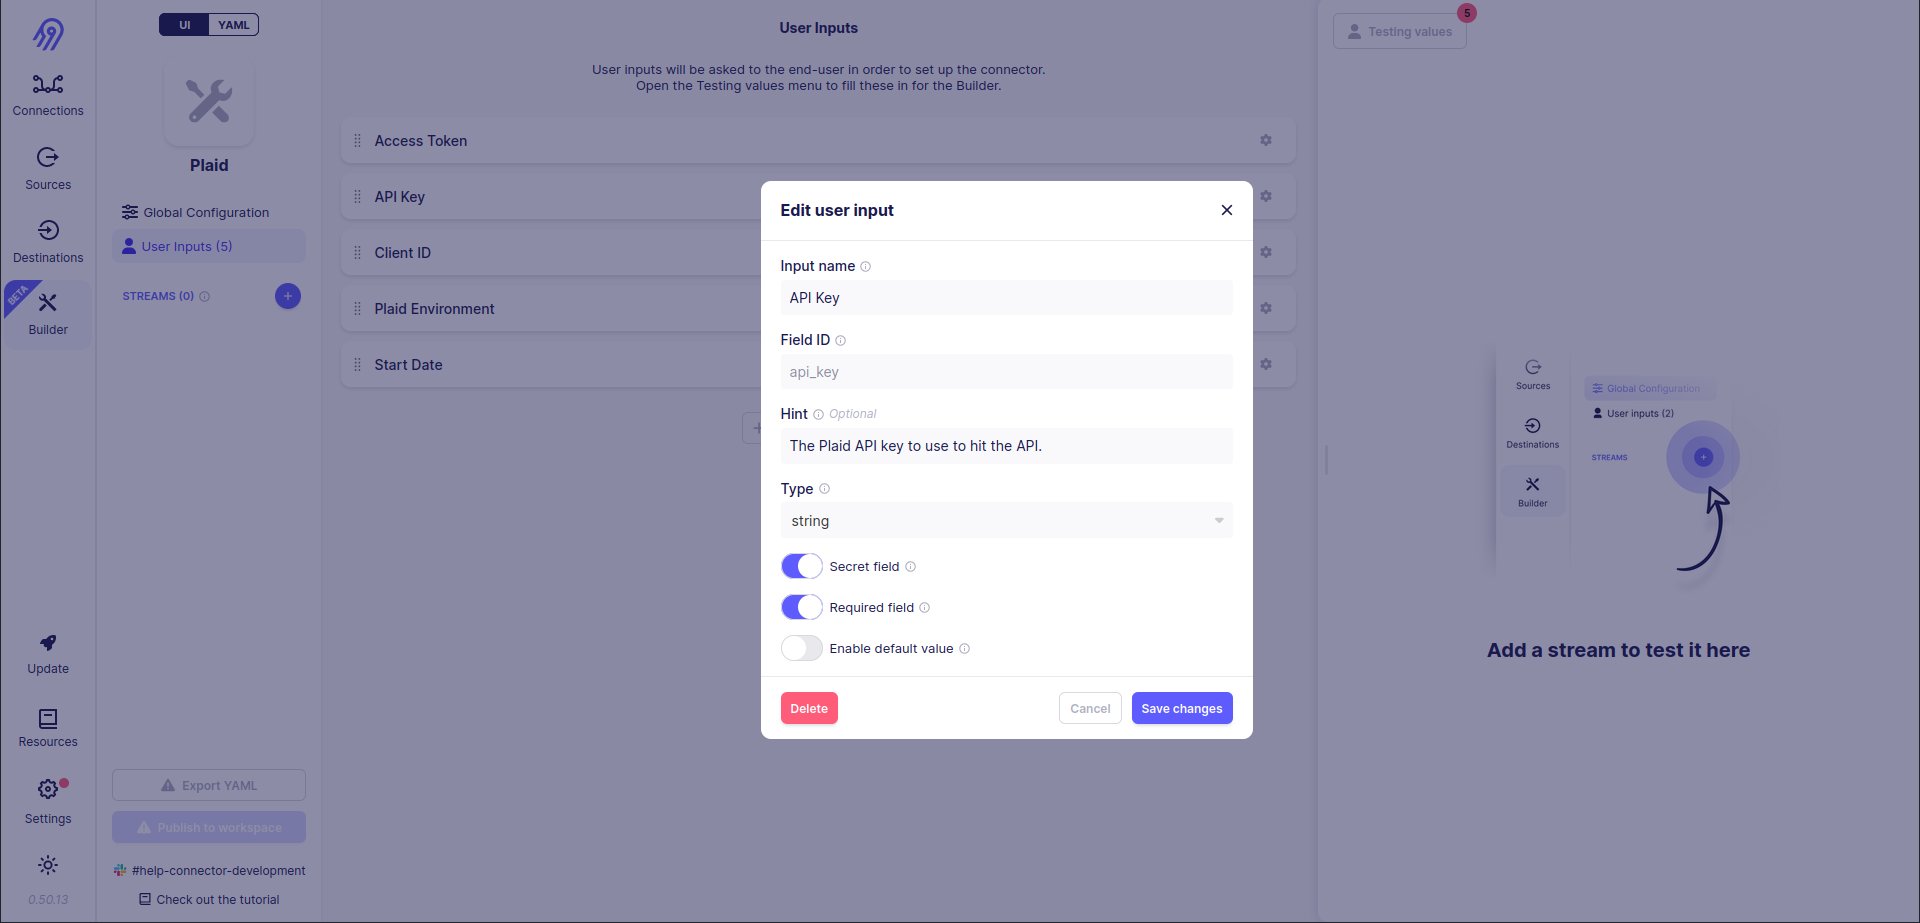
Sometimes you might want to hide the inserted field value from other people. You can use Secret Field selector to achieve it. Be careful, intruders can get this value from the Airbyte database because it needs to store it in non-encrypted format to access APIs.
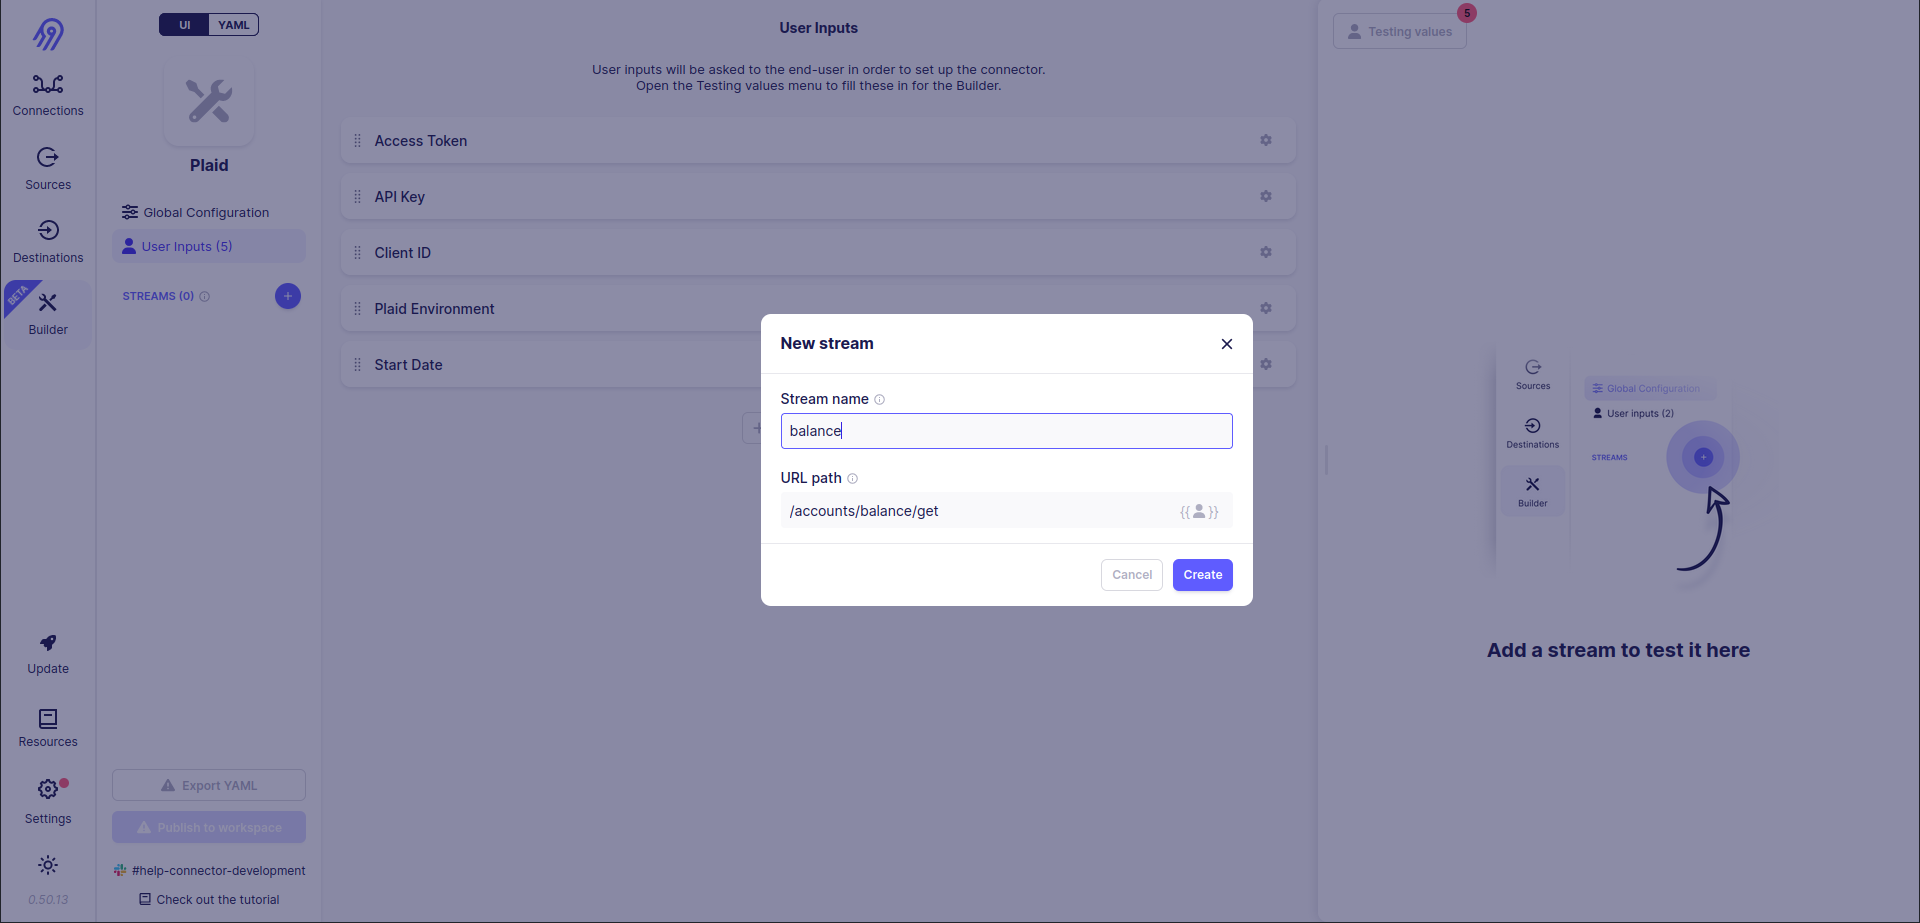
Next, you have to define streams. Let's start with the easier one, balance. To do that let's press the blue plus button on the left part of the screen and provide the stream name and HTTP path:
Then you need to set some basic request and request processing logic parameters. I will not dive deep into all of them, because you can always check them in Airbyte documentation or directly in Airbyte No-Code Connector Builder, but let's discuss the most interesting ones:
Record Selector is a parameter, that sets the path for record extraction inside the JSON response. It is really helpful because most of the time you will get multiple records in one response and they will be embedded into outer JSON as a field:
  {
      "records": [
          {"record no": "1"},
          {"record no": "2"},
          {"record no": "3"},
      ]
  }
For the example above path is (
records*).Primary Key is used to uniquely identify each record in the stream.
Query Parameters are just a list of key-value pairs, which are passed in the request URL.
Request Headers are also a list of key-value pairs, which are passed in the request headers.
Request Body is a little bit more interesting parameter. It can be not only a list of key-value pairs (in JSON format) but also a free text. The ability to pass free text and Jinja2 Templates are the things that we need:
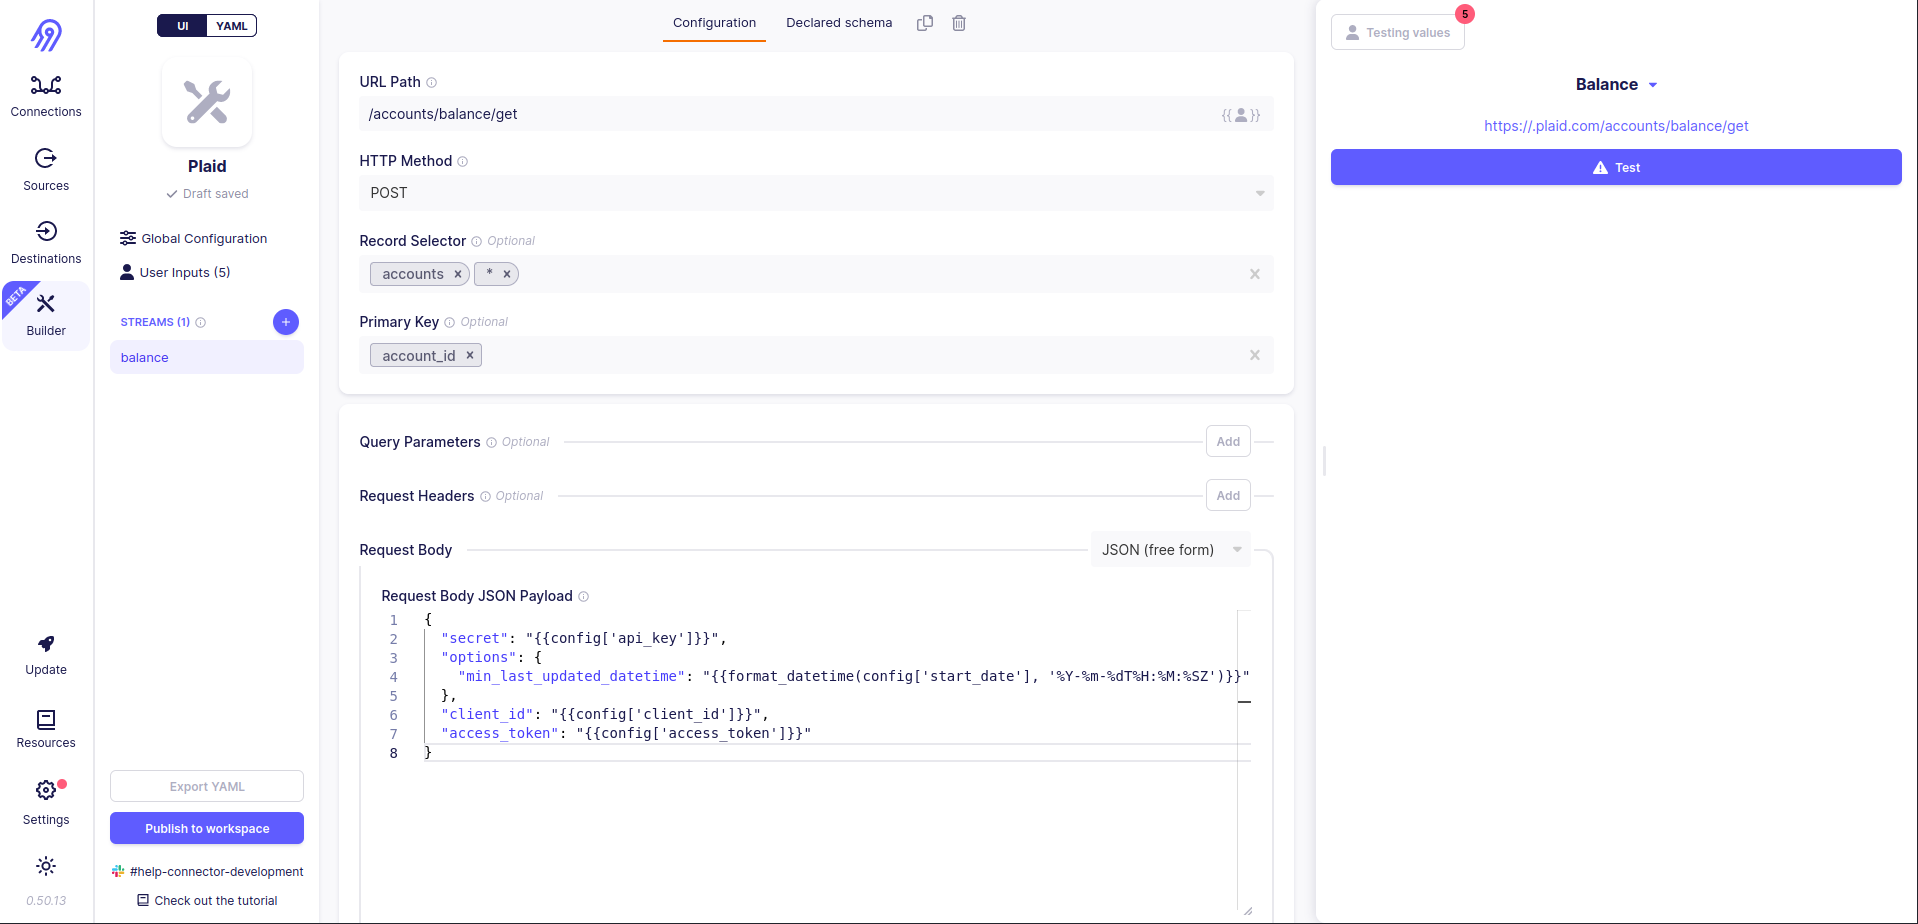
{
  "secret": "{{config['api_key']}}",
  "options": {
    "min_last_updated_datetime": "{{format_datetime(config['start_date'], '%Y-%m-%dT%H:%M:%SZ')}}"
  },
  "client_id": "{{config['client_id']}}",
  "access_token": "{{config['access_token']}}"
}
Pagination, Incremental Sync, Partitioning and Error Handler are not interesting for us in this stream.
Transformations section allows you to remove some fields from or add some fields to records. It is helpful when you already have a format from the original connector and you need to keep it in the Low-Code CDK version too.
Finally, you are ready to check if balance stream works. To do that, you have to specify the connector's testing values. Press Testing values button in the top right corner of the screen.
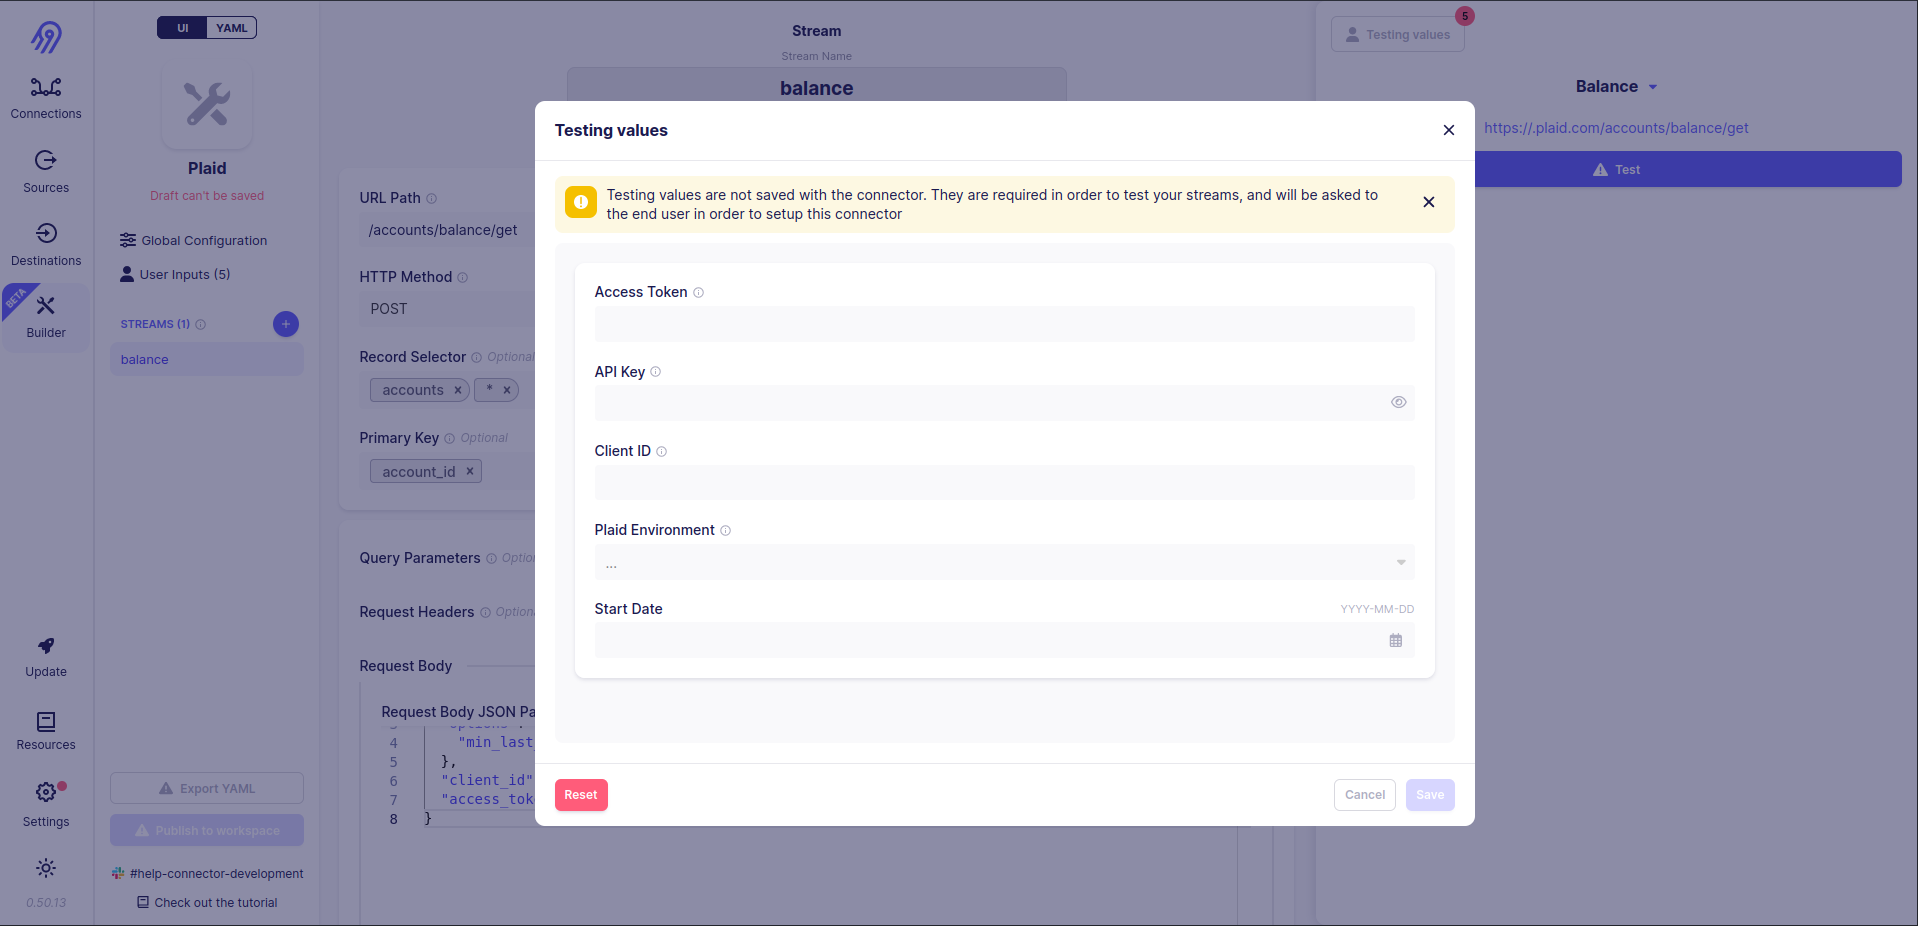
As you can see, the secret API Key value is not shown due to airbyte_secret flag being turned on in the config part of the tutorial.
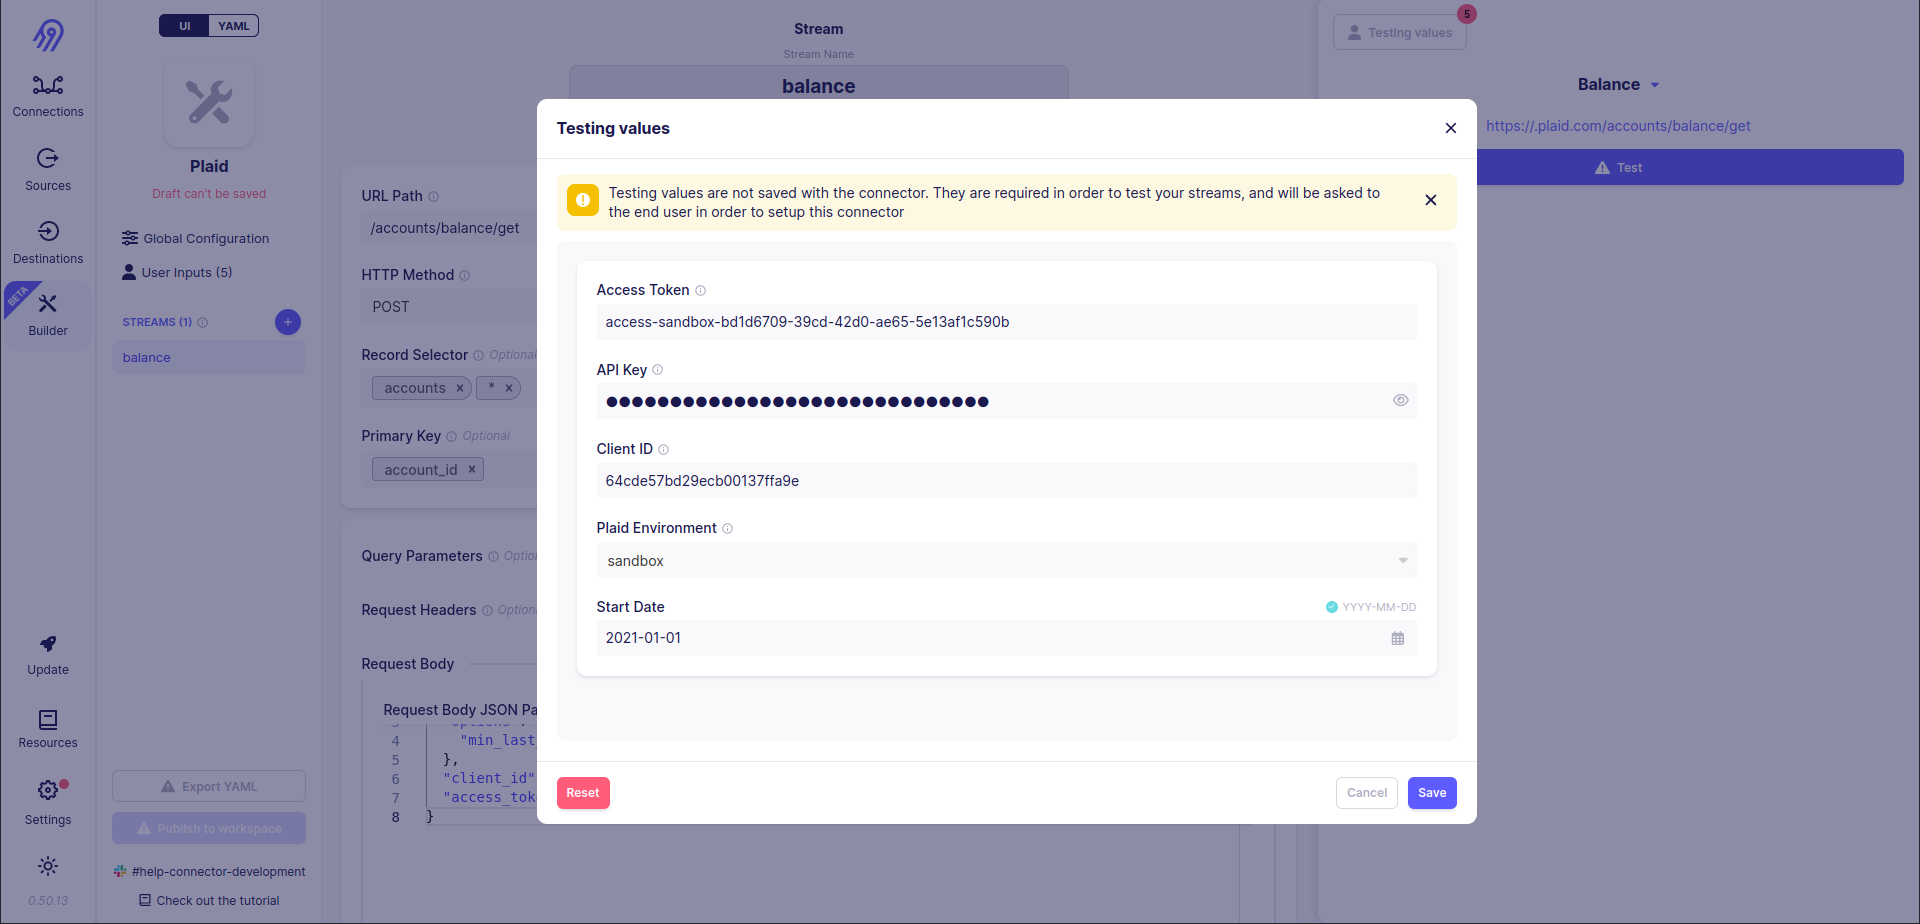
Now let's press the test button. After some time you will see the result. In my case, it is 9 records. You can check them in the right bar. Also, you can check here the original request, raw response and detected schema in JSON format.
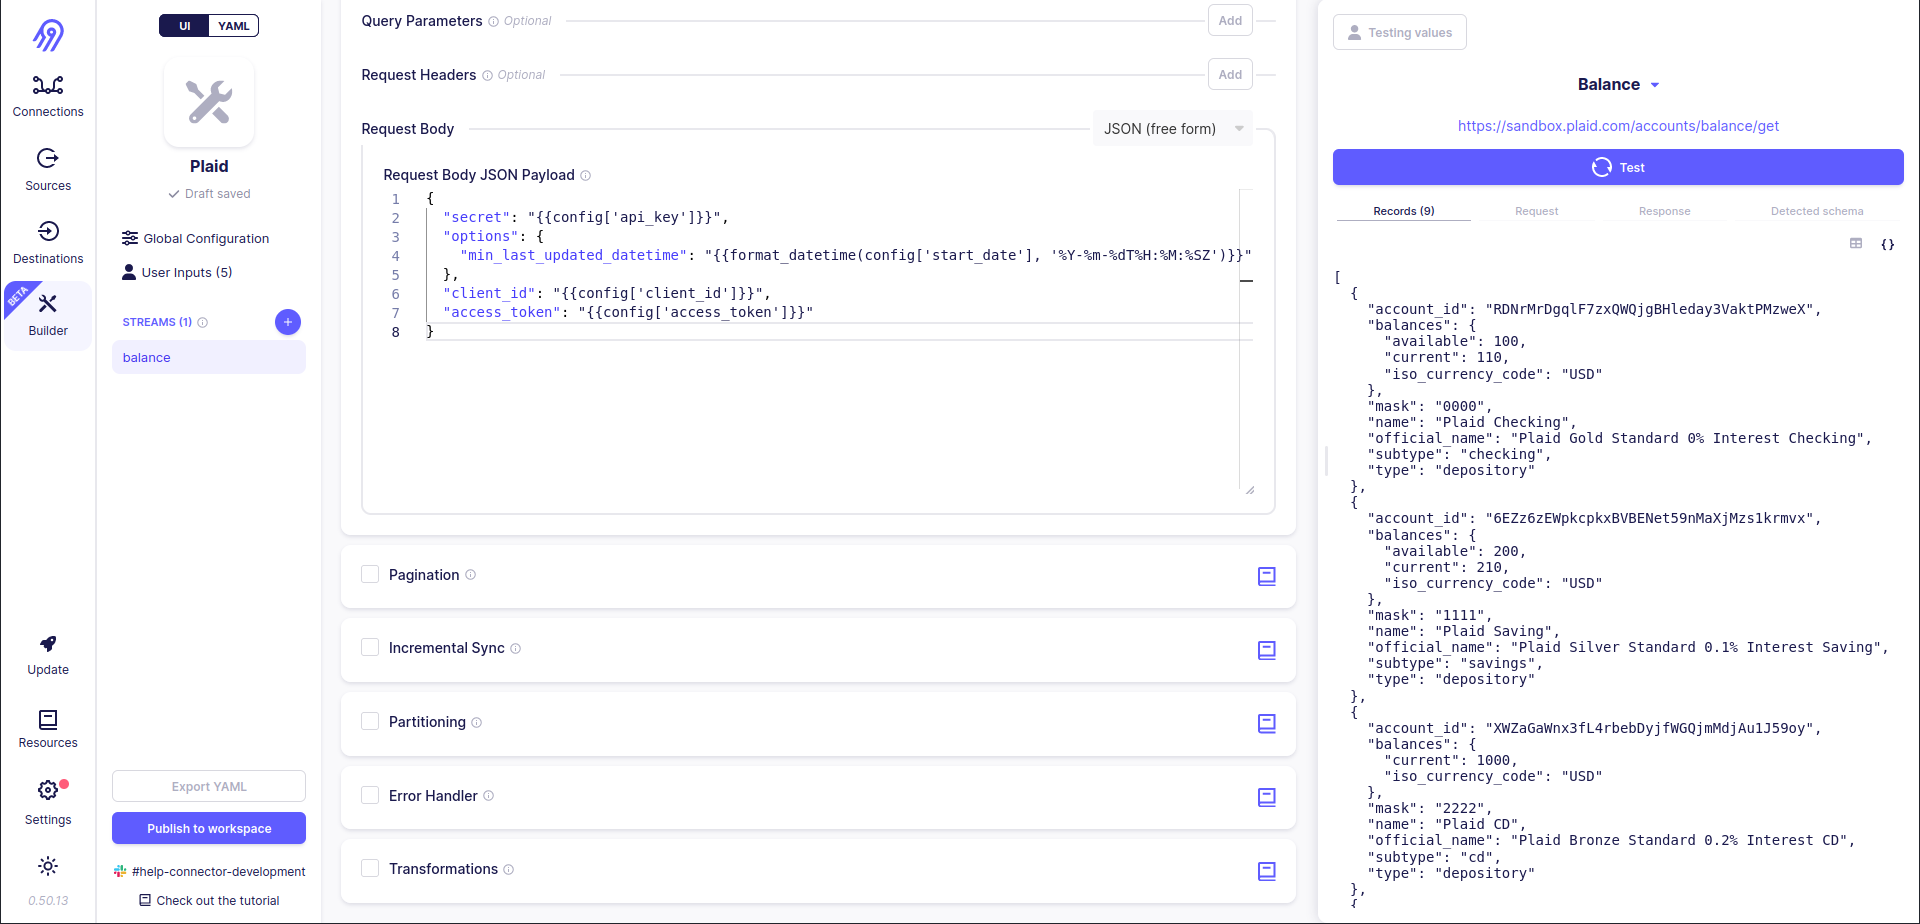
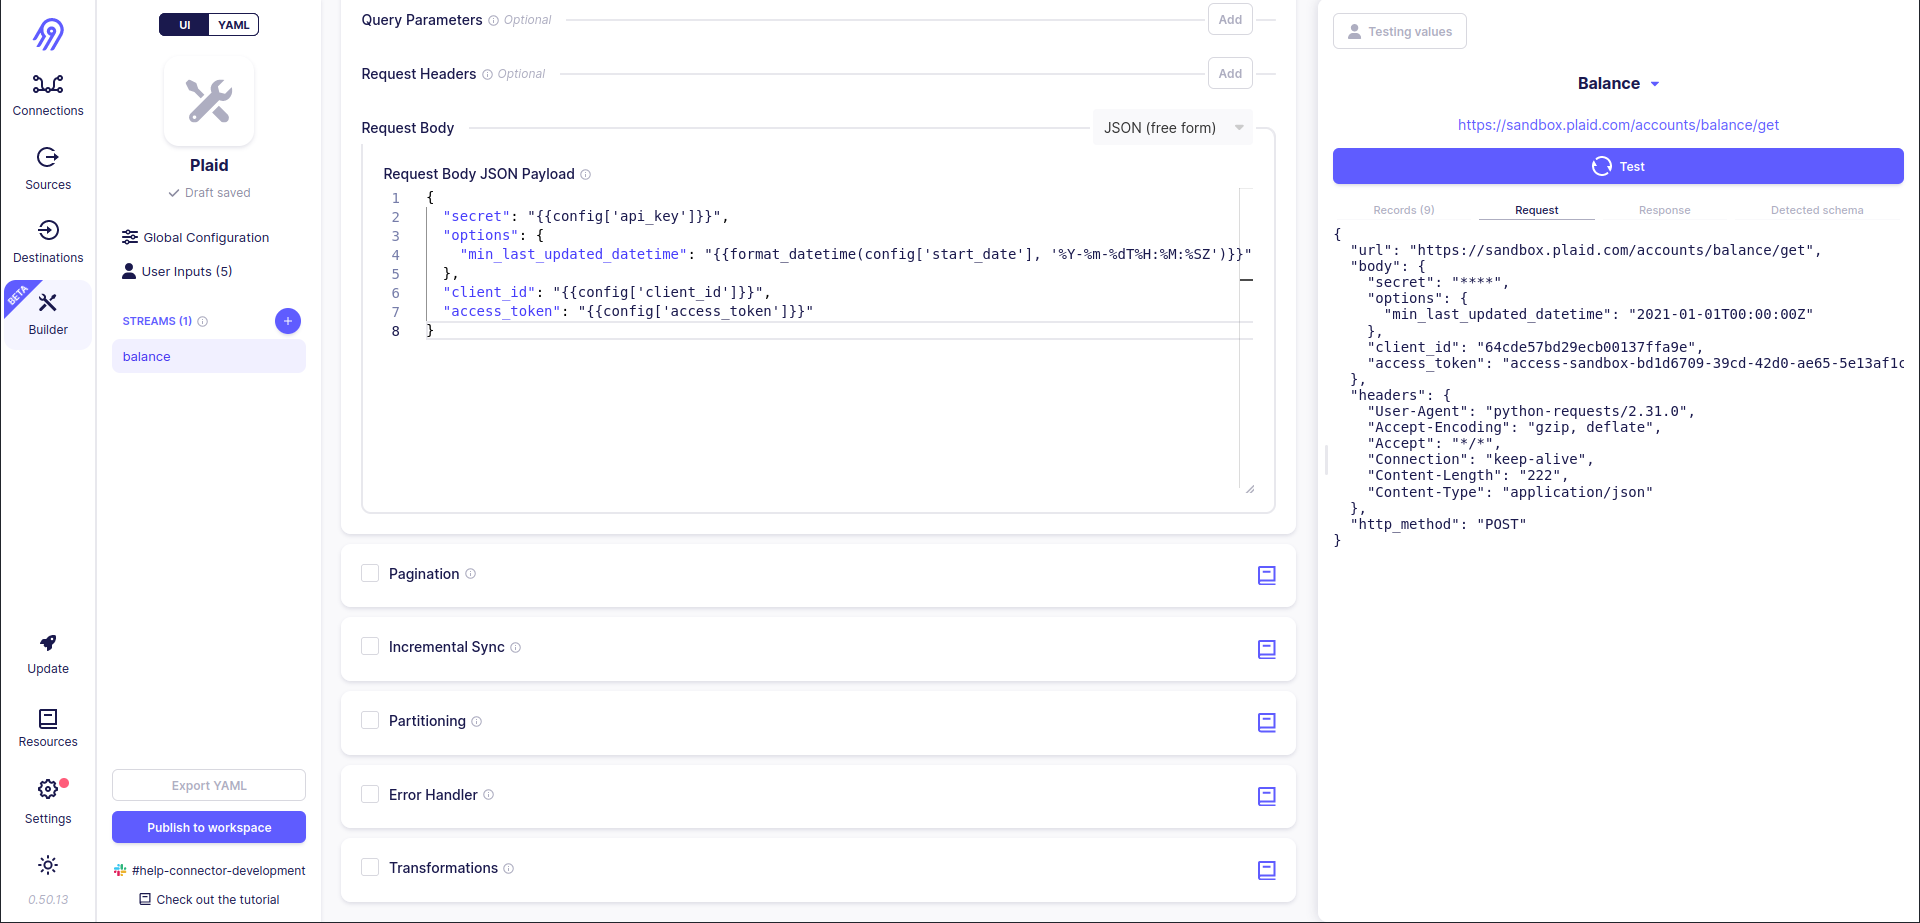
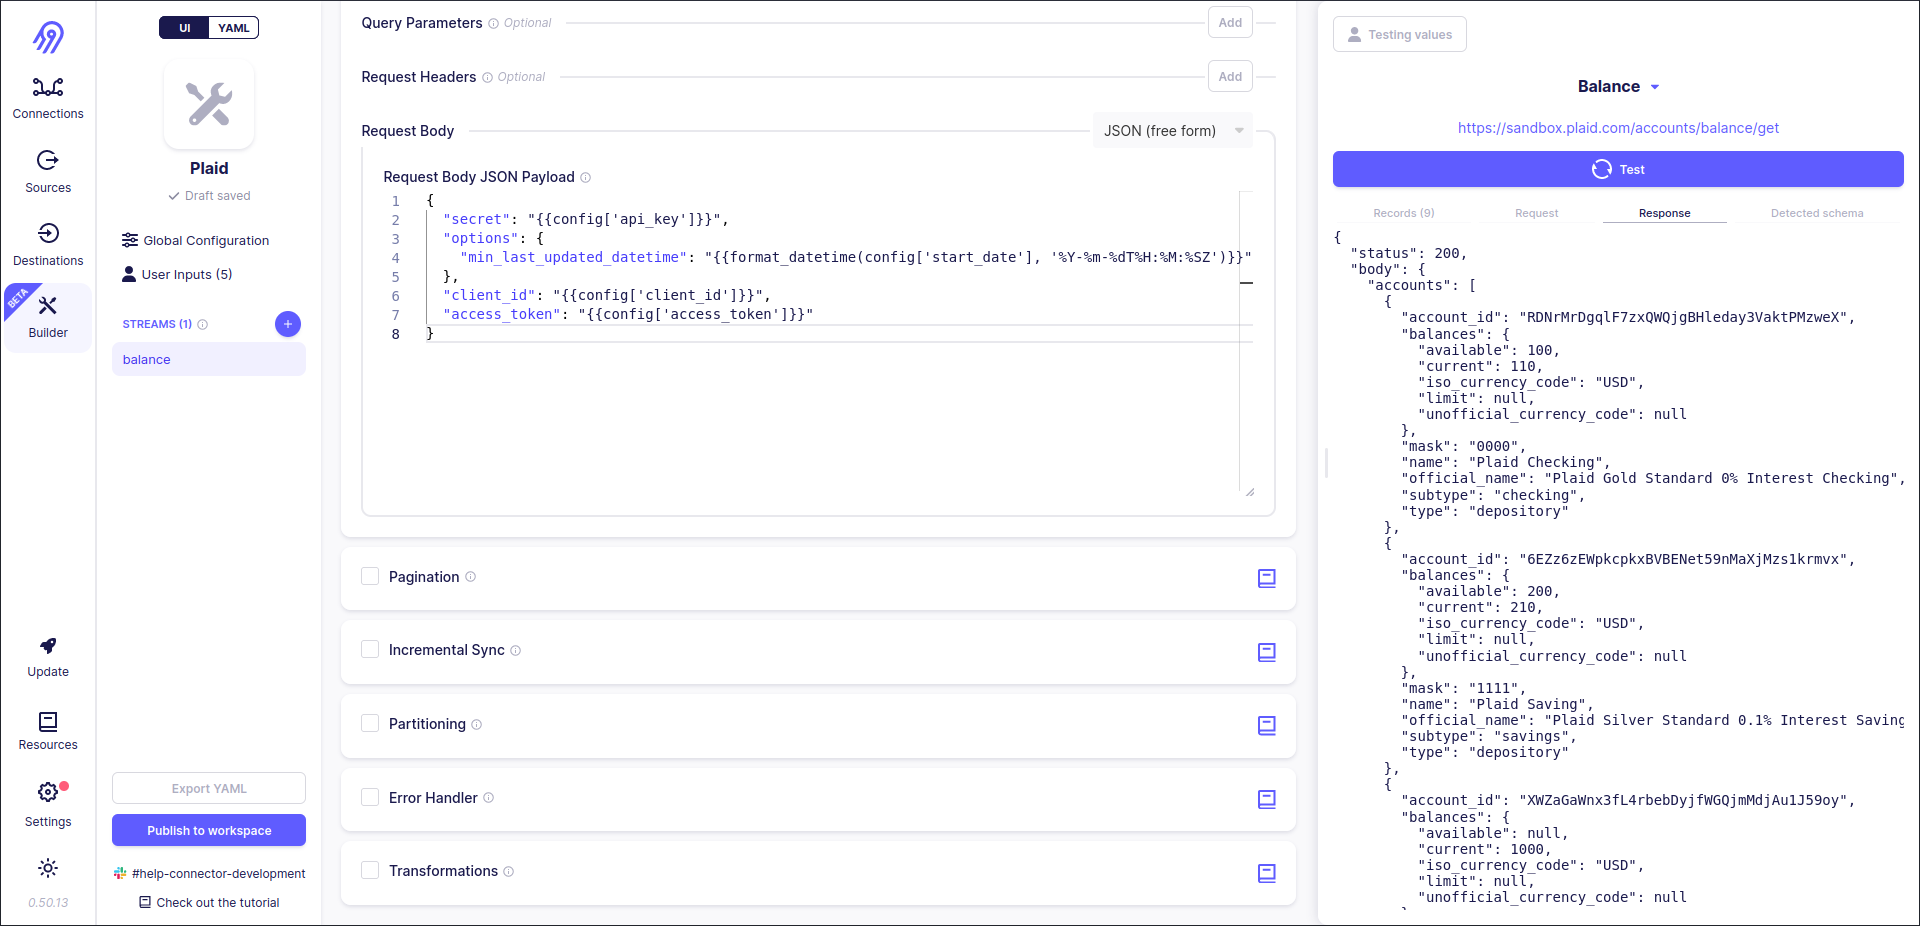
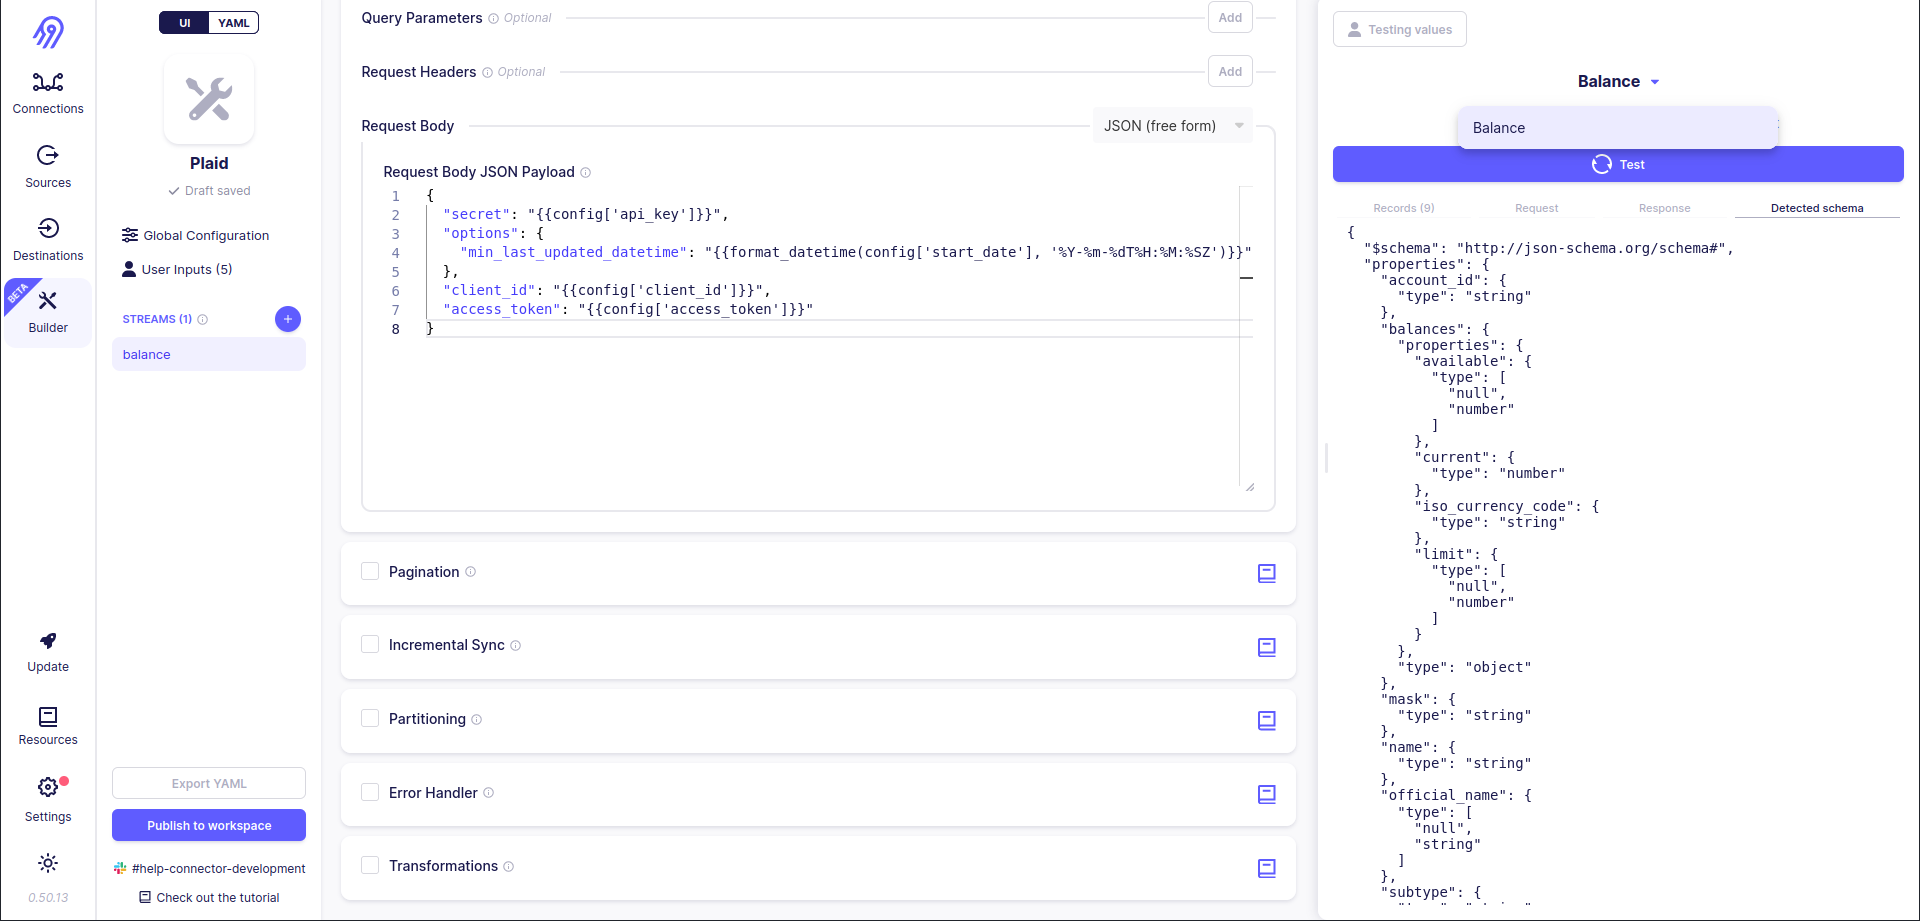
Let's have a look at the original stream schemas and check if got records are valid via them. The answer is... NO! Records have some extra fields and some expected fields are missing, but the API is the same... Also Detected Schema differs from the one, that we have seen in balance.json... To overcome this problem you can use the already mentioned previous Transformations section.
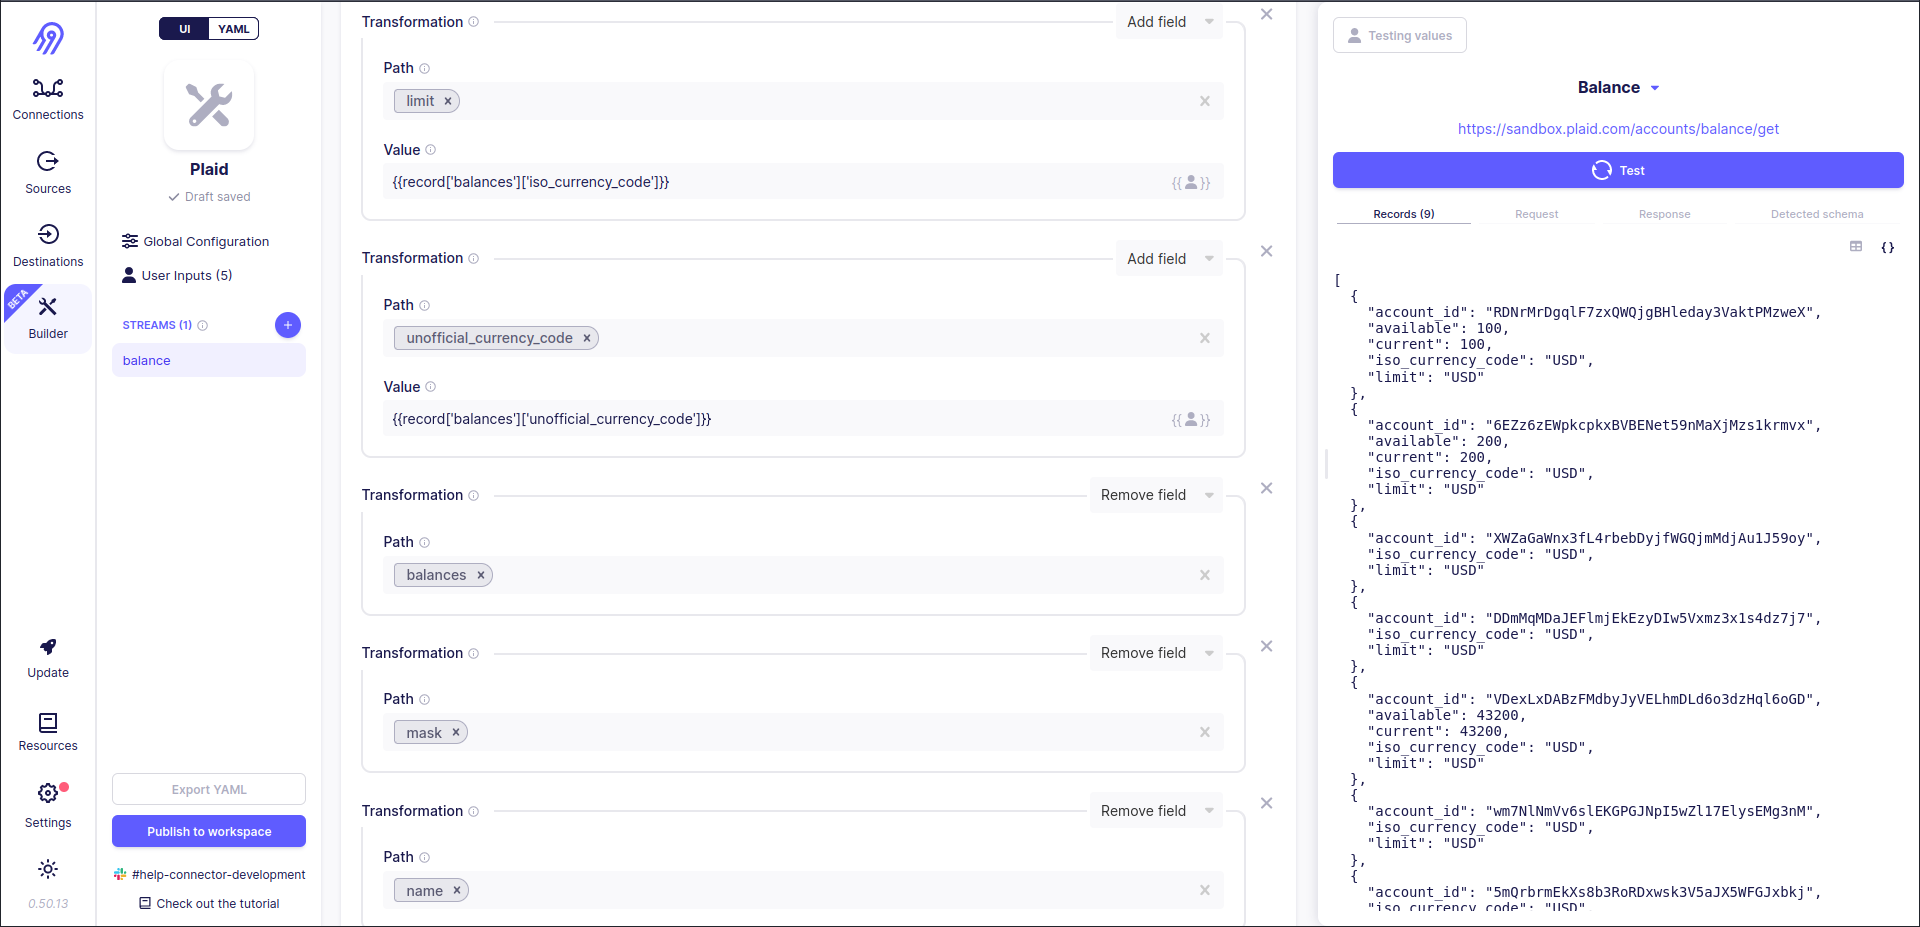
Now records correspond to the original balance.json schema and Detected Schema is equal to the original one. Success!
Also, it is recommended to go to Declared schema, disable Automatically import detected schema, validate it and provide it manually.
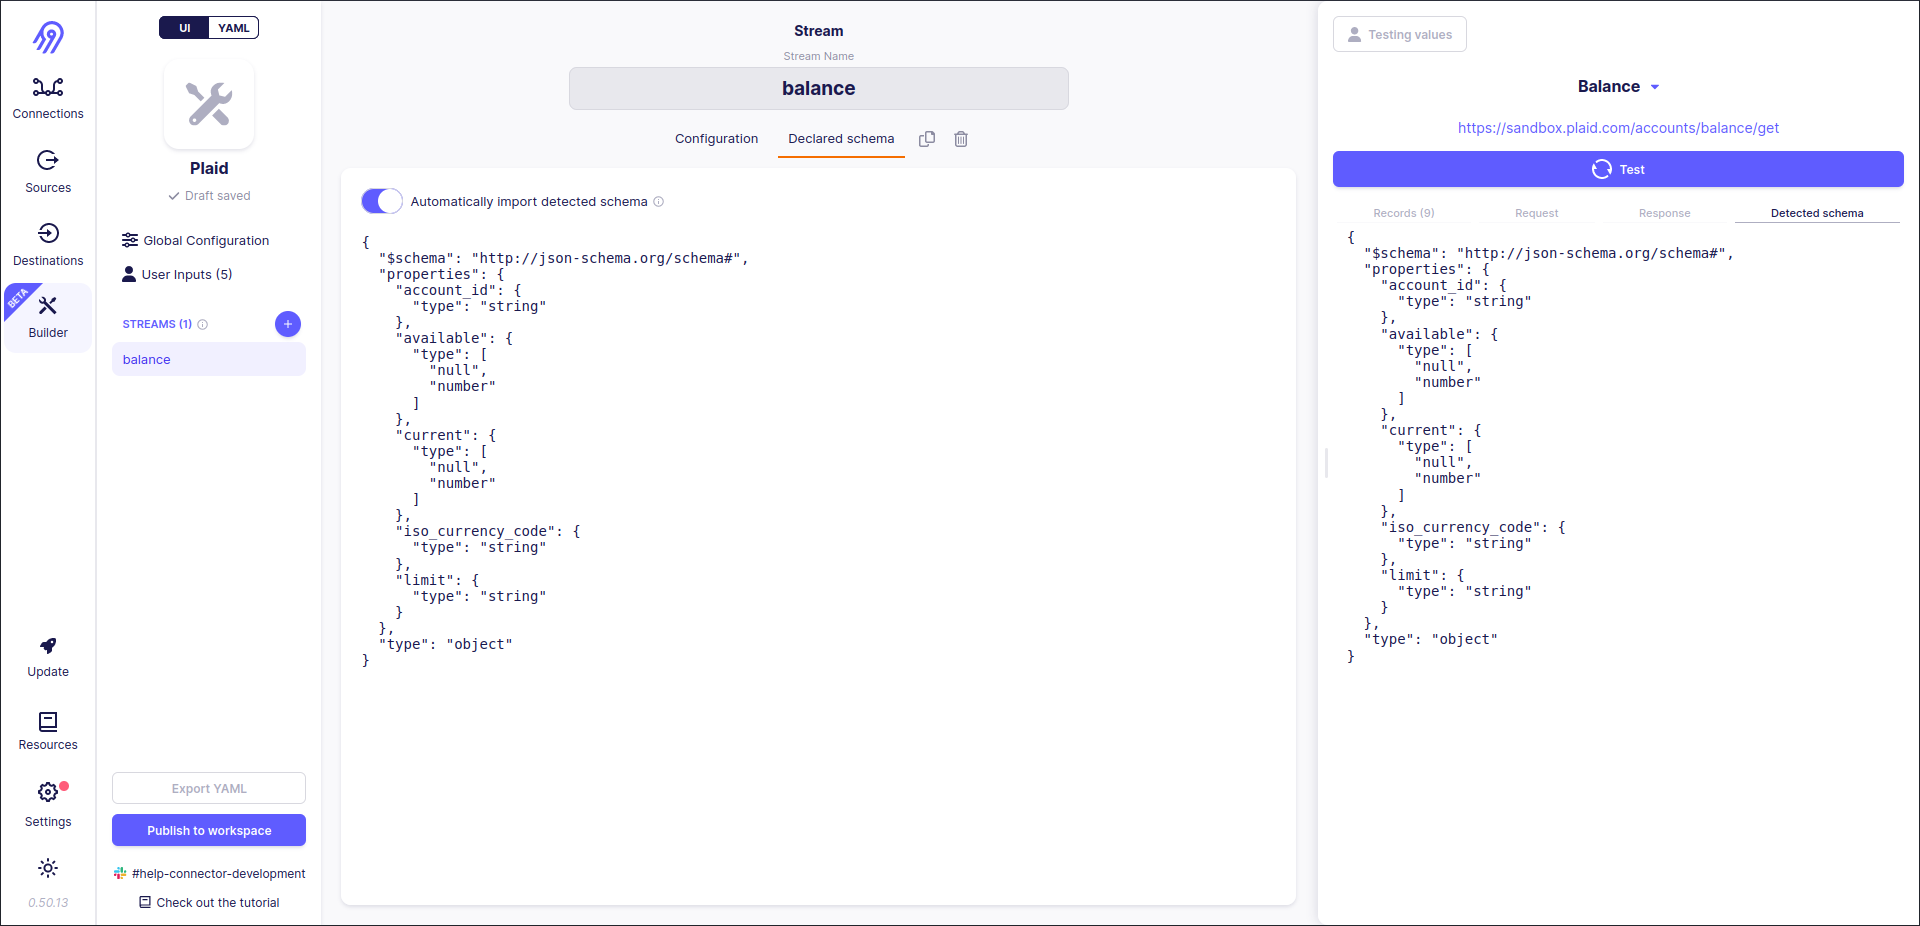
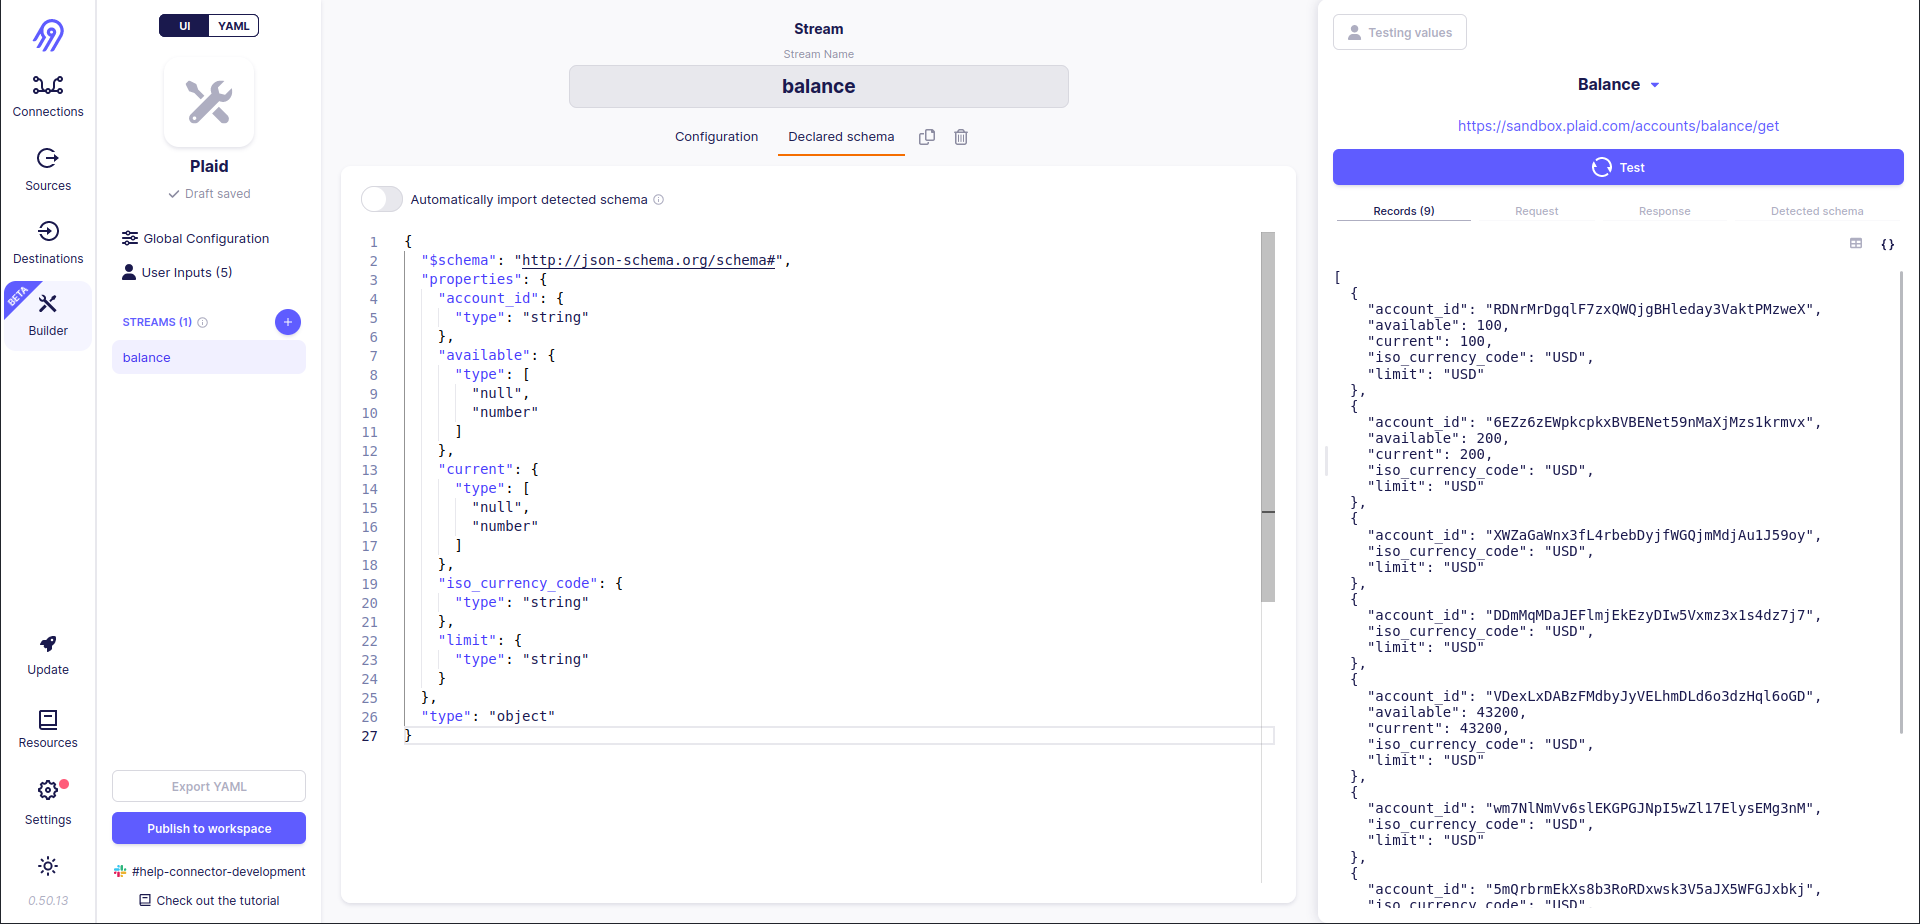
Now you are done with the first stream, so let's go to the second. The tutorial will skip similar steps and concentrate on incremental syncs and pagination.
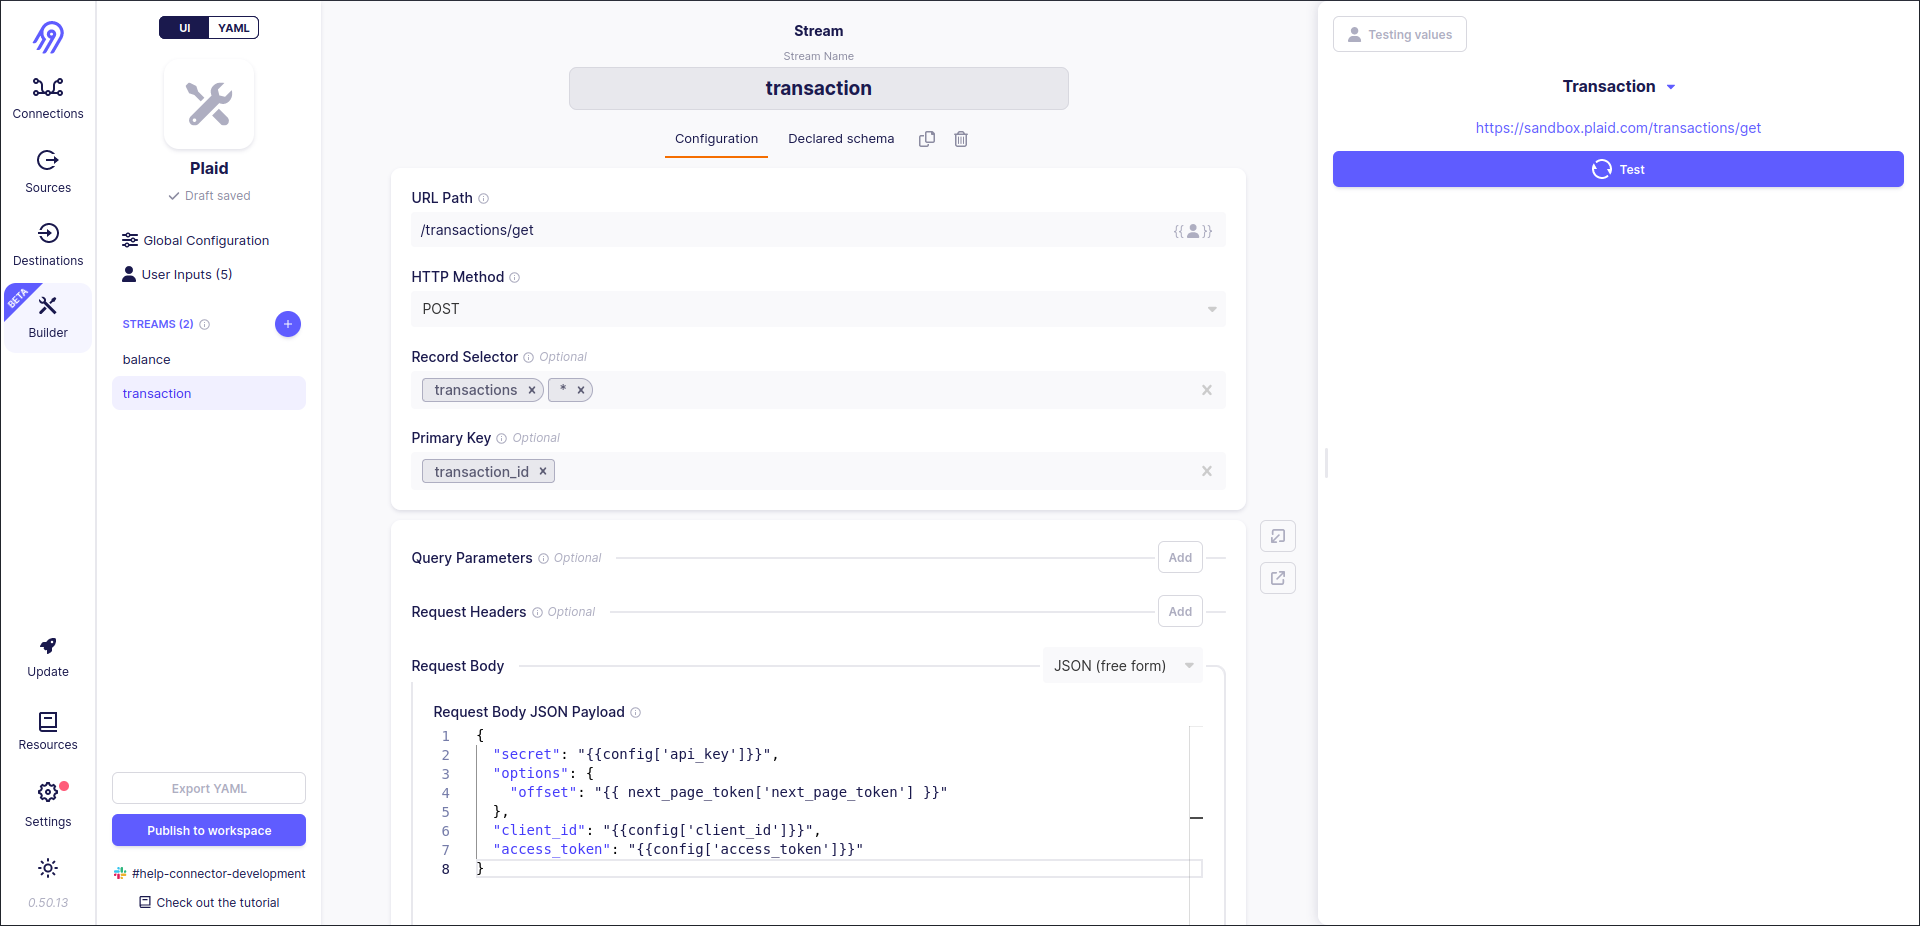
Corresponding to plaid library's source code transaction stream supports pagination and returns its record in reverse time order. Let's start with pagination. Endpoint uses a limit-offset pagination model (limit can be skipped), so you can rely on Airbyte No-Code Connector Builder. However, it can embed pagination fields (limit and offset) only into the first level of JSON:
{
    "level_1": {
        "level_2": "offset value".
    }
}
To overcome this problem Request Body in free JSON form can be used. Remember Jinja2 Template variable next_page_token. It is pretty similar to config but allows to access the current token, offset etc. values.
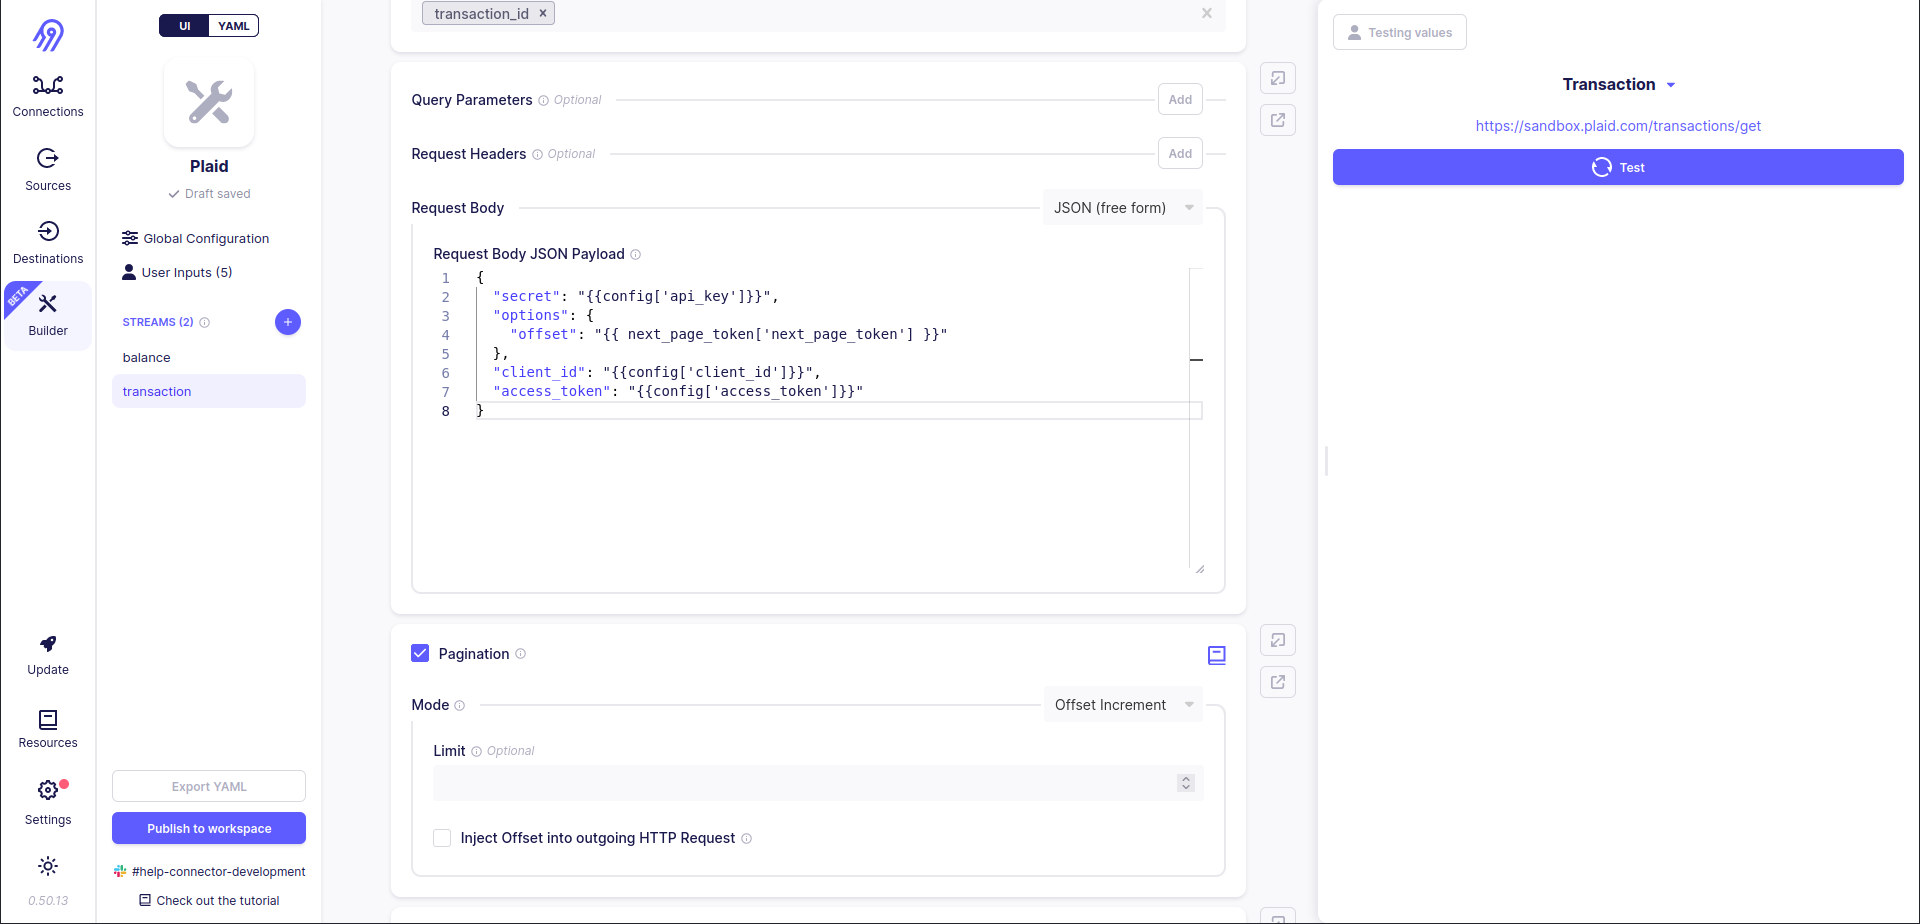
- Pagination section allows you to specify one of the following pagination (multiple requests looping) strategies: offset increment (limit-offset), page increment and token increment.
Finally, you are ready to add incremental sync support to transaction stream. To do that you have to open Incremental Sync section and put the following parameters inside it:
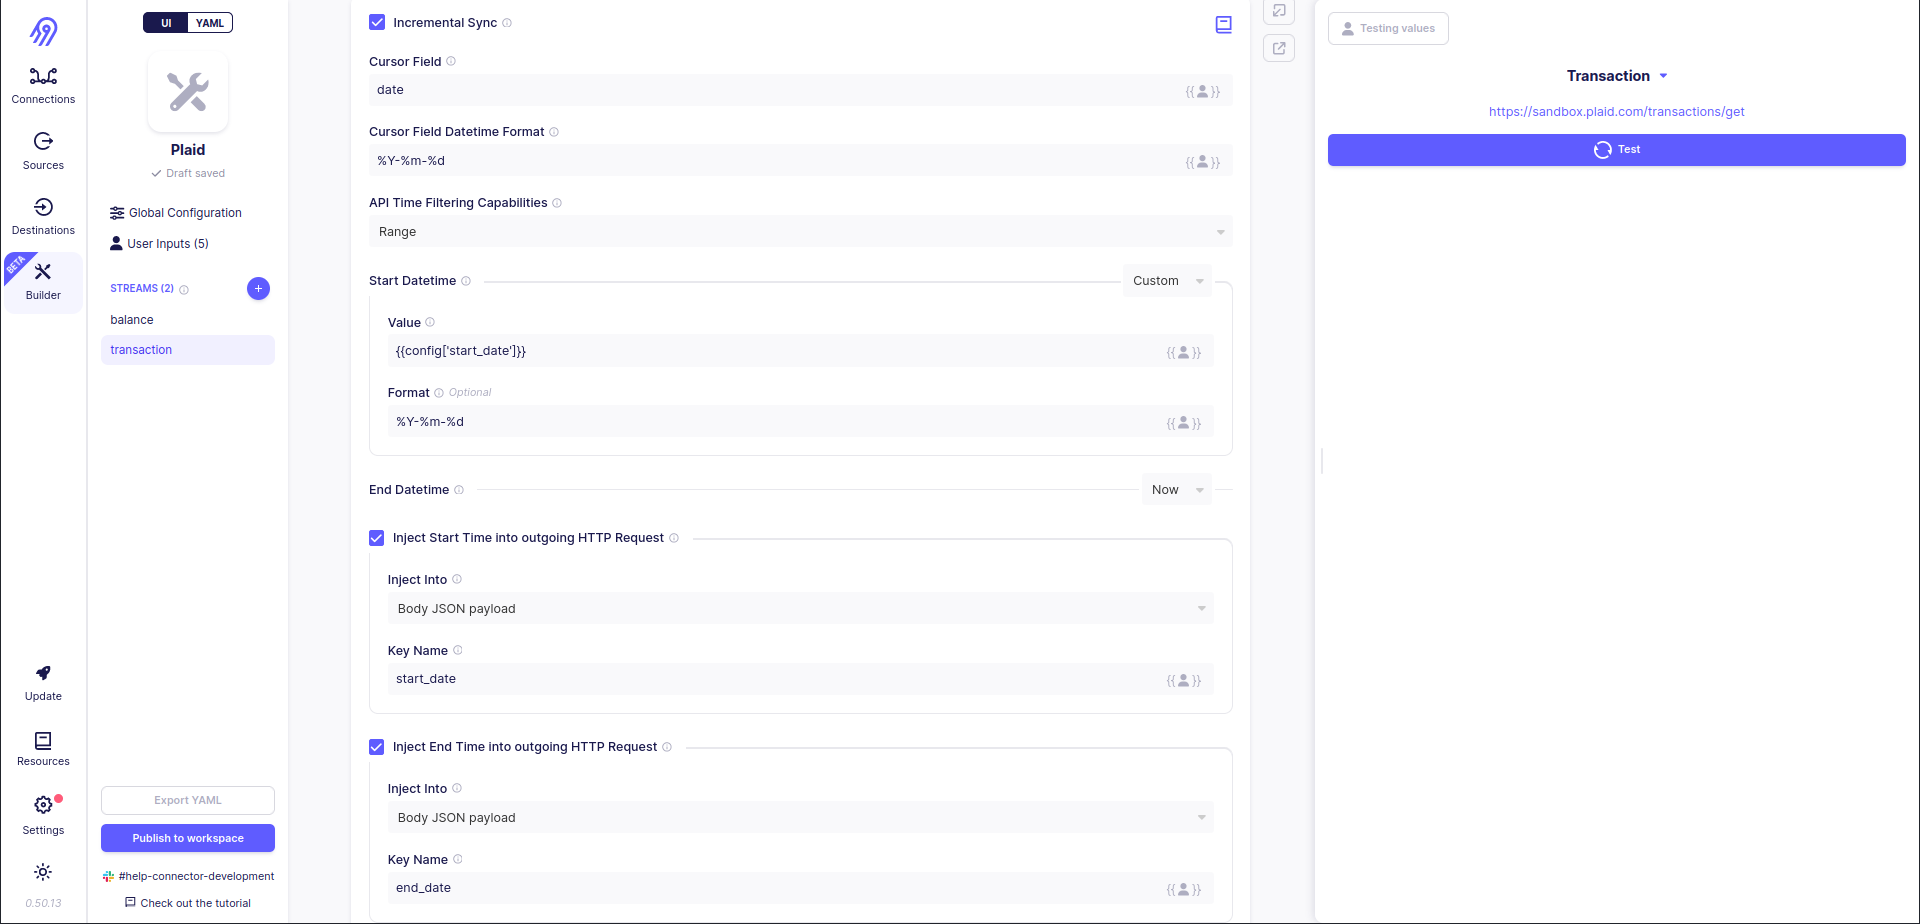
Incremental sync allows you not to overwrite all the records every time you want to sync source data to the destination. Also, it saves your bandwidth, because in some situations incremental syncs can make just one HTTP request instead of thousands and millions of them. They "understand" when it is better to stop sending new requests. They can do it by directly specifying Range of start and stop dates (date-times) (Start mode is the same, but the stop date (date-time) is always equal to the current date (date-time)), so an empty response is a sign of an incremental sync end, or by filtering records in reverse time order, so record with Cursor Field less than expected minimum field is dropped and all requests are finished.
- Incremental Sync section allows you to specify one of the following incremental sync strategies: range, start or no filter (data field) for reverse time order data without the ability to filter it through the API.
Let's test the second stream:
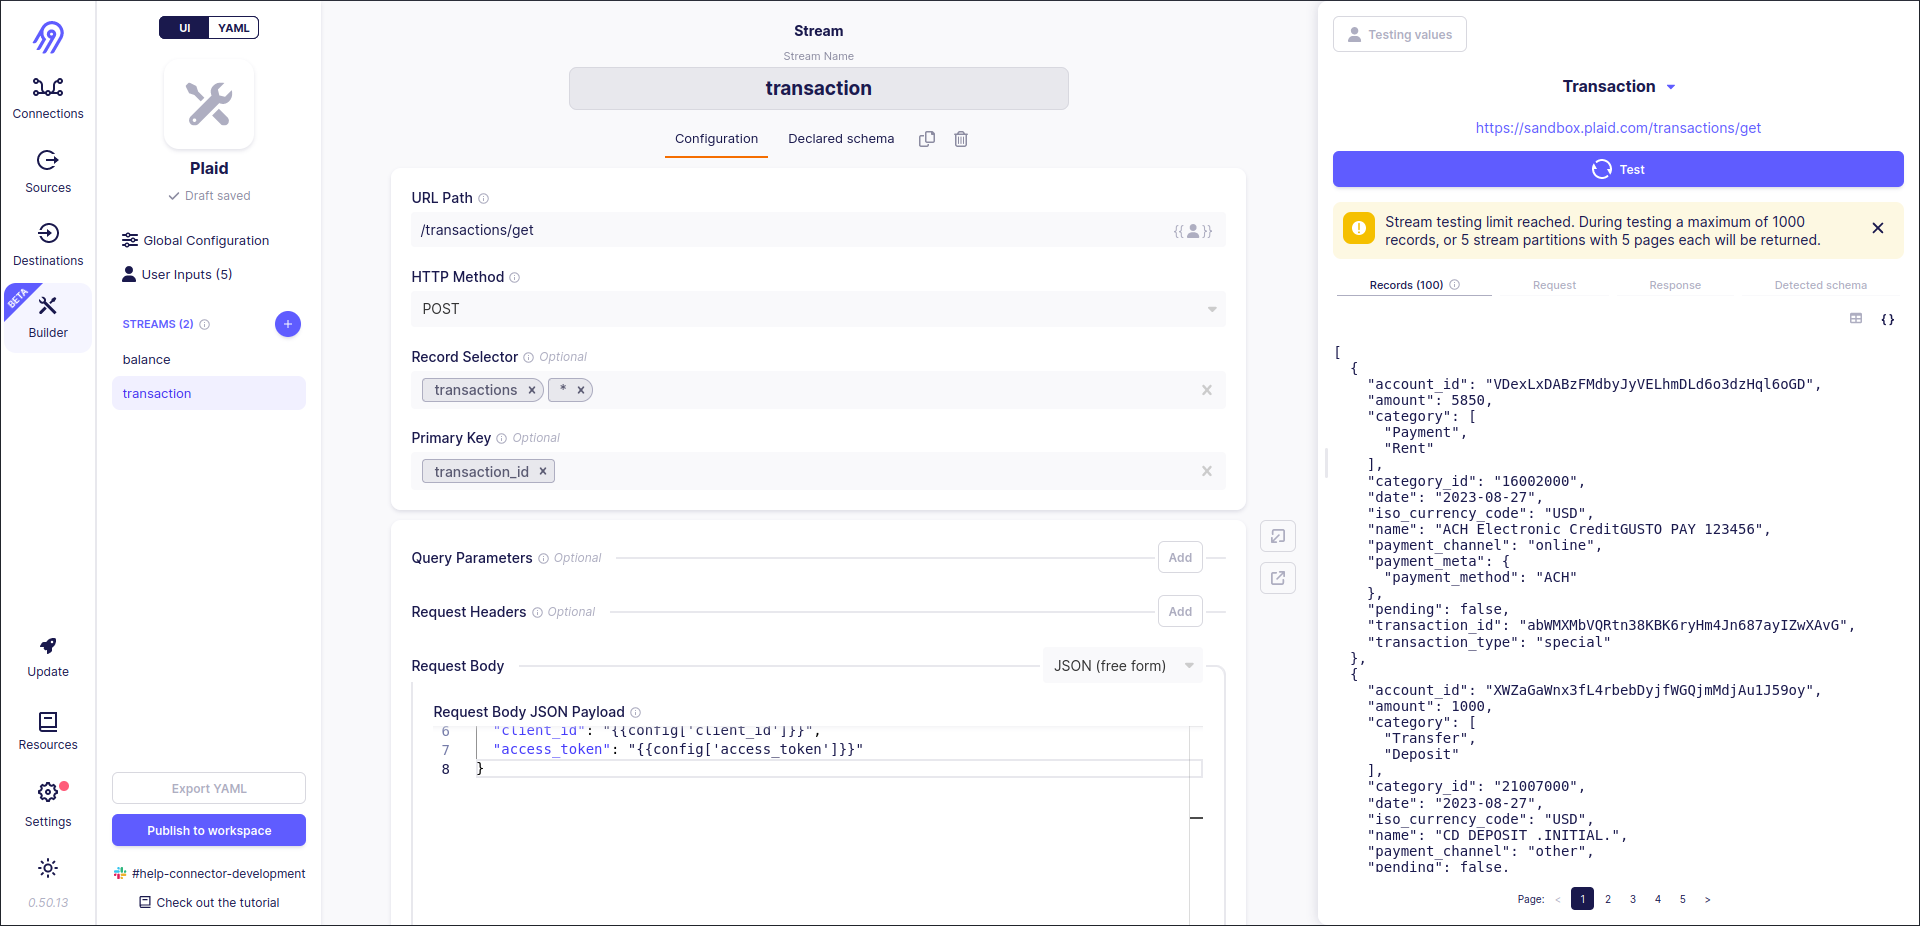
Finally, you can publish a new no-code source to your workspace by pressing Publish to workspace button in the left bottom corner of the screen:
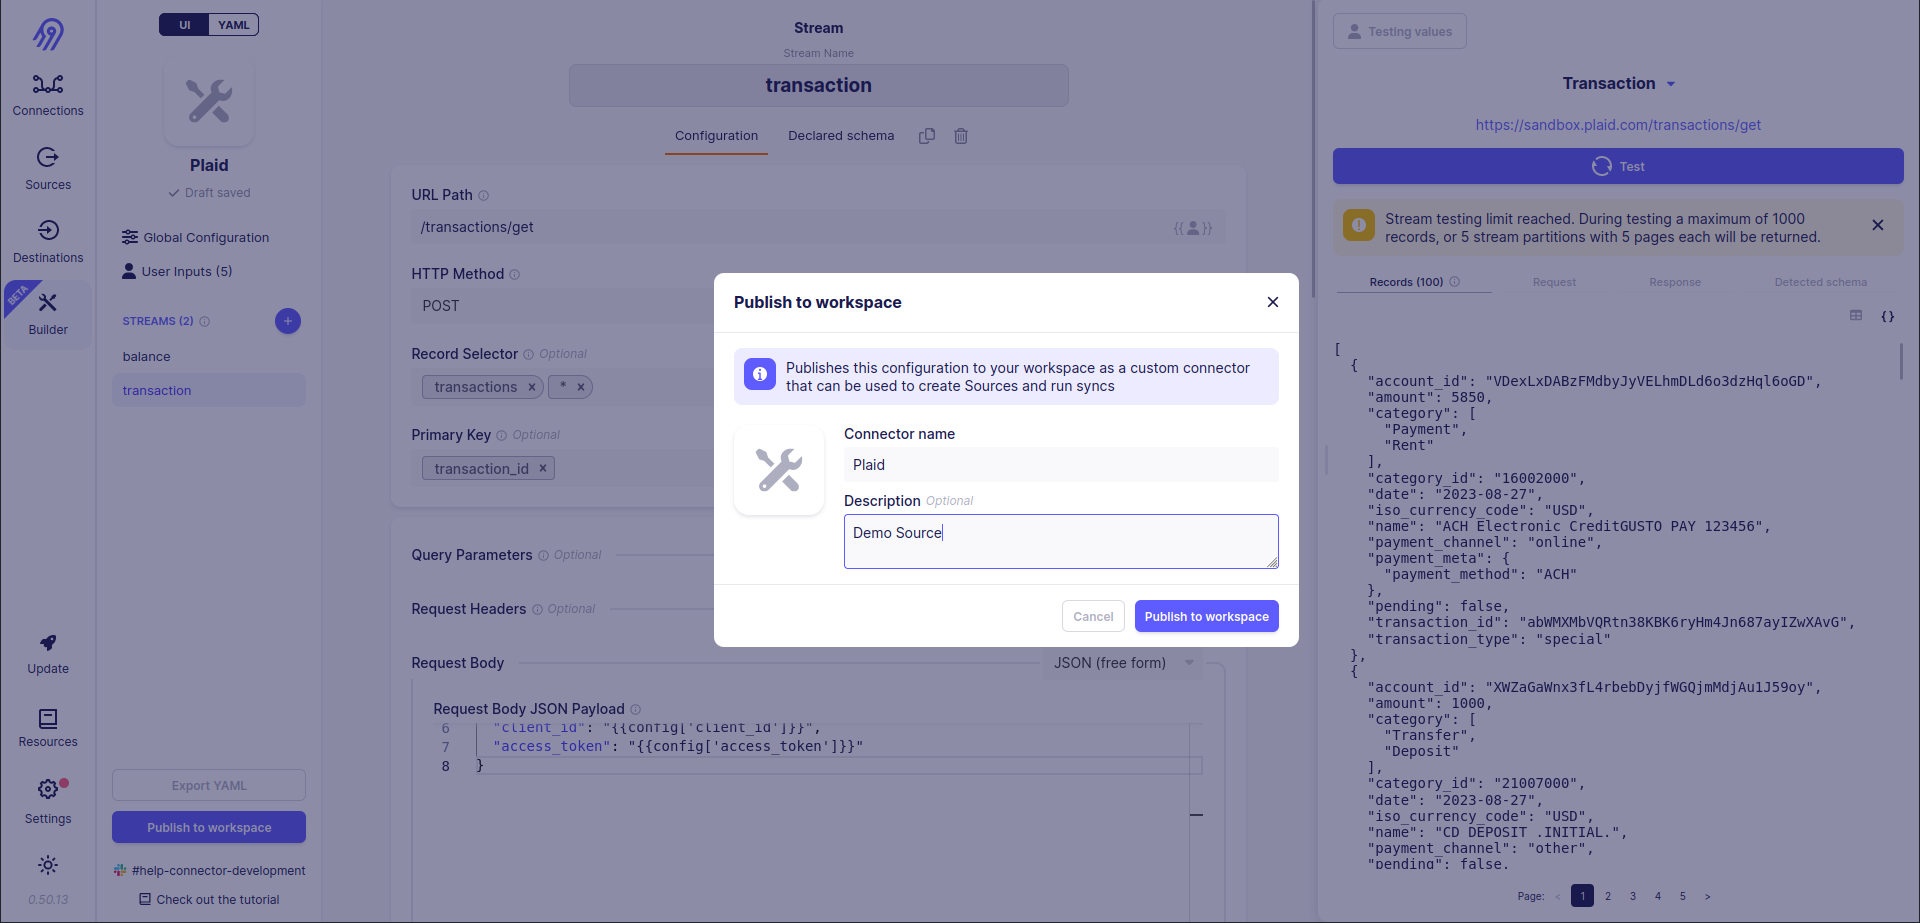
Airbyte Connector
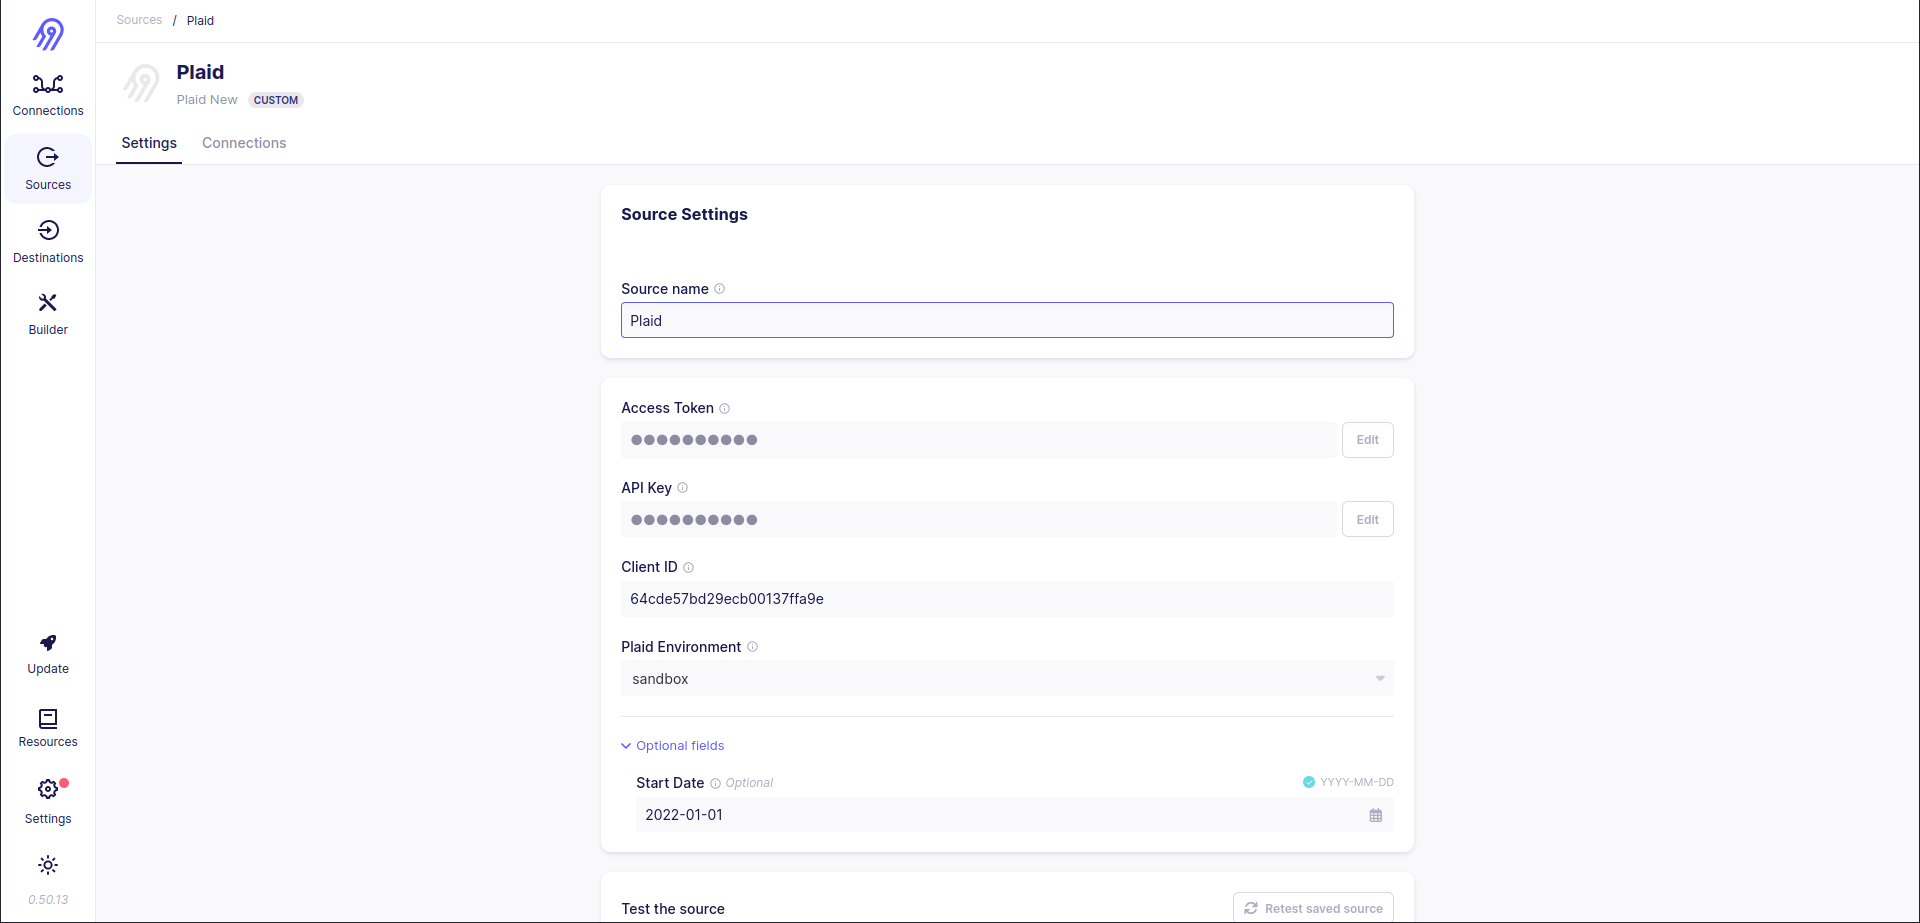
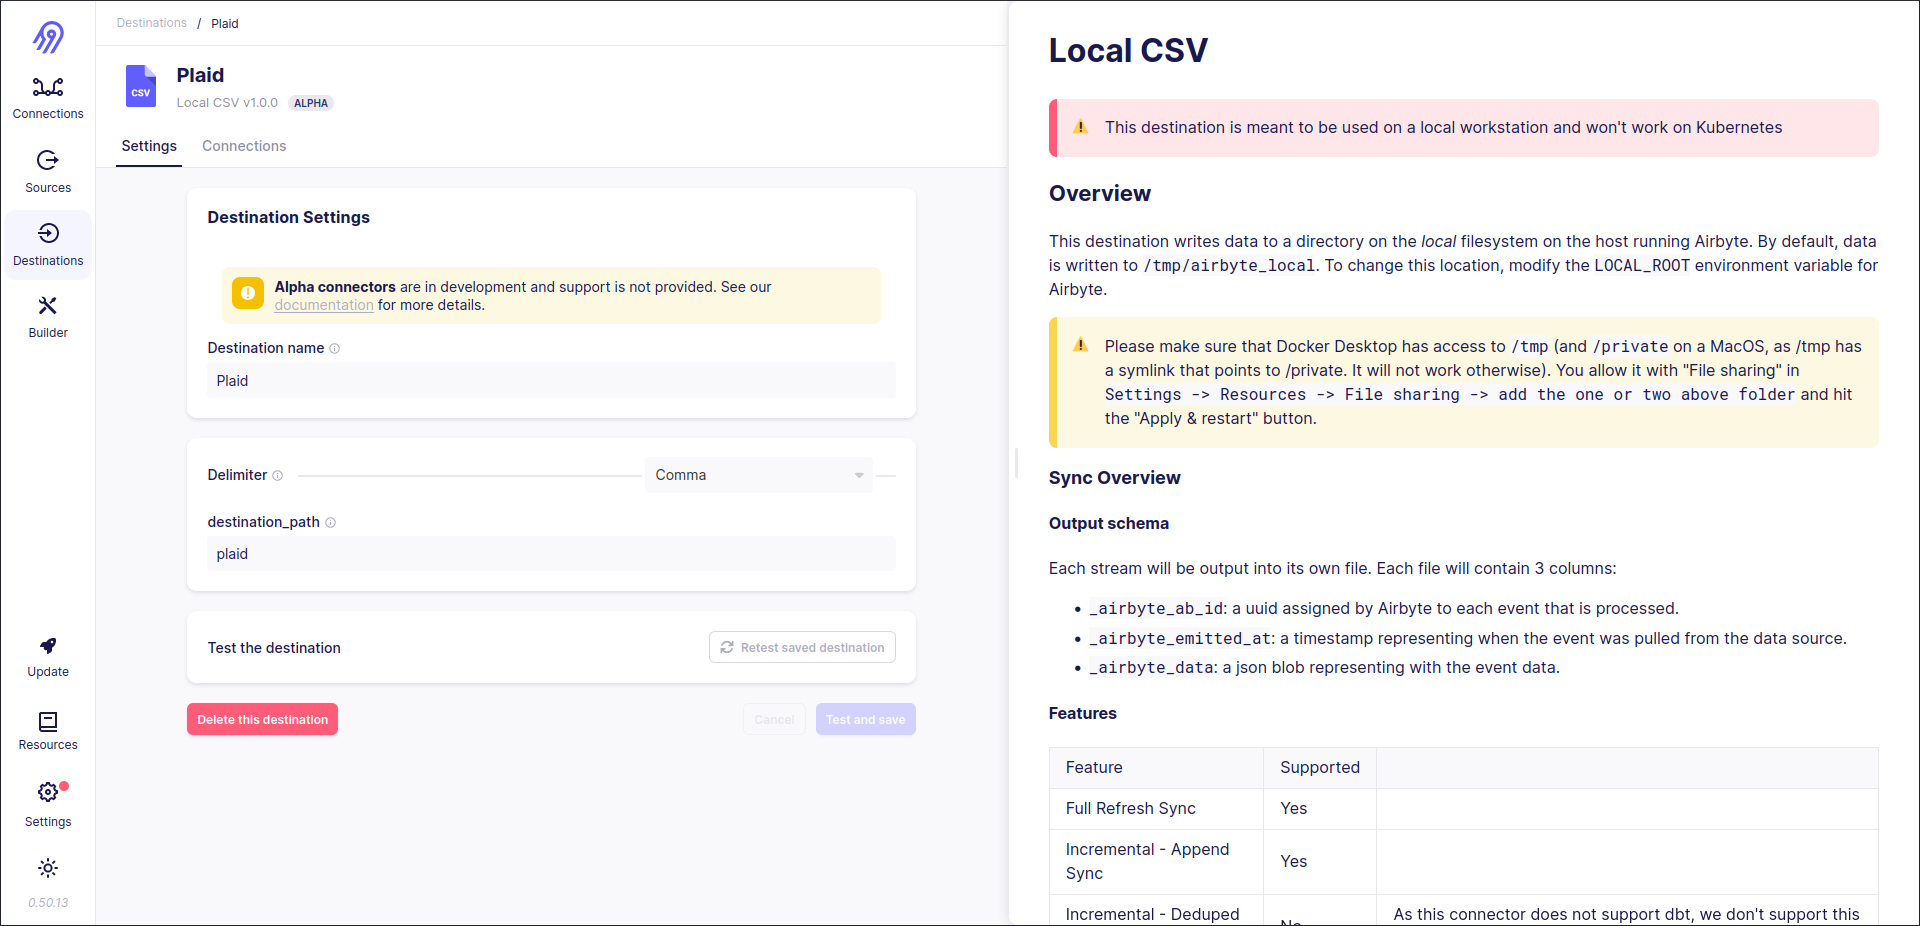
Now source is available in your local Airbyte and you can connect it to one of the destinations and sync the data. Let's for example choose a Local CSV destination. To do that let's create a source, a destination and a connection between them and test everything end-to-end.
Source:
Destination:
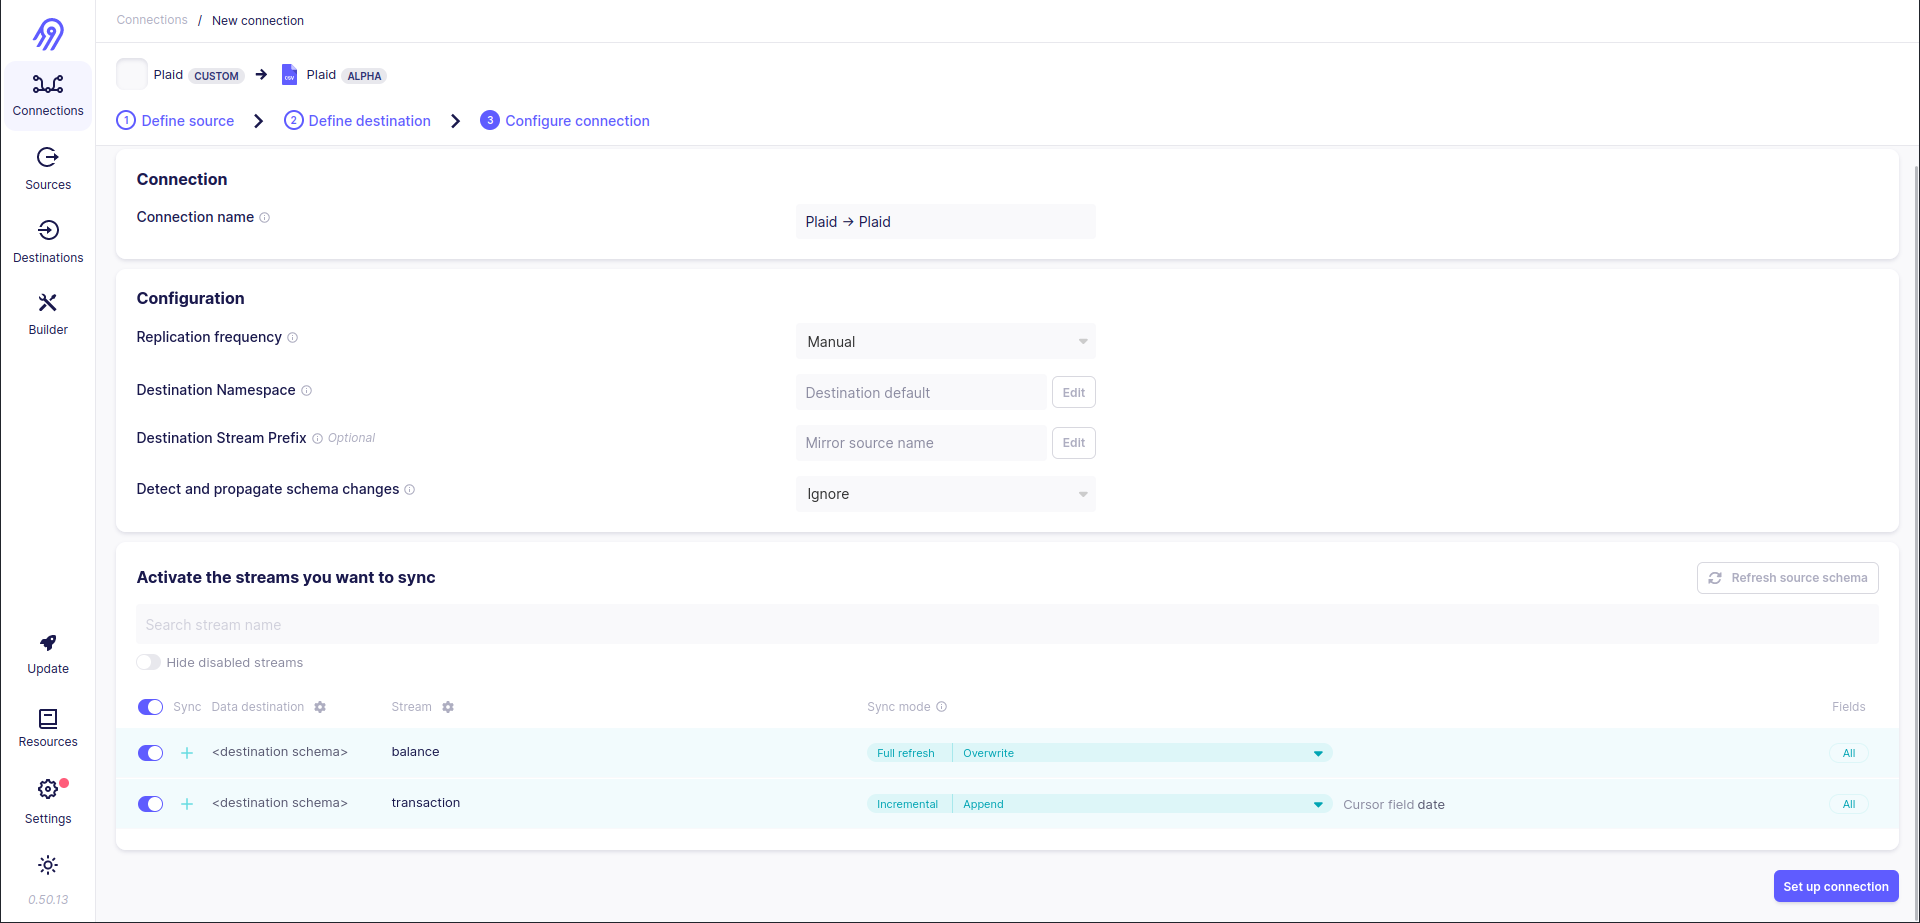
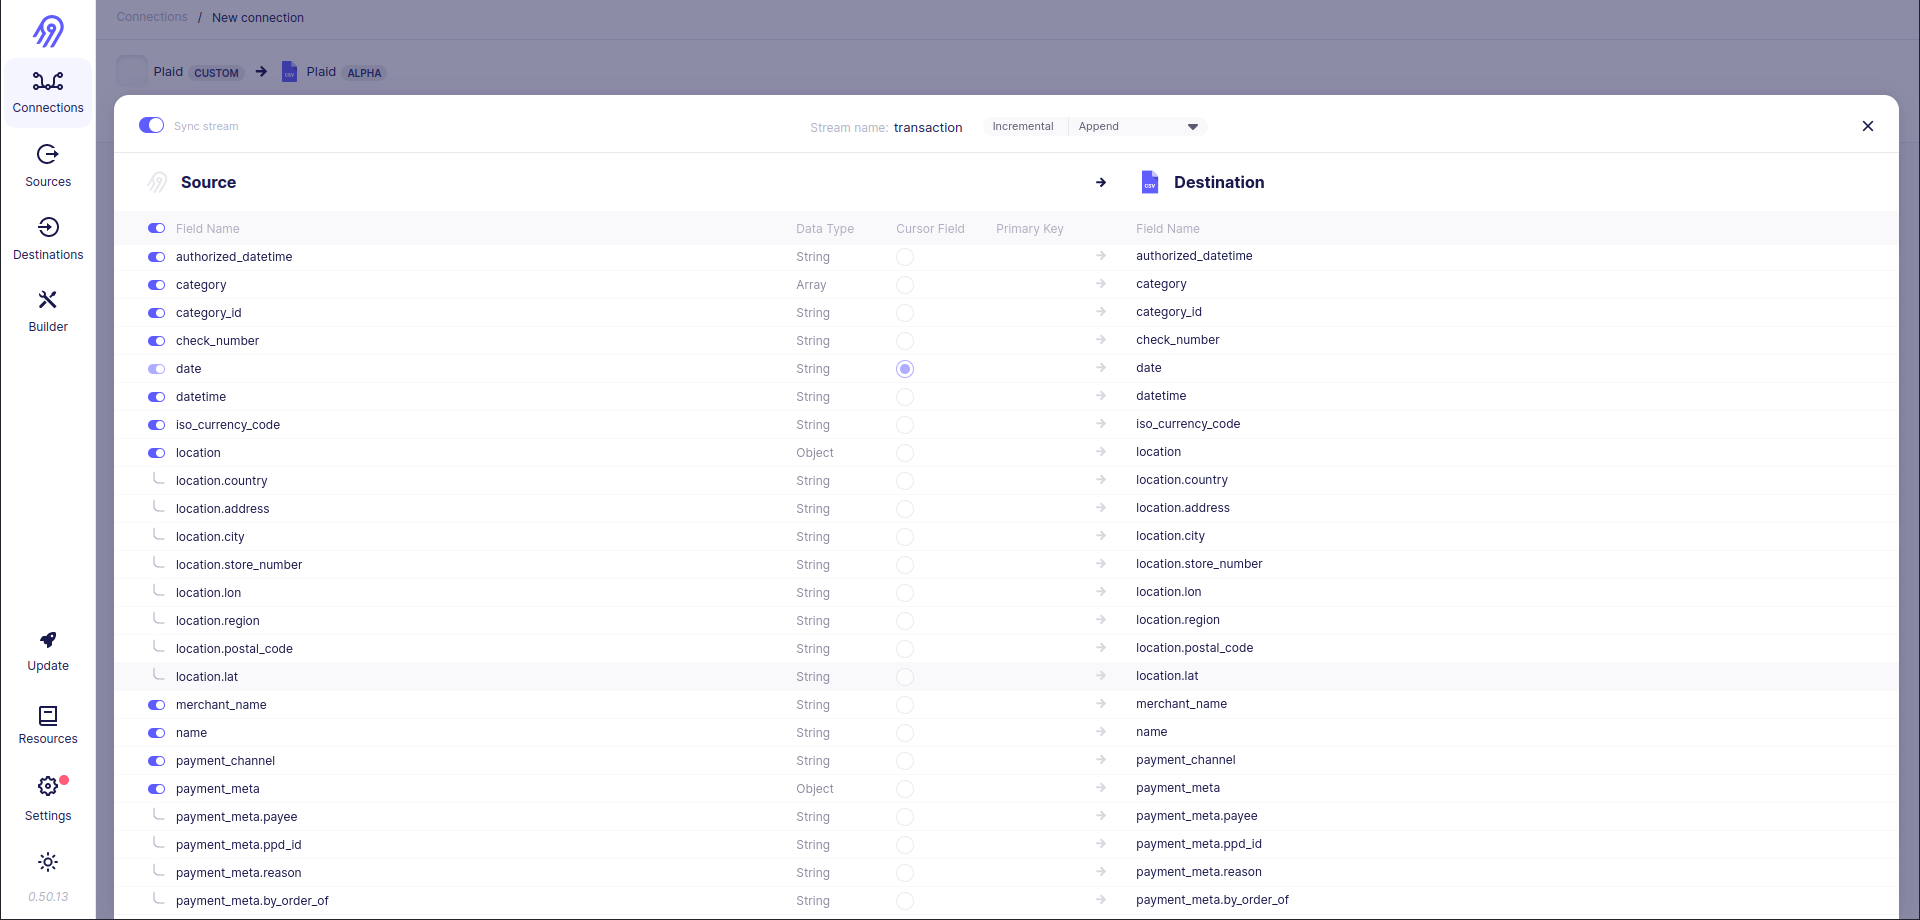
Connection (it includes both full refresh and incremental stream setups):
Test: As you can see, the first time 336 records were returned, then the connection was synced 5 times more and every time only 11 records were returned. It is the result of enabled incremental syncs for
transactionstream. You will get new records in it only if someone runs new transactions.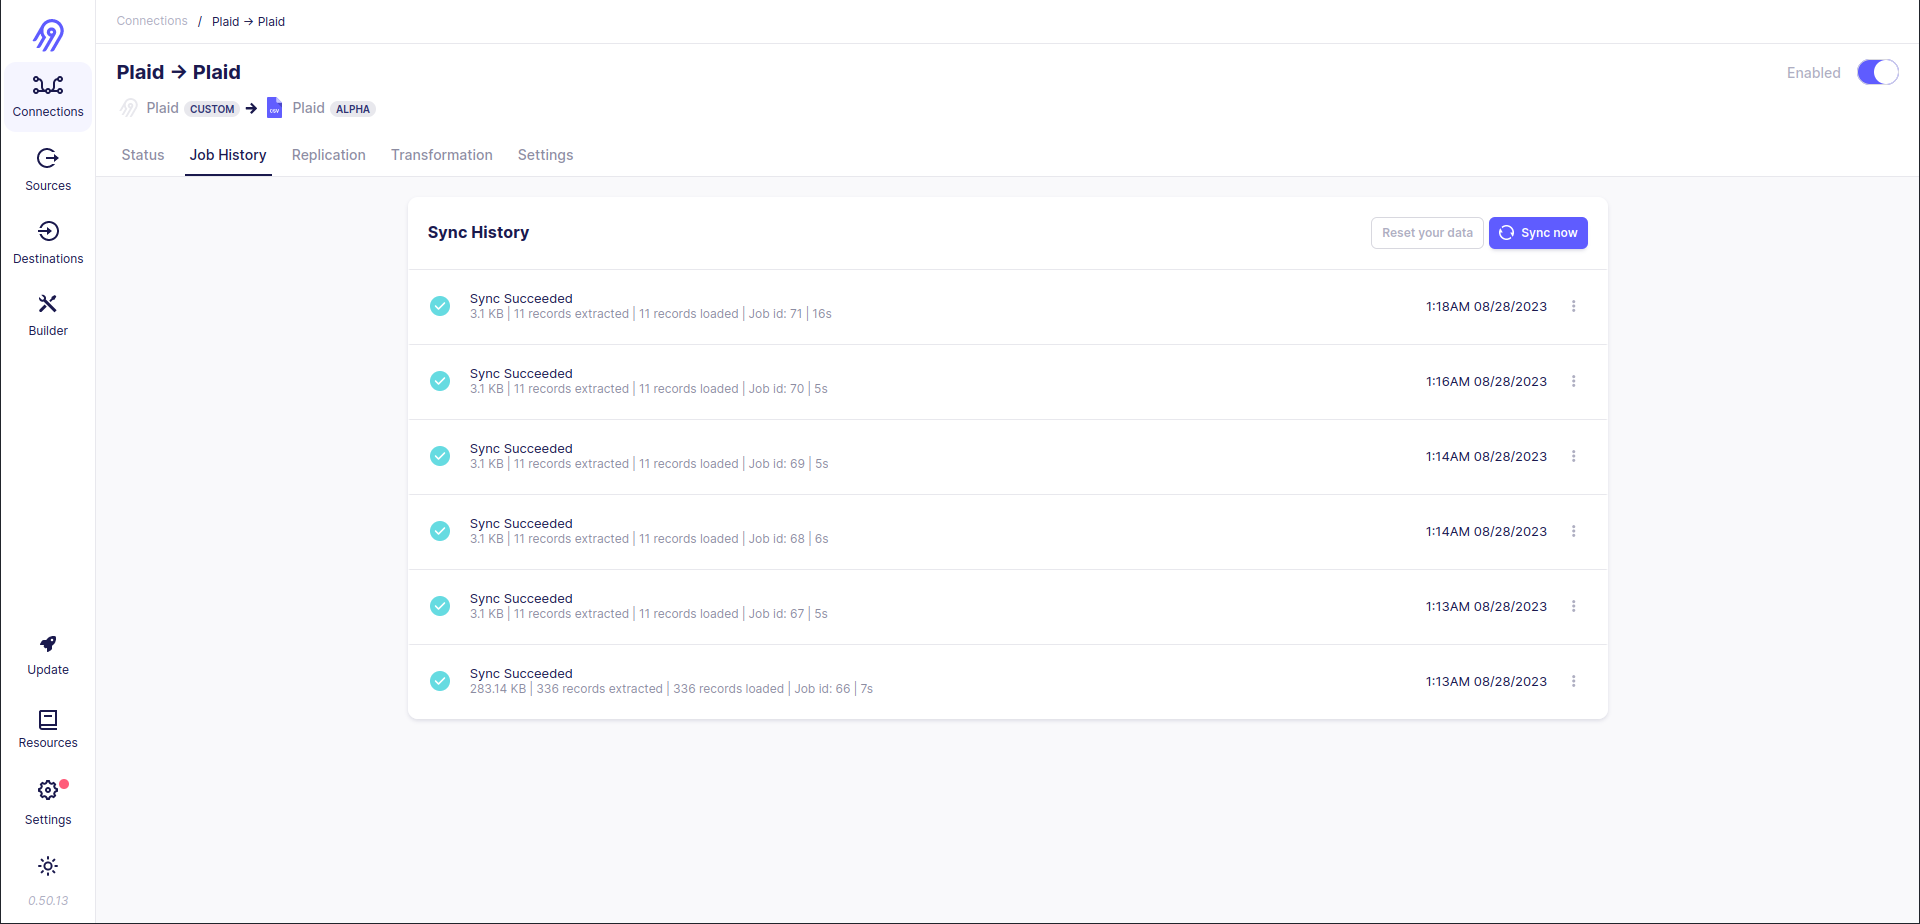
You can check synced data in your local tmp directory:
cd /tmp/airbyte_local/plaid/
ls
> _airbyte_raw_balance.csv  _airbyte_raw_transaction.csv
du -b *
> 2114    _airbyte_raw_balance.csv
> 349760    _airbyte_raw_transaction.csv
cat * | wc -l
> 348
Execute
You can use a new source on your local machine, but you can not share it with your colleagues for now. Also, you may want to make some additional tests to be 100% sure that everything works fine.
First of all, you have to dump your source definition into the YAML file. To do that return to Airbyte No-Code Connector Builder and choose created source. Press Export YAML button in the bottom left corner of the screen. It will produce plaid.yaml file with complete source definition in your downloads directory.
Next, go to airbyte/airbyte-integrations/connector-templates/generator directory and run the following commands:
./generate.sh
> Running generator...
> INSTALL DONE
>
> > airbyte-connector-generator@0.1.0 generate
> > plop
>
> ? [PLOP] Please choose a generator. (Use arrow keys)
> ❯ Python Destination - Generate a destination connector written in Python
>   Python HTTP API Source - Generate a Source that pulls data from a synchronous HTTP API.
>   Configuration Based Source - Generate a Source that is described using a low code configuration file
>   Python Singer Source - Generate a Singer-tap-based Airbyte Source.
>   Python Source - Generate a minimal Python Airbyte Source Connector that works with any kind of data source. Use this if none of the other Python templates serve your use case.
>   Java JDBC Source - Generate a minimal Java JDBC Airbyte Source Connector.
>   Generic Source - Use if none of the other templates apply to your use case.
> (Move up and down to reveal more choices)
# select Configuration Based Source
> ? [PLOP] Please choose a generator. Configuration Based Source - Generate a Source that is described using a low code configuration file
> ? Source name e.g: "google-analytics" plaid-no-code
> ✔  +! 22 files added
>  -> /airbyte/airbyte-integrations/connectors/source-plaid/Dockerfile
>  -> /airbyte/airbyte-integrations/connectors/source-plaid/README.md
>  -> /airbyte/airbyte-integrations/connectors/source-plaid/__init__.py
>  -> /airbyte/airbyte-integrations/connectors/source-plaid/build.gradle
>  -> /airbyte/airbyte-integrations/connectors/source-plaid/main.py
>  -> /airbyte/airbyte-integrations/connectors/source-plaid/metadata.yaml
>  -> /airbyte/airbyte-integrations/connectors/source-plaid/requirements.txt
>  -> /airbyte/airbyte-integrations/connectors/source-plaid/setup.py
>  -> /airbyte/airbyte-integrations/connectors/source-plaid/integration_tests/__init__.py
>  -> /airbyte/airbyte-integrations/connectors/source-plaid/integration_tests/abnormal_state.json
>  -> /airbyte/airbyte-integrations/connectors/source-plaid/integration_tests/acceptance.py
>  -> /airbyte/airbyte-integrations/connectors/source-plaid/integration_tests/configured_catalog.json
>  -> /airbyte/airbyte-integrations/connectors/source-plaid/integration_tests/invalid_config.json
>  -> /airbyte/airbyte-integrations/connectors/source-plaid/integration_tests/sample_config.json
>  -> /airbyte/airbyte-integrations/connectors/source-plaid/integration_tests/sample_state.json
>  -> /airbyte/airbyte-integrations/connectors/source-plaid/secrets/config.json
>  -> /airbyte/airbyte-integrations/connectors/source-plaid/source_plaid/__init__.py
>  -> /airbyte/airbyte-integrations/connectors/source-plaid/source_plaid/manifest.yaml
>  -> /airbyte/airbyte-integrations/connectors/source-plaid/source_plaid/source.py
>  -> /airbyte/airbyte-integrations/connectors/source-plaid/source_plaid/schemas/TODO.md
>  -> /airbyte/airbyte-integrations/connectors/source-plaid/source_plaid/schemas/customers.json
>  -> /airbyte/airbyte-integrations/connectors/source-plaid/source_plaid/schemas/employees.json
> ✔  +! 2 files added
>  -> /airbyte/airbyte-integrations/connectors/source-plaid/acceptance-test-config.yml
>  -> /airbyte/airbyte-integrations/connectors/source-plaid/acceptance-test-docker.sh
> ✔  ++ /airbyte/airbyte-integrations/connectors/source-plaid/.dockerignore
> ⠋
> 🚀 🚀 🚀 🚀 🚀 🚀
>
> Success!
>
> Your plaid connector has been created at ./airbyte/airbyte-integrations/connectors/source-plaid.
>
> Follow the TODOs in the generated module to implement your connector.
>
> Questions, comments, or concerns? Let us know in our connector development forum:
> https://discuss.airbyte.io/c/connector-development/16
>
> We`re always happy to provide any support!

> ✔  emitSuccess
> npm notice
> npm notice New major version of npm available! 8.19.4 -> 9.8.1
> npm notice Changelog: https://github.com/npm/cli/releases/tag/v9.8.1
> npm notice Run npm install -g npm@9.8.1 to update!
> npm notice
> chowning generated directory: /airbyte/airbyte-integrations/connectors/source-plaid
> chowning docs directory: /airbyte/docs/integrations
> Finished running generator
# go to new source directory and replace default manifest.yaml with yours one
cd ../../connectors/source-plaid-no-code
mv ~/Downloads/plaid.yaml source_plaid_no_code/manifest.yaml
rm -rf schemas
# install dependencies
python -m venv .venv
source .venv/bin/activate
pip install -r requirements.txt
# build source docker container
docker build . -t airbyte/source-plaid-no-code:dev
Now you have your new source in the docker image and can push it to Docker Hub or simply share it with your colleagues as an archive. Everyone can install and run it on his AIrbyte via the following steps (assuming that the docker image is already on his computer): click Settings button in the left bottom of the screen, go to Sources and then click the blue button at the right bottom of the screen + New connector. Fill in all inputs and press Add button:
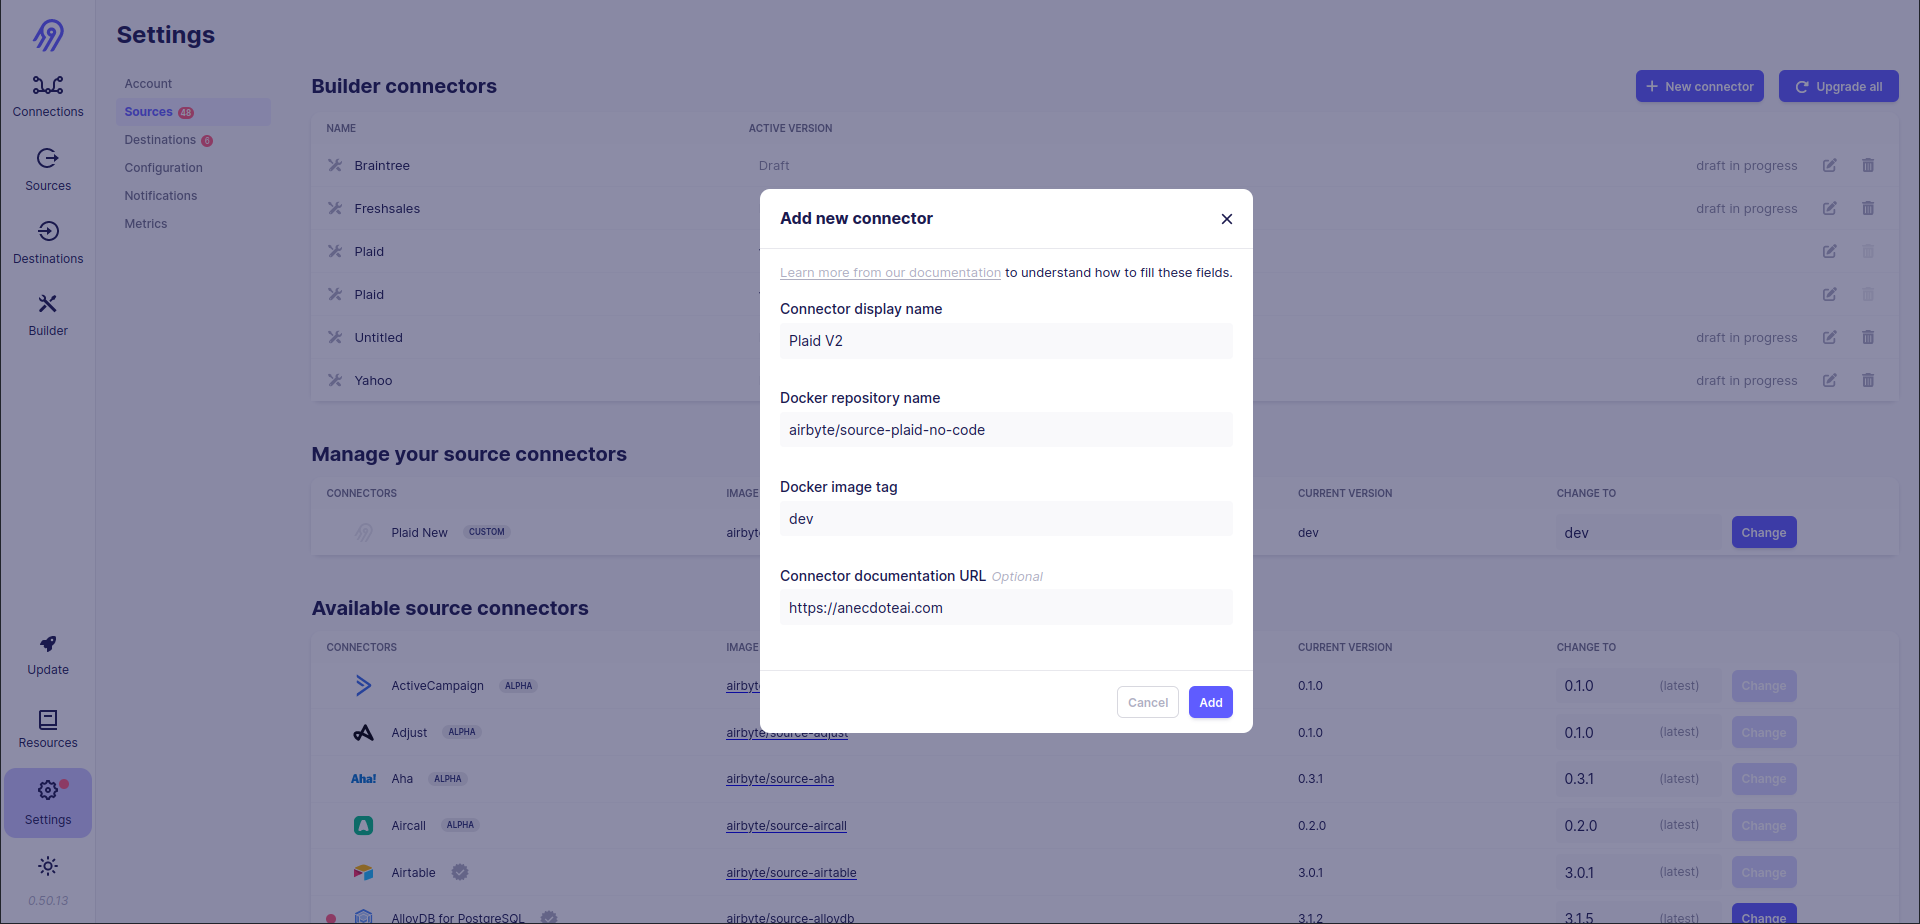
You can use your new source in Airbyte :)
If you want not to create a new connector but directly replace an existing one, you have to build it with the same name and a newer version than current latest and then press Change button on the right part of the connector's row.
I also suggest final testing your connector before publishing it via Docker Image.
To do that you can run an integration test for your new Docker Container:
python -m pytest integration_tests -p integration_tests.acceptance
Basic tests via python main.py and integration_tests directory, where:
abnormal_state.jsonis a group of abnormal states for incremental streams.sample_state.jsonis a group of correct states for incremental streams.configured_catalog.jsonis a group of configured streams to sync.invalid_config.jsonis an invalid config for the source.sample_config.jsonis a valid config for the source.
# get source specification
python main.py spec
# check source configuration
python main.py check --config integration_tests/config.json
# check full-refresh streams
python main.py read --config integration_tests/config.json --catalog integration_tests/configured_catalog.json
# check incremental streams
python main.py read --config integration_tests/config.json --catalog integration_tests/configured_catalog.json --state integration_tests/sample_state.json
Unit tests via pytest if you need them.
Now you know how to rewrite existing Python CDK connector to Low-Code CDK via AIrbyte Connector Builder UI. Hooray!
Story 2: BrainTree
This blog post is quite big for now, so some unimportant parts are skipped.
Investigate
You can find BrainTree's source.py file and schemas in a directory with the following path: airbyte/airbyte-integrations/connectors/source-braintree/source_braintree. Source has some additional Python files: spec.py and streams.py. Also, all files in schemas directory have *.py type instead of *.json.
Airbyte Python CDK supports not only JSON (YAML) formatted configs and schemas. You can specify them directly in Python code with pydantic library, so spec.json becomes spec.py and each stream schema is converted into a Python class.
There are 7 streams: merchant_account_stream, customer_stream, discount_stream, plan_stream, transaction_stream, subscription_stream and dispute_stream. Some of them support incremental syncs and pagination, some not.
The most interesting part of the source code of this connector is its imports again. Source uses external braintree library, so you have to dive into its code. In this library you can find that original responses are given in XML format and then converted to JSON via library transformations (from XML to JSON) and source-code transformations (via get_json_from_resource method from BraintreeStream(Stream, ABC) class from JSON to another JSON).
Estimate
BrainTree API returns original data in XML format, so you can not simply use Airbyte No-Code Connector Builder. You need to combine both Low-Code and Python CDKs. That is not easy but yet possible.
Effectuate
Airbyte No-Code Connector Builder
Low-Code CDK part can be created via No-Code Connector Builder and is responsible for stream definition, network and overall source configuration:
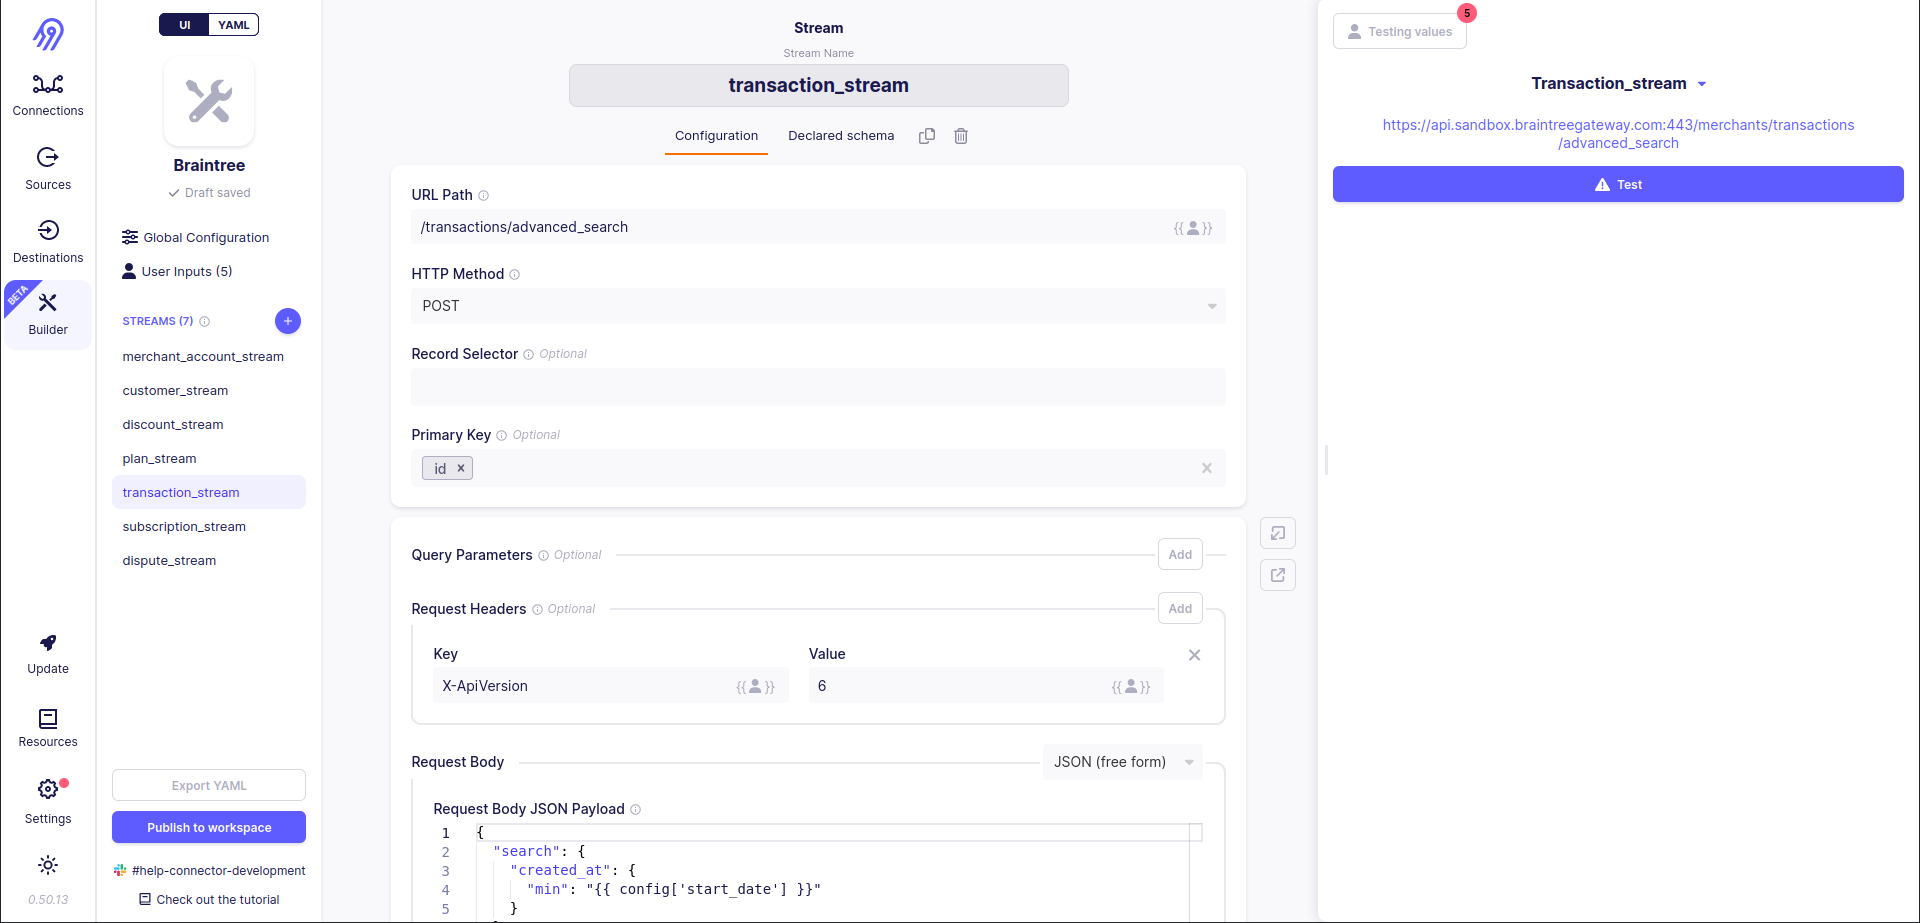
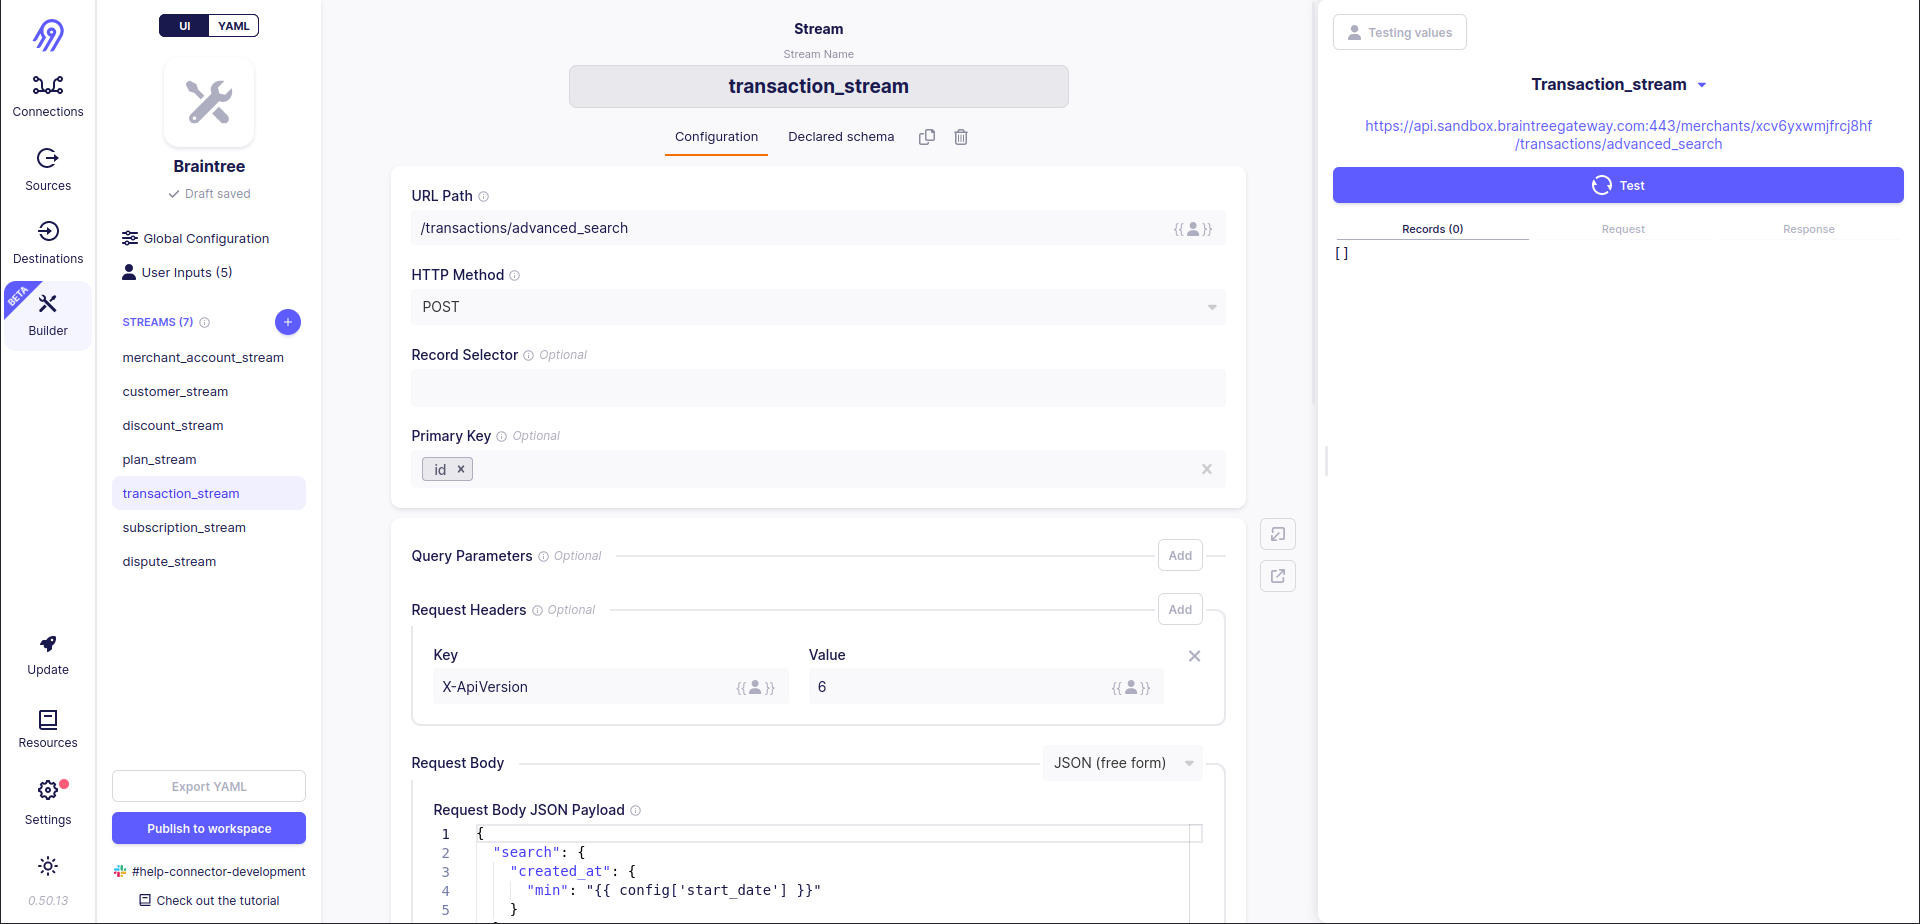
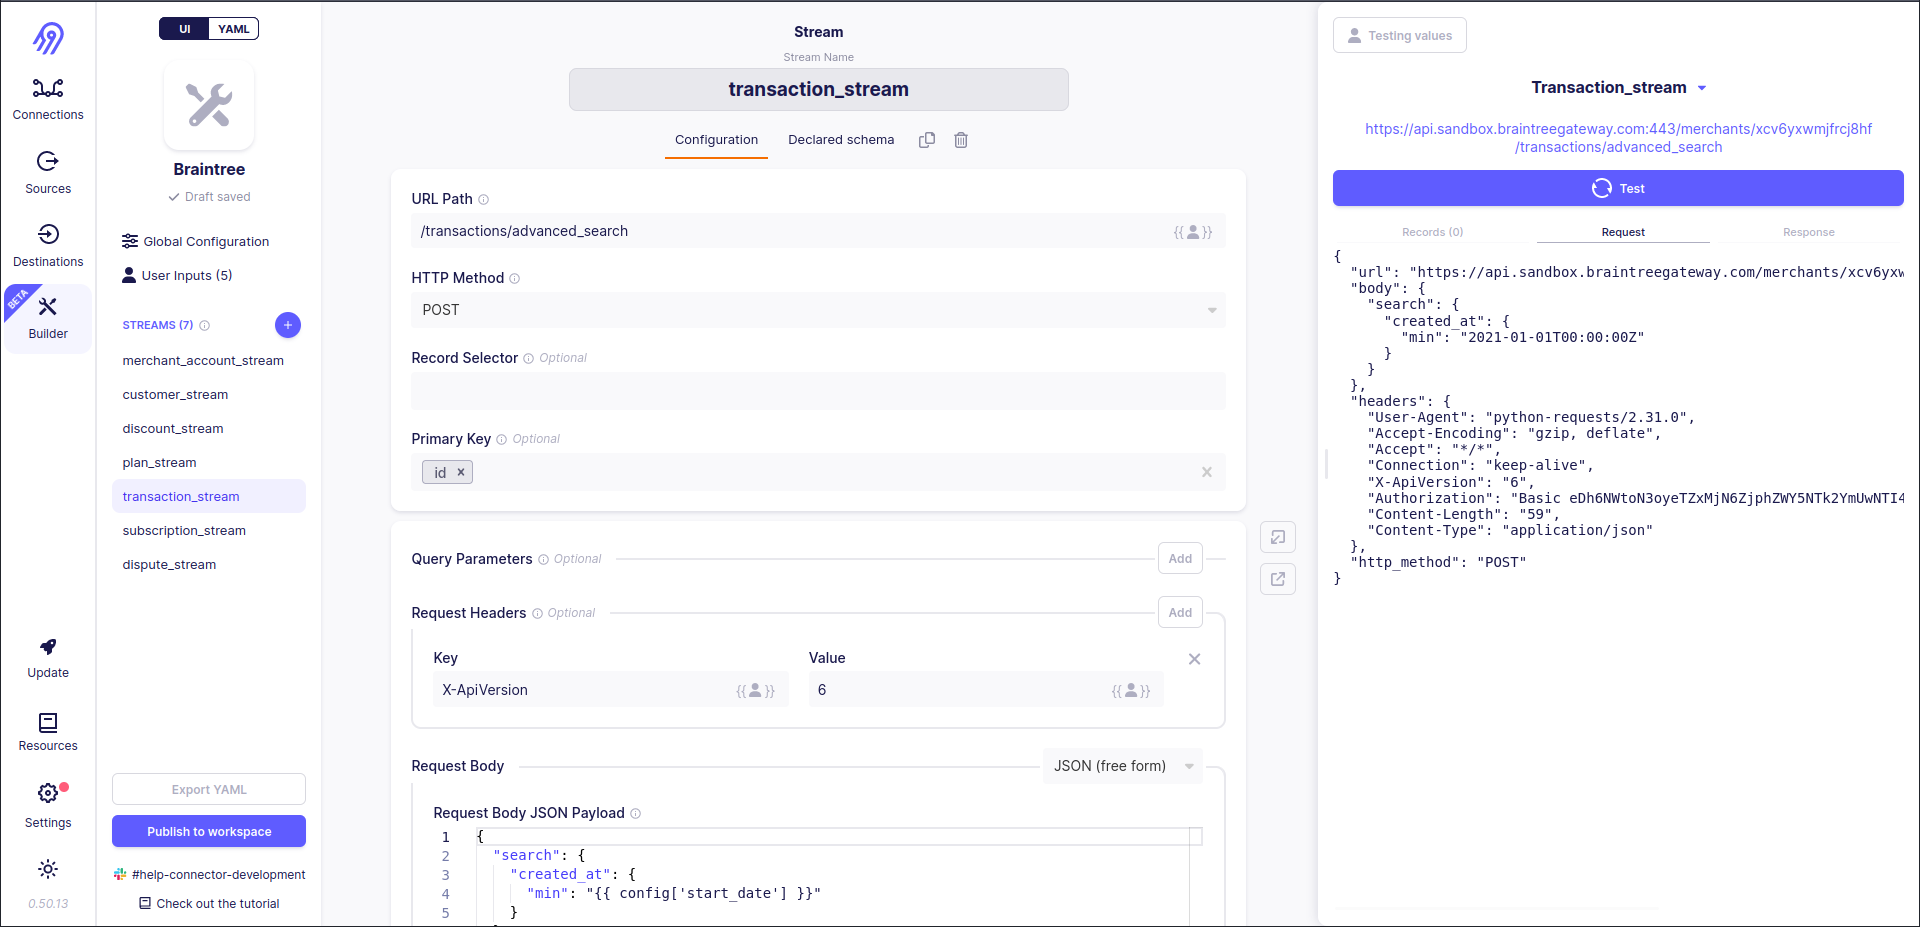
You should be ready that you will always get 0 records in response because Low-Code CDK can not process XML by default. However, if you check the response manually, you will see all the data:
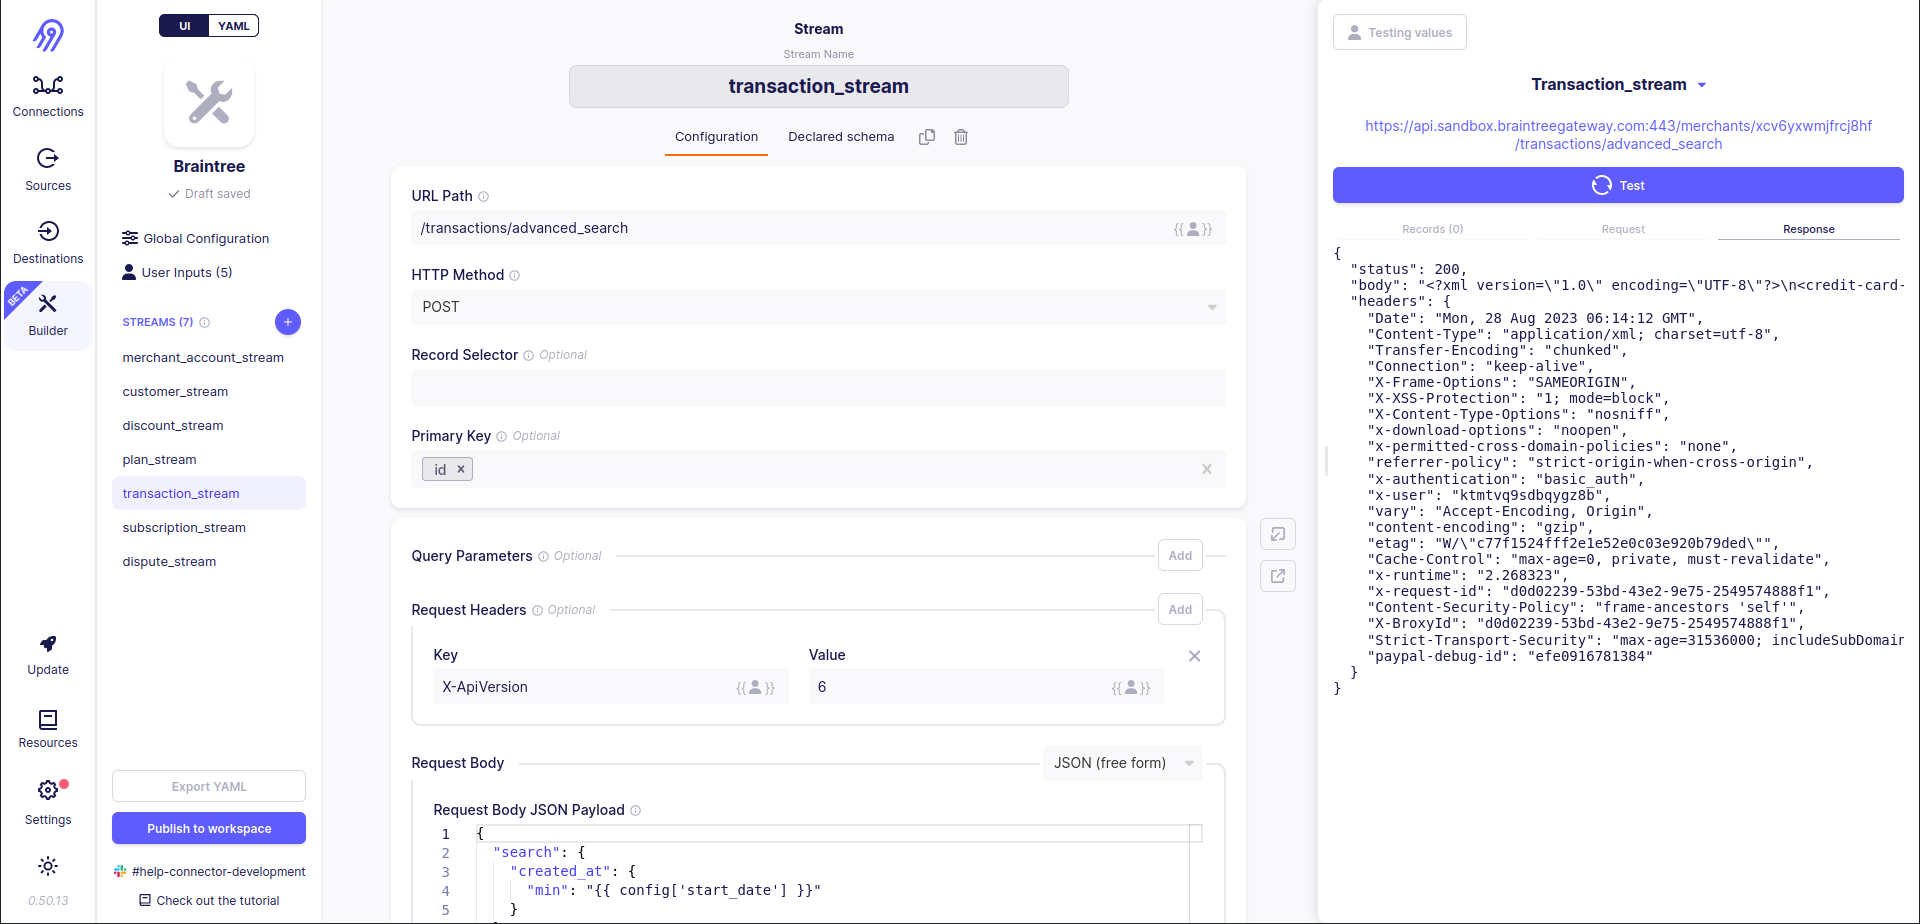
Python CDK
The records conversion code should be done in pure Python code with Python CDK. You may ask how can we combine two different CDKs. Happily, Airbyte Low-Code CDK supports it via class_name: you can refer to Python code from Low-Code CDK YAML specification with this keyword.
For example, for transaction_stream record_selector in manifset.yaml will have the following setup:
record_selector:
    type: RecordSelector
    extractor:
        class_name: "source_braintree.source.TransactionExtractor"
and in source.py file special TransactionExtractor class will be present. It is responsible for data conversion from YAML to JSON:
@dataclass
class TransactionExtractor(BraintreeExtractor):
    """
    Extractor for Transactions stream.
    It parses output XML and finds all `Transaction` occurrences in it.
    """

    def extract_records(
        self,
        response: requests.Response,
    ) -> List[Record]:
        data = XmlUtil.dict_from_xml(response.text)["credit_card_transactions"]
        transactions = self._extract_as_array(data, "transaction")
        return [
            Transaction(**self._get_json_from_resource(BTransaction(None, transaction))).dict(exclude_unset=True)
            for transaction in transactions
        ]
Execute
The execute part is pretty similar to the previous one, so it is completely skipped.
Now you know what to do if your source returns data in a non-JSON format, but you still need to rewrite it to Low-Code CDK. Hooray again!
Story 3: Yahoo-Finance-Price
This blog post is quite big for now, so some unimportant parts are skipped.
Investigate
You can find all Yahoo-Finance-Price's files in airbyte/airbyte-integrations/connectors/source-yahoo-finance-price/source_yahoo_finance_price directory. Connector's code looks pretty straightforward: no additional imports, no authorization and no format conversion. And only one stream: price. Amazing!
Estimate
Looks like we can convert this source into Low-Code CDK via No-Code Connector Builder in a few minutes. However, that is not true.
Effectuate
Airbyte No-Code Connector Builder
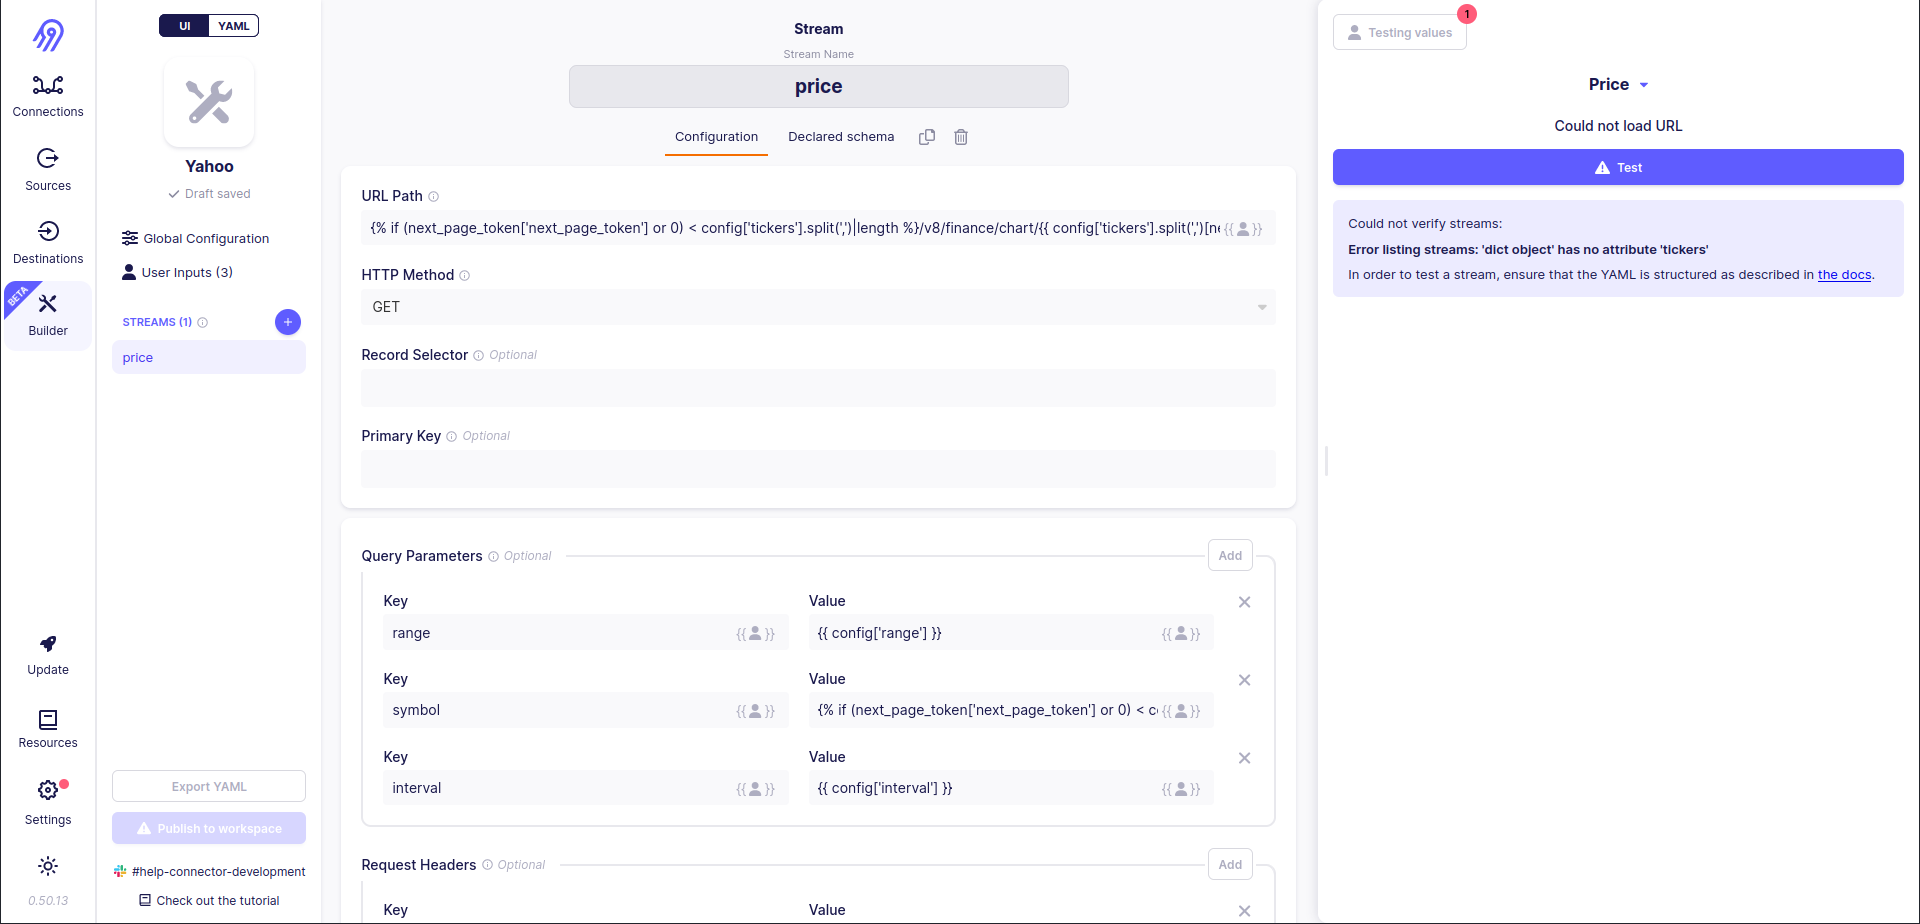
Yahoo-Finance-Price source iterates over given tickers and gets historical prices for each of them. That looks like pagination, however, it is not. Also, you can not specify the maximum number of pagination iterations.
What can be done? You can try to imitate pagination via Jinja2 Templates. You have to use the following complicated rule for the URL path:
{% if (next_page_token['next_page_token'] or 0) < config['tickers'].split(',')|length %}/v8/finance/chart/{{ config['tickers'].split(',')[next_page_token['next_page_token'] or 0].strip() }}{% endif %}
It provides a valid URL for all N given tickers and an invalid URL for N+1 ticker, so the API responds with a 403 code and no data in the body. Airbyte Low-Code CDK can not parse any records in this case and decides to stop iteration.
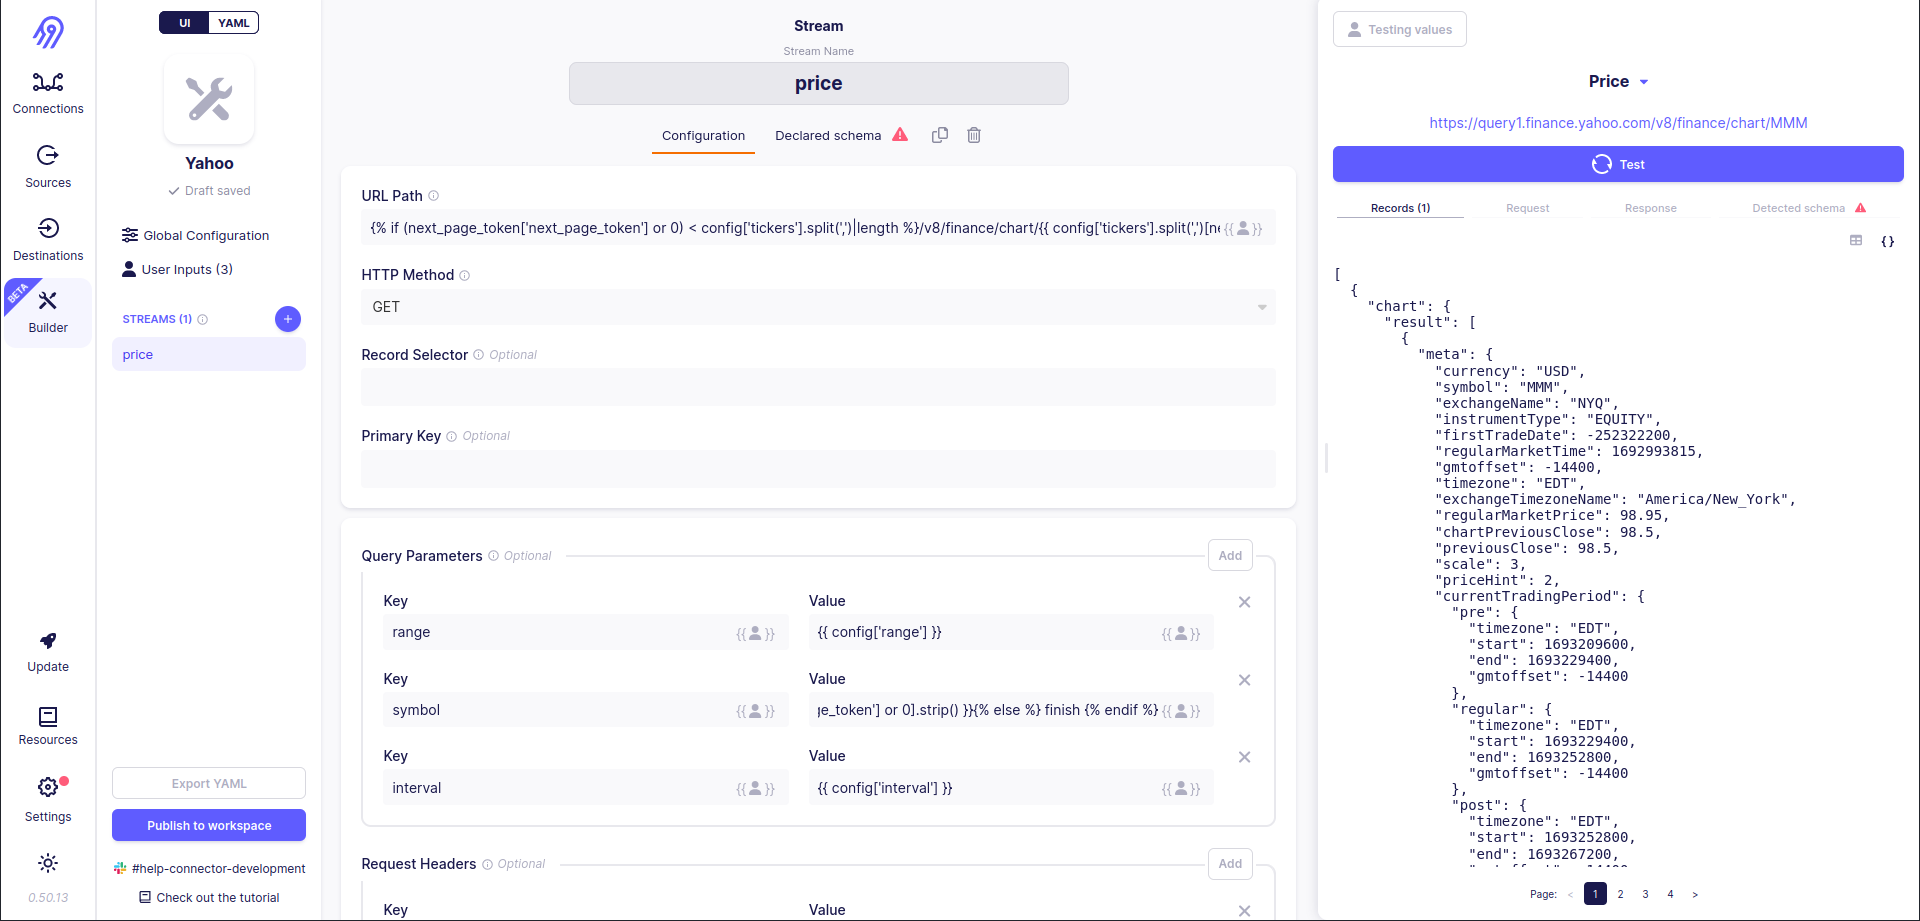
The same logic is applied to symbol query parameter too:
{% if (next_page_token['next_page_token'] or 0) < config['tickers'].split(',')|length %}{{ config['tickers'].split(',')[next_page_token['next_page_token'] or 0].strip() }}{% else %} finish {% endif %}
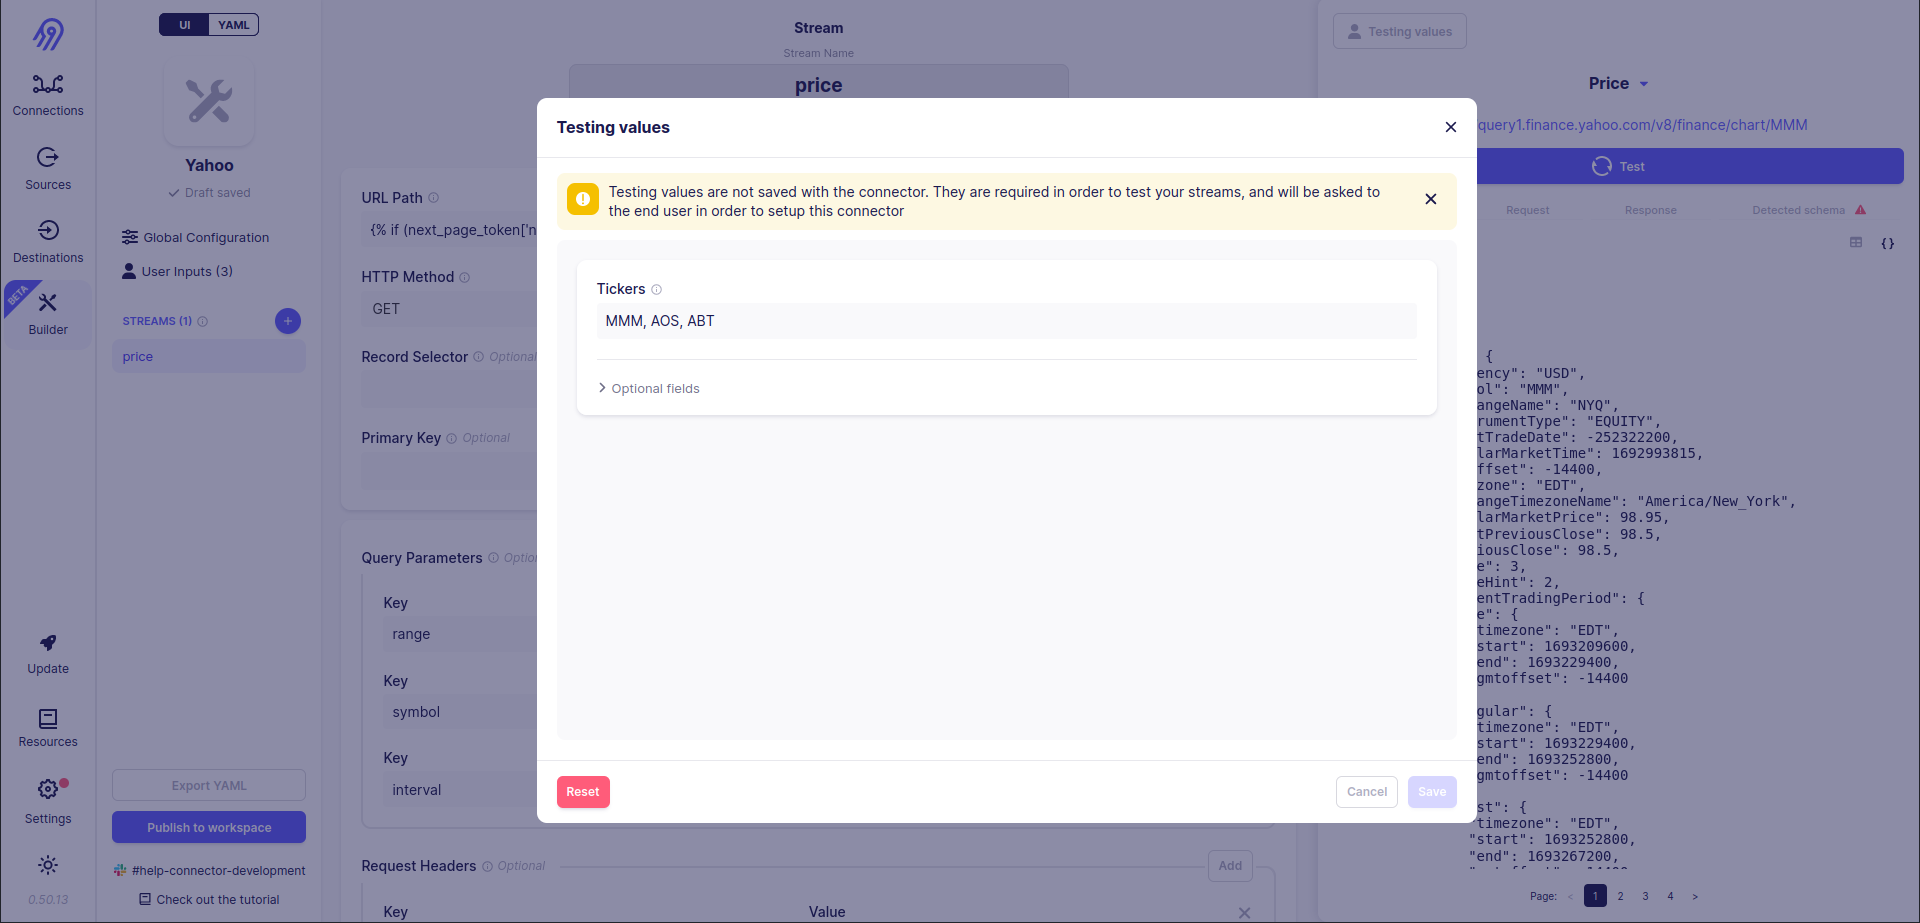
Now everything works fine:
Execute
The execute part is pretty similar to the previous one, so it is completely skipped.
We tricked Airbyte into thinking that our list of tickers iteration is just a basic pagination! Hooray!
Conclusion
Today you have learned how to (re)write Airbyte sources with 2 amazing tools: Low-Code CDK and Connector Builder UI. Through this step-by-step guide, you learn about IEEE rules:
Investigate!
Estimate!
Effectuate!
Execute!
Now you can write plain YAML Low-Code CDK sources, combine them with Python CDK and moreover sometimes trick Airbyte CDK :)
Good Luck!
Worth to Read
My Github Discussion. I am ready to answer all your questions here. Upvotes and rockets are appreciated!
Subscribe to my newsletter
Read articles from Mikhail Masyagin directly inside your inbox. Subscribe to the newsletter, and don't miss out.
Written by

Mikhail Masyagin
Mikhail Masyagin
Python, C\C++, Go and Lisp developer. Experienced with PostgreSQL, Elasticsearch, Redis, Milvus and LMDB. Can build a Cloud Architecture for your company in AWS. Writing reliable data pipelines & highly efficient low-level software. From scalable AWS infrastructure to bare-metal MIPS code. Speaking at IT & Science conferences.