#Day27: Jenkins Declarative Pipeline with Docker
 Karan Idnani
Jenkins Declarative Pipeline with Docker Integration 🚀
Are you looking to combine the power of Jenkins declarative pipelines with Docker? 🛠️ In this guide, we'll walk you through creating a Jenkins pipeline that seamlessly integrates Docker commands to build and run your applications. Let's get started! 🚢
Use your Docker Build and Run Knowledge
docker build - you can use sh 'docker build . -t <tag>' in your pipeline stage block to run the docker build command. (Make sure you have docker installed with correct permissions.
docker run: you can use sh 'docker run -d <image>' in your pipeline stage block to build the container.
How will the stages look
stages {
        stage('Build') {
            steps {
                sh 'docker build -t trainwithshubham/django-app:latest'
            }
        }
    }
Task-01
Create a docker-integrated Jenkins declarative pipeline
Use the above-given syntax using
shinside the stage block
🛠️ Creating a Jenkins Job with Docker Integration 🚀
Follow these steps to create a new Jenkins job with Docker integration:
Step 1: Access Jenkins
- Open your web browser and navigate to your Jenkins instance.
Step 2: Log In
- If you are not already logged in, log in to your Jenkins account.
Step 3: Dashboard
- Once logged in, you should be on the Jenkins dashboard.
Step 4: Create New Job
- Look for an option such as "New Item," "Create New Job," or "New Project" on the dashboard and click on it.
Step 5: Enter Job Details
Name: Provide a name for your job. This will be used to identify the job within Jenkins.
Type: Choose "Pipeline" as the job type. This allows you to define your job's tasks using a pipeline script.
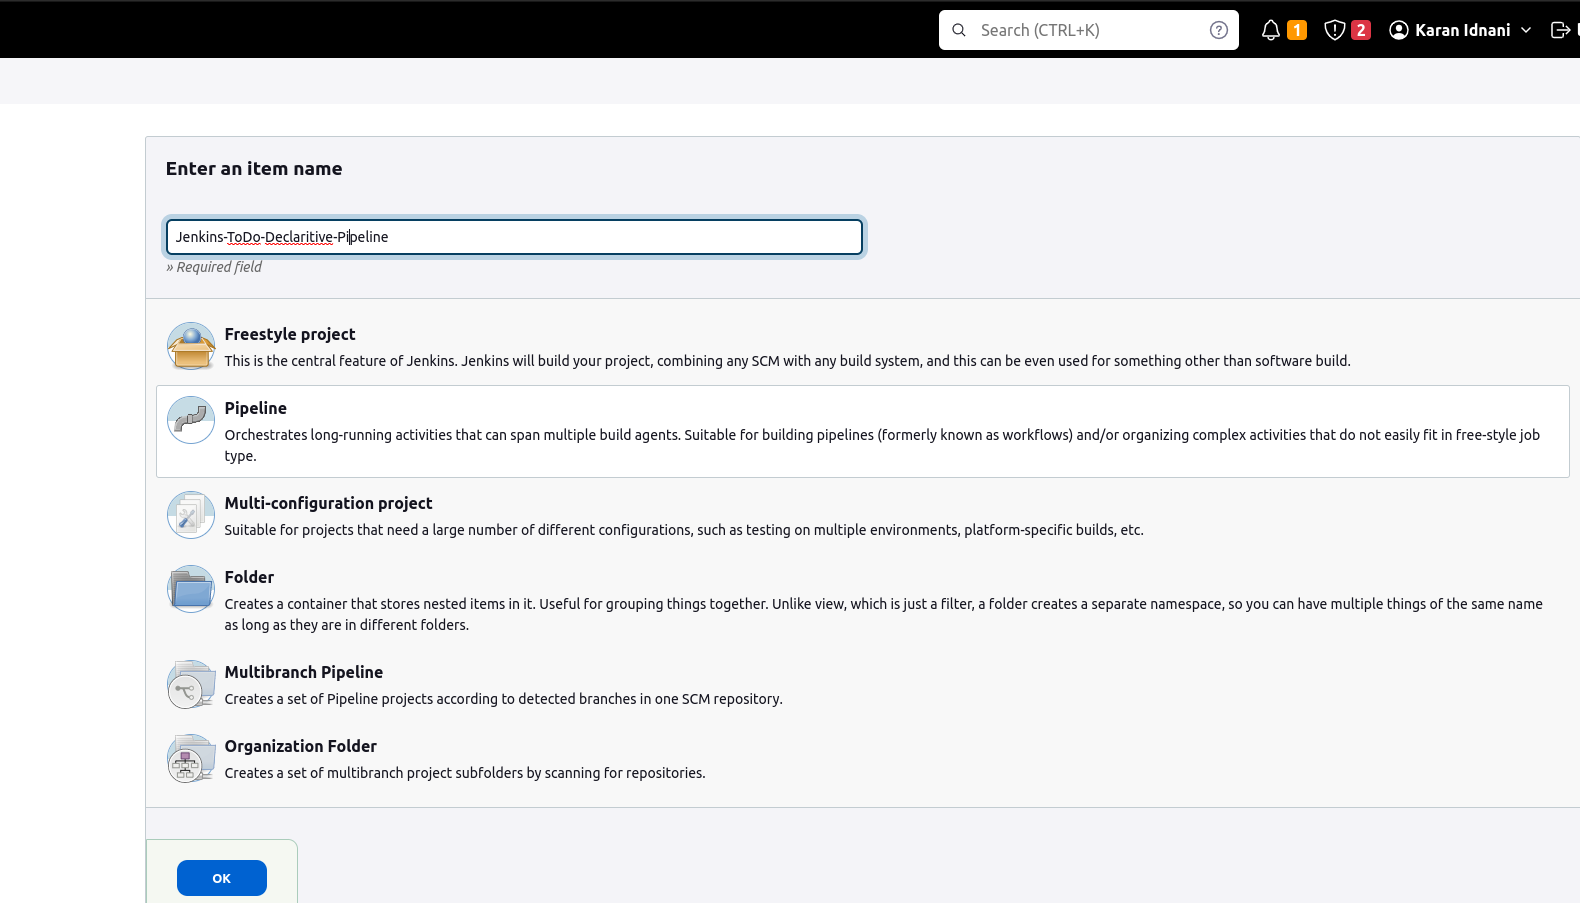
Step 6: Configure Pipeline
- After selecting "Pipeline," you'll typically see a section where you can define the pipeline configuration.
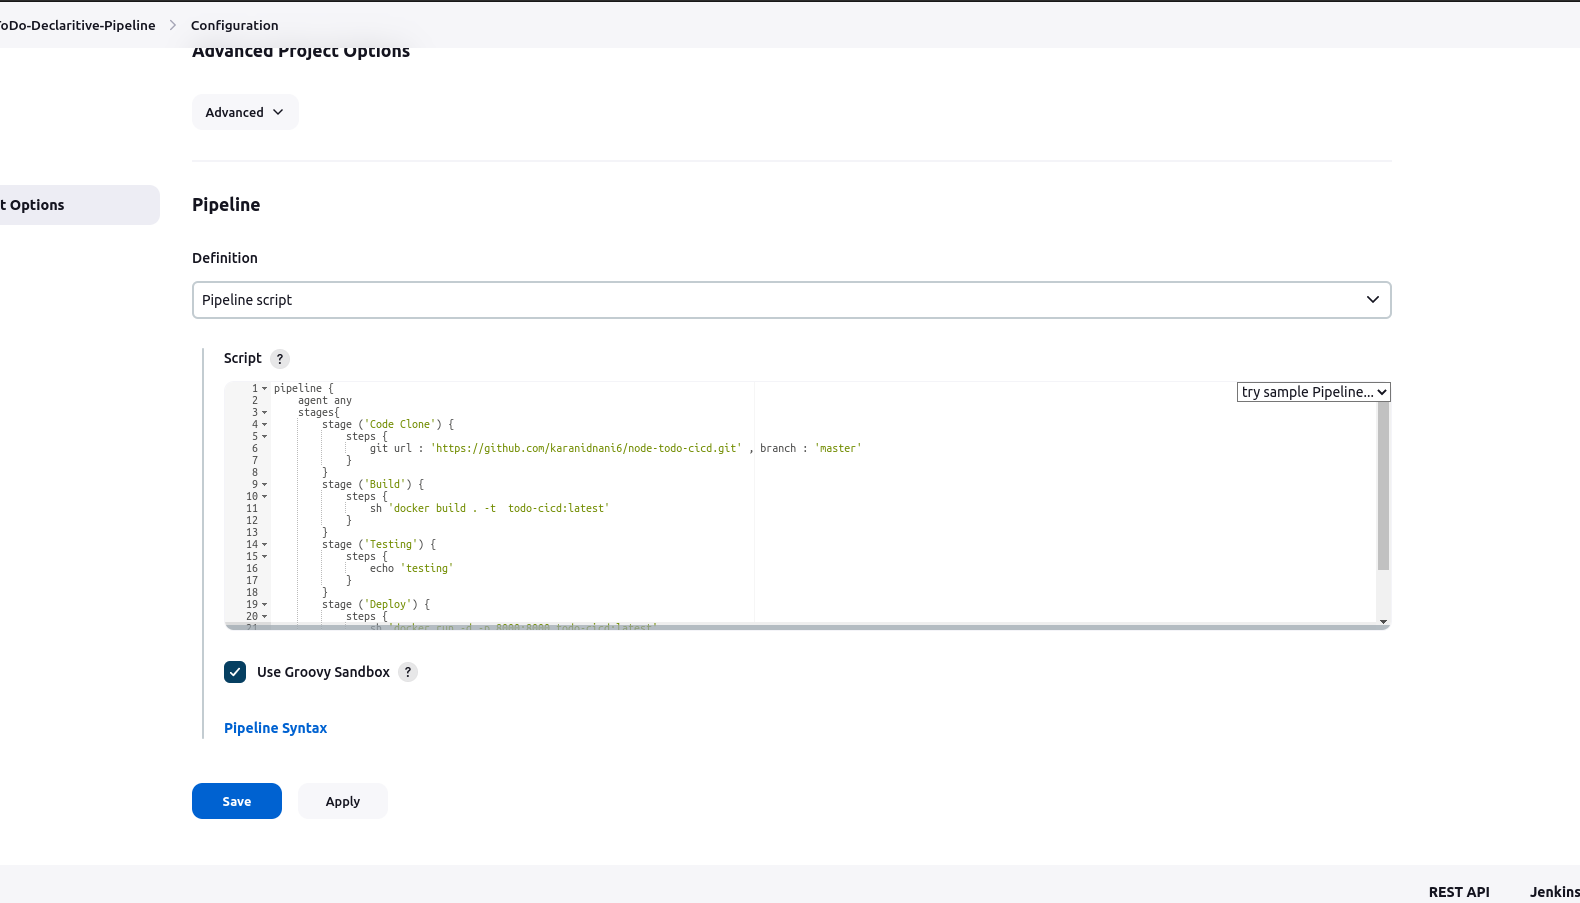
Step 7: Save
- Once you've configured your pipeline script, save your job configuration.
Step 8: Build
- You can manually trigger a build of your pipeline job or set up triggers based on events like code commits.
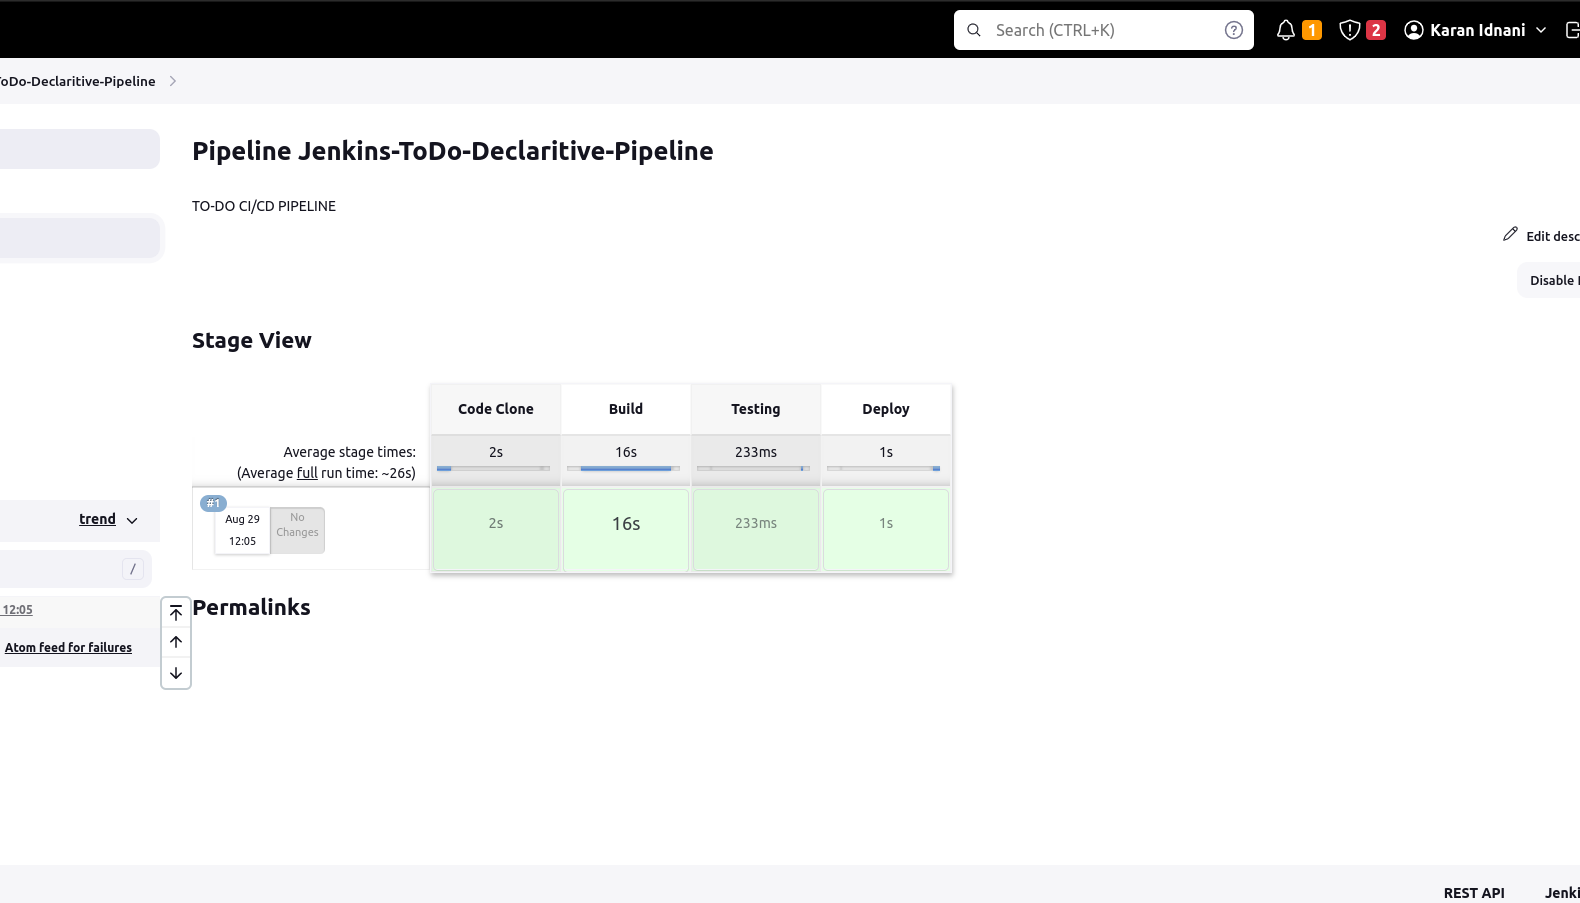
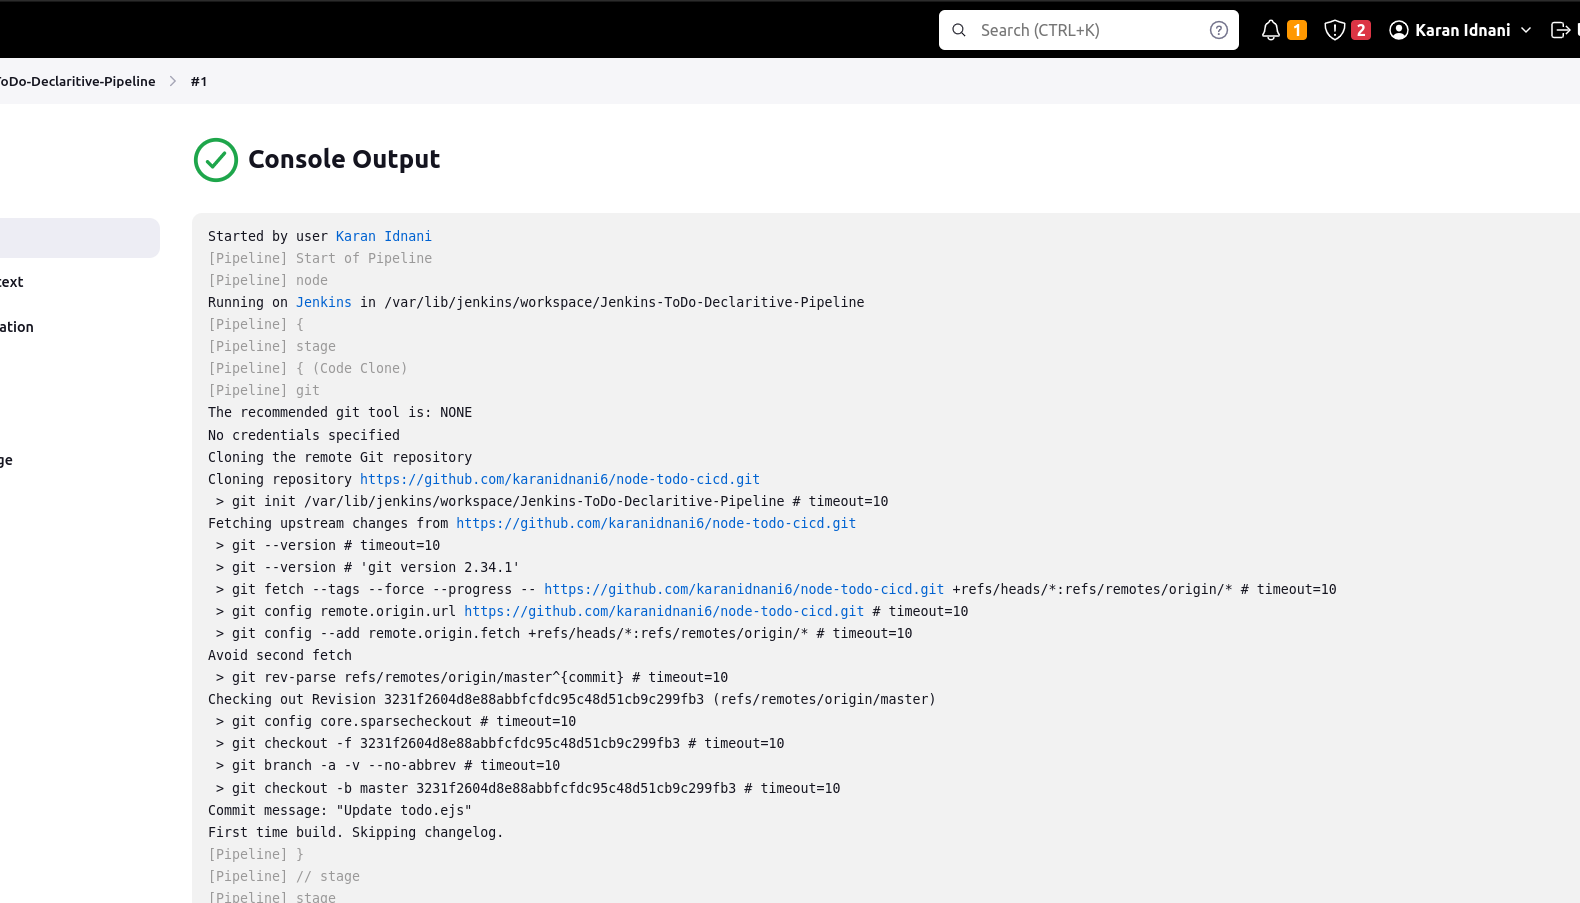
Step 9: Check the "Console Output"
- Review the "Console Output" to monitor the progress of your pipeline.
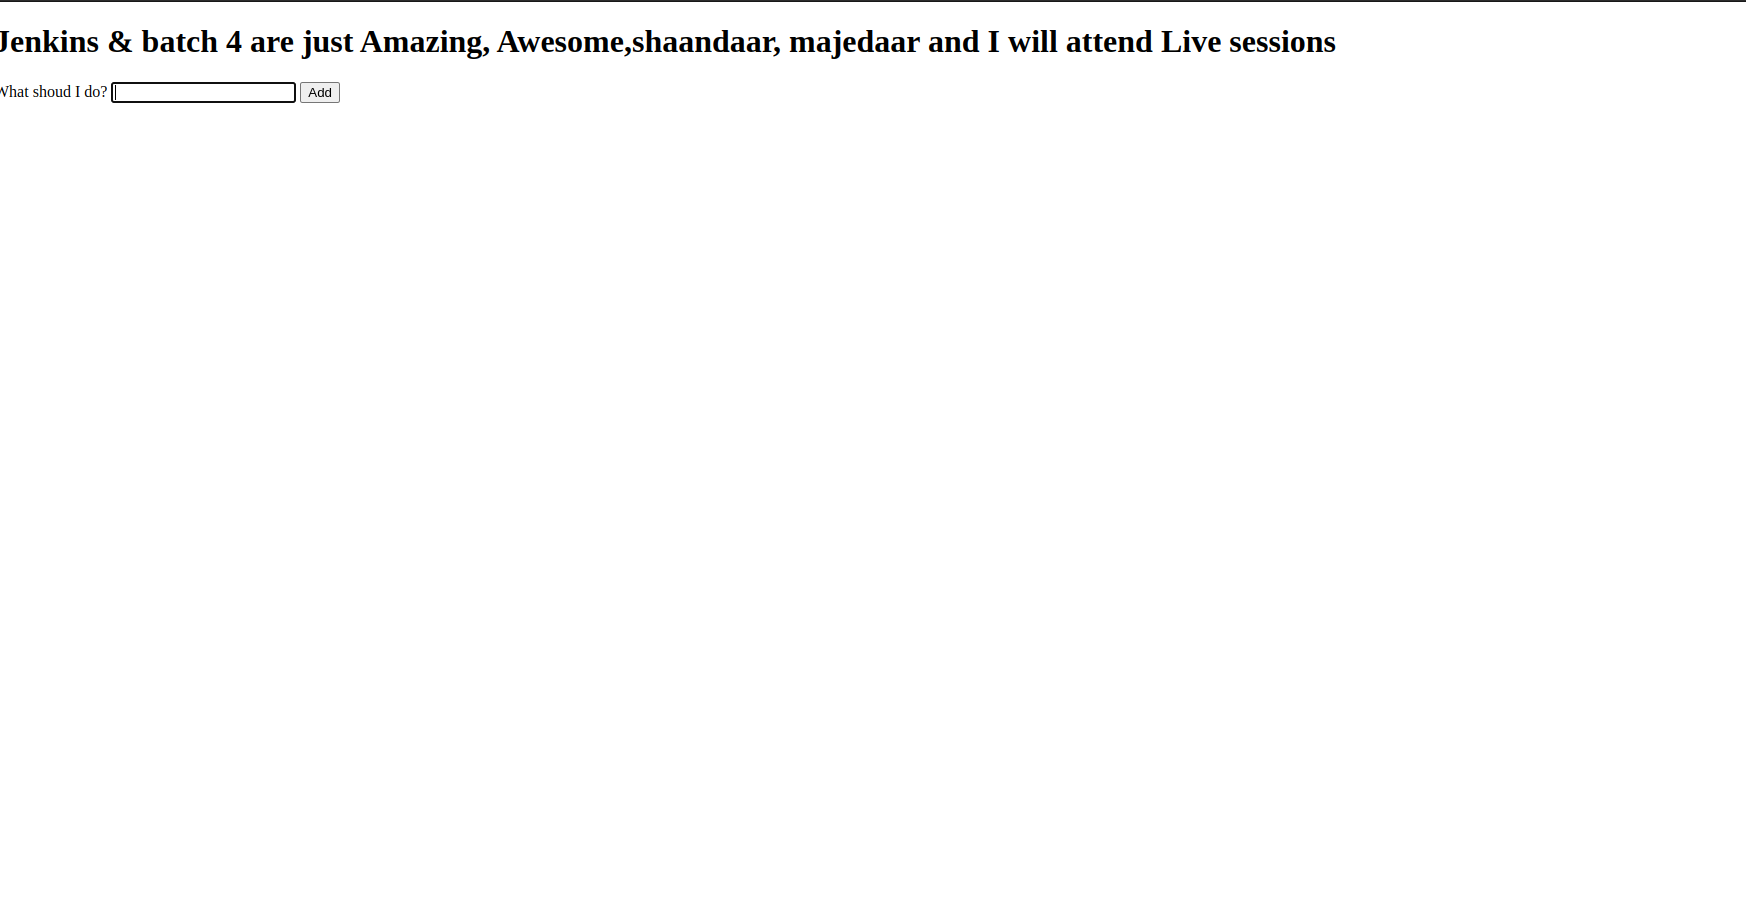
Step 10: Verify Application
- Check whether the application is working on port 8000.
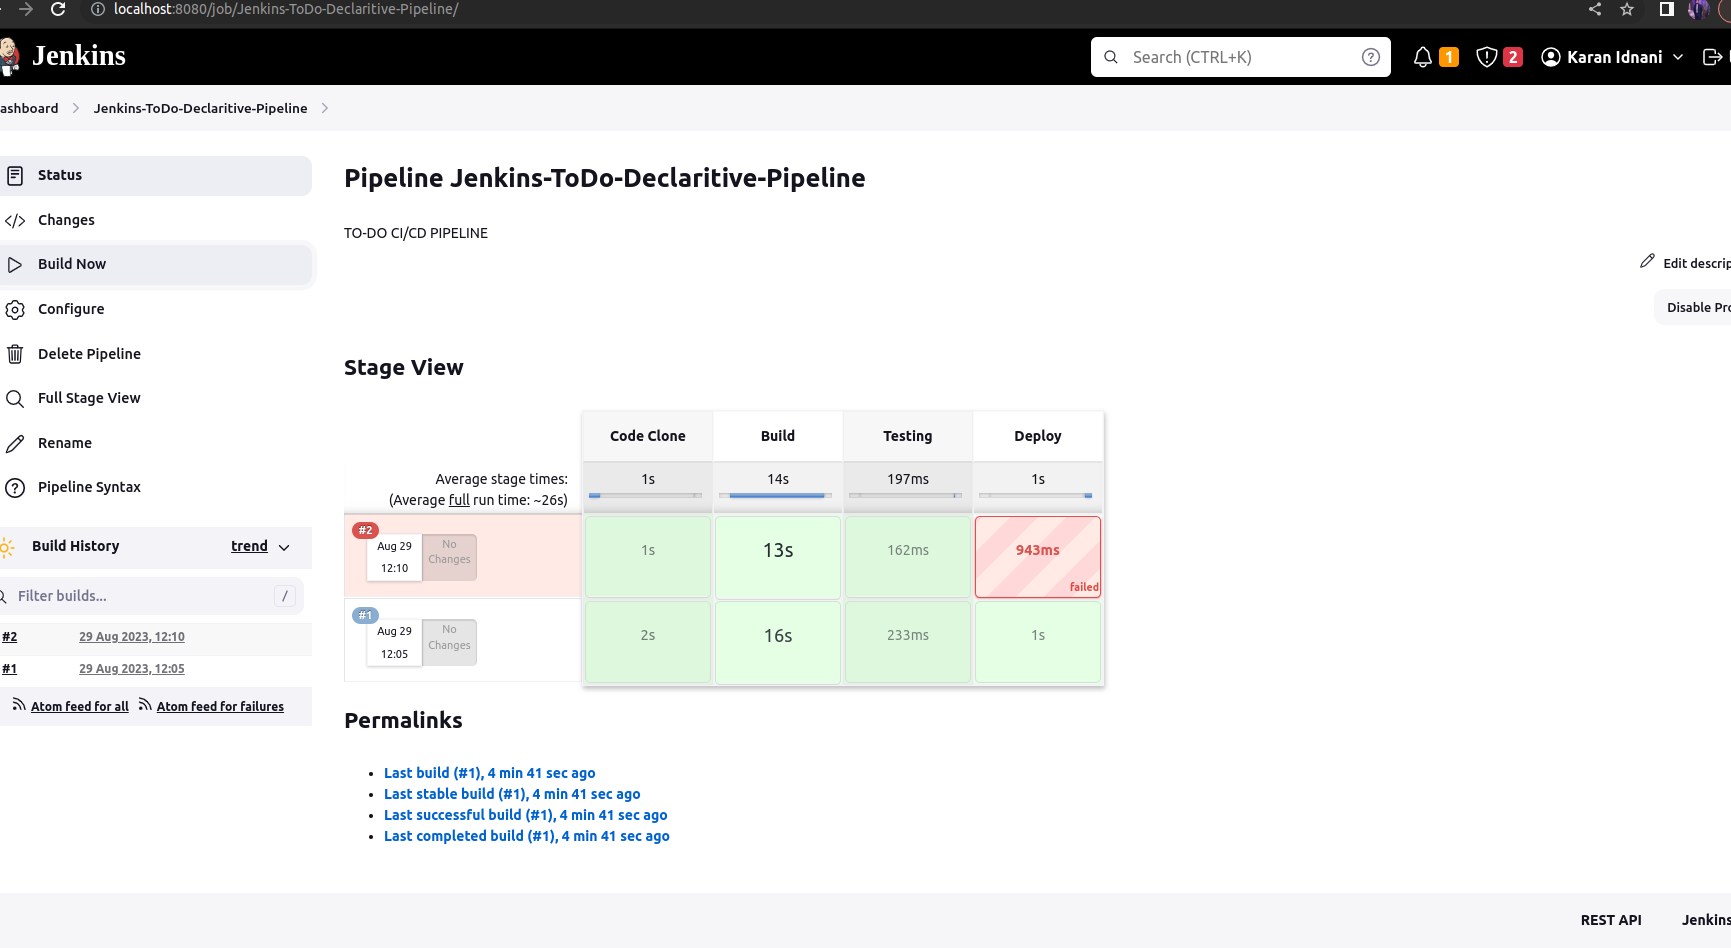
You will face errors in case of running a job twice, as the docker container will be already created.
Task-02
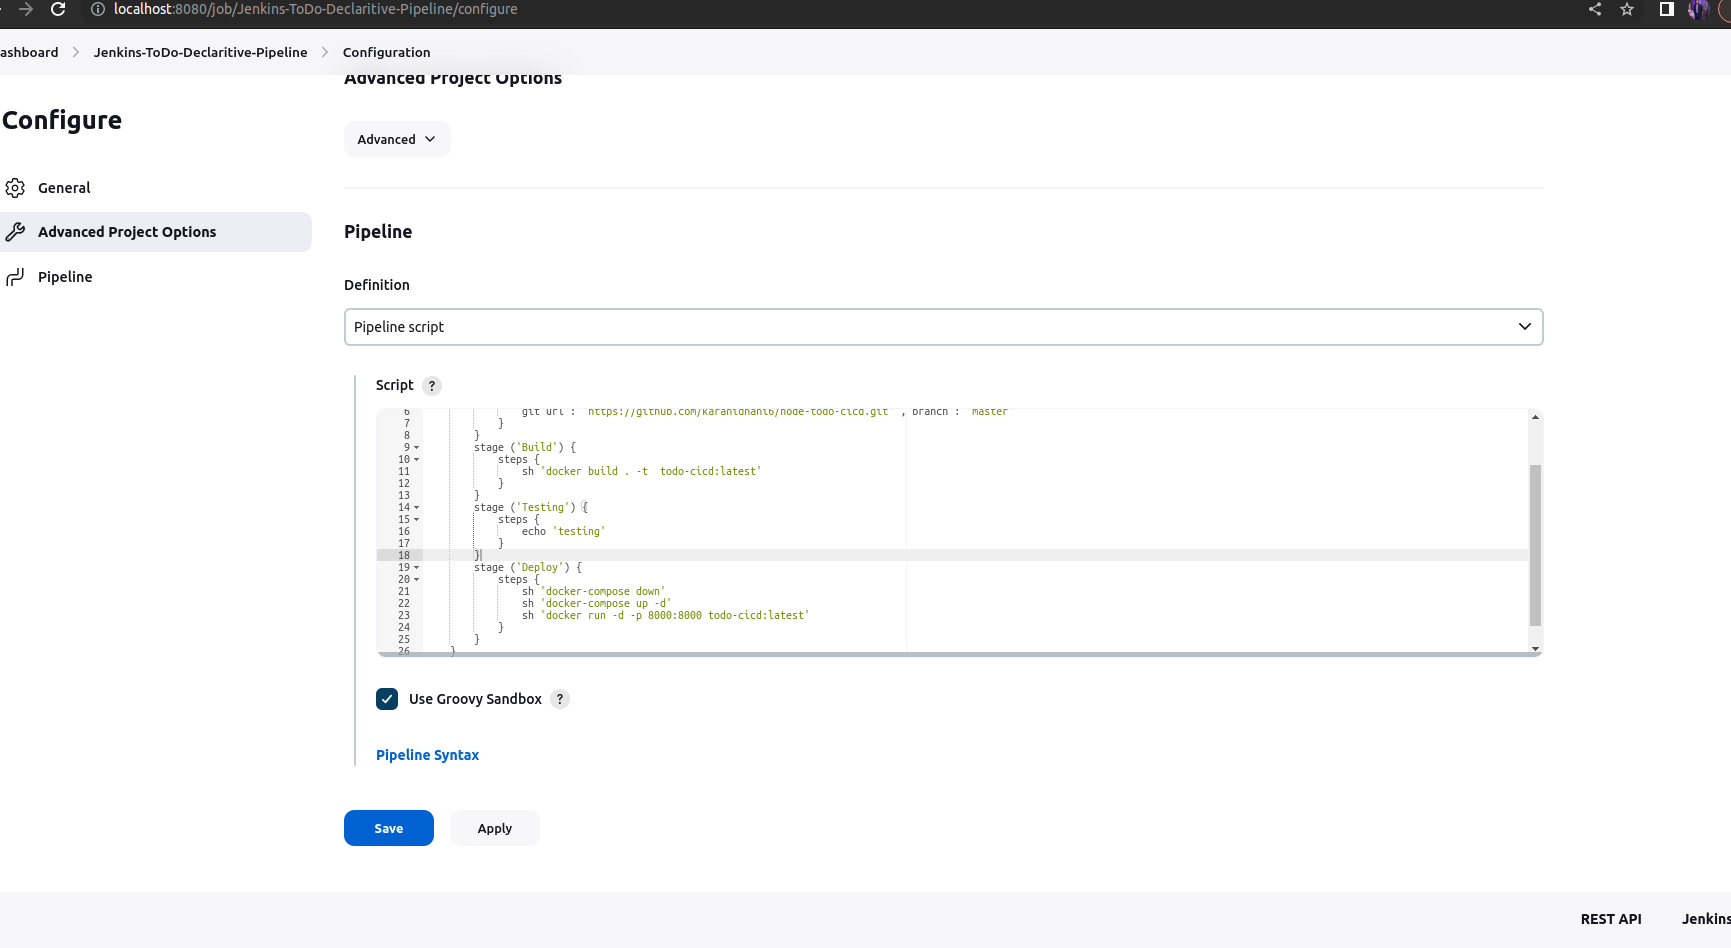
Create a docker-integrated Jenkins declarative pipeline using the
dockergroovy syntax inside the stage block.You won't face errors
Simply put, modify the script by incorporating the commands docker-compose down and docker-compose up.
Click the "Save" button followed by clicking "Build Now."
Monitor the progress by reviewing the "Console Output."
Concluding the Jenkins-Docker Integration
In wrapping up our exploration of Jenkins and Docker integration, we've unlocked a streamlined approach to software development. By fusing Jenkins' powerful pipelines with Docker's containerization, we've forged a pathway to more efficient and reliable CI/CD.
With carefully crafted Jenkins jobs and Docker commands, we've established a seamless process for building, testing, and deploying applications. The marriage of these technologies not only accelerates development but also ensures consistency across environments.
As you embark on your integration journey, remember that this synergy isn't just about tools – it's about transforming the way we create software. The outcome? A future of more agile, automated, and successful DevOps practices. 🚀🛡️
Subscribe to my newsletter
Read articles from Karan Idnani directly inside your inbox. Subscribe to the newsletter, and don't miss out.
Written by

Karan Idnani
Karan Idnani
"Engineer | DevOps Enthusiast | Fitness Lover | Traveler | Lifelong Learner 🚀✈️