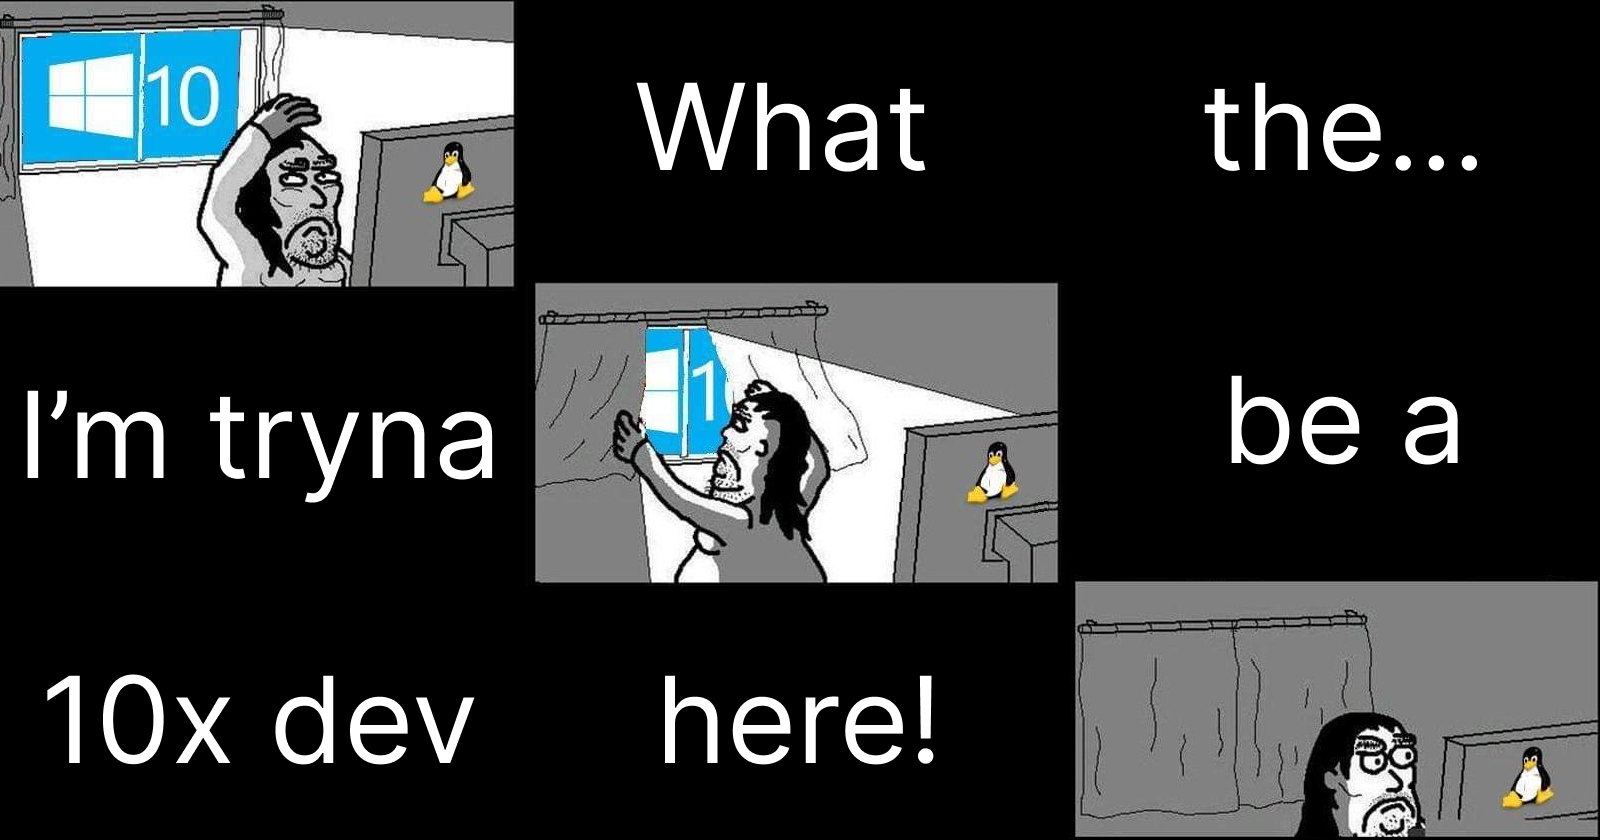
Navigating the Switch to Linux for Your Primary Dev Machine
 Ashutosh Khanduala
Table of contents

If you're currently utilizing a high-end operating system that comes with a price tag, chances are you're working on a Windows platform.
So, I've dabbled in both Windows and Linux. For a long time, I've been a Linux user. Windows? Yeah, I touch that like once every couple of months, if you catch my drift, lol.
Windows is cool and all, but let's be real – it's not the greatest when it comes to handling developer tasks. You could make the point that Windows has WSL and all, which hooks you up with a Linux environment. However, at the end of the day, WSL is essentially a lightweight virtual machine. It still takes quite a bit of extra time to get to your Windows files because it has to bounce in and out of that virtual setup. Sure thing, you might then suggest that all we have to do is allocate a bigger storage partition to WSL and stash all our development tools and local repositories right in there. This could potentially address the file access speed issue. However, I haven't given it a shot because the thought of managing everything through the terminal is a tad intimidating for me. And that's precisely why I made the switch to a Linux distro as my go-to development machine. One, because of the robust Linux environment, and two, for the improved performance and a decent user-friendly GUI.
When it comes to software compatibility, Windows has consistently held the upper hand. While Linux might not be able to run Adobe software, having Microsoft Edge browser on Linux covers a lot of ground. With just a browser, I've got access to a bunch of tools like Figma and Inkscape. When it comes to video editing, Shotcut serves its purpose admirably. I'm not a graphic designer, so I've never truly required all the bells and whistles that Adobe provides. As it stands, my browser pretty much fulfills most of my use cases.
Which distro should I use?
TL;DR: Ubuntu is the way to go. Its tooling and GUI, along with customizable extensions, offer everything I need for a comfortable setup. While I'll delve into customization in a future blog, let's get straight to the point. I've tested a few distros like Kali, Mint, and MX Linux, but they hit roadblocks and even crashed my PC. In my five-year experience with Ubuntu's LTS releases, stability has been a consistent strength.
How to make the move to Ubuntu?
Well, before we dive into that, I'd strongly suggest opting for a dual-boot setup. I've got Ubuntu and Windows coexisting on my system. Let's face it, Windows shines when it comes to tooling and software compatibility. Case in point: Linux isn't exactly a pro at handling external HDDs formatted with NTFS. There's a risk of memory blocks getting corrupted if something goes awry during a file transfer on Linux. And this is where Windows tools step up. Windows boasts seamless tools for managing NTFS drives, including error checks and repair utilities. Having premium things always comes in handy, just as a precaution.
Moving on, to set up Ubuntu, there are some decisions that you need to make particularly when installing the OS. Choose to install an LTS release to ensure stability and device compatibility
Arranging Your File System Partition
As a React Native developer who's also deep into React and Next.js, I've had a splendid performance and development journey. However, a lesson I've learned along the way is the critical nature of nailing down the file system partition upfront. Resizing partitions in a Linux distro down the line can be quite a hassle. So, my advice? Get it sorted during the OS installation process – that's the smoothest path to take.
Here's a suggestion: Think about resizing your Windows partition to a minimum size. In my scenario, Windows and its partition only eat up less than 30% of my 500GB internal SSD. Now, let's dive into the rest of the available space that Ubuntu will take up. You're going to want to create four partitions: a root partition (usually marked as "/"), a home partition ("/home"), a swap partition, and a separate partition dedicated to storing files (let's call it "/mylib"). This strategy helps you organize your space effectively.
In this setup, the root, home, and /mylib partitions will all be formatted with the ext4 file system. Linux is renowned for its efficiency in handling ext4 partitions, so you're in good hands there. In short, a swap partition is like extra "virtual" memory for your computer. It helps your system manage tasks more efficiently by temporarily moving data from RAM to disk when memory gets scarce.
How much space should I allocate to each partition?
The root partition does not need to be large unless you would want to install games. I've designated 60GB for this purpose, and at the moment, I still have around 20GB of free space remaining for a long time.
The home partition should have ample space. I'm into Android app development using React Native, and my home partition handles various caches, including those from package managers like npm and yarn. It also houses hefty gradle caches, the Android and Flutter binaries, as well as Snap packages and their configurations. Ideally, this partition should be around 100GB or more. I recommend allocating more space to this partition. since the space occupied will keep growing.
For the swap partition, it's advisable to allocate a space that's double the size of your computer's RAM.
As for your /mylib partition, you can assign the remaining available space. This partition serves as storage for various items like local repositories, downloaded files, documents, music, and movies. It doesn't necessarily require a large allocation, and if needed, you can easily relocate its contents to an external HDD.
Here's a little extra advice when thinking about investing in an external HDD: While external HDDs might be budget-friendly in comparison to external SSDs, I've stumbled upon a clever workaround. You can grab a low-cost internal SSD (I've spotted a Zebronics SSD on Amazon) and team it up with an SSD enclosure that turns it into an external SSD drive. These enclosures come at wallet-friendly prices. (As of 2023, you can find options like these for around 4,000 Rs. I must admit, I somewhat regret my choice of buying an external 1.5TB HDD for 4.5K)
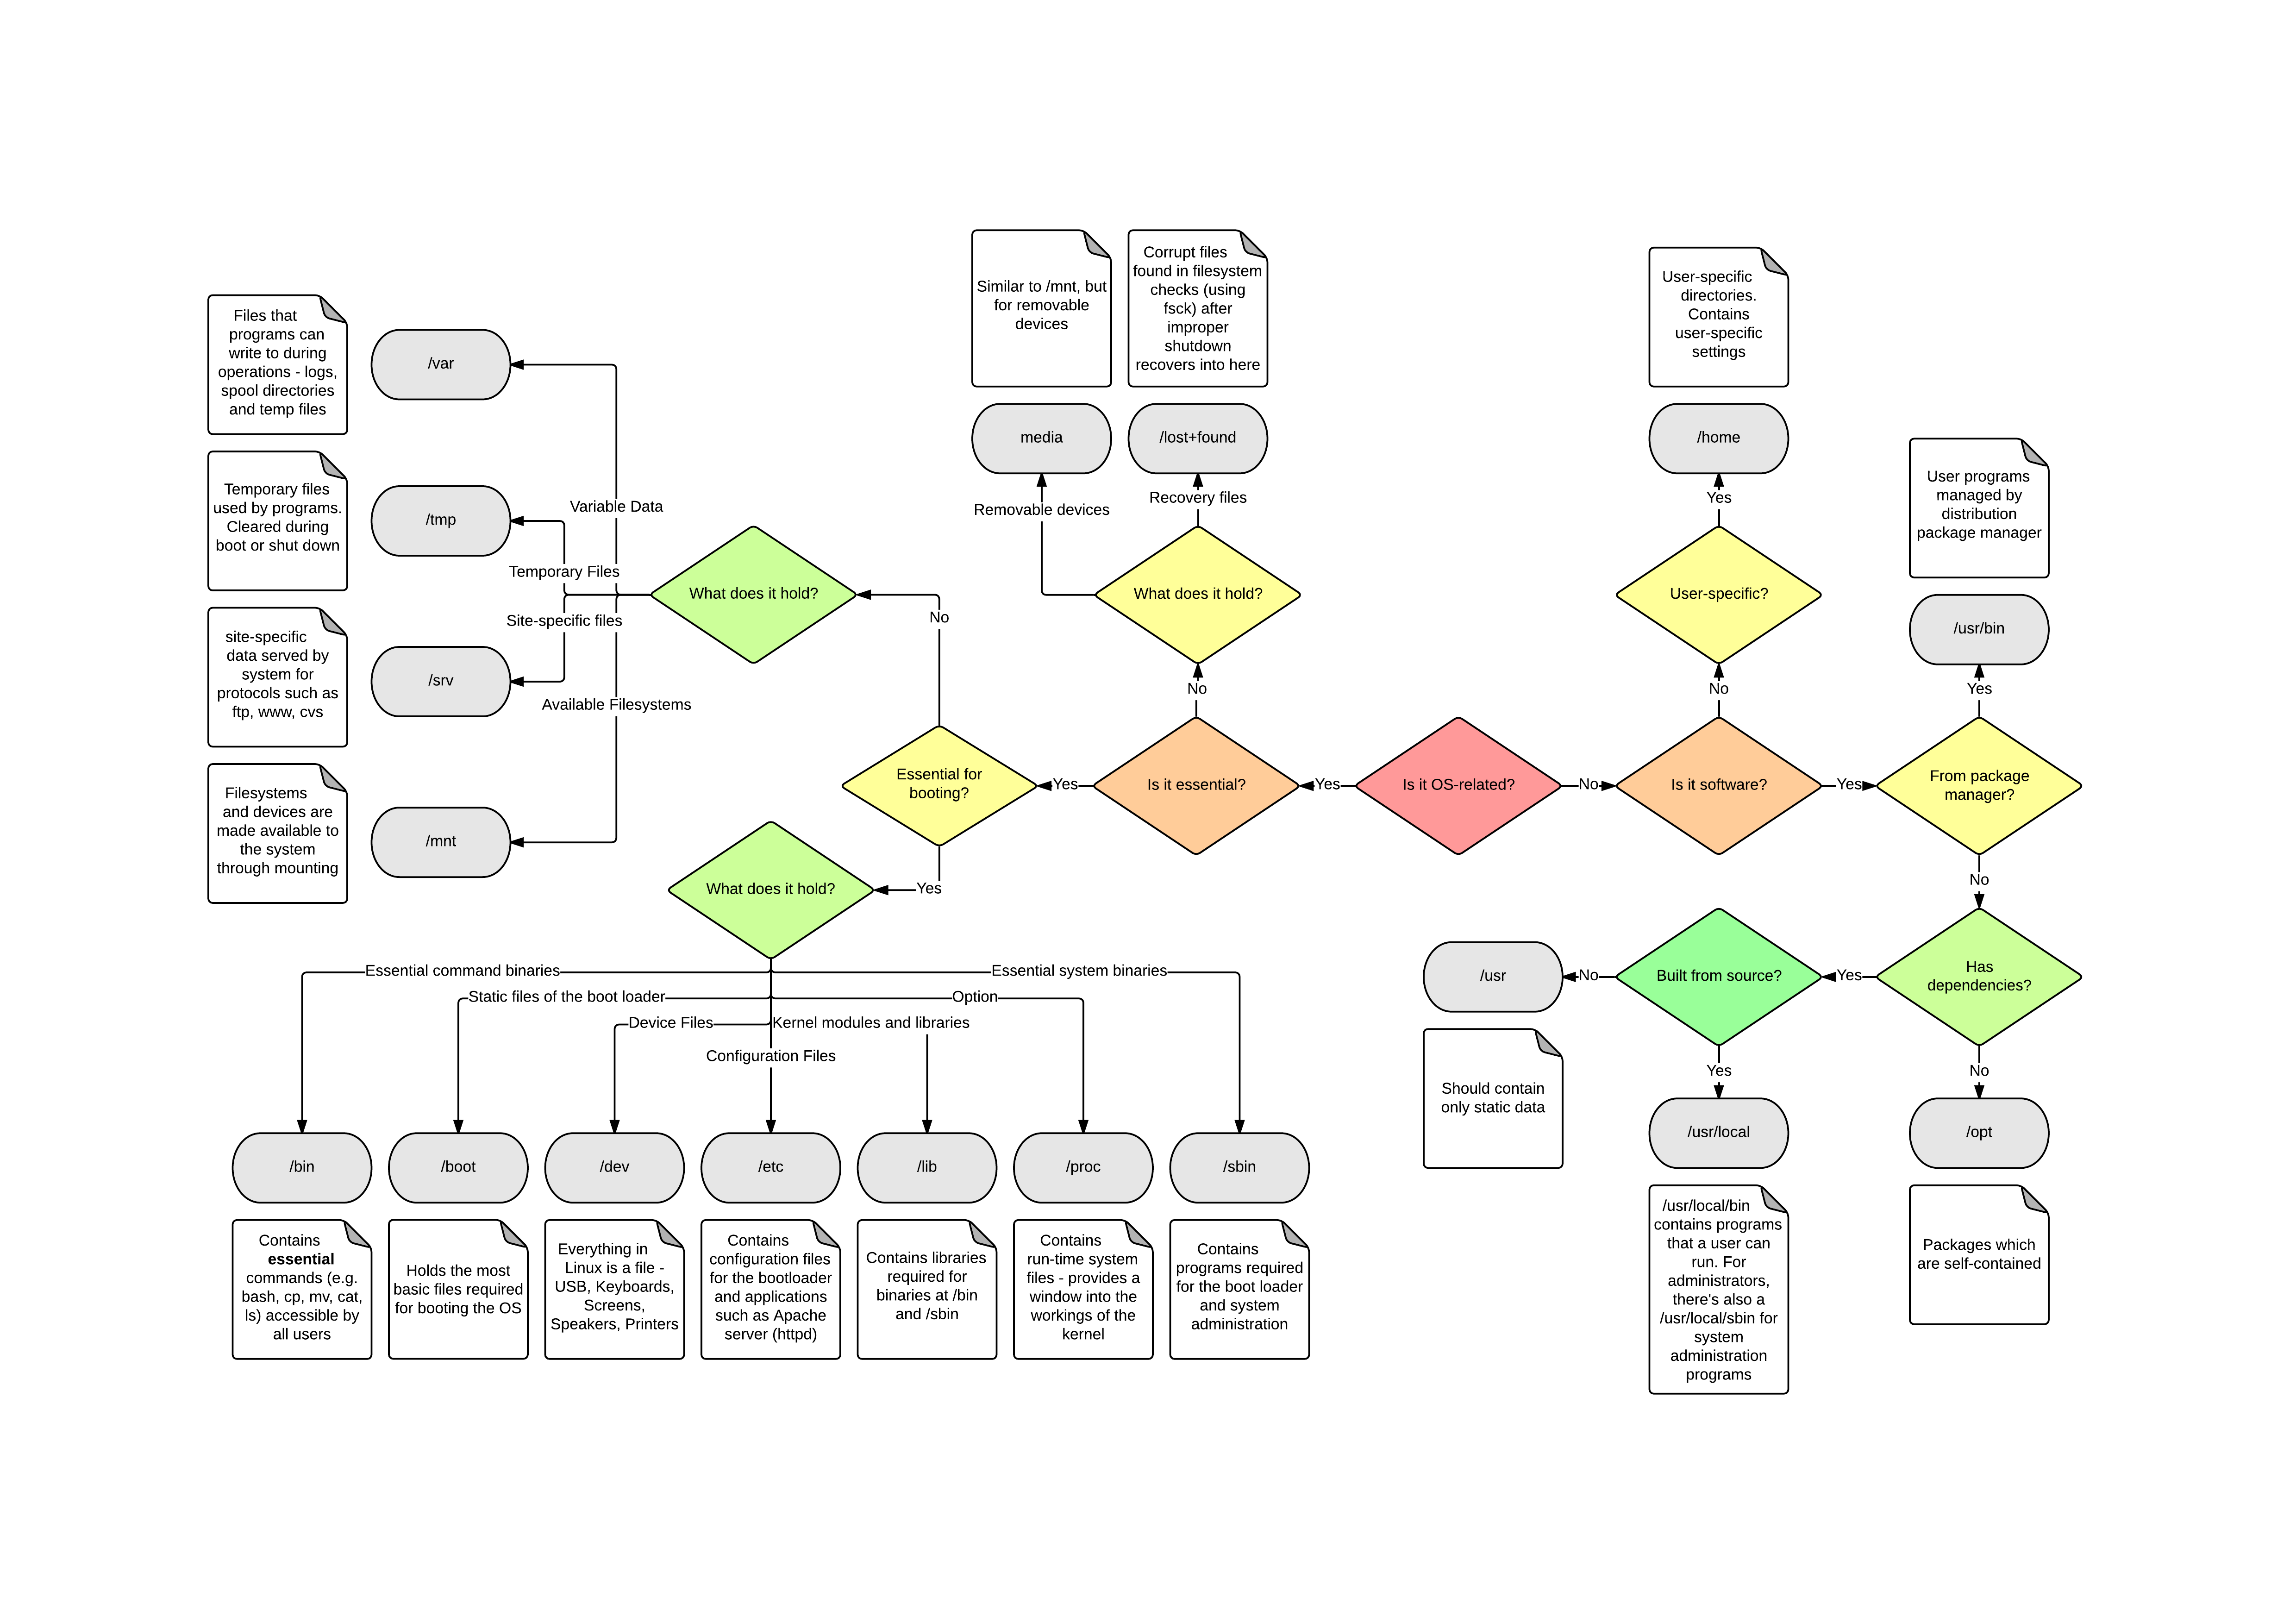
When you are going to install a software in your linux, you can follow the chart given below to determine where to store it.

There's plenty more I could dive into about setting up Ubuntu for a seamless experience. If you have any questions, feel free to reach out to me on Twitter!
I might write a blog to help you customize Ubuntu. But for now, check out itsfoss.com blogs for helpful tips. But for now, here are a couple of links to assist you on your customization journey, making Ubuntu feel more like home:
Ubuntu Extension Manager: https://itsfoss.com/extension-manager/
Gnome Tweak Took: https://itsfoss.com/gnome-tweak-tool/
With a well-tuned setup and a touch of personalization, your development journey will be smoother than ever. I'll be writing more blogs on React and React Native. For now, go ahead, make Ubuntu your coding sanctuary, and let your creativity flourish.
If I've made any mistakes along the way, Feel free to point out any corrections needed – after all, learning is part of the journey! 🚀🐧
Subscribe to my newsletter
Read articles from Ashutosh Khanduala directly inside your inbox. Subscribe to the newsletter, and don't miss out.
Written by

Ashutosh Khanduala
Ashutosh Khanduala
I am a Mobile & Web developer. I use React Native, Next.js and TypeScript to make cool stuff. Checkout my GitHub: https://github.com/ashuvssut