How to Change GitHub Repository Visibility
 Mutiat Adepoju
GitHub is a popular platform for hosting and collaborating on software projects. Managing repository visibility is essential to control access and contributions to your code. Ignoring this crucial element is not an option. GitHub provides clear steps to adjust repository visibility, whether public or private. In this article, I will walk you through changing the GitHub repository visibility.
Introduction
GitHub repositories can have different levels of visibility. The visibility options range from "public"(where everyone has access to your repository) to "private" (where only those with permission can access it). The level of visibility of a repository can affect who can view, clone, and contribute to your project. If you want to manage the accessibility of your projects, you must know how to change the visibility of your repository.
Prerequisites
Before you begin, ensure you have the following:
A GitHub account
A repository that you own or have administrative access to
Changing Repository Visibility
Making a Repository Private
Follow the steps below to change the visibility of your repository :
STEP 1: On your Github account, click on the repository you want to want to change its visibility.
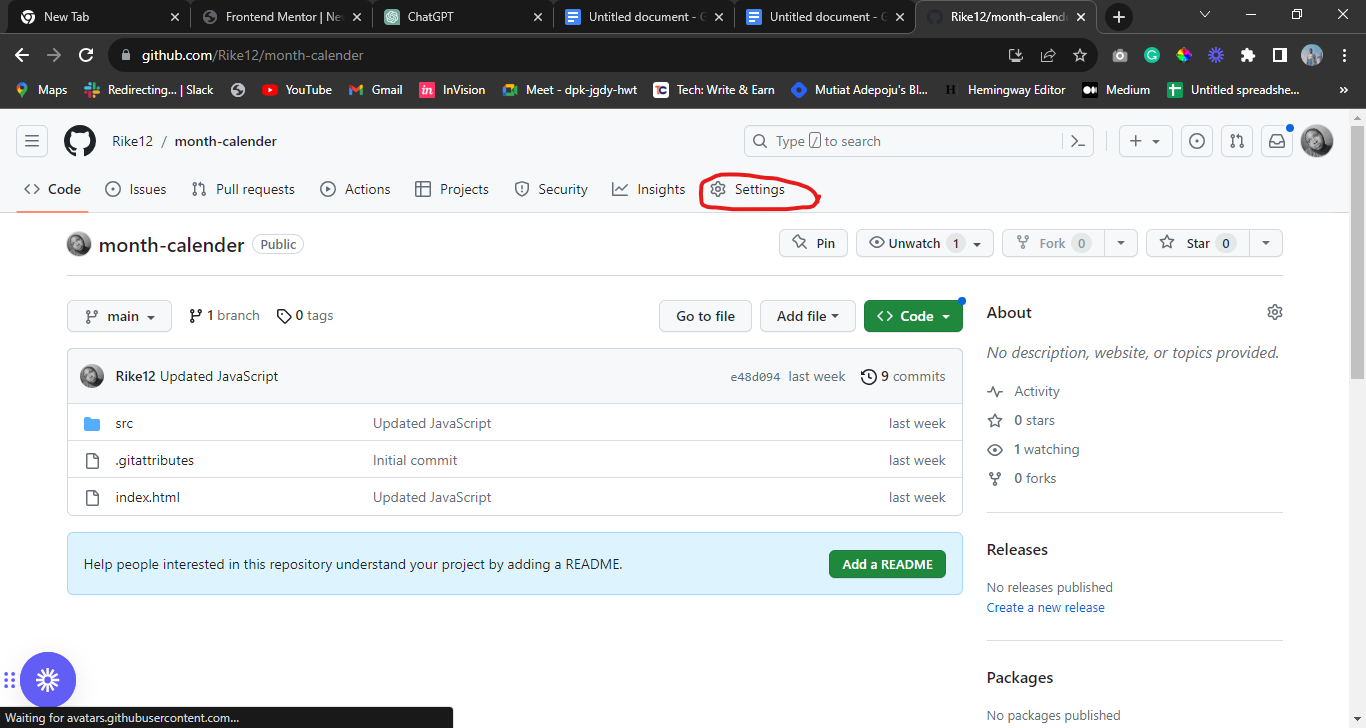
STEP 2: Click on the "Settings" tab.
STEP 3: Scroll down to the "Danger Zone" section.
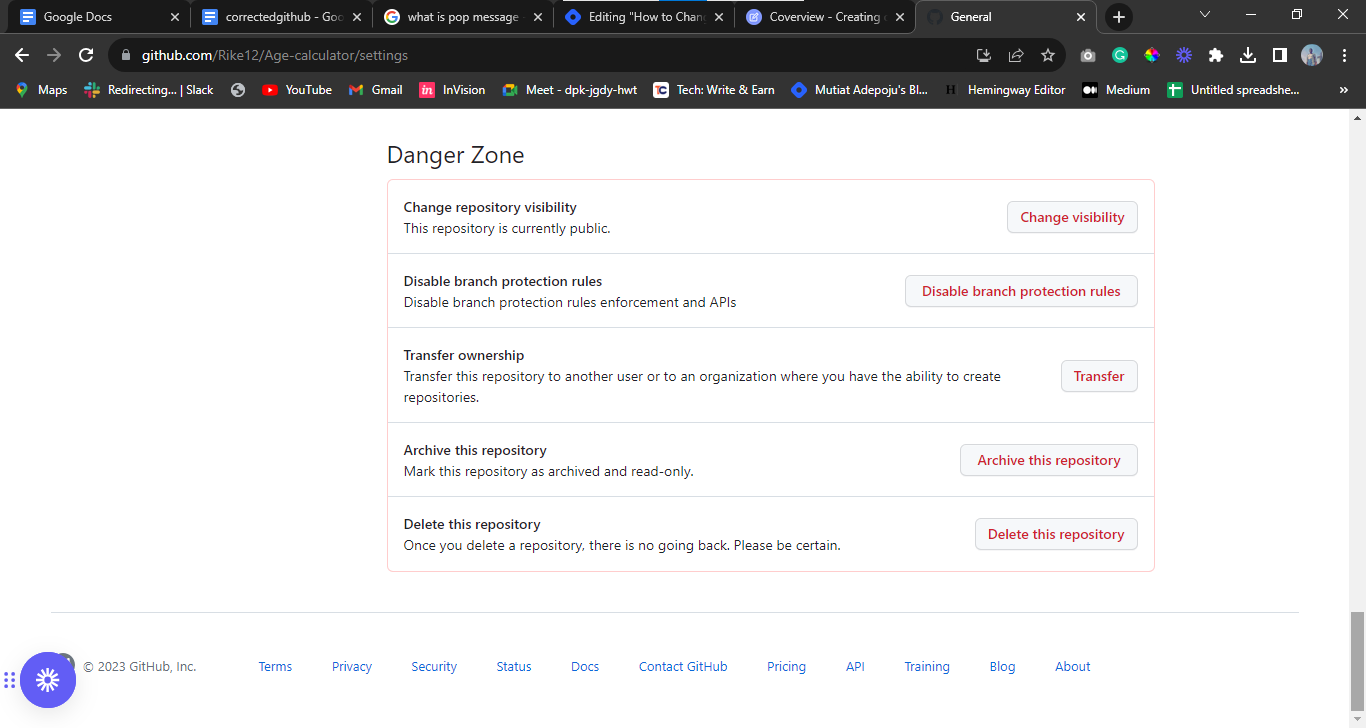
STEP 4: Look for the "Change repository visibility" section, it is the first heading you will see in the "Danger Zone" section.
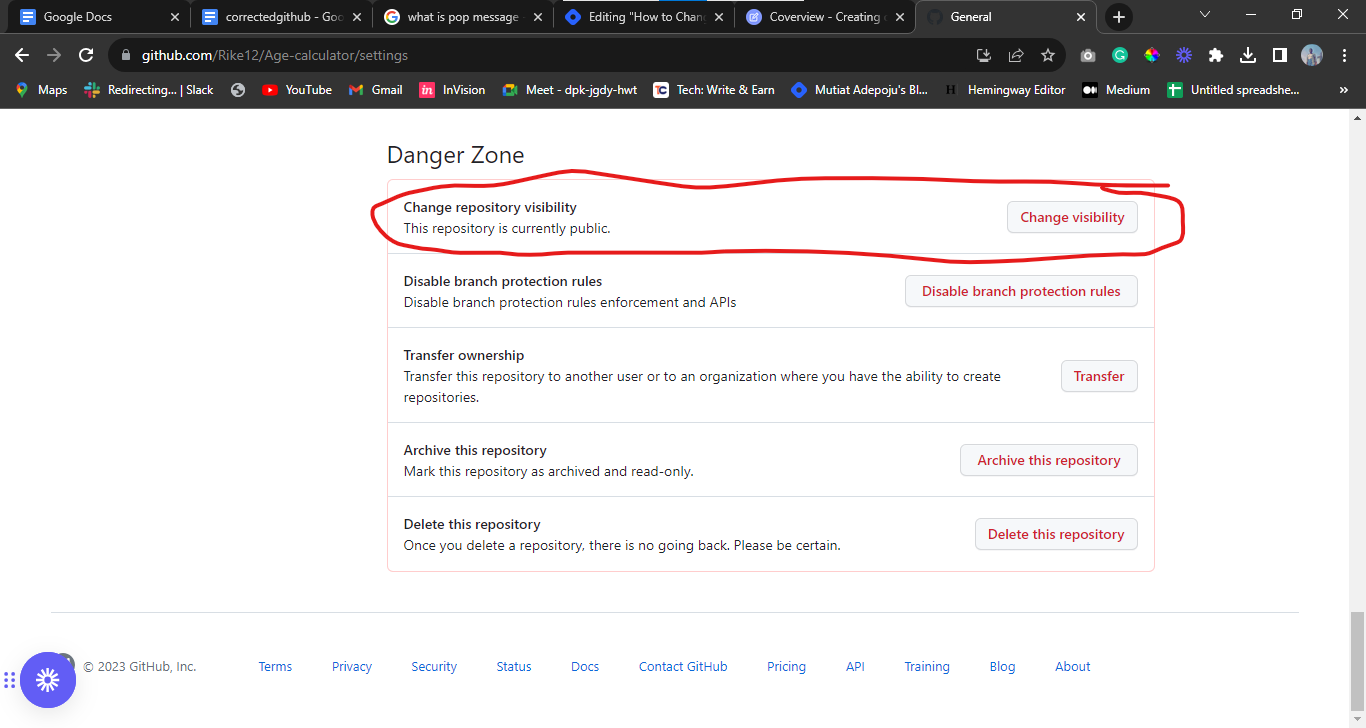
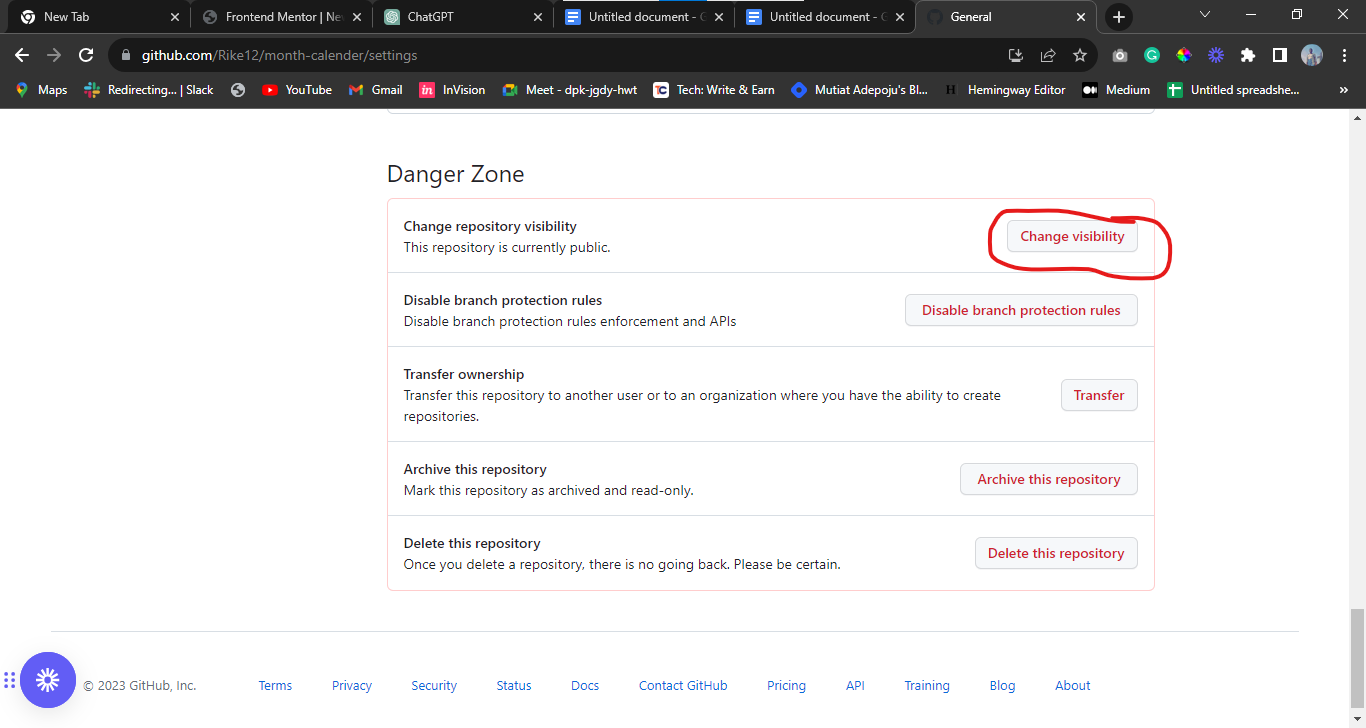
STEP 5: Click on “change visibility”.
STEP 6: Select "change to private" to change the repository to private,
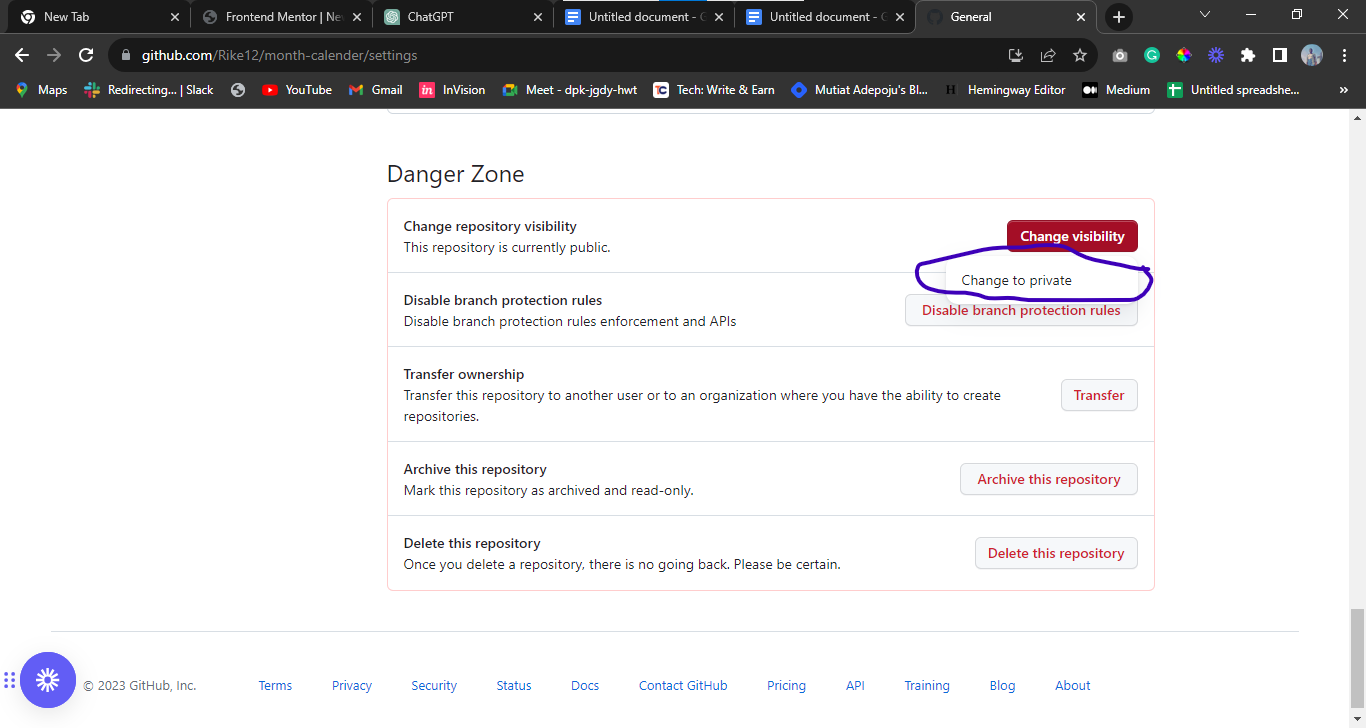
Or select "change to public" to change the repository to public.
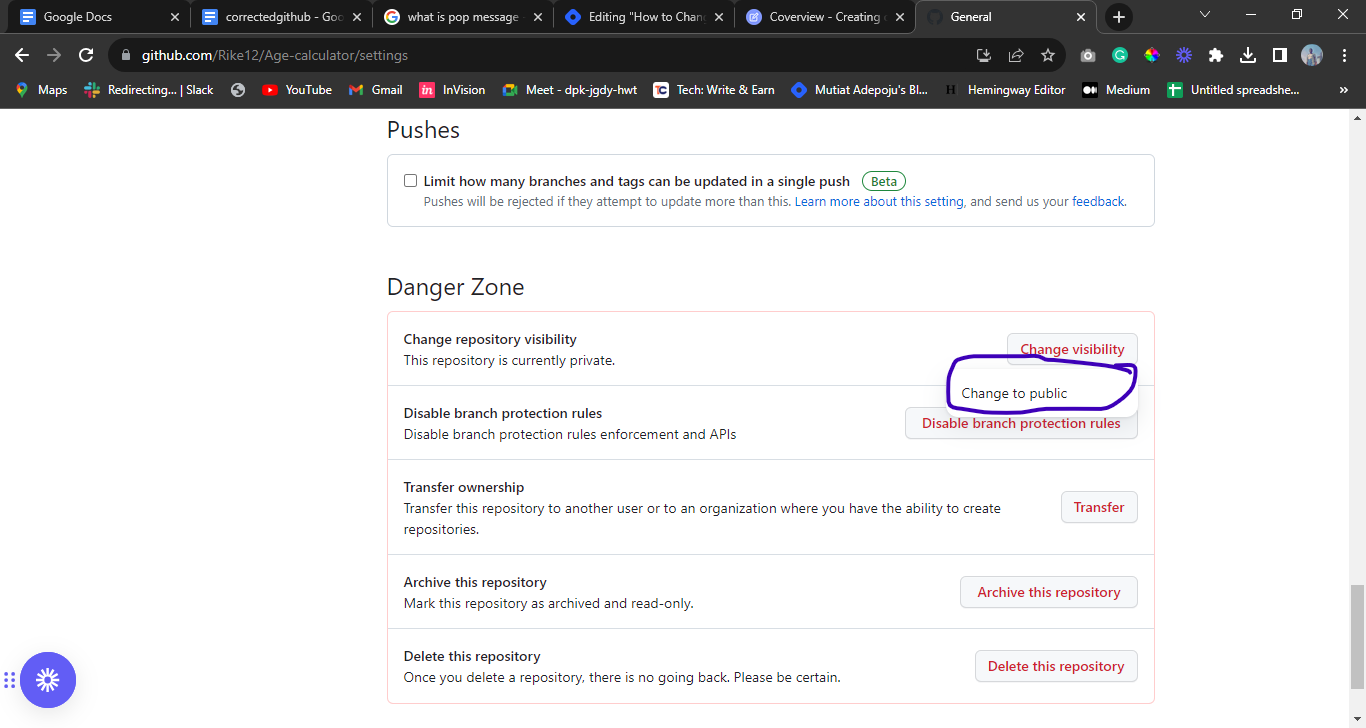
STEP 7: Click on the “I want to make this repository private” or
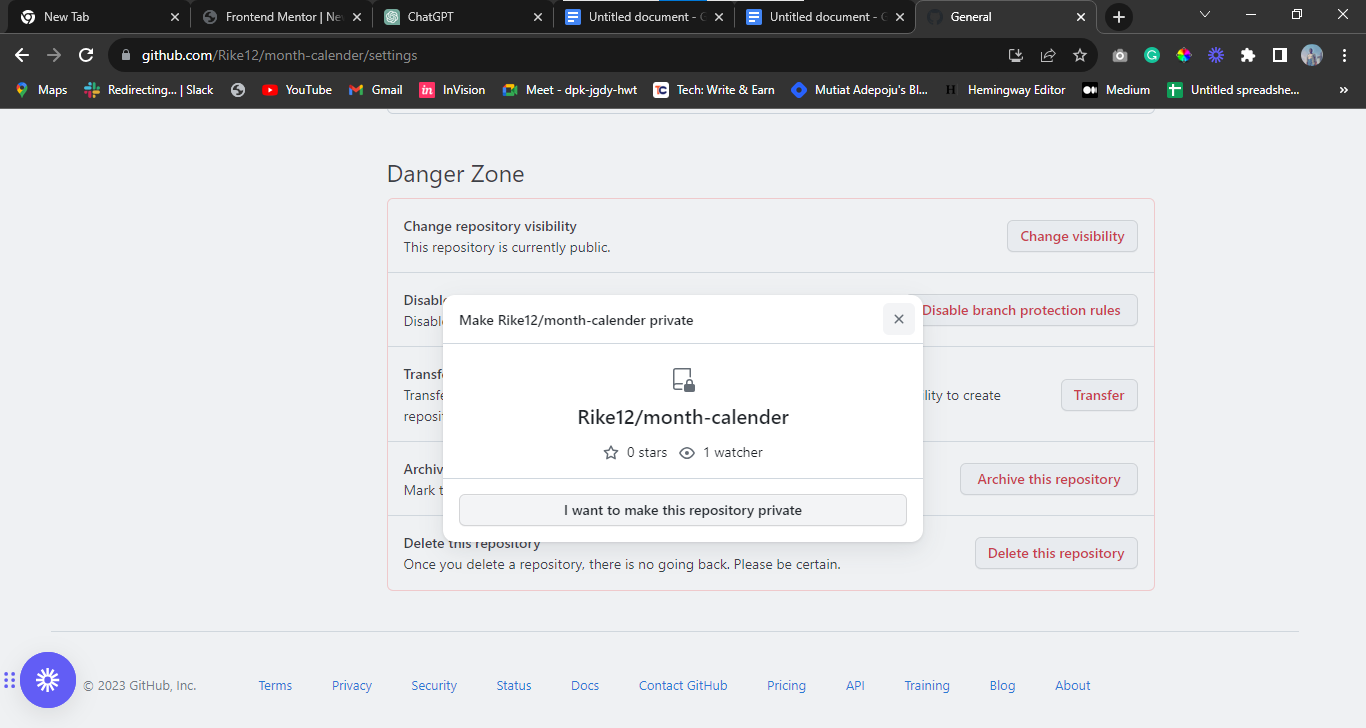
"I want to make this repository public” that appears on the screen.
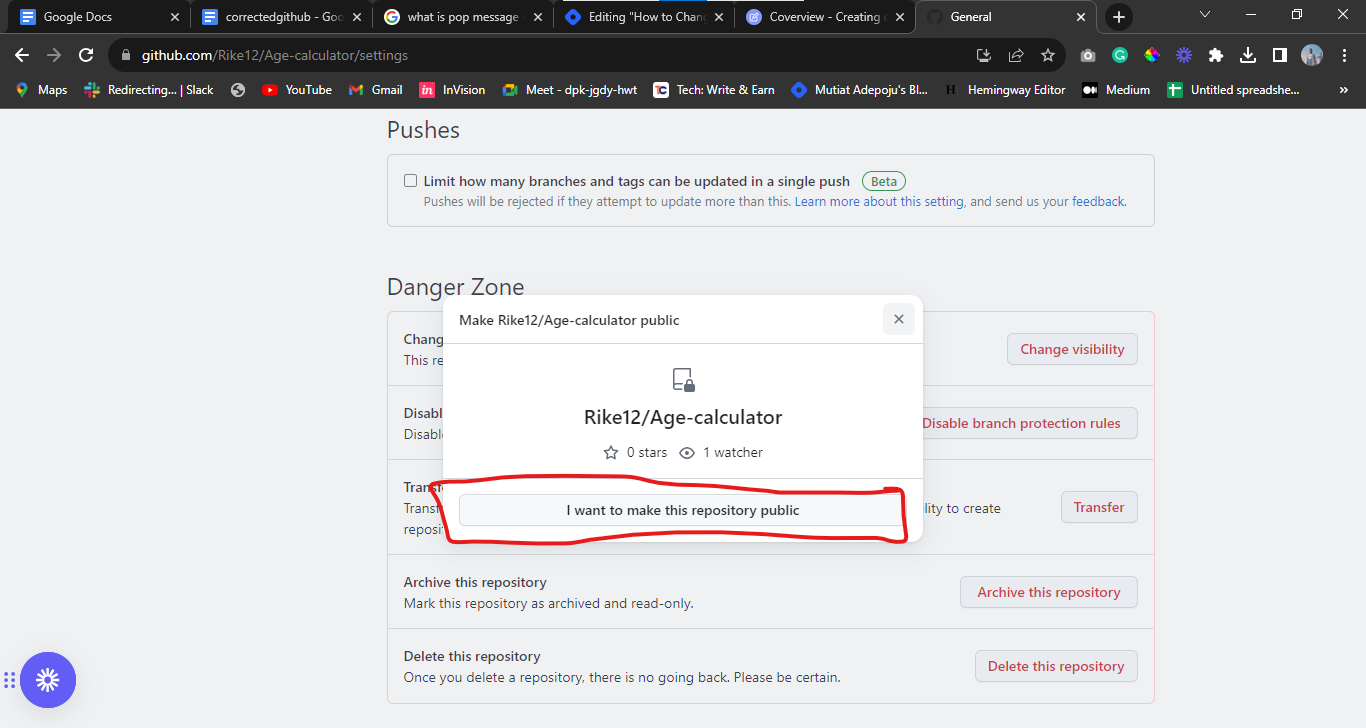
STEP 8: A popup message will appear on your screen after clicking on either “I want to make this repository private” or "I want to make this repository public”.
STEP 9: Scroll down, and click on “ I have read and understand these effects”.
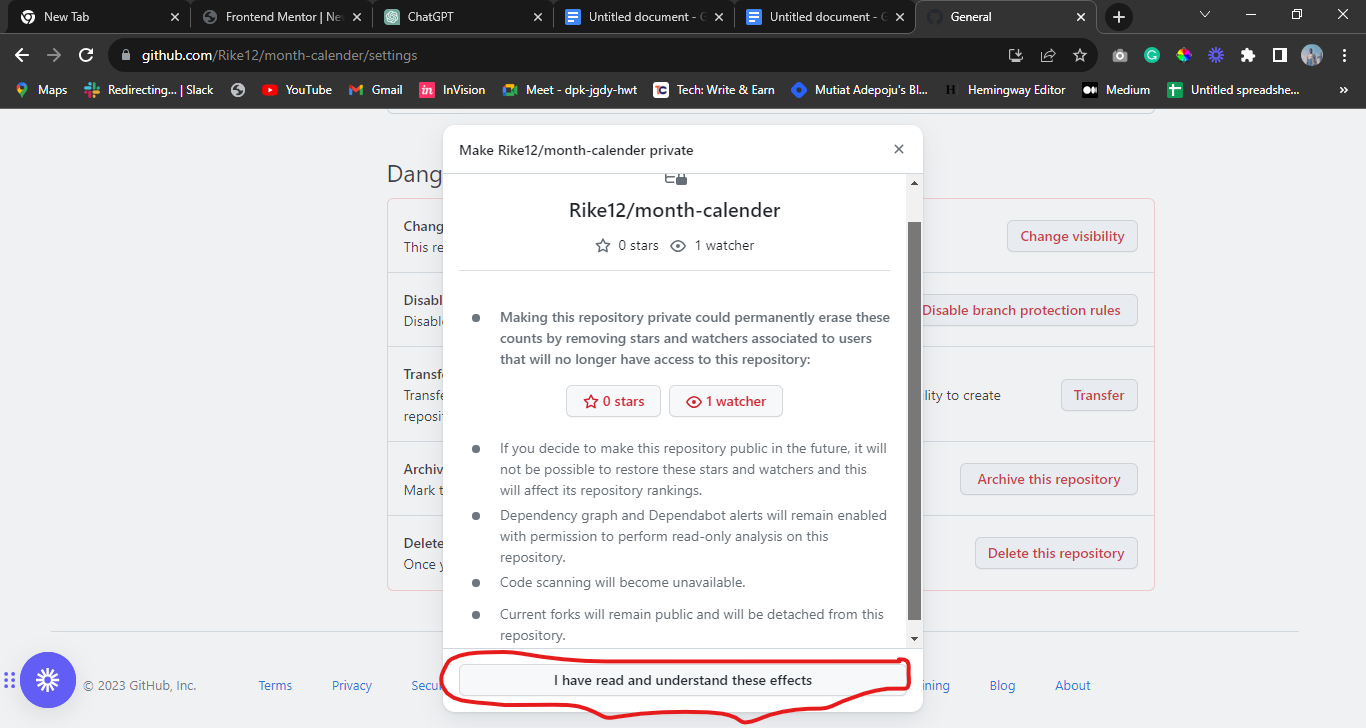
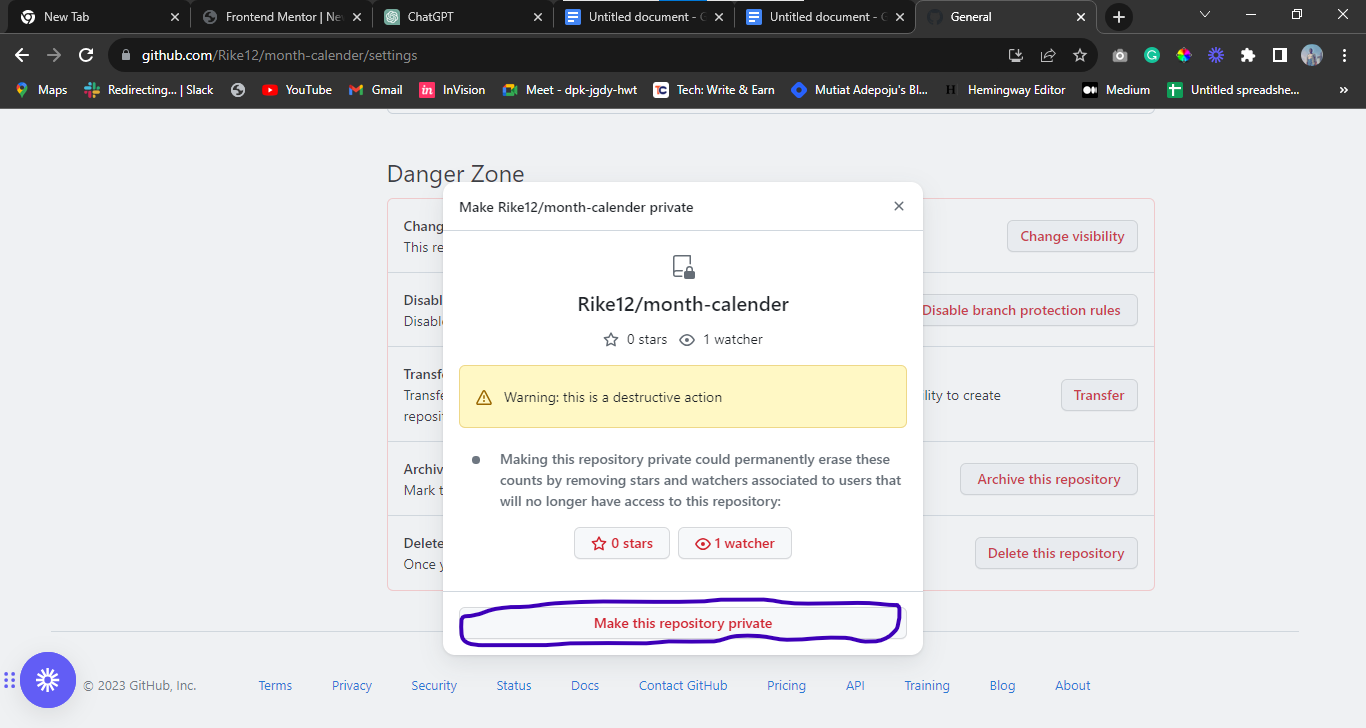
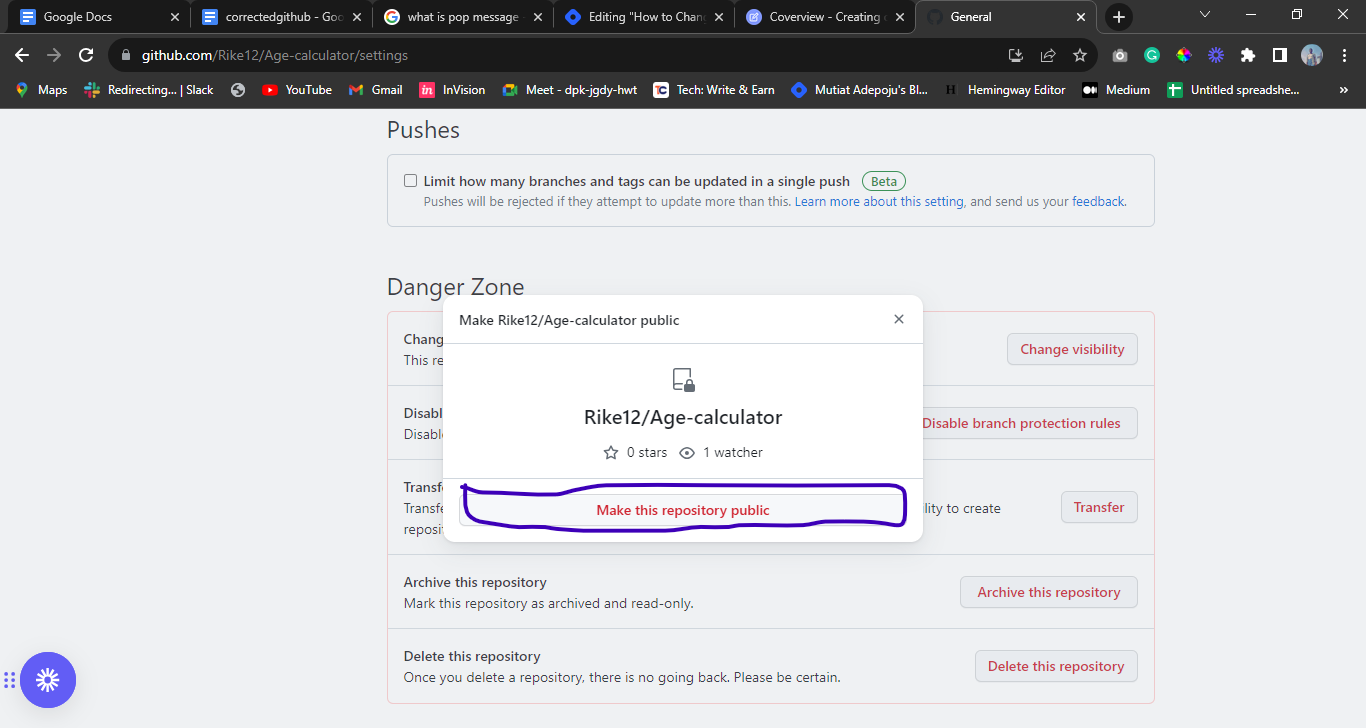
STEP 10: Another message will appear on your screen. Click on “Make this repository private” if you want to change it to private or
“Make this repository public”, if you are changing it to public.
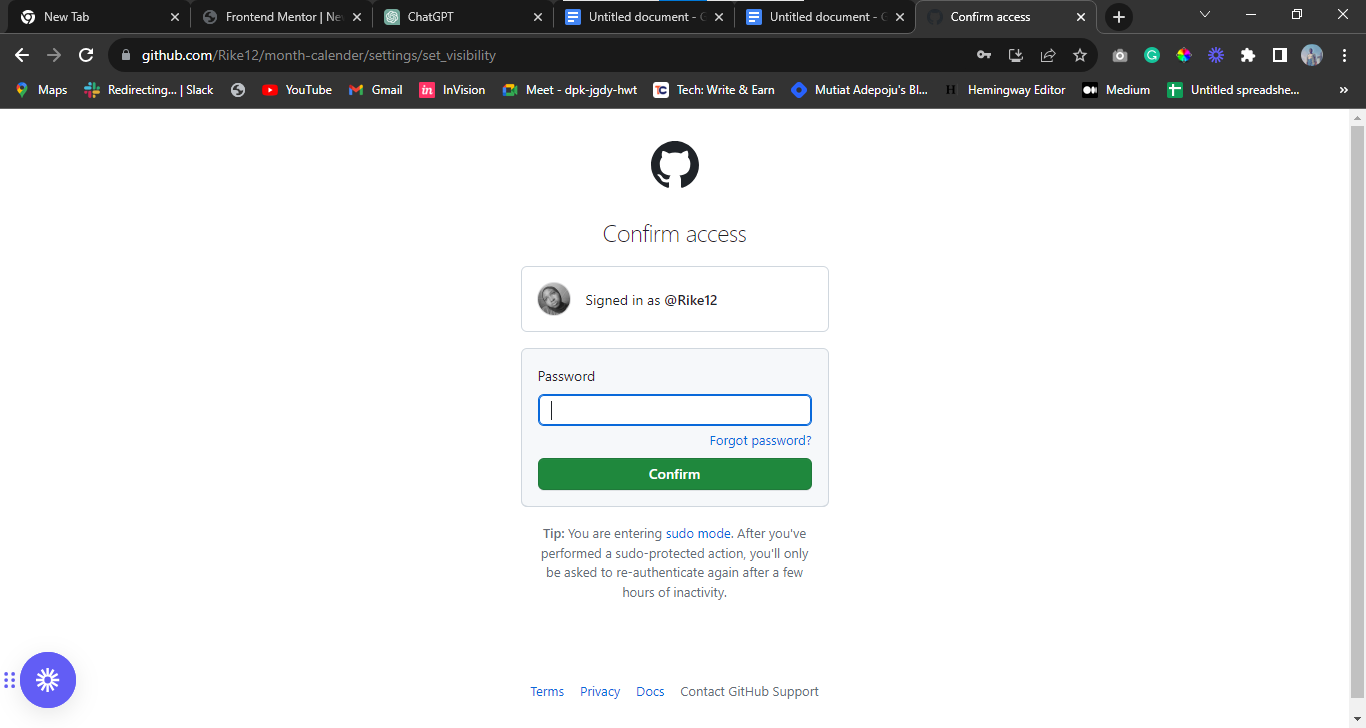
STEP 10: After step 9, you will insert your password on the next pop-up message that appears on your screen. This is to confirm you are the one changing the visibility, not someone else.
Considerations
Consider the following before you make changes to your repository:
- Collaborators
Remember that changing a repository's visibility might affect who can access to your project. Collaborators added to the repository should be aware of its visibility level.
- Public APIs:
If your repository contains sensitive data, making it public can expose this information. Always review your codebase for any potential security risks.
Conclusion
In summary, GitHub's repository visibility settings give you the ability to control who can access your code. It is important to understand how to adjust your GitHub repository's visibility settings. By following the simple steps outlined in this article, you can change the visibility of your repository to meet the specific needs of your project. I hope this article serves as a good guide when you want to change the visibility of your GitHub repository.
Subscribe to my newsletter
Read articles from Mutiat Adepoju directly inside your inbox. Subscribe to the newsletter, and don't miss out.
Written by

