Host a Static Website on AWS S3 with CI/CD, CDN and a Custom Domain
 Mary A. Ogunmola
Hosting static websites on cloud platforms like Amazon Web Services (AWS) provides numerous benefits such as scalability, high availability, and ease of maintenance. In this article, we will explore how to host a static website on AWS S3 (Simple Storage Service), implement Continuous Integration and Continuous Deployment (CI/CD) using AWS services, set up a Content Delivery Network (CDN) for improved performance, and configure a custom domain.
Prerequisites
Before diving into the main content, ensure you have the following prerequisites in place:
AWS Account: You'll need an AWS account to access the services required for this setup. Sign up for an AWS account if you don't have one already.
GitHub Account: Set up a GitHub account for version control and CI/CD integration.
Static Website: Have a static website ready, consisting of HTML, CSS, JavaScript, and other assets.
A registered domain: You should have a registered domain name from a domain registrar like Route 53, GoDaddy, or Namecheap.
Basic Knowledge: Familiarity with AWS concepts, static website structure, and CI/CD principles will be beneficial.
Architecture Diagram
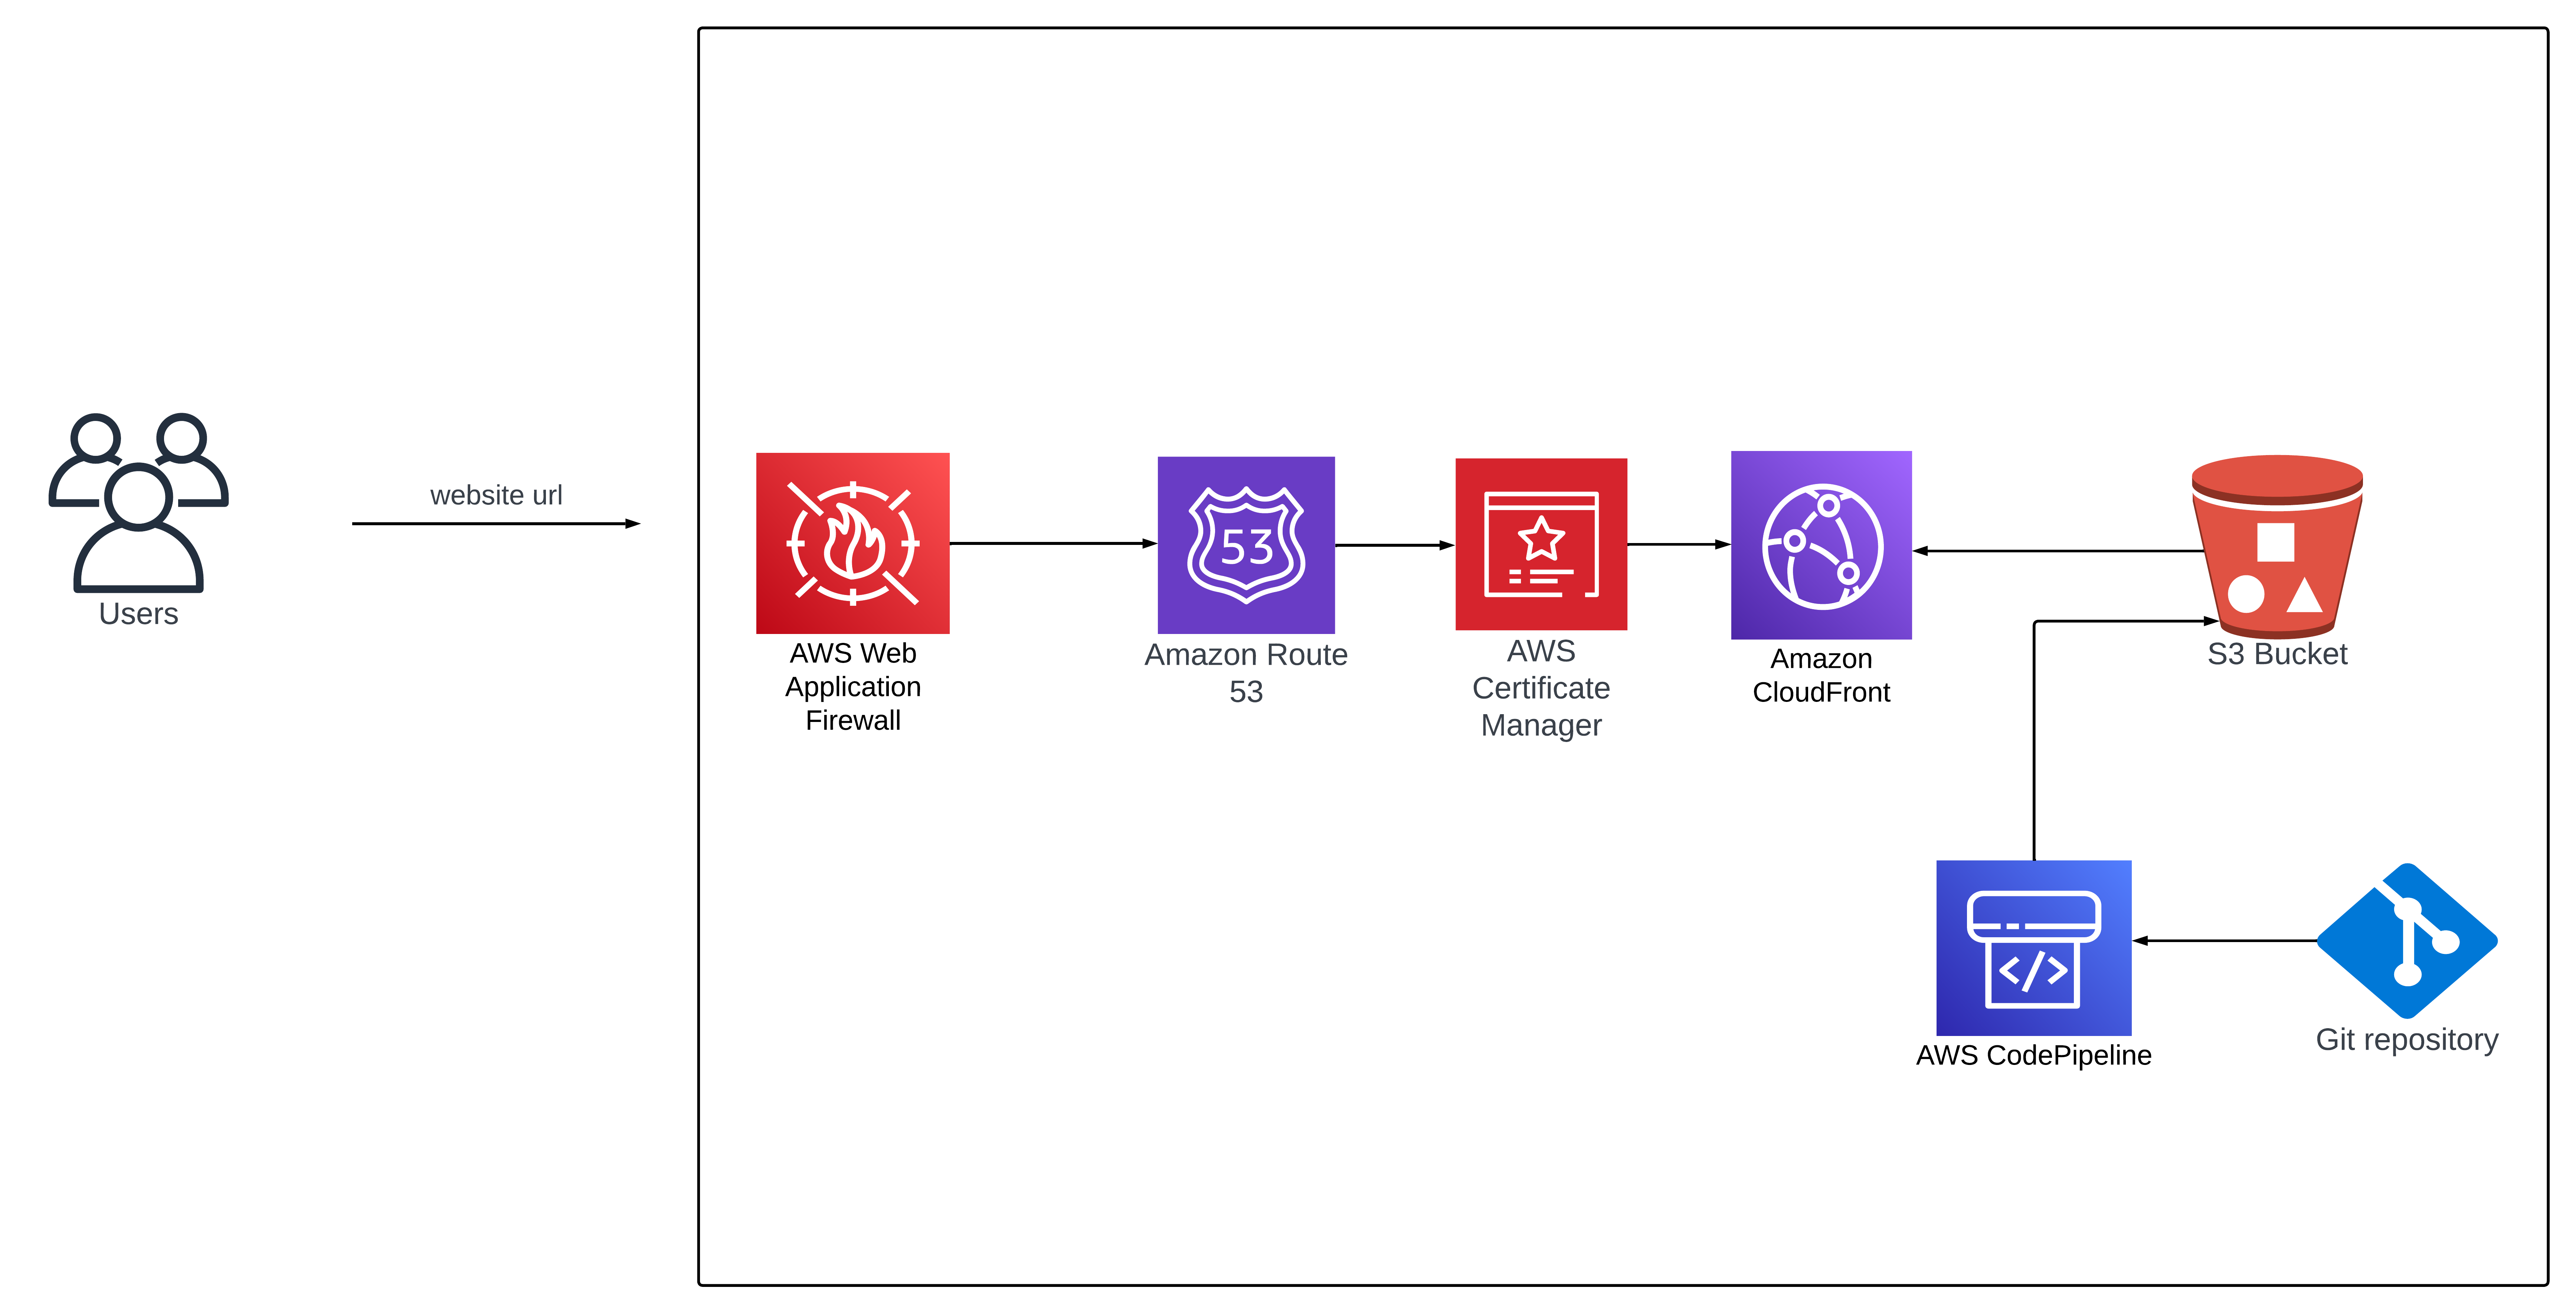
The architecture diagram presented above showcases the system we will be discussing in this article. It outlines the flow of a user's request when they enter the website URL.
The process begins with the user's request being checked by the AWS Web Application Firewall (WAF). If the check is successful, the request is then forwarded to Amazon Route53, which translates the website address into the corresponding CloudFront distribution name.
To ensure a secure connection, the AWS Certificate Manager is employed to handle SSL encryption. This ensures that the user's data remains protected during transmission.
The CloudFront distribution, in turn, retrieves its contents from an S3 bucket. This bucket serves as a storage location for the website's files and resources.
To facilitate continuous integration and deployment, the S3 bucket is connected to a Git repository through the use of AWS CodePipeline. The pipeline automates the process of fetching the latest code changes from the Git repository and deploying them to the S3 bucket. This allows for seamless updates and changes to the website's content, ensuring that the latest version is always available to users.
Steps
Create an S3 Bucket for Website Hosting
The first step is to create an S3 bucket and enable it for static web hosting. To do that, follow the steps below:
Log in to your AWS Management Console.
Search for and navigate to the S3 service.
Click on "Create bucket", then provide a globally unique name for your bucket.
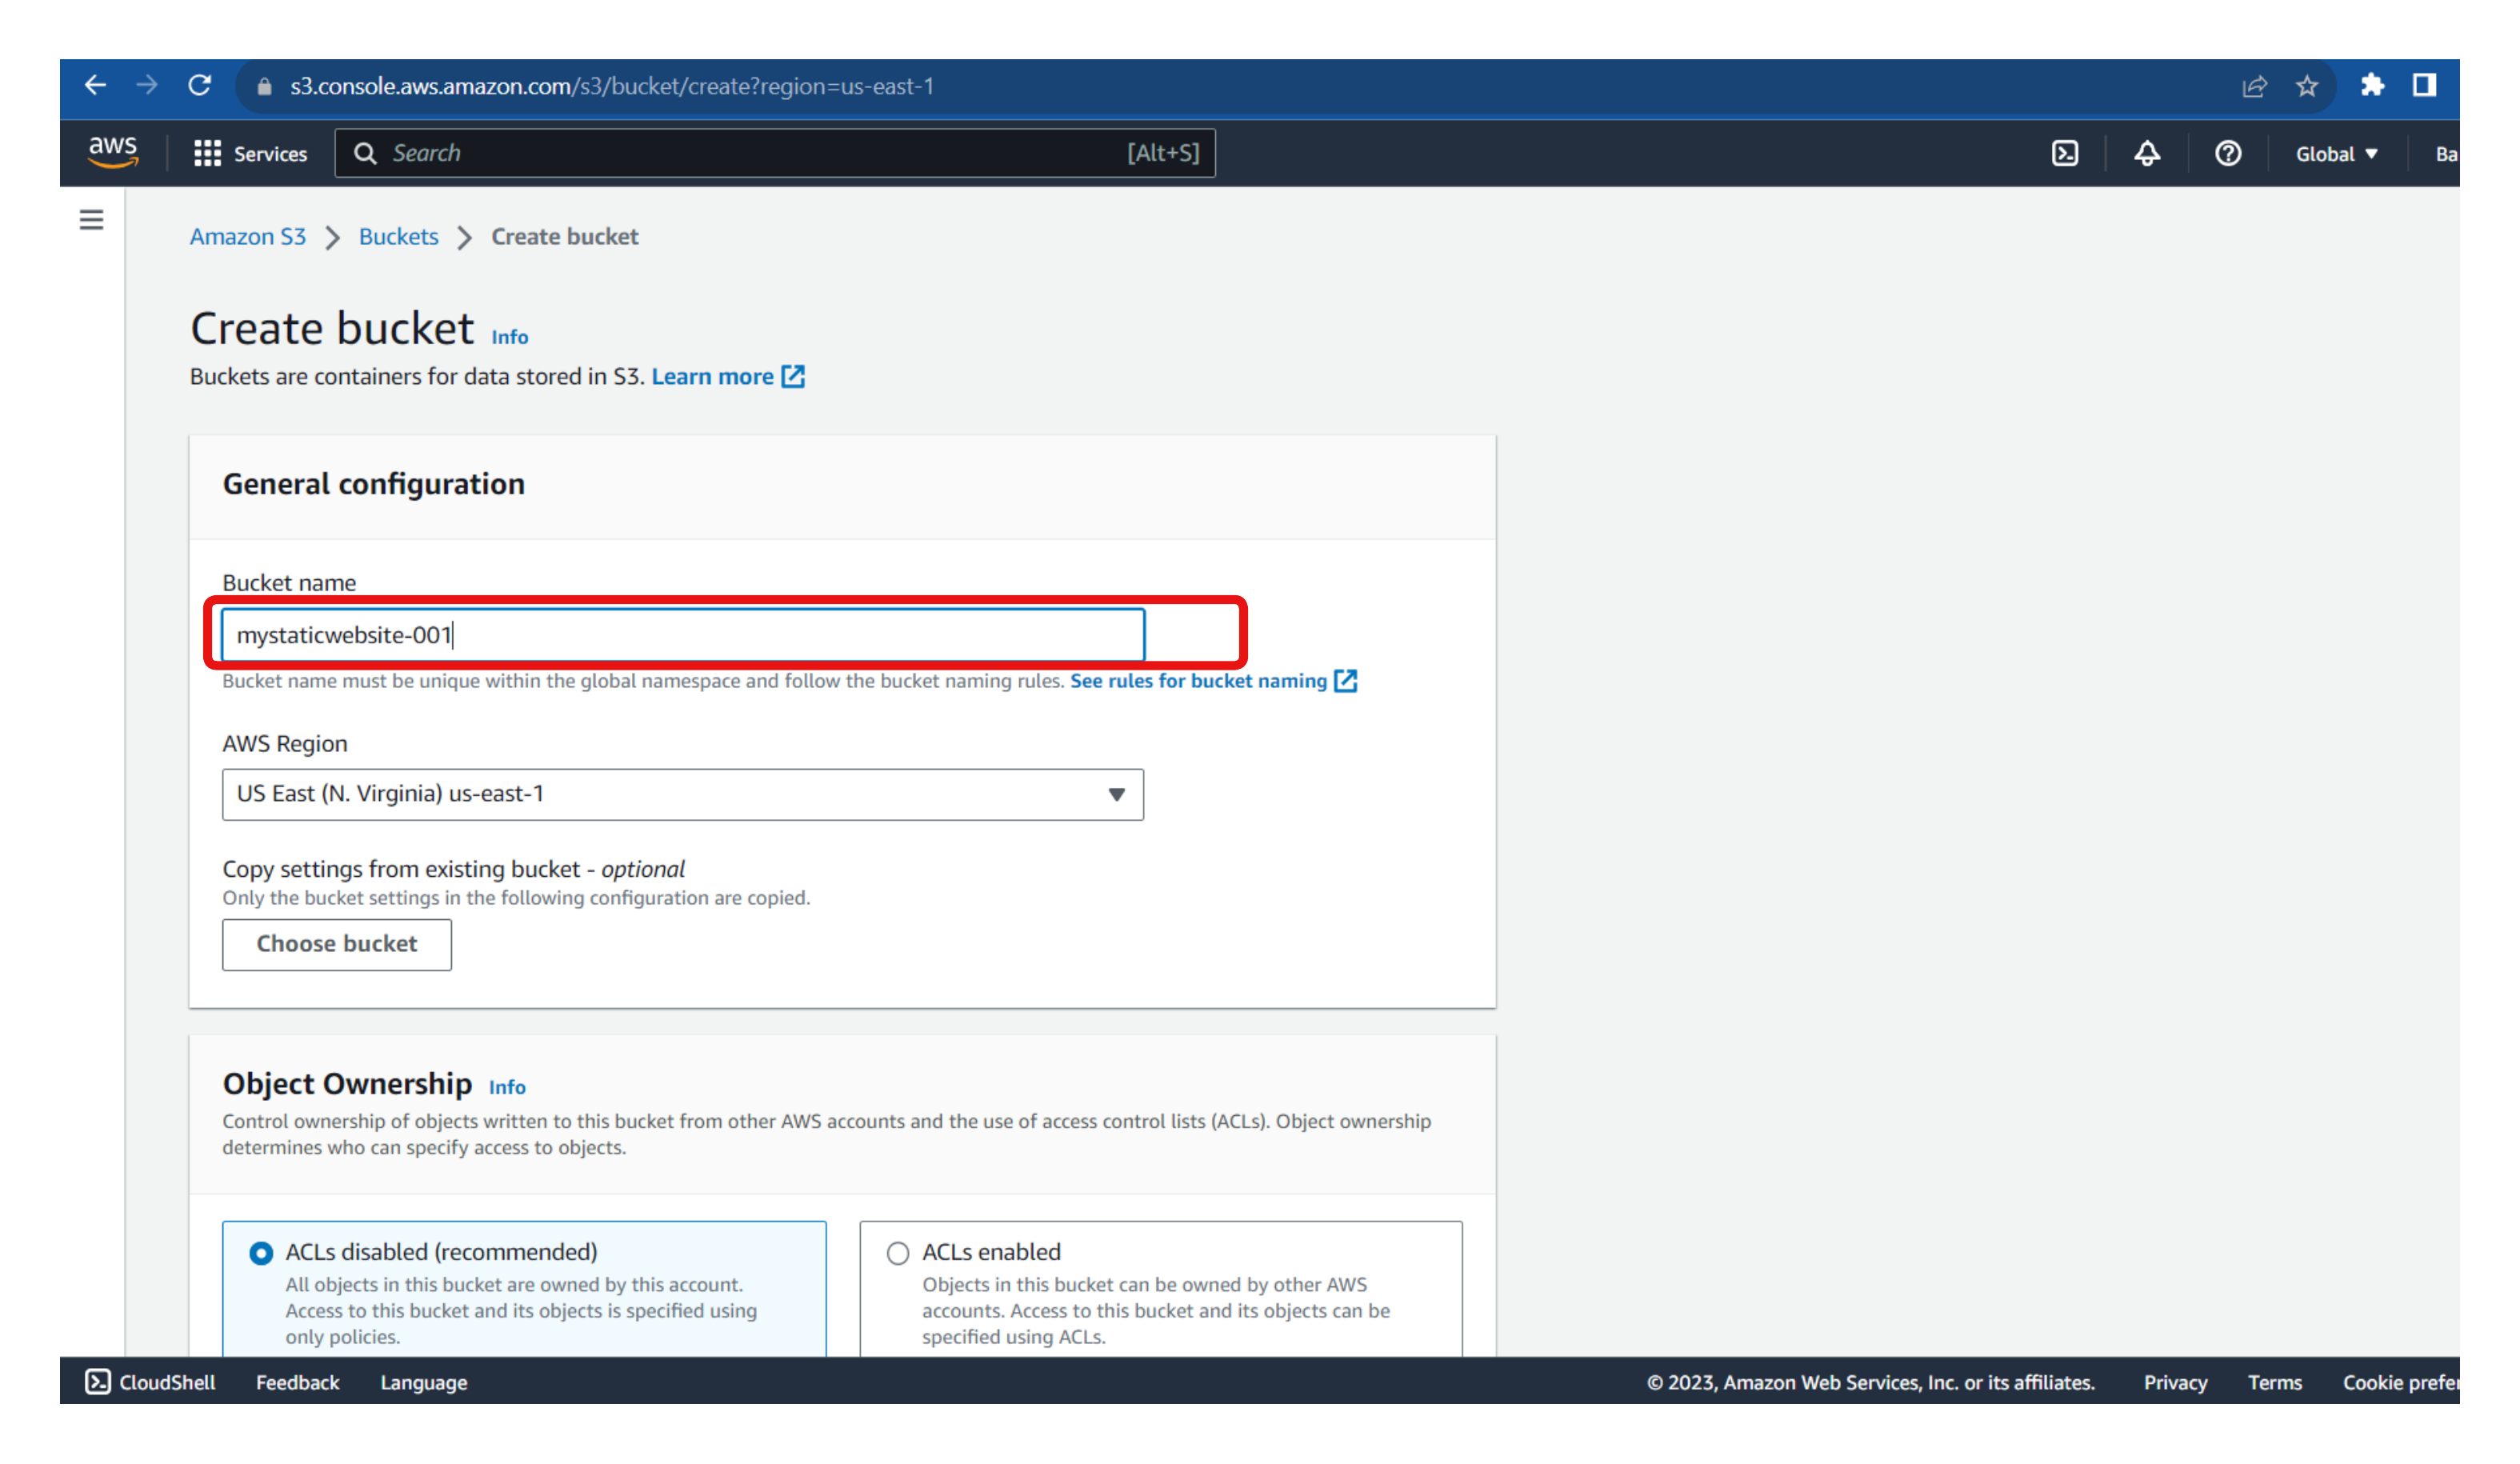
Make sure all public access to the bucket is blocked.
Leave the remaining settings as default and create the bucket.
To ensure the bucket can host our static website, we need to enable static hosting.
- Navigate to the "Properties" tab of the newly created bucket
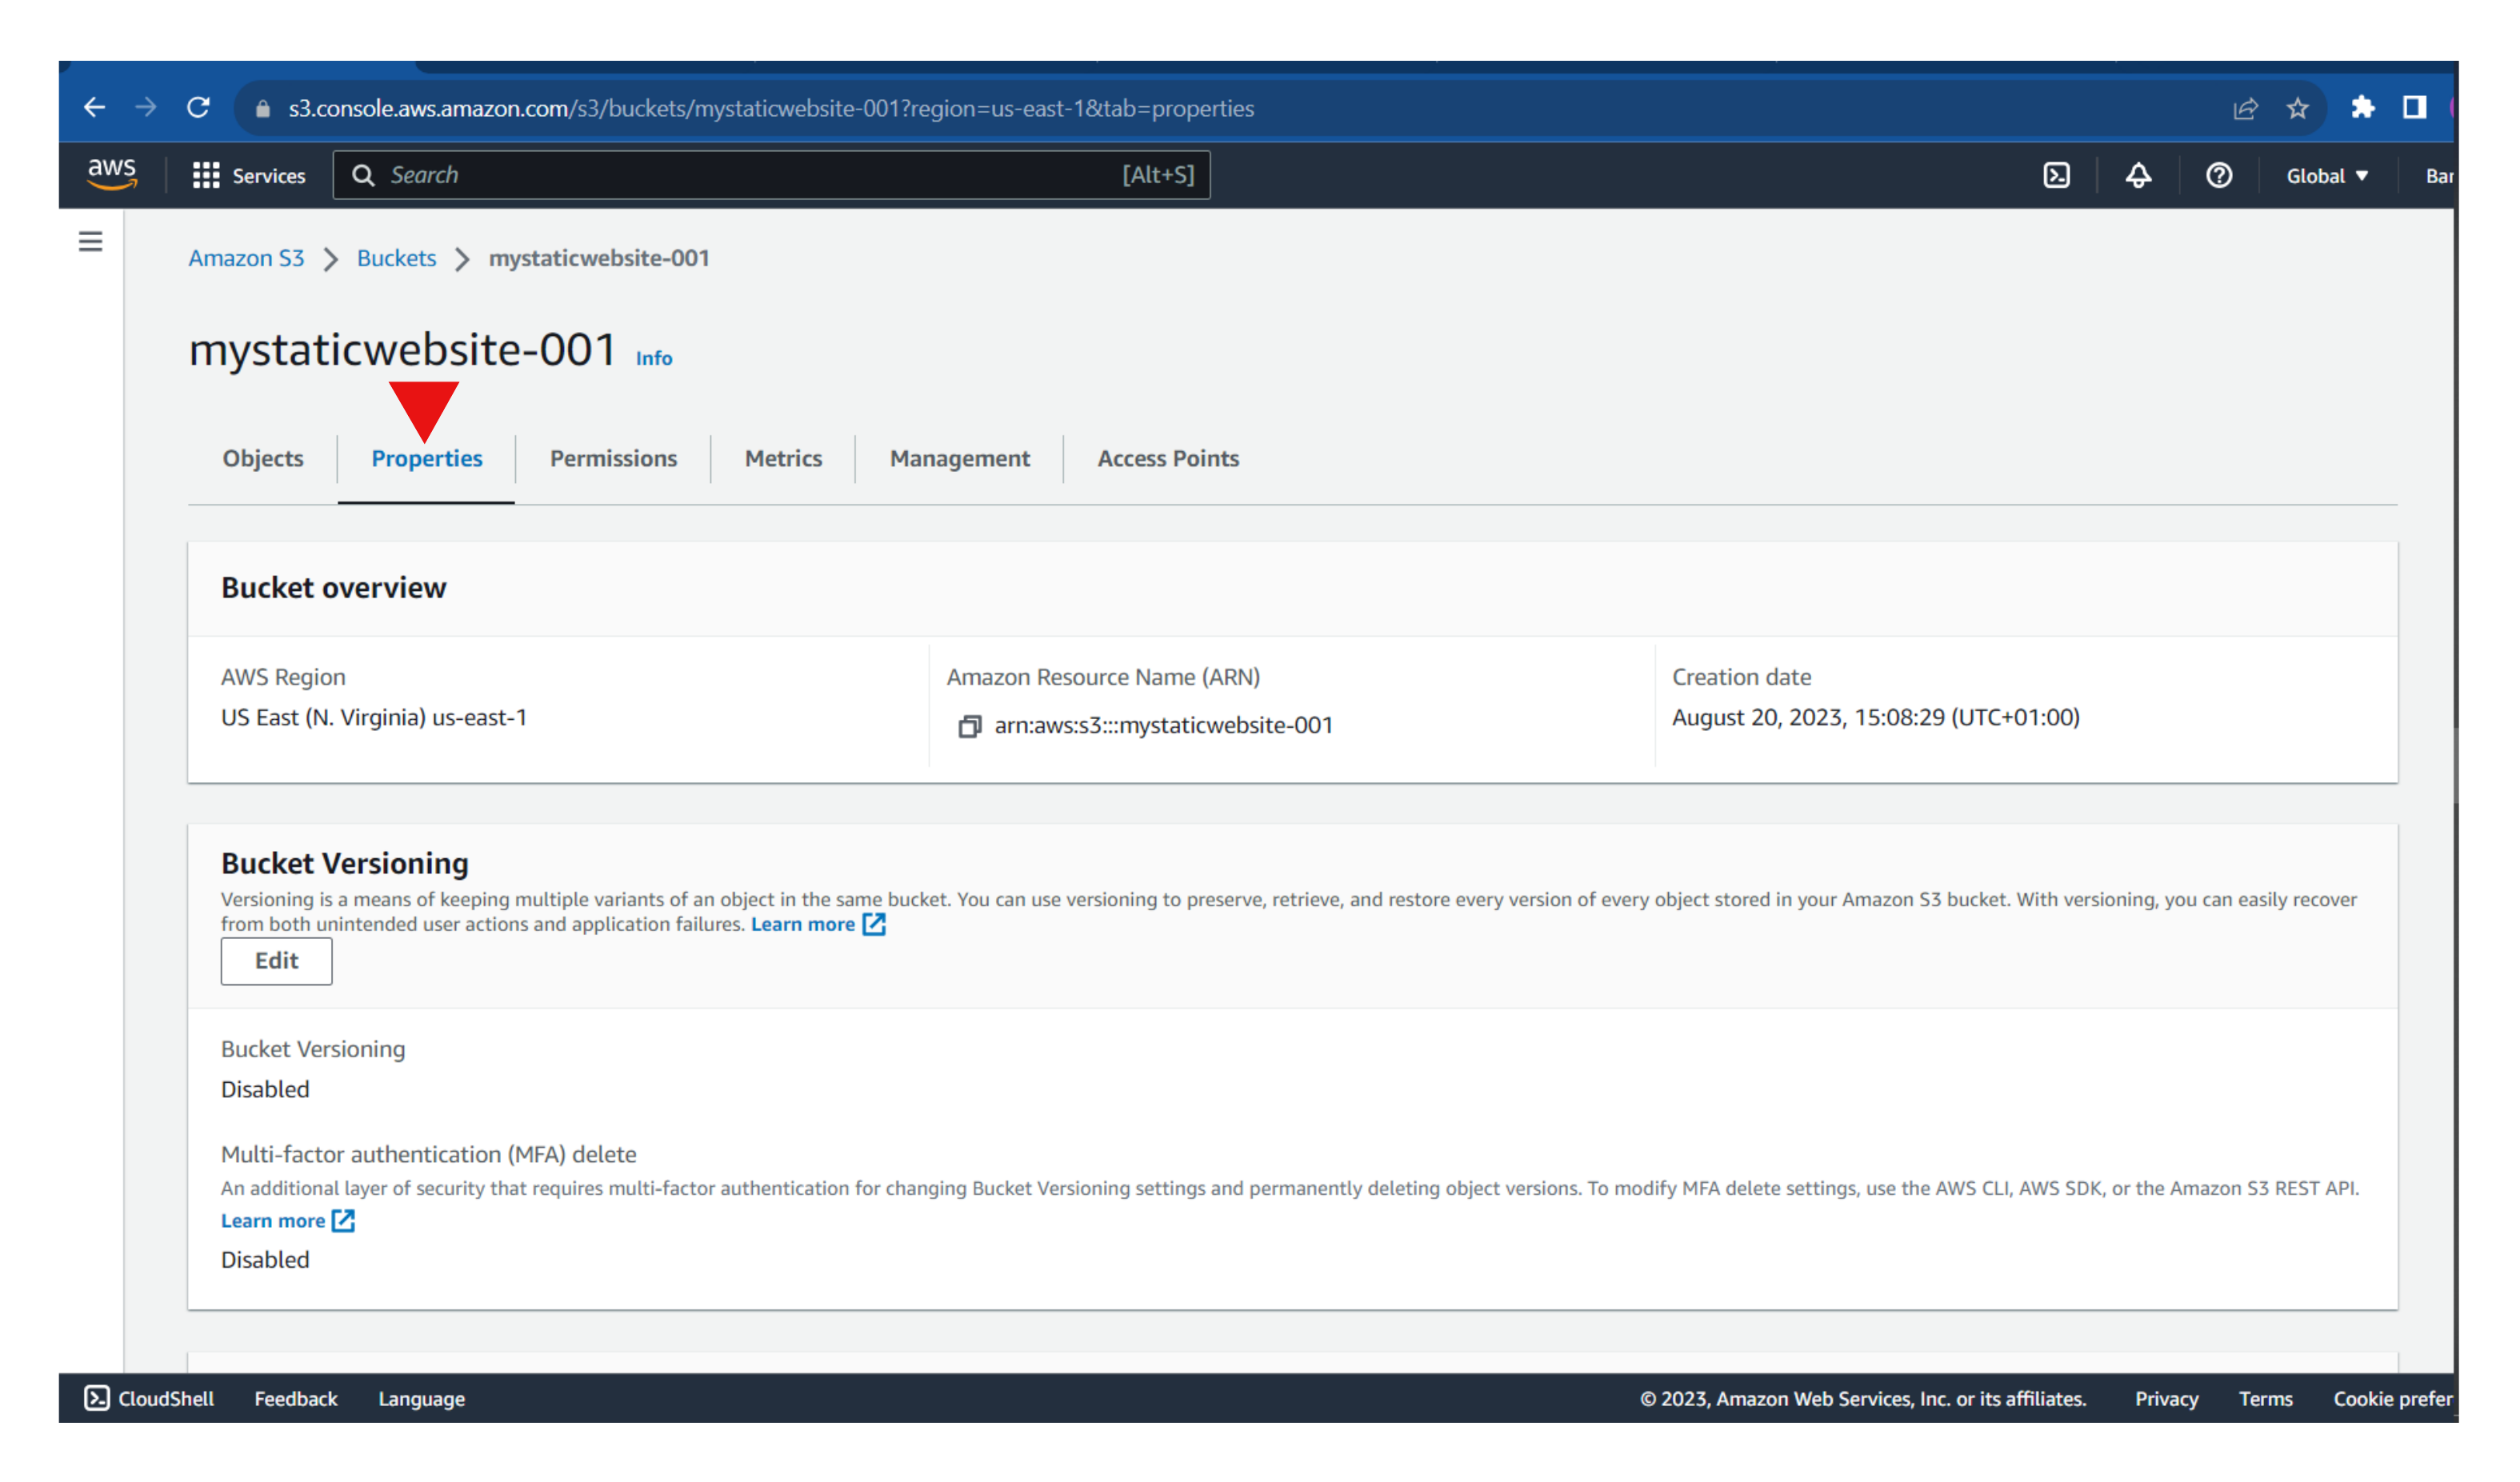

Enable static website hosting and select the hosting type as "Host a static website".
Enter the default index document and error document (if needed), then save the changes.

After making these changes, a bucket URL (as depicted in the second diagram) will be generated. This URL links to the website. However, clicking on it won't give any positive result because of two reasons: 1) Public access to the bucket is blocked, and 2) The bucket is empty.
In the following section, we will proceed to populate the S3 bucket with content from our GitHub repository.
Configure CI/CD Pipeline
Choose a CI/CD tool. In this article, we will be making use of AWS CodepipelinSearch for and navigate to the AWS Codepipeline service.
Create a new pipeline
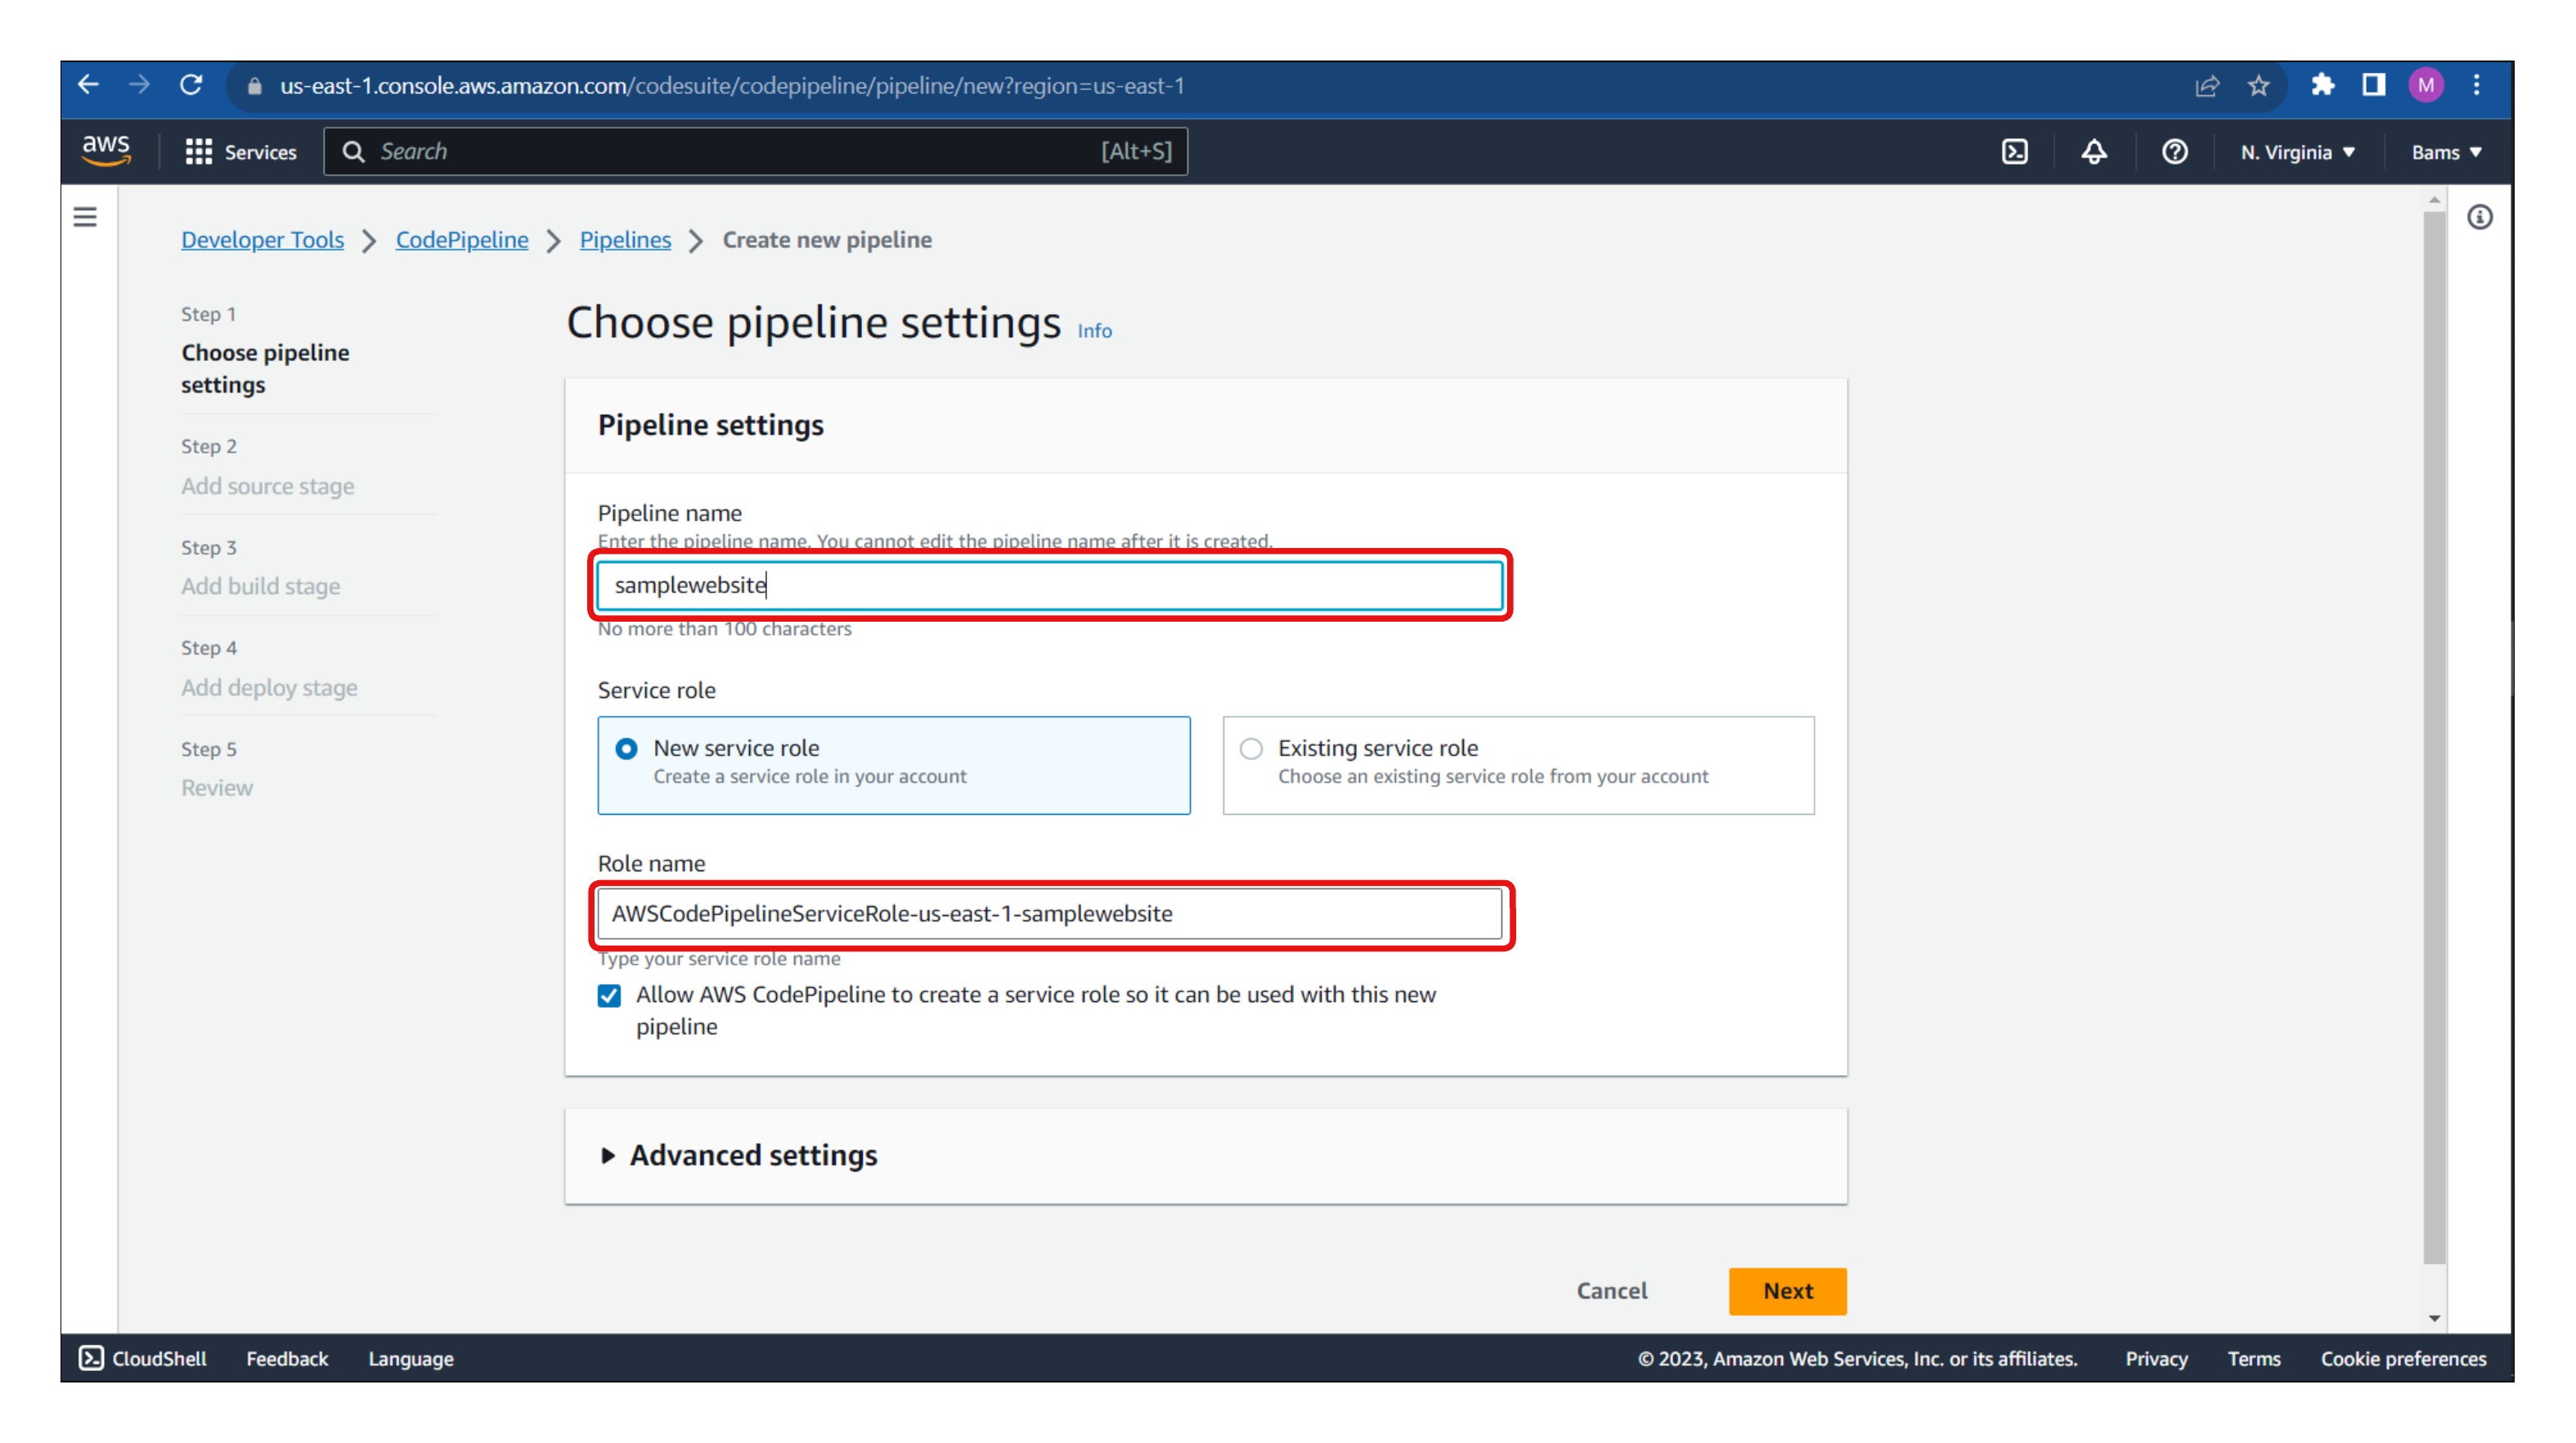
Give the pipleine a name, and create a new service role or use an existing one.
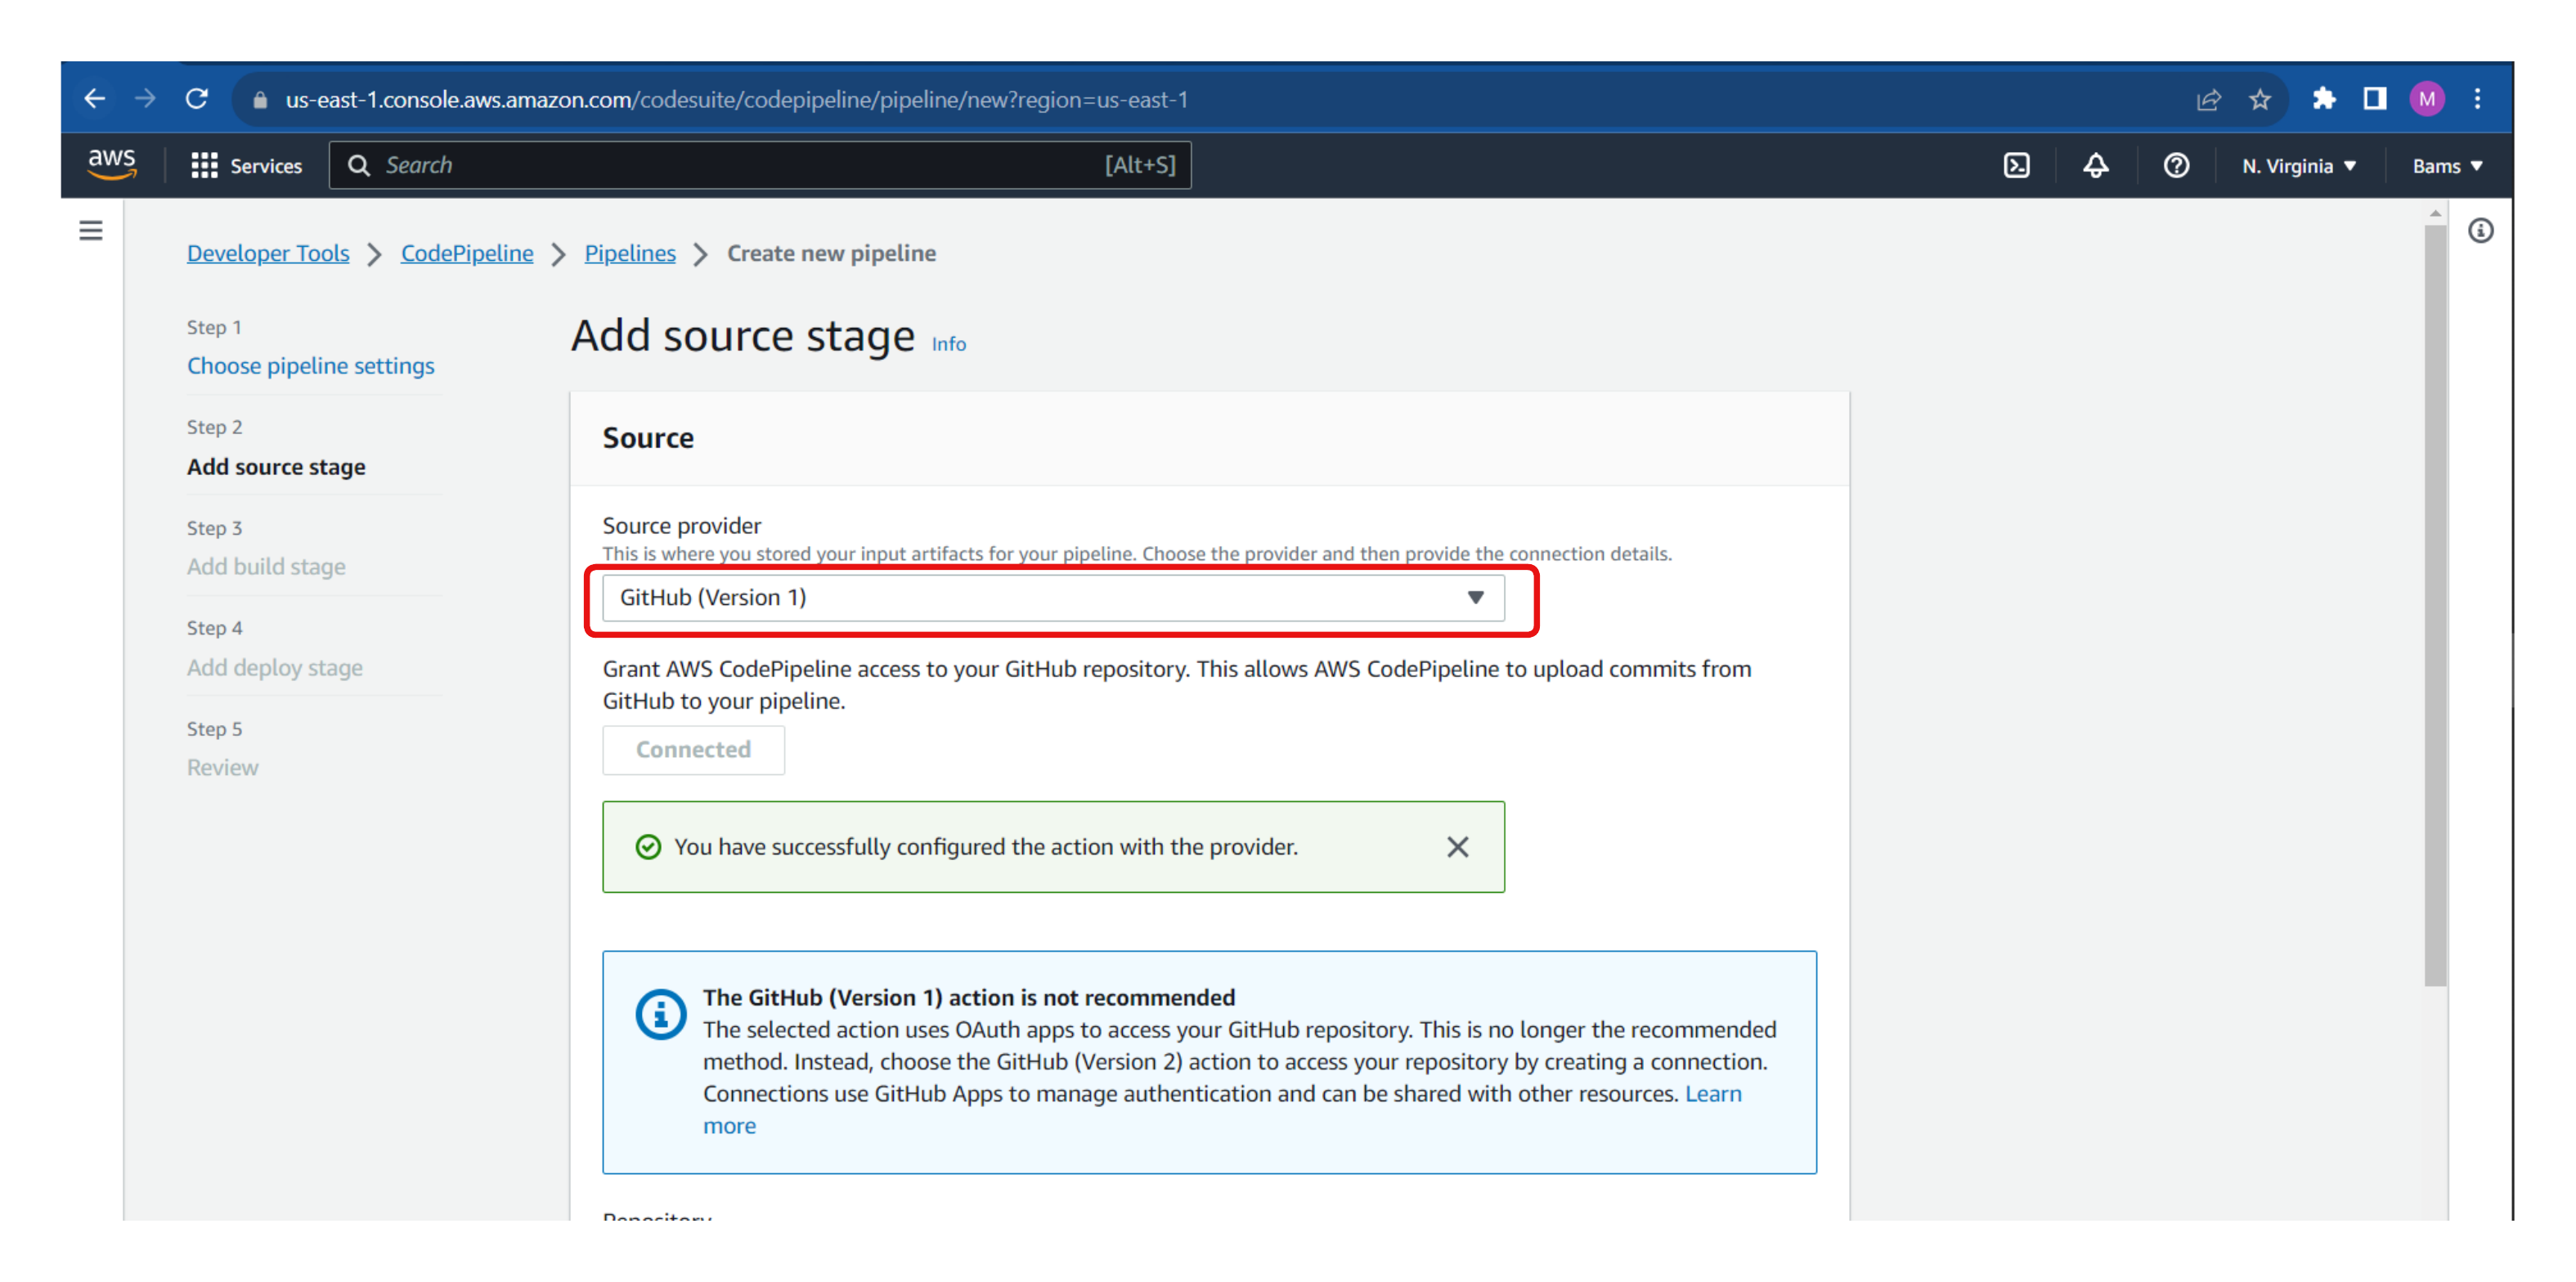
In the source stage, select GitHub as the source provider and authorize AWS to access your GitHub account.
Select the repository containing the application code and the branch,
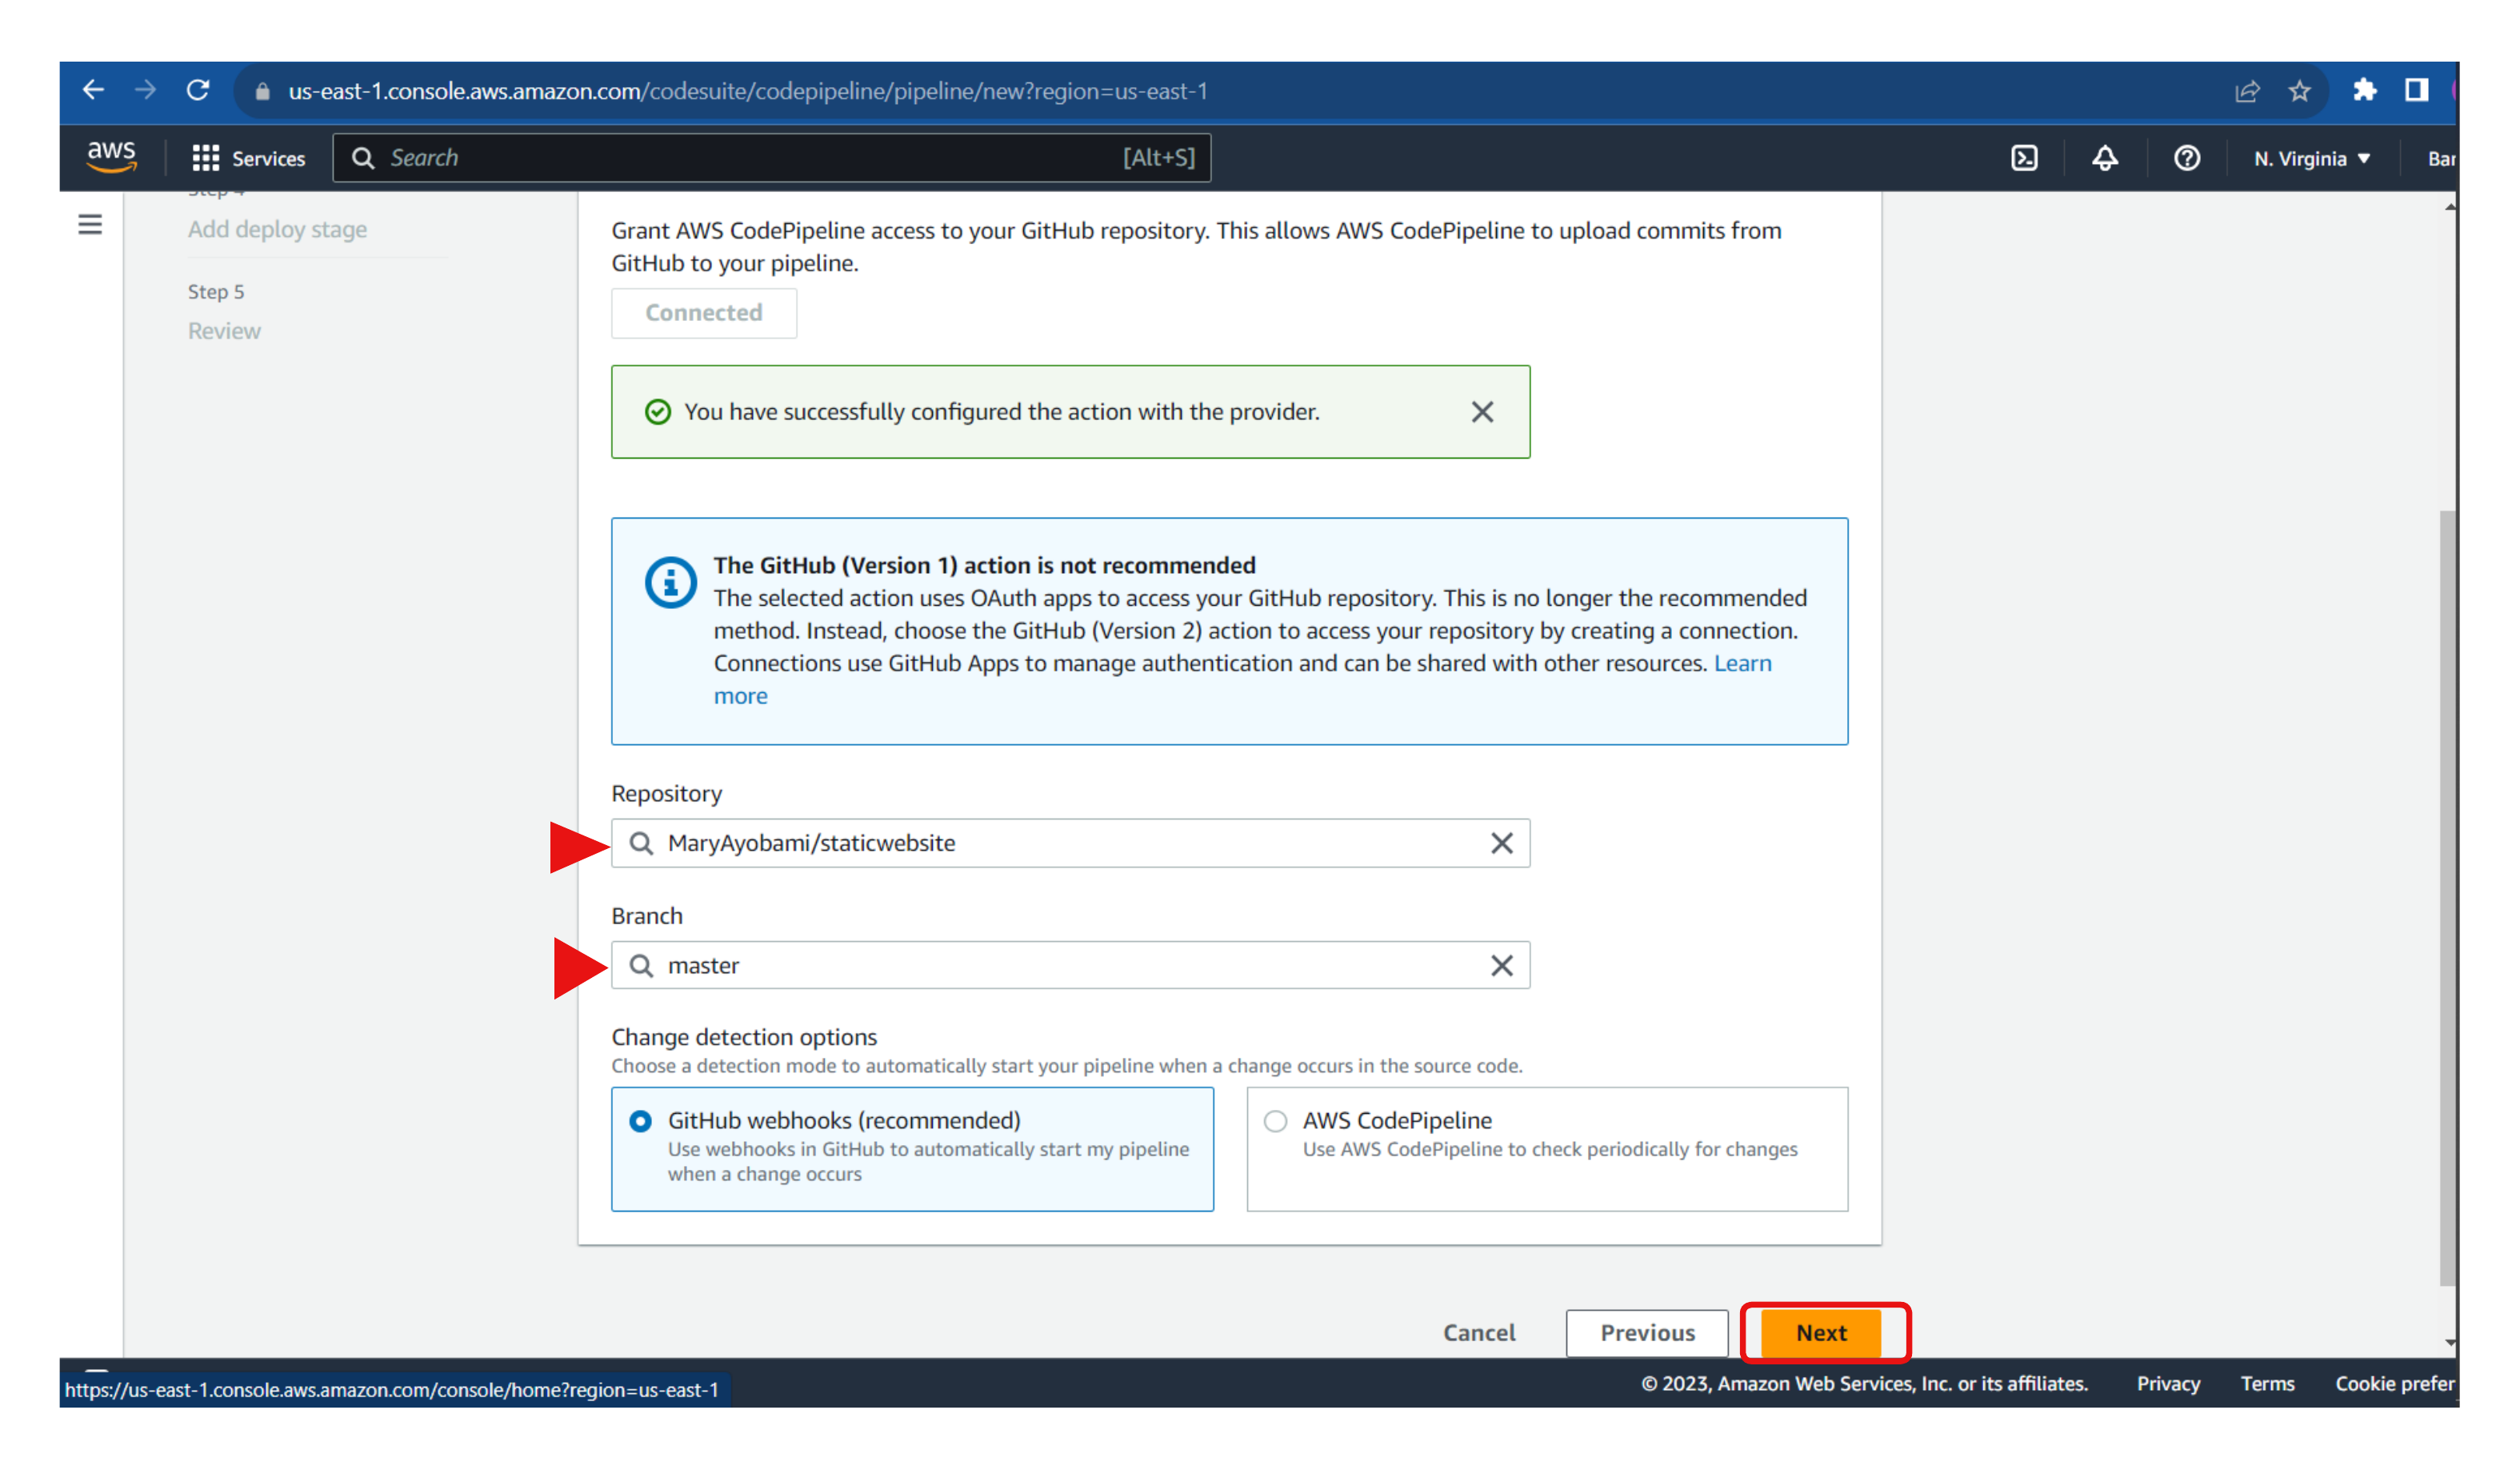
Then click on Next, skip the build stage, and proceed to the deploy stage.
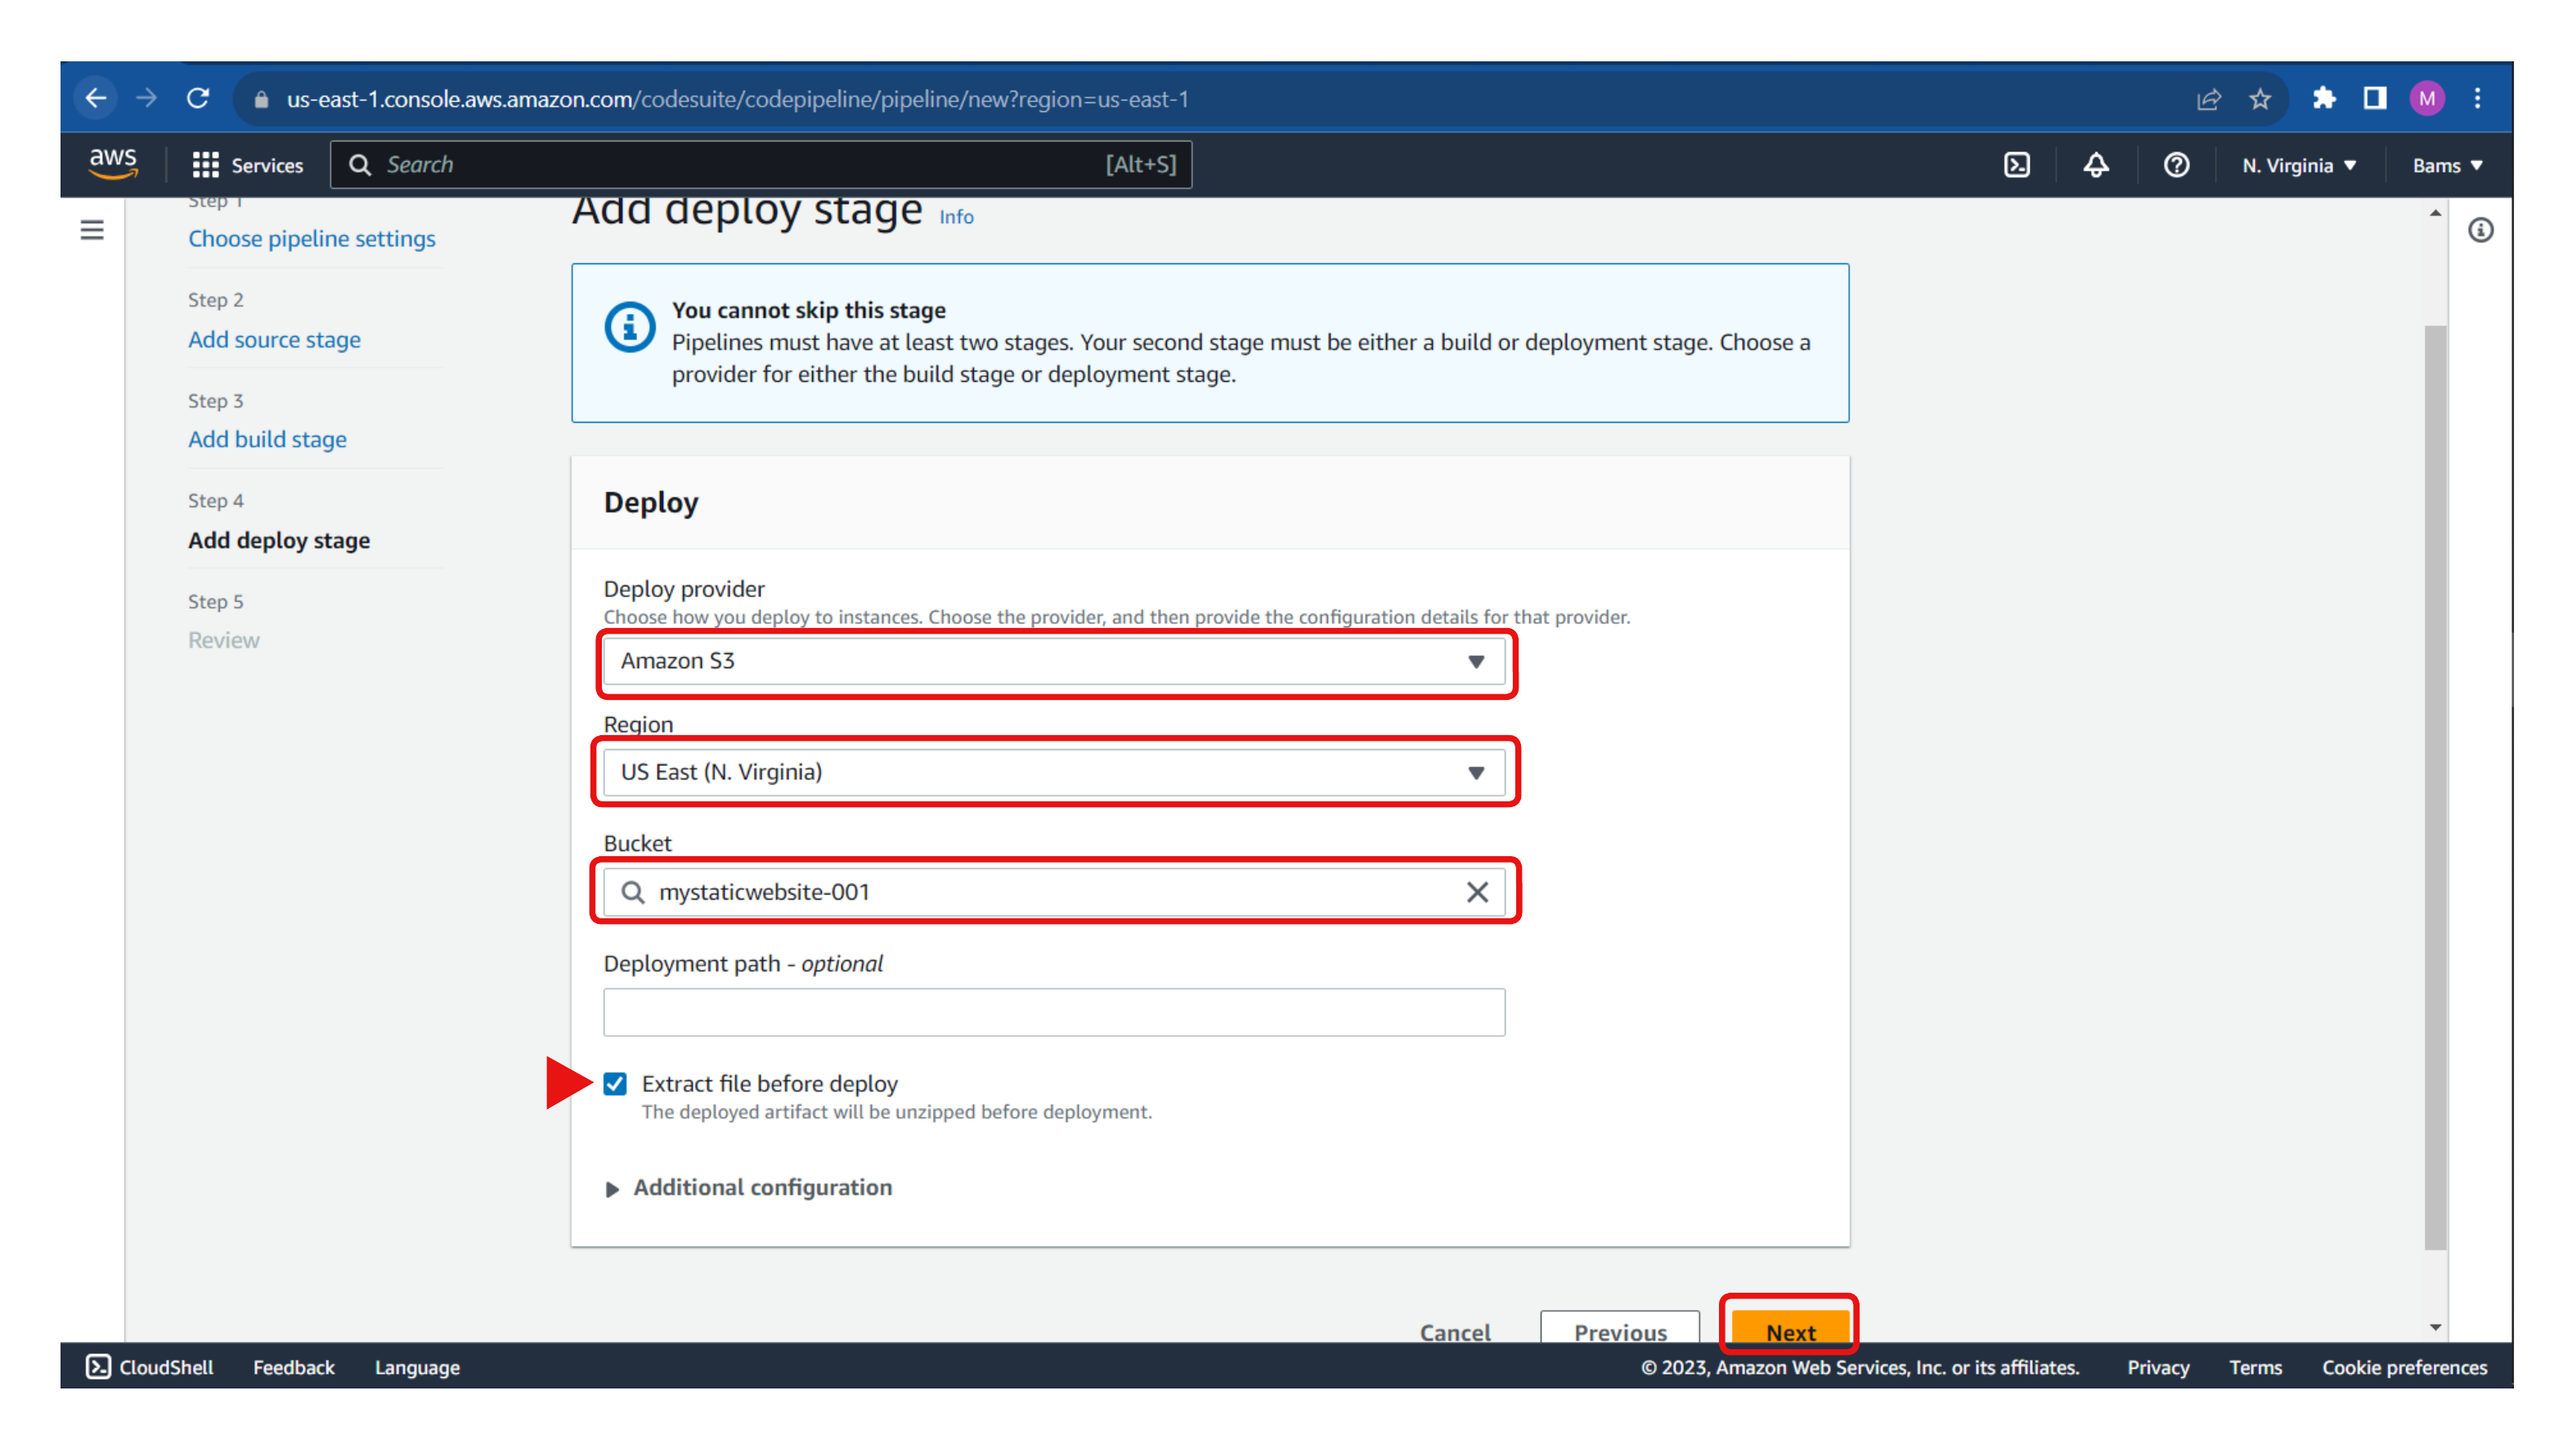
At the deploy stage, select Amazon S3 as the deploy provider, choose a region, and select the S3 bucket with the website content. Then click Next.
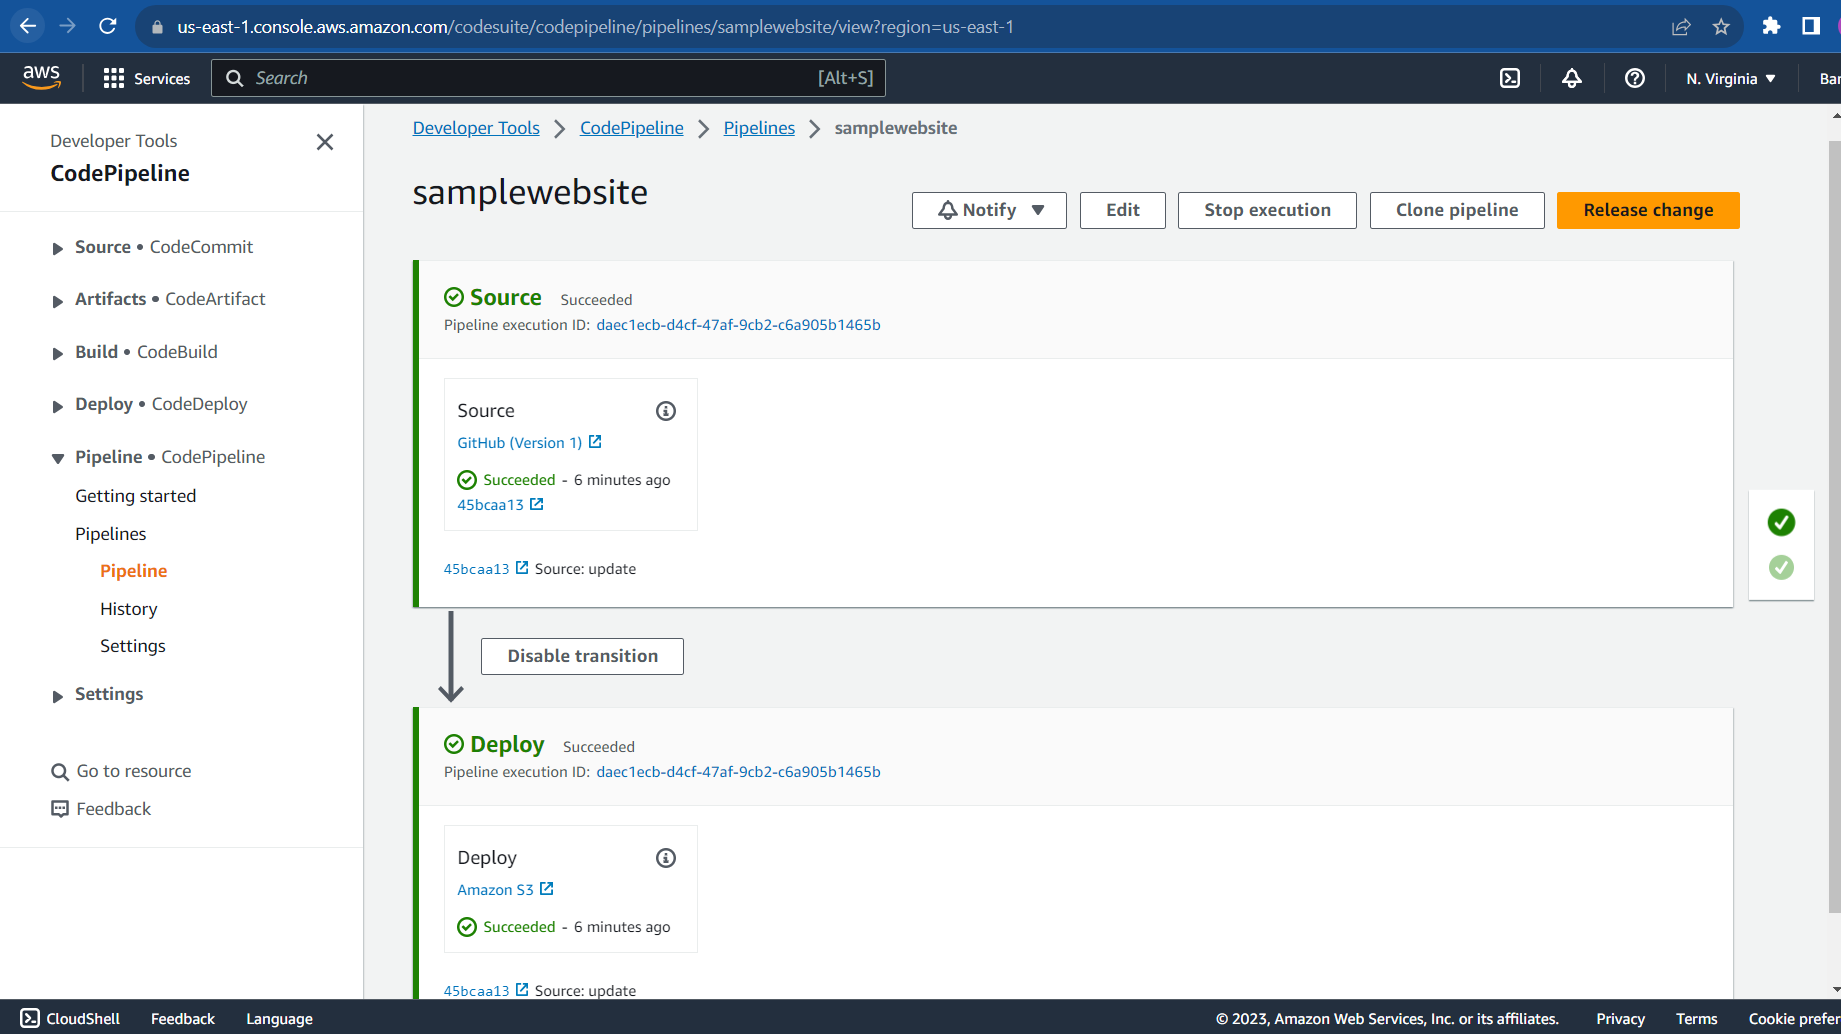
Once the pipeline has been successfully created, as shown in the image below, the content of our GitHub repository will be in the S3 bucket, and any changes made to the code will be updated in the S3 bucket.
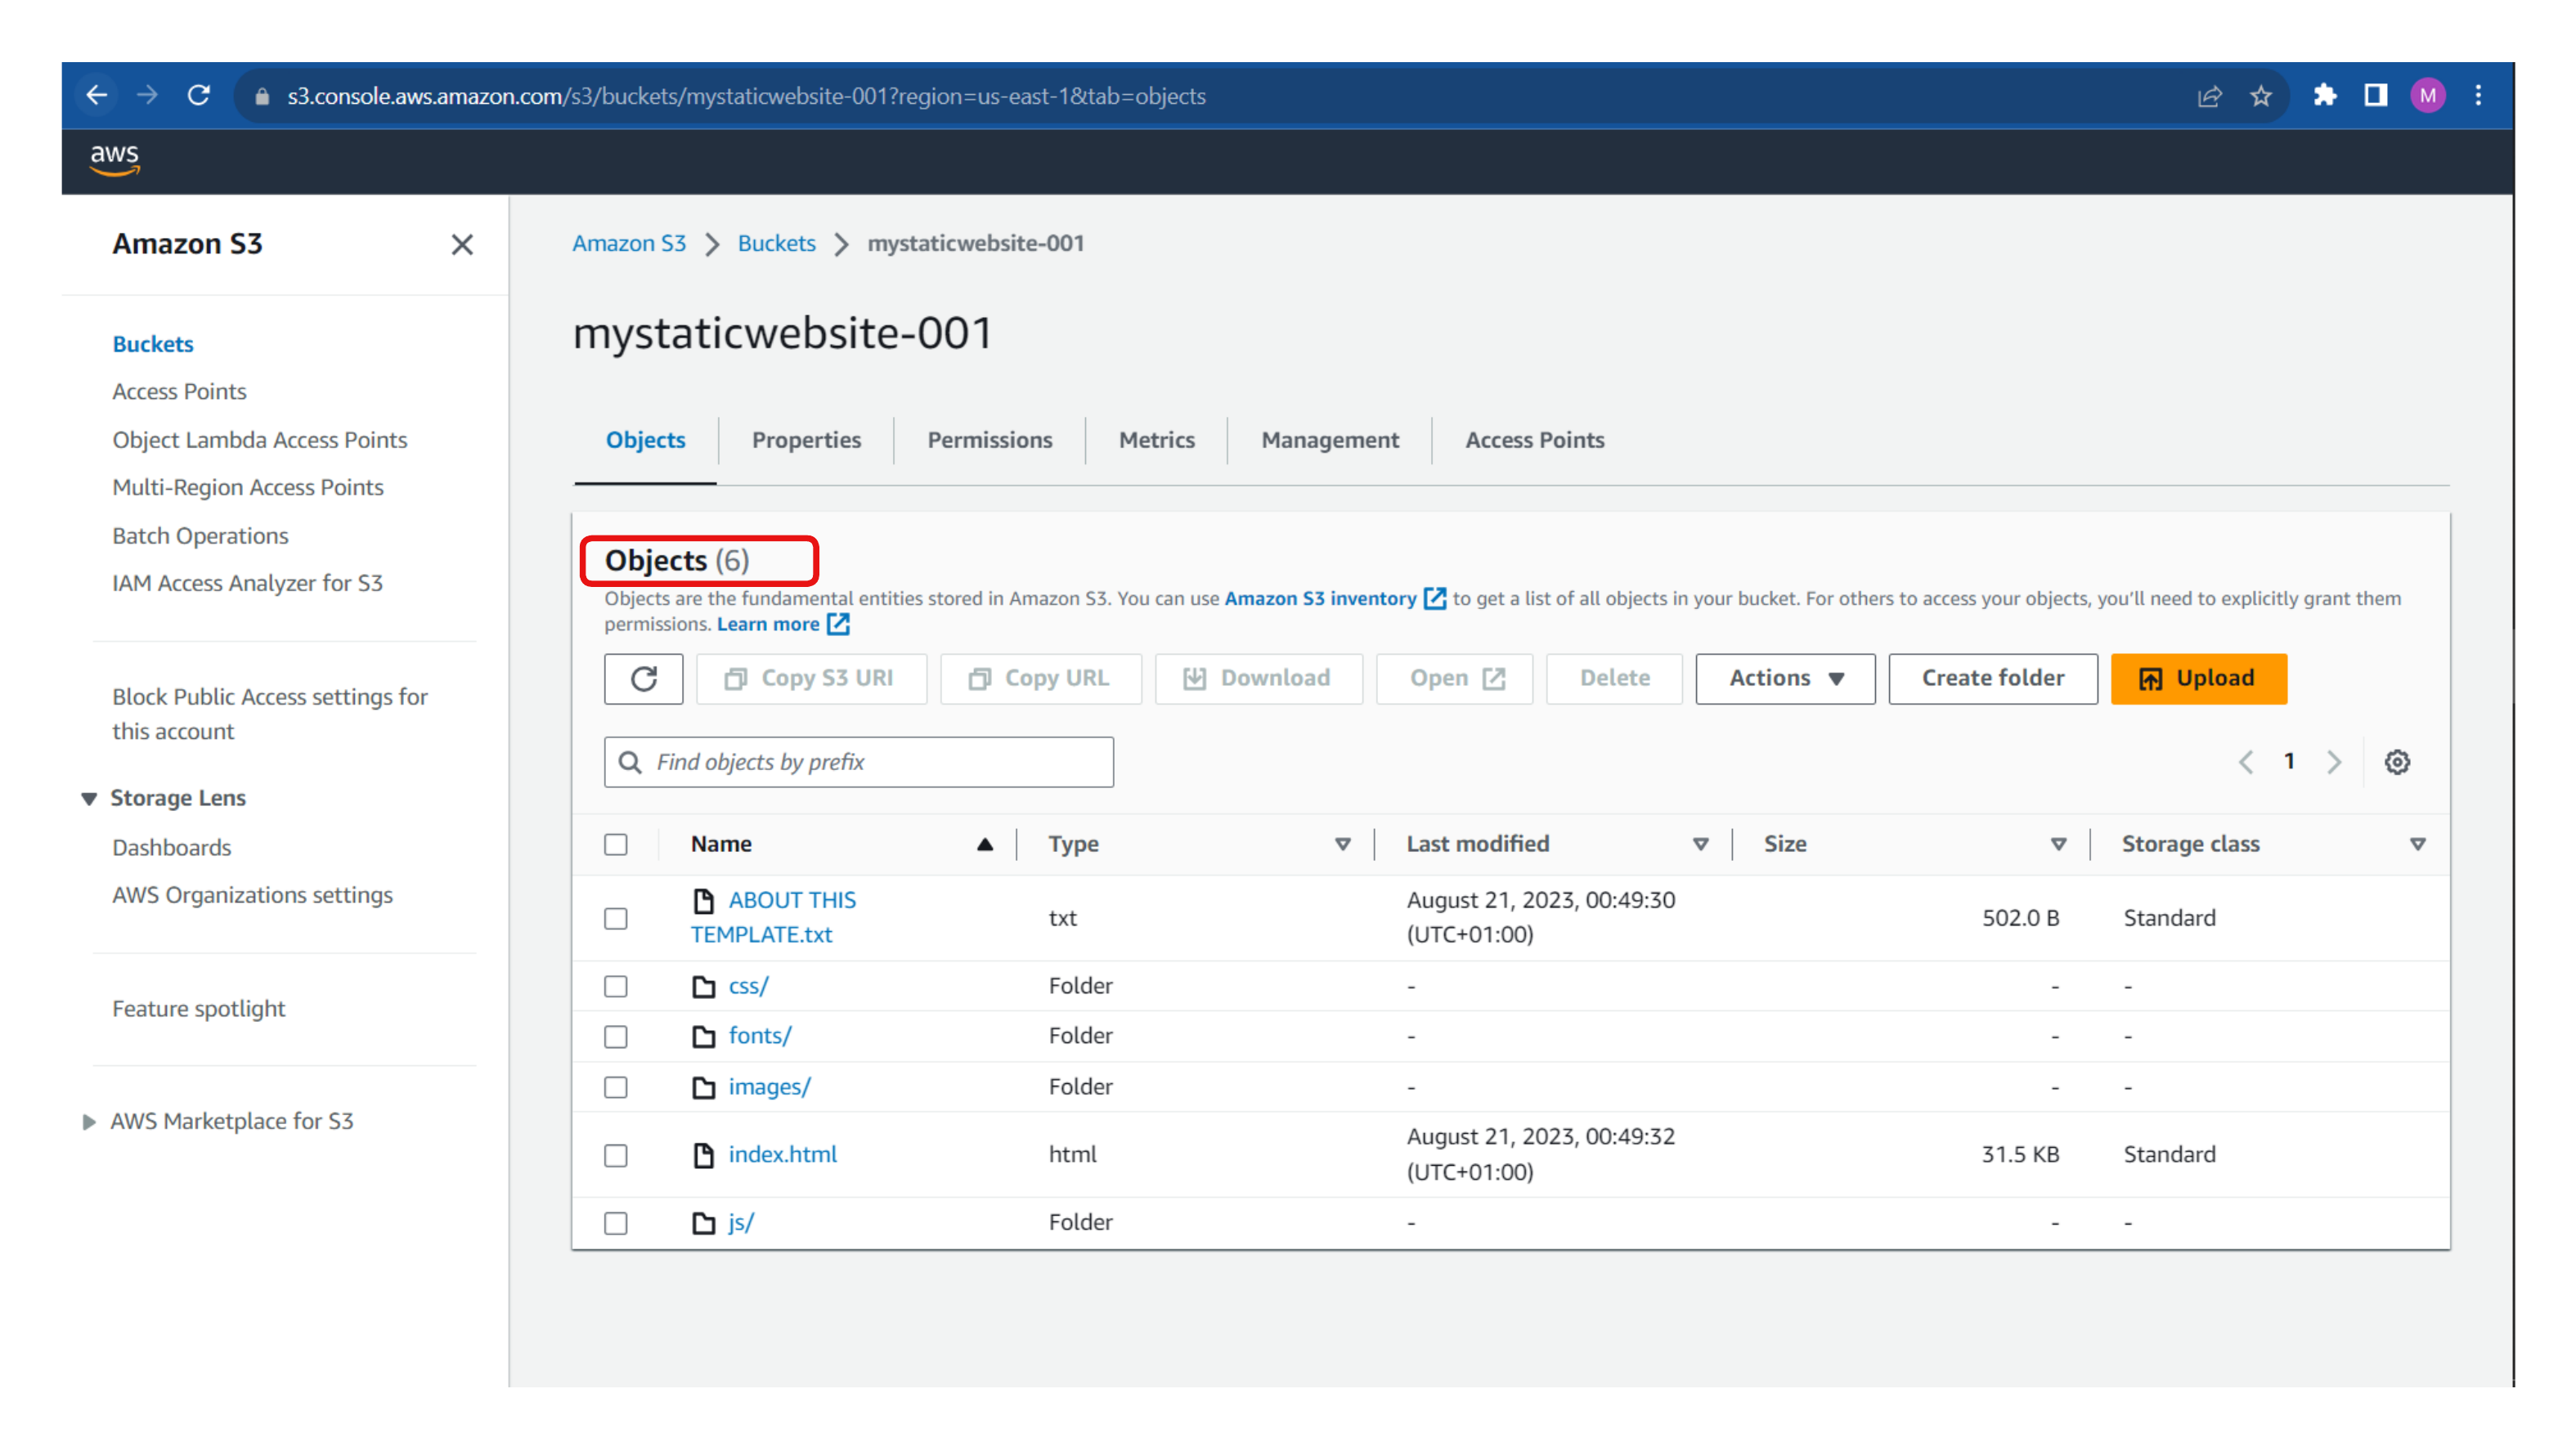
Now that our bucket contains the website code, we still can't access the website since all public access has been blocked.
To allow this, let's configure our CloudFront distribution to access the contents of the S3 bucket.
Configure CDN (Amazon CloudFront)
Navigate to the CloudFront service in the AWS Management Console.
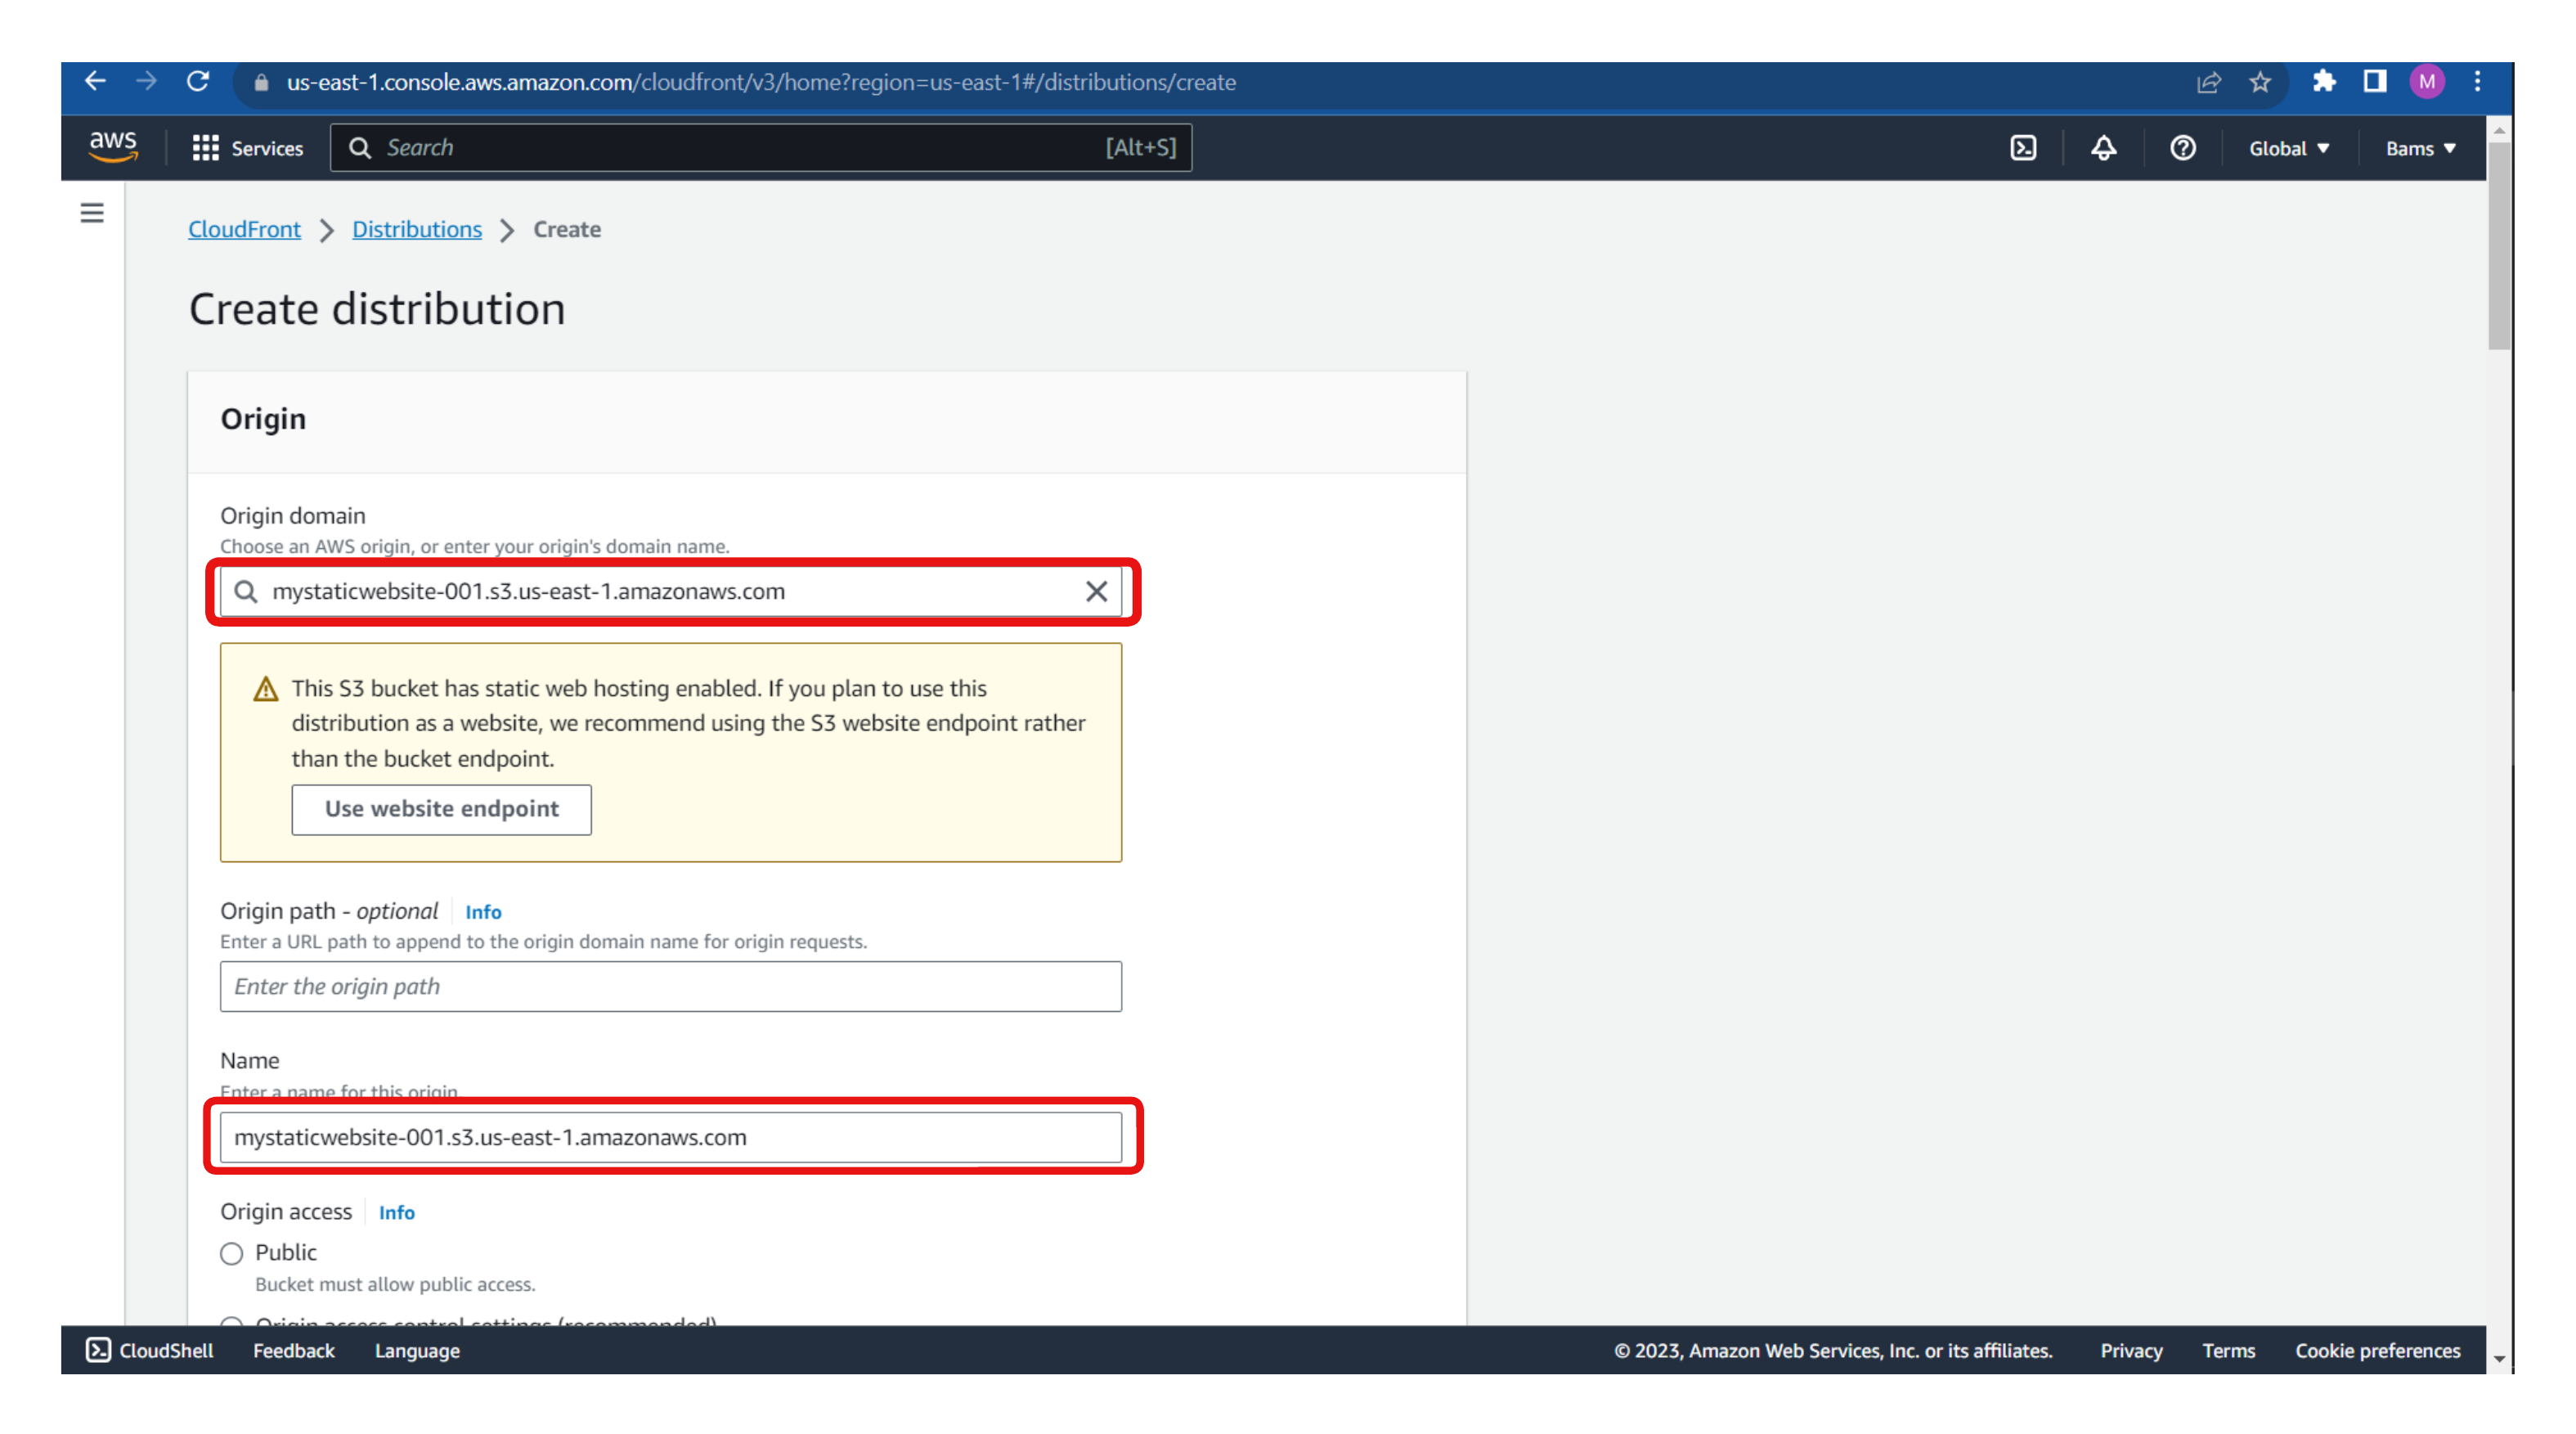
Click "Create Distribution" and select the S3 bucket as your origin domain. Also, give a name for the origin domain.
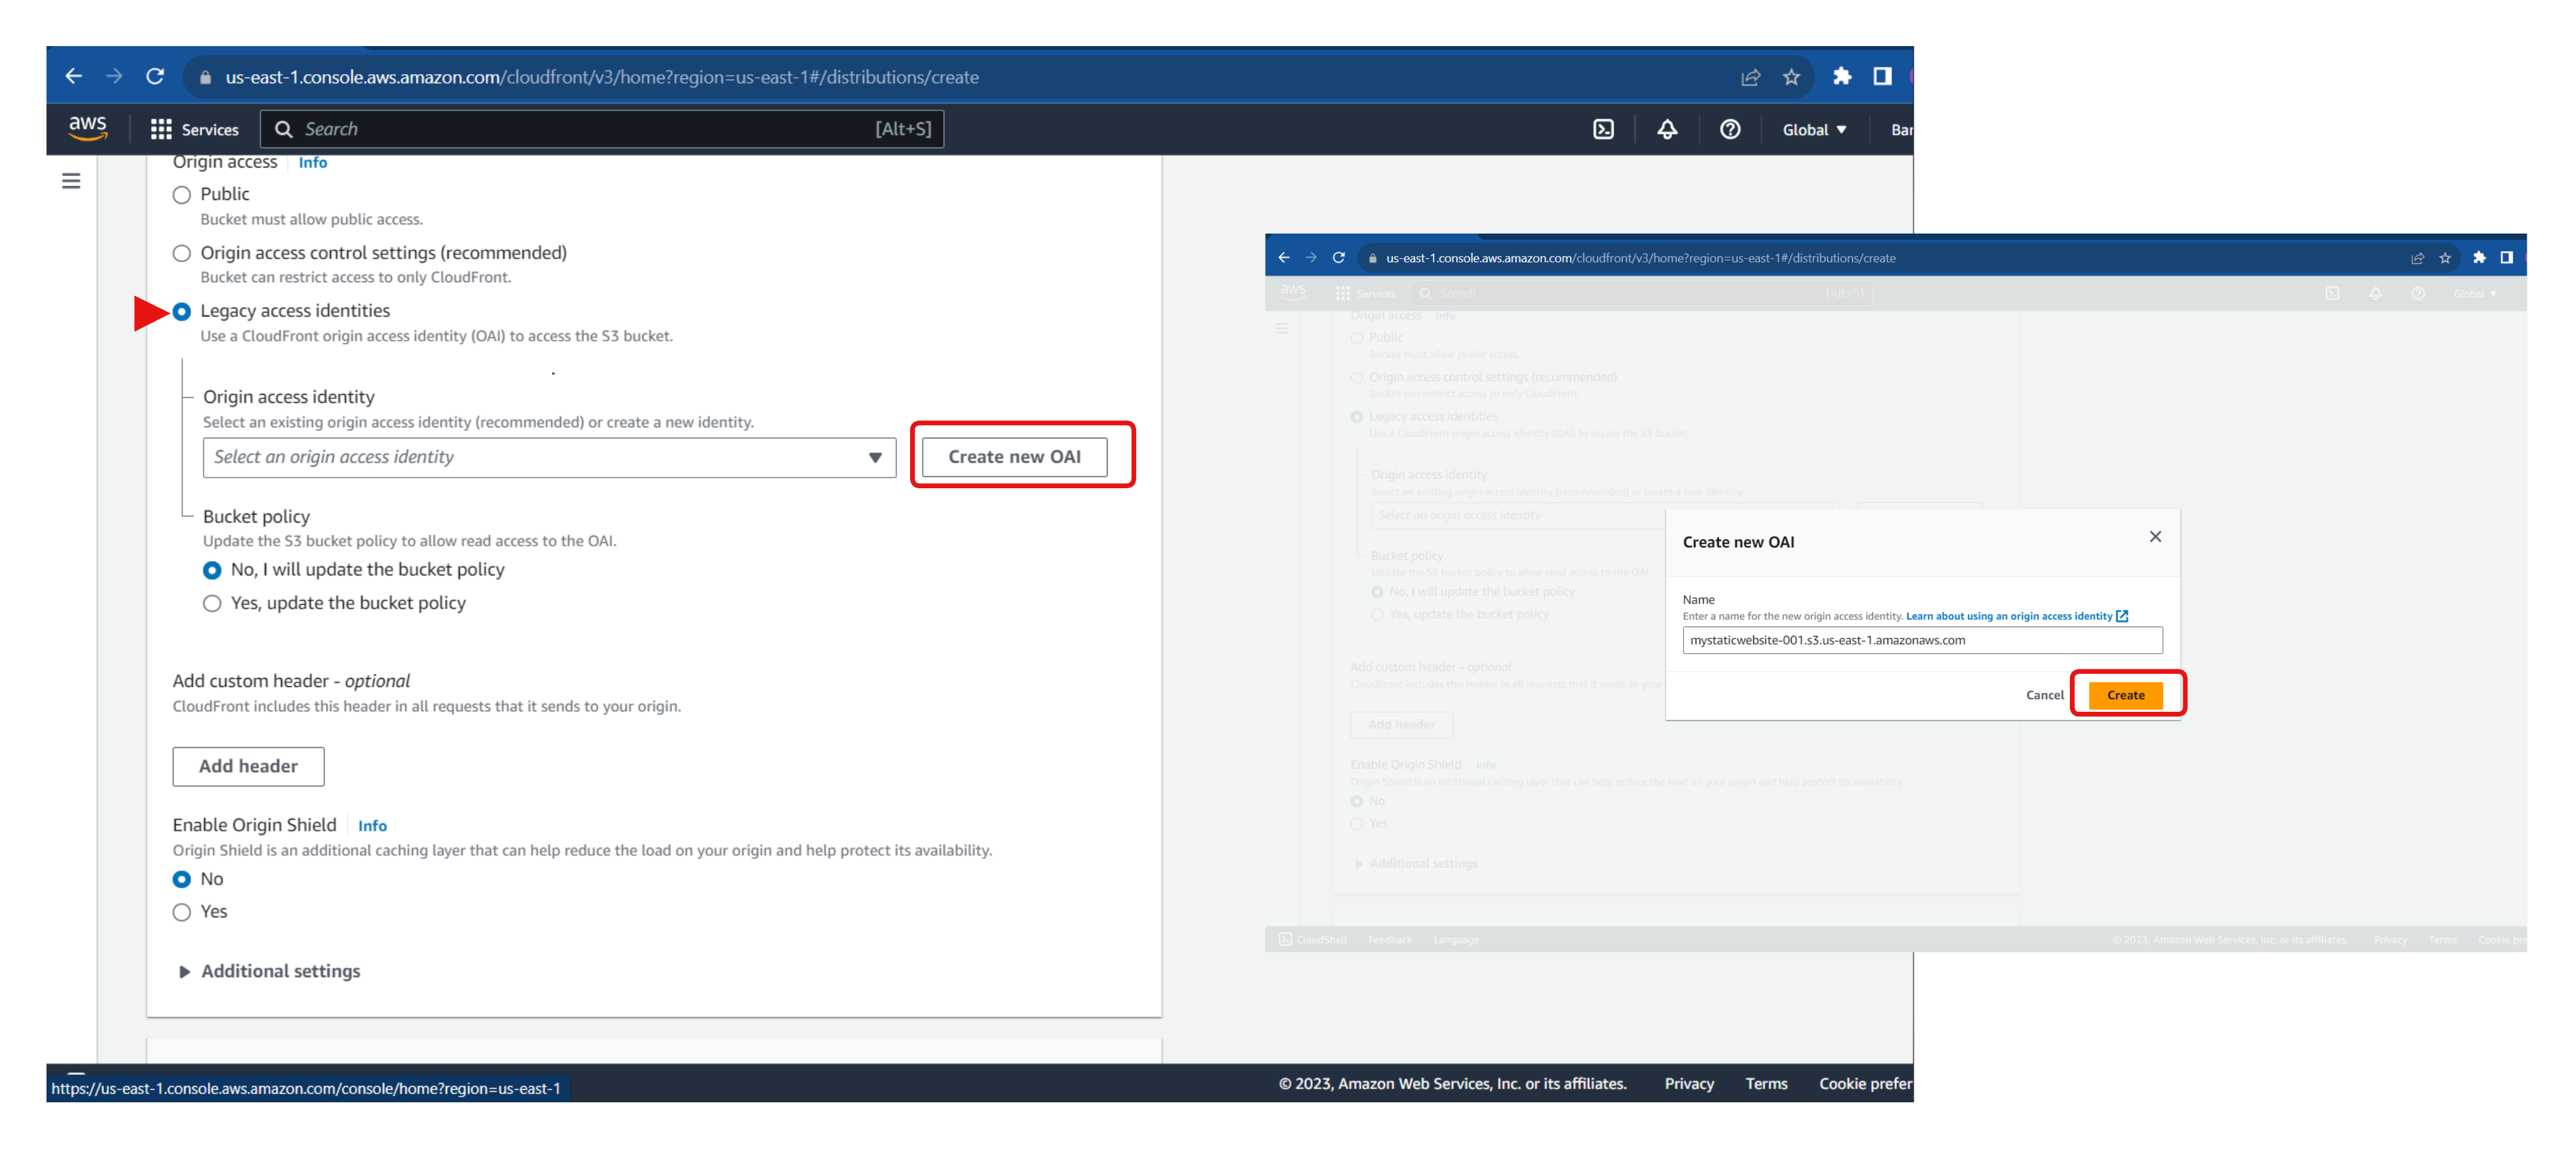
Select "Legal access identities" as the origin access. This will allow the distribution to access the contents of the S3 bucket even though public access is blocked.
Select an origin access identity or create a new one, as shown in the second image.
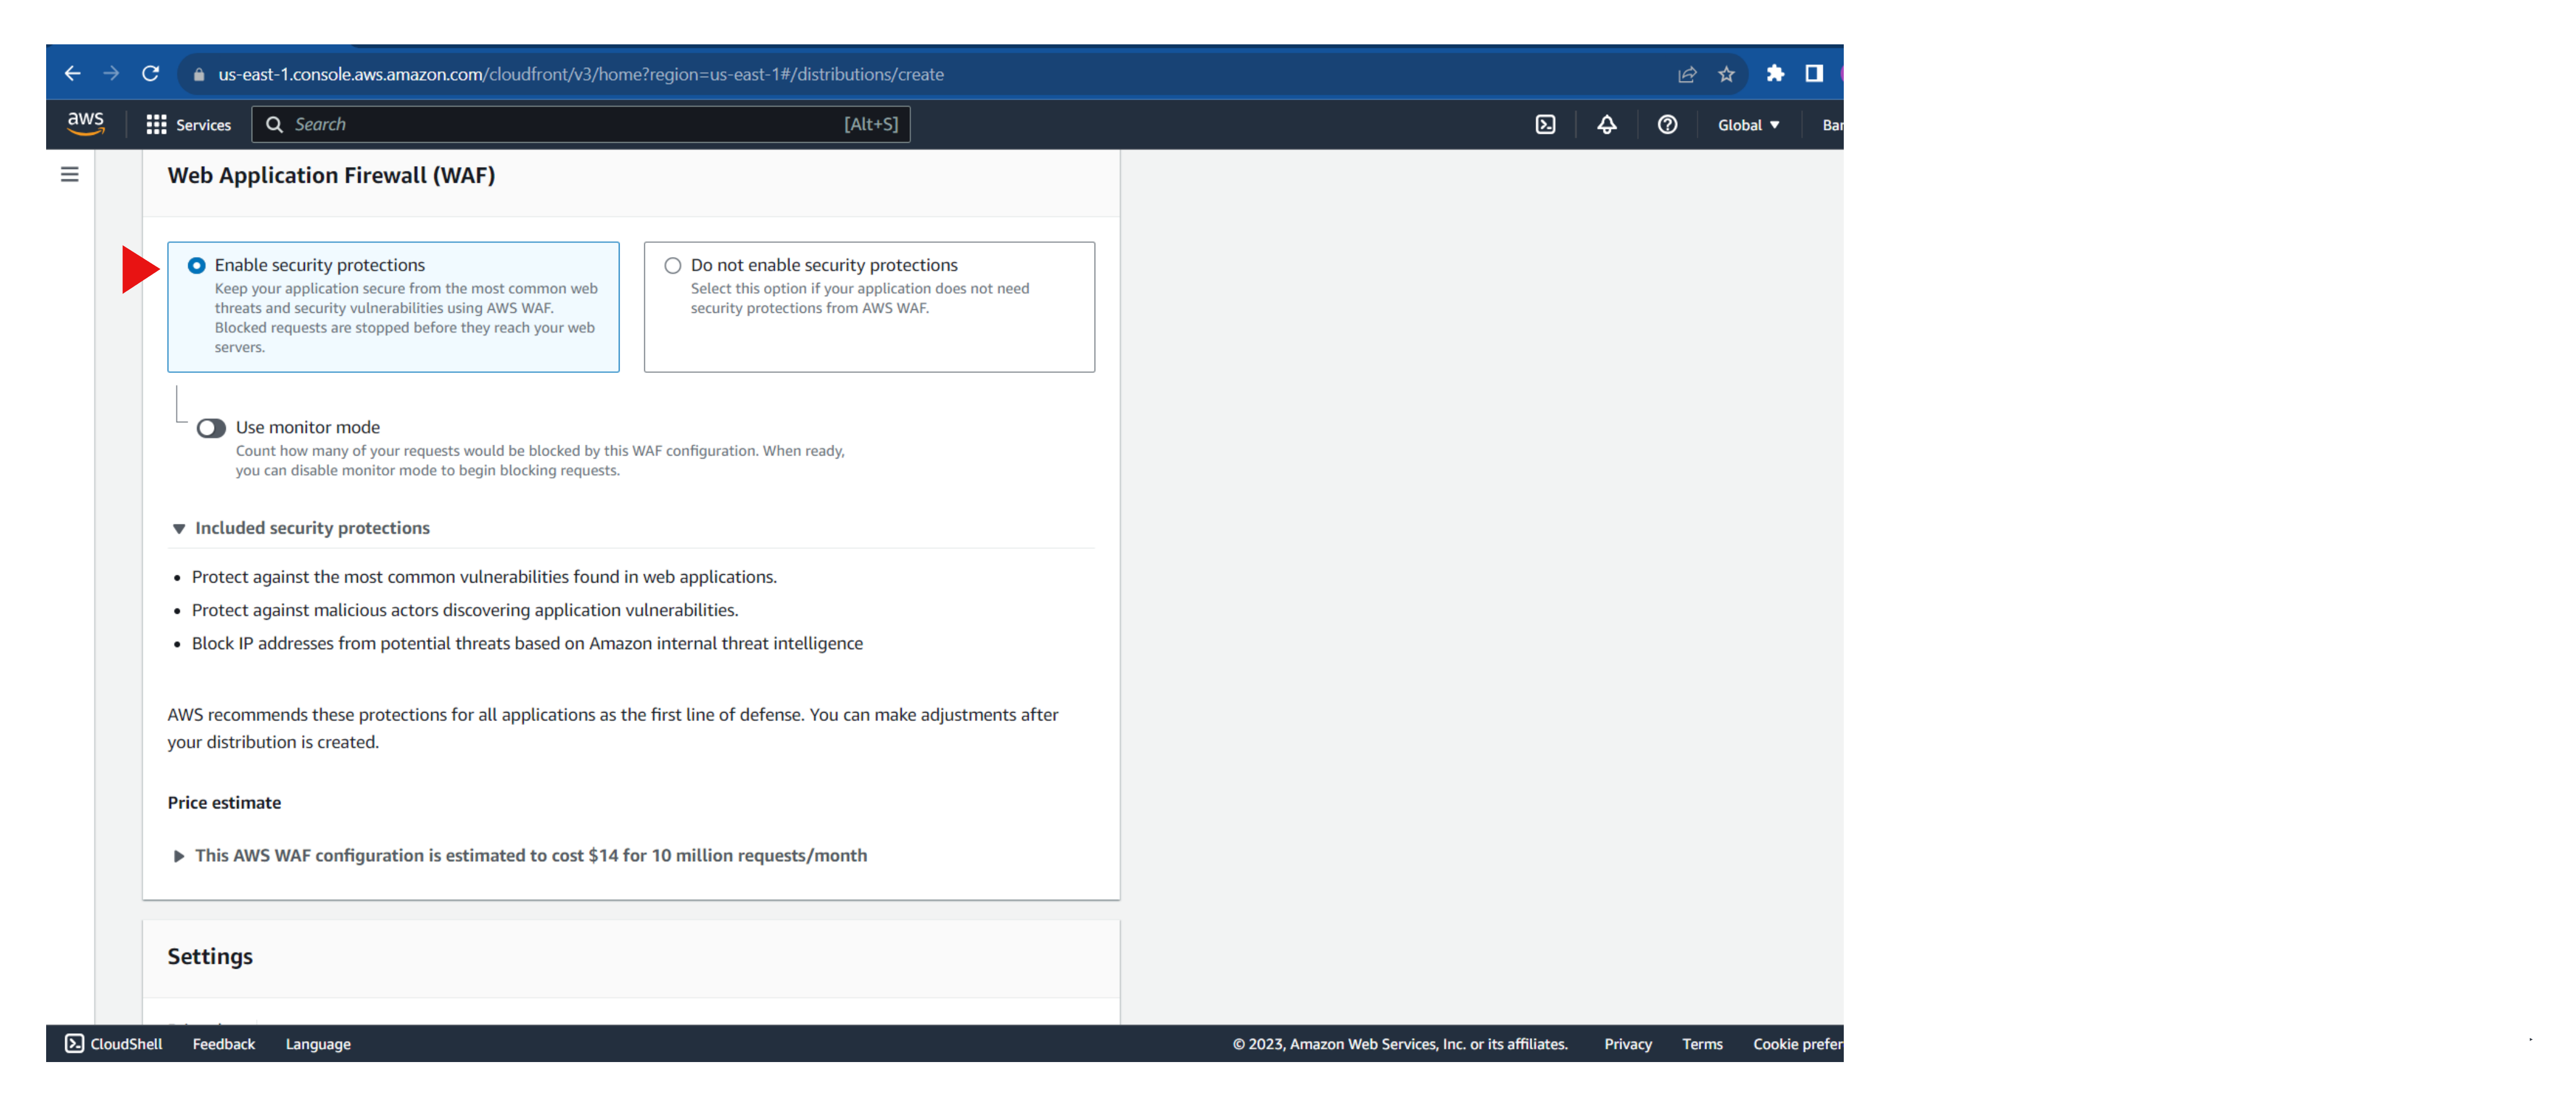
Enable Web Application Firewall (WAF) security protections to secure the application from threats and vulnerabilities by stopping requests before they can reach your application.
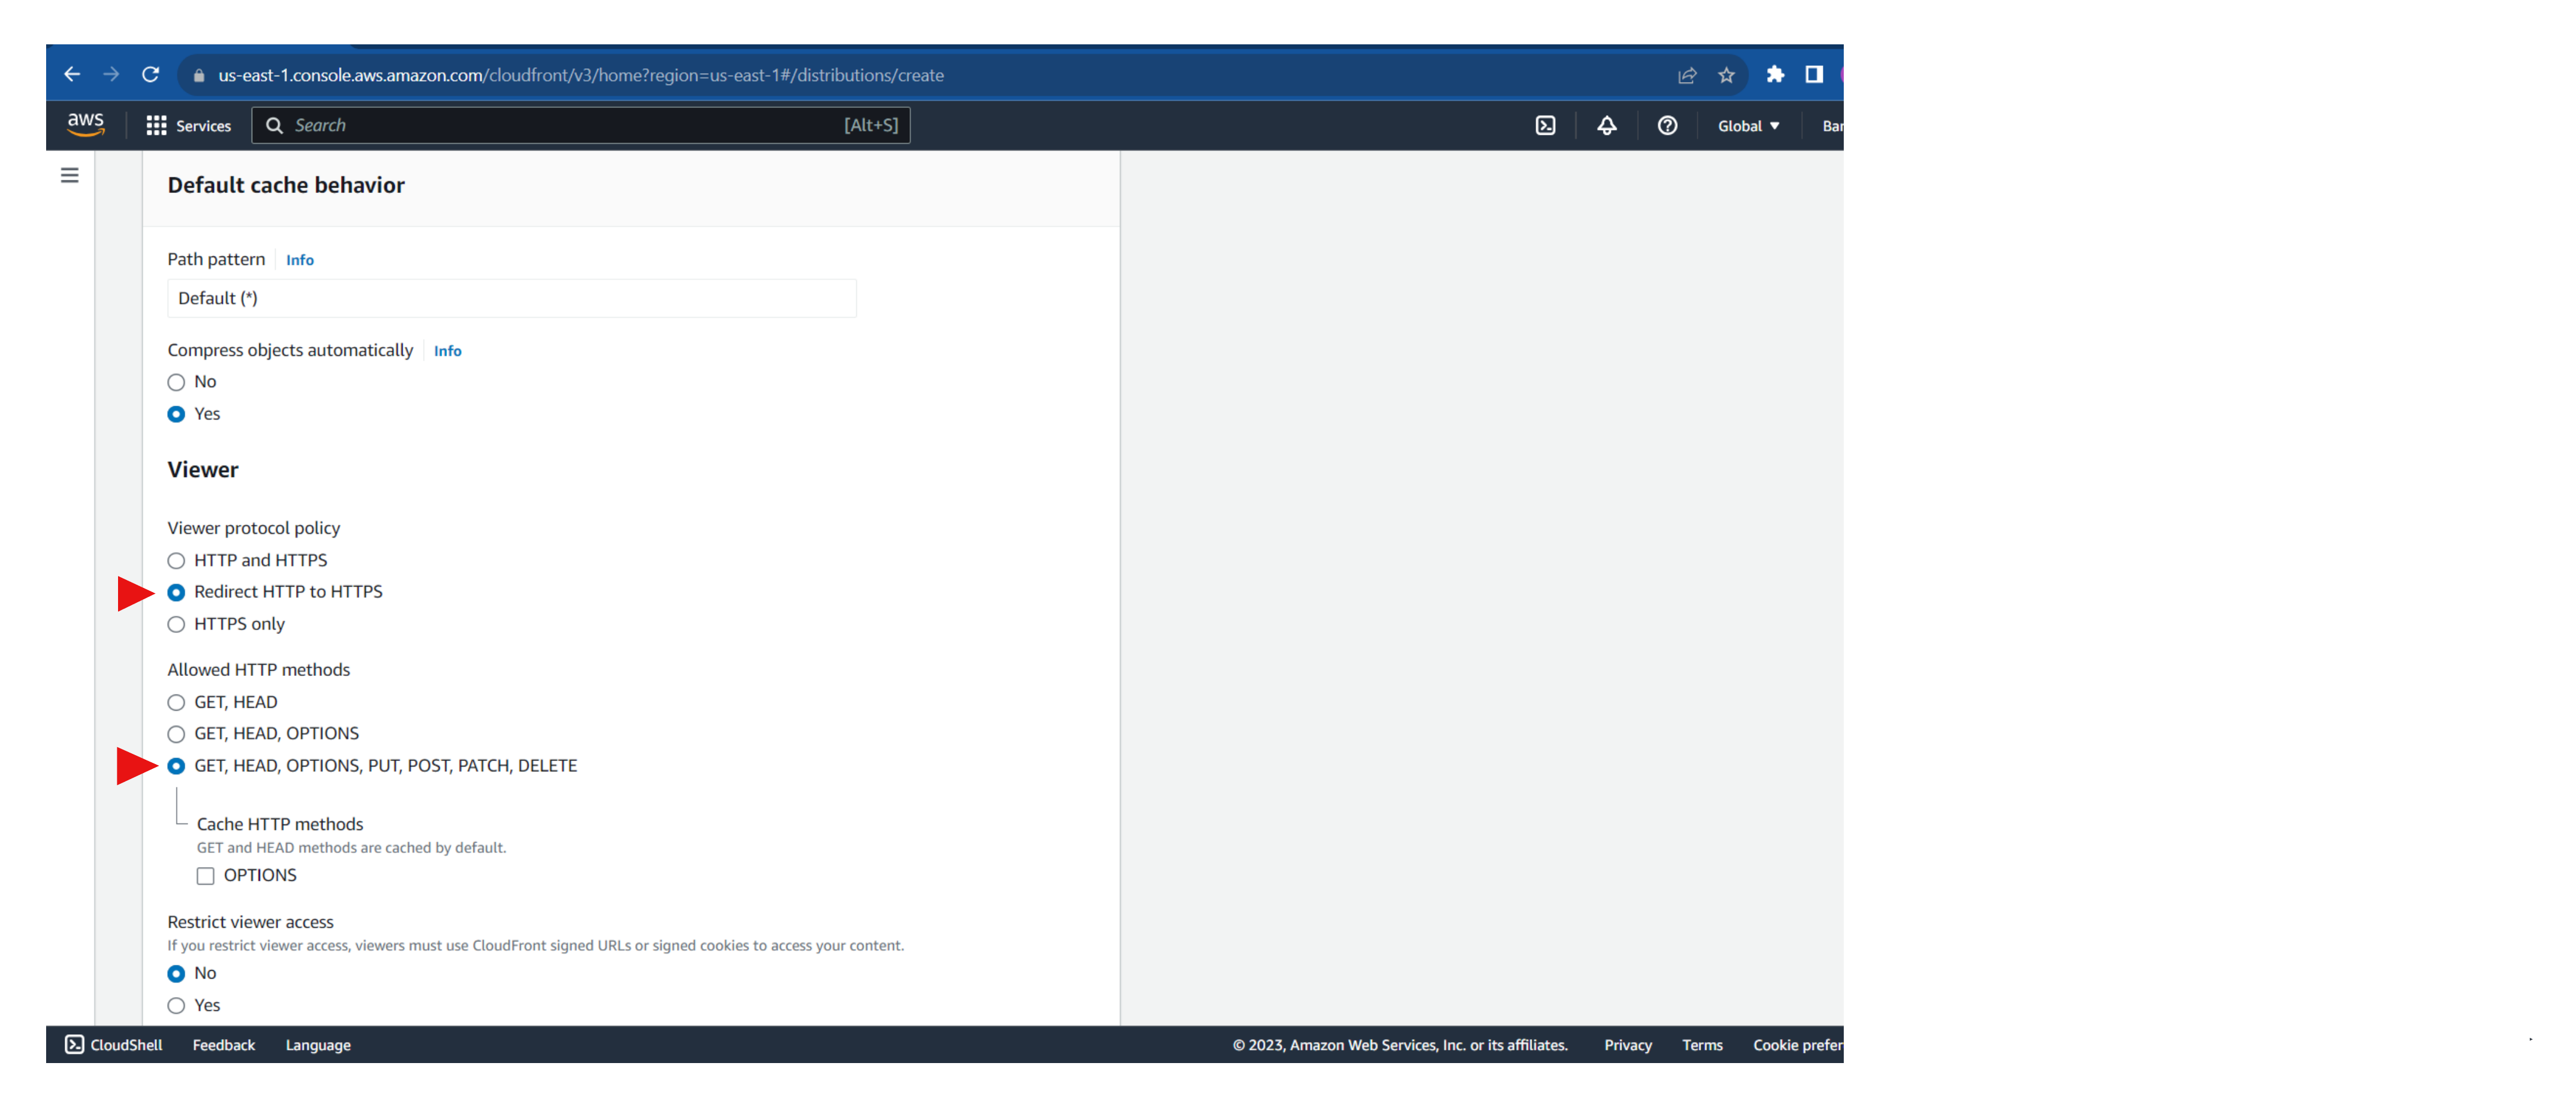
Select "redirect HTTP to HTTPS" and choose the HTTP methods.
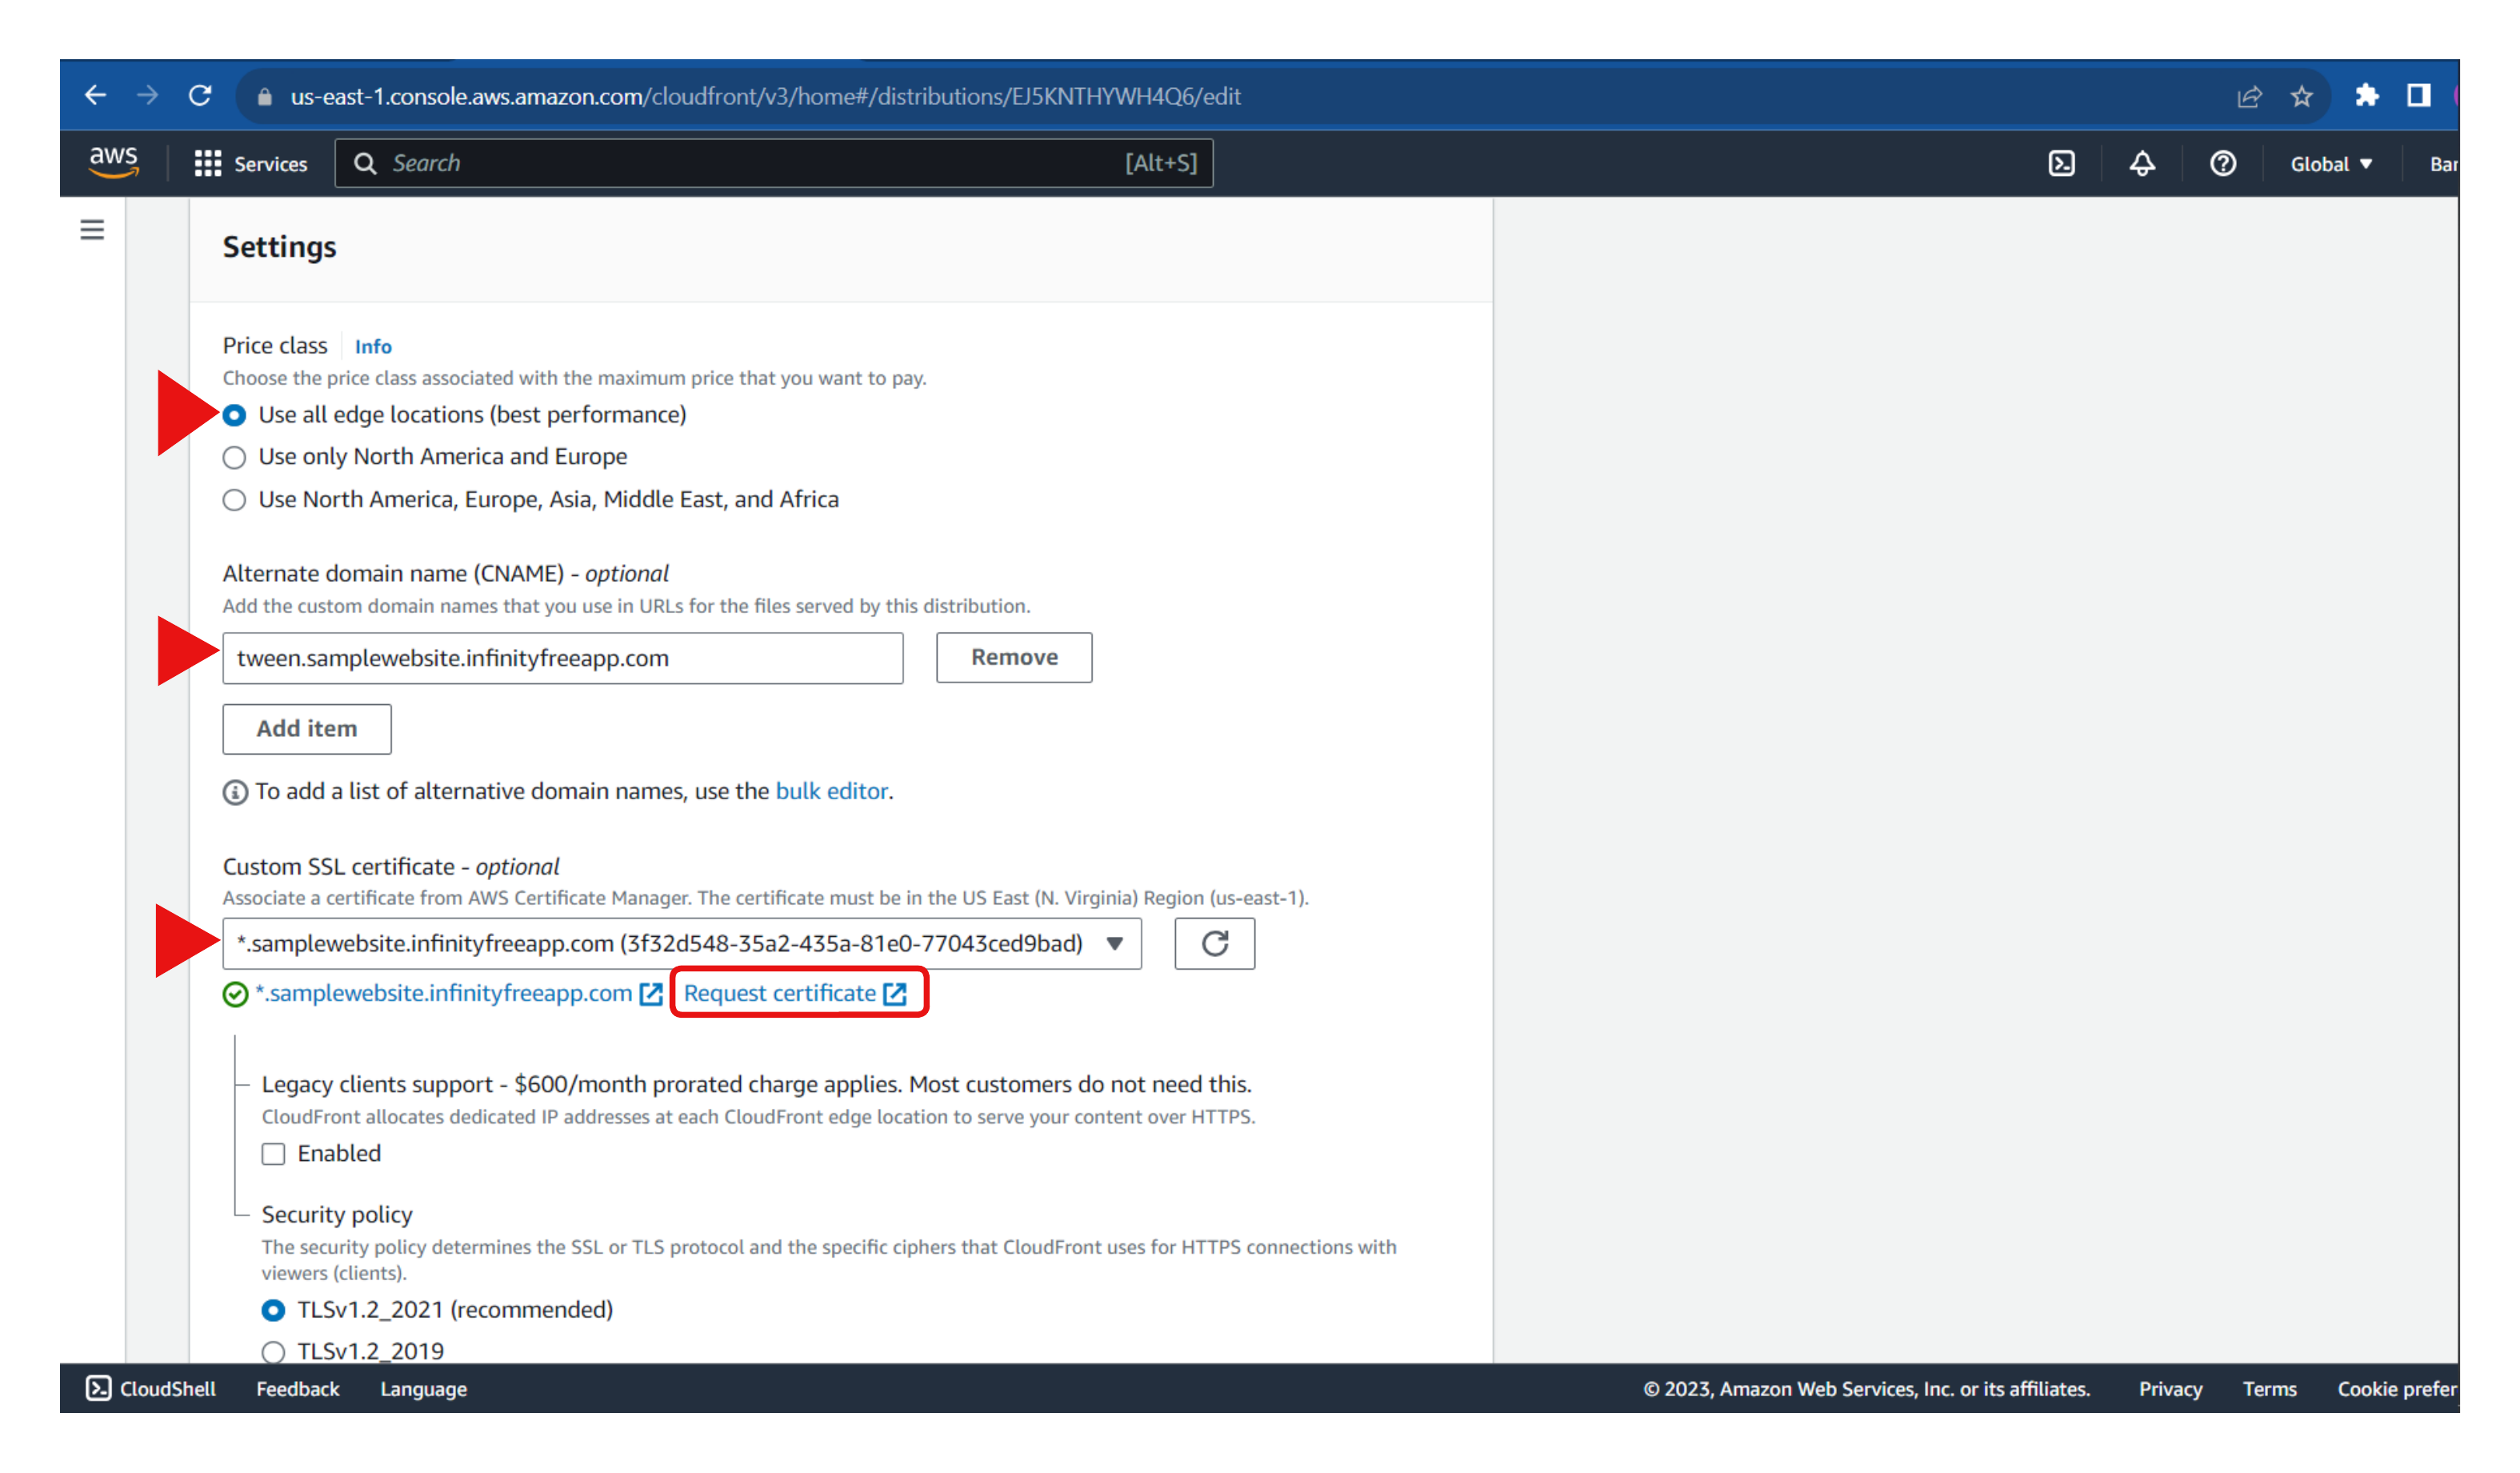
Use all edge locations to allow the best performance. Also, add an alternate domain name. Then associate a custom SSL certificate with the distribution. If no certificate is available, you can request a new certificate from the AWS Certificate Manager.
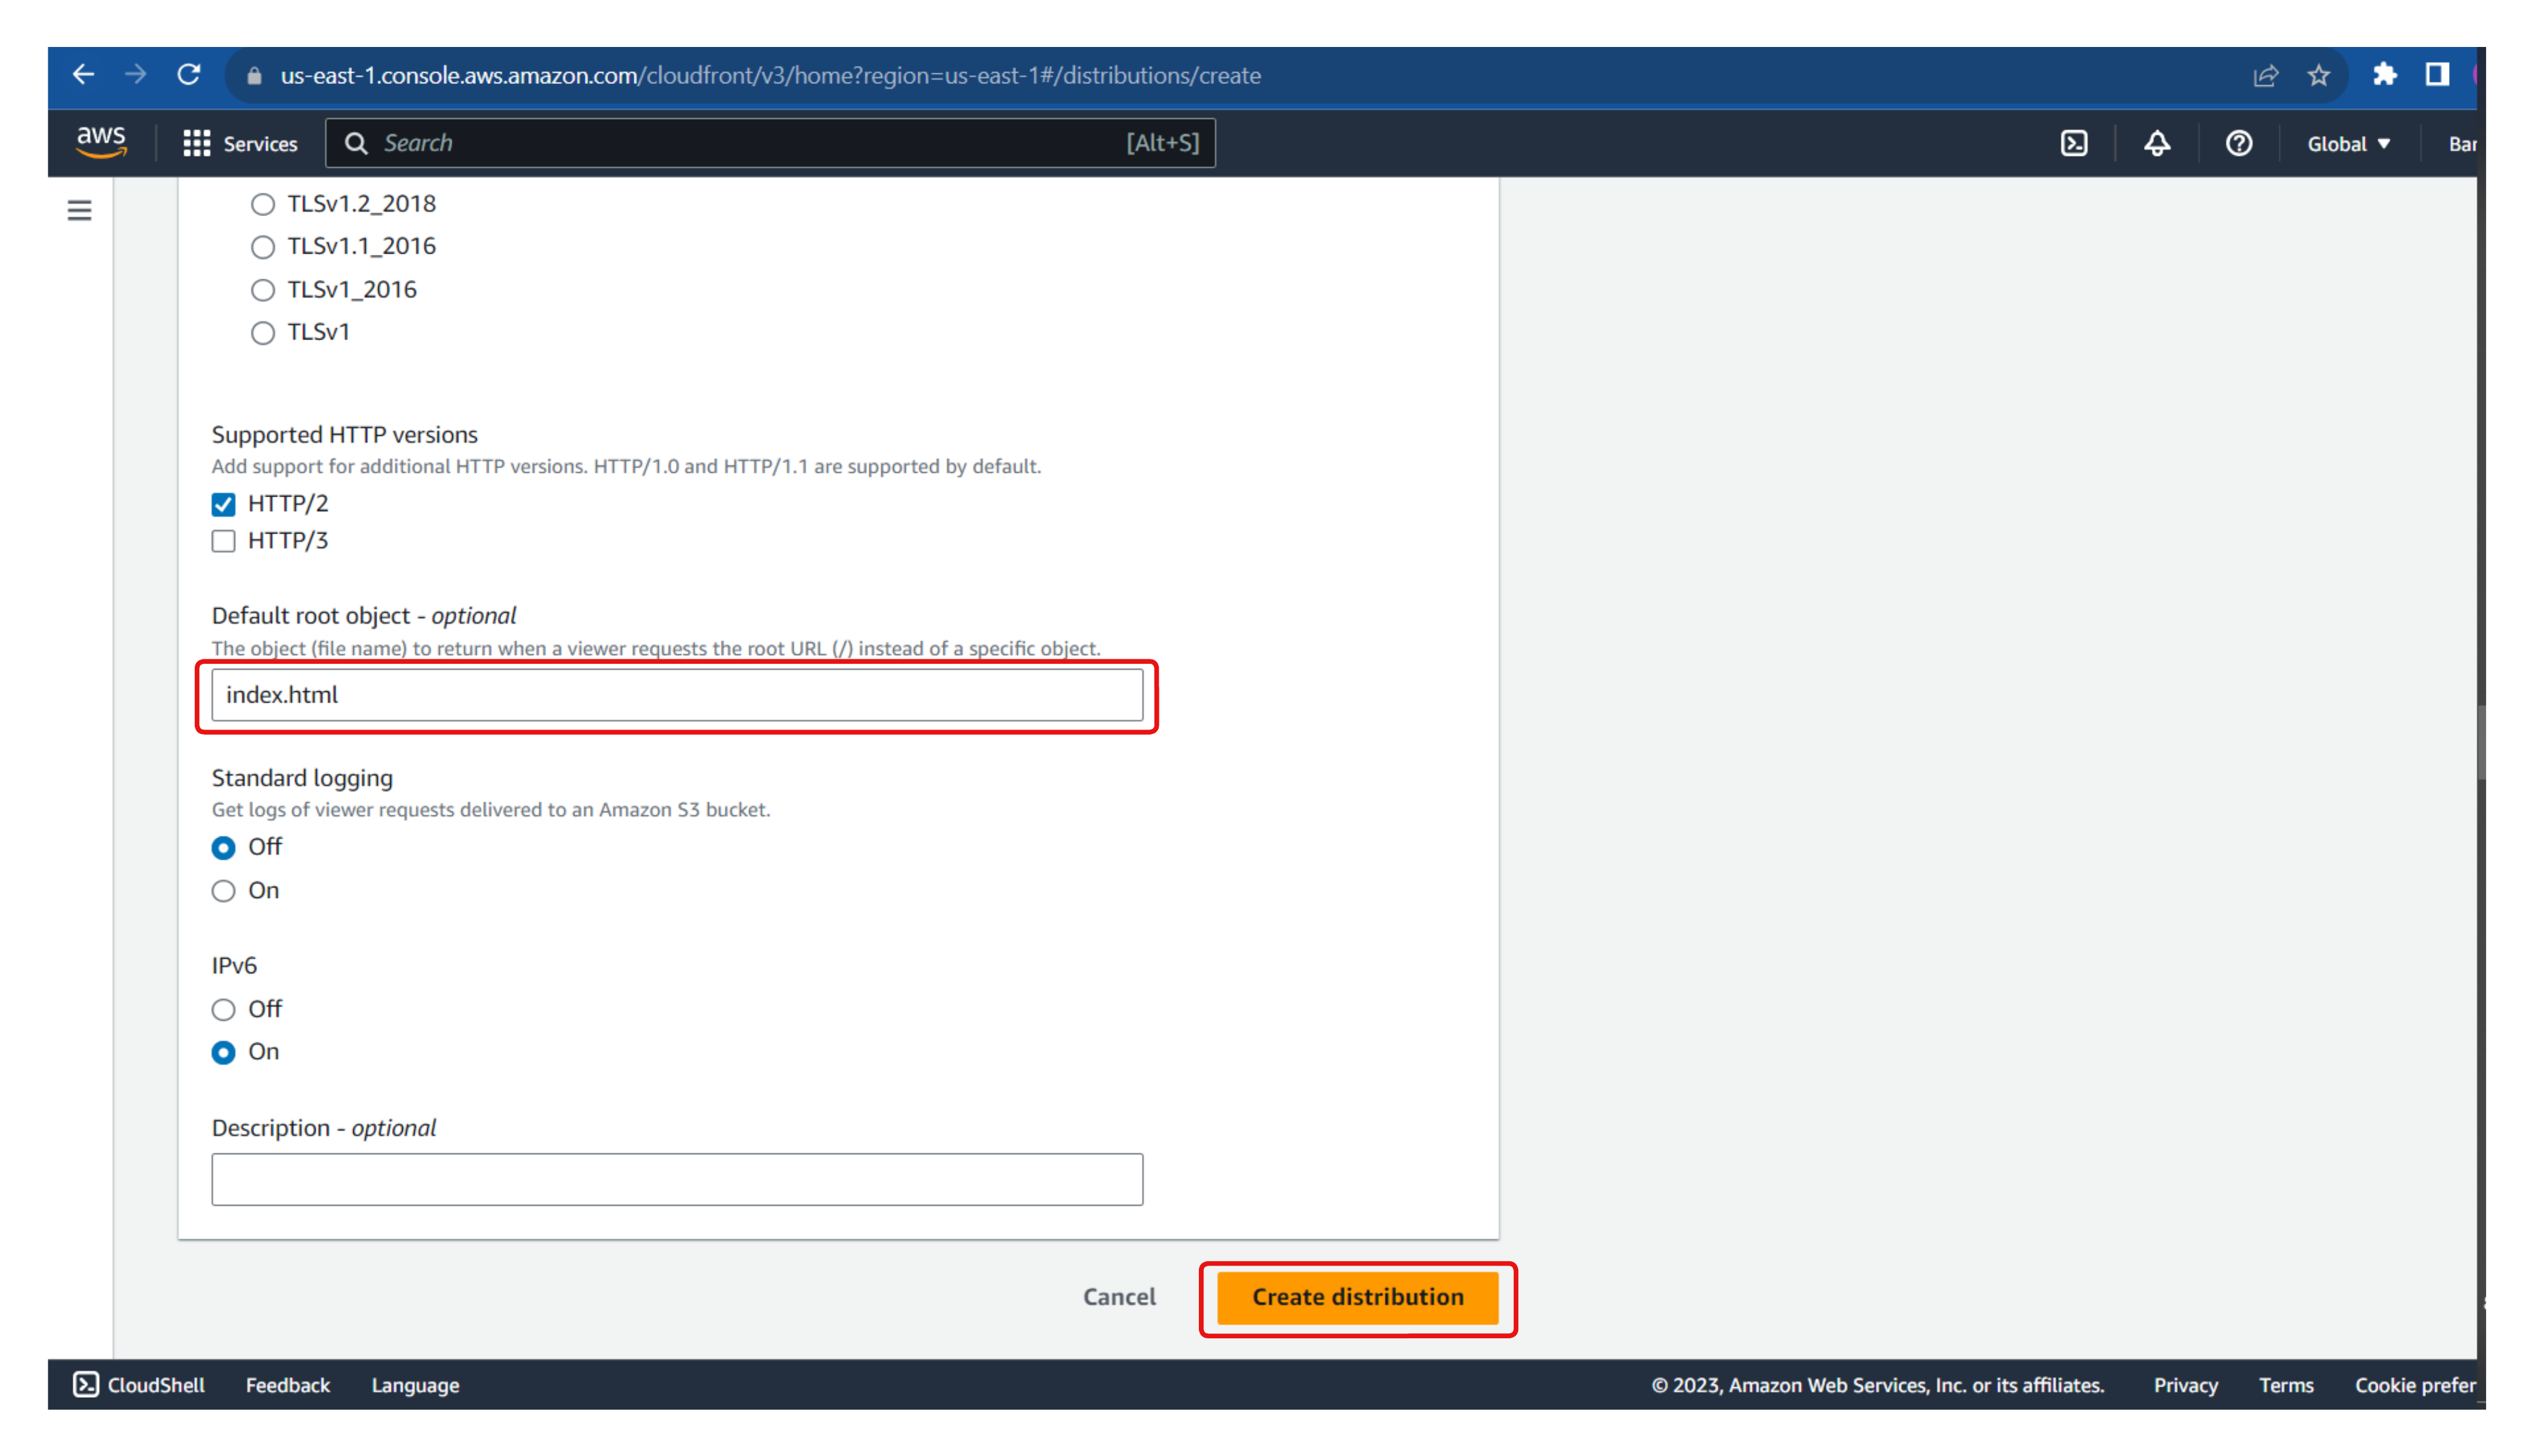
Specify the file name to return when a user requests the root URL (/). In this case, the index.html file was used. Leave the remaining configuration as default and create the distribution.
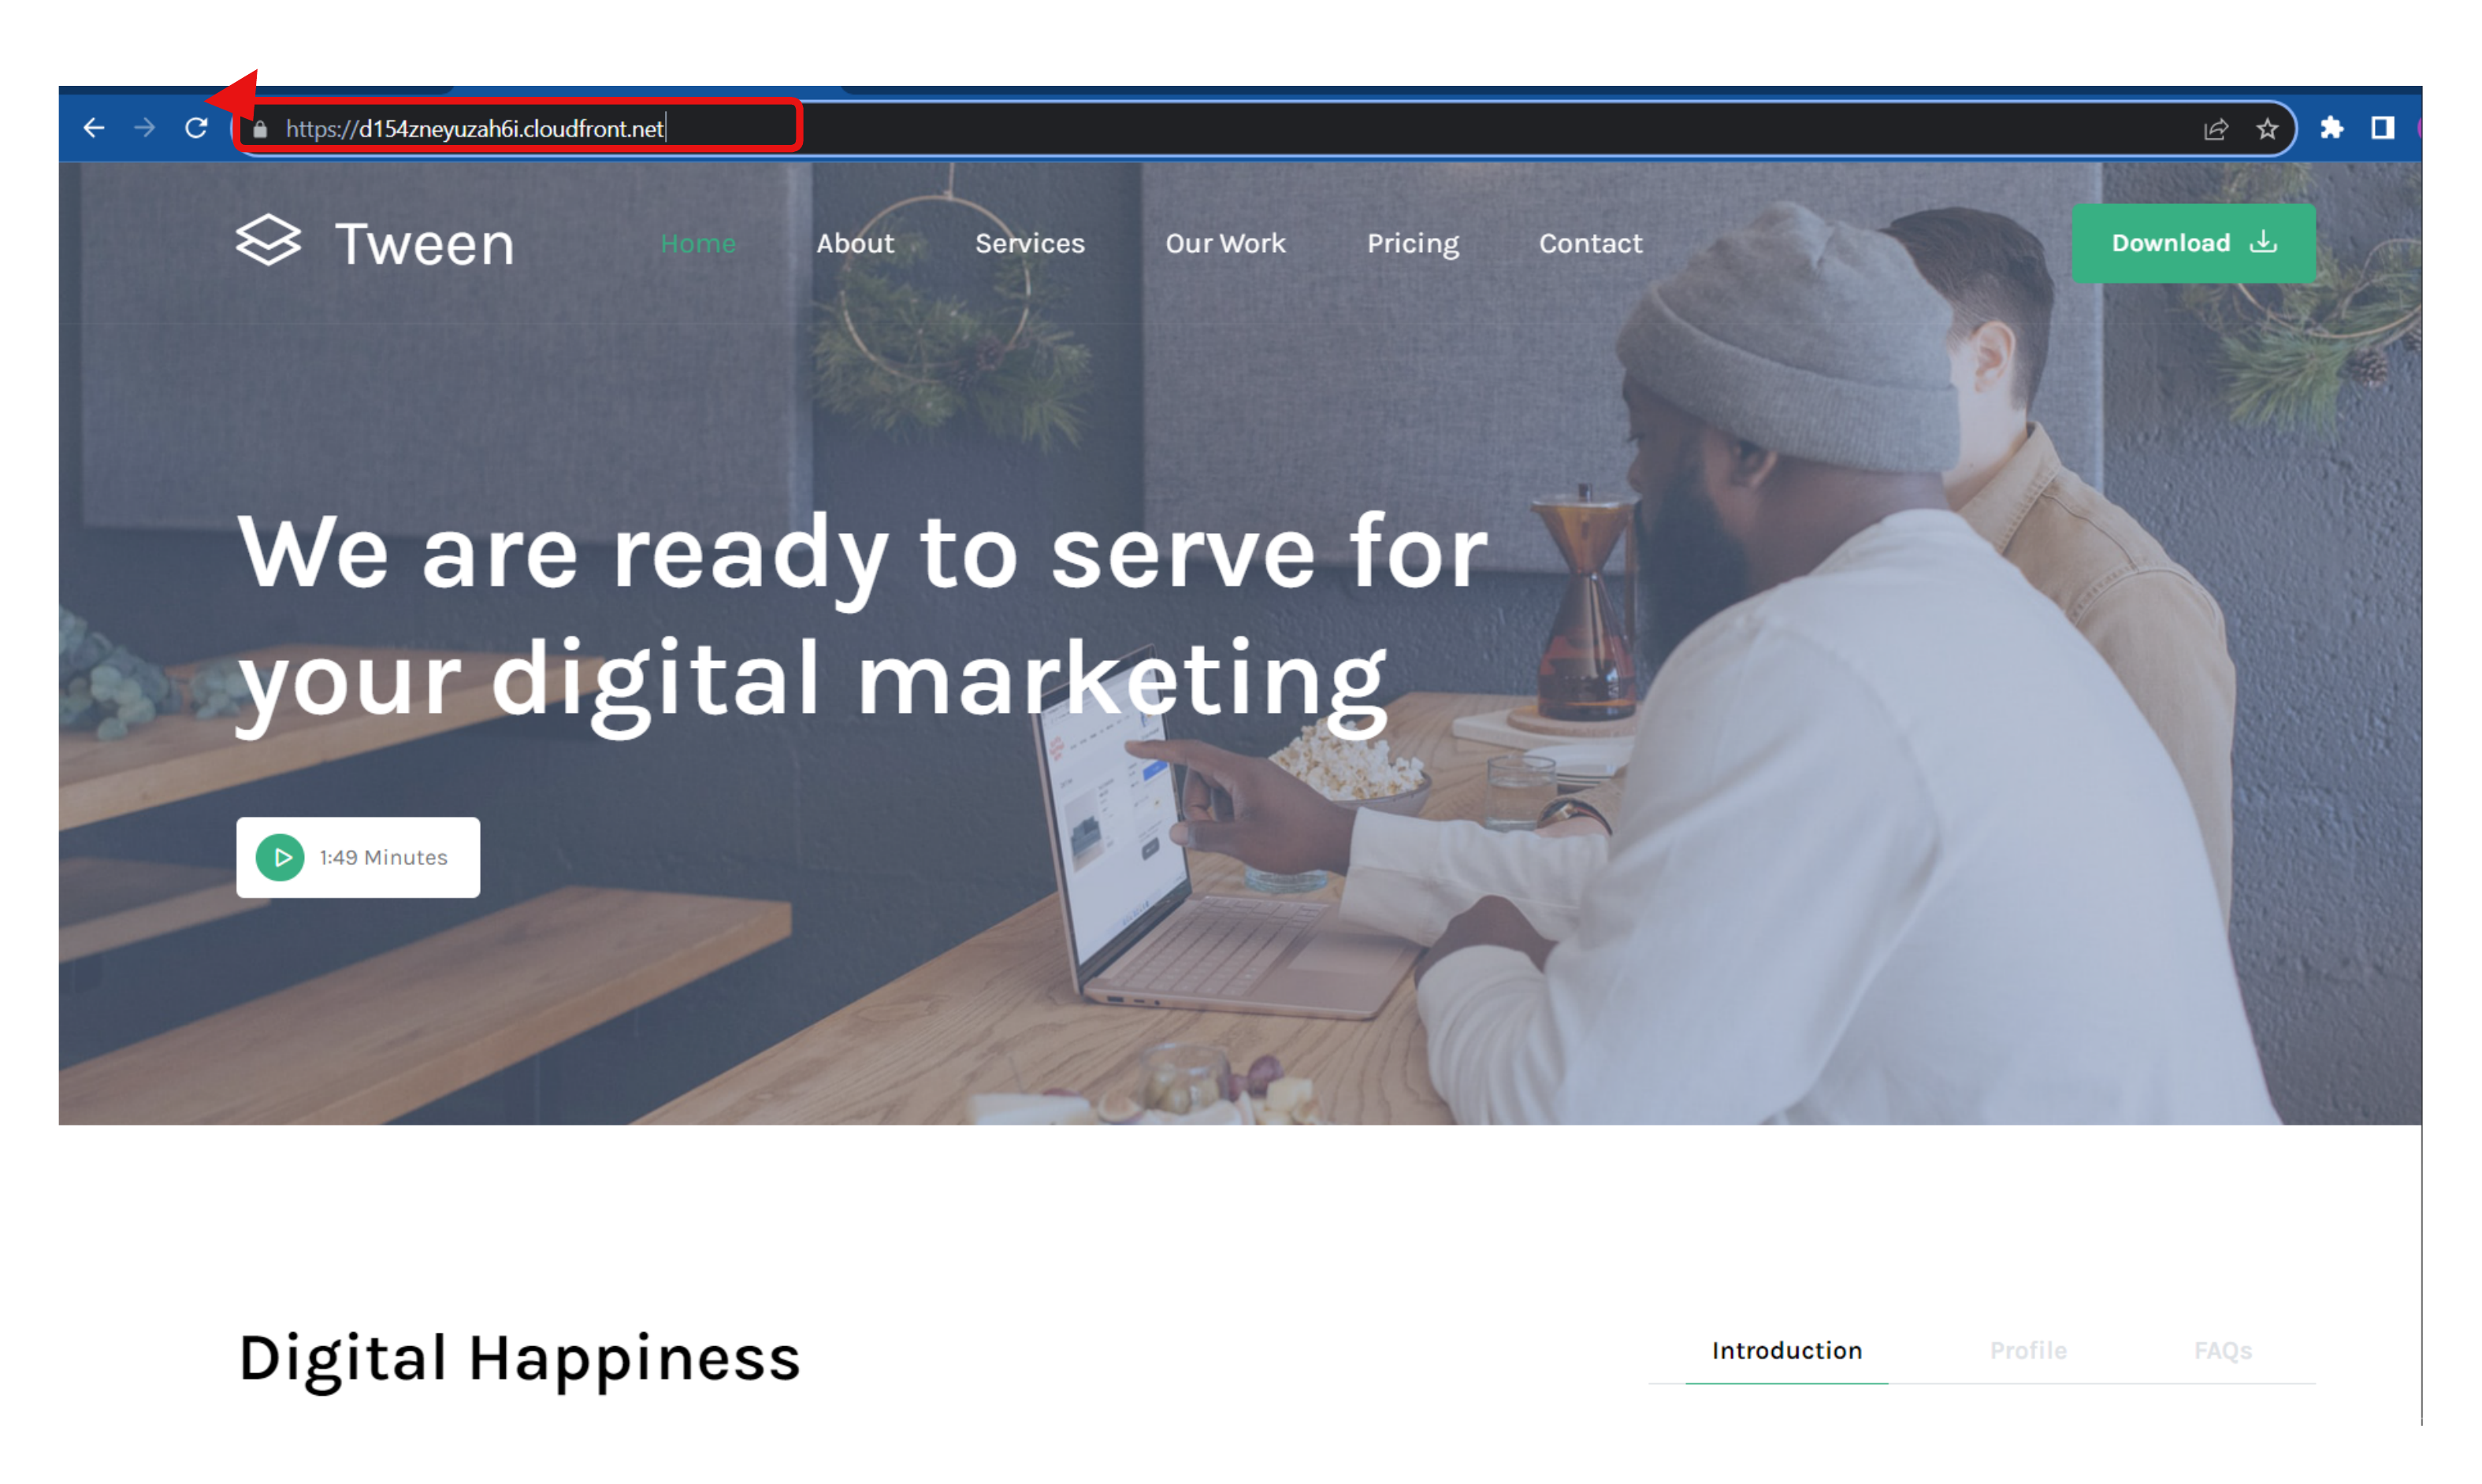
Once the CloudFront distribution has been successfully created, note down the CloudFront distribution domain name as that will be the URL to access the application.
Copy the distribution domain name and paste it in a new tab in a web browser. This takes us to the website, as shown in the image below, and as we can see, the connection is secured due to the SSL certificate, allowing only HTTPS requests.
Configure Custom Domain
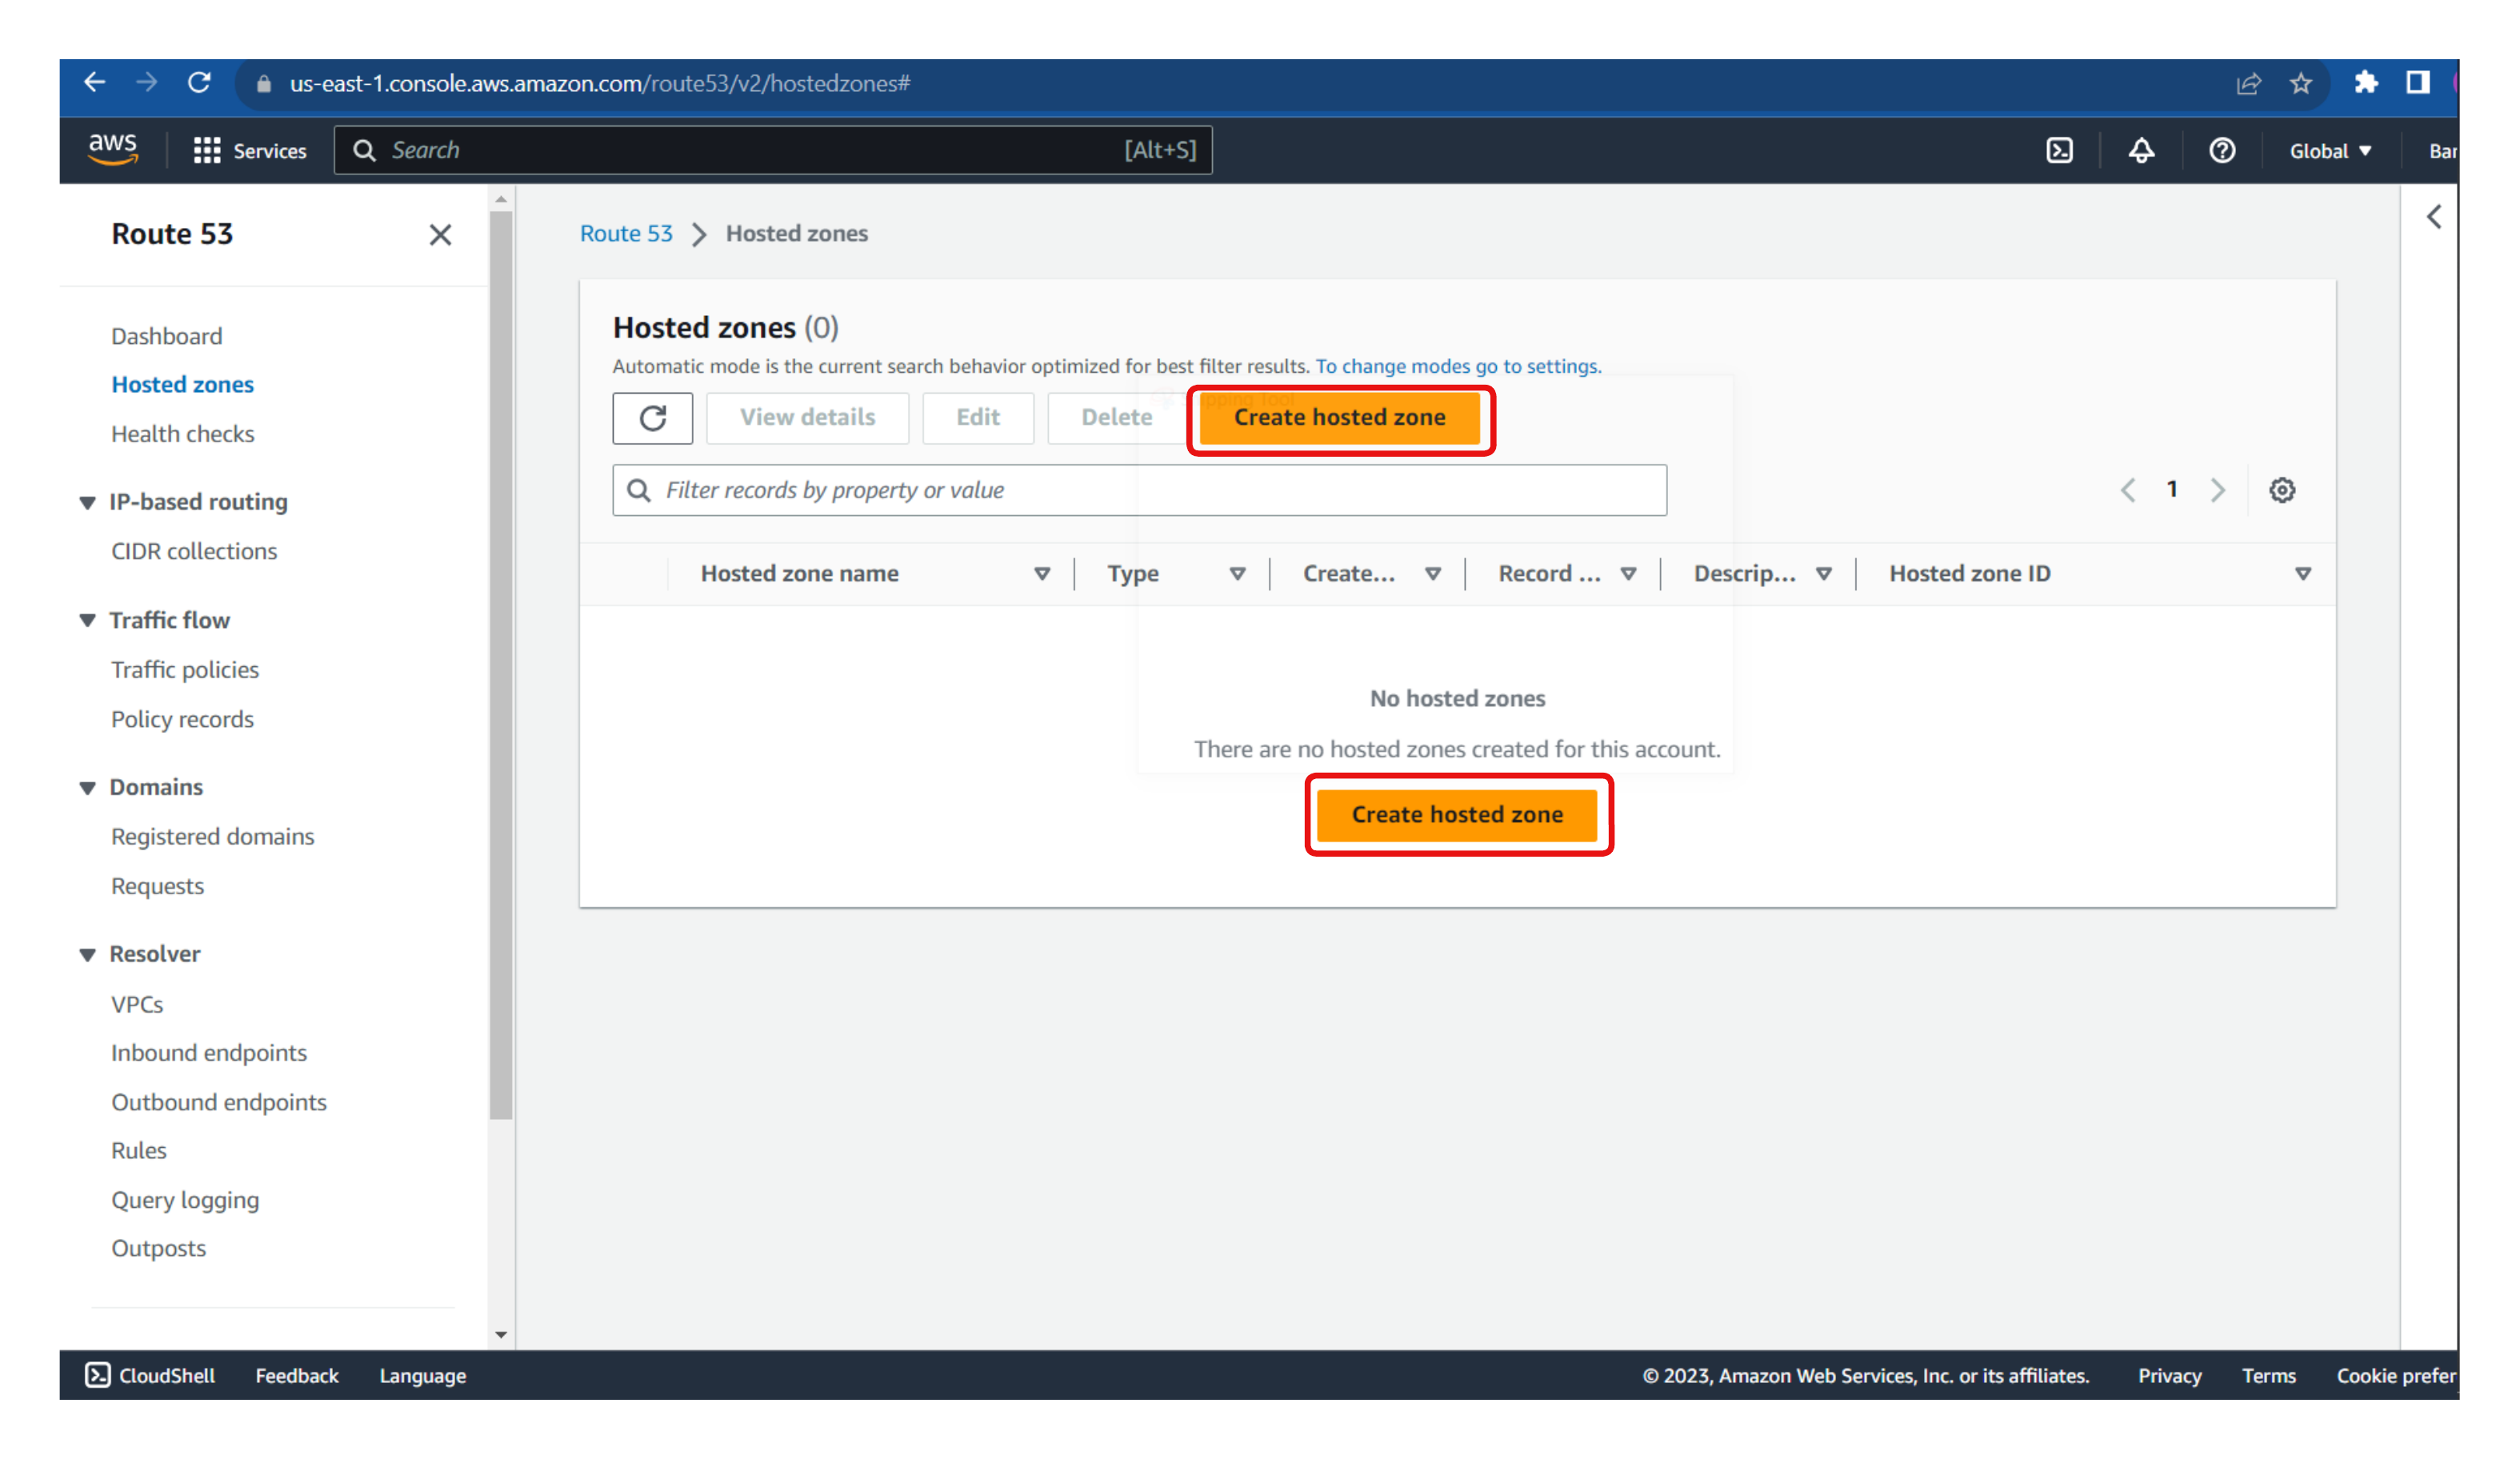
To configure a custom domain, navigate to the Route53 service in the AWS Management Console.
Create a new hosted zone by clicking on "Create hosted zone".
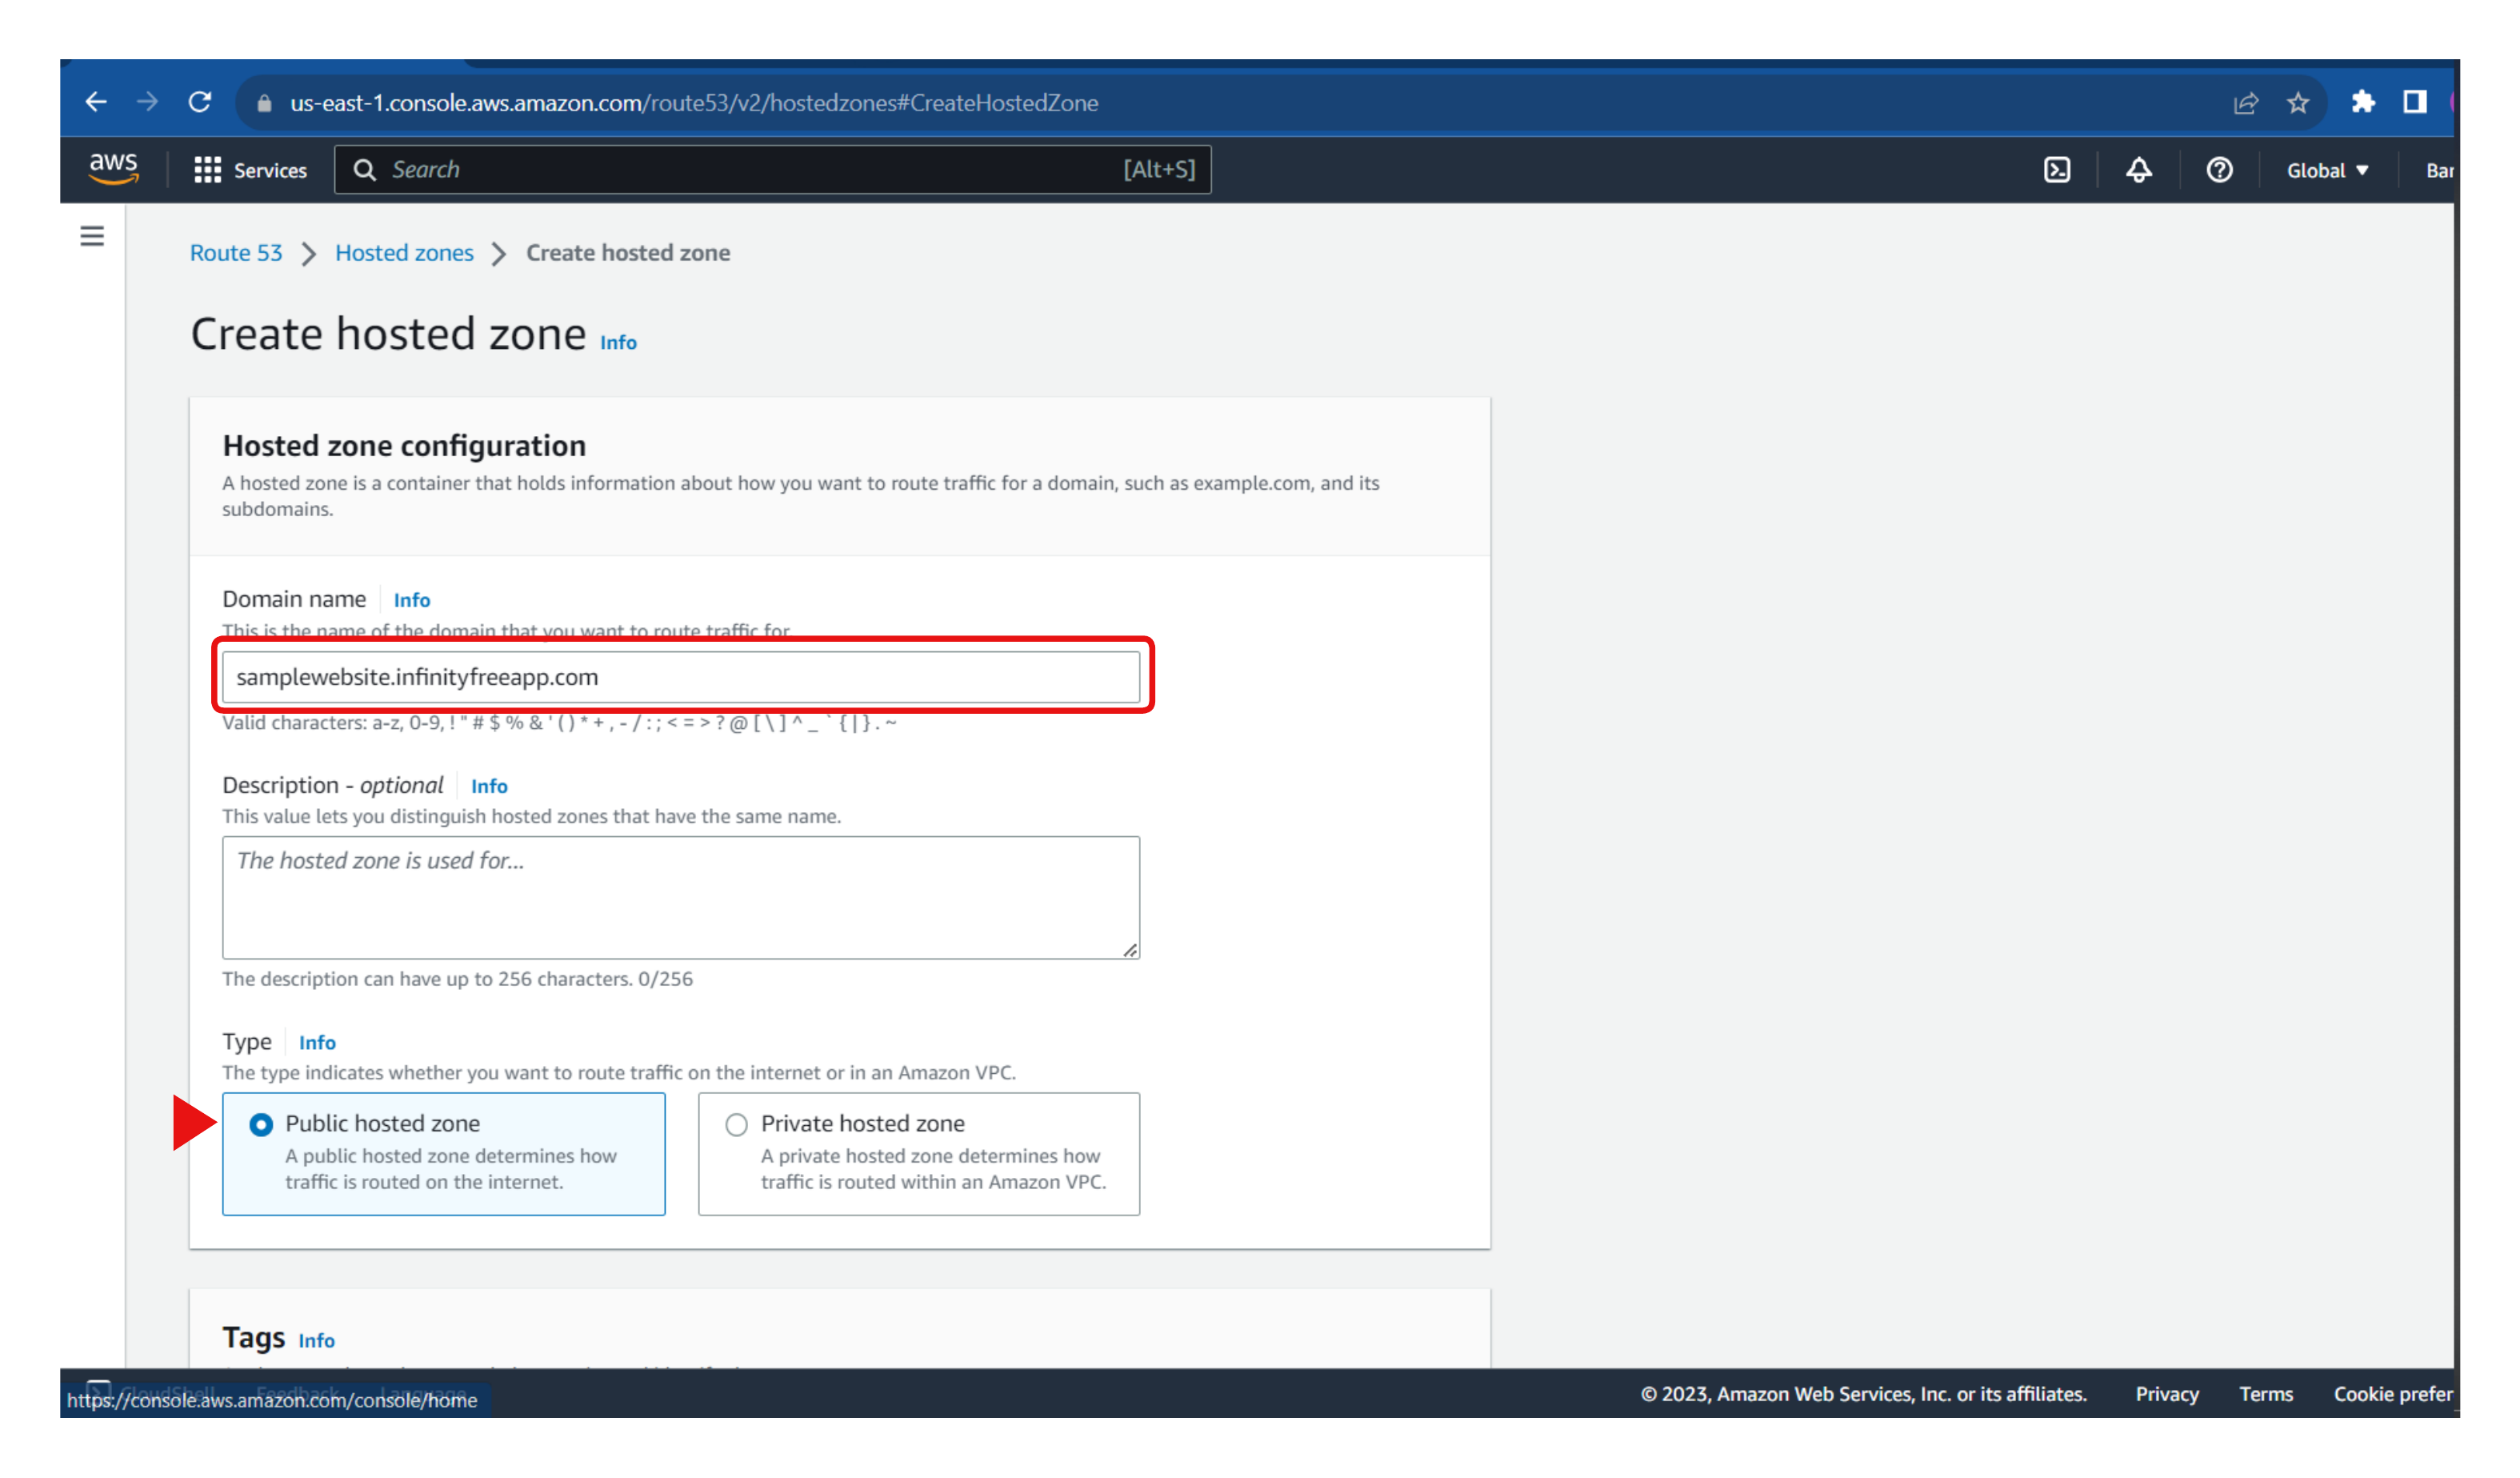
Enter the domain name
Select "Public hosted zone " as the hosted zone type
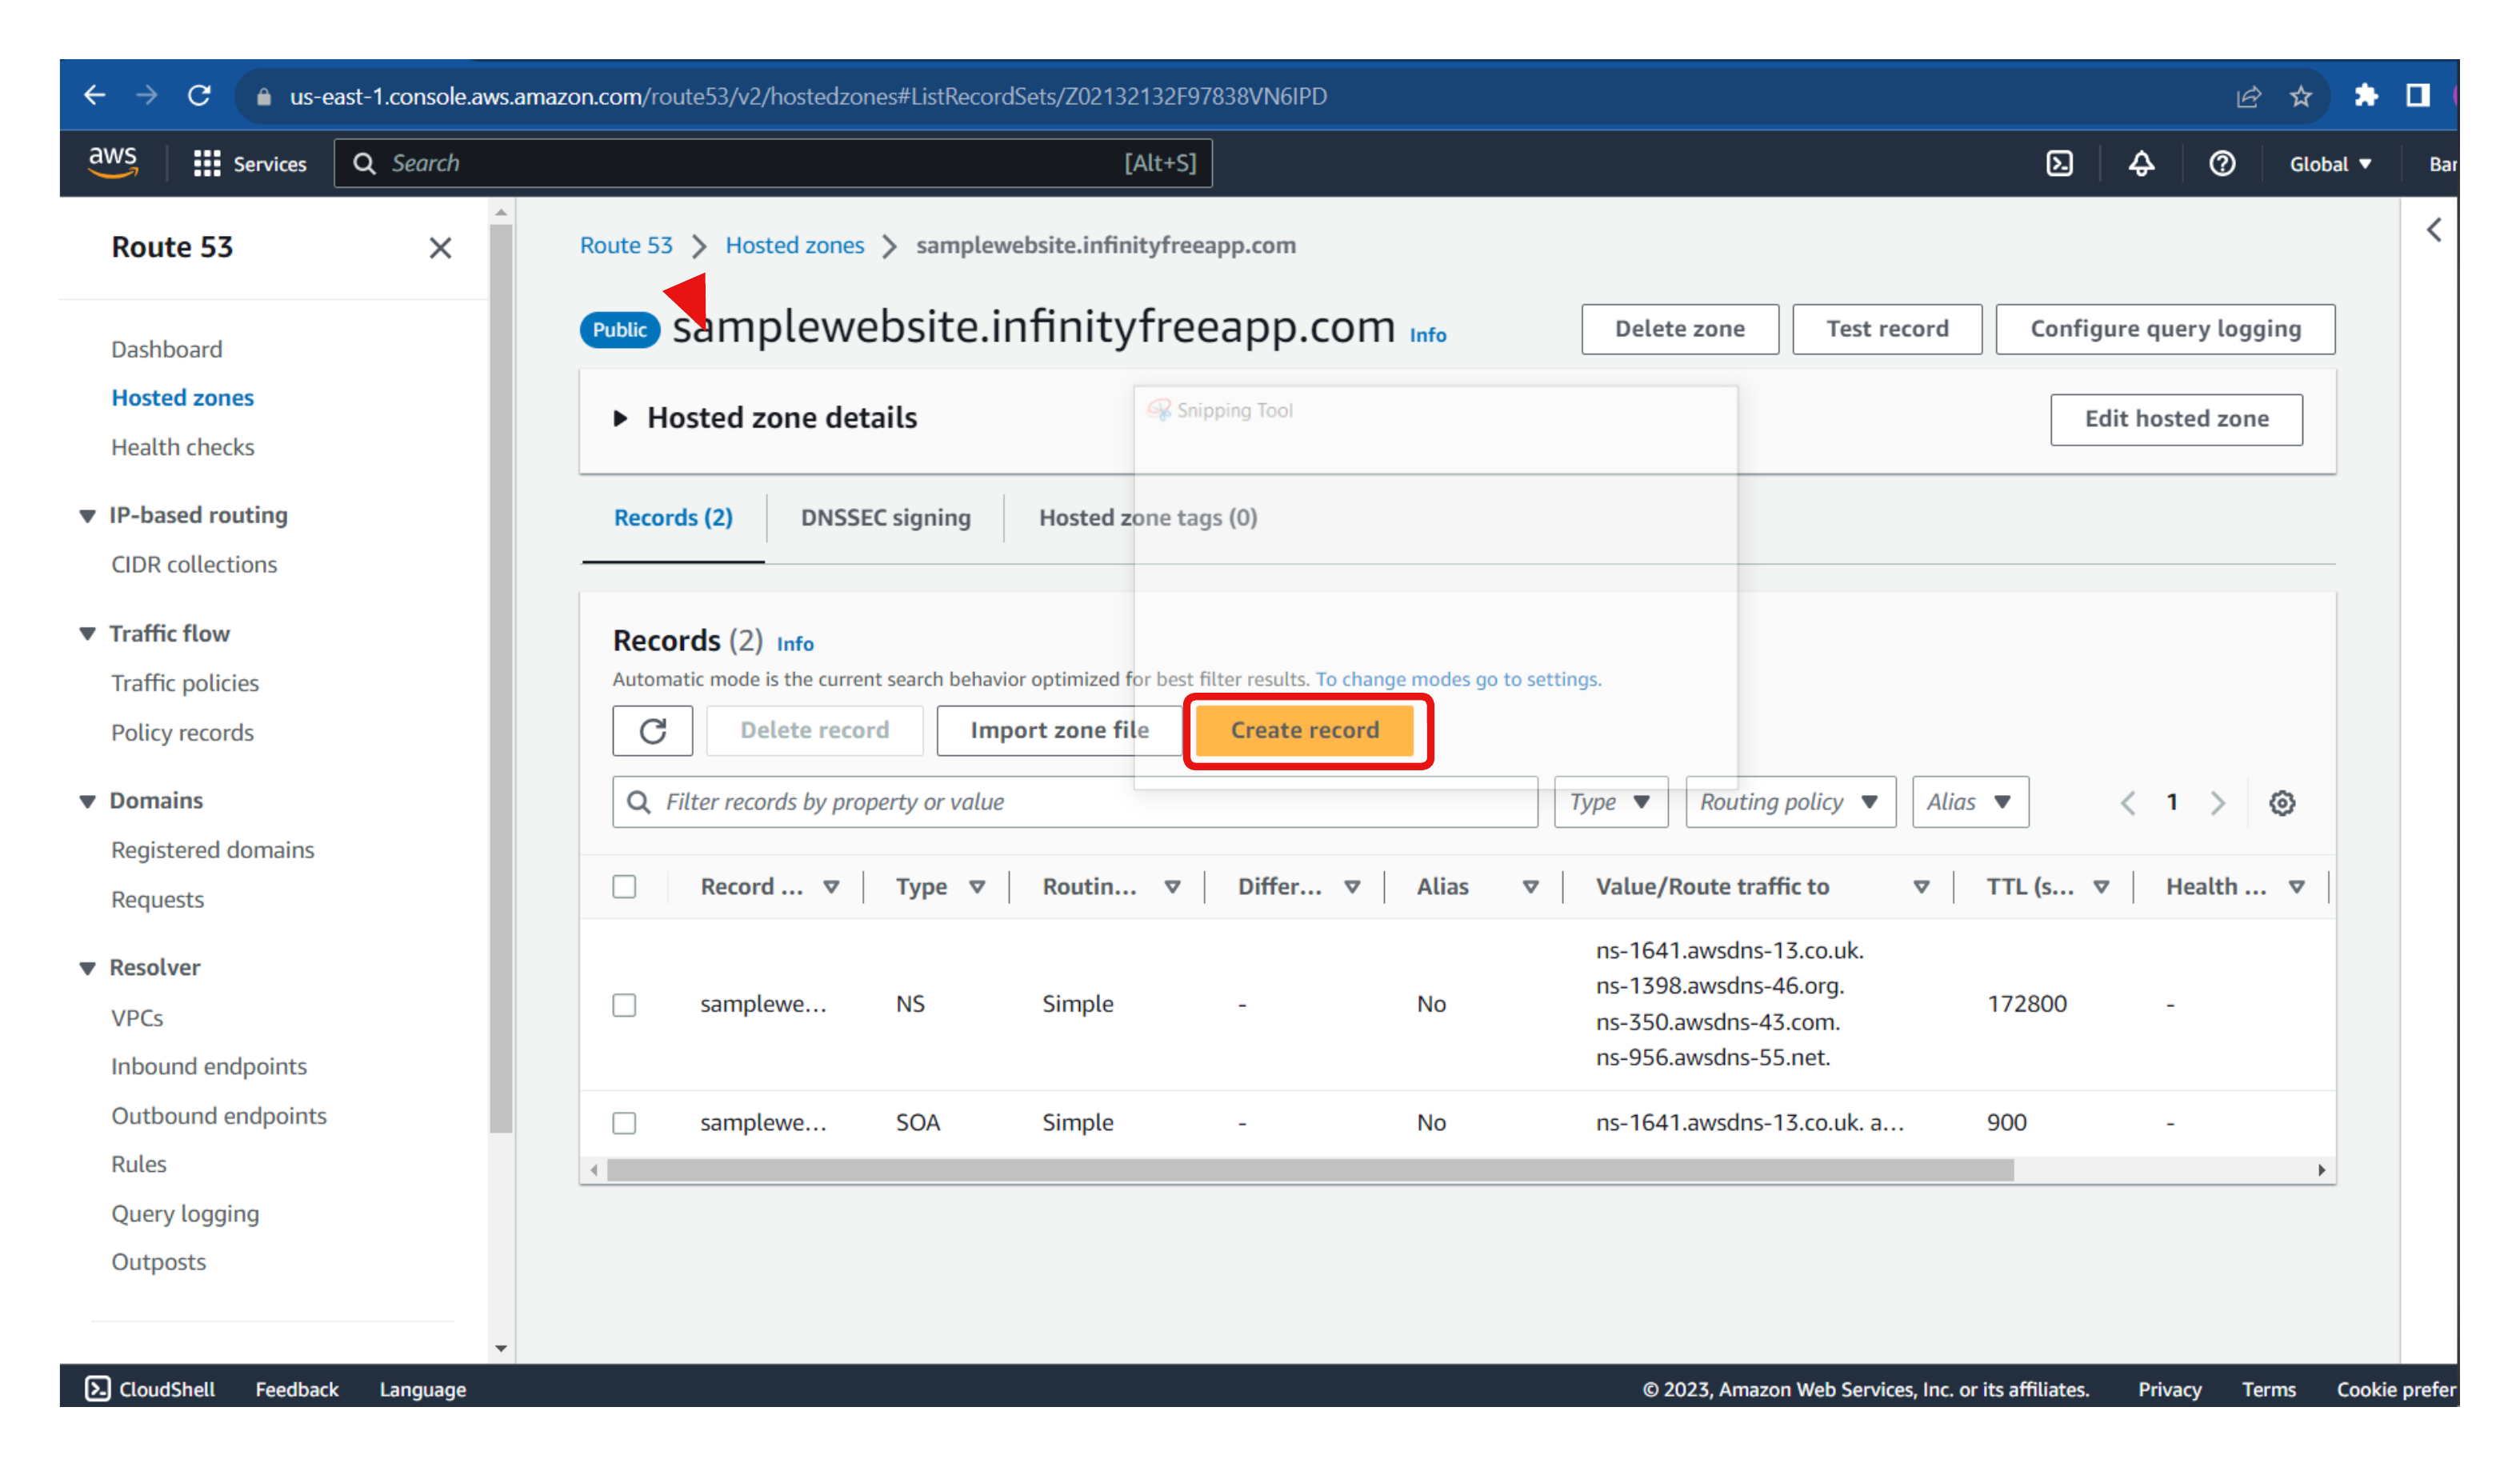
Once the hosted zone has been successfully created, navigate to the newly created hosted zone. By default, two records will come with the hosted zone. However, we will need to create a new record to map our CloudFront distribution domain name to the custom domain.
Click on "Create record" to create a new record.
Enter the record name
💡Make sure it aligns with the alternate domain name that was used during the configuration of the CloudFront distributionSelect the "A" record type
Enable "Alias" and select CloudFront distribution as the alias to route traffic to.
Then select the CloudFront distribution you have created earlier, and go ahead to create the new record.
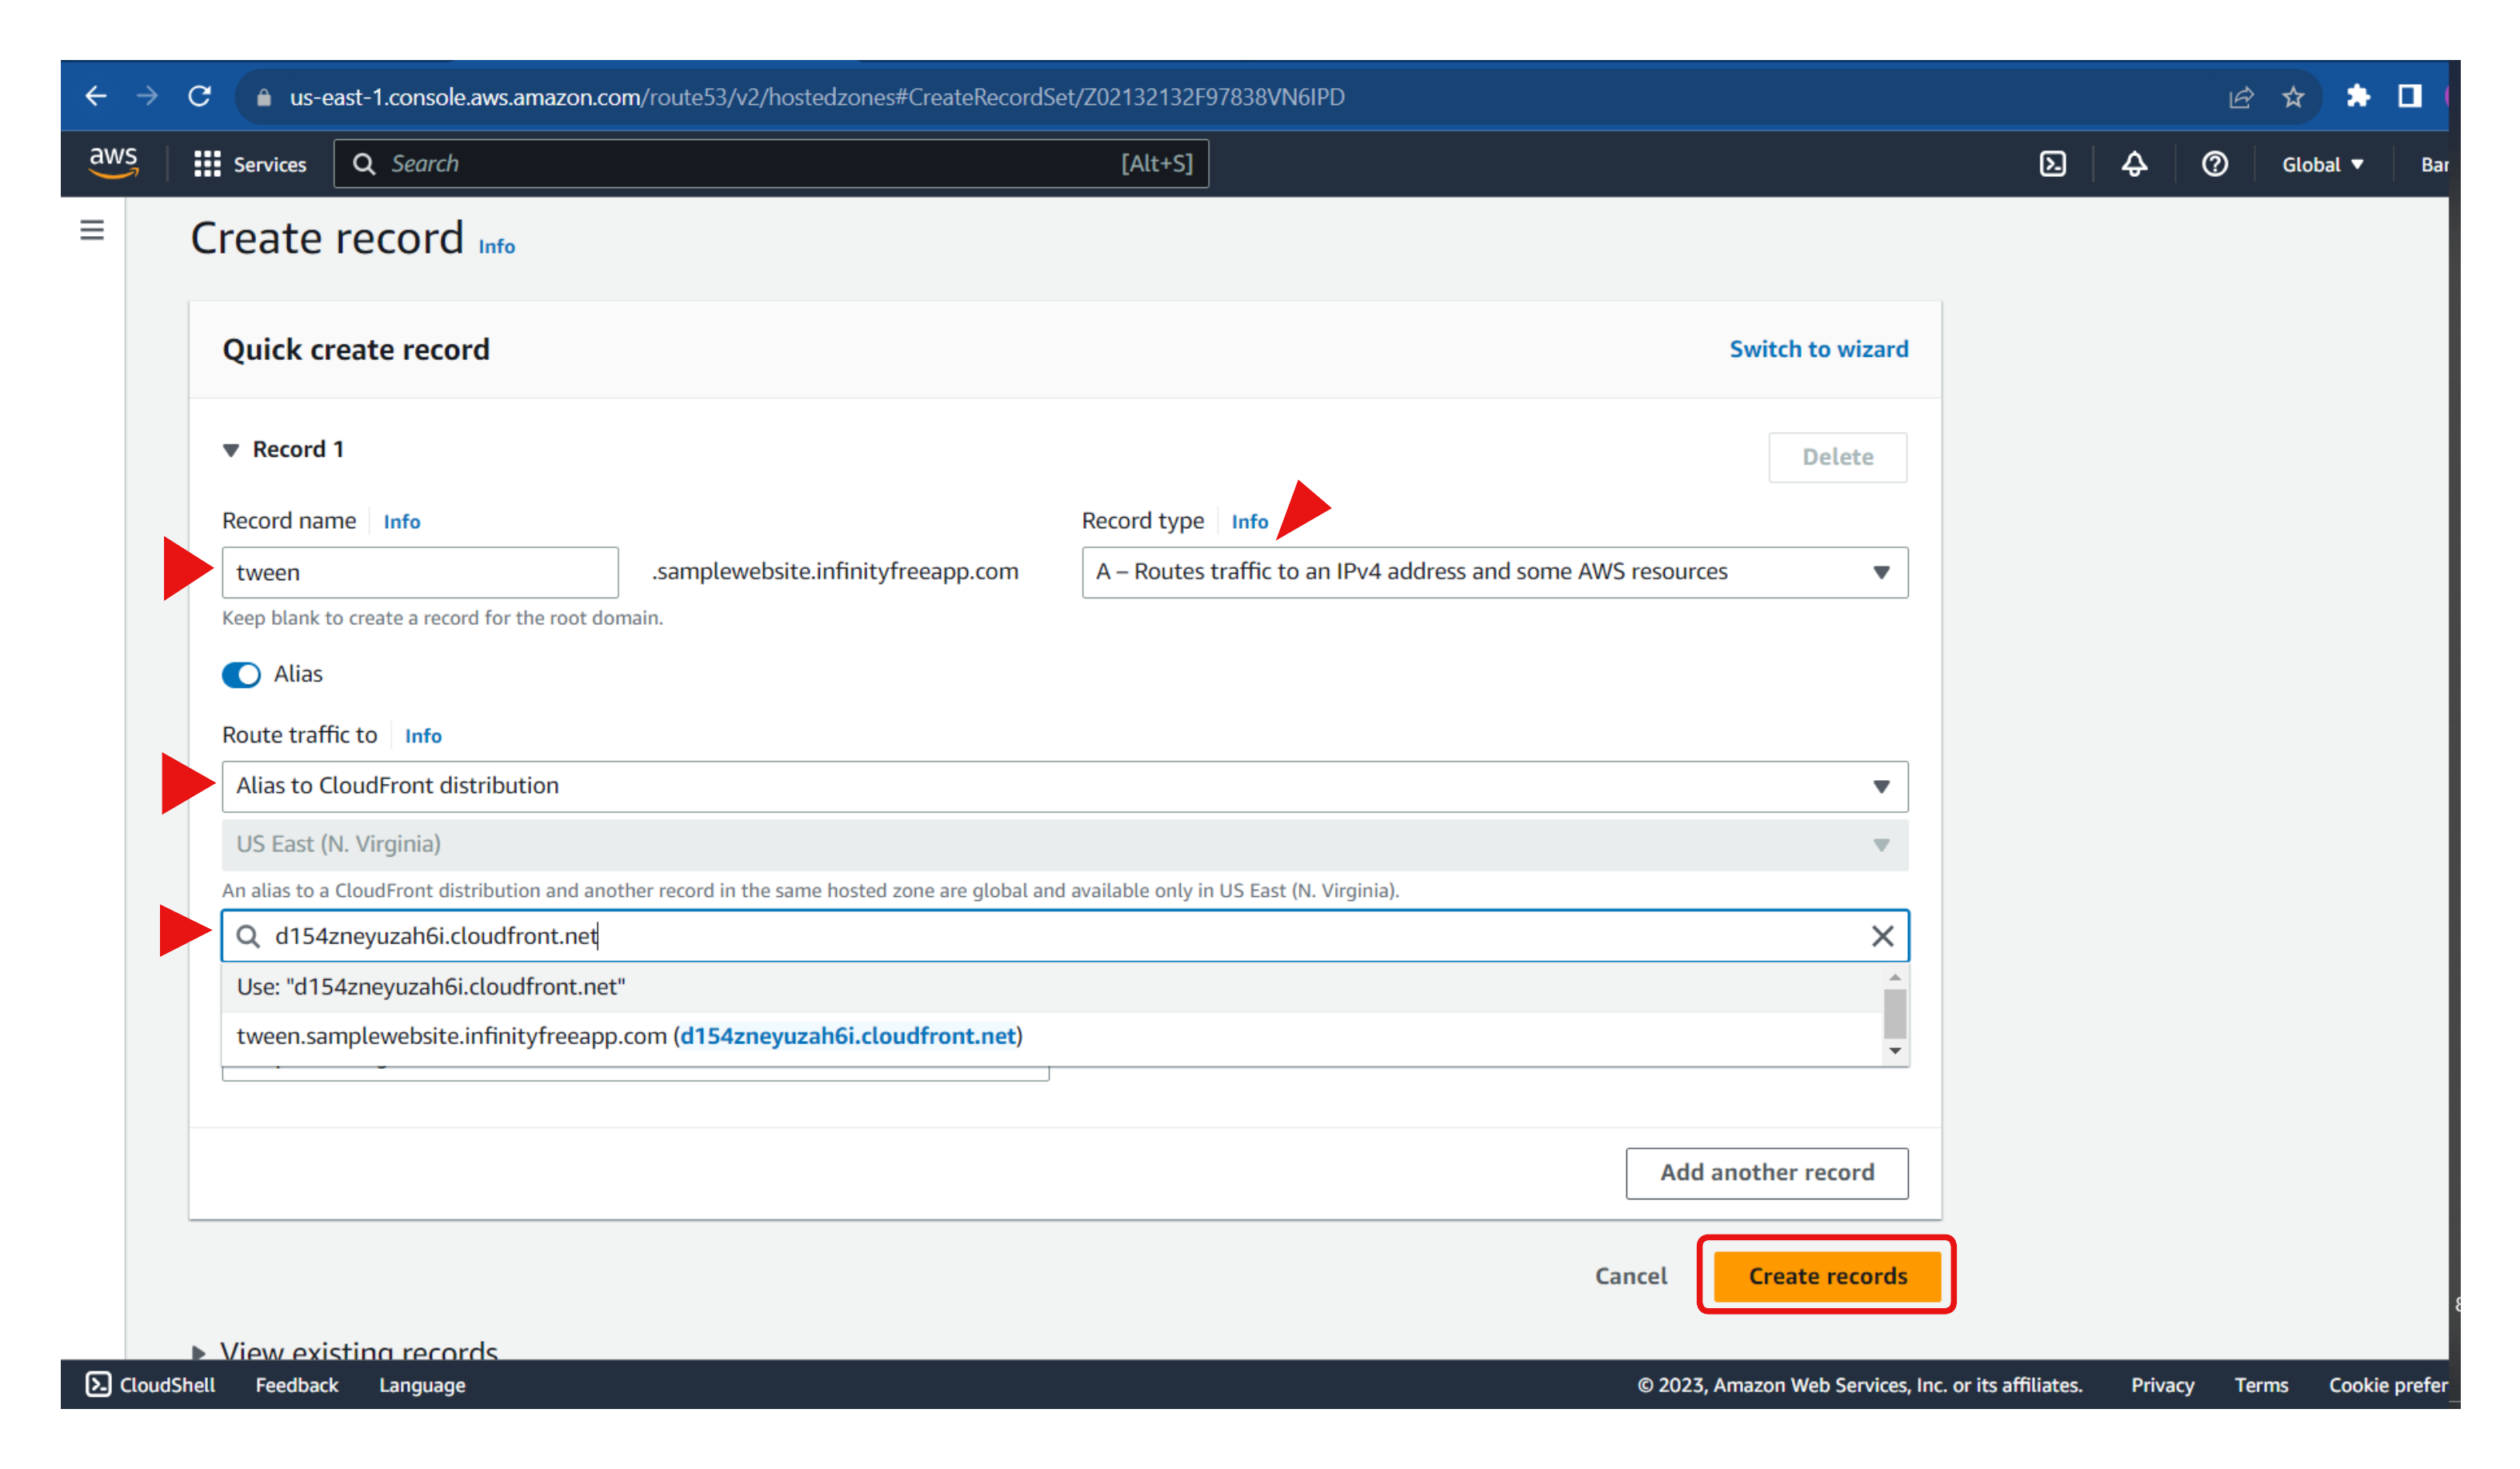
Once the record has been created, the domain name specified can now be used to access the website.
Conclusion
Throughout this article, we explored the step-by-step process of setting up a static website on AWS S3, configuring a CI/CD pipeline using AWS CodePipeline, and enhancing performance with a Content Delivery Network (CDN) using Amazon CloudFront. We also learned how to configure a custom domain using Route53, allowing users to access the website with a personalized URL.
By following these steps, you can create a robust and scalable infrastructure for hosting your static website.
As we have come to the end of this article, if you find it valuable, please consider sharing it with your network. I'd also love to hear your thoughts and comments.
Subscribe to my newsletter
Read articles from Mary A. Ogunmola directly inside your inbox. Subscribe to the newsletter, and don't miss out.
Written by
