Create a blog website using NextJs and Keystatic - Working with Keystatic (Part 2)
 Martin Mwangi
Welcome back to our journey of creating a blog website using Next.js and Keystatic! In Part 1, we laid the foundation by setting up our project and integrating Keystatic. Now, in Part 2, we're going to dive deeper into the Keystatic ecosystem and learn how to work with it to manage and display content on our Next.js front end.
Keystatic Configuration
Every Keystatic project expects an exported config. The config() function can be imported from the @keystatic/core package:
// keystatic.config.ts
import { config } from '@keystatic/core'
export default config({
  // ...
})
Configuration options
Keystatic's config requires at minimum a storage strategy.
It can also define collections and singletons:
// keystatic.config.ts
import { config } from '@keystatic/core'
export default config({
  // Required
  storage: { kind: 'local' },
  // Optional
  collections: {},
  singletons: {}
})
Collections
Picture collections as a way to assemble a bunch of instances of something you hold dear. It's like curating a series of blog posts, your favorite cooking recipes, or heartwarming testimonials from content customers.
Collections find their definition in the collections section of the Keystatic config. Each collection possesses its distinct key and is enveloped within the collection() function.
// keystatic.config.ts
import { config, collection } from '@keystatic/core';

export default config({
  // ...
  collections: {
    posts: collection({
      label: 'Posts',
      slugField: 'author',
      schema: {
        author: fields.slug({ name: { label: 'Author' } }),
        quote: fields.text({ label: 'Quote', multiline: true })
      }
    }),
  },
});
To learn more check out the official documentation
Singletons
When you're after a truly one-of-a-kind data entry, think of scenarios like crafting a dedicated "Settings" page or sculpting a finely-tailored set of fields for the cherished "Homepage" of a website. This is where singletons step in.
// keystatic.config.ts
import { config, singleton } from '@keystatic/core';

export default config({
  // ...
  singletons: {
    settings: singleton({
      label: 'Settings',
      schema: {}
    }),
  },
});
To learn more about singletons check out the official documentation
Another key part of Keystatic that is crucial is the field types. Keystatic has several fields that can be used in different scenarios depending on your use case. To learn about all the fields, I recommend you check here.
Now let's get started setting up Keystatic with a schema we will use for the blog.
Here is the new configuration that meets our requirements.
// keystatic.config.ts
import { config, fields, singleton, collection } from '@keystatic/core'

export default config({
    storage: {
        kind: 'local',
    },
    singletons: {
        homepage: singleton({
            label: 'HomeTitle',
            path: 'src/content/homepage',
            schema: {
                headline: fields.text({ label: 'HomeText' }),
            },
        }),
    },/
    collections: {
        articles: collection({
            slugField: "path",
            label: 'Articles',
            path: 'src/content/collections/articles/*/',
            schema: {
                path: fields.slug({name: {label: 'path'}}),
                title: fields.text({label: 'Title'}),
                cover: fields.image({
                    label: 'Cover Image',
                    directory: 'public/images/avatars',
                    publicPath: '/images/avatars/'
                }),
                date: fields.date({label: 'Date'}),
                text: fields.document({
                    label: 'Text',
                    formatting: true,
                    links: true,
                    dividers: true,
                    tables: true,
                    images: true,
                }),
            }
        }),
    }
})
Let's break down the code:
We first declare that our content will be stored locally. You can also store your content on a Github repository with Keystatic.
storage: {
    kind: 'local',
},
The singletons part represents a single piece of data. For our case the title of the website. You must provide a label and a schema, as well as the format of our data. Our title will be a simple text line in this case. We also specify where our content will be stored.
singletons: {
        homepage: singleton({
            label: 'HomeTitle',
            path: 'src/content/homepage',
            schema: {
                headline: fields.text({ label: 'HomeText' }),
            },
        }),
    },
The next part involves configuring a collection for our articles/blogs. Some properties can be used to define our articles. Each article will have a title, an image to illustrate it, a publication date, and finally a content text. The text options will allow us to include links, tables, images, and so on.
collections: {
        articles: collection({
            slugField: "path",
            label: 'Articles',
            path: 'src/content/collections/articles/*/',
            schema: {
                path: fields.slug({name: {label: 'path'}}),
                title: fields.text({label: 'Title'}),
                cover: fields.image({
                    label: 'Cover Image',
                    directory: 'public/images/avatars',
                    publicPath: '/images/avatars/'
                }),
                date: fields.date({label: 'Date'}),
                text: fields.document({
                    label: 'Text',
                    formatting: true,
                    links: true,
                    dividers: true,
                    tables: true,
                    images: true,
                }),
            }
        }),
    }
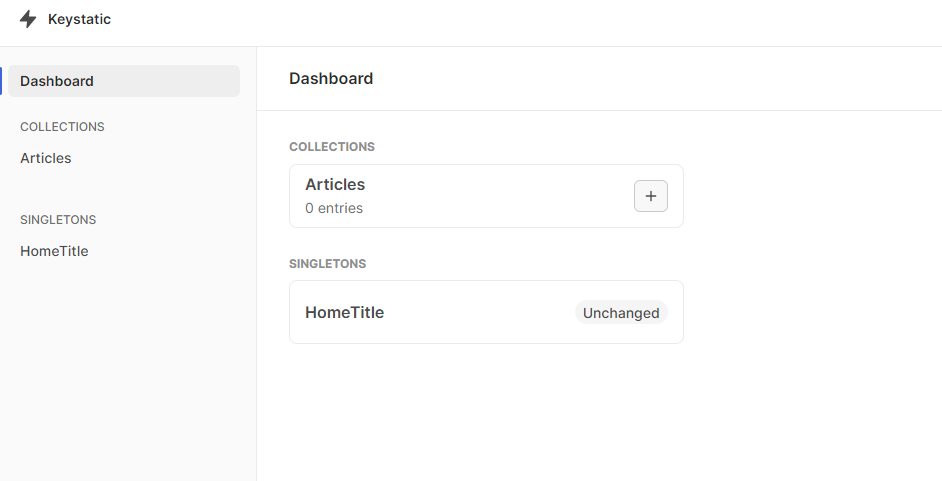
We can now restart our application and visit http://localhost:3000/keystatic to view the new configurations and update the data.
Your dashboard should look like this:

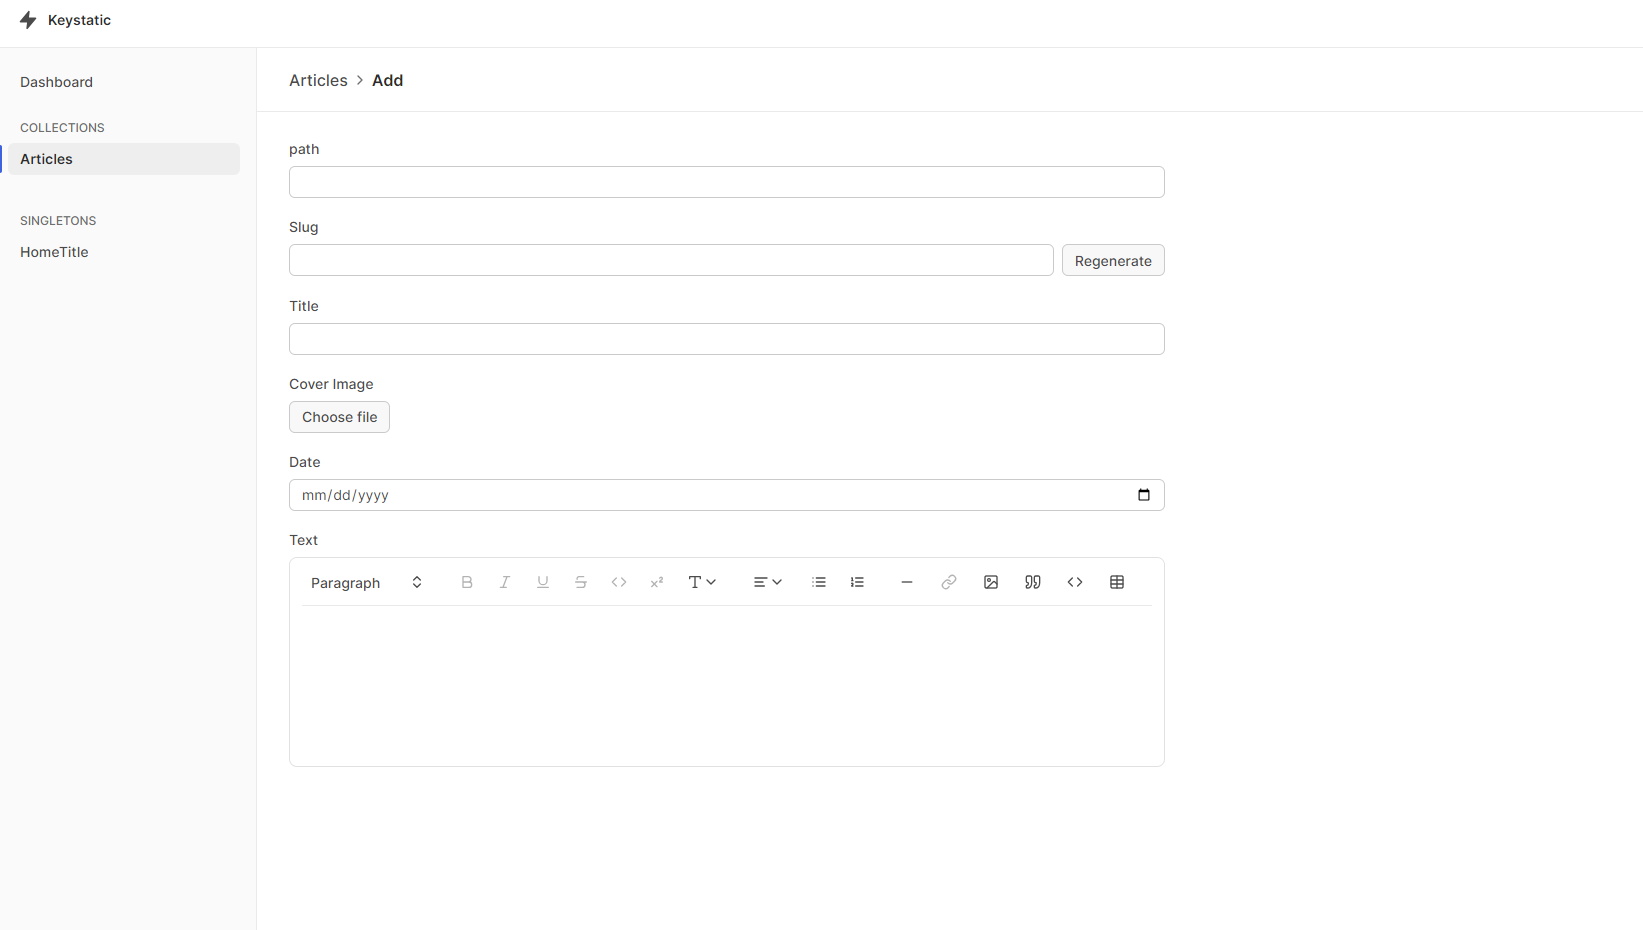
When you click on articles and the add button. You should be presented with a form with all the inputs we configured.

You can go ahead and add several sample articles.
Rendering Keystatic content
To render our content, we can make use of the Keystatic Reader API which must be run server-side.
Displaying a collection list
The following example displays a list of each post title, with a link to an individual post page:
// src/app/page.tsx
import { createReader } from '@keystatic/core/reader';
import keystaticConfig from '../../keystatic.config';

import Link from 'next/link';

// 1. Create a reader
const reader = createReader(process.cwd(), keystaticConfig);

export default async function Page() {
  // 2. Read the "articles" collection
  const articles = await reader.collections.articles.all();
  return (
    <div className="max-w-[1200px] mx-auto p-4">
      <ul className="">
        {articles.map(article => (
          <li>
            <Link className="shadow block w-[300px] p-4" href={`/${article.slug}`}>{article.entry.title}</Link>
          </li>
        ))}
      </ul>
    </div>
  );
}
Displaying a single collection entry
To display content from an individual post, you can import and use Keystatic's <DocumentRenderer />:
// src/app/[slug]/page.tsx
import { createReader } from '@keystatic/core/reader';
import { DocumentRenderer } from "@keystatic/core/renderer";
import Image from "next/image";
import { notFound } from "next/navigation";
import keystaticConfig from "../../../keystatic.config";

const reader = createReader(process.cwd(), keystaticConfig);

const page = async ({ params }: { params: { slug: string; }; }) => {
    const article = await reader.collections.articles.read(params?.slug);
    if (!article) return notFound();

    return (
        <div className="max-w-[900px] mx-auto py-8">
            <h1 className="text-3xl font-bold">{article.title}</h1>

            {article.cover &&
                <Image
                    width={300}
                    height={300}
                    alt="Cover Image"
                    src={article.cover + ""}
                    className="!w-full mt-5 rounded-lg"
                />
            }

            <div className="mt-6">
                <DocumentRenderer document={await article.text()} />
            </div>
        </div>
    );
};

export default page;
Now, a quick breakdown on what's happening in this code:
We're creating a Keystatic Reader, which acts as our connection to the Keystatic content management system.
This code handles dynamic content pages. These pages are designed to display articles or content based on the slug provided in the URL. Slugs are typically a part of the URL used to identify specific pieces of content.
Inside the
pagefunction, we attempt to retrieve an article from the Keystatic collections based on the slug provided in the URL.If no article is found with the given slug, the code returns a "not found" response, indicating that the requested content isn't available.
If an article is found, the code renders it on the web page. This includes displaying the article's title, cover image (if available), and text content.
The
DocumentRenderercomponent is used to ensure that the article's text content is properly formatted and displayed.
Now this is all we need to cover about working with Keystatic and displaying content in Nextjs marking the end of Part 2 of this series.
Resources:
https://github.com/marville001/nextjs-keystatic-blog
If you would like to see the complete app with styling, please leave a comment and I will share the link.

Keep coding :)
🤖
Subscribe to my newsletter
Read articles from Martin Mwangi directly inside your inbox. Subscribe to the newsletter, and don't miss out.
Written by

Martin Mwangi
Martin Mwangi
Hello, World :). I am Martin, a software developer. I am passionate about web development and my favorite stack is React.js and Node.js. When I am not coding I love reading books, and articles and exploring the internet (mostly dribbble).