How to Install OsmoBTS
 RFS
RFS
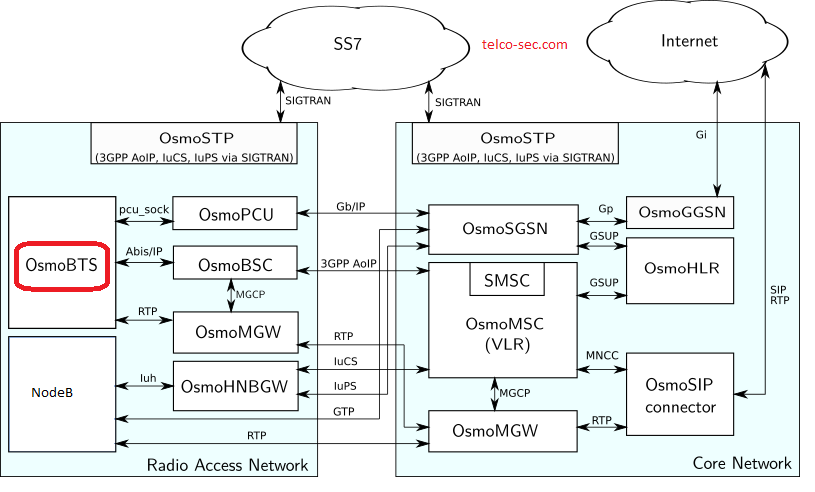
OsmoBTS is an open-source software package that allows you to build and deploy a complete GSM Base Transceiver Station.
In this blog post, we will show you how to get your OsmoBTS up and running in no time, so you can start using it right away. First, we will configure our machine and then install OsmoBTS.
Read on to learn the easy steps for setting up OsmoBTS on your system.
| Software | Download |
| Debian 12.1.0 | |
| VMWare WorkStation Pro 17 | |
| OsmoBTS | |
| OsmoBTS Virtual | |
| RFS VM OsmoBTS.ova |
rfs@bts01:~$ uname -a

Basic Machine Config
Install some packages
root# apt install -y sudo git curl vim locate
Add user to Sudo Group
usermod -a -G sudo rfs
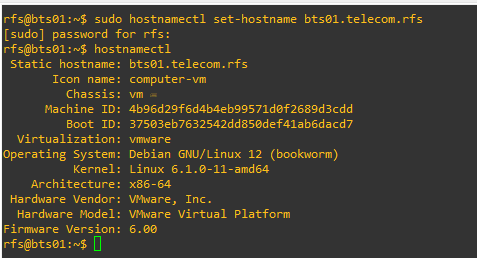
Define hostname
sudo hostnamectl set-hostname bts01.telecom.rfs
Add hostname to Hosts file
sudo vim /etc/hosts

Networking
Local services
| IP | Port | Service |
| 10.20.20.10 | 4729 | OsmoBTS Virtual |
| 127.0.0.1 | 4241 | OsmoBTS Console |
Network Devices
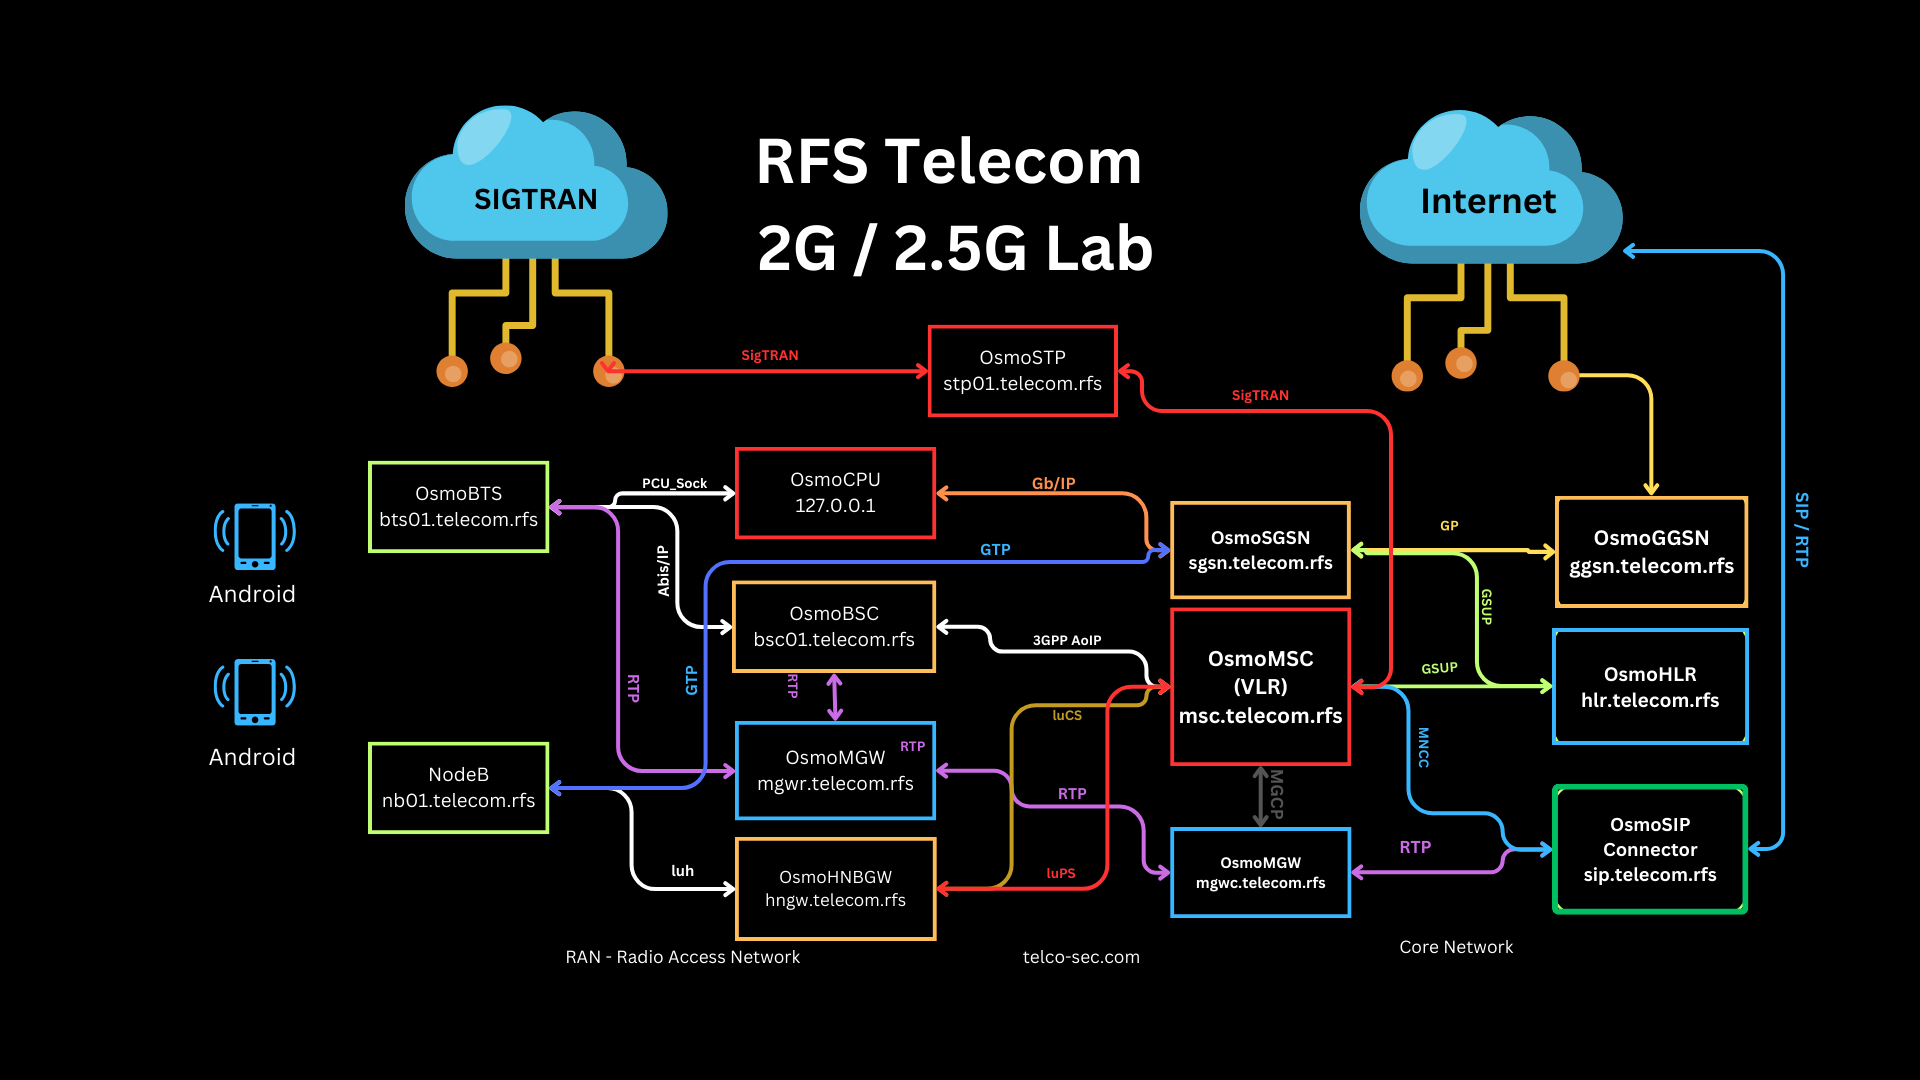
| IP | Machine | Hostname |
| 10.20.20.10 | BTS01 | bts01.telecom.rfs |
| 10.20.20.21 | BSC01 | bsc01.telecom.rfs |
| 10.20.20.22 | MGW | mgw.telecom.rfs |
| 10.20.20.23 | STP01 | stp01.telecom.rfs |
| 10.20.20.24 | MSC | msc.telecom.rfs |
| 10.20.20.25 | HLR | hlr.telecom.rfs |
| 10.20.20.26 | SGSN | sgsn.telecom.rfs |
| 10.20.20.27 | GGSN | ggsn.telecom.rfs |
| 10.20.20.28 | SIP Connector | sip.telecom.rfs |
sudo vim /etc/network/interfaces
auto ens33
iface ens33 inet static
  address 10.20.20.21
  netmask 255.255.255.0
  gateway 10.20.20.1
  dns-nameservers 10.20.20.5
  dns-nameservers 8.8.8.8
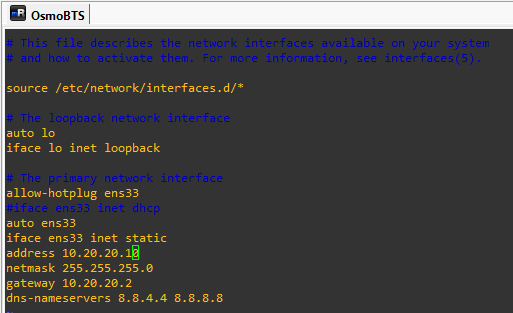
Define DNS Server
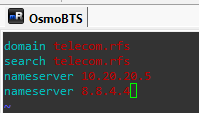
sudo vim /etc/resolv.conf

nameserver 10.20.20.5
nameserver 8.8.4.4
sudo systemctl restart networking.service
sudo systemctl status networking.service
sudo systemctl daemon-reload
Configure GRUB
sudo vim /etc/default/grub
GRUB_TIMEOUT_STYLE=hidden
GRUB_TIMEOUT = 0
sudo update-grub
Install OsmoBTS
sudo apt-get install -y osmo-bts*
sudo systemctl start osmo-bts
sudo systemctl status osmo-bts
sudo systemctl enable osmo-bts
telnet localhost 4241
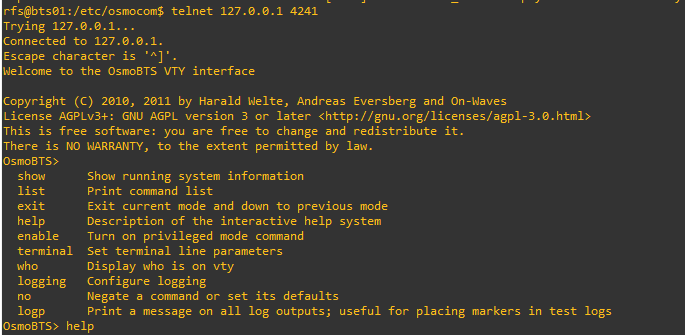
Troubleshoot OsmoBTS Service
journalctl -xeu osmo-bts.service
sudo systemctl status osmo-bts
OsmoBTS Parameters
rfs@bts01:/etc/osmocom$ /usr/bin/osmo-bts-trx -h
Some useful options:
  -h    --help                  this text
  -d    --debug MASK            Enable debugging (e.g. -d DRSL:DOML:DLAPDM)
  -D    --daemonize             For the process into a background daemon
  -c    --config-file           Specify the filename of the config file
  -s    --disable-color         Don't use colors in stderr log output
  -T    --timestamp             Prefix every log line with a timestamp
  -V    --version               Print version information and exit
  -e    --log-level             Set a global log-level

VTY reference generation:
        --vty-ref-mode MODE     VTY reference generation mode (e.g. 'expert').
        --vty-ref-xml           Generate the VTY reference XML output and exit.

Regression testing:
       --vty-test               VTY test mode. Do not connect to BSC, do not exit.
OsmoBTS Configuration file
cd /etc/osmocom

| File | Download |
| osmo-bts.cfg | |
| osmo-bts-trx.cfg | |
| osmo-bts-virtual.cfg |
Install Virtual OsmoBTS
Install Virtual OsmoBTS Service
sudo apt-get install -y osmo-bts-virtual
Manage Virtual OsmoBTS Service
sudo systemctl start osmo-bts
sudo systemctl status osmo-bts
sudo systemctl enable osmo-bts
That's all it takes to install OsmoBTS on your system. With a few simple steps, you can have your own GSM/GPRS/EDGE/UMTS/HSPA cell network up and running.
Combined with the right SDR hardware, OsmoBTS can make operating a cell network a breeze.
References
Subscribe to my newsletter
Read articles from RFS directly inside your inbox. Subscribe to the newsletter, and don't miss out.
Written by

RFS
RFS
Connected since 1996!