How to Set Up a Mandatory Profile using Citrix UPM
 Tanner
Introduction
In today's rapidly evolving tech landscape, staying ahead of the curve and tracking one's career and learning progress is essential. This blog platform is a way of organizing and documenting my career growth by blogging about tasks, implementations, configurations, and more in my lab.
What is a mandatory profile?
A mandatory profile, in simple terms, is like a set of rules and preferences for how a computer should look and behave when someone logs in. It's a template that ensures that no matter who logs in, the computer always looks and acts the same way. Any changes made by the user will not be saved when the user logs off.
Why use a mandatory profile?
Mandatory profiles provide a consistent user experience. Regardless of what machine the user logs on to, they will receive the same settings and configurations. Mandatory profiles provide security by preventing users from making changes and potentially introducing potentially harmful configurations. Also, it ensures that each user logs in with a clean and known good working profile.
Setting up Mandatory Profiles using Citrix UPM
Step 1 – Installing Citrix Profile Management ADMX Policy Template
You will need to import the Citrix Profile Management ADMX files before we can do any configurations. The Citrix GPO ADMX Templates are included in the Citrix Virtual Apps and Desktops ISO. Currently, in my lab, I have the CVAD 2203 LTSR installed.
Mount the CVAD ISO, and then browse to \x64\ProfileManagement\ADM_Templates\en. You should see the following:
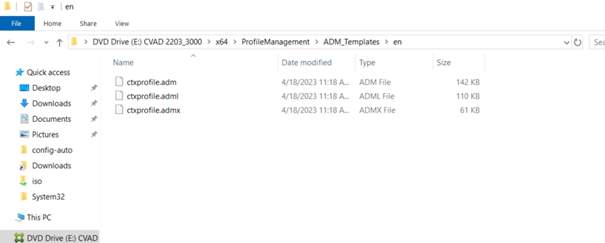
Copy the ctxprofile.admx and paste it to your domain Sysvol Policy Definitions
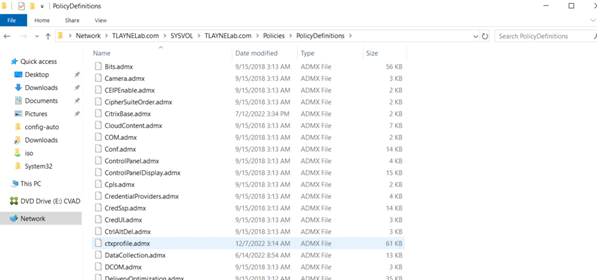
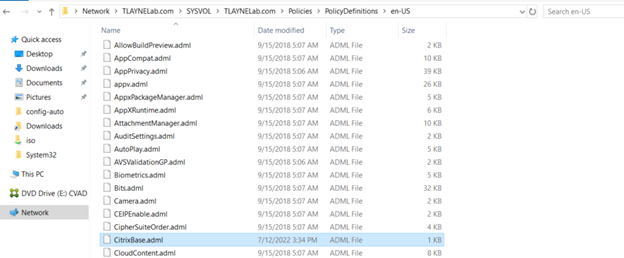
Go back to \x64\ProfileManagement\ADM_Templates\en and copy the ctxprofile.adml and paste it in the paste it in the en-us folder

Go back to the mounted CVAD ISO to x64\ProfileManagement\ADM_Templates\CitrixBase and copy the CitrixBase.admx

Paste the CitrixBase.admx to your domain Sysvol Policy Definitions

Go back to x64\ProfileManagement\ADM_Templates\CitrixBase and copy the CitrixBase.adml file

Paste it to the en-us folder
Step 2 – Setting Up a File Share
On any server, we will create a file share. To create a file share, do the following:
Create a folder on the computer's hard drive or an attached storage device where you want to store the shared files. Right-click and choose "New" > "Folder" to create a new folder if needed.
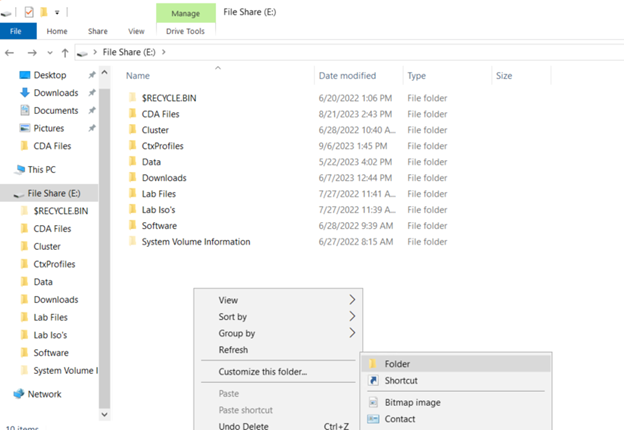
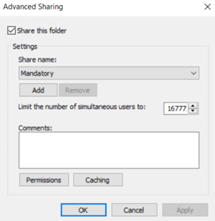
I called my folder CtxProfiles. Right-click on the folder and select “Properties”. In the “Properties” window, go to the sharing tab. Click the “Advanced Sharing…” button and check the box that says “Share this folder”.
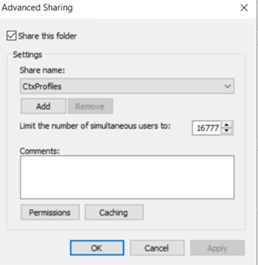
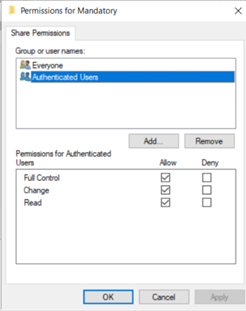
Configure the permissions by clicking the “Permissions” button. We will add authenticated users and give them full control.
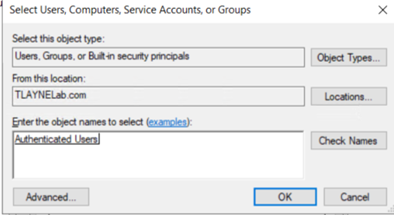
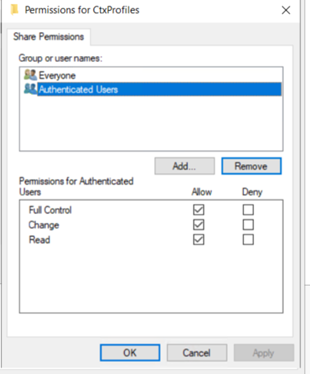
Apply the changes then click “OK”.
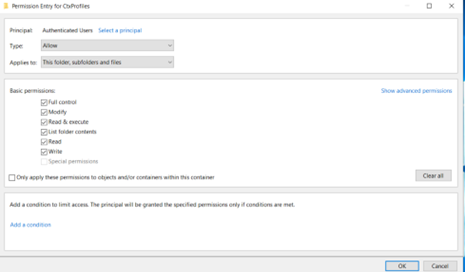
Now right-click on the file and select "Properties." Go to the "Security" tab. Click the "Advanced" button to change permissions for “CtxProfiles”. Click "Add".
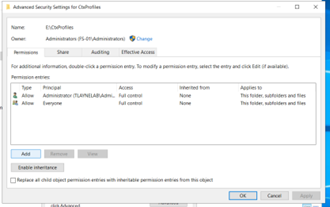
Add “Authenticated Users” and give full control and apply to this folder, subfolders and files.
Now we will go into our CtxProfiles folder and create a folder called “Mandatory. You can ignore the other folders I have in this directory.

Make sure Mandatory is being shared and has the same permissions as the CtxProfiles folder.
Step 3 – Create a Template Desktop Experience
Log in to a Prep Server as a template account and do any desired customizations. The template account will serve as what you want every user’s experience to replicate when they log in with a mandatory profile. So, with the template account do any customizations with icon setup. Desktop, etc.
For example, I logged into my template account and set up my desktop.
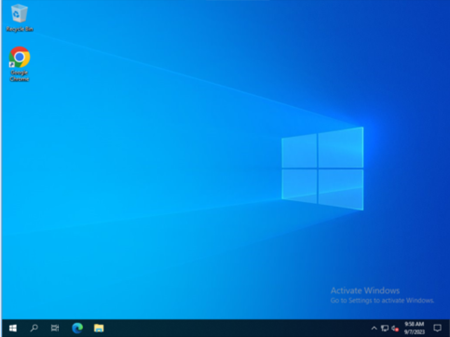
Once you have configured everything to your liking log out of the account and log into your local administrator account on the same prep server.
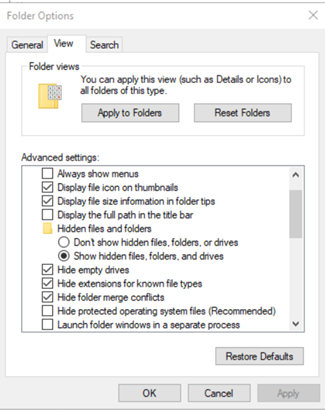
Enable to view hidden files and uncheck Hide Protected Operating System files (Recommended)
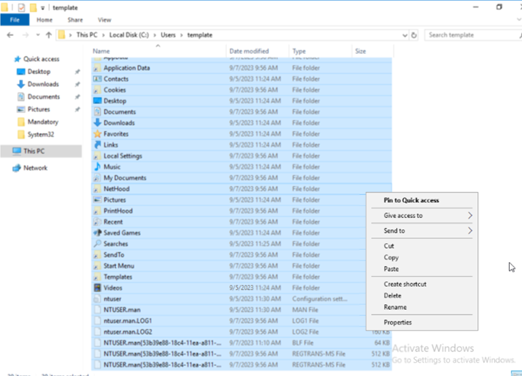
Copy C:\users\%username% contents and paste it to your “Mandatory” file share. I will be copying the account that I set up the template with.
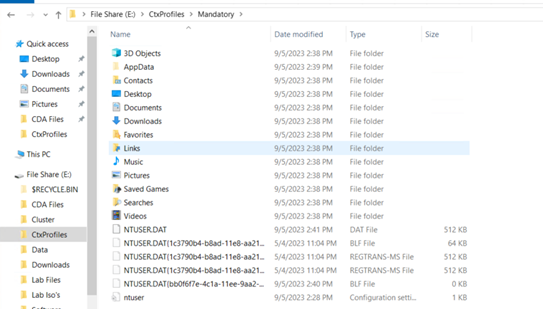
Open AppData and delete Local and LocalLow. Only Romaing should consist in the AppData folder.


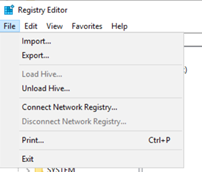
Open regedit and highlight HKEY_LOCAL_MACHINE. Select file and load hive.
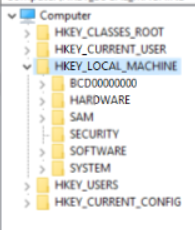
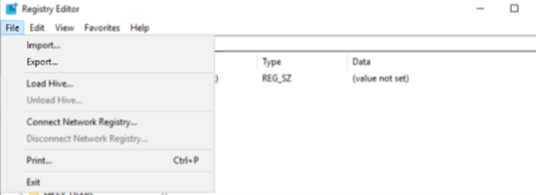
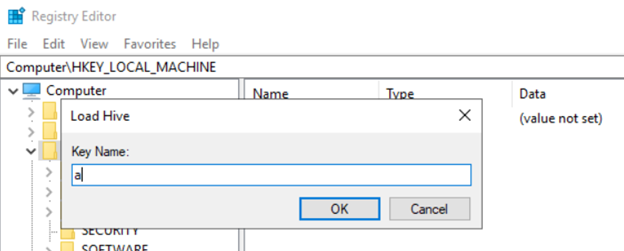
Go to C:\users\%username% and open the NTUSER.DAT. Load in the template profile you used.

Name the key Name “a” so it lists it first in regedit.

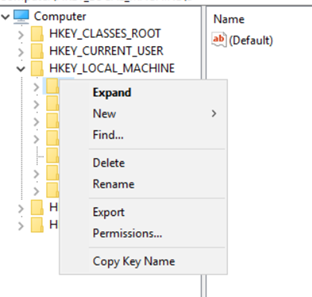
Right-click the “a” and go to “Permissions.”
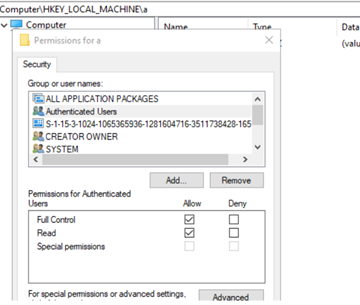
Add “Authenticated Users” and give full control.
Unload the hive.
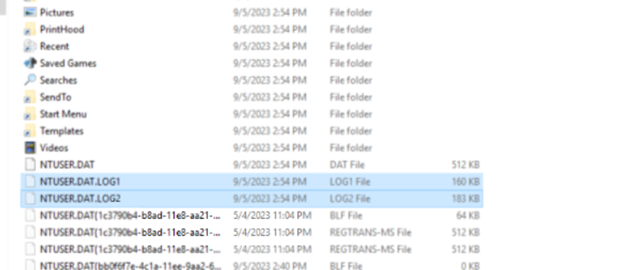
Go to your “Mandatory” folder and delete the .LOG files.
Step 4 – Create OU for Citrix VDAs
Create an OU:
Open the Active Directory Users and Computers (ADUC) console on a Windows server with administrative privileges. You can open ADUC by running dsa.msc from the "Run" dialog or PowerShell.
In the ADUC console, right-click on the domain or an existing OU where you want to create the new OU.
Select "New" and then "Organizational Unit."
Give the new OU a name that represents
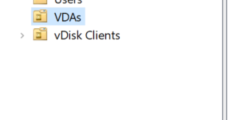
Next, move the Citrix VDAs that will require the specific GPO to the newly created OU. You can do this by dragging and dropping the computer accounts from their current location to the new OU.

Step 5 – Create Citrix Profile Management GPO
Create a GPO under the OU you just created. I named my GPO Mandatory Profile.

After creating the GPO, you can edit its settings by right-clicking on the GPO in the right pane of the GPMC console and selecting "Edit." This will open the Group Policy Object Editor, where you can configure various policies and settings. Navigate to Computer Configuration > Policies > Administrative Templates > Citrix Components > Profile Management. Enable Profile Management, this is essential, or nothing will work.
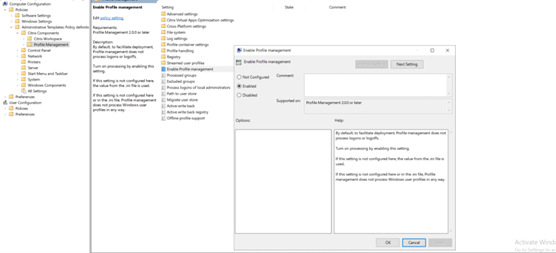
Now navigate to Computer Configuration > Policies > Administrative Templates > Citrix Components > Profile Management > Profile handling and edit the Template profile.
Enable Template Profile and put your file share path and check all three boxes. My share path is //fs-01/E/CtxProfiles/Mandatory
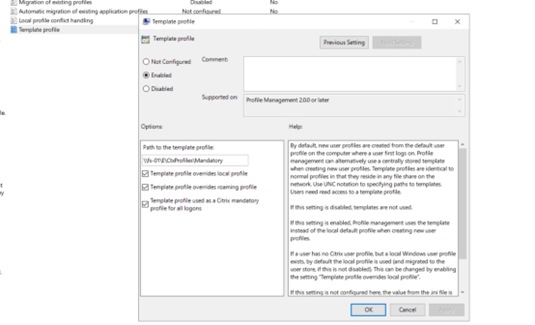
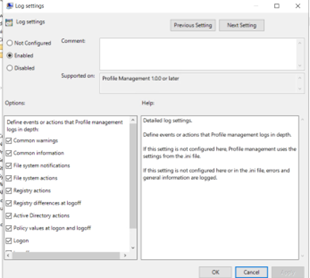
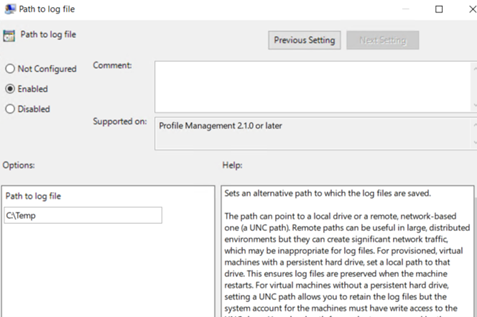
Click “OK”. Navigate to Computer Configuration > Policies > Administrative Templates > Citrix Components > Profile Management > Log settings. Enable “Enable logging”, “Log settings”, and “Path to log”.

Edit “Log settings” and check everything.
Edit “Path to log” and put a file path on your prep server to get logs of the UPM.
Step 5 – Testing UPM
Logged in as the local administrator on the Prep Server do a gpupdate /force to get the latest GPO policies. Then reboot the machine and log in as a domain user.
When logged in check the logs where you specified in the “Path to log” settings. A good sign that UPM is working is the log should be updated with the current time and date.

You can check the logs and see if there are any issues.
A good test to make sure the mandatory profile is working is to change the icon positions on the desktop and sign out of the account. Sign back into the same account and the icons should go back to how the template is, not saving the changes.
Conclusion
In conclusion, this blog has provided a comprehensive guide to setting up a mandatory profile using Citrix User Profile Management (UPM) in a lab environment. It has covered the entire process step-by-step, from installing the necessary ADMX policy templates to configuring file shares, creating a template desktop experience, and implementing Citrix Profile Management Group Policy Objects (GPOs).
The importance of mandatory profiles in ensuring a consistent user experience across multiple machines and enhancing security by preventing unauthorized changes has been emphasized. As technology continues to evolve, staying informed and mastering essential IT tasks like mandatory profile setup is vital for career growth and success in the ever-changing tech landscape.
Subscribe to my newsletter
Read articles from Tanner directly inside your inbox. Subscribe to the newsletter, and don't miss out.
Written by
