Setup (AD DS) Active Directory Domain Service on Windows Server 19
 Farkhanda Saleem
The role of AD DS is to manage and organize network resources, including users, computers, groups, and other objects, within a Windows-based network environment. AD DS provides centralized authentication, authorization, and configuration for network resources, making it easier to manage users and devices in a domain-based network.
Here's a step-by-step guide to setting up AD DS:
1. Open Server Manager: Log in to your Windows Server and open "Server Manager " You can typically find it on the taskbar or by searching in the Start menu.
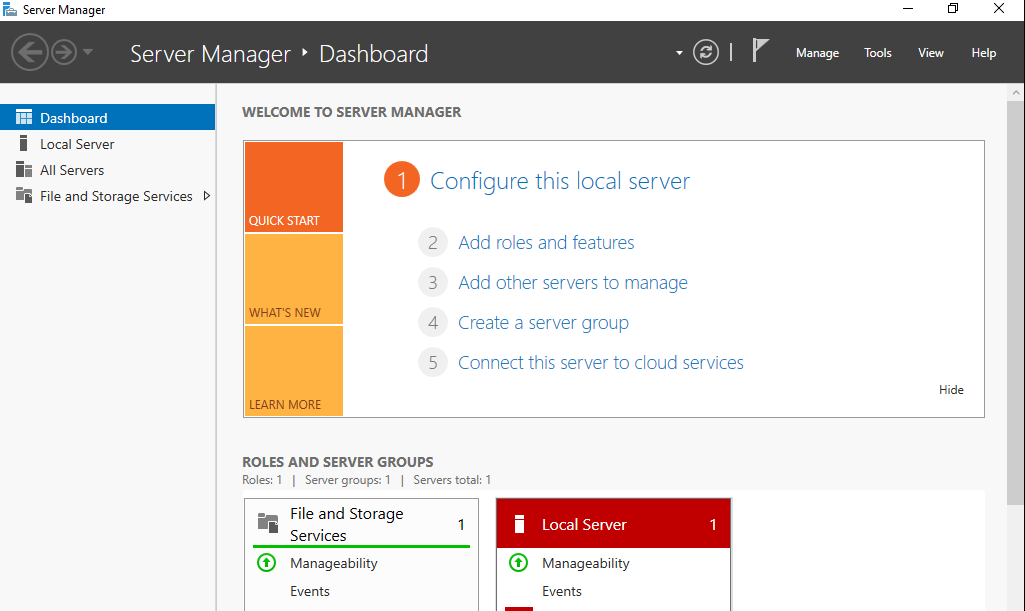
2. Add Roles and Features: In Server Manager, click on "Manage" in the top-right corner and select "Add Roles and Features" This will open the "Add Roles and Features Wizard."

3. Role-Based or Feature-Based Installation: Choose "Role-based or feature-based installation" and click "Next."
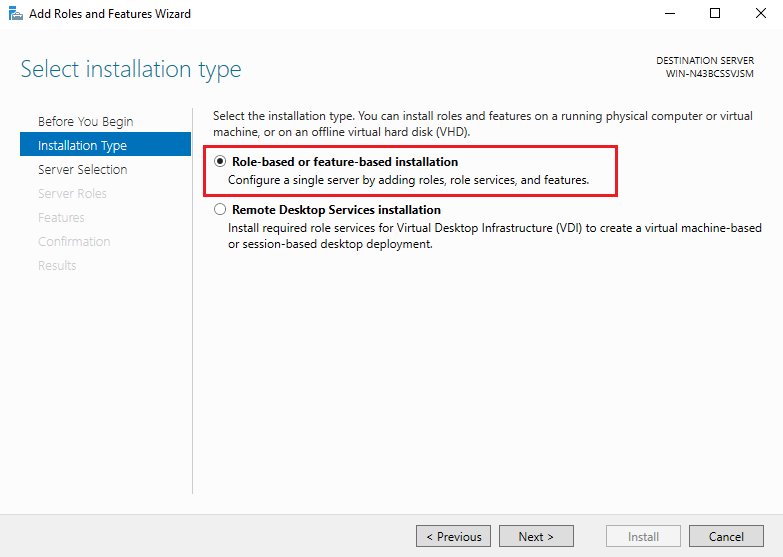
4. Select a Server: Ensure that the local server is selected and click "Next."
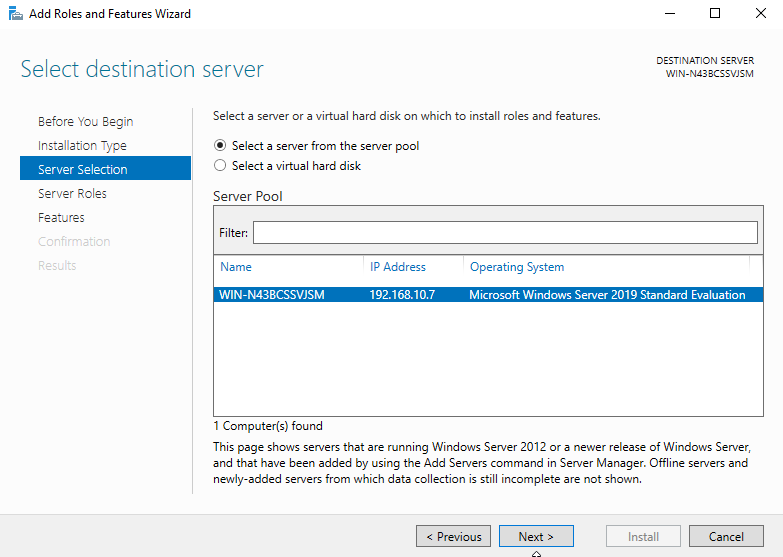
5. Choose Roles: Scroll down and select "Active Directory Domain Services." A prompt will appear asking you to add the required features. Click "Add Features" to include the required features and then click "Next."

6. Confirm Selections: Review the role services and features to be installed. Click "Next."
7. Active Directory Domain Services: Read about AD DS and click "Next."
8. Installation Confirmation: Review the information about the AD DS role and click "Next."
9. Select Features: AD DS requires some additional features to be installed. The required features will be automatically selected. Click "Next."
10. Confirm Selections: Review the feature selections and click "Next."
11. Active Directory Domain Services: Read about the additional features required for AD DS. Click "Next."
12. Installation Confirmation: Review the information, check the "restart the destination server automatically" box option and click "Install."

13. Installation Progress: Wait for the installation to complete. The progress will be displayed on the screen.
15. Promote this server to a domain controller: After the role installation is complete, click "Promote this server to a domain controller ".
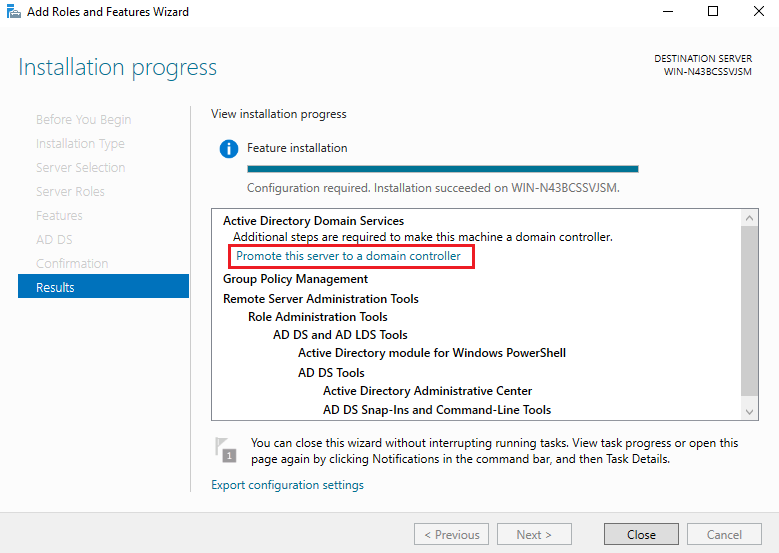
Note: If you forgot to click this or closed it directly a yellow notification flag will appear in Server Manager. Click on the flag and select "Promote this server to a domain controller ".
16. Deployment Configuration: In the Deployment Configuration window, choose "Add a new forest" if this is the first domain controller in your forest. Enter the root domain name and click "Next."

17. Domain Controller Options: Configure the options for the domain controller, including the Domain Name System (DNS) server and the Directory Services Restore Mode (DSRM) password. Provide the necessary information and click "Next."
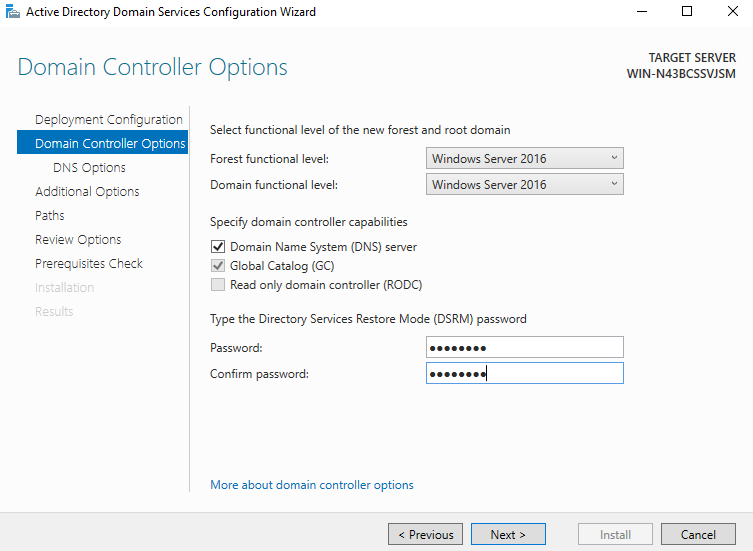
18. Additional Options: Configure any additional options such as the NetBIOS domain name and the paths for the AD DS database, log files, and SYSVOL. Review and modify the options as needed and click "Next."
19. Review: Review your selections and options. If everything looks correct, click "Next."
20. Prerequisites Check: The wizard will perform a prerequisites check. If there are no issues, click "Install."
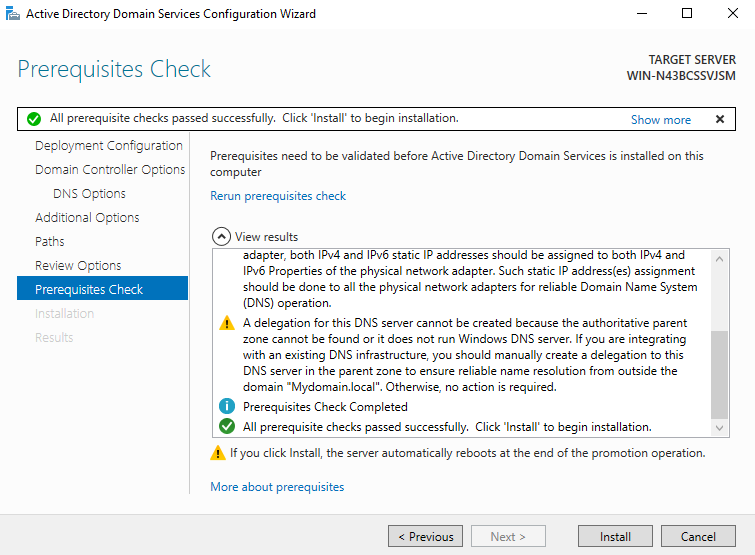
21. Installation Progress: The installation process will begin. The server will automatically restart during this process.
22. Completion: Once the installation is complete, the server will restart again. After the restart, you'll have a domain controller with Active Directory Domain Services installed.
23. Access Active Directory Administrative Center: After the server restarts, login, and you'll find the Active Directory Administrative Center in the Administrative Tools menu. Use it to manage your domain, users, groups, and other AD-related tasks.
Subscribe to my newsletter
Read articles from Farkhanda Saleem directly inside your inbox. Subscribe to the newsletter, and don't miss out.
Written by
