#Day36:Managing Persistent Volumes in Your Deployment 💥
 Karan Idnani
Introduction
Kubernetes, often abbreviated as K8s, is a powerful container orchestration platform that simplifies the deployment and management of containerized applications. One essential aspect of running stateful applications in Kubernetes is managing data storage. This is where Persistent Volumes (PVs) and Persistent Volume Claims (PVCs) come into play. In this blog, we'll explore the concepts of Persistent Volumes and Persistent Volume Claims in Kubernetes and how they enable reliable data storage for your applications.
Persistent Volumes (PVs)
Persistent Volumes are a fundamental Kubernetes resource used to manage and abstract the underlying storage resources in your cluster. A Persistent Volume represents a piece of network-attached storage in the cluster that can be provisioned dynamically or statically, depending on your requirements.
Key characteristics of Persistent Volumes include:
Storage Backend Agnosticism: Kubernetes provides support for various storage backends, such as NFS, iSCSI, AWS EBS, and more. PVs abstract these details, making it easier to work with different storage solutions.
Lifecycle Independence: PVs have a lifecycle independent of the pods that use them. This means that even if a pod is deleted or rescheduled, the data stored in the PV remains intact, ensuring data persistence.
Access Modes: PVs can be configured with different access modes to control how multiple pods can access the same volume concurrently. Common access modes include ReadWriteOnce (RWX), ReadOnlyMany (ROX), and ReadWriteMany (RWX).
Reclaim Policies: PVs also define a ReclaimPolicy, which specifies what should happen to the storage when the PV is released. The options typically include "Retain," "Recycle," or "Delete."
Persistent Volume Claims (PVCs)
While Persistent Volumes define the storage resources, Persistent Volume Claims are used by pods to request access to those resources. PVCs act as a way for applications to "claim" a piece of storage with specific characteristics, such as size, access mode, and storage class. Here's how they work:
Declaration: In your Kubernetes YAML manifests, you define a PVC object specifying the storage requirements of your application. For instance, you can request 5GB of storage with ReadWriteOnce access.
Binding: When a PVC is created, Kubernetes tries to find an available PV that matches the PVC's requirements. If a suitable PV exists, it is bound to the PVC, establishing a connection between the claim and the actual storage resource.
Attachment: Once bound, the PVC can be attached to a pod by referencing it in the pod's specification. This allows the pod to access the underlying storage.
Dynamic Provisioning: If no existing PV matches the PVC's requirements, and dynamic provisioning is enabled, Kubernetes can automatically create a new PV to satisfy the claim.
Use Cases
PVs and PVCs are particularly useful for stateful applications like databases, file storage, and message queues. These applications require persistent storage that can survive pod rescheduling, upgrades, or failures.
Task 1:Add a Persistent Volume to your Deployment todo
Step 1: Create a Persistent Volume (PV) YAML file (pv.yml) to define your PV:
apiVersion: v1
kind: PersistentVolume
metadata:
  name: pv-todo-app
spec:
  capacity:
    storage: 1Gi
  accessModes:
    - ReadWriteOnce
  persistentVolumeReclaimPolicy: Retain
  hostPath:
    path: "/tmp/data"
In this YAML file:
namespecifies the name of your PV.capacitydefines the storage capacity.accessModesdefine the access mode (ReadWriteOnce in this case, indicating that it can be mounted by a single node).hostPathspecifies the path on your node where the data will be stored. Make sure to replace/path/to/your/local/directorywith the actual path on your node.
Step 2: Create a Persistent Volume Claim (PVC) YAML file (pvc.yml) that references the PV:
apiVersion: v1
kind: PersistentVolumeClaim
metadata:
  name: pvc-todo-app
spec:
  accessModes:
    - ReadWriteOnce
  resources:
    requests:
      storage: 500Mi
In this YAML file:
namespecifies the name of your PVC.accessModesshould match the access mode of the PV (ReadWriteOnce in this case).resourcesrequest the storage capacity .

Step 3: Update your Deployment YAML file (deployment.yml) to include the Persistent Volume Claim (PVC). You should add the PVC to the volumes section of your pod spec:
apiVersion: apps/v1
kind: Deployment
metadata:
  name: todo-app-deployment
spec:
  replicas: 1
  selector:
    matchLabels:
      app: todo-app
  template:
    metadata:
      labels:
        app: todo-app
    spec:
      containers:
        - name: todo-app
          image: karanidnani6/todo-app
          ports:
            - containerPort: 8000
          volumeMounts:
            - name: todo-app-data
              mountPath: /app
      volumes:
        - name: todo-app-data
          persistentVolumeClaim:
            claimName: pvc-todo-appIn this YAML file:
volumeMountsspecify where the PVC should be mounted within your container.volumesspecify the PVC to use (my-pvcin this case).
Step 4: Apply the PV, PVC, and the updated Deployment using the following commands:
kubectl apply -f pv.yml
kubectl apply -f pvc.yml
kubectl apply -f deployment.yml
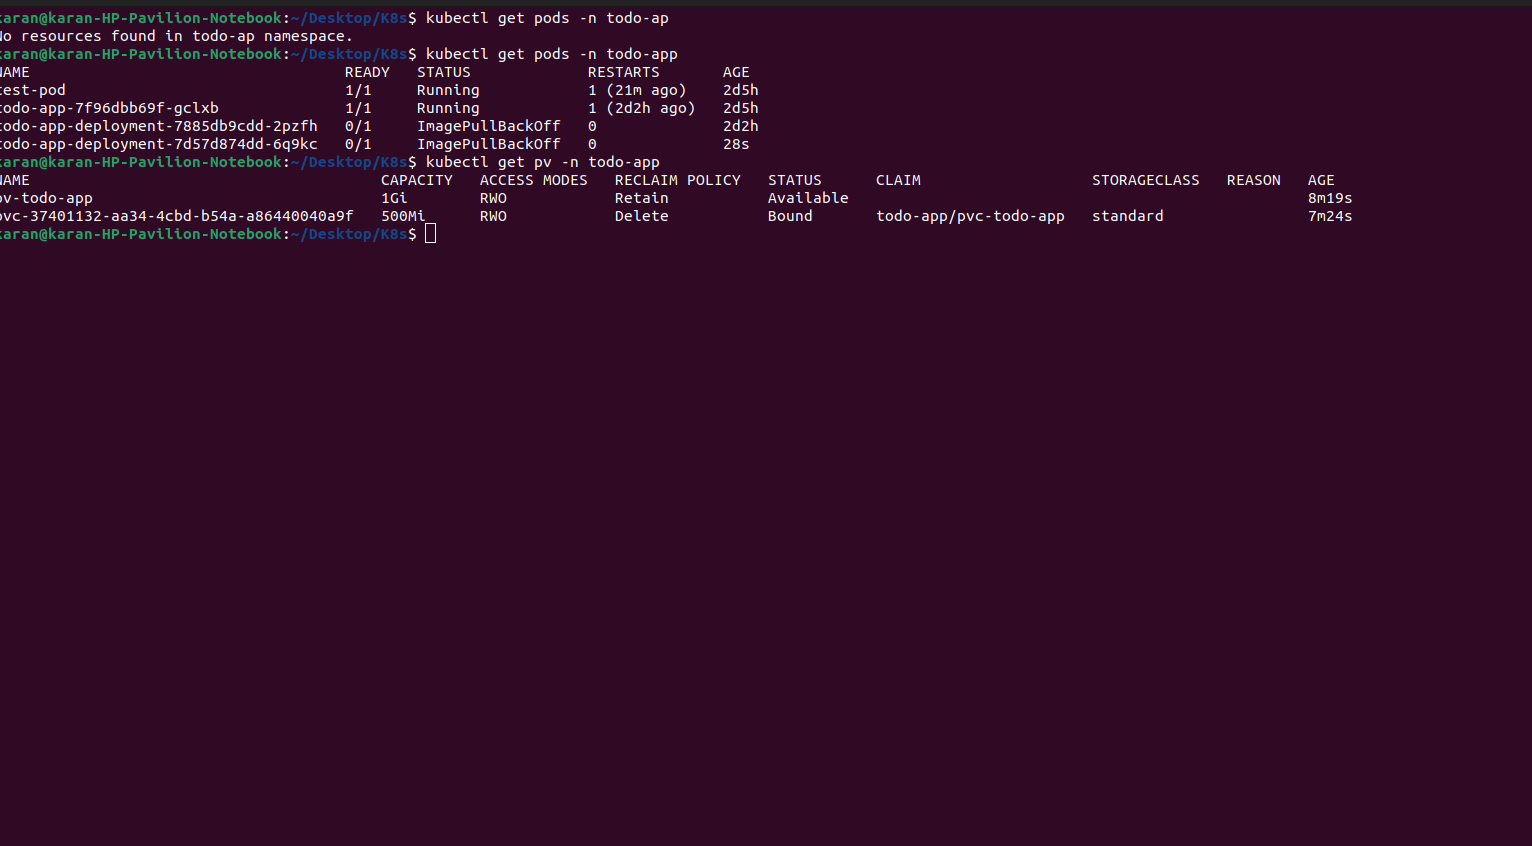
Step 5: Verify that the Persistent Volume has been added to your Deployment by checking the status of the Pods and Persistent Volumes:
kubectl get pods
kubectl get pv

Task 2:Accessing data in the Persistent Volume
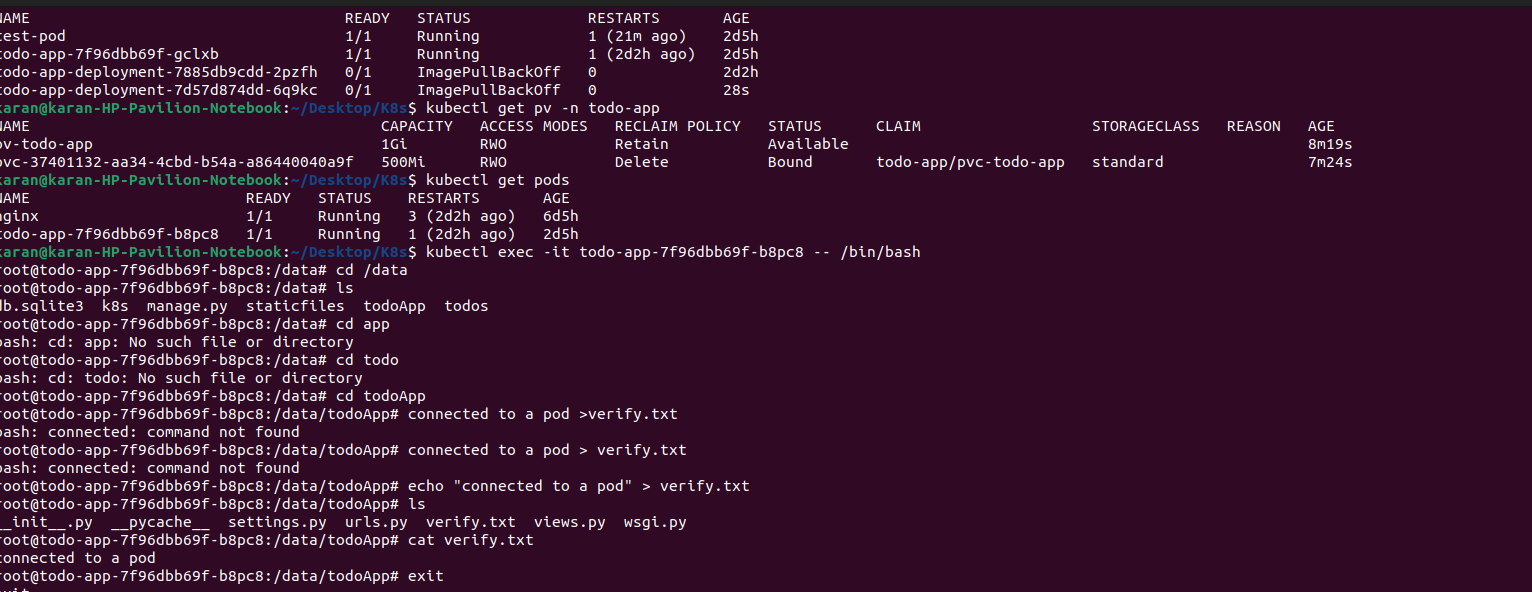
To access the data stored in the Persistent Volume from within a Pod in your Deployment, you can use the kubectl exec command. Here are the steps to do so:
- First, ensure that your Pod is running. You can check the status of your Pods with the following command:
kubectl get pods
- Once you've confirmed that your Pod is running, you can use the
kubectl execcommand to access the Pod. Replace<pod-name>with the actual name of your Pod:
kubectl exec -it todo-app-7f96dbb69f-b8pc8 -- /bin/bash
This command will open an interactive shell session within the Pod.
- Now that you're inside the Pod, you can navigate to the mount path where the Persistent Volume is mounted. In your Deployment YAML file, you specified the mount path as
/data, so you can access it like this:
cd /data
- You can list the contents of the directory to verify that you can access the data stored in the Persistent Volume:
ls
You should see the files and directories stored in the Persistent Volume. You can interact with these files as needed from within the Pod.

- When you're finished, you can exit the Pod's shell session by typing
exit.
By following these steps, you can access and manipulate the data stored in the Persistent Volume from within a Pod in your Deployment. This allows your application running in the Pod to read and write data to the Persistent Volume as needed.
Conclusion
Persistent Volumes and Persistent Volume Claims are critical components of Kubernetes, enabling reliable and flexible data storage for stateful applications. By abstracting the complexities of underlying storage systems and providing a declarative way to manage storage resources, they simplify the process of working with data in containerized environments. Understanding how to use PVs and PVCs effectively is essential for any Kubernetes operator looking to deploy stateful applications in their cluster.
Subscribe to my newsletter
Read articles from Karan Idnani directly inside your inbox. Subscribe to the newsletter, and don't miss out.
Written by

Karan Idnani
Karan Idnani
"Engineer | DevOps Enthusiast | Fitness Lover | Traveler | Lifelong Learner 🚀✈️