Cool looking counter in plain HTML,CSS and JS
 Palash Dhavle
Table of contents

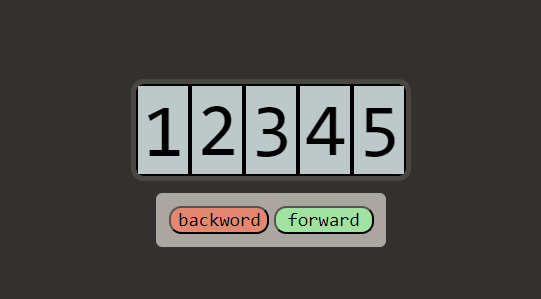
We need a counter for a lot of stuff when building web apps whether be it displaying the number of users who visited our site, live views or any other stats. We can easily make one by simply using JS to manipulate the text inside an element that holds the value for the counter but it looks boring.
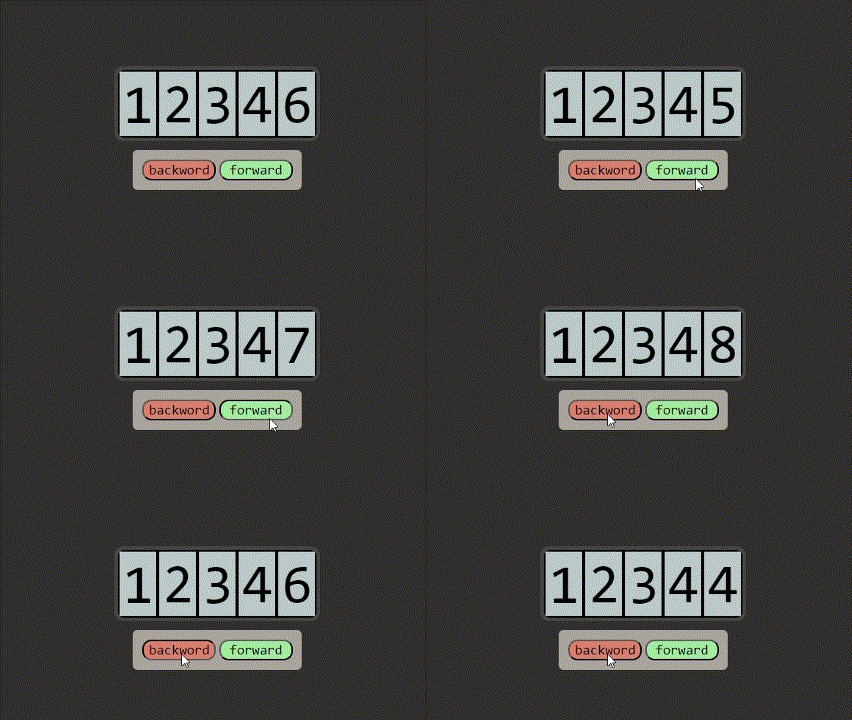
Now we'll see how can we make a better version of the counter which works like an odometer just using some plain HTML, CSS and JS.
What the final result looks like

HTML
First, we will set up a basic HTML structure, I have also added some CSS classes to the elements which we'll see later in the CSS part. We'll name the file index.html
<!DOCTYPE html>
<html lang="en">
    <head>
        <meta charset="UTF-8">
        <meta name="viewport" content="width=device-width, initial-scale=1.0">
        <title>Counter</title>
        <link rel="stylesheet" href="style.css">
    </head>
    <body>
        <div class="box">
            <div class="counter-container" id="cc">
            </div>
            <div class="button-container" id="bc">
                <input class="button red" type="button" value="backword" id="b">
                <input class="button green" type="button" value="forward" id="f">
            </div>
        </div>
        <script src="counter_script.js"></script>
    </body>
</html>
We have three things(div) to consider here
box - div with a class box that holds two other divs counter-container and button-container
Counter-container - This will be populated using JavaScript later. This will hold the contents of the counter
button container - This will hold the buttons used to increase and decrease the counter
I have also linked a stylesheet and a script to this document which I'll explain later
CSS
Let's make things look pretty
body,html{
    height: 100%;
    overflow: hidden;
    margin: 0px;
}

.box{
    display: flex;
    background-color: rgb(50, 49, 48);
    justify-content: center;
    align-items: center;
    flex-direction: column;
    height: 100%;
}

.counter-container{
    display: flex;
    width: fit-content;
    border: 4px rgb(73, 71, 66) solid;
    overflow: hidden;
    border-radius: 10px;
}

.button-container{
    margin: 10px;
    padding: 10px;
    border-radius: 5px;
    background-color: rgb(171, 166, 159);
}

.button{
    font-family: 'Consolas';
    font-size: 15px;
    border-radius: 10px;
    width: 80px;
}

.green{
    background-color: rgb(159, 227, 159);
}

.red{
    background-color: rgb(227, 136, 111);
}

.outer-container{
    background-color:rgb(189, 200, 201);
    padding-left: 4px;
    height: 70px;
    border: 2px black solid;
}

.number-container{
    font-family: 'Consolas';
    font-size: 60px;
    width: 0.6em;
    transition: transform;
    transition-duration: 0.2s;
}

.number{
    height: 70px;
}
Here we can see all the definitions of CSS classes that we have used in our HTML. I'll explain this CSS in a brief
box - this will be applied to the outermost box and we want its content to be at the center of the screen.
counter-container - This will be applied to the div/container of the counter and its overflow is hidden for a reason which I'll explain later
button-container - This will be applied to the div/container that holds the buttons
green, red - these are just class
body, html - we set the height of this element to 100% so the whole screen is covered
outer-container - This will be applied to the div that holds the divs representing each digit of the number. This div will be later added to the DOM using JS
number-container - This will be applied to individual digit divs that will hold the divs of numbers ranging from 0 to 9. This div will be later added to the DOM using JS
number - this will be applied to the div that holds each number
Don't worry if you find this a little bit confusing you'll understand this later when we talk counter container will be populated using JavaScript
The only thing you need to keep in mind while styling this is the overflow of the counter-container should be hidden as this directly affects the look and functionality of the counter. You need to also maintain the HTML structure as shown above for this to work
JavaScript
I will be explaining this JS code function by function first. Once we know the purpose of each function we will see how we use the functions to get our desired result.
We have three functions
get_number_digits
make_number_containers
counter_setter
get_number_digits
function get_number_digits(number){
    if (number == 0) return 1

    let number_of_digits = 0
    while(number > 0) {
        number = Math.floor(number/10)
        number_of_digits ++
    }
    return number_of_digits
}
This function will return the number of digits in a given number for example if the number is 3432 number of digits will be 4. If the number is 23932 the number of digits will be 5.
make_number_containers
function make_number_containers(number_of_digits) {
    let counter_c = document.getElementById('cc')

    // creating a number container for each digit of the number
    for (let index = number_of_digits; index > 0; index--) {

        // creating outer container and adding the required class
        let outer_c = document.createElement('div')
        outer_c.classList.add('outer-container')

        // creating number container and adding the required class and id
        let num_c = document.createElement("div")
        num_c.classList.add('number-container')
        num_c.id = 'nums' + index

        // adding number div inside number container. one for each from 0-9
        for (let i = 0; i < 10; i++) {
            let num = document.createElement('div')
            num.classList.add('number')
            num.innerText = i
            num_c.appendChild(num)
        }

        outer_c.appendChild(num_c)
        counter_c.appendChild(outer_c)
    }

}
The idea behind this function is that we create an outer-container for each digit of a number inside the counter. Inside it, we create a number-container that has 10 divs. Each div will represent a number from 0-9.
You will understand it better when you see this picture.

Let us assume the number is 0 so the number of digits will be 1 in that case only one container will be created. For the demonstration purpose, I have removed the overflow: hidden property of the counter-container class. This will give you a better perspective of things and now you will also understand the purpose of making the overflow hidden of counter-container.
HTML for the above image will look like this
<html lang="en">
    <head>
        <meta charset="UTF-8">
        <meta name="viewport" content="width=device-width, initial-scale=1.0">
        <title>Counter</title>
        <link rel="stylesheet" href="style.css">
    </head>
    <body>
        <div class="box">
            <div class="counter-container" id="cc">
                <div class="outer-container">
                    <div class="number-container" id="nums1" style="transform: translateY(0px);">
                        <div class="number">0</div>
                        <div class="number">1</div>
                        <div class="number">2</div>
                        <div class="number">3</div>
                        <div class="number">4</div>
                        <div class="number">5</div>
                        <div class="number">6</div>
                        <div class="number">7</div>
                        <div class="number">8</div>
                        <div class="number">9</div>
                    </div>
                </div>
            </div>
        </div>
        <script src="counter_script.js"></script>
    </body>
</html>
Here we have only one digit so only one container is created. If we set the overflow: hidden property of the counter-container class as intended we will get the following result

counter_setter
function counter_setter(number,salt) {
    for (let index = 1; index <= number_of_digits; index++) {
        // getting the correct number container
        let id = 'nums' + index
        let div = document.getElementById(id)

        // Geting the last digit of number
        const digit = (number % 10);
        let value = Math.floor(SLIDE_CONST * digit)
        value = Math.round(value + (salt * digit)) // adding salt to the value

        // updating the translate value of the div after 200ms
        setTimeout(() => { div.style.transform = `translateY(-${value}px)` }, 200)
        number = Math.floor(number / 10); // Remove the last digit
    }
}
Now we have a better picture of how the number divs are stacked on top of each other and because the overflow is hidden we can only see one number at a time. Now to display any number we just have to slide the number container up or down.
We calculate the number of pixels we need to slide the number container using this simple formula
silde_value = slide_constant x digit
where slide constant is the height of the div containing each number. In our case height is 70px. Suppose we have to display the number 7. Using the above formula we have to slide the container that holds the stacked divs of number exactly 490px.
The basic idea of this function is that we simply go through each digit of the given number access its number container and slide it depending on the value of the digit
So now we just have to put all these functions together. Here is what the final js code will look like
function get_number_digits(number){
    if (number == 0) return 1

    let number_of_digits = 0
    while(number > 0) {
        number = Math.floor(number/10)
        number_of_digits ++
    }
    return number_of_digits
}


function make_number_containers(number_of_digits) {
    let counter_c = document.getElementById('cc')

    // creating a number container for each digit of the number
    for (let index = number_of_digits; index > 0; index--) {

        // creating outer container and adding the required class and id
        let outer_c = document.createElement('div')
        outer_c.classList.add('outer-container')

        // creating number container and adding the required class
        let num_c = document.createElement("div")
        num_c.classList.add('number-container')
        num_c.id = 'nums' + index

        // adding number div inside number container. one for each from 0-9
        for (let i = 0; i < 10; i++) {
            let num = document.createElement('div')
            num.classList.add('number')
            num.innerText = i
            num_c.appendChild(num)
        }

        outer_c.appendChild(num_c)
        counter_c.appendChild(outer_c)
    }

}

function counter_setter(number,salt) {
    for (let index = 1; index <= number_of_digits; index++) {
        // getting the correct number container
        let id = 'nums' + index
        let div = document.getElementById(id)

        // Geting the last digit of number
        const digit = (number % 10);
        let value = Math.floor(SLIDE_CONST * digit)
        value = Math.round(value + (salt * digit)) // adding salt to the value

        // updating the translate value of the div after 200ms
        setTimeout(() => { div.style.transform = `translateY(-${value}px)` }, 200)
        number = Math.floor(number / 10); // Remove the last digit
    }
}

const SLIDE_CONST = 70
let number_counter = 1238
let salt = 0
let number_of_digits = get_number_digits(number_counter)
let btn_c = document.getElementById('bc')


make_number_containers(number_of_digits)
counter_setter(number_counter, salt)

btn_c.addEventListener('click',(event)=>{
    if (event.target.tagName == 'INPUT'){
        if(event.target.id == "f") number_counter ++
        if(event.target.id == "b") number_counter --
        console.log(number_counter);
        counter_setter(number_counter, salt)
    }
})
get_number_digits(number): This function calculates the number of digits in a given number. It returns 1 if the number is 0 and counts the digits using awhileloop for positive numbers.make_number_containers(number_of_digits): This function creates a set of HTML containers for displaying individual digits of a number. It appends these containers to an element with the id 'cc'.counter_setter(number, salt): This function updates the display of the individual digit containers to simulate a sliding effect. It takes thenumberandsaltas parameters and adjusts the position of each digit container based on these values.Constants and variables: They define a constant
SLIDE_CONSTwith a value of 70 and initializes variablesnumber_counter,salt, andnumber_of_digits. Thenumber_counterrepresents the current number, whilesaltis used for adjusting the sliding effect. Thenumber_of_digitsis calculated using theget_number_digitsfunction.btn_cis assigned a reference to an HTML element with the id 'bc', which is expected to be a button.The code calls
make_number_containers(number_of_digits)to create the initial digit containers based on the number of digits innumber_counter.It calls
counter_setter(number_counter, salt)to set the initial display of the digit containers based on thenumber_counterandsalt.An event listener is added to
btn_cto listen for click events on its child elements. When a click occurs on an input element insidebtn_c, it checks the element'sidattribute. If it's "f," it incrementsnumber_counter; if it's "b," it decrementsnumber_counterand then logs the updated value to the console. Finally, it callscounter_setterto update the display based on the newnumber_countervalue.
Overall, this code creates a visual representation of a number with sliding digits and allows the user to increment or decrement the displayed number using buttons. The sliding effect is controlled by the counter_setter function and the number of digits in the displayed number is dynamically determined by get_number_digits.
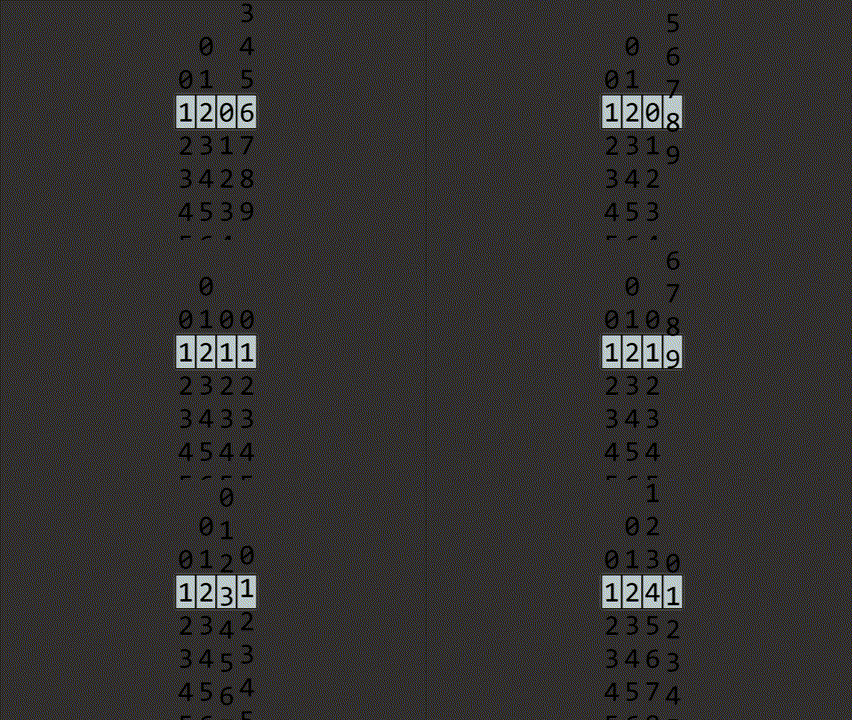
Here's how it looks in action under the hood

Access the code from GitHub repository
If you have reached till here thanks for reading and I hope it helped you in some way. This was my first blog and I hope you guys like it. If you have any suggestions/tips/corrections please feel free to write it down in the comments section.
Happy coding!!!
Subscribe to my newsletter
Read articles from Palash Dhavle directly inside your inbox. Subscribe to the newsletter, and don't miss out.
Written by

Palash Dhavle
Palash Dhavle
"Hello, I'm Palash Dhavle, a passionate software developer with a Master's Degree in Computer Applications. I specialize in crafting Python and JavaScript code to build dynamic applications. Through my blog, I share insights from my coding journey and explore the world of software development. Join me in this adventure of creativity, innovation, app development, and problem-solving. Welcome!