Day 41- 90DaysOfDevOps
 Amit Pawar
Hey Learners! Welcome back. I hope you have some understanding of Instances, Launch templates and Auto-scaling groups in EC2 as we learned all these topics in yesterday's challenge. Moving forward with the most important concept in EC2: Load Balancer. Let's start...
What is Load Balancing?
Load balancing is the distribution of workloads across multiple servers to ensure consistent and optimal resource utilization. It is an essential aspect of any large-scale and scalable computing system, as it helps you to improve the reliability and performance of your applications.
Load Balancers are the servers that forward internet traffic to multiple servers(EC2 instances) downstream.
Elastic Load Balancing:-
Elastic Load Balancing (ELB) is a service provided by AWS that automatically distributes incoming traffic across multiple EC2 instances.
AWS offers Three types of load balancers:-
Application Load Balancer
Network Load Balancer
Classic Load Balancer
Why We Need Load Balancers?
Spread load across multiple downstream instances
Expose a single point of access(DNS) to your application
Seamlessly handle failures of downstream instances
Do regular health checks on your instances
Provide SSL termination (HTTPS) for your websites
HA across zones
Task 1-
launch 2 EC2 instances with an Ubuntu AMI and use User Data to install the Apache Web Server.
Sign in to the AWS console with your AWS credentials and search for EC2 service. Select the EC2 service dashboard and click on Instances in the left navigation pane. Select Launch instances and enter the number of instances as 1 by selecting Ubuntu AMI with the t2.micro instance type.

Scroll down to the Advanced details section and enter user data as shown below

Add another instance with the same configuration but the index.html file should be different (as per the task). Ref below screenshot.


Task 2-
Create an Application Load Balancer (ALB) in EC2 using the AWS Management Console.
Select Load Balancers from the left navigation pane. Click Create Load Balancer.

Select Application Load Balancer

Enter the name for the load balancer select Availability Zones as per requirement and proceed to the next step.

Select the security group and proceed to create the target group. Enter the name for Targate Group, Targate Type must be instance as we demonstrate this on instances we created earlier and click next to register targets.

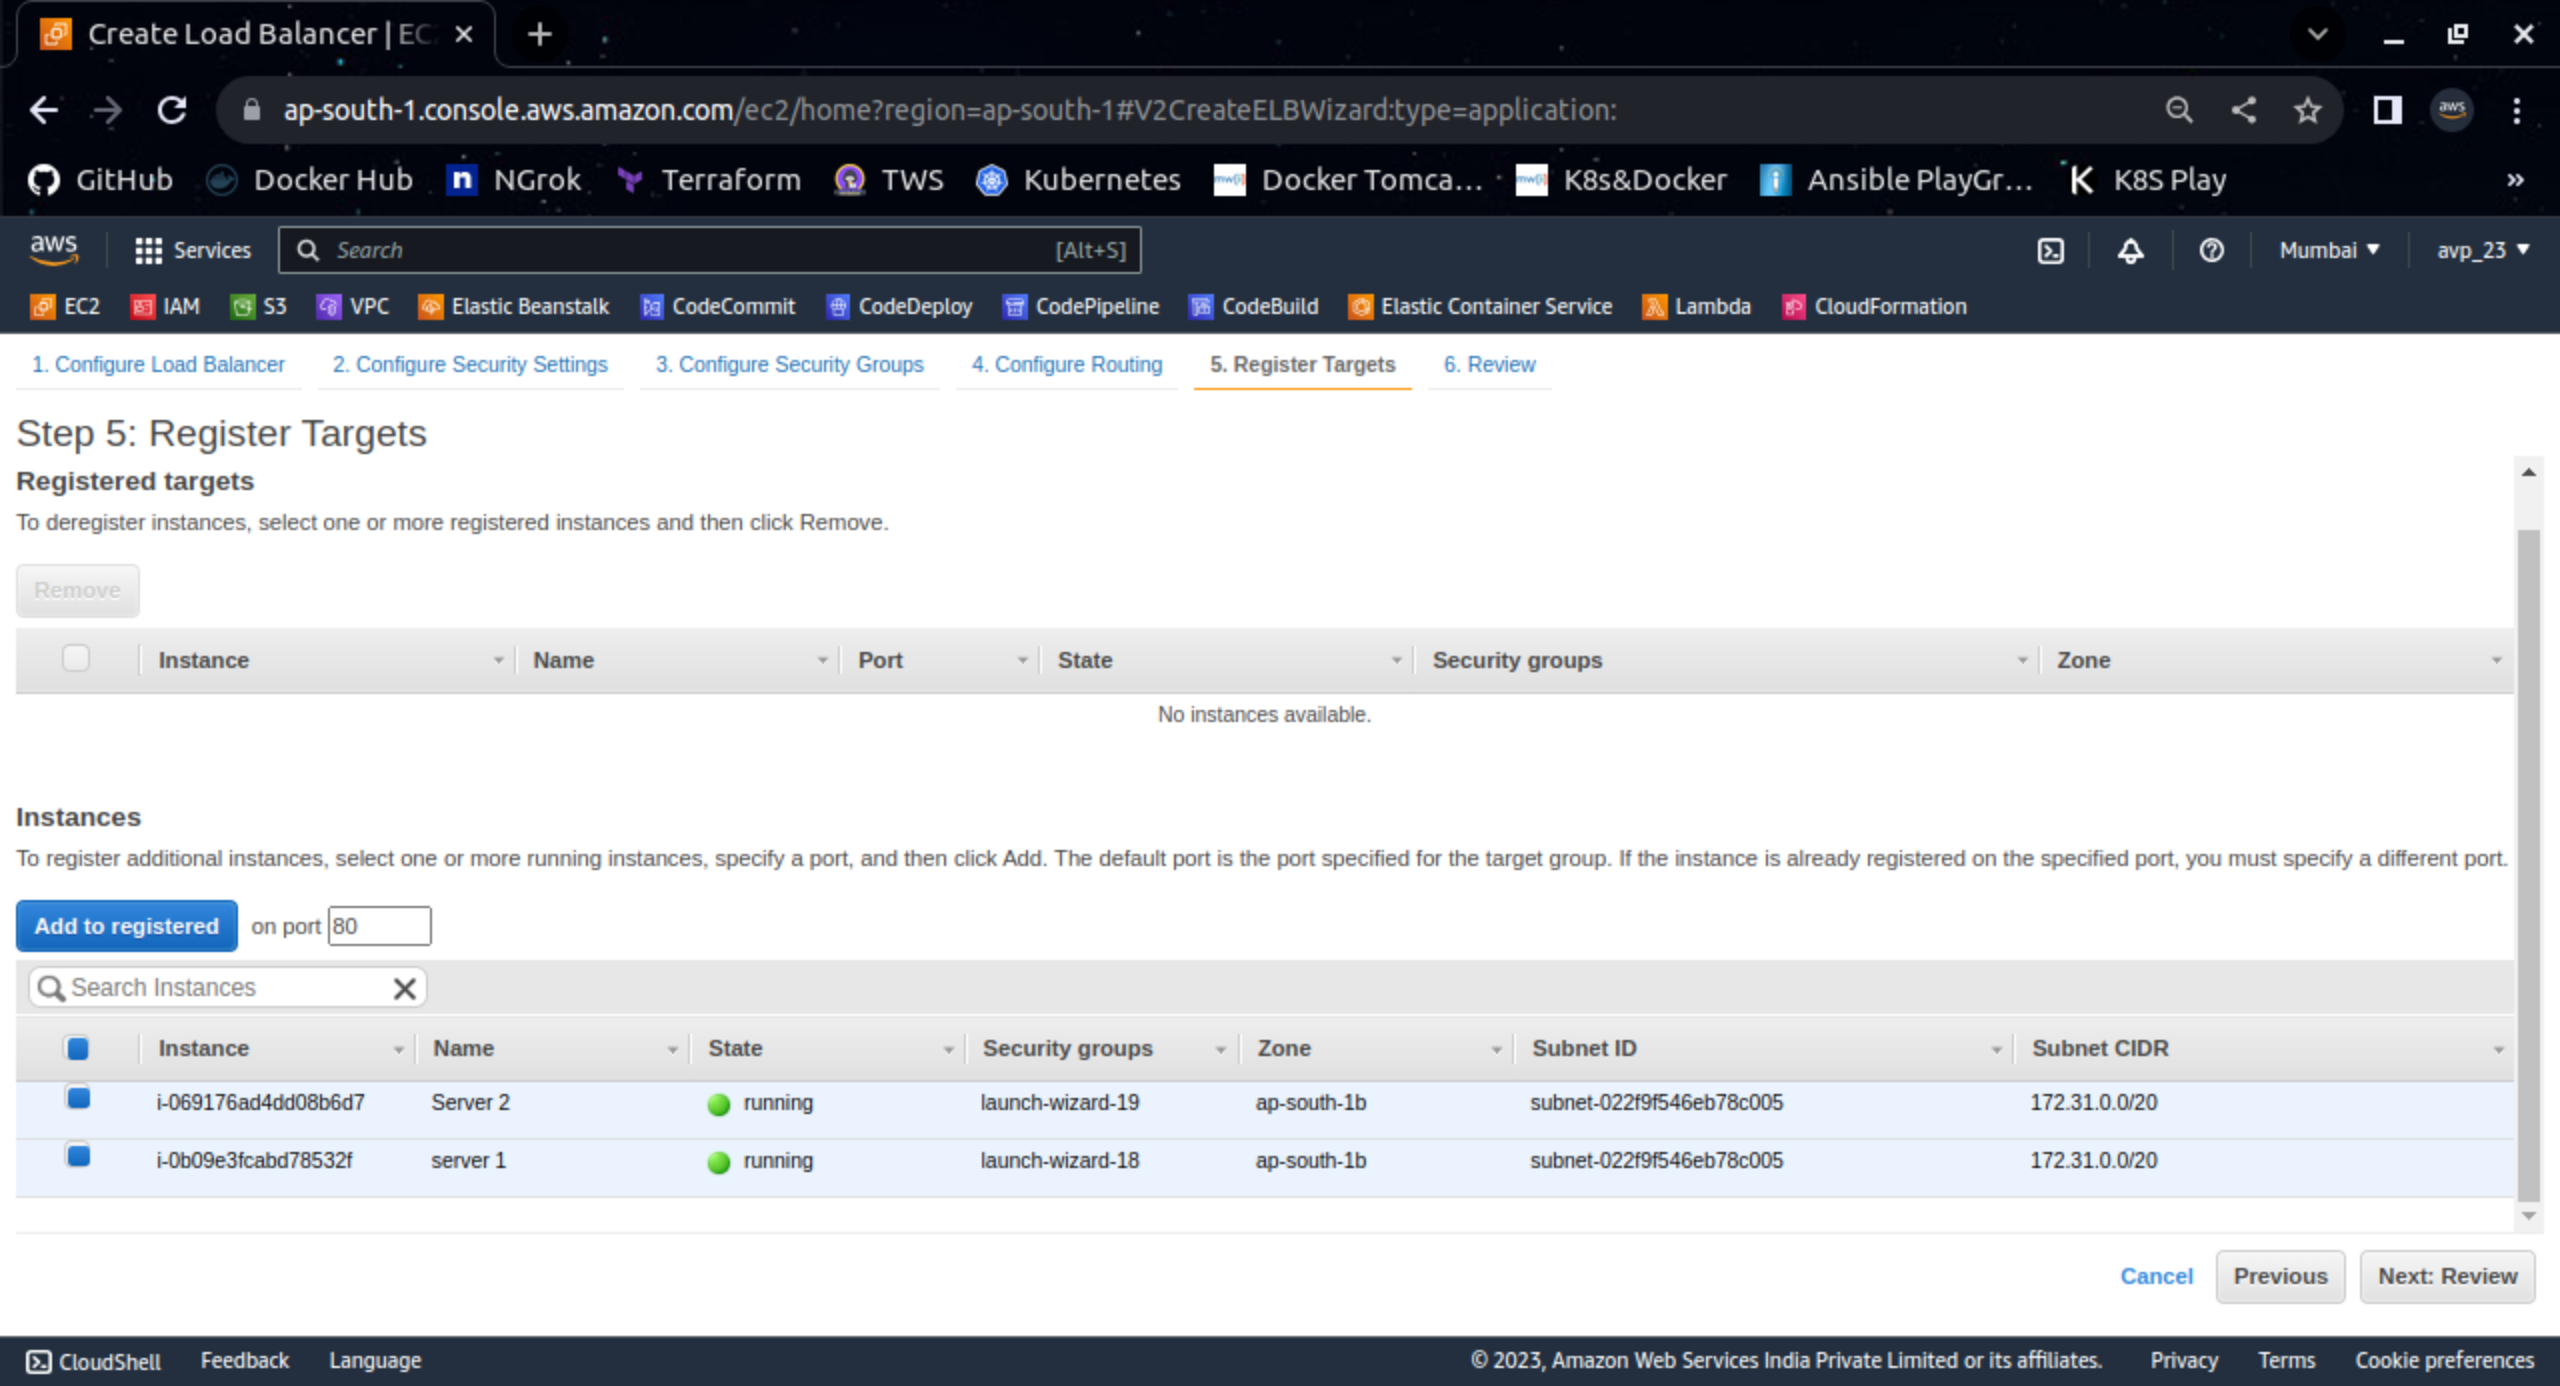
Select the instances you created earlier and review the details. Create the Load Balancer.

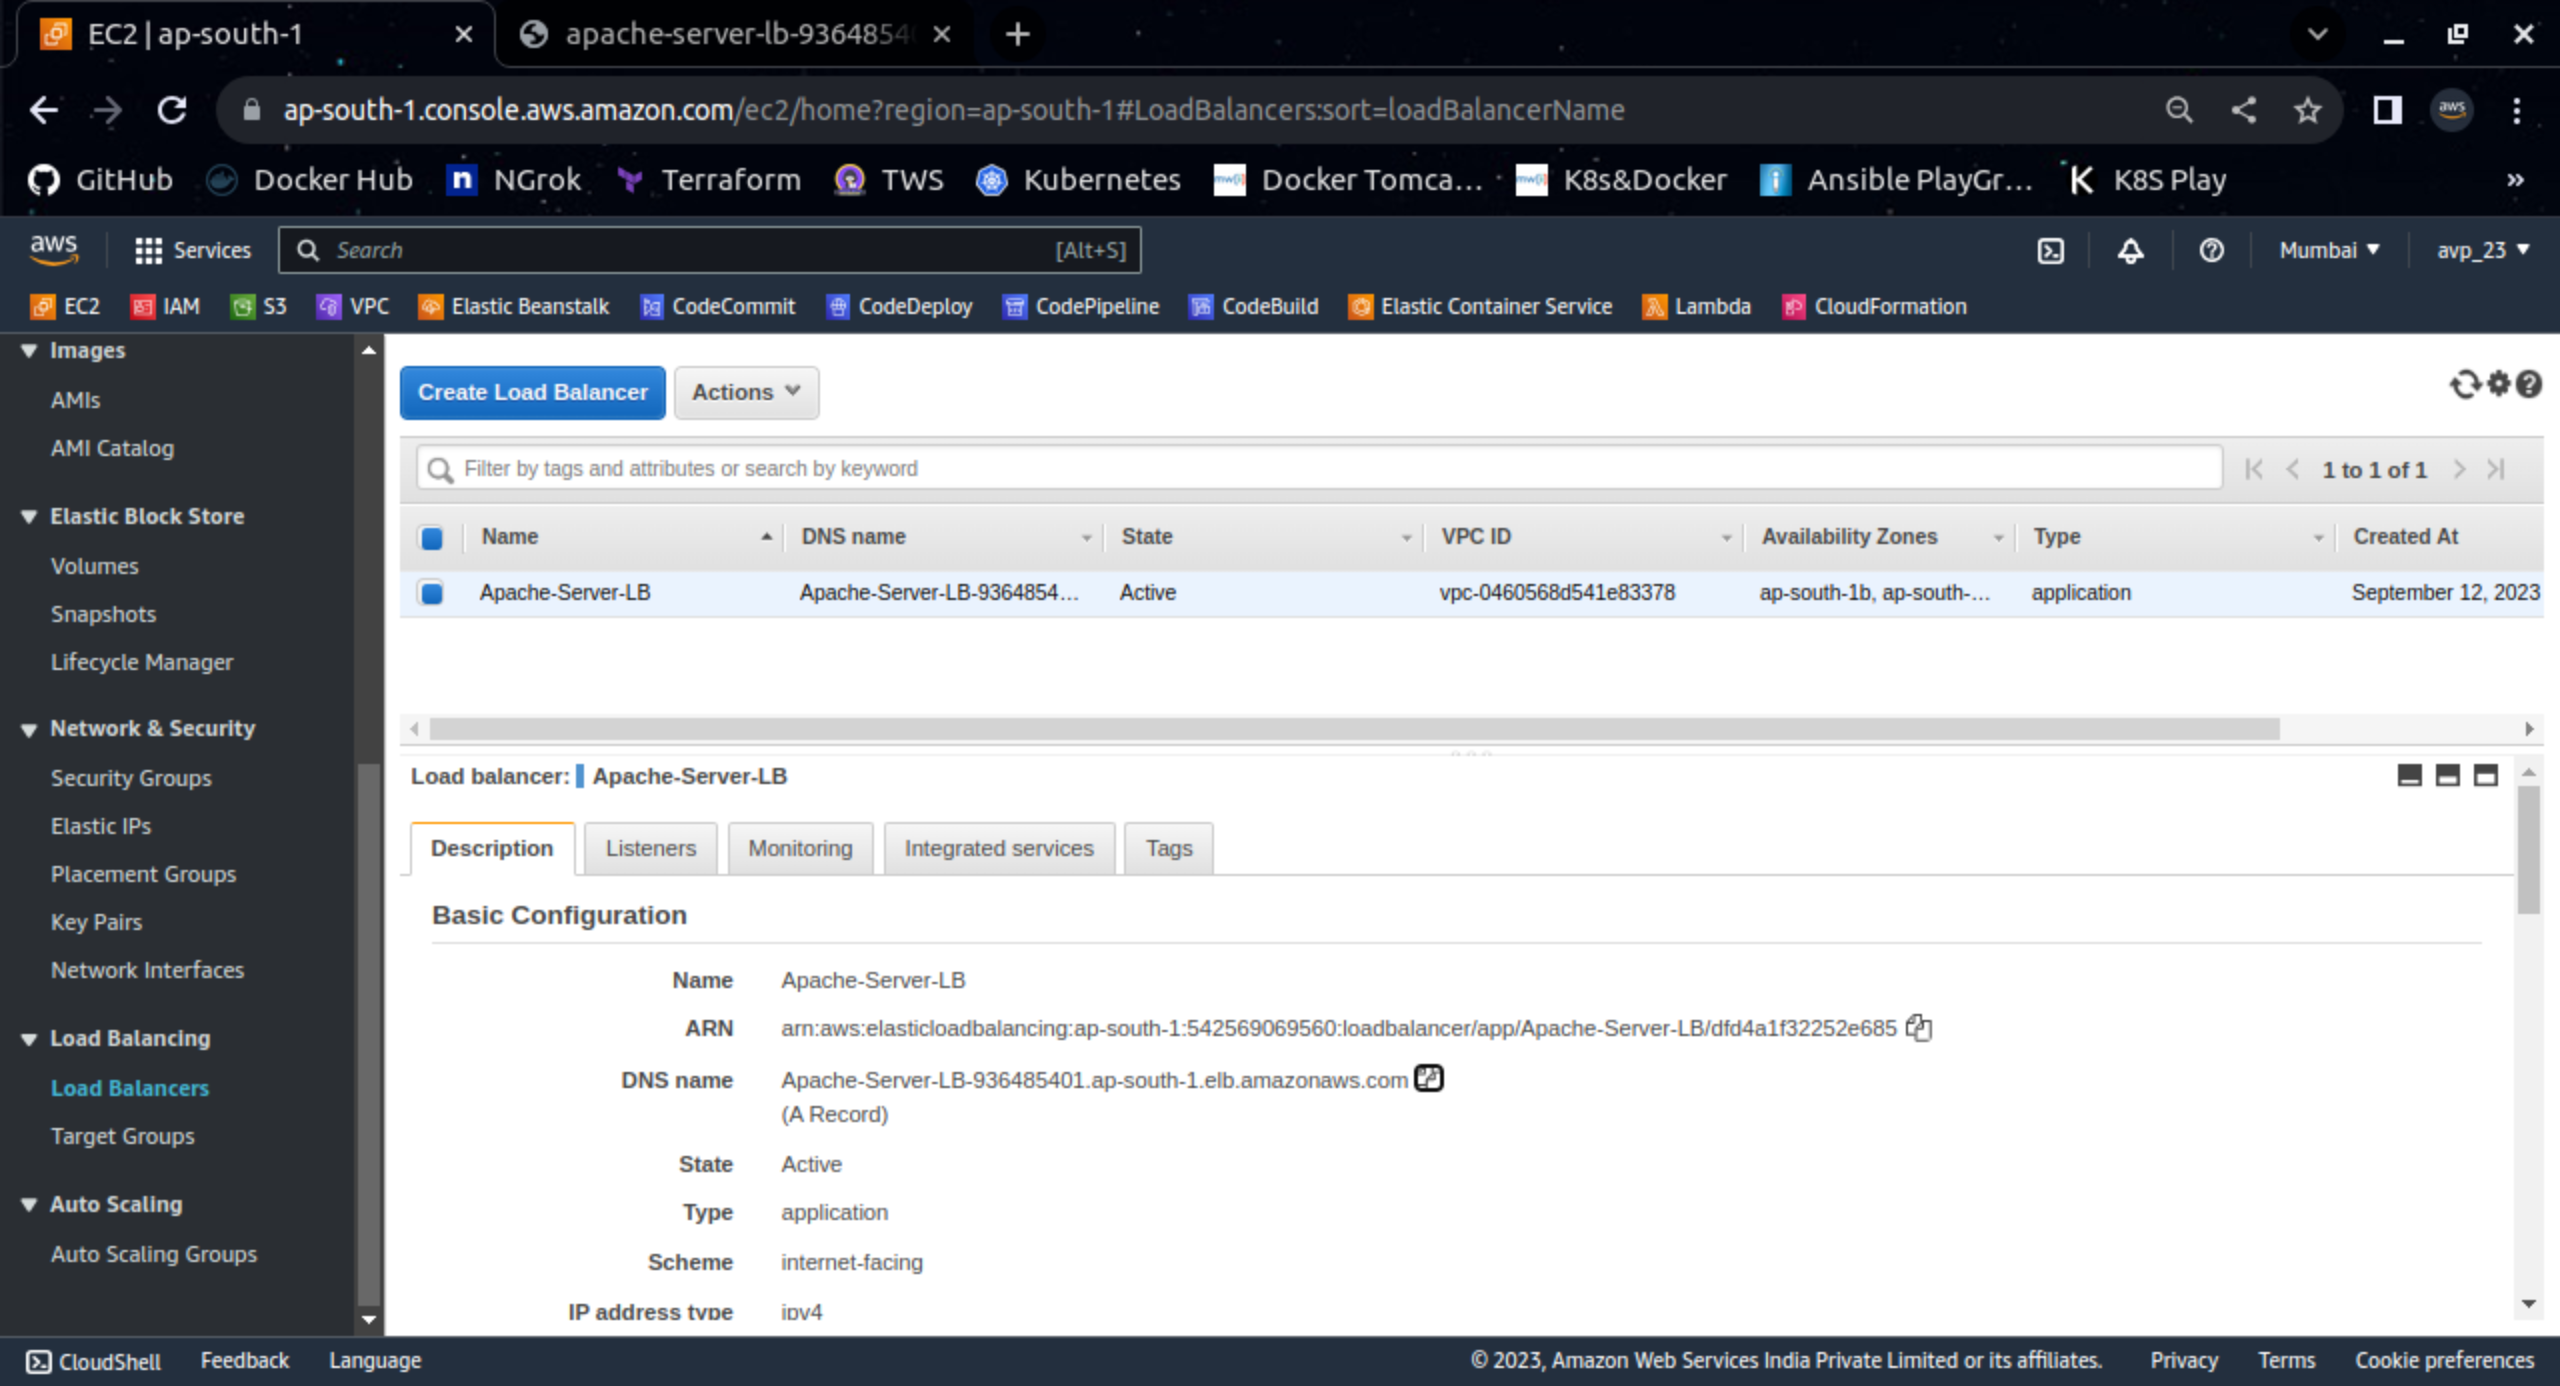
Check the details for created Load Balancers.

After the successful provisioning copy the DNS name for the load balancer and access through a browser. Try hitting twice and you will get a web page from another server every time.


This is how the Load balancer distributes the load equally to targeted servers. This is called the Round-Robin Mechanism(50% on Server 1 and -50% on Server 2).
If you want to have traffic distribution differently like 70% on Server 1 and 30% on Server 2 then this is only possible by Route53(AWS Service) policy.
Thank you so much for taking the time to read till the end! Hope you found this blog informative.
Feel free to explore more of my content, and don't hesitate to reach out if need any assistance from me or in case of you have any questions.
Find me on:- Hashnode LinkedIn Github
Happy Learning!
Subscribe to my newsletter
Read articles from Amit Pawar directly inside your inbox. Subscribe to the newsletter, and don't miss out.
Written by
