Hyperlane Warp Route
 Hyperlane Academy
Warp Route
This article focuses on implementing a Warp Router with Hyperlane. Warp routes are simple router applications using which you can move your ERC20 or ERC721 tokens between multiple chains. Hyperlane makes it pretty easy for you to implement Warp Route you just need to clone our GitHub repo, making some config changes as per your requirements and you are good to go. Defi applications can use Warp Routes to extend their functionality onto multiple chains to get more market penetration than competitors.
GitHub - hyperlane-xyz/hyperlane-deploy: Scripts for deploying Hyperlane contracts
The hyperlane-deploy repo contains all the important config and script files needed to deploy a warp route using Hyperlane. First, clone the repo onto your local machine. And then install all the important modules we will be needing for this project. Run the following commands to clone the repo and install the modules.
git clone <https://github.com/hyperlane-xyz/hyperlane-deploy.git>

yarn install

yarn build
After installing all the important modules required for the project, it’s time to edit the configuration files as per your requirements. To change the configurations head over to /config/warp_tokens.ts. Over there you will find some configurations like this:-
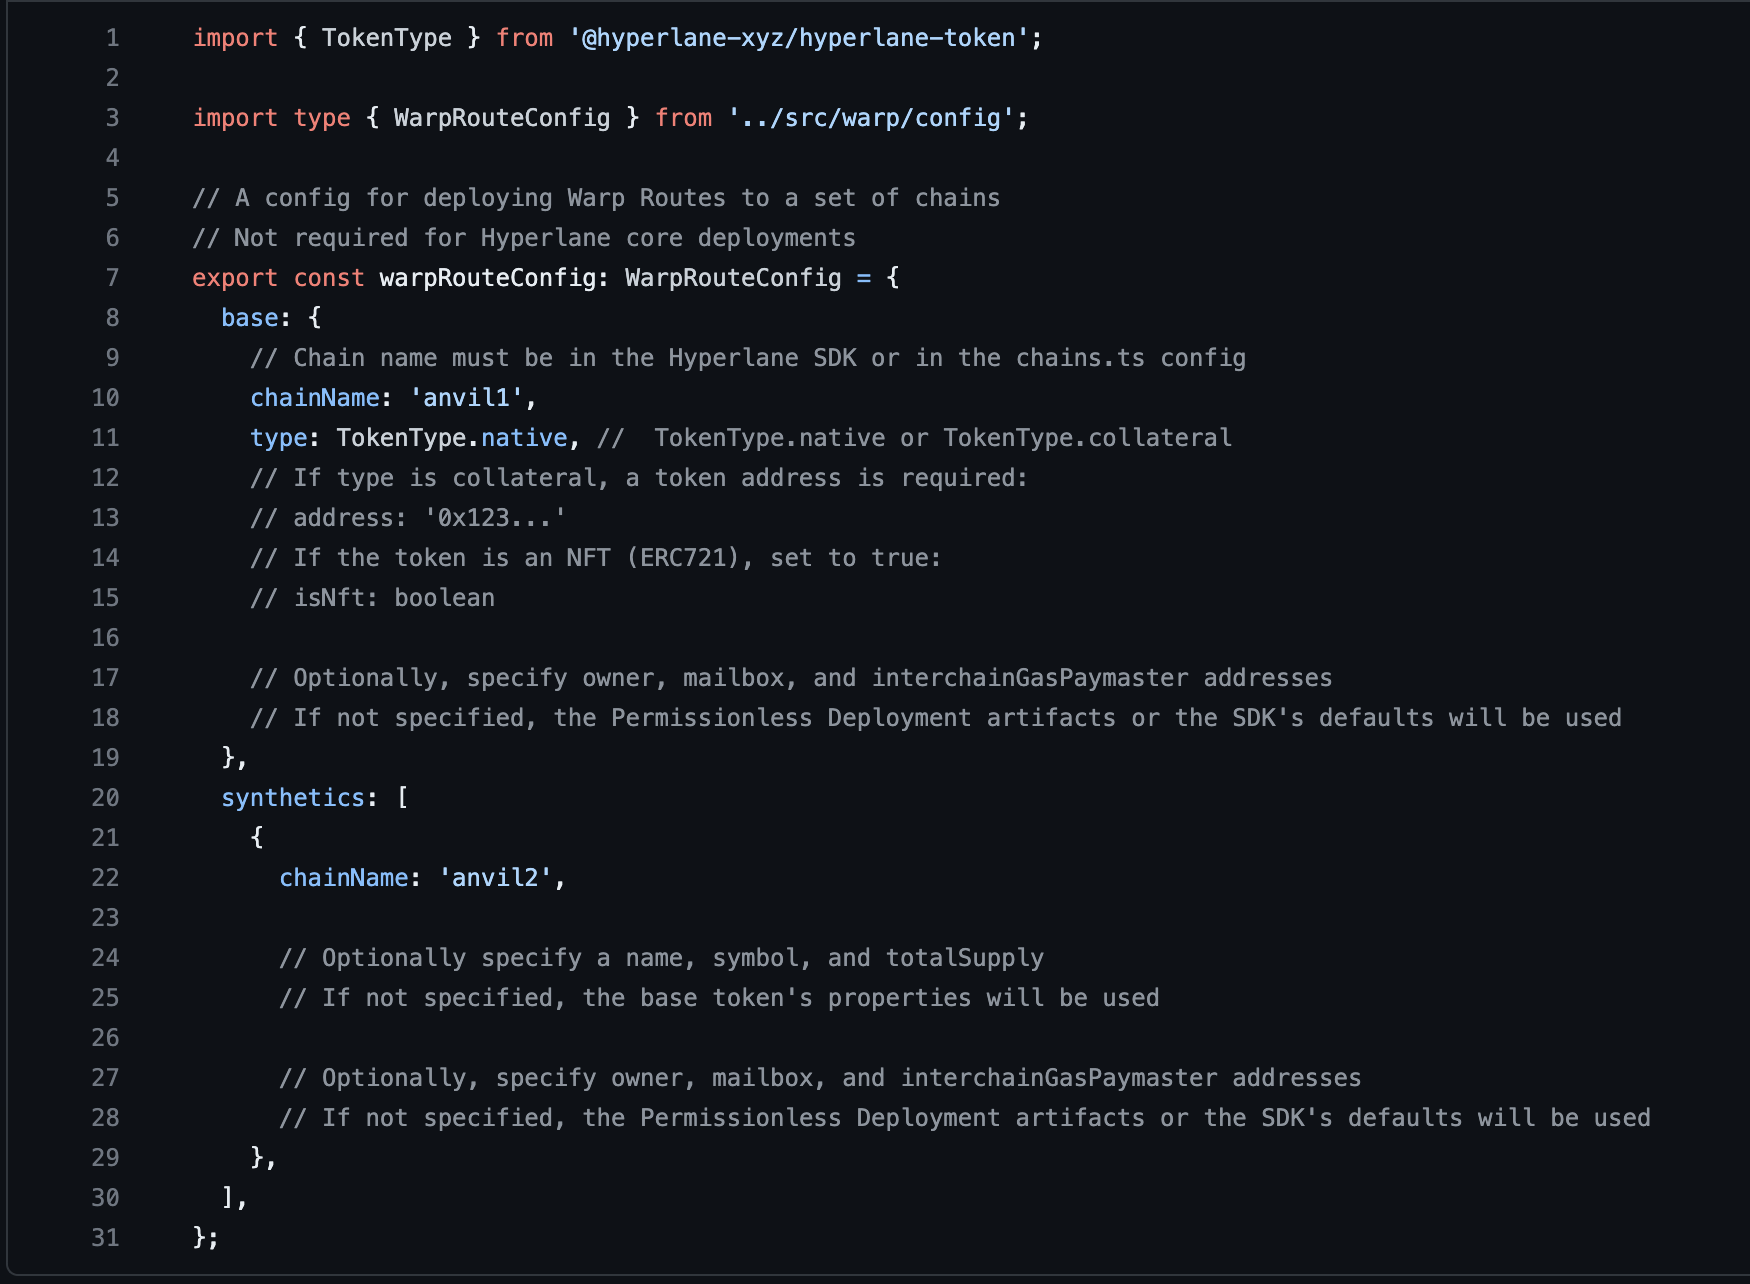
Now let’s understand the configuration file. You can clearly see that we have two subsections namely base and synthetics. Over in the base configurations you have data for your origin chain where you want to deploy your normal ERC20 token. Coming to the synthetics configuration, over here you declare a list of all the chains where you want to deploy your wrapped tokens. There can be a single base chain config but multiple synthetic configs.
In both the base and synthetic config you have an identical field i.e. chainName. With this common field, we are letting the deployment script know, in which chain we want to deploy our base and synthetic tokens. For this example, we will be deploying the base ERC20 token in the Sepolia chain and the synthetic token in the Avalanche Fuji chain.
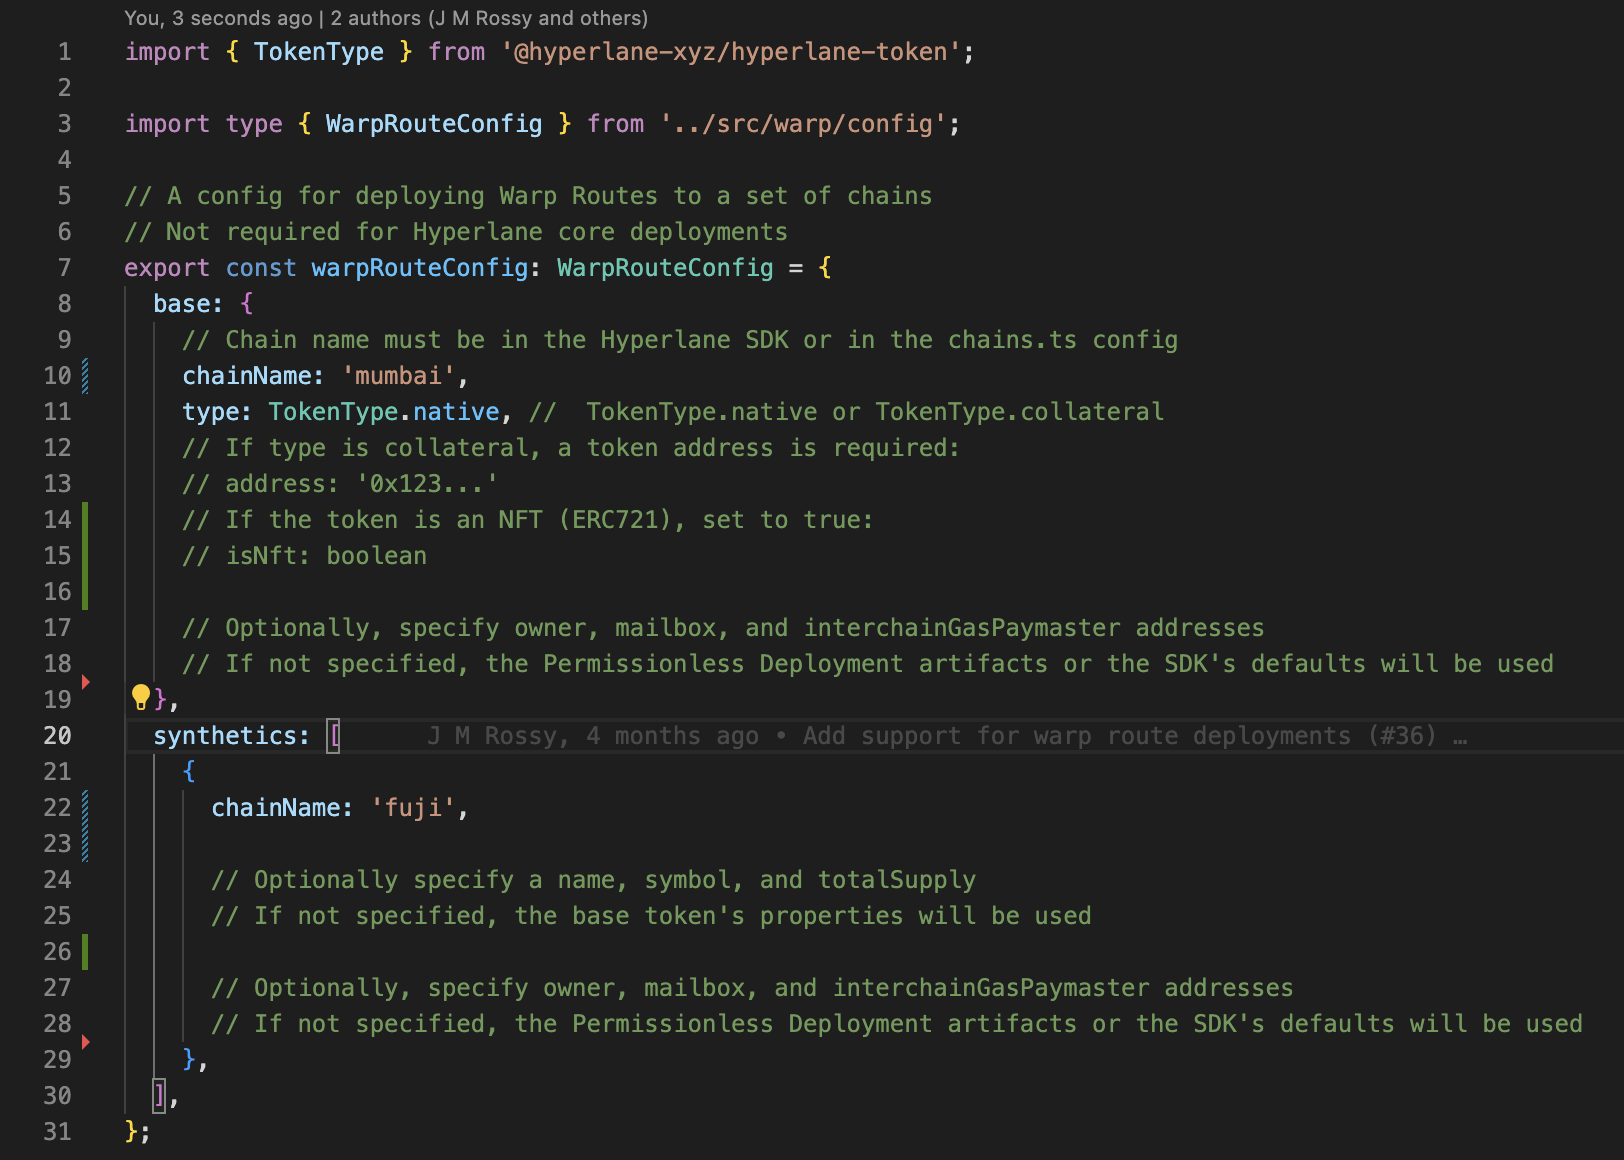
After changing the chain names, you don’t need to make any changes to the synthetic config. Heading over to the base config, there is one more field we need to change which is the type. Over in Hyperlane’s Warp Route, you have two types of base tokens. One is the Native token, you can choose this option if you don’t have an existing ERC20 token that you want to make interoperable.
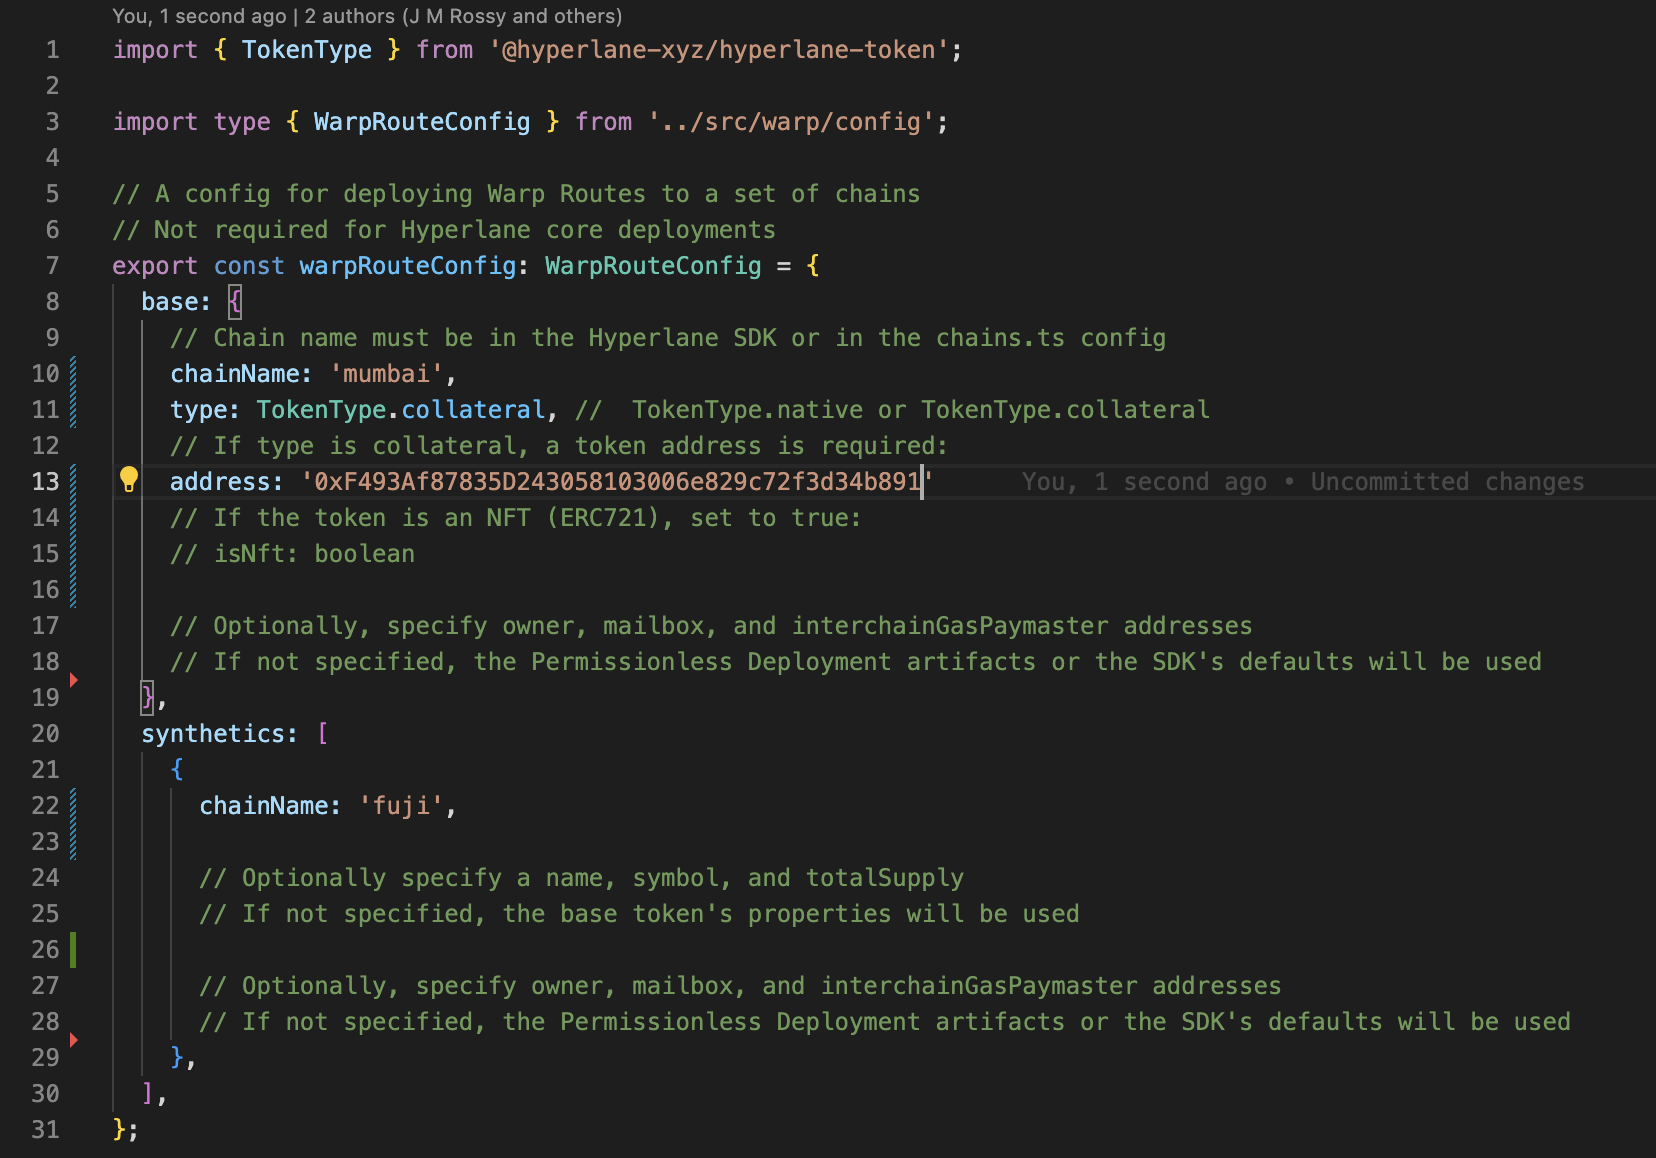
Now the second type is the Collateral token, which comes in handy if you already have a pre-existing ERC20 token that you want to make interoperable. If you choose this type, you need to add one more address field, in which you will provide the address of the existing token.
That’s it, you have successfully configured your warp route. Now it’s time to deploy it. We have already provided you with scripts to deploy your warp route with a single bash command. Make sure that you have a common account in which you have funds in both chains as we will be using a single account to deploy the contract on both chains. Fire up your terminal and run the following command and watch the magic:-
DEBUG=hyperlane* yarn ts-node scripts/deploy-warp-routes.ts \\
  --key your-private-key
Once the deployment is complete you will be able to see the following logs in your terminal. Now you move to your artifacts/warp_token-addresses.json file to check the router contract addresses for the warp route you deployed. Below we have attached two screenshots, both for the native type and collateral type.

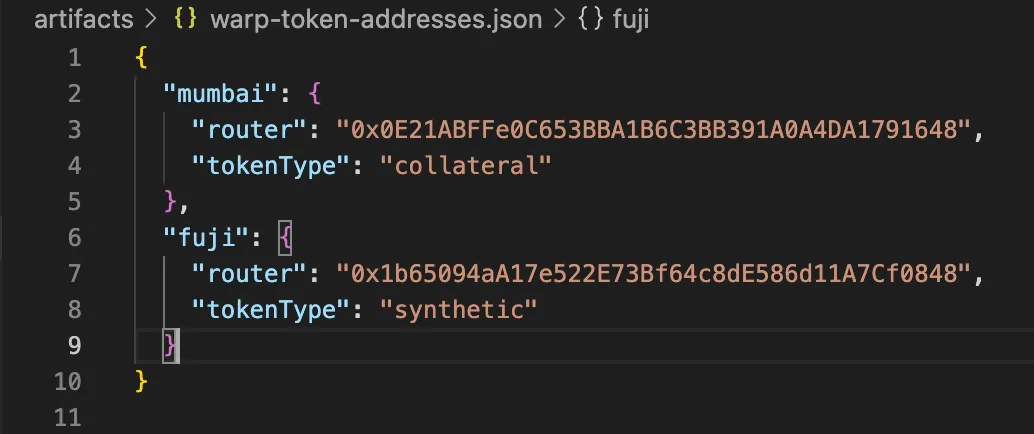

Now it’s time to test out your warp route. We already have a frontend repo that you can use to test out your warp route. Below is the frontend repo, clone it out and run the following commands to initialize it:-
git clone <https://github.com/hyperlane-xyz/hyperlane-warp-ui-template.git>

yarn install
After running the above commands, all the important modules needed for the project will be installed. Now, we need to provide the router address of the base and synthetic we got from the warp route deployment. Move on to the src/consts/tokens.ts, over there you can see we have two options either collateral or native. Add your warp route address as per your deployed type. We have added screenshots for the type.
{
    type: 'collateral',
    chainId: 5,
    address: '0xb4fbf271143f4fbf7b91a5ded31805e42b2208d6',
    hypCollateralAddress: '0x145de8760021c4ac6676376691b78038d3DE9097',
    name: 'Weth',
    symbol: 'WETH',
    decimals: 18,
    logoURI: '/logos/weth.png',
  }
Over in the collateral type, you will need to provide the address of the existing token as well as the router address(in the hypCollateralAddress field). The chainId is the domain identifier of the base chain. (You can find the whole list here).
{
    type: 'native',
    chainId: 11155111,
    name: "Demo Token",
    symbol: "DMT",
    decimals :18,
    hypNativeAddress:"0x1fF75Abd35a663aBEAaeF48B118d893ce001844B",
    logoURI: '/logos/weth.png',
}
In the native-type deployment, you need to just provide the router address you got from your deployment over in the hypNativeAddress field. Similar to collateral type, you need to give the chainId also. Once you have made these changes and configured the front end, it’s time to test it out. Run the following command in the terminal to start the front end.
yarn run dev
Then you can open your browser and go to http://localhost:3000/ and you will be able to view a beautiful interface that you can use to swap your tokens using the wrap router you deployed.
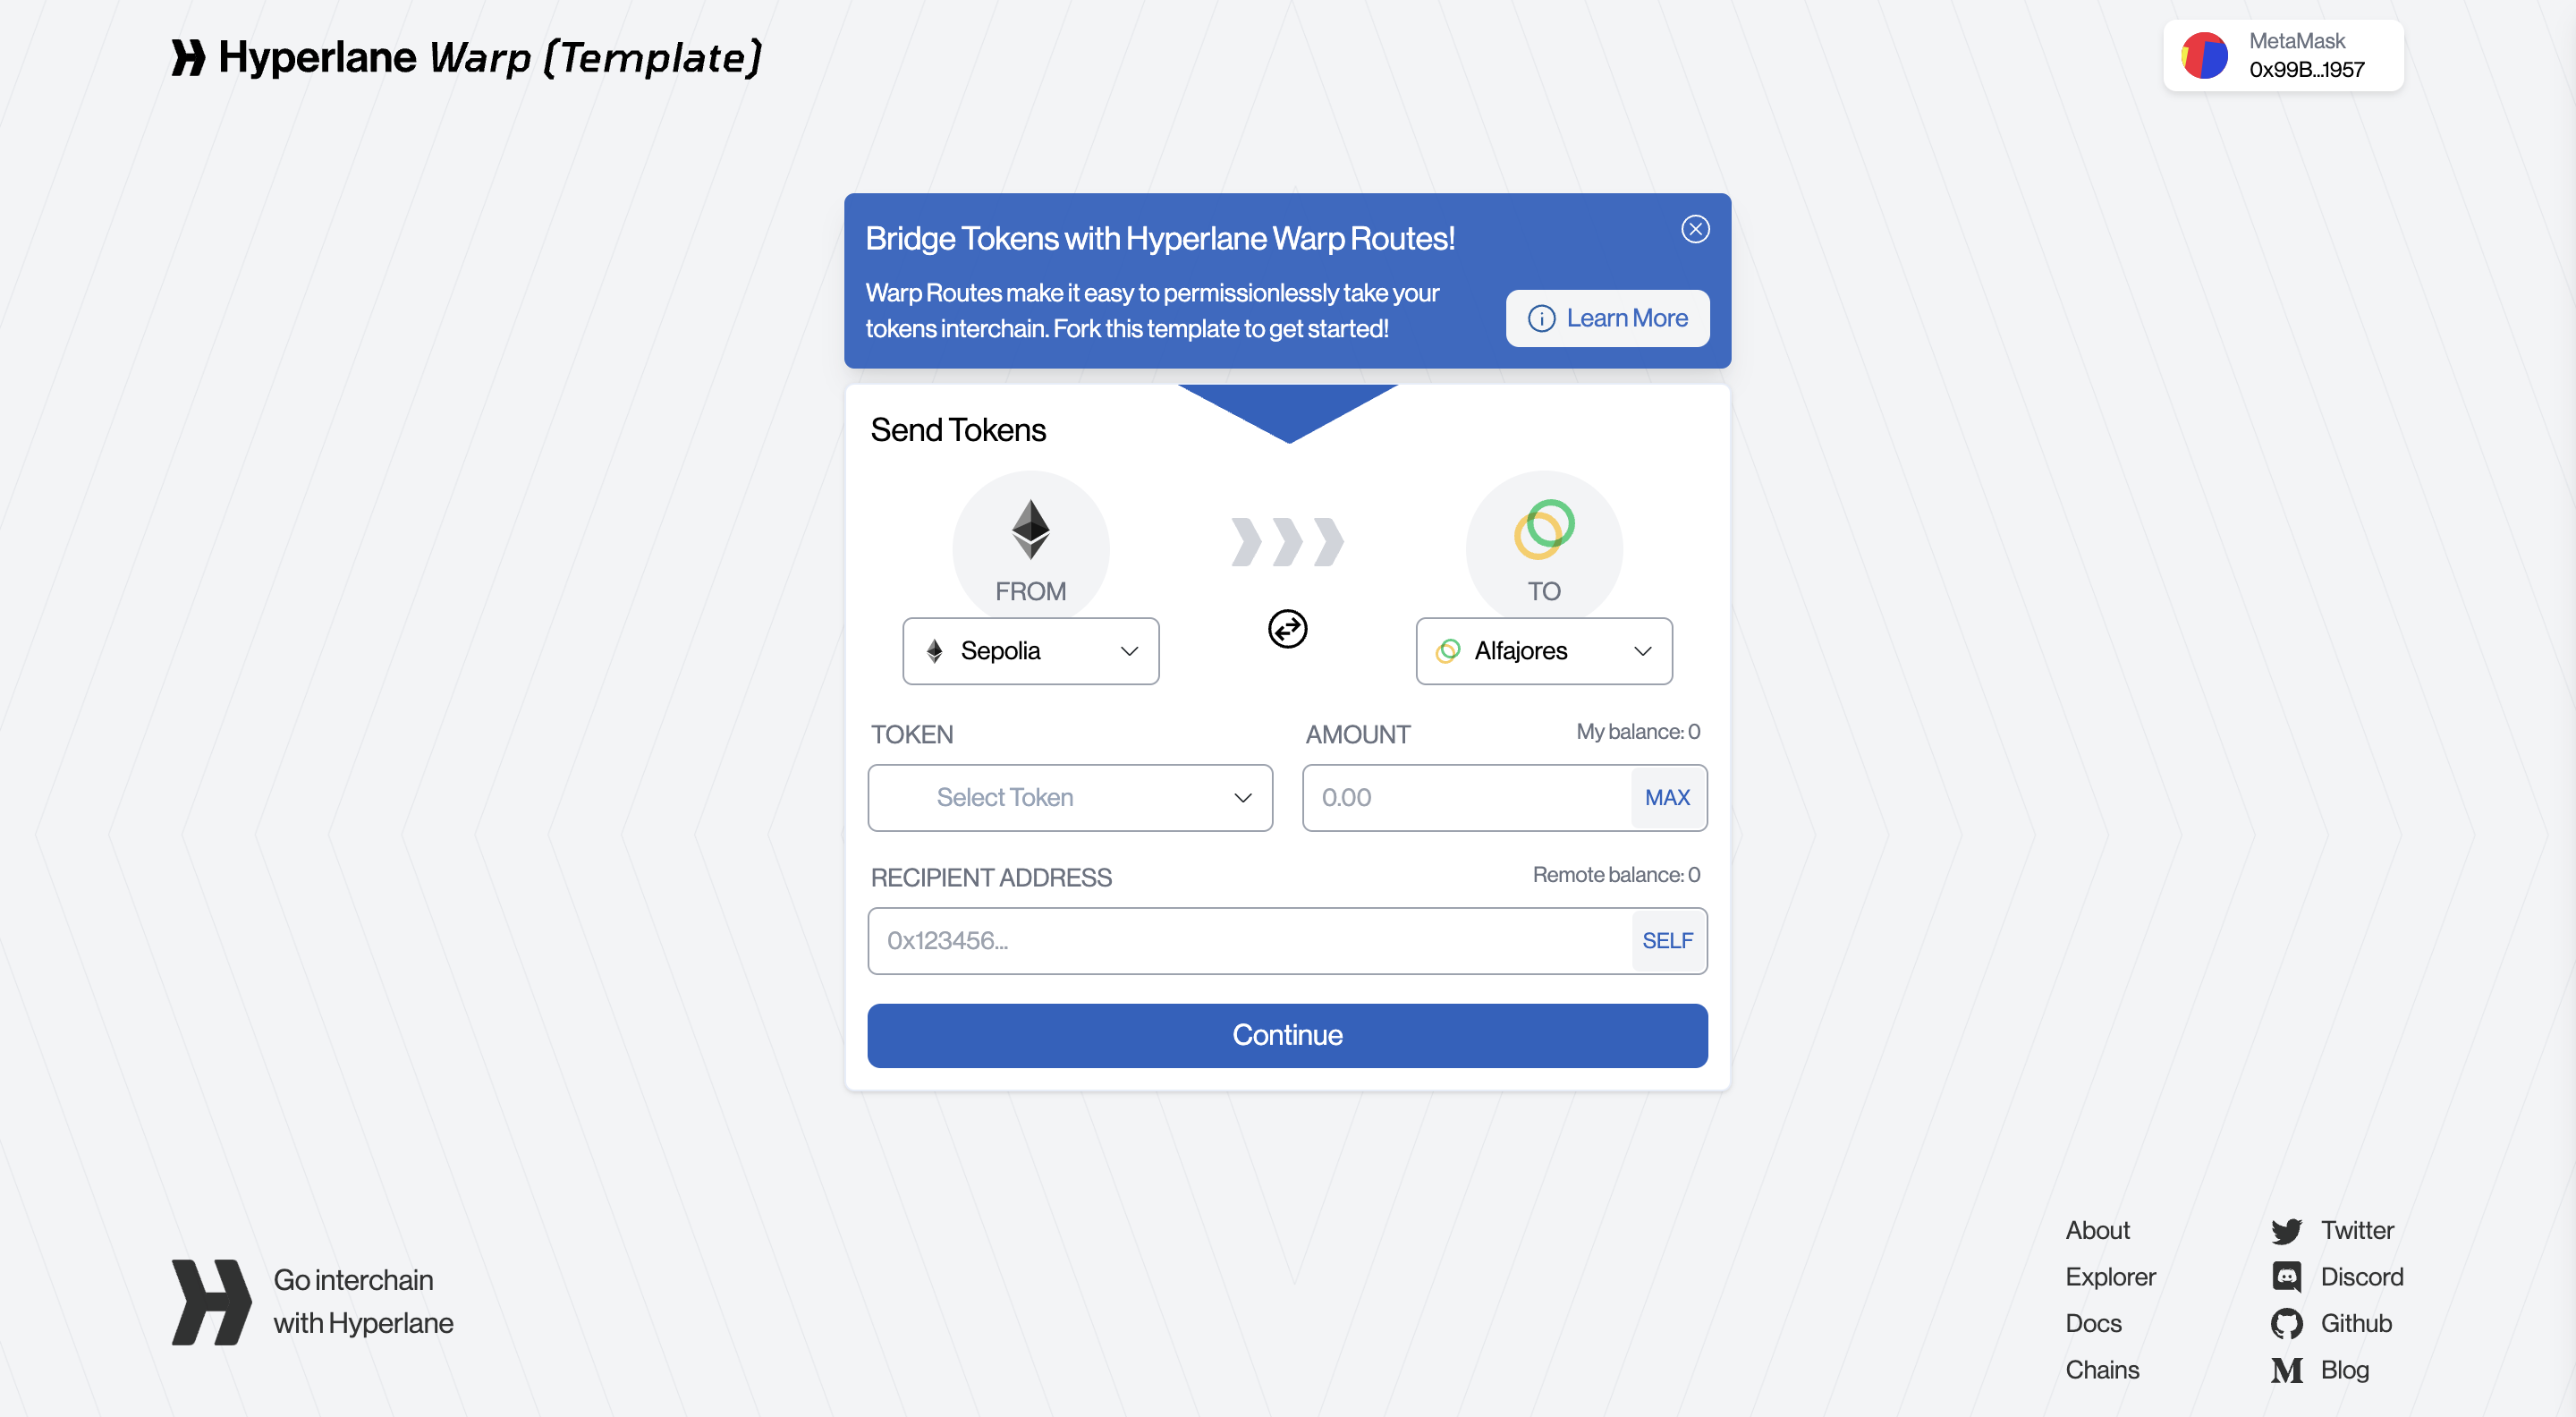
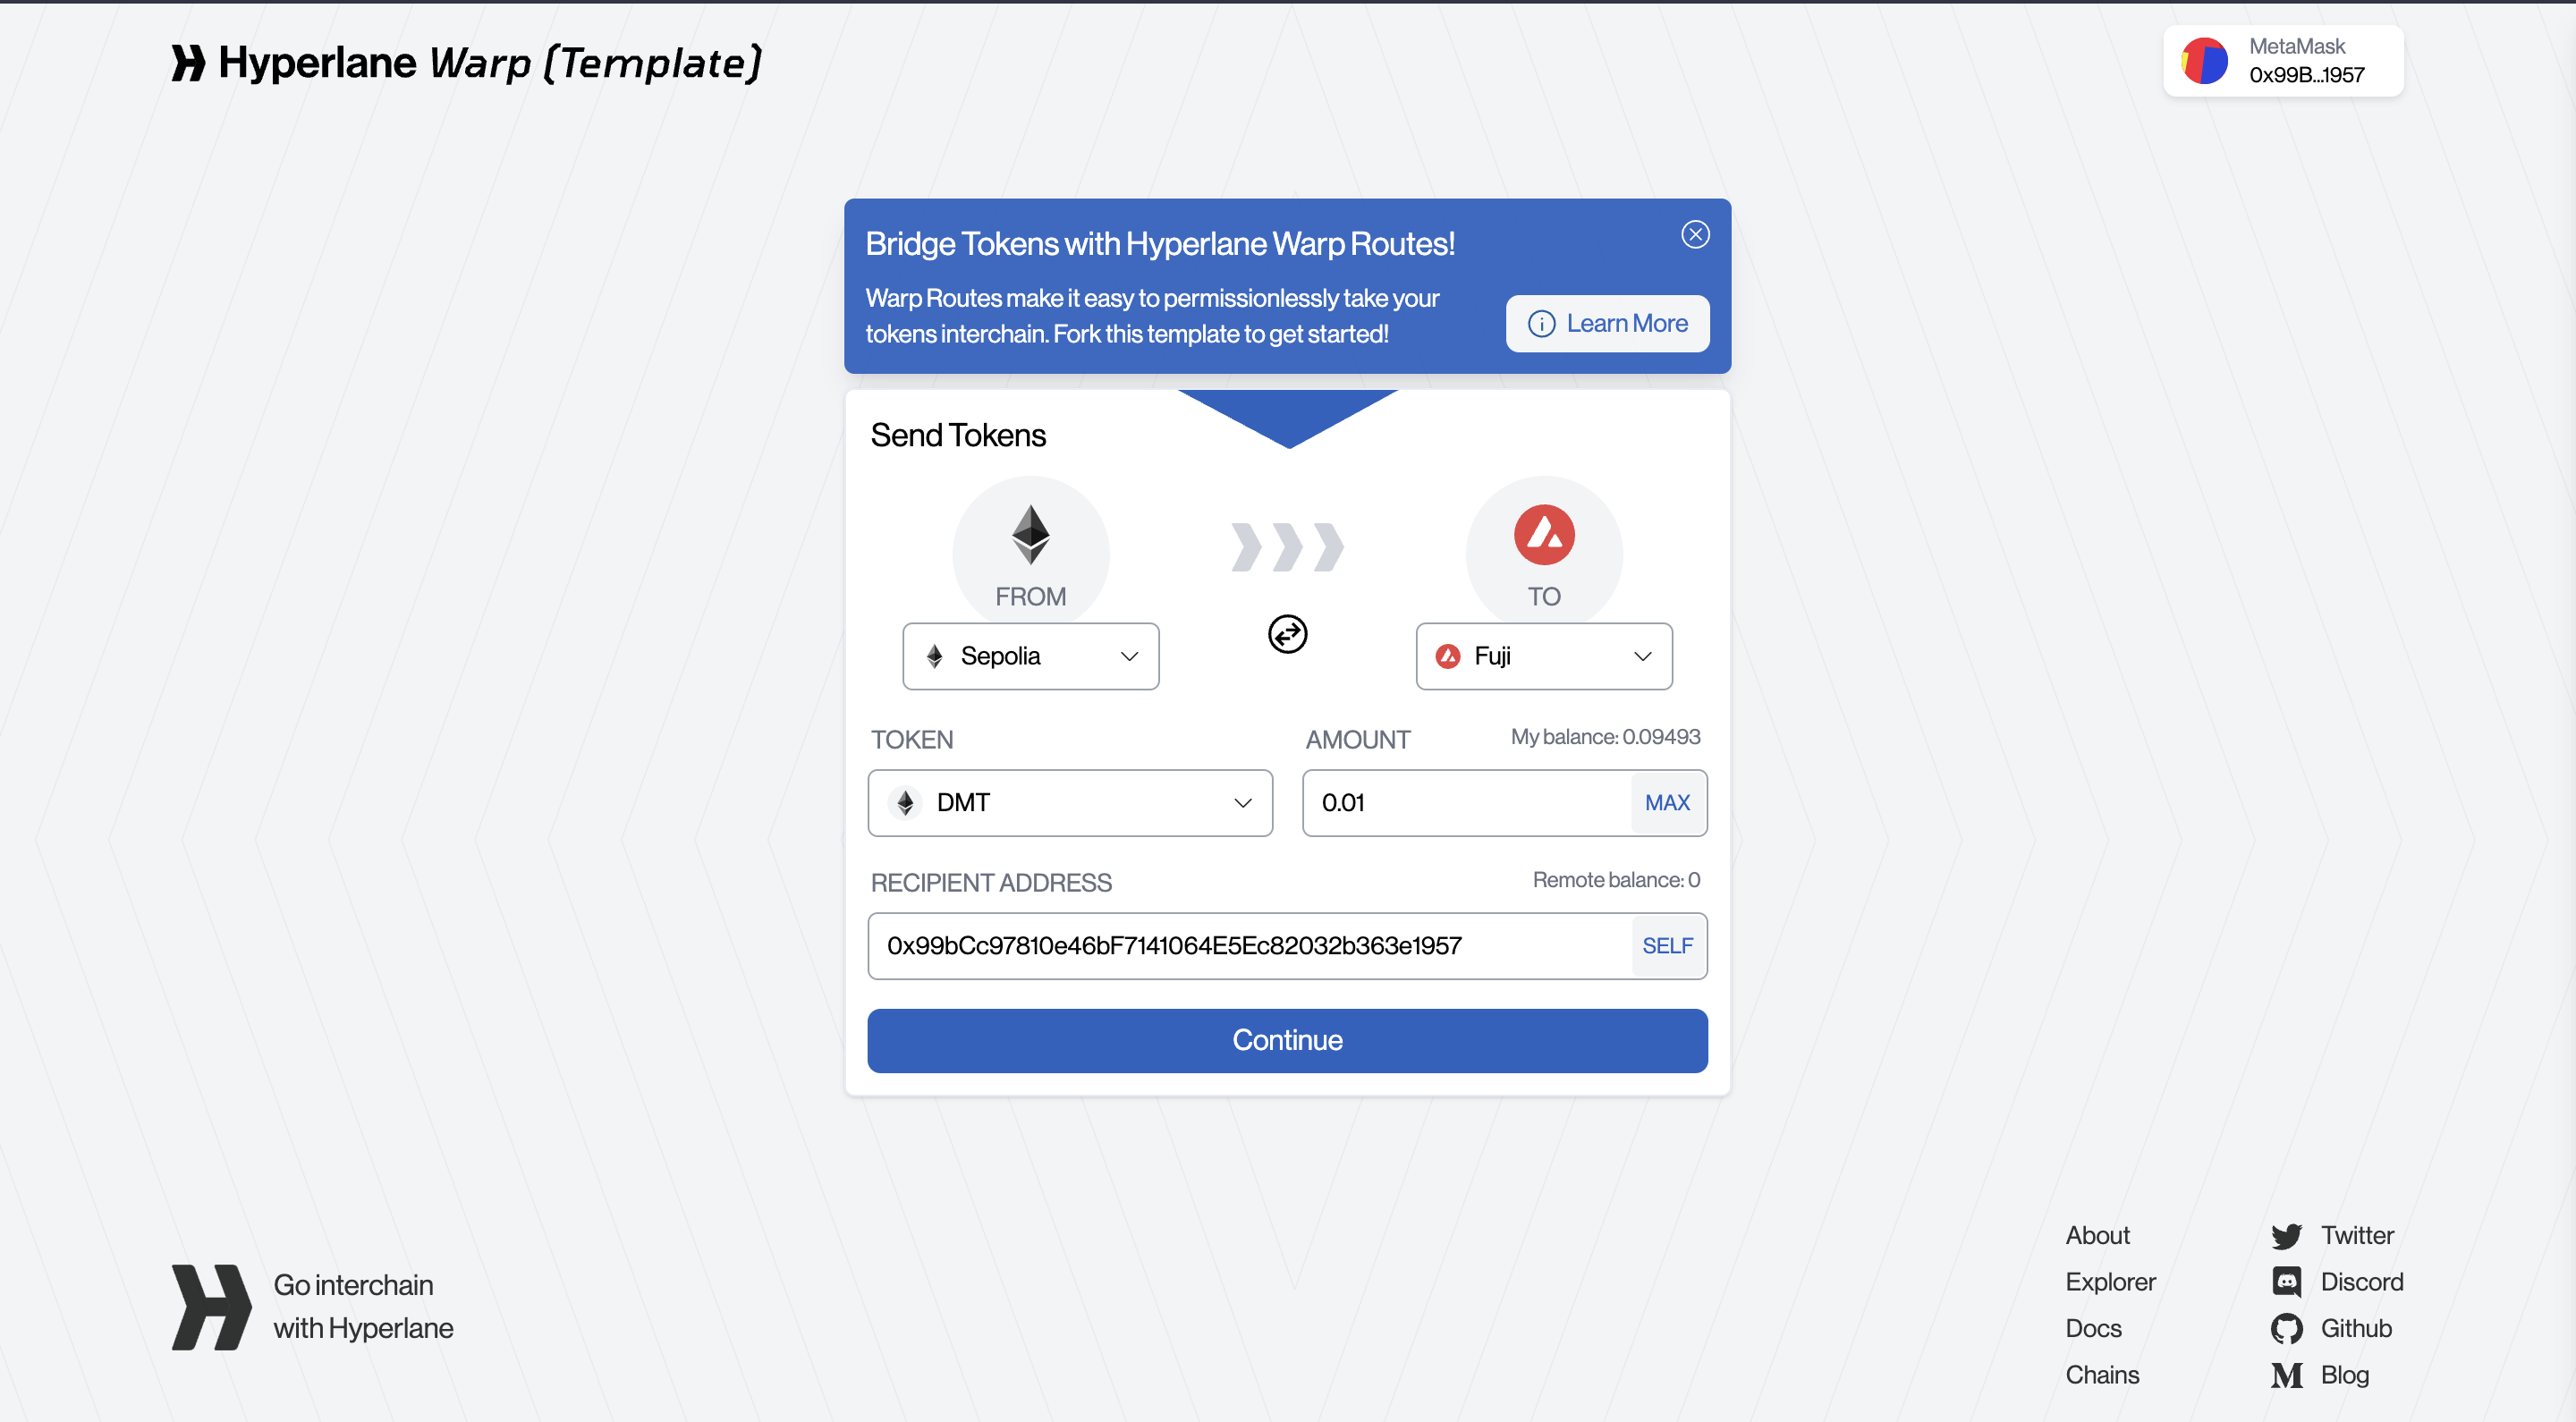
After this, choose Sepolia as the parent chain and Fuji as the remote chain. And in the token placeholder choose your deployed token. Enter the amount you will be bridging and click the self button to send it to your own address. Once you have filled up all these fields, click on continue.
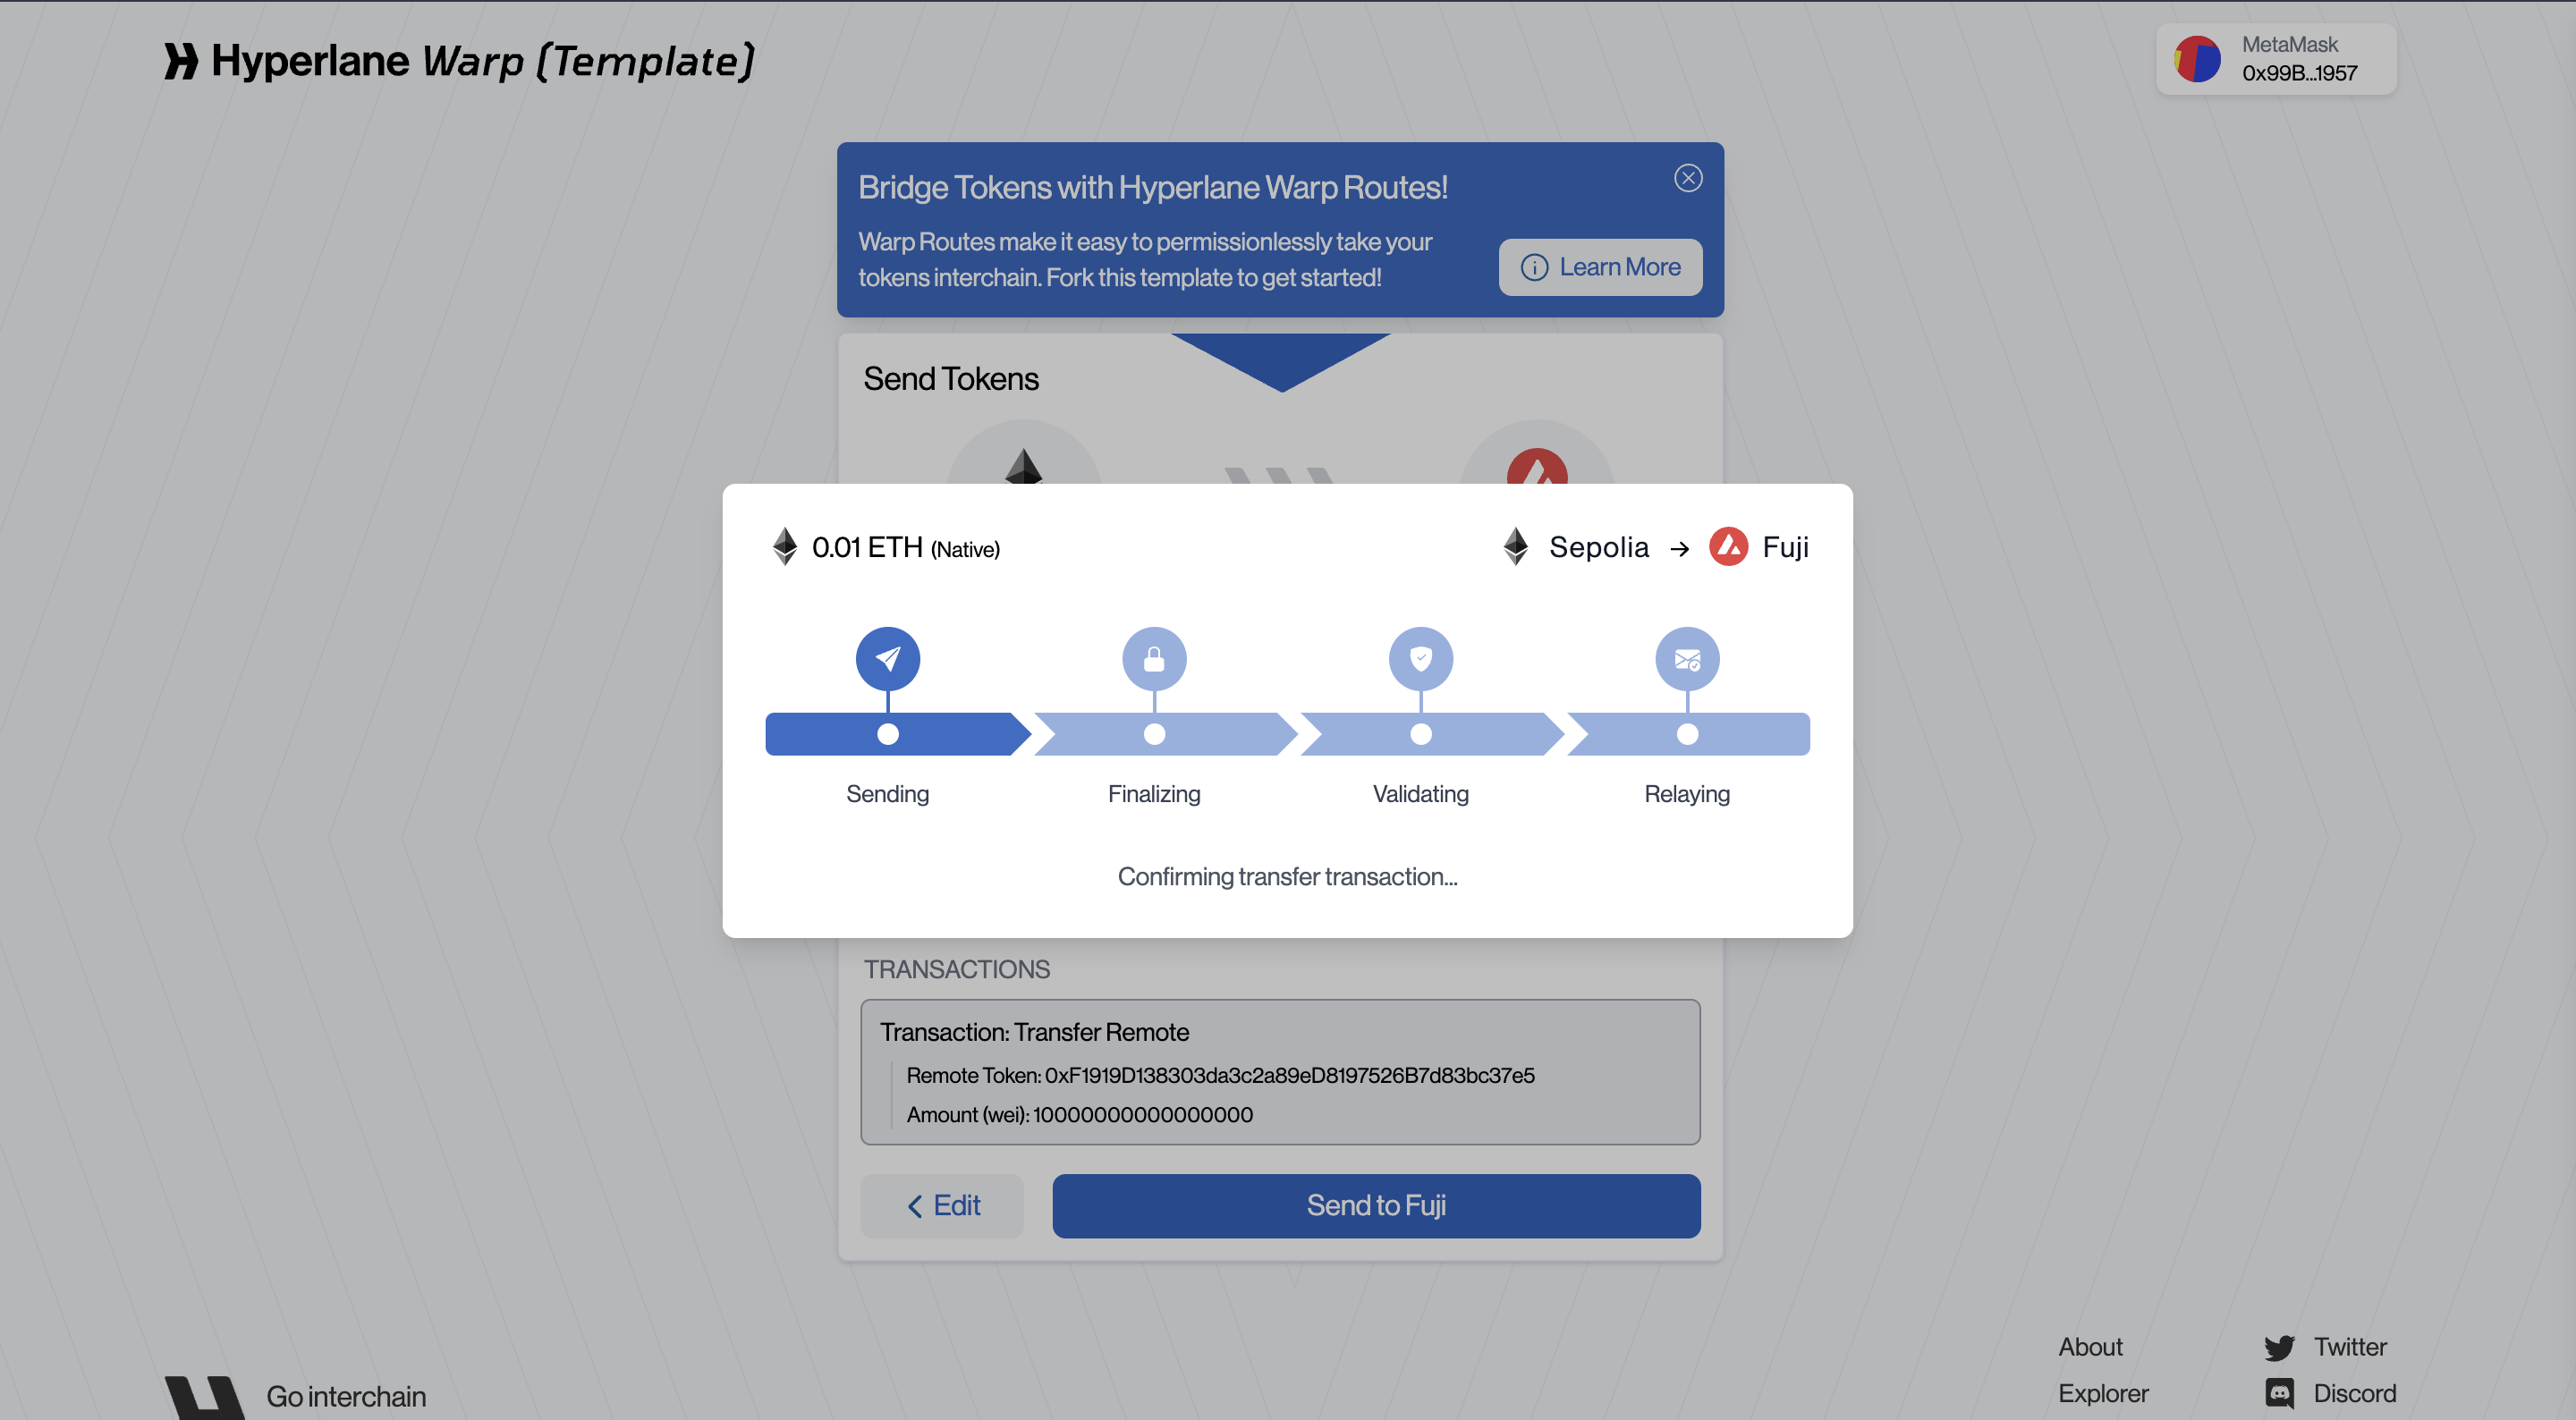
The transaction will be completed as soon as you sign it with your Metamask wallet. The status for the same warp route transaction will be displayed in the front end.
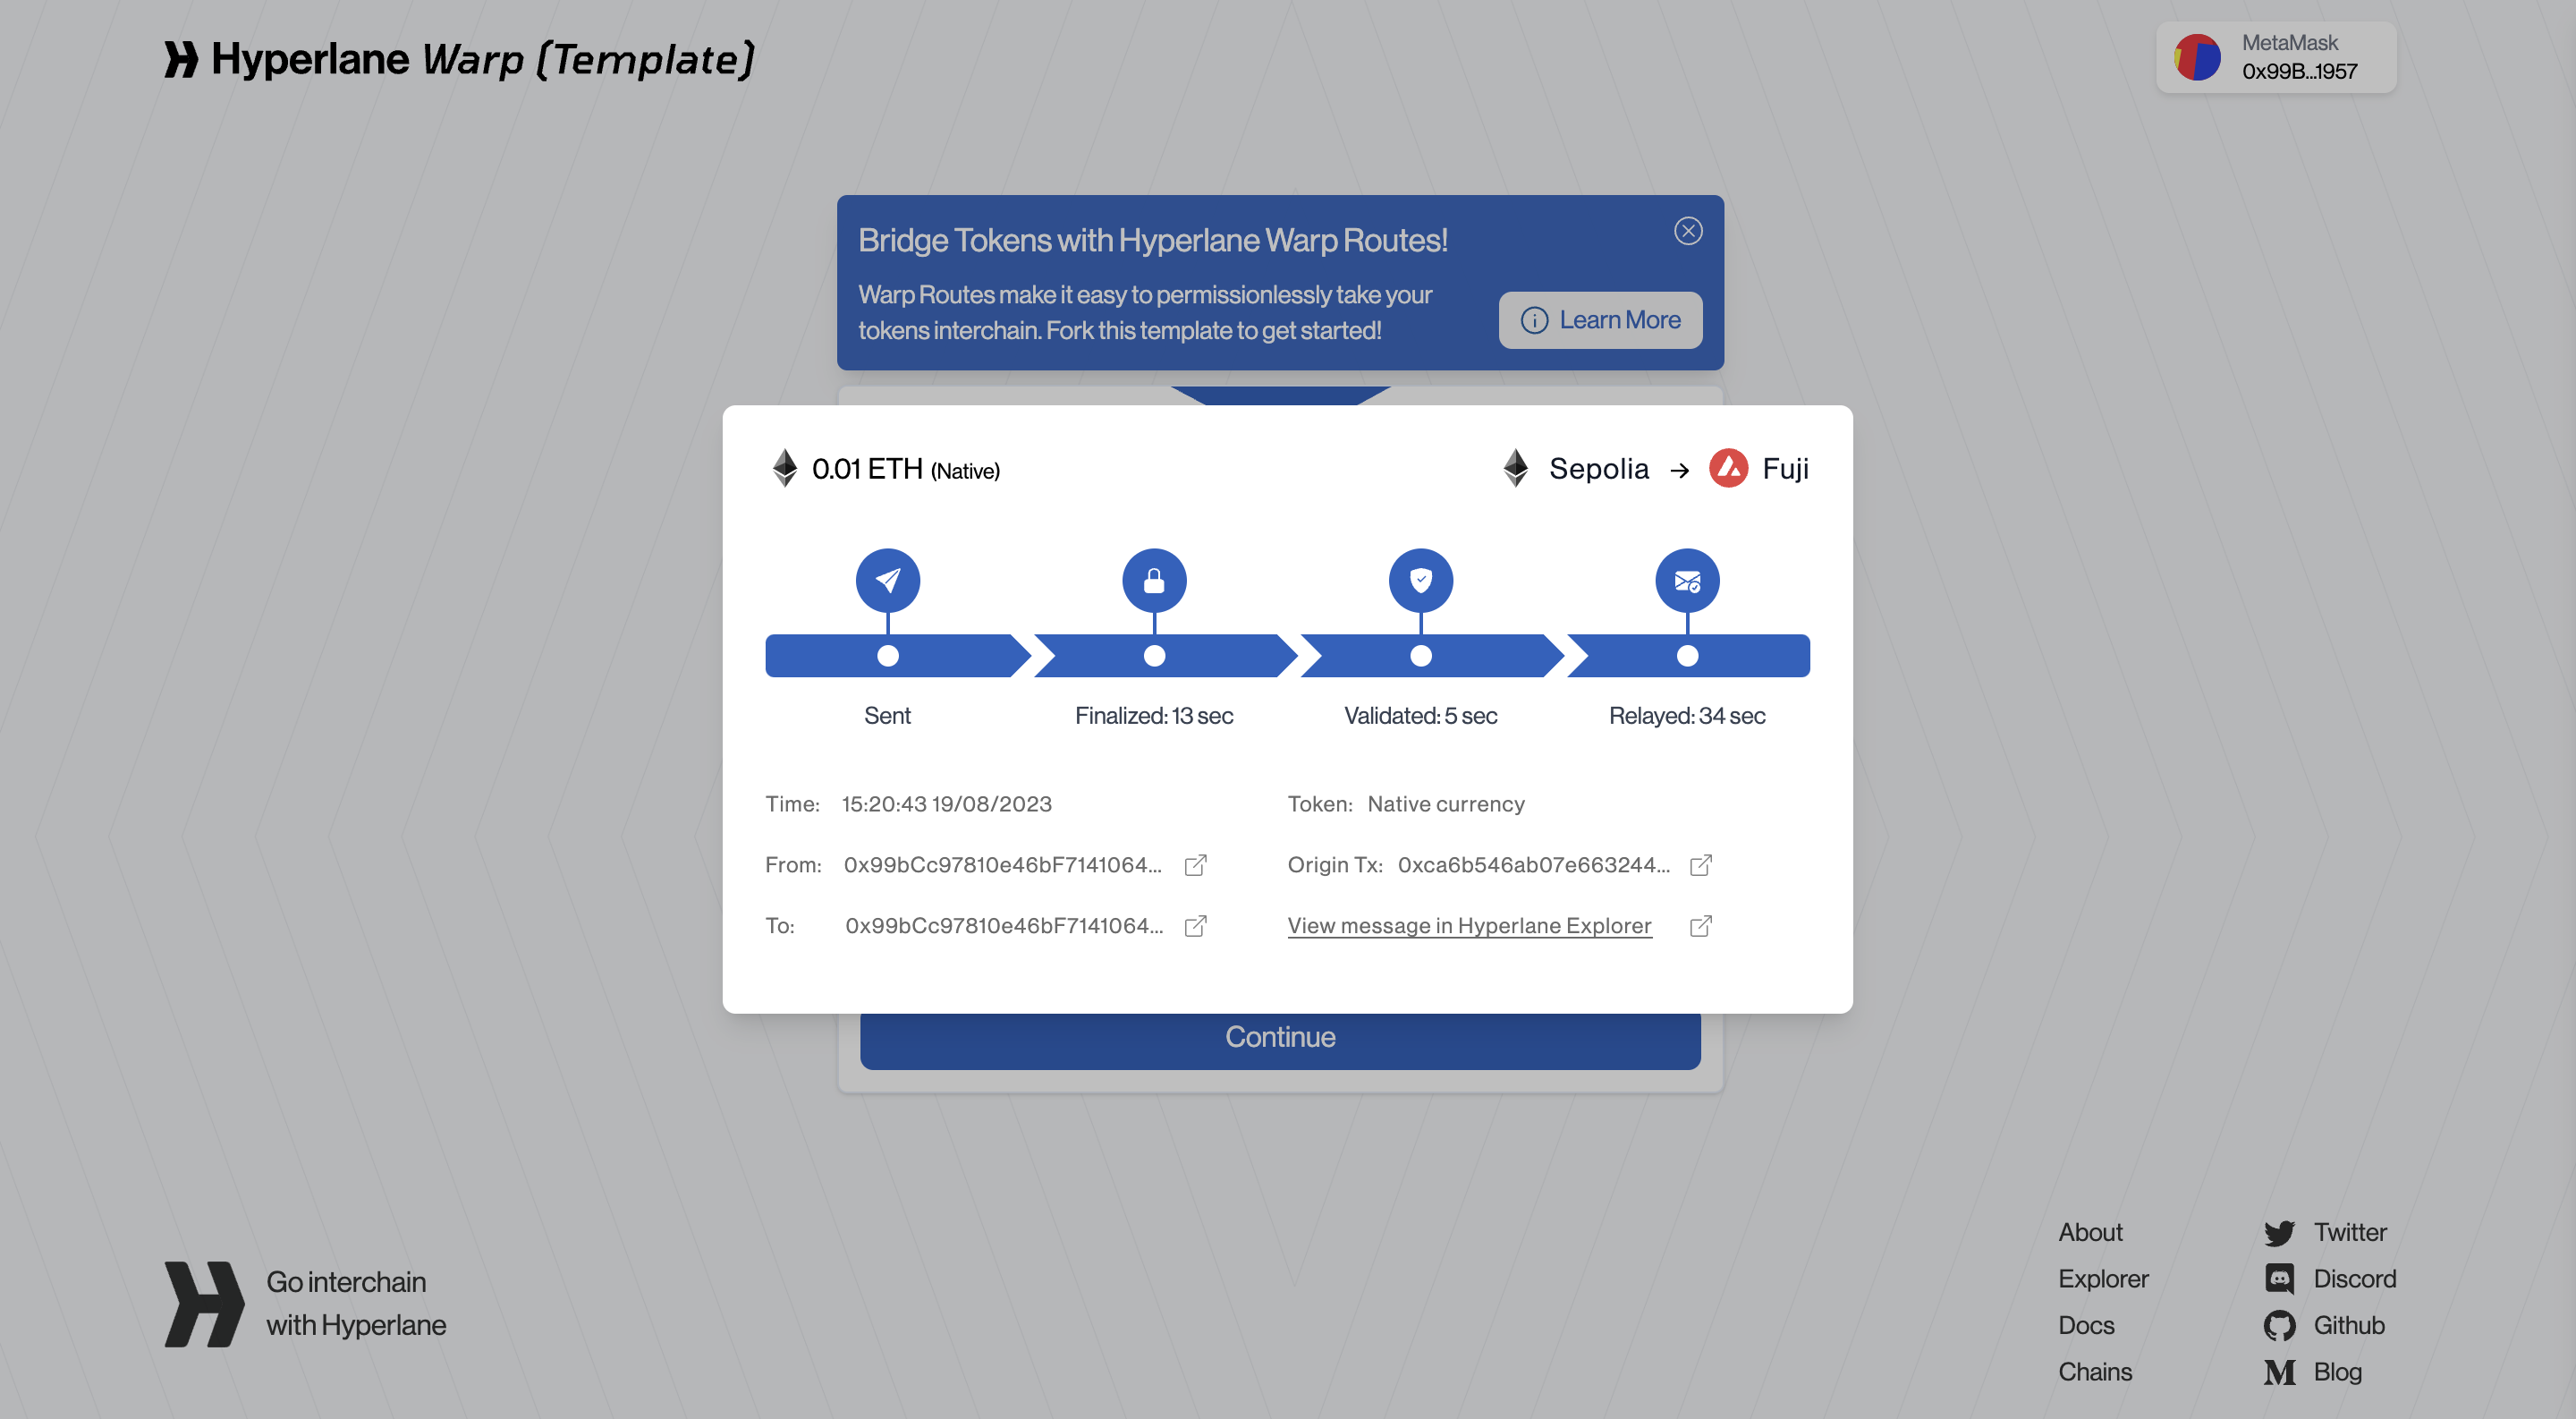
Woohoo!!! you created a warp route. Now anyone can use your warp route to bridge the tokens. This is how simple it is to make cross-chain tokens using Hyperlane. Warp routes are going to form the next version of interchain defi.
In conclusion, Hyperlane's interchain communication technology provides an easy way to bridge communication across multiple chains. With the ability to deploy smart contracts on multiple chains and bridge them together, developers can create new and innovative decentralized applications that were previously impossible. By using Hyperlane's tools, developers can leverage the power of multiple chains to create a more robust and efficient blockchain ecosystem. The code snippets provided in this article serve as an introduction to Hyperlane and its capabilities. With further exploration and experimentation, developers can create even more complex and powerful decentralized applications.
Subscribe to my newsletter
Read articles from Hyperlane Academy directly inside your inbox. Subscribe to the newsletter, and don't miss out.
Written by
