Perform a Git Bisect to Find a Bug: A Step-by-Step Guide
 Edvin Dsouza
Step 1: Create a Simple Repository
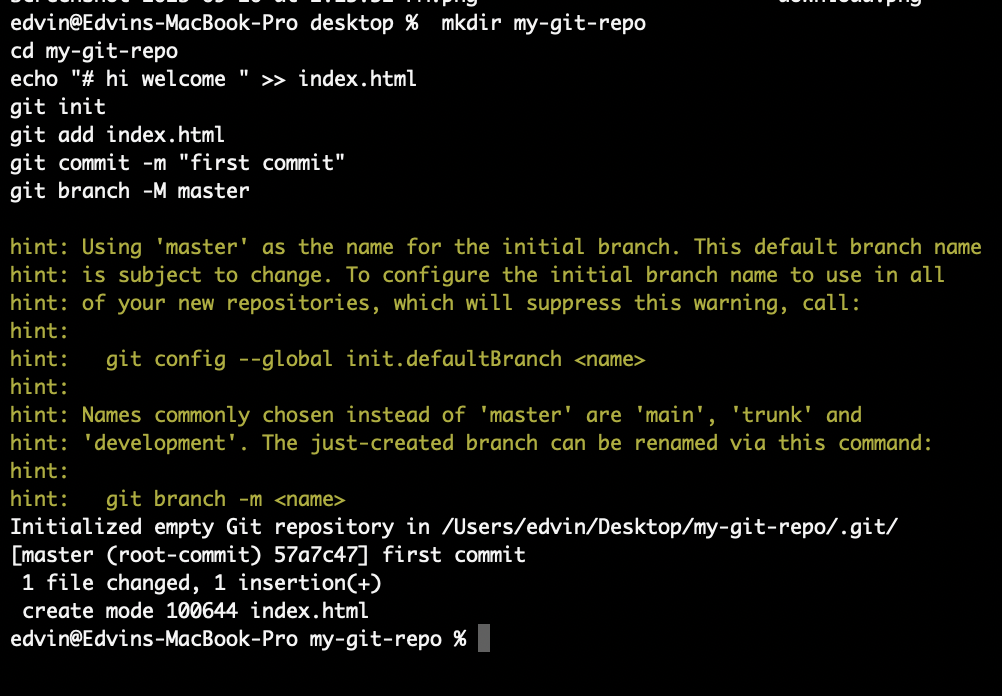
We'll start by creating a simple Git repository to demonstrate the Git bisect process.
mkdir my-git-repo
cd my-git-repo
echo "hi welcome " >> index.html
git init
git add index.html
git commit -m "first commit"
git branch -M master

Step 2: Add Code with a Known Working State
In this step, add some code that represents a known working state of your project. This code should be free of any bugs.
# Create a new file and add some code
echo "This is a known working state." > app.js

# Add and commit the changes
git add app.js
git commit -m "Initial commit - Known working state"

Step 3: Introduce a Bug
# Modify the code to introduce a bug
echo "This is a known buggy state." > app.js

# Add and commit the changes
git add app.js
git commit -m "Introduce a bug - Known buggy state"

Step 4: Bisect Setup
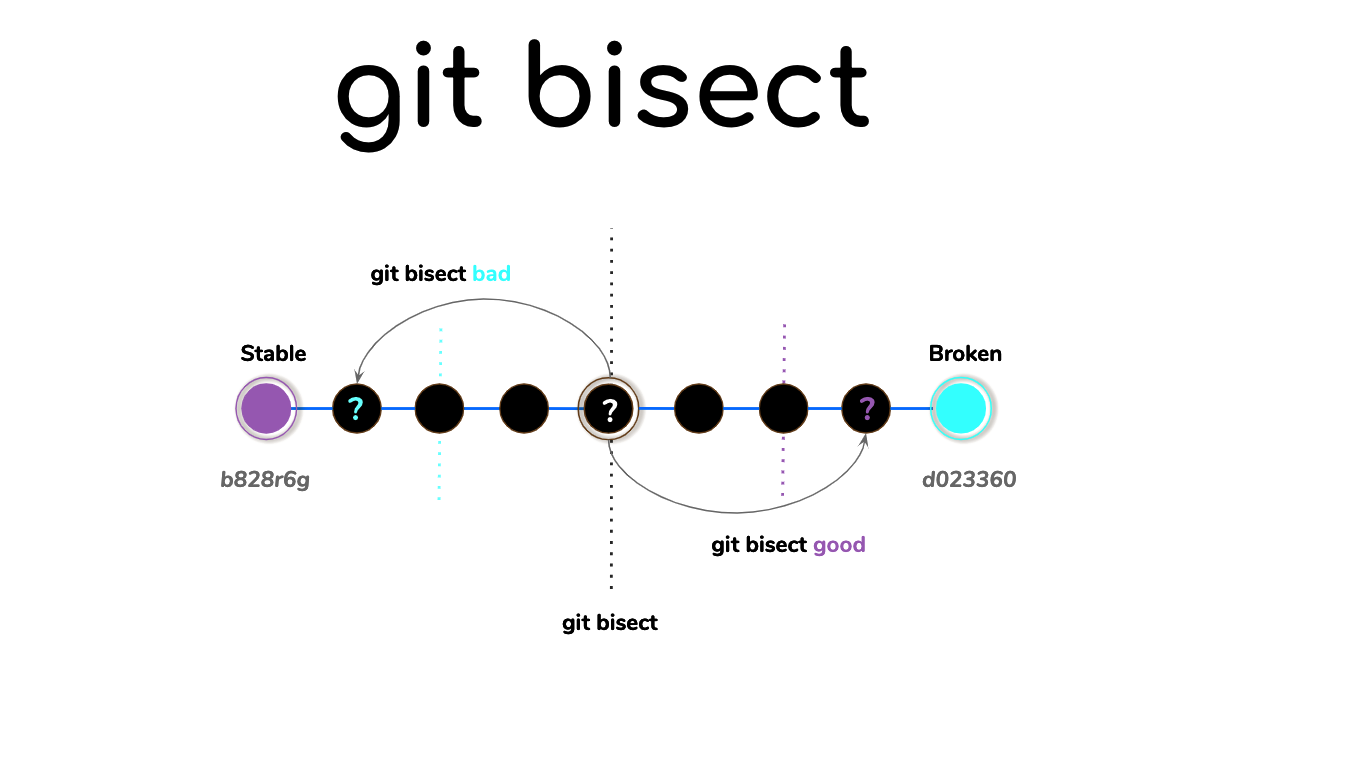
With our repository set up, we can start using Git bisect to find the commit that introduced the bug. First, we need to initiate the bisect process.
# Start the bisect process
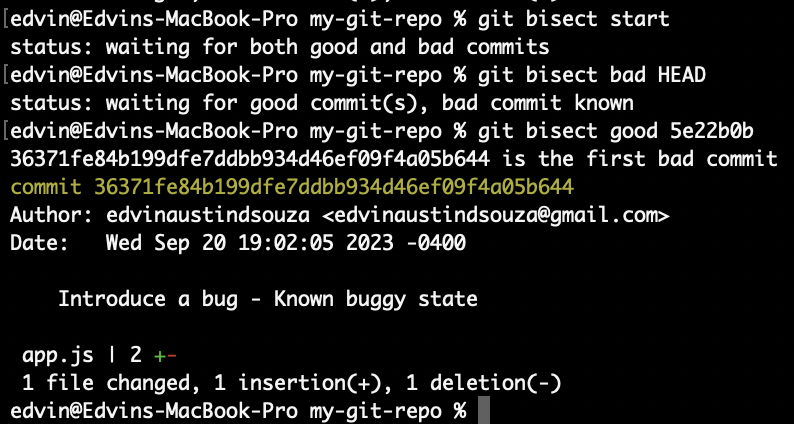
git bisect start

# Specify the bad commit (the known buggy state)
git bisect bad HEAD

# Specify the good commit (the known working state)
git bisect good <commit-hash-of-known-working-state>

Step 5: Begin the Bisect
Git bisect will now use a binary search algorithm to find the commit responsible for the bug. It will automatically check out commits for you to test. Mark each commit as 'good' or 'bad' based on whether it exhibits the bug or not.
# Git will check out a commit for you to test
# Test the code to see if it has the bug
# If it's buggy, run:
git bisect bad
# If it's not buggy, run:
git bisect good
Repeat this process until Git bisect narrows down the range of commits to a single commit that introduced the bug.
Step 6: Finish the Bisect
Once Git bisect has found the commit responsible for the bug, it will display the commit hash and a message indicating that you've found the culprit.You can now exit the bisect process.
git bisect reset

Step 7: Fix the Bug
Now that you've identified the commit that introduced the bug, you can examine the changes made in that commit and work on fixing the bug. Once the bug is fixed, commit the changes to resolve the issue.
# Fix the bug
# Add and commit the changes
git add app.js
git commit -m "Fix the bug introduced in commit <commit-hash>"
Conclusion
Git bisect is a valuable tool for efficiently tracking down the commit that introduced a bug in your code. By following this step-by-step guide, you can streamline the debugging process and ensure that your codebase remains healthy and bug-free. Happy debugging!
Subscribe to my newsletter
Read articles from Edvin Dsouza directly inside your inbox. Subscribe to the newsletter, and don't miss out.
Written by

Edvin Dsouza
Edvin Dsouza
👩💻 DevOps engineer 🚀 | Automation enthusiast ⚙️ | Infrastructure as code | CI/CD 🌟 Let's build awesome things together!