AWS CLI: Installation and Configuration
 Apoorv singh
INTRODUCTION
Amazon Web Services Command Line Interface (AWS CLI) is a powerful tool that enables users to interact with AWS services and manage their cloud resources from the command line. AWS CLI provides a command-line interface for AWS services, allowing developers, system administrators, and DevOps professionals to automate tasks, configure services, and perform various operations without the need for a graphical user interface.
The AWS Command Line Interface is an open-source tool that enables you to manage AWS services from the Command line. AWS CLI is a unified tool to manage your AWS services. It allows you to control multiple AWS services from the command line and automate them through scripts.
Step 1:
Now, we will Install the AWS CLI on our local machine. (In my case my local machine is Ubuntu.)
Firstly, we will update our system.
sudo apt-get update

Now we will Install AWS CLI:
a. Open a terminal.
b. Run the following command to install AWS CLI using curl:
curl "https://awscli.amazonaws.com/awscli-exe-linux-x86_64.zip" -o "awscliv2.zip"

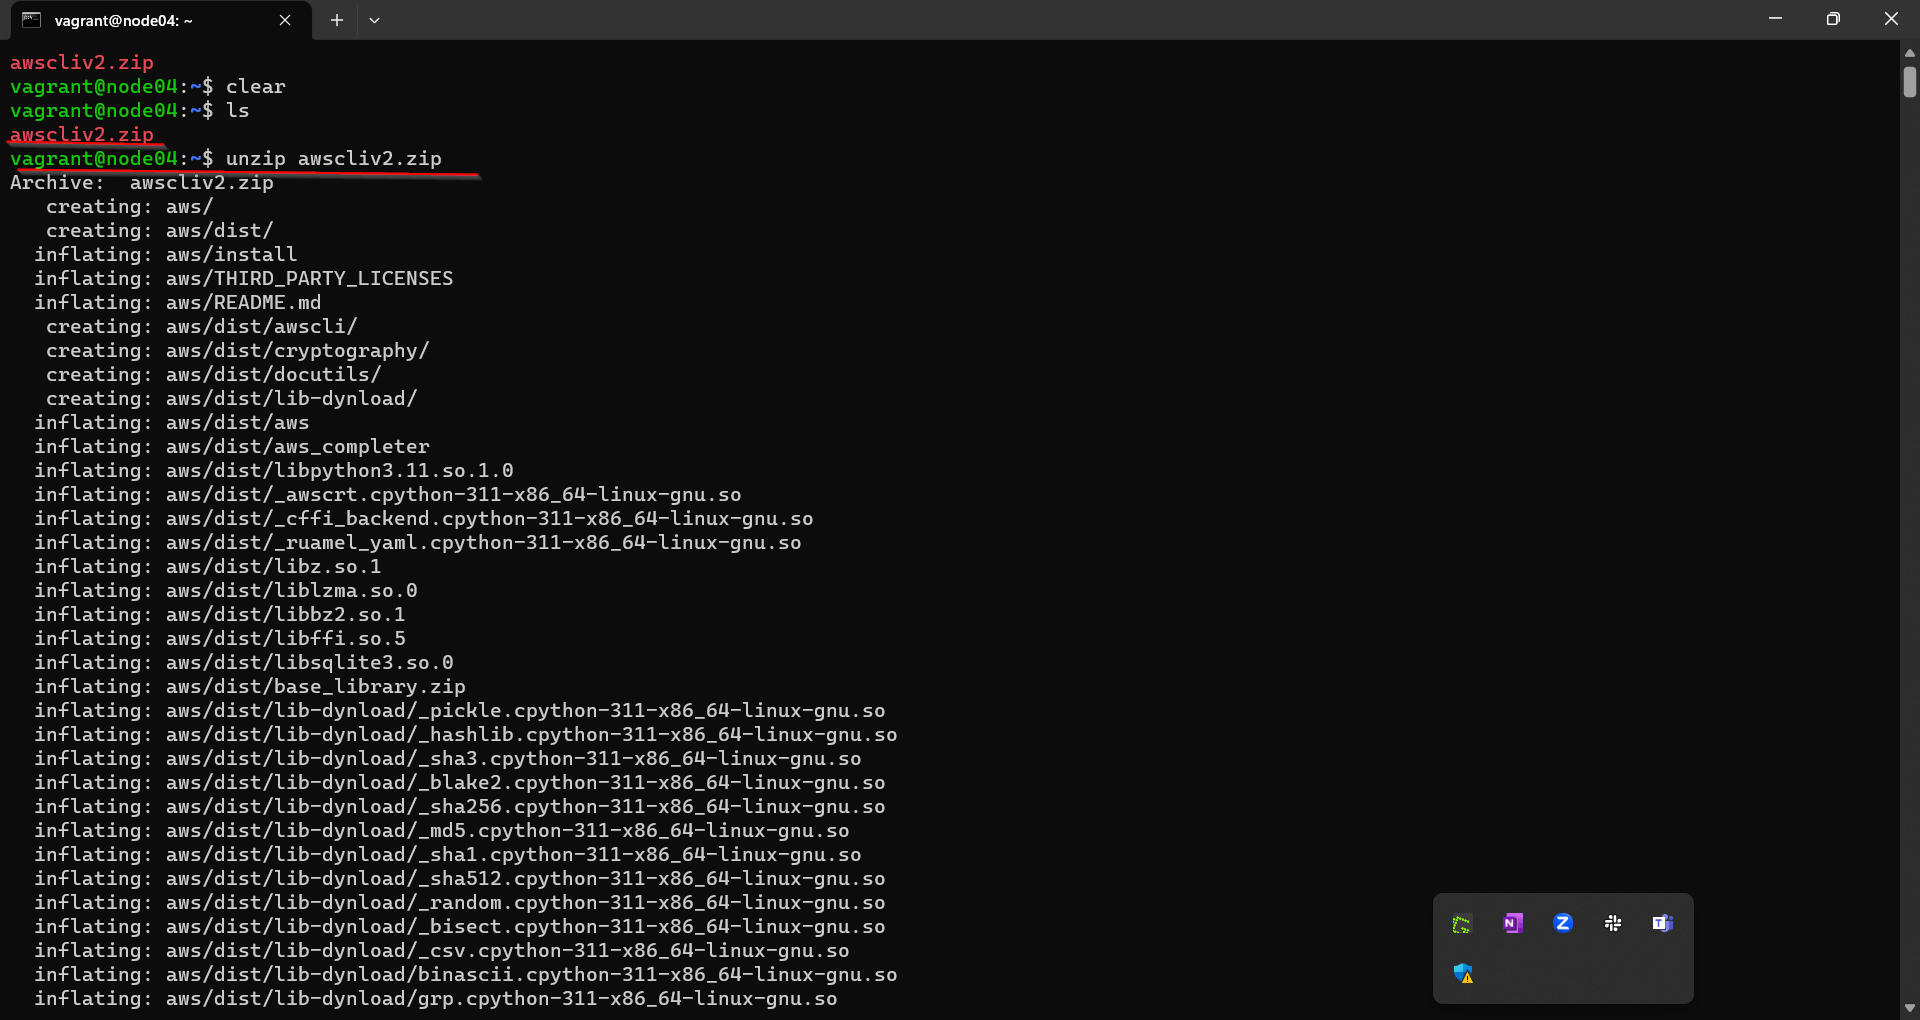
Unzip the AWS CLI:
Unzip the file awscli2.zip
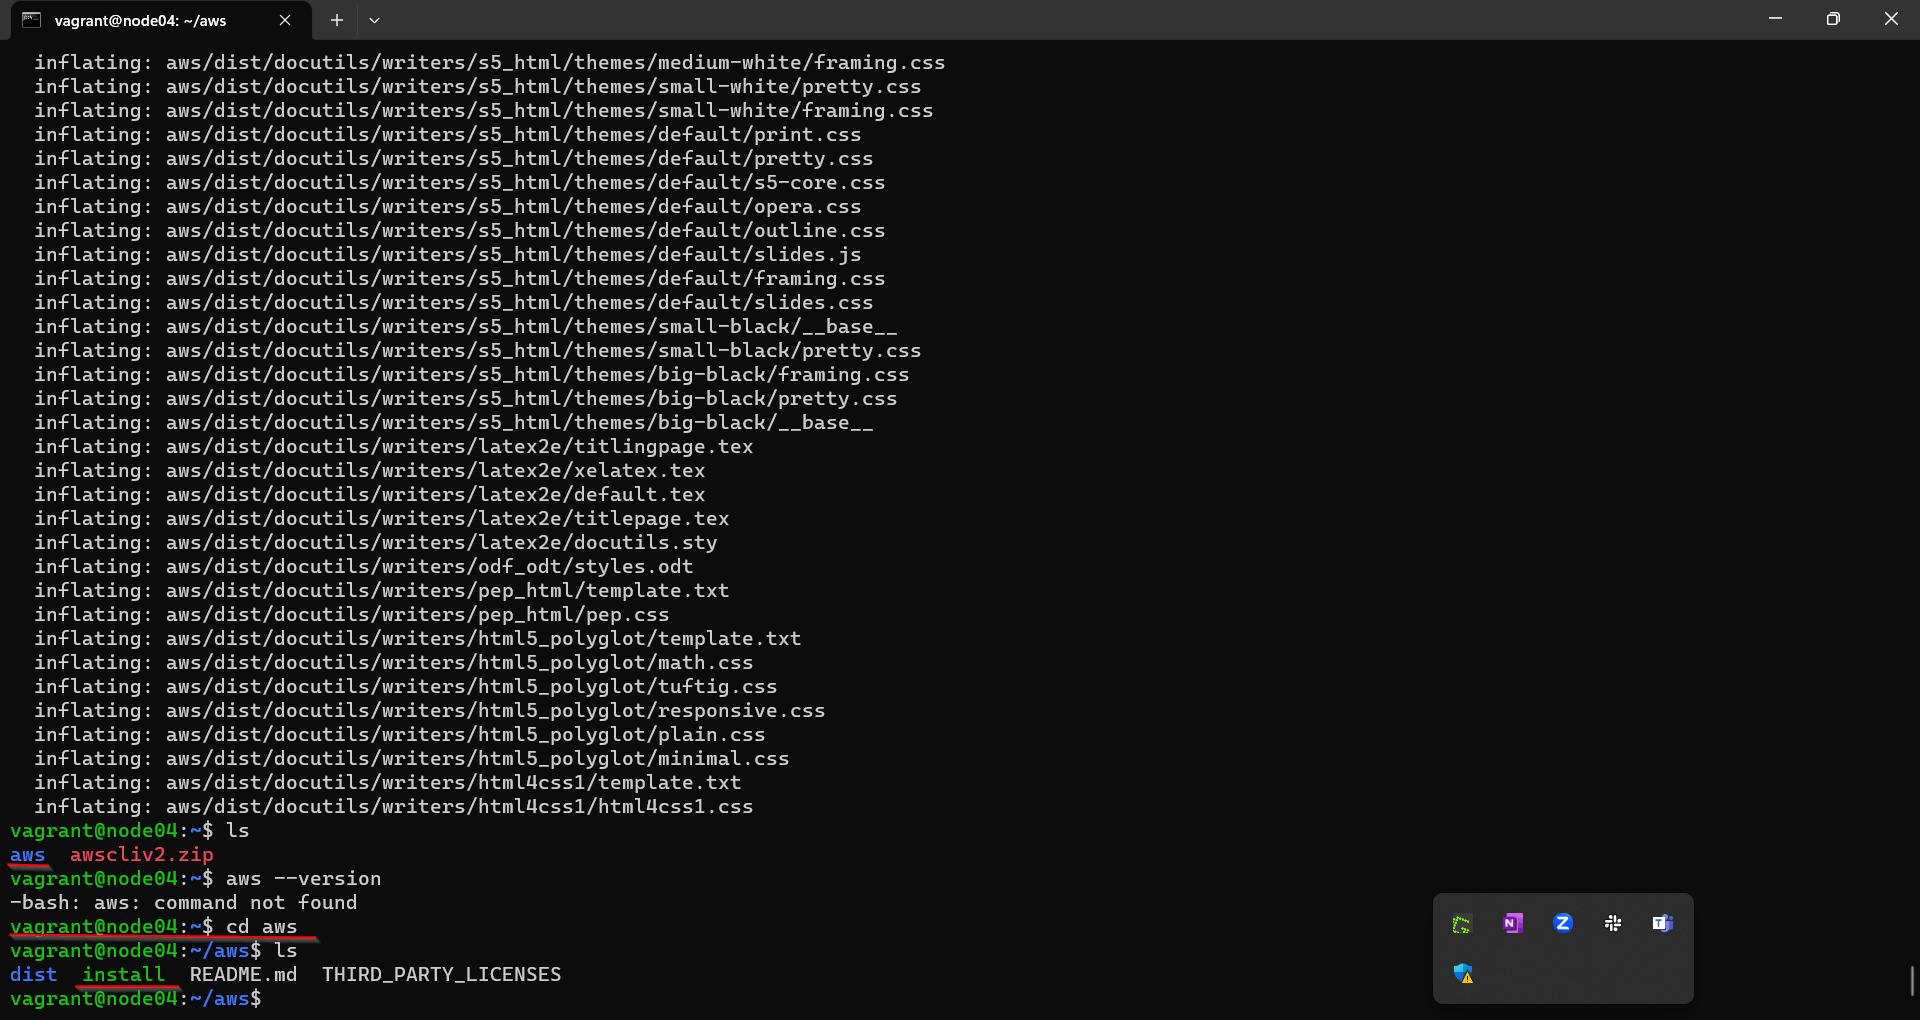
unzip awscliv2.zip

After unzipping, we will see an AWS folder. Just go into the AWS folder using cd and then you will see an install file.

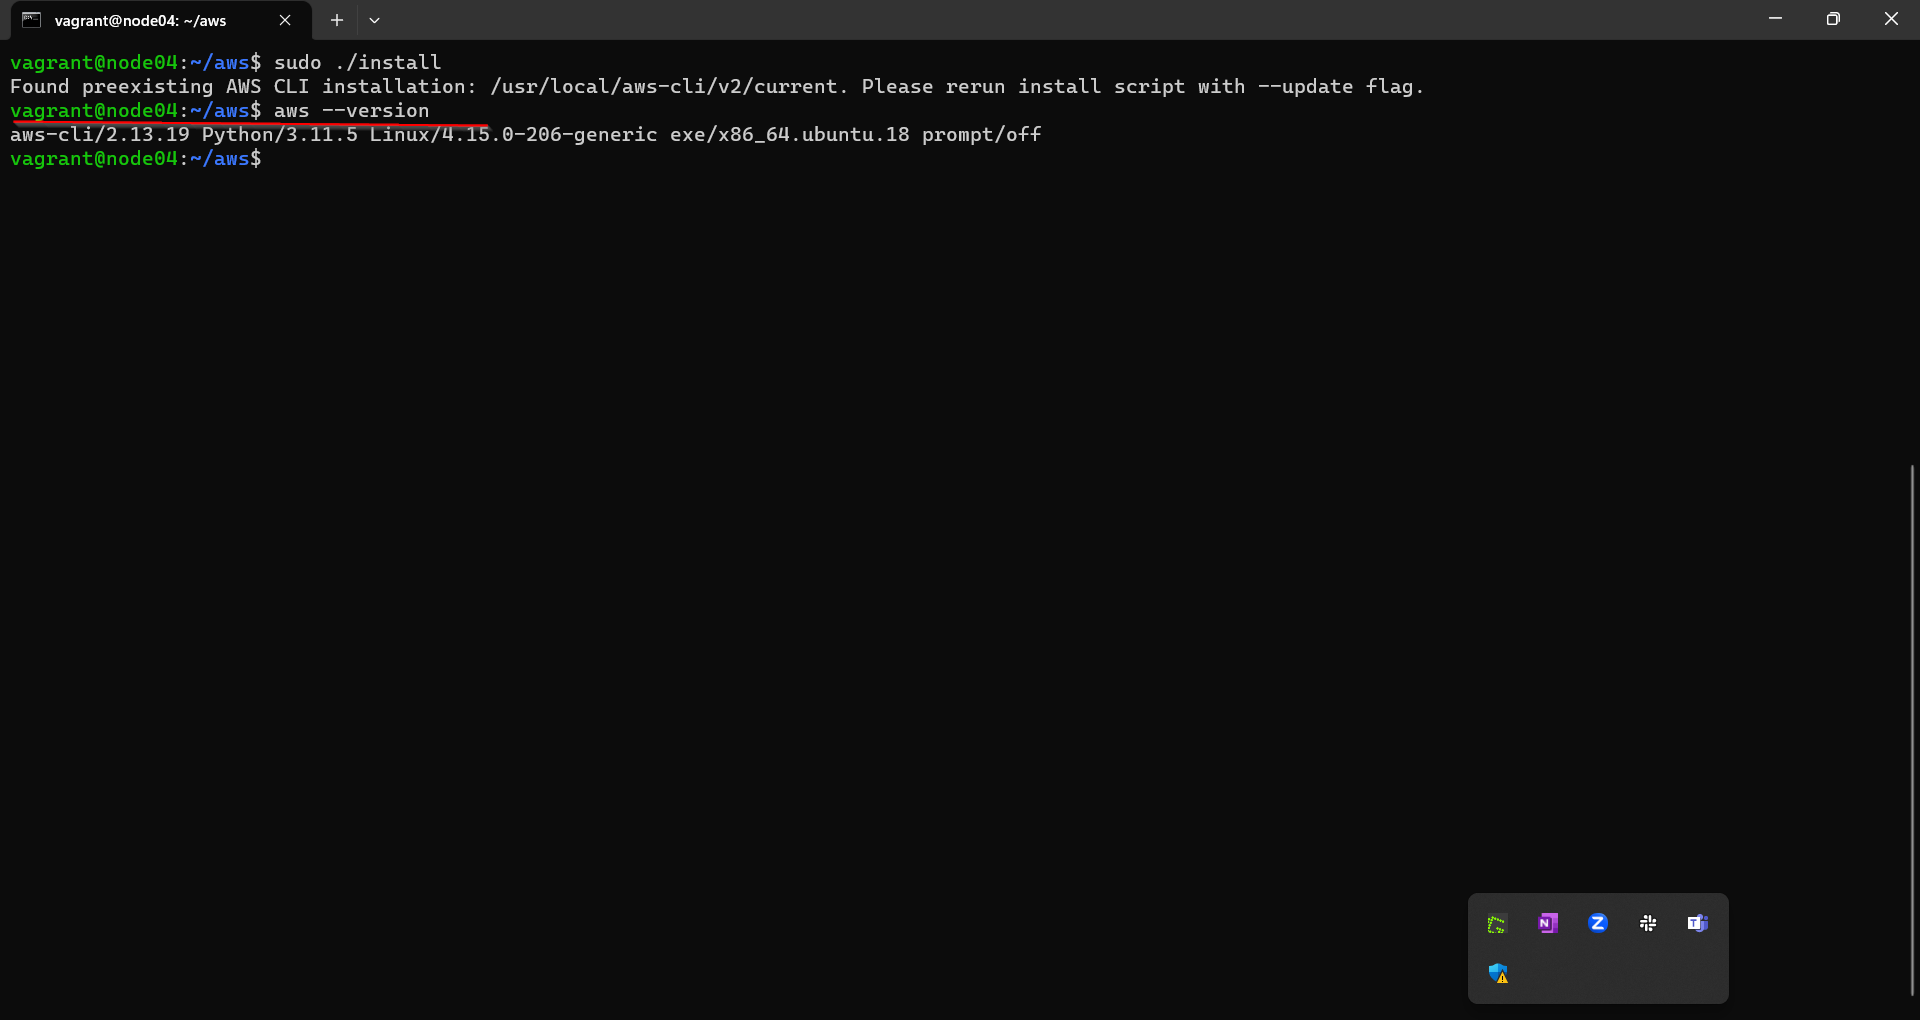
Install the install file :
sudo ./install

After installation, you can verify it by running:
aws --version
/usr/local/bin/aws --version

Step 2:
We will configure the AWS CLI:
Enter the following command and press Enter:
aws configure
We have to enter the AWS Access Key ID:
We have to enter the AWS Secret Access Key:
Enter default Region Name:
Enter Default Output Format: (EG: 'json', 'text', 'table', 'yaml',yaml-stream):
(NOTES:- All this details you will get in your AWS Account)

In the last step: Check whether your aws cli is working or not just use:
aws sts get-caller-identity

Subscribe to my newsletter
Read articles from Apoorv singh directly inside your inbox. Subscribe to the newsletter, and don't miss out.
Written by
